How to Export List to Excel in C# Without Excel Interop
Exporting list data to Excel with C# is a common requirement in modern .NET applications. Whether you are building a desktop application, a web system, or a background service, developers often need to convert in-memory collections—especially List<T>—into well-structured Excel files that users can download, analyze, or share.
This tutorial demonstrates how to export a list of objects to Excel in C# without using Excel Interop, using Spire.XLS for .NET. The solution is fully compatible with .NET Core and modern .NET versions, works with typical business data models, and does not require Microsoft Excel to be installed.
Table of Contents
- Why Export a List to Excel in C# Without Interop?
- Export a List of Objects to Excel in C#
- Formatting the Exported Excel Worksheet
- .NET Core and Server-Side Compatibility
- Conclusion
- Frequently Asked Questions
Why Export a List to Excel in C# Without Interop?
Exporting list data to Excel is a practical way to present structured information in a familiar and widely accepted format. In real-world applications, this requirement commonly appears in scenarios such as:
- Generating operational or financial reports
- Allowing users to download query results from web applications
- Sharing structured data with non-technical stakeholders
- Performing offline analysis or audits using Excel
Traditionally, many developers rely on Excel Interop to generate Excel files. While Interop can work in certain desktop environments, it also introduces several limitations:
- Microsoft Excel must be installed on the machine
- It is not recommended for server-side or ASP.NET Core applications
- It adds unnecessary dependencies for simple export tasks
As a result, exporting Excel files without Interop has become the preferred approach for modern .NET applications. Libraries such as Spire.XLS for .NET provide a clean, reliable, and server-friendly way to export a List<T> directly to Excel—without requiring Microsoft Office.
Export a List of Objects to Excel in C#
In most real-world applications, data is stored as a list of business objects rather than simple values. This section focuses on exporting a List<T> that represents a realistic reporting scenario, using a reusable and Interop-free approach.
Prerequisites
Before exporting a list to Excel, make sure Spire.XLS for .NET is installed in your project.
You can install it via NuGet:
Install-Package Spire.XLS
Once installed, you can start exporting List<T> data to Excel without any additional configuration.
Core Export Workflow
The overall process of exporting a list of objects to Excel can be summarized as follows:
- Prepare business-ready data in a
List<T> - Create an Excel workbook and worksheet
- Generate column headers dynamically from object properties
- Write list data into worksheet rows
- Save the Excel file
The following example demonstrates the complete implementation.
Complete Example: Export List to Excel
using Spire.Xls;
using System;
using System.Collections.Generic;
using System.Reflection;

public class OrderReport
{
    public int OrderId { get; set; }
    public string CustomerName { get; set; }
    public DateTime OrderDate { get; set; }
    public decimal TotalAmount { get; set; }
    public string Status { get; set; }
}

class Program
{
    static void Main()
    {
        // Prepare sample business data
        List<OrderReport> orders = new List<OrderReport>
        {
            new OrderReport { OrderId = 1001, CustomerName = "Alice", OrderDate = DateTime.Today.AddDays(-2), TotalAmount = 1200.50m, Status = "Completed" },
            new OrderReport { OrderId = 1002, CustomerName = "Bob", OrderDate = DateTime.Today.AddDays(-1), TotalAmount = 850.00m, Status = "Pending" },
            new OrderReport { OrderId = 1003, CustomerName = "Charlie", OrderDate = DateTime.Today, TotalAmount = 430.75m, Status = "Cancelled" }
        };

        // Create workbook and worksheet
        Workbook workbook = new Workbook();
        Worksheet sheet = workbook.Worksheets[0];

        // Read object properties dynamically
        PropertyInfo[] properties = typeof(OrderReport).GetProperties();

        // Write column headers
        for (int i = 0; i < properties.Length; i++)
        {
            sheet.Range[1, i + 1].Text = properties[i].Name;
        }

        // Write data rows
        for (int row = 0; row < orders.Count; row++)
        {
            for (int col = 0; col < properties.Length; col++)
            {
                object value = properties[col].GetValue(orders[row]);
                sheet.Range[row + 2, col + 1].Value2 = value;
            }
        }

        // Save Excel file
        workbook.SaveToFile("OrderReport.xlsx", ExcelVersion.Version2016);
    }
}
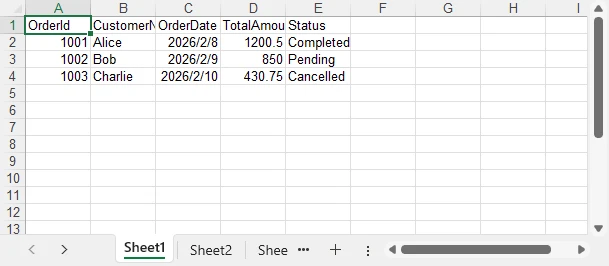
Below is a preview of the generated Excel file:
Technical Notes and Implementation Details
- An Excel file is created by instantiating
Workbook, with the first worksheet accessed viaworkbook.Worksheets[0] - Column headers are generated dynamically using reflection (
Type.GetProperties) to avoid hardcoded mappings - Header cells are written using
Range.Text, ensuring clear string output in the first row - Object values are written row by row using
Range.Value2to preserve native Excel data types - The final Excel document is generated with
Workbook.SaveToFile, without requiring Microsoft Excel or Interop
This pattern is ideal for building reusable export utilities and report-generation modules.
In scenarios where data is retrieved as a DataTable instead of a List, Spire.XLS also provides an efficient export approach. Refer to How to Export a DataTable to Excel in C# for detailed instructions.
Formatting the Exported Excel Worksheet
Beyond basic data export, Spire.XLS for .NET allows you to apply formatting to improve readability and usability of the generated Excel file.
Common formatting tasks include:
- Styling header rows
- Formatting dates and numeric values
- Adjusting column widths automatically
- Highlighting key fields
Example: Apply Basic Formatting
using System.Drawing;

// Format header row
CellStyle headerStyle = workbook.Styles.Add("HeaderStyle");
headerStyle.Font.FontName = "Arial";
headerStyle.Font.Size = 12f;
headerStyle.Font.IsBold = true;
headerStyle.Color = Color.LightGray;  // Set cell background color
headerStyle.HorizontalAlignment = HorizontalAlignType.Center;

sheet.Range[1, 1, 1, sheet.LastColumn].Style = headerStyle;

// Format date and amount columns
sheet.Range[2, 3, orders.Count + 1, 3].NumberFormat = "yyyy-mm-dd";
sheet.Range[2, 4, orders.Count + 1, 4].NumberFormat = "#,##0.00";

// Auto-fit row height and column width
sheet.AllocatedRange.AutoFitRows();
sheet.AllocatedRange.AutoFitColumns();
Below is a preview of the formatted Excel sheet:
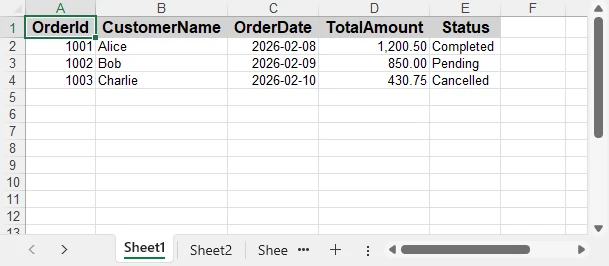
Applying formatting makes the exported Excel file more professional and suitable for direct business use.
For more advanced worksheet formatting—such as styles, merged cells, conditional formatting, and formulas—see How to Create and Format Excel Worksheets in C#.
.NET Core and Server-Side Compatibility
Spire.XLS for .NET is fully compatible with .NET Core and modern .NET versions, making it suitable for:
- ASP.NET Core web applications
- Web APIs
- Cloud and containerized environments
- Background services and scheduled jobs
Because it does not rely on Excel Interop, the export logic is safe to use in server-side and production environments.
If you are working in an ASP.NET Core or Web API project, this guide shows how to generate and format Excel files and return them to the client: Export Excel Files in ASP.NET Core Using C#.
Conclusion
Exporting a list to Excel in C# does not have to rely on Excel Interop. With Spire.XLS for .NET, you can efficiently convert a List<T> into a well-structured and formatted Excel file that works seamlessly across .NET Framework and .NET Core environments.
By adopting an Interop-free approach, you reduce deployment complexity, improve application stability, and gain greater flexibility when exporting business data.
Whether you need to export complex reports or simple lists, Spire.XLS provides a reliable and scalable solution for modern C# applications. For evaluation purposes or to remove trial limitations, a 30-day temporary license is available.
Frequently Asked Questions
Q1. Can this approach export large lists efficiently?
Yes. Spire.XLS for .NET is designed for server-side usage and can handle large List datasets efficiently. For very large exports, batching or streaming strategies can further improve performance.
Q2. Does this solution require Microsoft Excel to be installed?
No. Spire.XLS for .NET works independently of Microsoft Excel and does not rely on Excel Interop, making it suitable for server and cloud environments.
Q3. Can I customize column headers or formats?
Yes. Column headers can be customized manually, and cell formats such as dates, numbers, and styles can be applied programmatically. For advanced formatting scenarios, refer to the C# Excel formatting guide.
Q4. Is this compatible with ASP.NET Core and Web APIs?
Yes. The export logic works seamlessly in ASP.NET Core applications, Web APIs, background services, and other server-side .NET environments.
How to Convert DOCX to XLSX: Easily Turn Word into Excel
Table of Contents
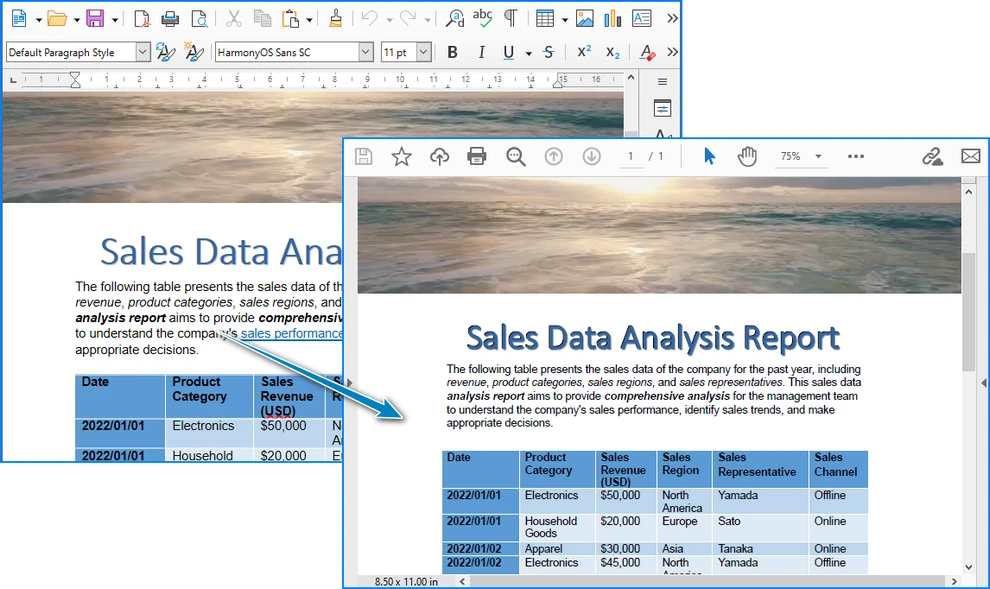
Converting a Word document (DOCX) to an Excel spreadsheet (XLSX) is a common requirement in office automation, data processing, and reporting workflows. Many users want to reuse tables stored in Word files, while others expect a direct document-to-spreadsheet conversion with minimal effort.
However, Word and Excel are designed for very different purposes. Word focuses on free-form document layout, while Excel is built around structured, tabular data. Understanding this difference is key to choosing the right DOCX to XLSX conversion method.
In this guide, you’ll learn how to convert DOCX to XLSX using online tools, desktop solutions, and Python automation, along with the advantages and limitations of each approach.
Quick Navigation
- Can You Really Convert a Word (DOCX) File to Excel (XLSX)?
- Method 1: Convert DOCX to XLSX Online
- Method 2: Convert Word Content to Excel Using Desktop Software
- Method 3: Convert DOCX to XLSX with Python
- Compare DOCX to XLSX Conversion Methods
- Frequently Asked Questions
Can You Really Convert a Word (DOCX) File to Excel (XLSX)?
Before choosing a conversion method, it’s important to clarify what “DOCX-to-XLSX conversion” actually means.
- Word documents may contain paragraphs, images, headings, and tables.
- Excel files are optimized for rows, columns, and structured data.
In practice, DOCX to XLSX conversion works best when the Word document contains tables. Plain text paragraphs and complex layouts do not always translate cleanly into spreadsheet cells.
If your goal is to extract tabular data from Word and reuse it in Excel, conversion is usually reliable. If you expect an entire Word document to appear perfectly in Excel, some formatting loss should be expected. However, you still insert Word text and image paragraphs into Excel.
Method 1: Convert DOCX to XLSX Online
Online tools are often the first choice for users who need a quick, one-time conversion. For example, you can use the Online2PDF DOCX to XLSX converter to convert documents directly in your browser without installing additional software.
A typical workflow looks like this:
-
Open the online DOCX to XLSX converter.
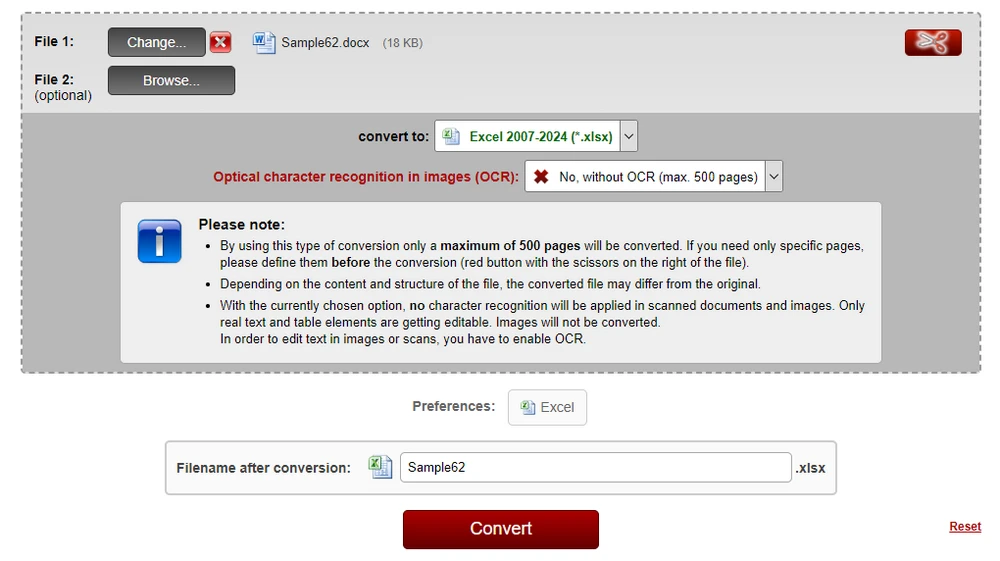
-
Upload your Word (DOCX) file.
-
Start the conversion process.
-
Download the converted Excel (XLSX) file.
Many online converters support DOCX-to-XLSX conversion, making it easy to transform Word documents into editable spreadsheets within seconds.
Pros and Cons of Online DOCX to XLSX Converters
Advantages
- No software installation required
- Easy to use for beginners
- Suitable for small files and occasional tasks
Limitations
- File size and usage limits
- Potential privacy and data security concerns
- Limited control over formatting
- Not suitable for batch or automated processing
Online converters are convenient, but they are best suited for simple, non-sensitive files.
Many online tools support converting Word files into multiple formats. For example, you can also explore how to convert Word to PowerPoint when preparing presentation materials.
Method 2: Convert Word Content to Excel Using Desktop Software
For documents that contain structured or semi-structured data, desktop office software offers a practical way to move content from Word into Excel with a high level of visual control. Common tools include Microsoft Office and LibreOffice, which allow users to copy Word content and paste it directly into Excel spreadsheets.
While these desktop software does not provide a native “DOCX to XLSX export” feature, it can still produce reliable results—especially when Word documents contain tables.
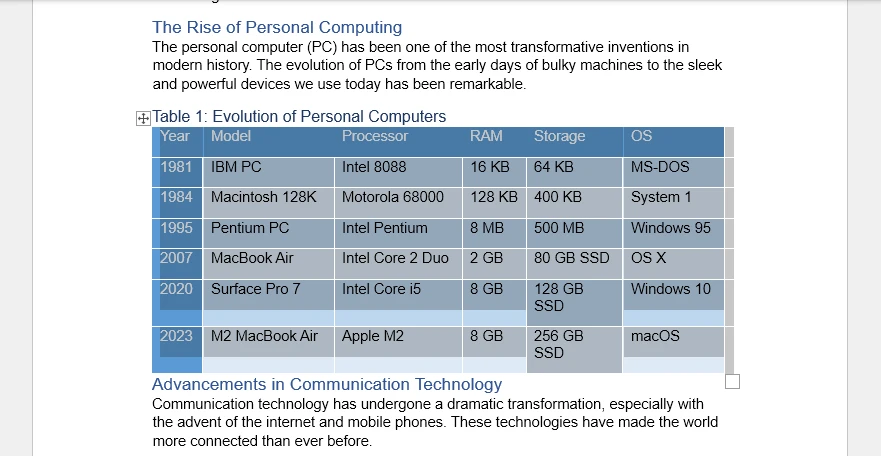
Why Tables Convert More Accurately
Most successful DOCX to XLSX conversions rely on table-based content. Tables in Word already define rows and columns, which closely align with Excel’s grid-based data model. When pasted into Excel, Word tables usually retain their structure, alignment, and cell boundaries with minimal adjustment.
Non-tabular content can also be transferred. Paragraphs, headings, and lists can be pasted into Excel cells, where each line is placed into individual rows. Although additional formatting may be required, this approach is often sufficient for organizing document content into a spreadsheet format.
Example: Copying Word Content into Excel Using Microsoft Office
Below is a typical workflow using Microsoft Office:
-
Open the DOCX file in Microsoft Word.
-
Select the content you want to transfer:
- Tables only, for best structural accuracy
- Or the entire document, if needed
-
Copy the selection (Ctrl + C).
-
Open Microsoft Excel and select the target worksheet.
-
Paste the content (Ctrl + V) into Excel.
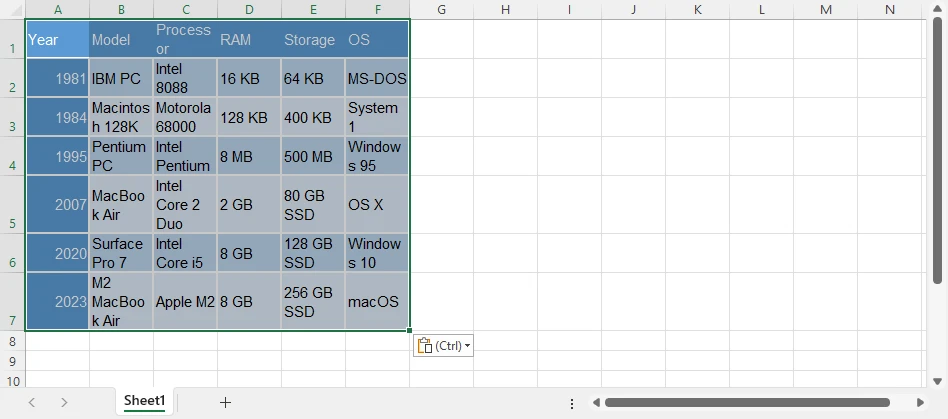
-
Adjust column widths, cell alignment, or text wrapping as needed.
This method works particularly well for Word documents that primarily contain tables, forms, or structured layouts. If your document contains complex tables, you may benefit from learning how to extract tables from Word programmatically for greater accuracy and control.
Limitations of Desktop-Based Conversion
Although desktop tools provide flexibility and visual control, they have several limitations:
- No true DOCX to XLSX export or batch conversion
- Manual steps are required for each document
- Formatting consistency can be difficult to maintain across files
When dealing with multiple documents or recurring conversion tasks, manual desktop workflows can quickly become time-consuming. In such cases, automated or programmatic solutions are usually more efficient.
Method 3: Convert DOCX to XLSX with Python (Ideal for Automated Workflows)
When manual methods become inefficient, Python offers a scalable way to convert Word documents into Excel files. This approach is particularly valuable for developers who need consistent, repeatable results without relying on desktop applications.
Python-based conversion is well suited for:
- Batch processing large numbers of DOCX files
- Automated data pipelines
- Server-side document workflows
- Environments where Microsoft Office is unavailable
Compared with manual exports, scripting provides greater flexibility and significantly reduces repetitive work.
How Python Converts Word Data to Excel
A practical strategy is to extract structured data from Word—especially tables—and write it directly into an Excel workbook. Because tables already organize content into rows and columns, they translate naturally into spreadsheet format while preserving logical structure.
In this example:
- Spire.Doc for Python loads the DOCX file and retrieves table data.
- Spire.XLS for Python creates the Excel workbook and writes the extracted content into worksheets.
Combining these libraries enables a controlled, programmatic conversion process suitable for production environments.
Before using the libraries in your project, make sure you have installed the necessary packages. You can install them via pip:
Step-by-Step: Convert Word Tables to Excel with Python
Below is a typical workflow for converting DOCX tables to XLSX using Python:
-
Load the DOCX file Use Spire.Doc for Python to open the Word document.
-
Extract tables from the document Iterate through the document structure and retrieve table data.
-
Create an Excel workbook Initialize a new workbook using Spire.XLS for Python.
-
Write table data into worksheets Map rows and cells from Word tables into Excel rows and columns.
-
Save the file as XLSX Export the final result as an Excel spreadsheet.
Python Code: Convert DOCX Tables to XLSX
The following example demonstrates how to extract tables from a Word document and export them to an Excel worksheet.
from spire.doc import Document
from spire.xls import Workbook, Color

# Load the Word document
doc = Document()
doc.LoadFromFile("Sample.docx")

# Create a new Excel workbook
workbook = Workbook()
workbook.Worksheets.Clear()

# Iterate through all sections in the Word document
for sec_index in range(len(doc.Sections)):
    section = doc.Sections.get_Item(sec_index)
    # Iterate through all tables in the current section
    for table_index in range(len(section.Tables)):
        table = section.Tables.get_Item(table_index)
        # Create a worksheet for each Word table
        sheet = workbook.Worksheets.Add(f"Table-{table_index + 1}")
        # Iterate through rows in the Word table
        for row_index in range(len(table.Rows)):
            row = table.Rows.get_Item(row_index)
            # Iterate through cells in the current row
            for cell_index in range(len(row.Cells)):
                table_cell = row.Cells.get_Item(cell_index)
                # Collect all paragraph text inside the Word table cell
                cell_data = ""
                for para_index in range(len(table_cell.Paragraphs)):
                    para = table_cell.Paragraphs.get_Item(para_index)
                    cell_data += para.Text + "\n"
                # Write text to the corresponding Excel cell
                cell = sheet.Range.get_Item(row_index + 1, cell_index + 1)
                cell.Value = cell_data
                # Copy the Word table cell background color to Excel
                # Note: Color must be assigned directly to the Style to take effect
                table_cell_color = table_cell.CellFormat.BackColor
                cell.Style.Color = Color.FromRgb(
                    table_cell_color.R,
                    table_cell_color.G,
                    table_cell_color.B
                )
        # Auto-fit columns after writing the table
        sheet.AllocatedRange.AutoFitColumns()

# Save the Excel file
workbook.SaveToFile("WordTableToExcel.xlsx")
Below is a preview of the XLSX file converted from the Word document:

This approach is especially useful for structured documents, reports, and form-based Word files where tables represent the core data.
For more advanced Python techniques, including preserving table formatting and styles during Word-to-Excel conversion, check out our detailed guide on converting Word tables to Excel with Python.
Compare DOCX to XLSX Conversion Methods
Choosing the right method depends on factors such as document volume, automation needs, and data sensitivity. The table below provides a quick overview to help you evaluate each option.
| Method | Best For | Automation Level | Advantages | Limitations |
|---|---|---|---|---|
| Online Converter | One-time tasks | None | Fast and easy | Privacy risks, limited accuracy |
| Desktop Software | Small workloads | Low | Visual control | Time-consuming, not scalable |
| Python Automation | Large workflows | High | Flexible, repeatable | Requires programming |
How to Choose the Right Method
- Use online converters when speed matters and the files are not sensitive.
- Choose desktop software if you prefer manual control for a small number of documents.
- Opt for Python automation when handling large datasets or building repeatable workflows.
For ongoing or business-critical processes, automated solutions typically provide greater long-term efficiency and consistency.
FAQ: DOCX to XLSX Conversion
Can I convert any Word document to Excel?
Most Word files can be converted, but documents with tables or structured data work best. Free-form text and complex layouts may need adjustment after conversion.
Will the formatting stay the same after conversion?
Not always. Word and Excel handle layouts differently, so some spacing, merged cells, or text flow may change. Minor adjustments in Excel are usually needed.
Can I convert only tables from Word to Excel?
Yes. If your Word document contains tables, you can extract just the tables for a more accurate and reliable conversion.
What is the easiest way to convert multiple DOCX files?
For multiple files, automated solutions or batch tools—like Python libraries—can save time and ensure consistent results, especially for large documents.
Conclusion
Converting DOCX to XLSX is not a one-size-fits-all task. While online and desktop tools are useful for simple scenarios, they often fall short when accuracy, scalability, or automation is required.
By understanding the structure of your Word documents and choosing the right conversion approach, you can achieve reliable results. For developers and advanced users, Python offers a powerful and flexible way to convert Word tables into Excel spreadsheets efficiently.
See Also
PDF to Scanned PDF: Convert PDFs into Image-Based Documents
Table of Contents
PDF files are widely used for document exchange, but not all PDFs behave like scanned documents. Many PDFs contain editable text layers, vector graphics, and selectable content, which makes them easy to modify, copy, or reuse.
In real-world scenarios—such as archiving, public distribution, or document finalization—you may want a PDF to look and behave like a scanned file. Converting a PDF to a scanned PDF removes its editable structure and turns each page into an image-based representation.
This guide explains what a scanned PDF is, why you might need one, and how to convert a PDF into a scanned document using online tools or Python automation.
Quick Navigation
- What Is a Scanned PDF?
- Why Convert PDF to Scanned PDF?
- Method 1: Convert PDF to Scanned PDF Using an Online Tool
- Method 2: Convert PDF to Scanned PDF with Python
- PDF vs. Scanned PDF: Key Differences
- Can Scanned PDFs Still Be Edited?
- Frequently Asked Questions
What Is a Scanned PDF?
A scanned PDF is a PDF document in which each page is stored as an image rather than editable text or vector objects. It closely resembles a document created by scanning paper with a physical scanner.
Key characteristics of scanned PDFs include:
- Text is not selectable or editable
- Pages are image-based
- Layout and appearance are visually fixed
- File size is usually larger than text-based PDFs
- Text search is unavailable unless OCR is applied
When you convert a PDF to a scanned PDF, you are essentially flattening its content and removing its internal structure.
Why Convert PDF to Scanned PDF?
Turning a PDF into a scanned document is useful in many situations:
- Prevent casual editing or content reuse
- Prepare documents for archiving
- Distribute finalized reports or notices
- Simulate paper-based workflows
- Standardize document appearance across platforms
Compared with permission-based protection, scanned PDFs rely on structural conversion rather than viewer-enforced rules, making them more resistant to casual modification.
Method 1: Convert PDF to Scanned PDF Using an Online Tool
Online PDF converters are suitable for quick, one-time conversions of non-sensitive documents.
Steps:
-
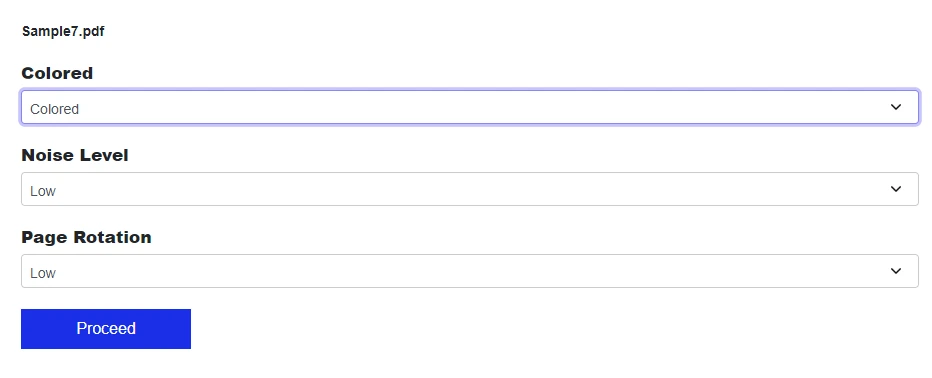
Open a trusted PDF to scanned PDF converter website (for example, SafePDFKit).
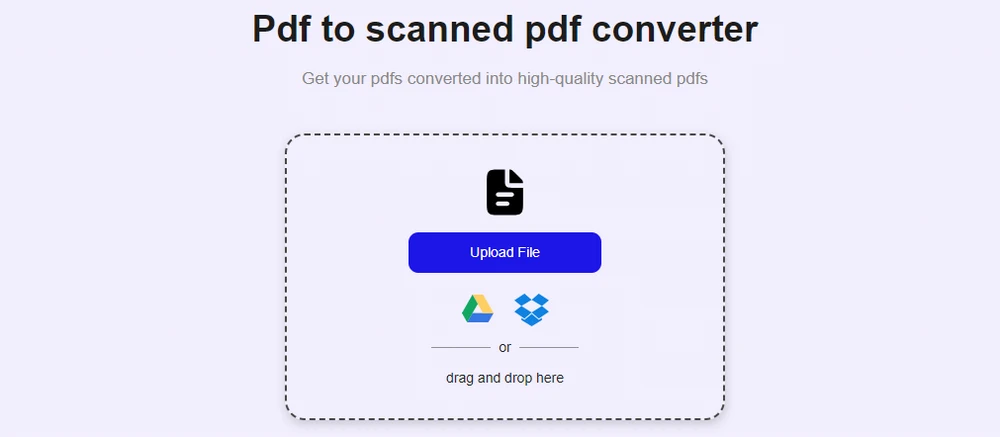
-
Upload the PDF file you want to convert.
-
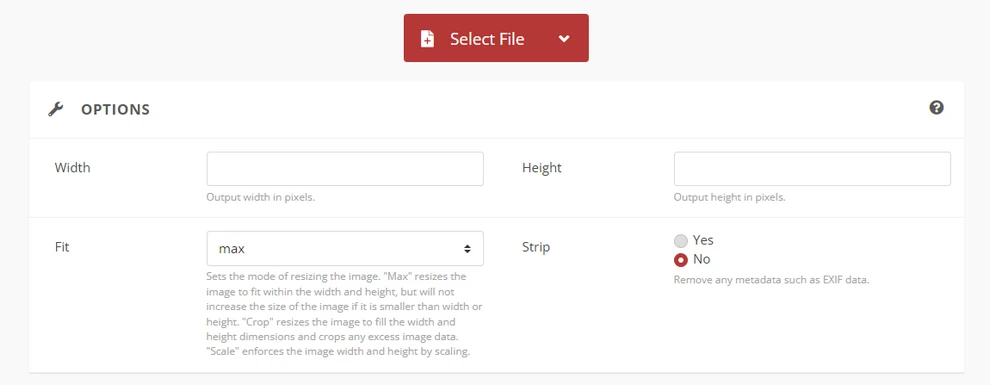
Configure the settings, such as color mode, noise level, and page rotation.
-
Convert and download the scanned PDF.
Best for:
- Occasional conversions
- Public or low-risk documents
- Users who prefer browser-based tools
Note: Avoid uploading confidential files unless the service clearly explains how uploaded documents are handled and deleted.
If you want to restrict editing, copying, or printing via password protection, you can refer to how to encrypt PDFs for a detailed guide.
Method 2: Convert PDF to Scanned PDF with Python
For batch processing or automated workflows, Python offers a reliable way to convert PDFs into scanned, image-based documents.
Libraries such as Spire.PDF for Python allow you to render each PDF page as an image and rebuild a new PDF using those images.
Step 1: Install the library
pip install spire.pdf
You can also download Spire.PDF for Python and add it to your project manually.
Step 2: Convert PDF pages into images and rebuild the PDF
from spire.pdf import *

# Load the original PDF
pdf = PdfDocument()
pdf.LoadFromFile("Sample.pdf")

# Create a new PDF for the scanned output
scanned_pdf = PdfDocument()

# Convert each page to an image
for i in range(pdf.Pages.Count):
    image_stream = pdf.SaveAsImage(i)
    image = PdfImage.FromStream(image_stream)

    page = scanned_pdf.Pages.Add(
        SizeF(float(image.Width), float(image.Height)),
        PdfMargins(0.0, 0.0)
    )
    page.Canvas.DrawImage(
        image,
        RectangleF.FromLTRB(0.0, 0.0, float(image.Width), float(image.Height))
    )

# Save the scanned PDF
scanned_pdf.SaveToFile("ScannedPDF.pdf")

pdf.Dispose()
scanned_pdf.Dispose()
Preview of the converted scanned PDF:
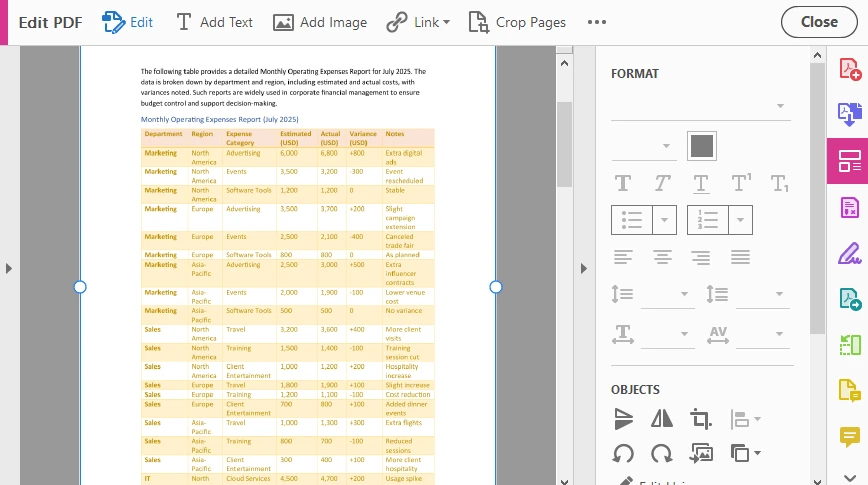
In this scanned PDF, every page is rendered and embedded as a full-page image. This conversion removes the original text layer and document structure, making the content non-editable and non-selectable.
Advantages of programmatic conversion:
- Consistent output quality
- Batch processing support
- No manual intervention
- Easy integration into document pipelines
For more flexible batch workflows, Python also supports converting PDFs directly to images or encrypting PDFs to further reduce the risk of editing and content reuse.
PDF vs. Scanned PDF: Key Differences
| Feature | Standard PDF | Scanned PDF |
|---|---|---|
| Editable text | Yes | No |
| Text selection | Yes | No |
| Searchable content | Yes | No (without OCR) |
| File size | Smaller | Larger |
| Best use case | Editing & reuse | Distribution & archiving |
Quick tip: If users should only view the document—not reuse or modify its content—a scanned PDF is often the better choice.
Can Scanned PDFs Still Be Edited?
Scanned PDFs are significantly harder to edit than standard PDFs, but they are not absolutely uneditable.
- Advanced editors can replace images
- OCR tools can extract text
- Content can be manually retyped
However, for most users and everyday workflows, scanned PDFs effectively discourage editing and content reuse.
Best practice:
- Keep original editable PDFs securely
- Use scanned PDFs for distribution or archiving
- Combine with OCR only if text search is required
Conclusion
Converting a PDF to a scanned PDF is a practical way to turn editable documents into visually fixed, image-based files. By removing the text structure and flattening each page into an image, scanned PDFs are better suited for sharing finalized content and preserving document integrity.
Whether you use an online PDF to scanned PDF converter for quick tasks or Python automation for large-scale workflows, choosing the right approach ensures your documents remain consistent, professional, and resistant to casual modification.
FAQ
Does converting a PDF to a scanned PDF remove searchable text?
Yes. When a PDF is converted into a scanned PDF, each page is stored as an image, so the original text layer is removed. As a result, text cannot be searched or selected unless OCR is applied afterward.
Will converting a PDF to a scanned document increase the file size?
In most cases, yes. Scanned PDFs are image-based, and image data usually requires more storage than text and vector content. The final file size depends on factors such as image resolution and compression settings.
What is the difference between a scanned PDF and exporting a PDF as images?
Exporting a PDF as images produces separate image files, while a scanned PDF embeds those images back into a single PDF document. A scanned PDF preserves the PDF container format, making it easier to share, view, and archive.
Can scanned PDFs completely prevent editing or copying?
Scanned PDFs significantly reduce casual editing and copying because they contain no editable text. However, advanced tools or OCR software can still extract content, so scanned PDFs should be seen as a practical deterrent rather than absolute protection.
Parse Excel Files in Java Easily – Read .XLS and .XLSX Files

Excel files are widely used to store and exchange structured data, such as reports, user-submitted forms, and exported records from other systems. In many Java applications, developers need to open these Excel files and extract the data for further processing.
In Java, parsing an Excel file usually means loading an .xls or .xlsx file, reading worksheets, and converting cell values into Java-friendly formats such as strings, numbers, or dates. This article shows how to parse Excel files in Java step by step using Spire.XLS for Java, with practical examples ranging from basic text reading to data type–aware parsing.
Table of Contents
- Prepare the Environment
- Load and Parse an Excel File in Java
- Read Excel Data as Text (Basic Parsing)
- Parse Excel Cells into Different Data Types
- Common Parsing Scenarios in Real Applications
- Conclusion
- Frequently Asked Questions
Prepare the Environment
Before parsing Excel files, you need to add Spire.XLS for Java to your project. The library supports both .xls and .xlsx formats and does not require Microsoft Excel to be installed.
Add the Dependency
If you are using Maven, add the following dependency to your pom.xml:
<repositories>
    <repository>
        <id>com.e-iceblue</id>
        <name>e-iceblue</name>
        <url>https://repo.e-iceblue.com/nexus/content/groups/public/</url>
    </repository>
</repositories>
<dependencies>
    <dependency>
        <groupId>e-iceblue</groupId>
        <artifactId>spire.xls</artifactId>
        <version>16.4.1</version>
    </dependency>
</dependencies>
Once the dependency is added, you are ready to load and parse Excel files in Java.
If you are not using Maven, you can also download Spire.XLS for Java and add it to your project manually.
Load and Parse an Excel File in Java
The first step when parsing an Excel file is to load it into a Workbook object and access the worksheet you want to read.
import com.spire.xls.*;

public class ParseExcel {
    public static void main(String[] args) {
        Workbook workbook = new Workbook();
        workbook.loadFromFile("data.xlsx");

        Worksheet sheet = workbook.getWorksheets().get(0);
        System.out.println("Worksheet loaded: " + sheet.getName());
    }
}
Preview of the reading result:
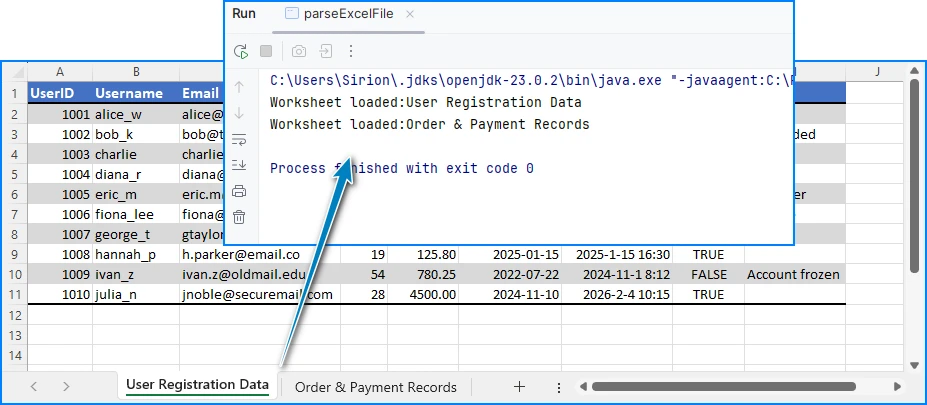
This code works for both .xls and .xlsx files. After loading the worksheet, you can start reading rows and cells.
Read Excel Data as Text (Basic Parsing)
In many cases, developers only need to read Excel data as text, without worrying about specific data types. This approach is simple and suitable for logging, displaying data, or quick imports.
Read All Cells as Strings
for (int i = 1; i <= sheet.getLastRow(); i++) {
    for (int j = 1; j <= sheet.getLastColumn(); j++) {
        String cellText = sheet.getCellRange(i, j).getValue();
        System.out.print(cellText + "\t");
    }
    System.out.println();
}
Preview of the text reading result:
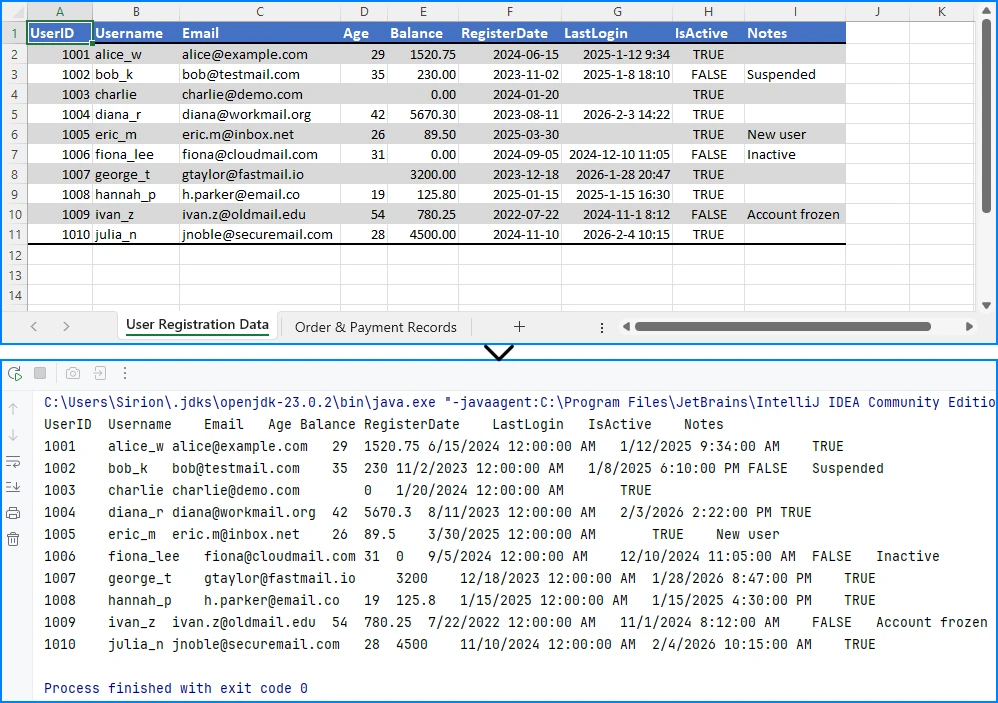
Using getValue() returns the formatted value shown in Excel. This is often the easiest way to read data when precision or data type conversion is not critical.
If your requirement goes beyond reading and involves modifying or editing Excel files, you can refer to a separate guide that demonstrates how to edit Excel documents in Java using Spire.XLS.
Parse Excel Cells into Different Data Types
For data processing, validation, or calculations, reading everything as text is usually not enough. In these cases, you need to parse Excel cell values into proper Java data types.
Parse Numeric Values (int / double / float)
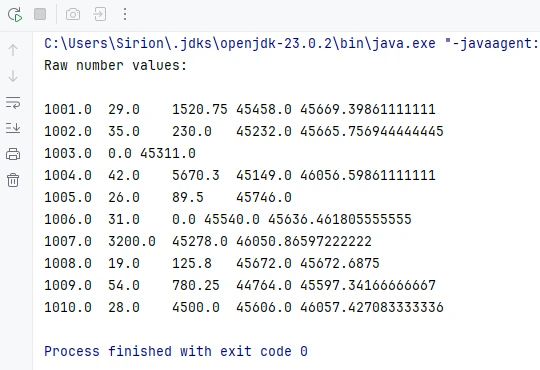
In Excel, many cells are stored internally as numeric values, even if they are displayed as dates, currencies, or percentages. Spire.XLS for Java allows you to read these cells directly using getNumberValue().
CellRange usedRange = sheet.getAllocatedRange();
System.out.println("Raw number values:");
for (int i = usedRange.getRow(); i <= usedRange.getLastRow(); i++) {
    for (int j = usedRange.getColumn(); j <= usedRange.getLastColumn(); j++) {
        CellRange cell = sheet.getRange().get(i, j);
        if (!(Double.isNaN(cell.getNumberValue())))
            {
                System.out.print(cell.getNumberValue() + "\t");
            }
        }
    System.out.println();
}
Below is a preview of the numeric reading result:
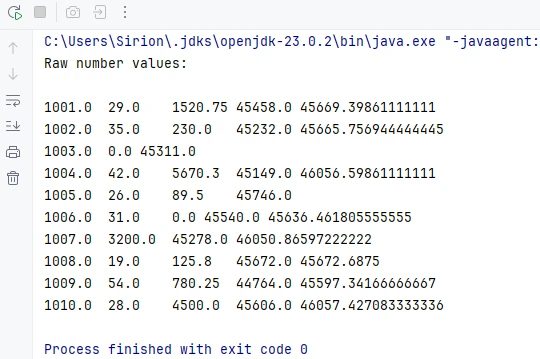
This method returns the underlying numeric value stored in the cell, regardless of the display format applied in Excel.
Convert Numeric Values Based on Application Logic
Once you have the numeric value, you can convert it to the appropriate Java type according to your application requirements.
double numberValue = cell.getNumberValue();

// Convert to int
int intValue = (int) numberValue;

// Convert to float
float floatValue = (float) numberValue;

// Keep as double
double doubleValue = numberValue;
For example, IDs, counters, or quantities are often converted to int, while prices, balances, or measurements are better handled as double or float.
Note: Excel dates are also stored as numeric values. If a cell represents a date or time, it is recommended to read it using date-related APIs instead of treating it as a plain number. This is covered in the next section.
Parse Date and Time Values
In Excel, date and time values are internally stored as numbers, while the display format determines how they appear in the worksheet. Spire.XLS for Java provides the getDateTimeValue() method to read these values directly as Date objects, allowing you to handle date and time data more conveniently in Java.
For example, if a column is designed to store date values, you can read all cells in that range as Date objects:
CellRange usedRange = sheet.getAllocatedRange();
System.out.println("Date values:");

for (int i = 0; i < usedRange.getRowCount(); i++) {
    // Read values from column F (for example, a date column)
    CellRange cell = usedRange.get(String.format("G%d", i + 1));
    java.util.Date date = cell.getDateTimeValue();
    System.out.println(date);
}
Preview of the date reading result from the seventh column:
This approach is widely used in real-world applications such as reports, data imports, or spreadsheets with predefined columns.
Because Excel dates are stored as numeric values, getDateTimeValue() converts the numeric value into a Date object and is typically applied to columns that represent date or time information.
Parse Mixed Cell Values in a Practical Way
In real-world Excel files, a single column may contain different kinds of values, such as text, numbers, dates, booleans, or empty cells. When parsing such data in Java, a practical approach is to read cell values using different APIs and select the most appropriate representation based on your business logic.
CellRange cell = sheet.getRange().get(2, 1); // B2

// Formatted text (what is displayed in Excel)
String text = cell.getText();

// Raw string value
String value = cell.getValue();

// Generic underlying value (number, boolean, date, etc.)
Object rawValue = cell.getValue2();

// Formula, if the cell contains one
String formula = cell.getFormula();

// Evaluated result of the formula
String evaluated = cell.getEnvalutedValue();

// Numeric value
double numberValue = cell.getNumberValue();

// Date value (commonly used for columns representing dates or times)
java.util.Date dateValue = cell.getDateTimeValue();

// Boolean value
boolean booleanValue = cell.getBooleanValue();
In practice, many applications use getText() as a safe fallback for display, logging, or export scenarios. For data processing, methods like getNumberValue(), getDateTimeValue(), or getBooleanValue() are typically applied based on the known meaning of each column.
This flexible approach works well for user-generated or loosely structured Excel files and helps avoid incorrect assumptions while keeping the parsing logic simple and robust.
If your primary goal is reading Excel files in Java—for example, extracting cell values for display or reporting—you may also want to refer to a separate guide that focuses specifically on Excel data reading scenarios in Java.
Common Parsing Scenarios in Real Applications
Parse Excel Rows into Java Objects
A common use case is mapping each row in an Excel sheet to a Java object, such as a DTO or entity class.
For example, one row can represent a product or a record, and each column maps to a field in the object. After parsing, you can store the objects in a list for further processing or database insertion.
Read Excel Data into Collections
Another typical scenario is reading Excel data into a List<List
Convert HEIC to PDF: Online, Desktop & Python Automation
Table of Contents
HEIC (High Efficiency Image Container) is the default image format used by Apple devices such as iPhone and iPad. While HEIC offers high image quality with smaller file sizes, it is not universally supported across platforms and applications. This often leads to compatibility issues when sharing, printing, or archiving images.
Converting HEIC files to PDF is a common and effective solution. PDF is a widely accepted format that ensures consistent display across devices and operating systems. In this article, we will explore several ways to convert HEIC to PDF, including free methods and an automated approach using Python code.
Quick Navigation
- What Is a HEIC File and Why Convert HEIC to PDF?
- Method 1: Convert HEIC to PDF Using Online Tools
- Method 2: Convert HEIC to PDF Using Desktop Software
- Method 3: Convert HEIC to PDF Using Python
- How to Choose the Right HEIC to PDF Conversion Method
- Frequently Asked Questions
What Is a HEIC File and Why Convert HEIC to PDF?
HEIC is an image container format based on HEVC (High Efficiency Video Coding). It allows Apple devices to store photos with better compression and high visual quality. However, HEIC files are not natively supported by many Windows applications, web browsers, or document management systems, which can create friction when you try to open or share them.
Typical situations where converting HEIC to PDF becomes useful include:
- Improving compatibility across platforms
- Combining multiple HEIC images into a single document
- Preparing images for printing or submission
- Archiving images in a stable, non-editable format
Because of these limitations, converting HEIC to PDF is often less about preference and more about ensuring accessibility and consistency across different environments.
Method 1: Convert HEIC to PDF Using Online Tools (Free)
Online converters are often the fastest way to convert HEIC to PDF, especially when you need a quick result without installing additional software.
Steps:
-
Open an online HEIC to PDF converter (such as CloudConvert).
-
Upload your HEIC file.
-
Select PDF as the output format.
-
Download the converted PDF file.
Pros:
- Free and easy to use
- No installation required
Cons:
- File size and batch limits
- Potential privacy and data security concerns
- Limited control over output quality
This method is suitable for one-time or occasional conversions.
For converting other images formats to PDF, you can check How to Convert Images to PDF on Various Platforms.
Method 2: Convert HEIC to PDF Using Desktop Software
Desktop software provides a more stable and private way to convert HEIC to PDF, especially if you frequently work with local files or prefer not to upload images to third-party platforms. Many modern operating systems already include built-in tools that can handle this task without requiring additional downloads.
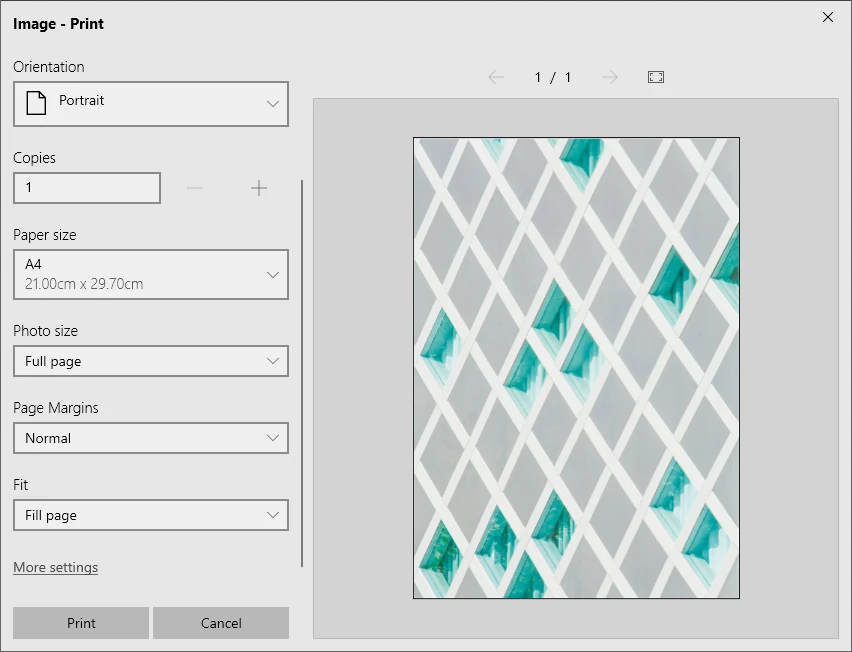
For example, Microsoft Photos on Windows and macOS Preview allow you to open HEIC files and export or print them as PDF documents. Compared to online tools, desktop solutions typically offer better reliability and fewer file size restrictions.
Steps:
-
Open the HEIC file using a compatible image viewer (e.g., Microsoft Photos).

-
Choose the export or print option.
-
Select PDF as the output format.
-
Save the PDF file.
Pros:
- Better privacy than online tools
- No coding required
Cons:
- Manual operation
- Inefficient for batch processing
This approach works well for users who need basic conversion with minimal technical effort.
If the result PDF file is too large, you can try compressing the PDF file to avoid transmission and sharing issues.
Method 3: Convert HEIC to PDF Using Python (Recommended for Automation)
If you need to convert HEIC files to PDF regularly, handle large image collections, or integrate conversion into an existing workflow, manual tools can quickly become inefficient. In these scenarios, automation offers a significant advantage.
Python enables you to build a repeatable conversion process that runs with minimal human intervention. Instead of converting images one by one, you can process entire folders, standardize output settings, and integrate the workflow into backend services or data pipelines.
Required Libraries
To implement this solution, you will need:
- pillow – for image processing
- pillow-heif – to enable HEIC image support
- Spire.PDF for Python – to create and manage PDF documents
You can install these libraries using pip:
pip install pillow pillow-heif spire.pdf
This combination allows you to read HEIC images, process them, and generate high-quality PDF files programmatically.
Step-by-Step: Convert HEIC to PDF with Python
Below is a general workflow for converting a HEIC file to PDF using Python:
- Register HEIC support and open the HEIC image with Pillow.
- Convert the image to RGB and save it as JPEG or PNG in memory.
- Create a PDF document and load the image from a byte stream.
- Render the image onto a PDF page and save the PDF file.
Python Example: Convert HEIC to PDF
from spire.pdf import PdfDocument, PdfImage, PointF, Stream, SizeF, PdfMargins
from PIL import Image
import pillow_heif
import io

# Register the HEIF support
pillow_heif.register_heif_opener()

# Open the HEIC image and convert to RGB (HEIC images may be RGBA)
img = Image.open("Image.heic")
img = img.convert("RGB")

# Save the image to JPEG or PNG bytes (for Spire.PDF support)
buffer = io.BytesIO()
img.save(buffer, format="JPEG")  # Or "PNG"
image_bytes = buffer.getvalue()

# Load the image from bytes
stream = Stream(image_bytes)
image = PdfImage.FromStream(stream)

# Create a PDF document
pdf = PdfDocument()

# Set the page size to the image size and margins to 0
# This will make the image fill the page
pdf.PageSettings.Size.Width = image.Width
pdf.PageSettings.Size.Height = image.Height
pdf.PageSettings.Margins.All = 0

# Add a page to the document
page = pdf.AppendPage()

# Draw the image on the page
page.Canvas.DrawImage(image, PointF(0.0, 0.0))

# Save the PDF document
pdf.SaveToFile("output/HEICToPDF.pdf")
pdf.Close()
Below is a preview of the generated PDF file:
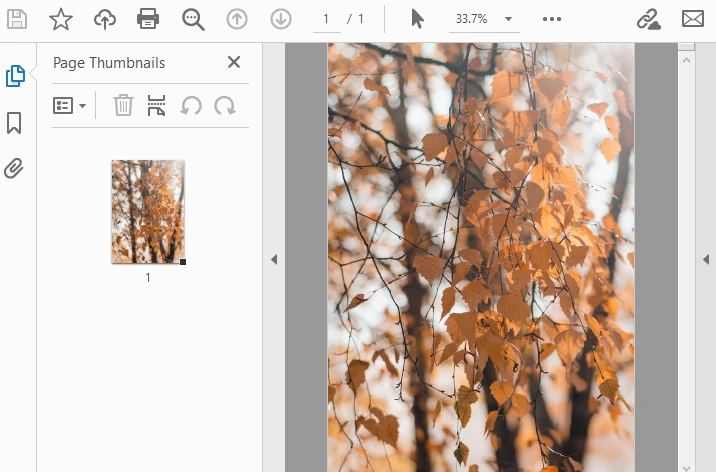
This approach supports batch processing and can be extended to merge multiple images into a single PDF. For more advanced image-to-PDF conversions, including other formats and options like page size, margins, and image quality, you can check out our Python guide on converting images to PDF.
How to Choose the Right HEIC to PDF Conversion Method
The best method depends less on technical preference and more on your actual usage scenario. Instead of assuming that one approach fits all situations, consider how often you perform conversions and how much control you need over the output.
Choose an Online Tool if:
- You only need to convert a few files occasionally
- You want the fastest possible solution
- Installing software is not convenient
Online converters are ideal for quick, low-effort tasks. However, they may not be suitable for sensitive images or large batches.
Choose Desktop Software if:
- You prefer working offline
- Privacy is important
- You want a simple, no-code experience
Desktop tools strike a balance between ease of use and reliability. They are often the most practical choice for everyday office workflows.
Choose Python if:
- You regularly convert large numbers of HEIC files
- The process needs to be automated
- You want precise control over layout, resolution, or document structure
- Conversion is part of a larger system or application
While this approach requires some technical knowledge, it becomes significantly more efficient at scale.
Overall, online tools suit quick tasks, desktop software supports everyday workflows, and Python is ideal for automated or large-scale conversions.
Conclusion
Converting HEIC files to PDF is a practical solution for improving compatibility and usability. While free online tools and desktop software are suitable for simple tasks, they often fall short when automation, privacy, or batch processing is required.
For developers and advanced users, converting HEIC to PDF using Python provides the most flexibility. With libraries such as pillow-heif and Spire.PDF for Python, you can build an efficient and professional conversion workflow tailored to your needs.
FAQ: HEIC to PDF Conversion
What are the free ways to convert HEIC to PDF?
Yes, many online tools offer free HEIC to PDF conversion, but they may have limitations on file size or usage.
Will converting HEIC to PDF affect image quality?
Image quality depends on the conversion method. Programmatic solutions allow better control over resolution and compression.
How can I merge multiple HEIC files into one PDF?
Yes. Using a programming approach, multiple HEIC images can be merged into a single PDF document.
Is it possible to convert HEIC to PDF for free with Spire.PDF?
Yes, Free Spire.PDF for Python allows you to convert HEIC files to PDF at no charge.
ODT to PDF Conversion Made Easy: Free Tools & Python
Table of Contents
ODT files (OpenDocument Text) are widely used for creating and editing documents in LibreOffice or Apache OpenOffice. However, sharing or distributing ODT files can be inconvenient, as not all devices or platforms support this format. Converting ODT files to PDF ensures that your document layout, fonts, and formatting remain intact, making it easier to share, print, or archive reliably.
This article guides you through practical methods to convert ODT to PDF, covering online tools, desktop software, and Python-based automation for both occasional and large-scale conversions.
Quick Navigation
- What Is an ODT File and Why Convert It to PDF?
- Convert ODT to PDF Online (Free and Web-Based Tools)
- Convert ODT to PDF Using Desktop Software
- Convert ODT to PDF Programmatically with Python
- Choosing the Right Method for Your Needs
- FAQ
What Is an ODT File and Why Convert It to PDF?
An ODT file is a word processing document based on the OpenDocument standard. It is commonly used in environments that prioritize open formats and cross-platform compatibility. ODT files support rich text, images, tables, and styles, making them suitable for everyday document creation.
However, ODT is not universally supported outside office applications. When documents need to be shared with a wider audience, submitted formally, or archived for long-term use, PDF becomes the more practical choice.
Converting ODT to PDF helps address several common needs:
- Consistent layout: PDFs display the same way on all devices and operating systems.
- Improved compatibility: PDF readers are widely available and require no editing software.
- Document integrity: PDFs reduce the risk of accidental content changes.
- Professional distribution: PDFs are often preferred for reports, contracts, and official documents.
Convert ODT to PDF Online (Free and Web-Based Tools)
Online converters are often the fastest way to convert an ODT file to PDF, especially for users who only need occasional conversions and do not want to install additional software.
Step-by-Step: Convert ODT to PDF Online
- Open a web-based ODT to PDF conversion service in your browser (for example, CloudXDocs ODT to PDF Converter).

- Upload the ODT file from your local device or supported cloud storage.
- Wait while the file is processed and converted on the server.
- Download the resulting PDF file to your computer.
Most online tools follow this simple workflow, making them accessible even to non-technical users.
Advantages of Online Conversion
- No installation or setup required
- Accessible from any modern browser
- Suitable for quick, one-time conversions
- Often available for free with basic usage
Limitations of Online Converters
Online tools typically impose file size limits or daily conversion caps. Uploading documents to third-party servers may also be unsuitable for confidential or sensitive files. In addition, complex formatting—such as custom fonts or advanced layouts—may not always be preserved accurately, and batch conversion is rarely supported.
In cases where editing and collaboration are required, converting ODT files to Word format can be a more practical option than PDF.
Convert ODT to PDF Using Desktop Software
Desktop office applications provide a more controlled environment for converting ODT files to PDF. LibreOffice and Apache OpenOffice both include built-in PDF export functionality.
Step-by-Step: Convert ODT to PDF with LibreOffice or OpenOffice
- Open the ODT file in LibreOffice Writer (or Apache OpenOffice Writer).
- Review the document to ensure formatting and layout are correct.
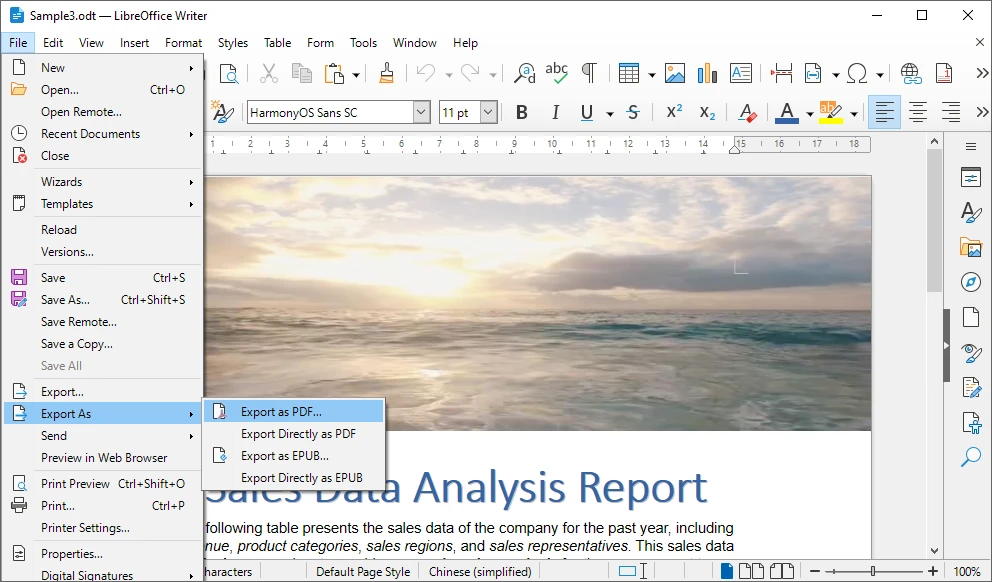
- Click File and select Export As PDF.
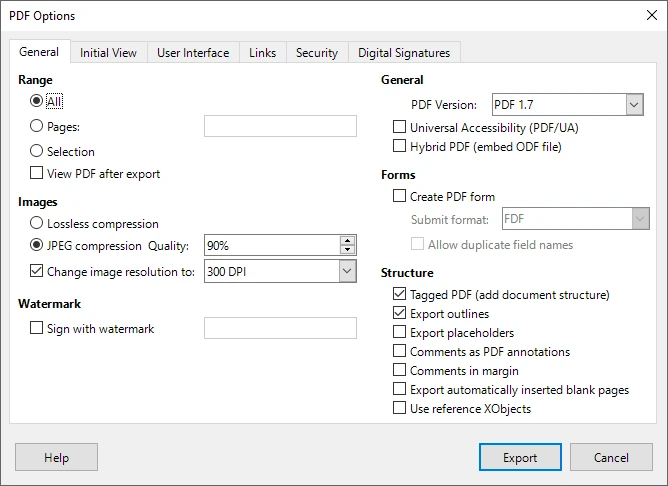
- Configure export options such as image quality, font embedding, or page range.
- Save the exported PDF file to your local system.
This approach gives users greater confidence in the final output, particularly for visually complex documents.
Advantages of Desktop-Based Conversion
- Better preservation of formatting and layout
- No need to upload files to external servers
- Greater control over PDF export settings
- Reliable for documents with tables, images, and styles
Limitations of Manual Conversion
Manual conversion requires user interaction for each document, making it inefficient for high-volume workflows. It is also difficult to automate and unsuitable for server-side or headless environments where no graphical interface is available.
When Online and Manual Methods Are Not Enough
There are many scenarios where online tools and desktop software no longer meet practical requirements. As document volume increases or workflows become more complex, manual conversion quickly turns into a bottleneck.
Typical situations where traditional methods fall short include:
- Converting large numbers of ODT files on a regular basis
- Running conversions automatically on a server or backend system
- Integrating document conversion into an existing application or service
- Ensuring consistent output without user intervention
- Operating in environments without a graphical interface
In these cases, a programmatic approach provides greater reliability, scalability, and control.
Convert ODT to PDF Programmatically with Python
Python is widely used for automation, data processing, and backend development. Using Python to convert ODT files to PDF allows the process to be fully automated and integrated into larger systems.
Why Use Python for ODT to PDF Conversion?
Python enables batch processing, repeatable workflows, and seamless integration with existing applications. Once implemented, conversions can run unattended, ensuring consistent results while reducing manual effort.
Using Spire.Doc for Python
Spire.Doc for Python is a document processing library that supports OpenDocument formats and enables direct conversion from ODT to PDF. It preserves text, images, and layout without relying on Microsoft Word or LibreOffice, making it suitable for server-side and enterprise use.
Installation
Spire.Doc for Python can be installed via pip:
pip install spire-doc
Example: Convert ODT to PDF with Python
from spire.doc import Document, FileFormat

# Create a Document object and load the ODT file
doc = Document()
doc.LoadFromFile("Sample.odt", FileFormat.Odt)

# Save the ODT document as a PDF file
doc.SaveToFile("output/ODTToPDF.pdf", FileFormat.PDF)
doc.Close()
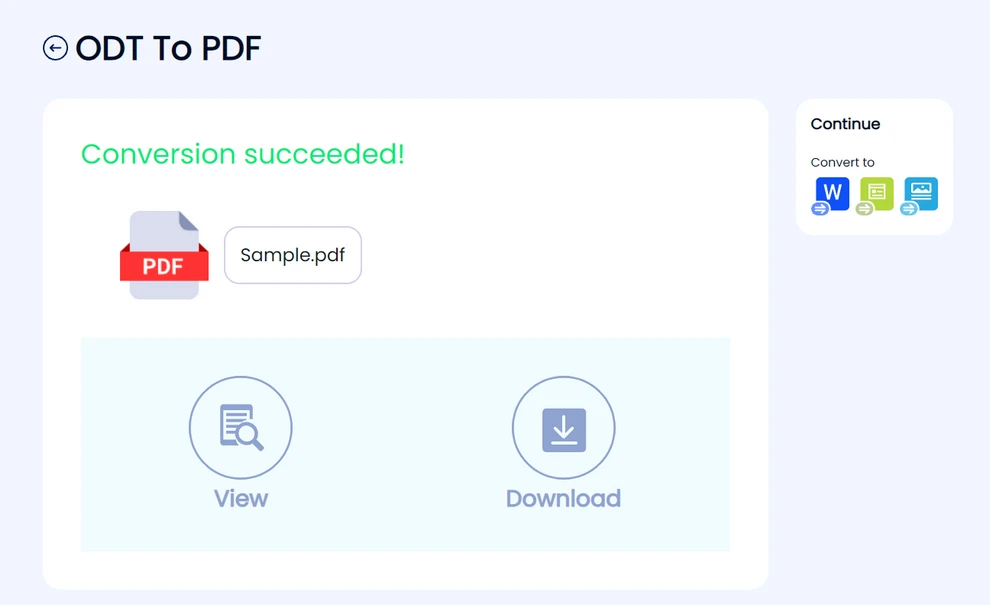
Below is a preview of the PDF file converted from ODT using Python:
This approach can easily be extended to handle batch conversions or integrated into automated workflows.
After converting the ODT file to PDF, you can further edit the generated PDF using Python, such as adding watermarks, setting metadata, or applying additional security options.
Save ODT as PDF to a Stream (Optional)
In backend or web-based applications, you may want to generate a PDF file in memory without writing it to disk. Spire.Doc for Python allows saving the converted document to a stream.
from spire.doc import Document, FileFormat, Stream

doc = Document()
doc.LoadFromFile("Sample.odt", FileFormat.Odt)

# Save the ODT document to a PDF stream
pdf_stream = Stream()
doc.SaveToStream(pdf_stream, FileFormat.PDF)
doc.Close()

# Get PDF bytes from the stream
pdf_bytes = bytes(pdf_stream.ToArray())
This approach is useful for returning PDF files in web APIs, uploading to cloud storage, or processing documents in memory.
If your workflow requires further processing of PDF files in memory—such as merging documents, adding watermarks, or applying security settings—you may find it helpful to explore techniques for working with PDF documents directly in streams.
Choosing the Right Method for Your Needs
The best way to convert ODT to PDF depends on how often you perform the task and the level of control required.
- Online tools are ideal for quick, occasional conversions when convenience is the priority.
- Desktop software works well for users who need better formatting control and convert files manually.
- Python-based automation is the most suitable option for large-scale processing, backend systems, and enterprise workflows.
Understanding your usage scenario helps ensure you choose a method that balances efficiency, reliability, and maintainability.
FAQs About Converting ODT to PDF
Is it safe to convert ODT to PDF online?
Online converters can be convenient for non-sensitive documents, but they may not be suitable for sensitive documents due to privacy concerns.
Will the document formatting change after conversion?
Simple documents usually convert accurately, while complex layouts may benefit from desktop or programmatic methods.
Can multiple ODT files be converted at once?
Batch conversion is rarely supported by online tools and is inefficient manually. Programmatic solutions handle this more effectively.
Do Python-based conversions require office software?
No. Libraries such as Spire.Doc for Python operate independently of office applications.
Conclusion
Converting ODT files to PDF can be accomplished in several ways, each suited to different needs. Online tools and desktop applications are effective for everyday use, while Python-based automation provides a scalable solution for advanced and high-volume scenarios. By selecting the appropriate method, you can ensure accurate, efficient, and reliable document conversion.
See Also
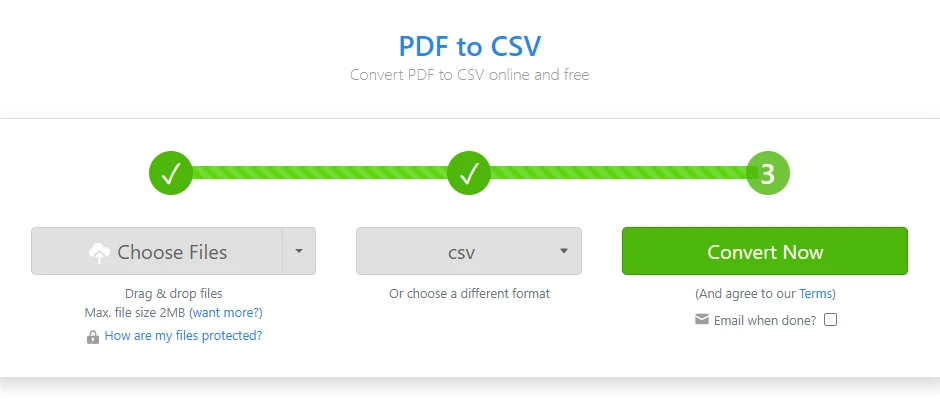
Convert PDF Tables to CSV: Manual, Online & Automated
Table of Contents
Converting tables from PDF files into CSV format is a common requirement in reporting, analytics, and data integration workflows. CSV files are lightweight, widely supported, and well suited for automation, making them far more useful than static PDFs once tabular data needs to be reused.
In practice, however, converting a PDF table to CSV is rarely straightforward. PDF files are designed to preserve visual appearance rather than logical structure. A table that looks perfectly aligned on screen may not exist as rows and columns internally, which is why naïve conversion methods often fail.
This article focuses on practical PDF table to CSV conversion methods. Instead of covering every theoretical option, it explains the most commonly used approaches, how they behave in practice, and when each method is appropriate.
Table of Contents
- Common Practical Ways to Convert PDF Tables to CSV
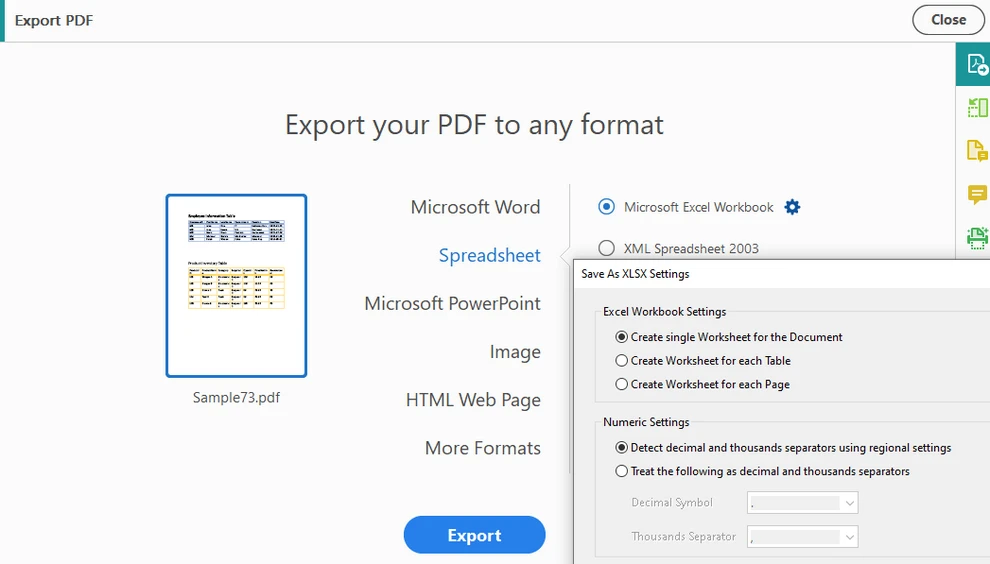
- Method 1: Export PDF to Spreadsheet Using Acrobat
- Method 2: Online PDF Table to CSV Conversion
- Method 3: Programmatic PDF Table Extraction with Python
- Handling Real-World PDF Table Scenarios
- Key Takeaways: Converting PDF Tables to CSV
- FAQ
Common Practical Ways to Convert PDF Tables to CSV
In most real workflows, converting a PDF table to CSV falls into one of the following categories:
- Exporting tables via PDF to spreadsheet tools (such as Acrobat)
- Using online PDF table to CSV converters
- Extracting tables programmatically using Python code
Simple copy-and-paste techniques are intentionally excluded, as they usually flatten tables into plain text and require extensive manual reconstruction.
Method 1: Export PDF to Spreadsheet Using Acrobat
Exporting a PDF to a spreadsheet format and then saving it as CSV is a common choice for users who prefer desktop tools and visual inspection.
When This Method Works Well
- The PDF is text-based and well structured
- Tables have clear row and column boundaries
- Manual review and correction are acceptable
Typical Acrobat-Based Workflow
-
Open the PDF file in Acrobat
-
Choose Export PDF and select Spreadsheet as the output format
-
Export the document to Excel format
-
Review and adjust the table structure if necessary
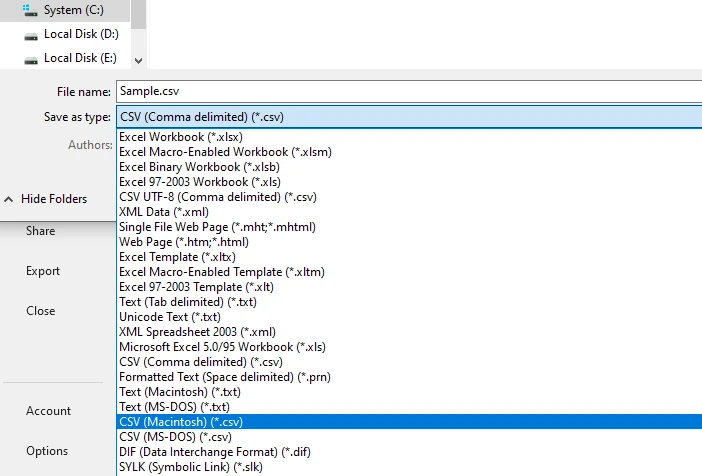
-
Save or export the spreadsheet as a CSV file
This workflow often produces better structural results than direct copying, especially for single-page or consistently formatted tables.
Practical Limitations
- Complex or multi-page tables may be split across sheets
- Merged cells can lead to misaligned columns in CSV output
- Manual cleanup is often required before export
- Not suitable for batch or automated processing
This approach is effective for occasional conversions where visual validation matters, but it does not scale well.
For users looking for a free alternative to Acrobat for converting PDF tables to Excel before saving as CSV, see How to Convert PDF to Excel for Free.
Method 2: Online PDF Table to CSV Conversion
Online converters are widely used because they require no installation and provide fast results.
When Online Conversion Is a Good Fit
- The PDF contains selectable (non-scanned) text
- Table layouts are relatively simple
- Only a small number of files need conversion
Typical Online PDF Table to CSV Workflow
Most online tools follow a similar process (Zamzar example):
-
Open an online PDF to CSV converter
-
Upload the PDF file containing the table
-
Configure page range or table detection options, if available
-
Start the conversion process
-
Download the generated CSV file
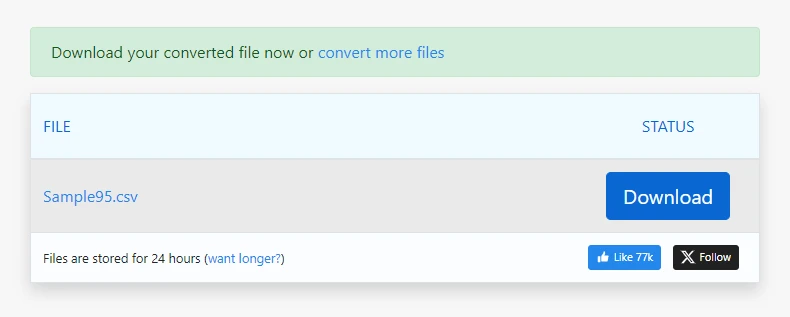
For straightforward PDFs, this process can generate usable CSV output in seconds.
Common Considerations With Online Converters
- Columns may shift when spacing is inconsistent
- Converters often export the whole PDF as CSV, not just the tables
- Line breaks inside cells may create extra rows
- Output quality varies by document layout
- File size limits and privacy concerns may apply
Online tools are best treated as a convenience option rather than a predictable or reusable solution.
Method 3: Programmatic PDF Table Extraction with Python
When accuracy, consistency, or automation is required, programmatic extraction is often the most reliable way to convert PDF tables to CSV.
Why Programmatic Extraction Is Often Preferred
- Tables can be processed page by page
- Multi-page tables can be handled consistently
- The same extraction logic can be reused in batch jobs
- Output is reproducible and easier to validate
This approach is common in data pipelines, reporting systems, and backend services that process PDFs at scale. With Spire.PDF for Python, developers can accurately extract tables from PDF documents, handle multi-page and complex layouts, and automate the conversion to CSV with minimal manual intervention.
Typical Programmatic Workflow for PDF Table to CSV
Most programmatic solutions follow a similar high-level process:
- Load the PDF document
- Iterate through each page
- Detect table structures on each page
- Extract rows and columns as structured data
- Normalize extracted text where necessary
- Write the structured data to CSV files
Python is widely used for this task because it combines readability with strong data-processing capabilities.
Example: Convert PDF Tables to CSV Using Python
Before running the example below, make sure the required PDF processing library is installed.
You can install Spire.PDF for Python using pip:
pip install spire.pdf
Once installed, you can proceed with the table extraction example.
The following example demonstrates how to convert PDF tables to CSV using Spire.PDF for Python.
import os
import csv
from spire.pdf import PdfDocument, PdfTableExtractor

# Load the PDF document
pdf = PdfDocument()
pdf.LoadFromFile("Sample.pdf")

# Create a table extractor
extractor = PdfTableExtractor(pdf)

# Normalize text to handle PDF ligatures and PUA characters
def normalize_text(text: str) -> str:
    if not text:
        return text
    if not any('\uE000' <= ch <= '\uF8FF' for ch in text):
        return text

    ligatures = {
        '\uE000': 'ff',
        '\uE001': 'fi',
        '\uE002': 'fl',
        '\uE003': 'ffl',
        '\uE004': 'ffi',
        '\uE005': 'ft',
        '\uE006': 'st',
    }
    for lig, repl in ligatures.items():
        text = text.replace(lig, repl)
    return text

# Extract tables page by page
for page_index in range(pdf.Pages.Count):
    tables = extractor.ExtractTable(page_index)
    if tables:
        for table_index, table in enumerate(tables):
            rows = []
            for r in range(table.GetRowCount()):
                row = []
                for c in range(table.GetColumnCount()):
                    cell = normalize_text(table.GetText(r, c)).replace("\n", " ")
                    row.append(cell)
                rows.append(row)

            os.makedirs("output/Tables", exist_ok=True)
            with open(
                f"output/Tables/Page{page_index + 1}-Table{table_index + 1}.csv",
                "w",
                newline="",
                encoding="utf-8",
            ) as f:
                writer = csv.writer(f)
                writer.writerows(rows)

pdf.Close()
Below is a preview of the PDF table to CSV conversion results:
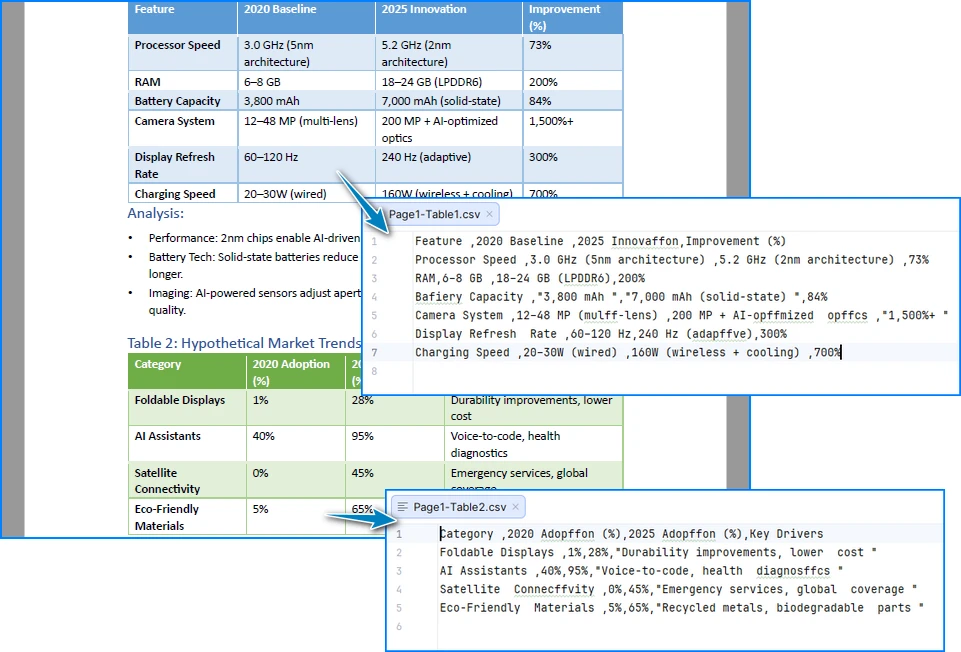
How This Implementation Works
This implementation focuses on preserving table structure rather than inferring layout from text positions:
- Cell-level extraction ensures rows and columns are preserved as logical units instead of being reconstructed from spacing
- Page-by-page processing prevents tables from being merged incorrectly across page boundaries
- Explicit text normalization handles common PDF issues such as ligatures and private-use Unicode characters, which can silently corrupt CSV output
- Direct CSV writing avoids intermediate formats that may introduce additional formatting artifacts
As a result, the generated CSV files are more stable and suitable for automated processing. For a step-by-step guide on extracting tables from PDF documents, see Detailed Guide: Extracting Tables from PDF.
Handling Real-World PDF Table Scenarios
In real-world workflows, PDF tables often behave differently from how they look on screen. Typical issues include:
- Tables spanning multiple pages with repeated or missing headers
- Slight column position shifts between pages
- Rows with empty, wrapped, or irregular cells
- Large batches of PDFs with similar but not identical layouts
These factors are usually where generic export tools and online converters start to produce inconsistent CSV output.
From a practical perspective, programmatic extraction is better suited to these cases because it allows:
- Page-by-page processing without accidentally merging unrelated tables
- Controlled handling of multi-page tables
- Stable column alignment even when layouts are not perfectly uniform
One additional usability detail worth noting is CSV encoding:
- When extracted data includes non-ASCII characters, CSV files opened directly in Excel may display garbled text
- Saving CSV output as UTF-8 with BOM (UTF-8-SIG) helps ensure correct character display without manual import steps
These considerations become especially relevant when working with real-world PDFs rather than idealized examples.
Key Takeaways: Converting PDF Tables to CSV
In practice, converting a PDF table to CSV usually comes down to three options:
- Acrobat export works well for occasional, visually verified conversions, such as single-page invoices or reports
- Online converters are convenient for simple, one-off tasks with straightforward tables
- Programmatic extraction offers the most reliable results for complex, multi-page, or repeated workflows, especially in automated pipelines
Choosing the right method depends less on the tool itself and more on how the extracted data will be used.
FAQ
Can scanned PDF tables be converted to CSV directly?
No. Scanned PDFs require OCR before table extraction is possible. For a step-by-step guide on extracting text from scanned PDFs using Python, see Extracting Text from Scanned PDFs with Python.
Is CSV better than Excel for extracted PDF tables? CSV is simpler and better suited for automation, while Excel is often preferred for manual review.
Is Python suitable for batch PDF table conversion? Yes. Python is widely used for large-scale and automated PDF table extraction due to its flexibility and readability.
See Also
Transform DataTables into Professional PDF Reports with C#
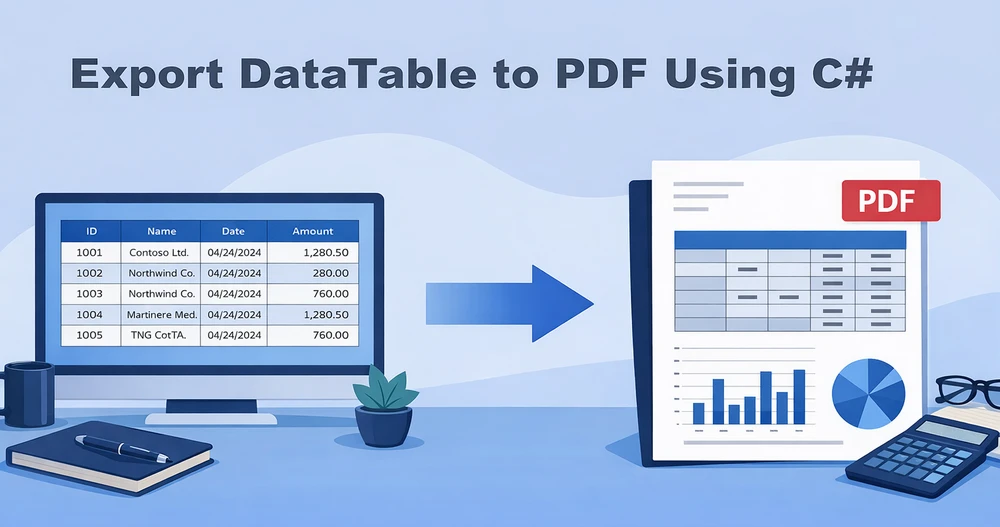
In many .NET-based business systems, structured data is often represented as a DataTable. When this data needs to be distributed, archived, or delivered as a read-only report, exporting a DataTable to PDF using C# becomes a common and practical requirement.
Compared with formats such as Excel or CSV, PDF is typically chosen when layout stability, visual consistency, and document integrity are more important than data editability. This makes PDF especially suitable for reports, invoices, audit records, and system-generated documents.
This tutorial takes a code-first approach to converting a DataTable to PDF in C#, focusing on the technical implementation rather than conceptual explanations. The solution is based on Spire.PDF for .NET, using its PdfGrid component to render DataTable content as a structured table inside a PDF document.
Table of Contents
- 1. Overview: DataTable to PDF Export in C#
- 2. Environment Setup
- 3. Core Workflow and Code Implementation
- 4. Controlling Table Layout, Page Flow, and Pagination
- 5. Customizing Table Appearance
- 6. PDF File and Stream Output
- 7. Practical Tips and Common Issues
1. Overview: DataTable to PDF Export in C#
Exporting a DataTable to PDF is fundamentally a data-binding and rendering task, not a low-level drawing problem.
Instead of manually calculating row positions, column widths, or page breaks, the recommended approach is to bind an existing DataTable to a PDF table component and let the rendering engine handle layout and pagination automatically.
In Spire.PDF for .NET, this role is fulfilled by the PdfGrid class.
Why PdfGrid Is the Right Abstraction
PdfGrid is a Spire.PDF for .NET component designed specifically for rendering structured, tabular data in PDF documents. It treats rows, columns, headers, and pagination as first-class concepts rather than graphical primitives.
From a technical standpoint, PdfGrid provides:
- Direct binding via the DataSource property, which accepts a DataTable
- Automatic column generation based on the DataTable schema
- Built-in header and row rendering
- Automatic page breaking when content exceeds page bounds
As a result, exporting a DataTable to PDF becomes a declarative operation: you describe what data should be rendered, and the PDF engine determines how it is laid out across pages.
The following sections focus on the concrete implementation and practical refinements of this approach.
2. Environment Setup
All examples in this article apply to both .NET Framework and modern .NET (6+) projects. The implementation is based entirely on managed code and does not require platform-specific configuration.
Installing Spire.PDF for .NET
Spire.PDF for .NET can be installed via NuGet:
Install-Package Spire.PDF
You can also download Spire.PDF for .NET and include it in your project manually.
Once installed, the library provides APIs for PDF document creation, page management, table rendering, and style control.
3. DataTable to PDF in C#: Core Workflow and Code Implementation
With the environment prepared, exporting a DataTable to PDF becomes a linear, implementation-driven process.
At its core, the workflow relies on binding an existing DataTable to PdfGrid and delegating layout, pagination, and table rendering to the PDF engine. There is no need to manually draw rows, columns, or borders.
From an implementation perspective, the process consists of the following steps:
- Prepare a populated DataTable
- Create a PDF document and page
- Bind the DataTable to a PdfGrid
- Render the grid onto the page
- Save the PDF output
These steps are typically executed together as a single, continuous code path in real-world applications. The following example demonstrates the complete workflow in one place.
Complete Example: Exporting a DataTable to PDF
The example below uses a business-oriented DataTable schema to reflect a typical reporting scenario. The source of the DataTable (database, API, or in-memory processing) does not affect the export logic.
DataTable dataTable = new DataTable();
dataTable.Columns.Add("OrderId", typeof(int));
dataTable.Columns.Add("CustomerName", typeof(string));
dataTable.Columns.Add("OrderDate", typeof(DateTime));
dataTable.Columns.Add("TotalAmount", typeof(decimal));

dataTable.Rows.Add(1001, "Contoso Ltd.", DateTime.Today, 1280.50m);
dataTable.Rows.Add(1002, "Northwind Co.", DateTime.Today, 760.00m);
dataTable.Rows.Add(1003, "Adventure Works", DateTime.Today, 2145.75m);
dataTable.Rows.Add(1004, "Wingtip Toys", DateTime.Today, 1230.00m);
dataTable.Rows.Add(1005, "Bike World", DateTime.Today, 1230.00m);
dataTable.Rows.Add(1006, "Woodgrove Bank", DateTime.Today, 1230.00m);

PdfDocument document = new PdfDocument();
PdfPageBase page = document.Pages.Add();

PdfGrid grid = new PdfGrid();
grid.DataSource = dataTable;

grid.Draw(page, new PointF(40f, 0));

document.SaveToFile("DataTableToPDF.pdf");
document.Close();
This single code block completes the entire DataTable-to-PDF export process. Below is a preview of the generated PDF:
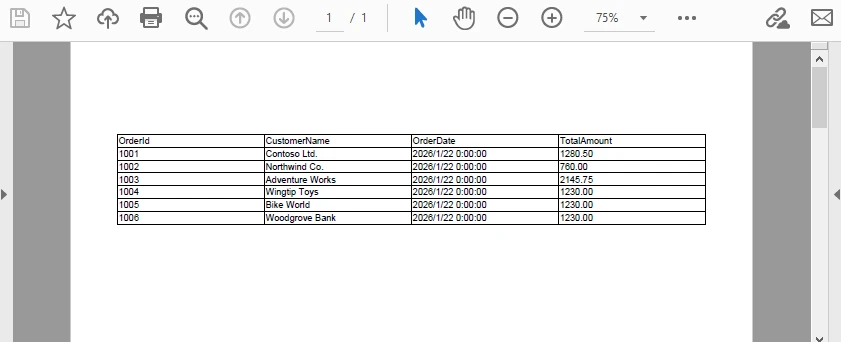
Key technical characteristics of this implementation:
- PdfGrid.DataSource accepts a DataTable directly, with no manual row or column mapping
- Column headers are generated automatically from DataColumn.ColumnName
- Row data is populated from each DataRow
- Pagination and page breaks are handled internally during rendering
- No coordinate-level table layout logic is required
The result is a structured, paginated PDF table that accurately reflects the DataTable’s schema and data. This method is already a fully functional and production-ready solution for exporting a DataTable to PDF in C#.
In practical applications, however, additional control is often required for layout positioning, page size, orientation, and visual styling. The following sections focus on refining table placement, appearance, and pagination behavior without altering the core export logic.
4. Controlling Table Layout, Page Flow, and Pagination
In real-world documents, table rendering is part of a larger page composition. Page geometry, table start position, and pagination behavior together determine how tabular data flows across one or more pages.
In PdfGrid, these concerns are resolved during rendering. The grid itself does not manage absolute layout or page transitions; instead, layout and pagination are governed by page configuration and the parameters supplied when calling Draw.
The following example demonstrates a typical layout and pagination configuration used in production reports.
Layout and Pagination Example
PdfDocument document = new PdfDocument();

// Create an A4 page with margins
PdfPageBase page = document.Pages.Add(
    PdfPageSize.A4,
    new PdfMargins(40),
    PdfPageRotateAngle.RotateAngle0,  // Rotates the page coordinate system
    PdfPageOrientation.Landscape  // Sets the page orientation
);

PdfGrid grid = new PdfGrid();
grid.DataSource = dataTable;

// Enable header repetition across pages
grid.RepeatHeader = true;

// Define table start position
float startX = 40f;
float startY = 80f;

// Render the table
grid.Draw(page, new PointF(startX, startY));
Below is a preview of the generated PDF with page configuration applied:
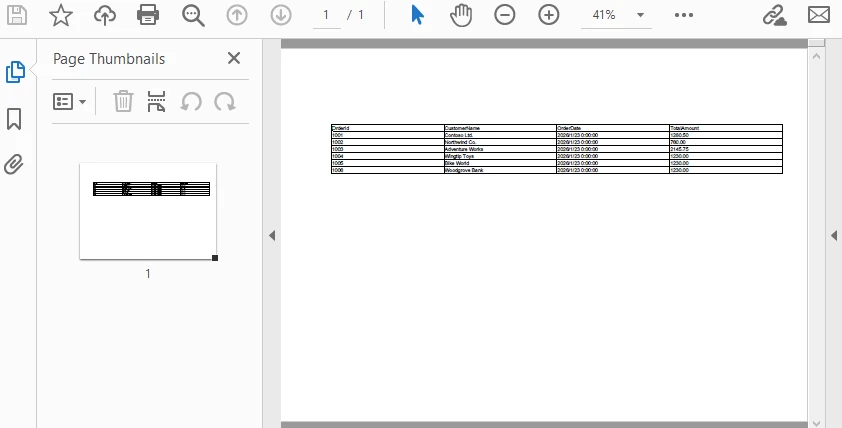
Technical Explanation
The rendering behavior illustrated above can be understood as a sequence of layout and flow decisions applied at draw time:
-
PdfPageBase
- Pages.Add creates a new page with configurable size, margins, rotation, and orientation.
-
RepeatHeader
- Boolean property controlling whether column headers are rendered on each page. When enabled, headers repeat automatically during multi-page rendering.
-
Draw method
- Accepts a PointF defining the starting position on the page.
- Responsible for rendering the grid and automatically handling pagination.
By configuring page geometry, table start position, and pagination behavior together, PdfGrid enables predictable multi-page table rendering without manual page management or row-level layout control.
Page numbers are also important for PDF reports. Refer to How to Add Pages Numbers to PDF with C# to learn page numbering techniques.
5. Customizing Table Appearance
Once layout is stable, appearance becomes the primary concern. PdfGrid provides a centralized styling model that allows table-wide, column-level, and row-level customization without interfering with data binding or pagination.
The example below consolidates common styling configurations typically applied in reporting scenarios.
Styling Example: Headers, Rows, and Columns
PdfDocument document = new PdfDocument();
PdfPageBase page = document.AppendPage();

PdfGrid grid = new PdfGrid();
grid.DataSource = dataTable;

// Create and apply the header style
PdfGridCellStyle headerStyle = new PdfGridCellStyle();
headerStyle.Font =
    new PdfFont(PdfFontFamily.Helvetica, 10f, PdfFontStyle.Bold);
headerStyle.BackgroundBrush =
    new PdfSolidBrush(Color.FromArgb(60, 120, 200));
headerStyle.TextBrush = PdfBrushes.White;
grid.Headers.ApplyStyle(headerStyle);


// Create row styles
PdfGridCellStyle defaultStyle = new PdfGridCellStyle();
defaultStyle.Font = new PdfFont(PdfFontFamily.Helvetica, 9f);
PdfGridCellStyle alternateStyle = new PdfGridCellStyle();
alternateStyle.BackgroundBrush = new PdfSolidBrush(Color.LightSkyBlue);
// Apply row styles
for (int rowIndex = 0; rowIndex < grid.Rows.Count; rowIndex++)
{
    if (rowIndex % 2 == 0)
    {
        grid.Rows[rowIndex].ApplyStyle(defaultStyle);
    }
    else
    {
        grid.Rows[rowIndex].ApplyStyle(alternateStyle);
    }
}

// Explicit column widths
grid.Columns[0].Width = 60f;    // OrderId
grid.Columns[1].Width = 140f;   // CustomerName
grid.Columns[2].Width = 90f;    // OrderDate
grid.Columns[3].Width = 90f;    // TotalAmount

// Render the table
grid.Draw(page, new PointF(40f, 80f));
Below is a preview of the generated PDF with the above styling applied:
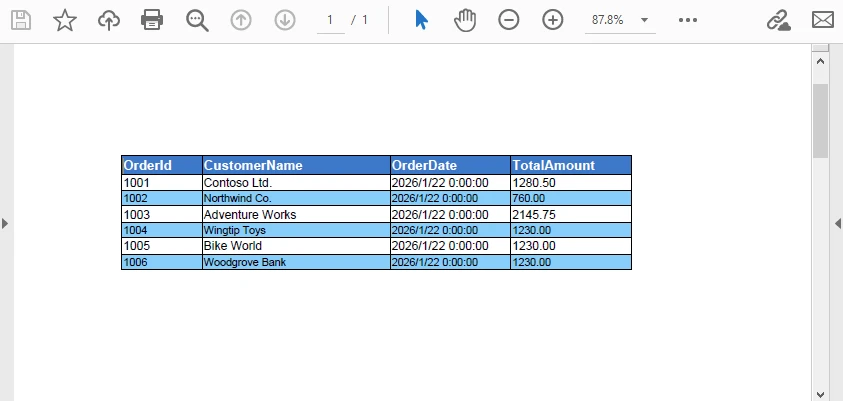
Styling Behavior Notes
-
Header styling
- Header appearance is defined through a dedicated PdfGridCellStyle and applied using grid.Headers.ApplyStyle(...).
- This ensures all header cells share the same font, background color, text color, and alignment across pages.
-
Row styling
- Data rows are styled explicitly via grid.Rows[i].ApplyStyle(...).
- Alternating row appearance is controlled by the row index, making the behavior predictable and easy to extend with additional conditions if needed.
-
Column width control
- Column widths are assigned directly through grid.Columns[index].Width.
- Explicit widths avoid layout shifts caused by content length and produce consistent results in report-style documents.
Make sure to bind the styles before applying styles.
All styles (header, rows, and columns) are resolved before calling grid.Draw(...). The rendering process applies these styles without affecting pagination or data binding.
For more complex styling scenarios, check out How to Create and Style Tables in PDF with C#.
6. Output Options: File vs Stream
Once the table has been rendered, the final step is exporting the PDF output.
The rendering logic remains identical regardless of the output destination.
Saving to a File
Saving directly to a file is suitable for desktop applications, background jobs, and batch exports.
document.SaveToFile("DataTableReport.pdf");
document.Close();
This approach is typically used in:
- Windows desktop applications
- Scheduled report generation
- Offline or server-side batch processing
Writing to a Stream (Web and API Scenarios)
In web-based systems, saving to disk is often unnecessary or undesirable. Instead, the PDF can be written directly to a stream.
using (MemoryStream stream = new MemoryStream())
{
    document.SaveToStream(stream);
    document.Close();

    byte[] pdfBytes = stream.ToArray();
    // return pdfBytes as HTTP response
}
Stream output integrates cleanly with ASP.NET controllers or minimal APIs, without the need for temporary file storage.
For a complete example of returning a generated PDF from an ASP.NET application, see how to create and return PDF documents in ASP.NET.
7. Practical Tips and Common Issues
This section focuses on issues commonly encountered in real-world projects when exporting DataTables to PDF.
7.1 Formatting Dates and Numeric Values
PdfGrid renders values using their string representation. To ensure consistent formatting, values should be normalized before binding.
Typical examples include:
- Formatting DateTime values using a fixed culture
- Standardizing currency precision
- Avoiding locale-dependent formats in multi-region systems
This preparation step belongs in the data layer, not the rendering layer.
7.2 Handling Null and Empty Values
DBNull.Value may result in empty cells or inconsistent alignment. Normalizing values before binding avoids layout surprises.
row["TotalAmount"] =
    row["TotalAmount"] == DBNull.Value ? 0m : row["TotalAmount"];
This approach keeps rendering logic simple and predictable.
7.3 Preventing Table Width Overflow
Wide DataTables can exceed page width if left unconfigured.
Common mitigation strategies include:
- Explicit column width configuration
- Slight font size reduction
- Switching to landscape orientation
- Increasing page margins selectively
These adjustments should be applied at the layout level rather than modifying the underlying data.
7.4 Large DataTables and Performance Considerations
When exporting DataTables with hundreds or thousands of rows, performance characteristics become more visible.
Practical recommendations:
- Avoid per-cell or per-row styling in large tables.
- Prefer table-level or column-level styles
- Use standard fonts instead of custom embedded fonts
- Keep layout calculations simple and consistent
For example, applying styles using grid.Rows[rowIndex].ApplyStyle(...) inside a loop can introduce unnecessary overhead for large datasets. In such cases, prefer applying a unified style at the row or column collection level (e.g., grid.Rows.ApplyStyle(...)) when individual row differentiation is not required.
In addition to rendering efficiency, in web environments, PDF generation should be performed outside the request thread when possible to avoid blocking.
8. Conclusion
Exporting a DataTable to PDF in C# can be handled directly through PdfGrid without manual table construction or low-level drawing. By binding an existing DataTable, you can generate paginated PDF tables while keeping layout and appearance fully under control.
This article focused on a practical, code-first approach, covering layout positioning, styling, and data preparation as they apply in real-world export scenarios. With these patterns in place, the same workflow scales cleanly from simple reports to large, multi-page documents.
If you plan to evaluate this workflow in a real project, you can apply for a temporary license from E-ICEBLUE to test the full functionality without limitations.
FAQ: DataTable to PDF in C#
When is PdfGrid the right choice for exporting DataTables to PDF?
PdfGrid is most suitable when you need structured, paginated tables with consistent layout. It handles column generation, headers, and page breaks automatically, making it a better choice than manual drawing for reports, invoices, and audit documents.
Should formatting be handled in the DataTable or in PdfGrid?
Data normalization (such as date formats, numeric precision, and null handling) should be done before binding. PdfGrid is best used for layout and visual styling, not for value transformation.
Can PdfGrid handle large DataTables efficiently?
Yes. PdfGrid supports automatic pagination and header repetition. For large datasets, applying table-level or column-level styles instead of per-cell styling helps maintain stable performance.
How to Create Structured Word Documents Using Python

Creating Word documents programmatically is a common requirement in Python applications. Reports, invoices, contracts, audit logs, and exported datasets are often expected to be delivered as editable .docx files rather than plain text or PDFs.
Unlike plain text output, a Word document is a structured document composed of sections, paragraphs, styles, and layout rules. When generating Word documents in Python, treating .docx files as simple text containers quickly leads to layout issues and maintenance problems.
This tutorial focuses on practical Word document creation in Python using Spire.Doc for Python. It demonstrates how to construct documents using Word’s native object model, apply formatting at the correct structural level, and generate .docx files that remain stable and editable as content grows.
Content Overview
- 1. Understanding Word Document Structure in Python
- 2. Creating a Basic Word Document in Python
- 3. Adding and Formatting Text Content
- 4. Inserting Images into a Word Document
- 5. Creating and Populating Tables
- 6. Adding Headers and Footers
- 7. Controlling Page Layout with Sections
- 8. Setting Document Properties and Metadata
- 9. Saving, Exporting, and Performance Considerations
- 10. Common Pitfalls When Creating Word Documents in Python
1. Understanding Word Document Structure in Python
Before writing code, it is important to understand how a Word document is structured internally.
A .docx file is not a linear stream of text. It consists of multiple object layers, each with a specific responsibility:
- Document – the root container for the entire file
- Section – defines page-level layout such as size, margins, and orientation
- Paragraph – represents a logical block of text
- Run (TextRange) – an inline segment of text with character formatting
- Style – a reusable formatting definition applied to paragraphs or runs
When you create a Word document in Python, you are explicitly constructing this hierarchy in code. Formatting and layout behave predictably only when content is added at the appropriate level.
Spire.Doc for Python provides direct abstractions for these elements, allowing you to work with Word documents in a way that closely mirrors how Word itself organizes content.
2. Creating a Basic Word Document in Python
This section shows how to generate a valid Word document in Python using Spire.Doc. The example focuses on establishing the correct document structure and essential workflow.
Installing Spire.Doc for Python
pip install spire.doc
Alternatively, you can download Spire.Doc for Python and integrate it manually.
Creating a Simple .docx File
from spire.doc import Document, FileFormat

# Create the document container
document = Document()

# Add a section (defines page-level layout)
section = document.AddSection()

# Add a paragraph to the section
paragraph = section.AddParagraph()
paragraph.AppendText(
    "This document was generated using Python. "
    "It demonstrates basic Word document creation with Spire.Doc."
)

# Save the document
document.SaveToFile("basic_document.docx", FileFormat.Docx)
document.Close()
This example creates a minimal but valid .docx file that can be opened in Microsoft Word. It demonstrates the essential workflow: creating a document, adding a section, inserting a paragraph, and saving the file.
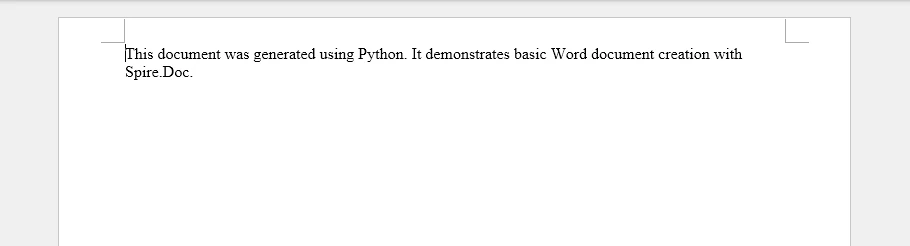
From a technical perspective:
- The Document object represents the Word file structure and manages its content.
- The Section defines the page-level layout context for paragraphs.
- The Paragraph contains the visible text and serves as the basic unit for all paragraph-level formatting.
All Word documents generated with Spire.Doc follow this same structural pattern, which forms the foundation for more advanced operations.
3. Adding and Formatting Text Content
Text in a Word document is organized hierarchically. Formatting can be applied at the paragraph level (controlling alignment, spacing, indentation, etc.) or the character level (controlling font, size, color, bold, italic, etc.). Styles provide a convenient way to store these formatting settings so they can be consistently applied to multiple paragraphs or text ranges without redefining the formatting each time. Understanding the distinction between paragraph formatting, character formatting, and styles is essential when creating or editing Word documents in Python.
Adding and Setting Paragraph Formatting
All visible text in a Word document must be added through paragraphs, which serve as containers for text and layout. Paragraph-level formatting controls alignment, spacing, and indentation, and can be set directly via the Paragraph.Format property. Character-level formatting, such as font size, bold, or color, can be applied to text ranges within the paragraph via the TextRange.CharacterFormat property.
from spire.doc import Document, HorizontalAlignment, FileFormat, Color

document = Document()
section = document.AddSection()

# Add the title paragraph
title = section.AddParagraph()
title.Format.HorizontalAlignment = HorizontalAlignment.Center
title.Format.AfterSpacing = 20  # Space after the title
title.Format.BeforeSpacing = 20
title_range = title.AppendText("Monthly Sales Report")
title_range.CharacterFormat.FontSize = 18
title_range.CharacterFormat.Bold = True
title_range.CharacterFormat.TextColor = Color.get_LightBlue()

# Add the body paragraph
body = section.AddParagraph()
body.Format.FirstLineIndent = 20
body_range = body.AppendText(
    "This report provides an overview of monthly sales performance, "
    "including revenue trends across different regions and product categories. "
    "The data presented below is intended to support management decision-making."
)
body_range.CharacterFormat.FontSize = 12

# Save the document
document.SaveToFile("formatted_paragraph.docx", FileFormat.Docx)
document.Close()
Below is a preview of the generated Word document.
Technical notes
- Paragraph.Format sets alignment, spacing, and indentation for the entire paragraph
- AppendText() returns a TextRange object, which allows character-level formatting (font size, bold, color)
- Every paragraph must belong to a section, and paragraph order determines reading flow and pagination
Creating and Applying Styles
Styles allow you to define paragraph-level and character-level formatting once and reuse it across the document. They can store alignment, spacing, font, and text emphasis, making formatting more consistent and easier to maintain. Word documents support both custom styles and built-in styles, which must be added to the document before being applied.
Creating and Applying a Custom Paragraph Style
from spire.doc import (
    Document, HorizontalAlignment, BuiltinStyle,
    TextAlignment, ParagraphStyle, FileFormat
)

document = Document()

# Create a new custom paragraph style
custom_style = ParagraphStyle(document)
custom_style.Name = "CustomStyle"
custom_style.ParagraphFormat.HorizontalAlignment = HorizontalAlignment.Center
custom_style.ParagraphFormat.TextAlignment = TextAlignment.Auto
custom_style.CharacterFormat.Bold = True
custom_style.CharacterFormat.FontSize = 20

# Inherit properties from a built-in heading style
custom_style.ApplyBaseStyle(BuiltinStyle.Heading1)

# Add the style to the document
document.Styles.Add(custom_style)

# Apply the custom style
title_para = document.AddSection().AddParagraph()
title_para.ApplyStyle(custom_style.Name)
title_para.AppendText("Regional Performance Overview")
Adding and Applying Built-in Styles
# Add a built-in style to the document
built_in_style = document.AddStyle(BuiltinStyle.Heading2)
document.Styles.Add(built_in_style)

# Apply the built-in style
heading_para = document.Sections.get_Item(0).AddParagraph()
heading_para.ApplyStyle(built_in_style.Name)
heading_para.AppendText("Sales by Region")

document.SaveToFile("document_styles.docx", FileFormat.Docx)
Preview of the generated Word document.

Technical Explanation
- ParagraphStyle(document) creates a reusable style object associated with the current document
- ParagraphFormat controls layout-related settings such as alignment and text flow
- CharacterFormat defines font-level properties like size and boldness
- ApplyBaseStyle() allows the custom style to inherit semantic meaning and default behavior from a built-in Word style
- Adding the style to document.Styles makes it available for use across all sections
Built-in styles, such as Heading 2, can be added explicitly and applied in the same way, ensuring the document remains compatible with Word features like outlines and tables of contents.
4. Inserting Images into a Word Document
In Word’s document model, images are embedded objects that belong to paragraphs, which ensures they flow naturally with text. Paragraph-anchored images adjust pagination automatically and maintain relative positioning when content changes.
Adding an Image to a Paragraph
from spire.doc import Document, TextWrappingStyle, HorizontalAlignment, FileFormat

document = Document()
section = document.AddSection()
section.AddParagraph().AppendText("\r\n\r\nExample Image\r\n")

# Insert an image
image_para = section.AddParagraph()
image_para.Format.HorizontalAlignment = HorizontalAlignment.Center
image = image_para.AppendPicture("Screen.jpg")

# Set the text wrapping style
image.TextWrappingStyle = TextWrappingStyle.Square
# Set the image size
image.Width = 350
image.Height = 200
# Set the transparency
image.FillTransparency(0.7)
# Set the horizontal alignment
image.HorizontalAlignment = HorizontalAlignment.Center

document.SaveToFile("document_images.docx", FileFormat.Docx)
Preview of the generated Word document.

Technical details
- AppendPicture() inserts the image into the paragraph, making it part of the text flow
- TextWrappingStyle determines how surrounding text wraps around the image
- Width and Height control the displayed size of the image
- FillTransparency() sets the image opacity
- HorizontalAlignment can center the image within the paragraph
Adding images to paragraphs ensures they behave like part of the text flow.
- Pagination adjusts automatically when images change size.
- Surrounding text reflows correctly when content is edited.
- When exporting to formats like PDF, images maintain their relative position.
These behaviors are consistent with Word’s handling of inline images.
For more advanced image operations in Word documents using Python, see how to insert images into a Word document with Python for a complete guide.
5. Creating and Populating Tables
Tables are commonly used to present structured data such as reports, summaries, and comparisons.
Internally, a table consists of rows, cells, and paragraphs inside each cell.
Creating and Formatting a Table in a Word Document
from spire.doc import Document, DefaultTableStyle, FileFormat, AutoFitBehaviorType

document = Document()
section = document.AddSection()
section.AddParagraph().AppendText("\r\n\r\nExample Table\r\n")

# Define the table data
table_headers = ["Region", "Product", "Units Sold", "Unit Price ($)", "Total Revenue ($)"]
table_data = [
    ["North", "Laptop", 120, 950, 114000],
    ["North", "Smartphone", 300, 500, 150000],
    ["South", "Laptop", 80, 950, 76000],
    ["South", "Smartphone", 200, 500, 100000],
    ["East", "Laptop", 150, 950, 142500],
    ["East", "Smartphone", 250, 500, 125000],
    ["West", "Laptop", 100, 950, 95000],
    ["West", "Smartphone", 220, 500, 110000]
]

# Add a table to the section
table = section.AddTable()
table.ResetCells(len(table_data) + 1, len(table_headers))

# Populate table headers
for col_index, header in enumerate(table_headers):
    header_range = table.Rows[0].Cells[col_index].AddParagraph().AppendText(header)
    header_range.CharacterFormat.FontSize = 14
    header_range.CharacterFormat.Bold = True

# Populate table data
for row_index, row_data in enumerate(table_data):
    for col_index, cell_data in enumerate(row_data):
        data_range = table.Rows[row_index + 1].Cells[col_index].AddParagraph().AppendText(str(cell_data))
        data_range.CharacterFormat.FontSize = 12

# Apply a default table style and auto-fit columns
table.ApplyStyle(DefaultTableStyle.ColorfulListAccent6)
table.AutoFit(AutoFitBehaviorType.AutoFitToContents)

document.SaveToFile("document_tables.docx", FileFormat.Docx)
Preview of the generated Word document.
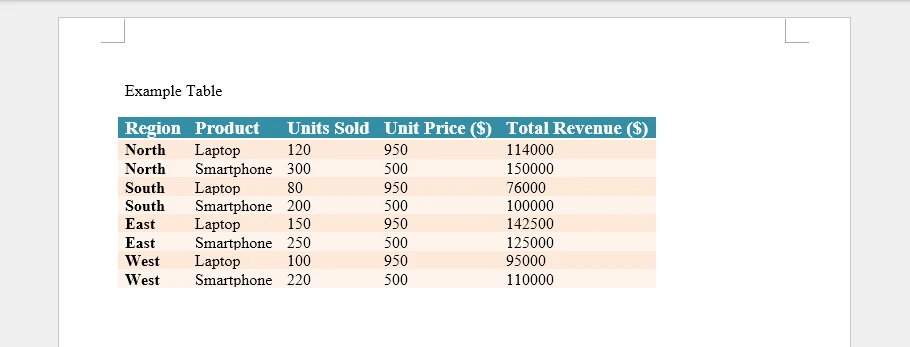
Technical details
- Section.AddTable() inserts the table into the section content flow
- ResetCells(rows, columns) defines the table grid explicitly
- Table[row, column] or Table.Rows[row].Cells[col] returns a TableCell
Tables in Word are designed so that each cell acts as an independent content container. Text is always inserted through paragraphs, and each cell can contain multiple paragraphs, images, or formatted text. This structure allows tables to scale from simple grids to complex report layouts, making them flexible for reports, summaries, or any structured content.
For more detailed examples and advanced operations using Python, such as dynamically generating tables, merging cells, or formatting individual cells, see how to insert tables into Word documents with Python for a complete guide.
6. Adding Headers and Footers
Headers and footers in Word are section-level elements. They are not part of the main content flow and do not affect body pagination.
Each section owns its own header and footer, which allows different parts of a document to display different repeated content.
Adding Headers and Footers in a Section
from spire.doc import Document, FileFormat, HorizontalAlignment, FieldType, BreakType

document = Document()
section = document.AddSection()
section.AddParagraph().AppendBreak(BreakType.PageBreak)

# Add a header
header = section.HeadersFooters.Header
header_para1 = header.AddParagraph()
header_para1.AppendText("Monthly Sales Report").CharacterFormat.FontSize = 12
header_para1.Format.HorizontalAlignment = HorizontalAlignment.Left

header_para2 = header.AddParagraph()
header_para2.AppendText("Company Name").CharacterFormat.FontSize = 12
header_para2.Format.HorizontalAlignment = HorizontalAlignment.Right

# Add a footer with page numbers
footer = section.HeadersFooters.Footer
footer_para = footer.AddParagraph()
footer_para.Format.HorizontalAlignment = HorizontalAlignment.Center
footer_para.AppendText("Page ").CharacterFormat.FontSize = 12
footer_para.AppendField("PageNum", FieldType.FieldPage).CharacterFormat.FontSize = 12
footer_para.AppendText(" of ").CharacterFormat.FontSize = 12
footer_para.AppendField("NumPages", FieldType.FieldNumPages).CharacterFormat.FontSize = 12

document.SaveToFile("document_header_footer.docx", FileFormat.Docx)
document.Dispose()
Preview of the generated Word document.
Technical notes
- section.HeadersFooters.Header / .Footer provides access to header/footer of the section
- AppendField() inserts dynamic fields like FieldPage or FieldNumPages to display dynamic content
Headers and footers are commonly used for report titles, company information, and page numbering. They update automatically as the document changes and are compatible with Word, PDF, and other export formats.
For more detailed examples and advanced operations, see how to insert headers and footers in Word documents with Python.
7. Controlling Page Layout with Sections
In Spire.Doc for Python, all page-level layout settings are managed through the Section object. Page size, orientation, and margins are defined by the section’s PageSetup and apply to all content within that section.
Configuring Page Size and Orientation
from spire.doc import PageSize, PageOrientation

section.PageSetup.PageSize = PageSize.A4()
section.PageSetup.Orientation = PageOrientation.Portrait
Technical explanation
- PageSetup is a layout configuration object owned by the Section
- PageSize defines the physical dimensions of the page
- Orientation controls whether pages are rendered in portrait or landscape mode
PageSetup defines the layout for the entire section. All paragraphs, tables, and images added to the section will follow these settings. Changing PageSetup in one section does not affect other sections in the document, allowing different sections to have different page layouts.
Setting Page Margins
section.PageSetup.Margins.Top = 50
section.PageSetup.Margins.Bottom = 50
section.PageSetup.Margins.Left = 60
section.PageSetup.Margins.Right = 60
Technical explanation
- Margins defines the printable content area for the section
- Margin values are measured in document units
Margins control the body content area for the section. They are evaluated at the section level, so you do not need to set them for individual paragraphs, and header/footer areas are not affected.
Using Multiple Sections for Different Layouts
When a document requires different page layouts, additional sections must be created.
landscape_section = document.AddSection()
landscape_section.PageSetup.Orientation = PageOrientation.Landscape
Technical notes
- AddSection() creates a new section and appends it to the document
- Each section maintains its own PageSetup, headers, and footers
- Content added after this call belongs to the new section
Using multiple sections allows mixing portrait and landscape pages or applying different layouts within a single Word document.
Below is an example preview of the above settings in a Word document:

8. Setting Document Properties and Metadata
In addition to visible content, Word documents expose metadata through built-in document properties. These properties are stored at the document level and do not affect layout or rendering.
Assigning Built-in Document Properties
document.BuiltinDocumentProperties.Title = "Monthly Sales Report"
document.BuiltinDocumentProperties.Author = "Data Analytics System"
document.BuiltinDocumentProperties.Company = "Example Corp"
Technical notes
BuiltinDocumentPropertiesprovides access to standard document properties- Properties such as
Title,Author, andCompanycan be set programmatically
Document properties are commonly used for file indexing, search, document management, and audit workflows. In addition to built-in properties, Word documents support other metadata such as Keywords, Subject, Comments, and Hyperlink base. You can also define custom properties using Document.CustomDocumentProperties.
For a guide on managing document custom properties with Python, see how to manage custom metadata in Word documents with Python.
9. Saving, Exporting, and Performance Considerations
After constructing a Word document in memory, the final step is saving or exporting it to the required output format. Spire.Doc for Python supports multiple export formats through a unified API, allowing the same document structure to be reused without additional formatting logic.
Saving and Exporting Word Documents in Multiple Formats
A document can be saved as DOCX for editing or exported to other commonly used formats for distribution.
from spire.doc import FileFormat

document.SaveToFile("output.docx", FileFormat.Docx)
document.SaveToFile("output.pdf", FileFormat.PDF)
document.SaveToFile("output.html", FileFormat.Html)
document.SaveToFile("output.rtf", FileFormat.Rtf)
The export process preserves document structure, including sections, tables, images, headers, and footers, ensuring consistent layout across formats. Check out all the supported formats in the FileFormat enumeration.
Performance Considerations for Document Generation
For scenarios involving frequent or large-scale Word document generation, performance can be improved by:
- Reusing document templates and styles
- Avoiding unnecessary section creation
- Writing documents to disk only after all content has been generated
- After saving or exporting, explicitly releasing resources using document.Close()
When generating many similar documents with different data, mail merge is more efficient than inserting content programmatically for each file. Spire.Doc for Python provides built-in mail merge support for batch document generation. For details, see how to generate Word documents in bulk using mail merge in Python.
Saving and exporting are integral parts of Word document generation in Python. By using Spire.Doc for Python’s export capabilities and following basic performance practices, Word documents can be generated efficiently and reliably for both individual files and batch workflows.
10. Common Pitfalls When Creating Word Documents in Python
The following issues frequently occur when generating Word documents programmatically.
Treating Word Documents as Plain Text
Issue Formatting breaks when content length changes.
Recommendation Always work with sections, paragraphs, and styles rather than inserting raw text.
Hard-Coding Formatting Logic
Issue Global layout changes require editing multiple code locations.
Recommendation Centralize formatting rules using styles and section-level configuration.
Ignoring Section Boundaries
Issue Margins or orientation changes unexpectedly affect the entire document.
Recommendation Use separate sections to isolate layout rules.
11. Conclusion
Creating Word documents in Python involves more than writing text to a file. A .docx document is a structured object composed of sections, paragraphs, styles, and embedded elements.
By using Spire.Doc for Python and aligning code with Word’s document model, you can generate editable, well-structured Word files that remain stable as content and layout requirements evolve. This approach is especially suitable for backend services, reporting pipelines, and document automation systems.
For scenarios involving large documents or document conversion requirements, a licensed version is required.
Create Excel Files in Python: From Basics to Automation
Creating Excel files in Python is a common requirement in data-driven applications. When application data needs to be delivered in a format that business users can easily review and share, Excel remains one of the most practical and widely accepted choices.
In real projects, generating an Excel file with Python is often the starting point of an automated process. Data may come from databases, APIs, or internal services, and Python is responsible for turning that data into a structured Excel file that follows a consistent layout and naming convention.
This article shows how to create Excel files in Python, from generating a workbook from scratch, to writing data, applying basic formatting, and updating existing files when needed. All examples are presented from a practical perspective, focusing on how Excel files are created and used in real automation scenarios.
Table of Contents
- Typical Scenarios for Creating Excel Files in Python
- Environment Setup
- Creating a New Excel File from Scratch in Python
- Writing Structured Data to an XLSX File Using Python
- Formatting Excel Data for Real-World Reports in Python
- Reading and Updating Existing Excel Files in Python
- Combining Read and Write Operations in a Single Workflow
- Choosing the Right Python Approach for Excel File Creation
- Common Issues and Solutions
- Frequently Asked Questions
1. Typical Scenarios for Creating Excel Files with Python
Creating Excel files with Python usually happens as part of a larger system rather than a standalone task. Common scenarios include:
- Generating daily, weekly, or monthly business reports
- Exporting database query results for analysis or auditing
- Producing Excel files from backend services or batch jobs
- Automating data exchange between internal systems or external partners
In these situations, Python is often used to generate Excel files automatically, helping teams reduce manual effort while ensuring data consistency and repeatability.
2. Environment Setup: Preparing to Create Excel Files in Python
In this tutorial, we use Free Spire.XLS for Python to demonstrate Excel file operations. Before generating Excel files with Python, ensure that the development environment is ready.
Python Version
Any modern Python 3.x version is sufficient for Excel automation tasks.
Free Spire.XLS for Python can be installed via pip:
pip install spire.xls.freeYou can also download Free Spire.XLS for Python and include it in your project manually.
The library works independently of Microsoft Excel, which makes it suitable for server environments, scheduled jobs, and automated workflows where Excel is not installed.
3. Creating a New Excel File from Scratch in Python
This section focuses on creating an Excel file from scratch using Python. The goal is to define a basic workbook structure, including worksheets and header rows, before any data is written.
By generating the initial layout programmatically, you can ensure that all output files share the same structure and are ready for later data population.
Example: Creating a Blank Excel Template
from spire.xls import Workbook, FileFormat

# Initialize a new workbook
workbook = Workbook()

# Access the default worksheet
sheet = workbook.Worksheets[0]
sheet.Name = "Template"

# Add a placeholder title
sheet.Range["B2"].Text = "Monthly Report Template"

# Save the Excel file
workbook.SaveToFile("template.xlsx", FileFormat.Version2016)
workbook.Dispose()
The preview of the template file:
In this example:
- Workbook() creates a new Excel workbook that already contains three default worksheets.
- The first worksheet is accessed via Worksheets[0] and renamed to define the basic structure.
- The Range[].Text property writes text to a specific cell, allowing you to set titles or placeholders before real data is added.
- The SaveToFile() method saves the workbook to an Excel file. And FileFormat.Version2016 specifies the Excel version or format to use.
Creating Excel Files with Multiple Worksheets in Python
In Python-based Excel generation, a single workbook can contain multiple worksheets to organize related data logically. Each worksheet can store a different data set, summary, or processing result within the same file.
The following example shows how to create an Excel file with multiple worksheets and write data to each one.
from spire.xls import Workbook, FileFormat

workbook = Workbook()

# Default worksheet
data_sheet = workbook.Worksheets[0]
data_sheet.Name = "Raw Data"

# Remove the second default worksheet
workbook.Worksheets.RemoveAt(1)

# Add a summary worksheet
summary_sheet = workbook.Worksheets.Add("Summary")

summary_sheet.Range["A1"].Text = "Summary Report"

workbook.SaveToFile("multi_sheet_report.xlsx", FileFormat.Version2016)
workbook.Dispose()
This pattern is commonly combined with read/write workflows, where raw data is imported into one worksheet and processed results are written to another.
Excel File Formats in Python Automation
When creating Excel files programmatically in Python, XLSX is the most commonly used format and is fully supported by modern versions of Microsoft Excel. It supports worksheets, formulas, styles, and is suitable for most automation scenarios.
In addition to XLSX, Spire.XLS for Python supports generating several common Excel formats, including:
- XLSX – the default format for modern Excel automation
- XLS – legacy Excel format for compatibility with older systems
- CSV – plain-text format often used for data exchange and imports
In this article, all examples use the XLSX format, which is recommended for report generation, structured data exports, and template-based Excel files. You can check the FileFormat enumeration for a complete list of supported formats.
4. Writing Structured Data to an XLSX File Using Python
In real applications, data written to Excel rarely comes from hard-coded lists. It is more commonly generated from database queries, API responses, or intermediate processing results.
A typical pattern is to treat Excel as the final delivery format for already-structured data.
Python Example: Generating a Monthly Sales Report from Application Data
Assume your application has already produced a list of sales records, where each record contains product information and calculated totals. In this example, sales data is represented as a list of dictionaries, simulating records returned from an application or service layer.
from spire.xls import Workbook

workbook = Workbook()
sheet = workbook.Worksheets[0]
sheet.Name = "Sales Report"

headers = ["Product", "Quantity", "Unit Price", "Total Amount"]
for col, header in enumerate(headers, start=1):
    sheet.Range[1, col].Text = header

# Data typically comes from a database or service layer
sales_data = [
    {"product": "Laptop", "qty": 15, "price": 1200},
    {"product": "Monitor", "qty": 30, "price": 250},
    {"product": "Keyboard", "qty": 50, "price": 40},
    {"product": "Mouse", "qty": 80, "price": 20},
    {"product": "Headset", "qty": 100, "price": 10}
]

row = 2
for item in sales_data:
    sheet.Range[row, 1].Text = item["product"]
    sheet.Range[row, 2].NumberValue = item["qty"]
    sheet.Range[row, 3].NumberValue = item["price"]
    sheet.Range[row, 4].NumberValue = item["qty"] * item["price"]
    row += 1

workbook.SaveToFile("monthly_sales_report.xlsx")
workbook.Dispose()
The preview of the monthly sales report:
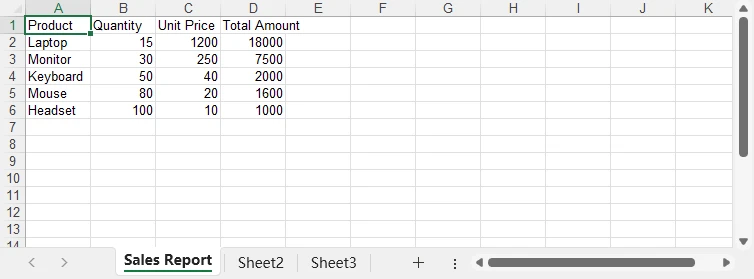
In this example, text values such as product names are written using the CellRange.Text property, while numeric fields use CellRange.NumberValue. This ensures that quantities and prices are stored as numbers in Excel, allowing proper calculation, sorting, and formatting.
This approach scales naturally as the dataset grows and keeps business logic separate from Excel output logic. For more Excel writing examples, please refer to the How to Automate Excel Writing in Python.
5. Formatting Excel Data for Real-World Reports in Python
In real-world reporting, Excel files are often delivered directly to stakeholders. Raw data without formatting can be difficult to read or interpret.
Common formatting tasks include:
- Making header rows visually distinct
- Applying background colors or borders
- Formatting numbers and currencies
- Automatically adjusting column widths
The following example demonstrates how these common formatting operations can be applied together to improve the overall readability of a generated Excel report.
Python Example: Improving Excel Report Readability
from spire.xls import Workbook, Color, LineStyleType

# Load the created Excel file
workbook = Workbook()
workbook.LoadFromFile("monthly_sales_report.xlsx")

# Get the first worksheet
sheet = workbook.Worksheets[0]

# Format header row
header_range = sheet.Range.Rows[0] # Get the first used row
header_range.Style.Font.IsBold = True
header_range.Style.Color = Color.get_LightBlue()

# Apply currency format
sheet.Range["C2:D6"].NumberFormat = "$#,##0.00"

# Format data rows
for i in range(1, sheet.Range.Rows.Count):
    if i % 2 == 0:
        row_range = sheet.Range[i, 1, i, sheet.Range.Columns.Count]
        row_range.Style.Color = Color.get_LightGreen()
    else:
        row_range = sheet.Range[i, 1, i, sheet.Range.Columns.Count]
        row_range.Style.Color = Color.get_LightYellow()

# Add borders to data rows
sheet.Range["A2:D6"].BorderAround(LineStyleType.Medium, Color.get_LightBlue())

# Auto-fit column widths
sheet.AllocatedRange.AutoFitColumns()

# Save the formatted Excel file
workbook.SaveToFile("monthly_sales_report_formatted.xlsx")
workbook.Dispose()
The preview of the formatted monthly sales report:
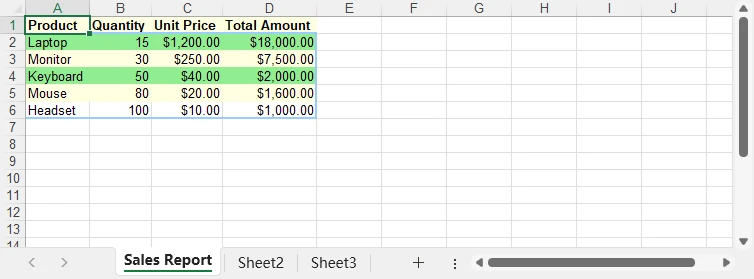
While formatting is not strictly required for data correctness, it is often expected in business reports that are shared or archived. Check How to Format Excel Worksheets with Python for more advanced formatting techniques.
6. Reading and Updating Existing Excel Files in Python Automation
Updating an existing Excel file usually involves locating the correct row before writing new values. Instead of updating a fixed cell, automation scripts often scan rows to find matching records and apply updates conditionally.
Python Example: Updating an Excel File
from spire.xls import Workbook

workbook = Workbook()
workbook.LoadFromFile("monthly_sales_report.xlsx")
sheet = workbook.Worksheets[0]

# Locate the target row by product name
for row in range(2, sheet.LastRow + 1):
    product_name = sheet.Range[row, 1].Text
    if product_name == "Laptop":
        sheet.Range[row, 5].Text = "Reviewed"
        break

sheet.Range["E1"].Text = "Status"

workbook.SaveToFile("monthly_sales_report_updated.xlsx")
workbook.Dispose()
The preview of the updated monthly sales report:
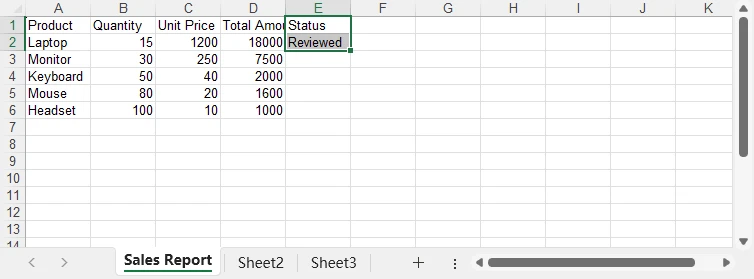
7. Combining Read and Write Operations in a Single Workflow
When working with imported Excel files, raw data is often not immediately suitable for reporting or further analysis. Common issues include duplicated records, inconsistent values, or incomplete rows.
This section demonstrates how to read existing Excel data, normalize it, and write the processed result to a new file using Python.
In real-world automation systems, Excel files are often used as intermediate data carriers rather than final deliverables.
They may be imported from external platforms, manually edited by different teams, or generated by legacy systems before being processed further.
As a result, raw Excel data frequently contains issues such as:
- Multiple rows for the same business entity
- Inconsistent or non-numeric values
- Empty or incomplete records
- Data structures that are not suitable for reporting or analysis
A common requirement is to read unrefined Excel data, apply normalization rules in Python, and write the cleaned results into a new worksheet that downstream users can rely on.
Python Example: Normalizing and Aggregating Imported Sales Data
In this example, a raw sales Excel file contains multiple rows per product.
The goal is to generate a clean summary worksheet where each product appears only once, with its total sales amount calculated programmatically.
from spire.xls import Workbook, Color

workbook = Workbook()
workbook.LoadFromFile("raw_sales_data.xlsx")

source = workbook.Worksheets[0]
summary = workbook.Worksheets.Add("Summary")

# Define headers for the normalized output
summary.Range["A1"].Text = "Product"
summary.Range["B1"].Text = "Total Sales"

product_totals = {}

# Read raw data and aggregate values by product
for row in range(2, source.LastRow + 1):
    product = source.Range[row, 1].Text
    value = source.Range[row, 4].Value

    # Skip incomplete or invalid rows
    if not product or value is None:
        continue

    try:
        amount = float(value)
    except ValueError:
        continue

    if product not in product_totals:
        product_totals[product] = 0

    product_totals[product] += amount

# Write aggregated results to the summary worksheet
target_row = 2
for product, total in product_totals.items():
    summary.Range[target_row, 1].Text = product
    summary.Range[target_row, 2].NumberValue = total
    target_row += 1
# Create a total row
summary.Range[summary.LastRow, 1].Text = "Total"
summary.Range[summary.LastRow, 2].Formula = "=SUM(B2:B" + str(summary.LastRow - 1) + ")"

# Format the summary worksheet
summary.Range.Style.Font.FontName = "Arial"
summary.Range[1, 1, 1, summary.LastColumn].Style.Font.Size = 12
summary.Range[1, 1, 1, summary.LastColumn].Style.Font.IsBold = True
for row in range(2, summary.LastRow + 1):
    for column in range(1, summary.LastColumn + 1):
        summary.Range[row, column].Style.Font.Size = 10
summary.Range[summary.LastRow, 1, summary.LastRow, summary.LastColumn].Style.Color = Color.get_LightGray()
summary.Range.AutoFitColumns()

workbook.SaveToFile("normalized_sales_summary.xlsx")
workbook.Dispose()
The preview of the normalized sales summary:
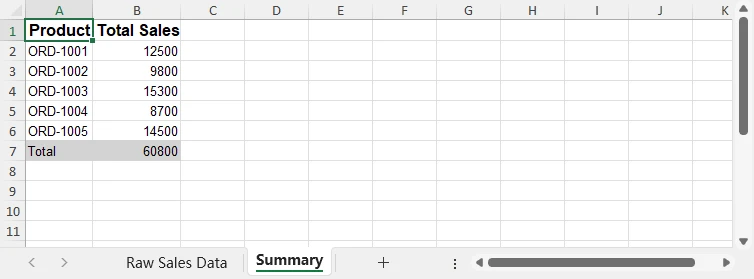
Python handles data validation, aggregation, and normalization logic, while Excel remains the final delivery format for business users—eliminating the need for manual cleanup or complex spreadsheet formulas.
Choosing the Right Python Approach for Excel File Creation
Python offers multiple ways to create Excel files, and the best approach depends on how Excel is used in your workflow.
Free Spire.XLS for Python is particularly well-suited for scenarios where:
- Excel files are generated or updated without Microsoft Excel installed
- Files are produced by backend services, batch jobs, or scheduled tasks
- You need precise control over worksheet structure, formatting, and formulas
- Excel is used as a delivery or interchange format, not as an interactive analysis tool
For data exploration or statistical analysis, Python users may rely on other libraries upstream, while using Excel generation libraries like Free Spire.XLS for producing structured, presentation-ready files at the final stage.
This separation keeps data processing logic in Python and presentation logic in Excel, improving maintainability and reliability.
For more detailed guidance and examples, see the Spire.XLS for Python Tutorial.
8. Common Issues When Creating and Writing Excel Files in Python
When automating Excel generation, several practical issues are frequently encountered.
-
File path and permission errors
Always verify that the target directory exists and that the process has write access before saving files.
-
Unexpected data types
Explicitly control whether values are written as text or numbers to avoid calculation errors in Excel.
-
Accidental file overwrites
Use timestamped filenames or output directories to prevent overwriting existing reports.
-
Large datasets
When handling large volumes of data, write rows sequentially and avoid unnecessary formatting operations inside loops.
Addressing these issues early helps ensure Excel automation remains reliable as data size and complexity grow.
9. Conclusion
Creating Excel files in Python is a practical solution for automating reporting, data export, and document updates in real business environments. By combining file creation, structured data writing, formatting, and update workflows, Excel automation can move beyond one-off scripts and become part of a stable system.
Spire.XLS for Python provides a reliable way to implement these operations in environments where automation, consistency, and maintainability are essential. You can apply a temporary license to unlock the full potential of Python automation in Excel file processing.
FAQ: Creating Excel Files in Python
Can Python create Excel files without Microsoft Excel installed?
Yes. Libraries such as Spire.XLS for Python operate independently of Microsoft Excel, making them suitable for servers, cloud environments, and automated workflows.
Is Python suitable for generating large Excel files?
Python can generate large Excel files effectively, provided that data is written sequentially and unnecessary formatting operations inside loops are avoided.
How can I prevent overwriting existing Excel files?
A common approach is to use timestamped filenames or dedicated output directories when saving generated Excel reports.
Can Python update Excel files created by other systems?
Yes. Python can read, modify, and extend Excel files created by other applications, as long as the file format is supported.