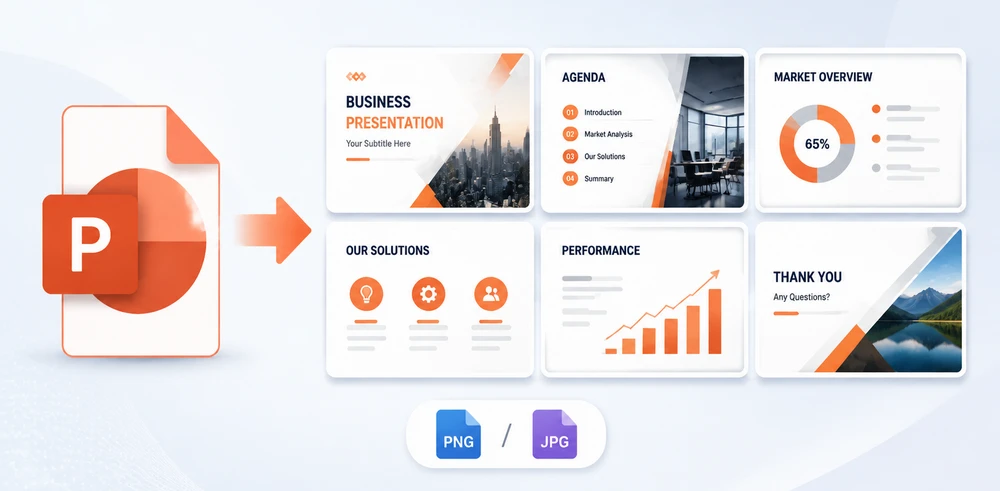
You finished the deck. Now someone needs it as images for a website, a handout, or a slide inside another document. You click Save As, send the PNGs, and they come back: "These look blurry."
That's the catch. PowerPoint's default slide export is about 96 pixels per inch (PPI), so slides that look crisp on screen turn soft the moment they're enlarged or printed. This guide covers every practical way to turn PowerPoint slides into PNG or JPG files — and, just as important, how to make those images actually sharp.
Quick answer: For a fast one-off, use PowerPoint's Save As (PNG/JPG, a few clicks). If the result looks blurry, raise the export resolution — no registry edits required. No PowerPoint installed? Use the free CloudXDocs online converter. Need to process many decks or build export into your own software? Automate with VBA or the Spire.Presentation API. The full comparison is below.
1. Export slides using PowerPoint's "Save As" (fastest)
PowerPoint's built-in Save As is the lowest-effort way to turn a deck into images, and it's the right pick when PowerPoint is already open and you just need a quick export. PNG is the safer default for slides with text, diagrams, or charts — see PNG vs JPG for when JPG fits.
- Open the presentation and go to File → Save As (or Save a Copy on OneDrive/SharePoint).
- Choose a folder and file name.
- Open the Save as type dropdown and pick PNG or JPEG.
- Click Save, then choose All Slides (each slide as its own file) or Just This One.
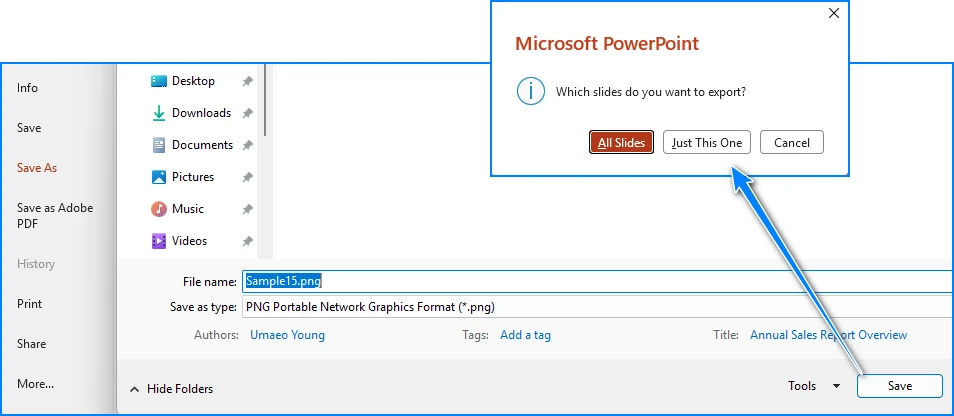
Why results can look soft: this method exports at ~96 PPI (1280×720 on a widescreen slide). Fine for web, too low for print or large displays — see Method 2.
Pros: No extra software, no account, the official method, fastest for one-off jobs.
Cons: Fixed at ~96 PPI by default, so images can look blurry when enlarged or printed; one file at a time.
2. Export PowerPoint slides at higher resolution (fix blurry images)
Best for: print, posters, or any use where 96 PPI looks blurry. This is the core fix for low-quality exports.
PowerPoint's default export resolution is 96 PPI. Microsoft's official fix is editing the Windows registry (ExportBitmapResolution) — risky and easy to get wrong. You don't have to. Here are the alternatives — all avoid the registry: a no-Office default, a no-Office high-resolution option, and a fully scripted route:
| Target resolution | Pixel size (16:9 widescreen) | Good for |
|---|---|---|
| 96 PPI | 1280 × 720 | Web, email, in-slide use |
| 150 PPI | 2000 × 1125 | Projectors, large monitors |
| 200 PPI | 2667 × 1500 | A4 handouts |
| 300 PPI | 4000 × 2250 | Posters, professional print |
PPI (pixels per inch) is the on-screen measure; for print, aim for 200–300 PPI. PowerPoint's default is 96 PPI.
- No Office, default quality: CloudXDocs converts in the browser at the same default (~96 PPI) — see Method 3.
- No Office, higher resolution: CloudConvert (also in Method 3) renders online at ~1920×1080 and lets you raise the DPI — comfortably above 96 PPI.
- Custom size (most control): script the export at any pixel size with VBA or an API — Method 4.
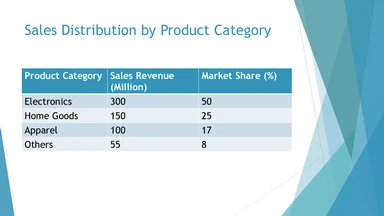
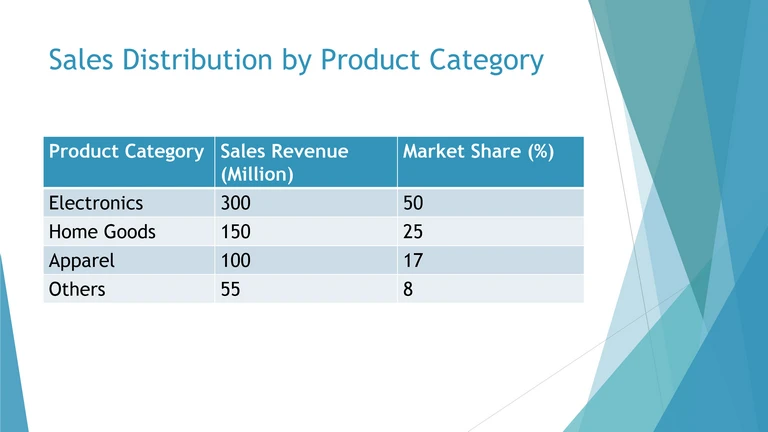
Both images are the same 16:9 slide, each scaled to 30% of its original pixel size so the difference is easy to compare at the same on-page width. At 96 PPI (top) the text and thin lines look softer; at 192 PPI (bottom) they stay noticeably sharper.
If you do use the registry method: go to
HKEY_CURRENT_USER\Software\Microsoft\Office\<ver>\PowerPoint\Options, add aDWORDnamedExportBitmapResolution, set its decimal value (e.g.,300). Back up the registry first; proceed at your own risk.
Best for: anyone who hits the 96 PPI quality ceiling and needs sharper output for print or large displays.
Keep in mind: the built-in Save As can't exceed its default without the registry tweak or a different tool. The VBA/API route and CloudConvert both get past that ceiling; CloudXDocs stays at the default but needs no Office.
3. Convert PowerPoint slides to images online (no PowerPoint required)
Best for: users without PowerPoint installed, or anyone who wants a browser-based converter when Office isn't available or multiple files need processing quickly.
CloudXDocs is a browser-based converter by the same team behind Spire. It needs no Microsoft Office and no installation.
- Open the CloudXDocs PPT to Image Converter in any browser.
- Click or drag your
.pptx/.pptfile into the upload area. - Wait for CloudXDocs to render and convert automatically (usually seconds).
- Download the resulting
.zipand unzip to get every slide as a separate image.
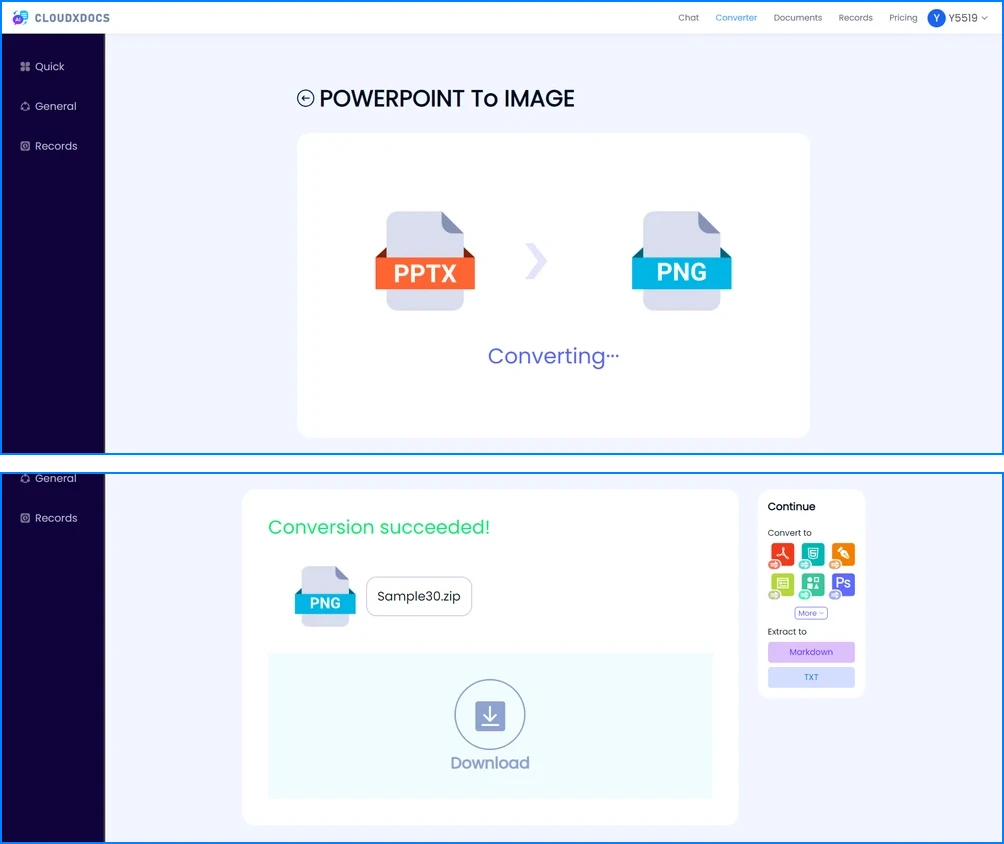
Why it is useful: CloudXDocs provides a convenient browser-based way to convert presentations when PowerPoint is unavailable or when you need to process multiple files quickly. Uploaded files are automatically deleted after 24 hours according to the service policy. [VERIFY: confirm CloudXDocs 24h auto-delete policy wording]
Pros: No Office, no install, no desktop software; handles a whole deck as a zip; works on any device.
Cons: Requires an internet connection; output quality follows the converter's rendering rather than a setting you control.
If you need sharper output but can't install Office, some online converters let you choose the export resolution. CloudConvert, for example, defaults to about 1920×1080 and lets you raise the DPI further — comfortably above PowerPoint's 96 PPI default.
The steps are essentially the same as above: upload your .pptx → pick JPG or PNG → raise the DPI in the options → convert → download the zip.
That makes an online converter a genuine fix for blurry exports when no desktop tool is available, though files do pass through a third-party server, so avoid confidential decks.
4. Automate PowerPoint image export (VBA & APIs)
Best for: many decks, scheduled jobs, or building export into an internal tool. Two routes depending on who you are.
Option A — VBA macro (for Office power users on Windows)
If you work in PowerPoint on Windows and need a custom export size, a short macro automates the whole deck. Press Alt + F11, Insert → Module, paste, then Macros → Run ExportSlidesHighRes (create C:\Exports\ first):
Sub ExportSlidesHighRes()
    Dim sld As Slide, i As Integer
    i = 1
    For Each sld In ActivePresentation.Slides
        sld.Export "C:\Exports\Slide_" & i & ".png", "PNG", 3000, 1688  ' ~200 PPI
        i = i + 1
    Next sld
End Sub
Adjust 3000, 1688 to hit your target (see Method 2 table).
Option B — Spire.Presentation API (for .NET developers)
Need server-side or fully programmable export? Spire.Presentation for .NET renders every slide to an image with a few lines of code — no Microsoft PowerPoint, no registry edits, output size set in code. For a full walkthrough, see our Spire.Presentation tutorial for converting slides to images.
using Spire.Presentation;
using System.Drawing;
using System.Drawing.Imaging;

class Program
{
    static void Main(string[] args)
    {
        using (Presentation ppt = new Presentation())
        {
            ppt.LoadFromFile("Sample.pptx");
            for (int i = 0; i < ppt.Slides.Count; i++)
            {
                Image img = ppt.Slides[i].SaveAsImage(1280 * 2, 720 * 2);
                img.Save(string.Format("Slide_{0}.png", i), ImageFormat.Png);
            }
        }
    }
}
SaveAsImage(width, height) sets the exact pixel size, so the API renders at the resolution you specify — no registry, no Office. Here 1280 * 2, 720 * 2 produces 2560×1440 (about 192 PPI); change the two numbers to any size in the Method 2 table.
Enterprise Tip: run headless on Linux, set exact output dimensions, and pipe exports into a larger document workflow — no Office, no registry tweaks. Download the complete sample project →
[VERIFY: link to current sample project]
Pros: Full control over pixel size, true batch/headless processing, no manual steps; Spire runs without Office installed.
Cons: VBA only on Windows with PowerPoint; the API is a paid library for production use.
5. Capture a slide as an image (screenshot)
Best for: grabbing one slide exactly as shown on screen, or when you can't open the file in an editor.
-
Windows: Snipping Tool / Snip & Sketch (
Win + Shift + S) → select the slide → save as PNG. -
macOS:
Cmd + Shift + 4then spacebar to capture a window. - Third-party: ShareX, Lightshot, or Snagit for annotated captures.
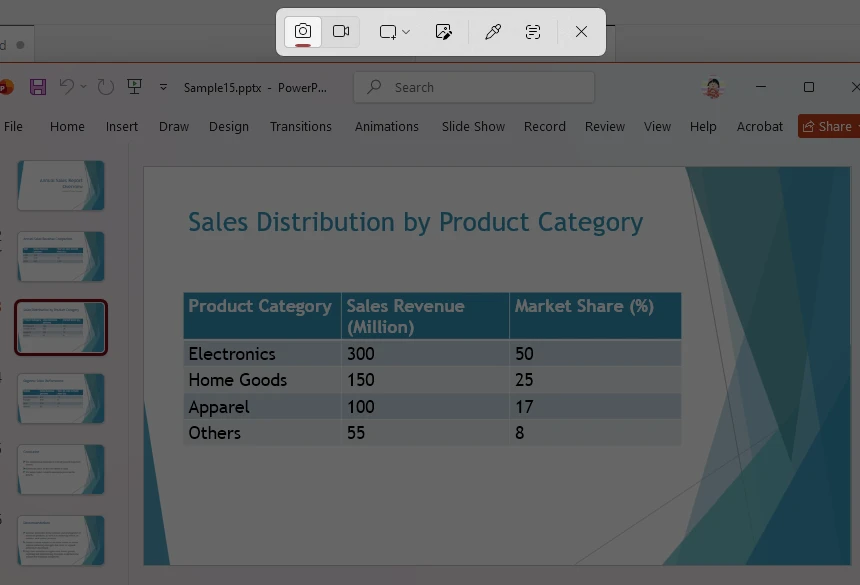
Caveat: screenshots inherit your screen's resolution and may include UI chrome. For clean, full-slide images at a controllable size, prefer Methods 1–4.
Pros: Zero setup, works on any machine, perfect for "grab exactly what's on screen."
Cons: Resolution capped by your display; not a real export; can't batch.
Decision support
The sections below help you compare methods, choose a format, and fix quality issues. Working from a PDF instead of PowerPoint? See how to convert PDF pages to images.
Comparison & how to choose
| # | Method | Best for | Resolution | Install needed | Batch? |
|---|---|---|---|---|---|
| 1 | PowerPoint Save As | Quick one-off | 96 PPI | PowerPoint | Per-file |
| 2 | Higher resolution | Fix blurry / print | Up to 300 PPI* | — | Per-file |
| 3 | CloudXDocs online | No Office / quick | Same as default (~96 PPI) | No (browser) | Yes (zip) |
| 4 | VBA / Spire API | Dev / batch / server | Custom px | VBA: PowerPoint; Spire: NuGet | Yes |
| 5 | Screenshot | Single slide on screen | Screen-limited | No | No |
| — | Google Slides / LibreOffice | No PowerPoint | Native app | App | Per-file |
*Achieved via VBA or the Spire API; online tools render at the slide's native dimensions.
Pick by situation:
- Need one or two images quickly → PowerPoint Save As
- Result looks blurry → Higher-resolution export
- No PowerPoint installed → CloudXDocs online
- Hundreds of slides / server-side → VBA or Spire API
- Exact on-screen capture → Screenshot
How to export slides as images without PowerPoint
If Microsoft PowerPoint isn't installed, you still have options — the CloudXDocs converter above, plus two free office suites:
- Google Slides: open the deck, then File → Download → PNG image (.png) or JPEG image (.jpg). Each download exports the current slide; repeat per slide, or use CloudXDocs for a whole deck at once.
- LibreOffice Impress: open the file, then File → Export, choose PNG or JPG, and select the slides to export.
These are handy when PowerPoint isn't available, though they offer less control over resolution than Method 2 or Method 4.
PNG vs JPG: which format should you export?
| Format | Best for | Advantages |
|---|---|---|
| PNG | Text, diagrams, charts, UI screenshots | Lossless quality, sharper edges |
| JPG | Photos, image-heavy slides | Smaller file size |
For most business presentations, PNG is usually the better choice because slides often contain text and diagrams that need sharp edges. Use JPG only when a slide is dominated by photographs and file size matters more than pixel-perfect text.
Why do exported images look blurry? (and how to fix it)
PowerPoint's default export is about 96 PPI, so slides look soft once they're enlarged or printed. If your images still aren't sharp enough:
- Use the higher-resolution routes in Method 2 — no registry edits needed.
- Avoid screenshots for print or large displays; their resolution is capped by your screen (Method 5).
- Prefer PNG for slides with text or diagrams (PNG vs JPG).
- For full control over pixel size or server-side export, automate with VBA or the Spire API (Method 4).
For print, aim for 200–300 PPI. The full resolution table shows the pixel size for each target.
FAQ
How do I save all PowerPoint slides as separate images at once?
File → Save As → PNG/JPEG, then choose "All Slides" when prompted. For a no-install batch, use the CloudXDocs converter; for scripted batch, the VBA macro or Spire API.
Which image format is best — PNG or JPG?
PNG for slides with text, charts, or sharp lines (lossless). JPG for photo-heavy slides where smaller file size matters.
Can I export slides without Microsoft PowerPoint installed?
Yes. The CloudXDocs PPT to Image Converter runs in any browser with no install, and Spire.Presentation (Method 4) converts server-side without Office. Google Slides and LibreOffice Impress can also export slides — see without PowerPoint.
How do I export just one slide instead of the whole deck?
In the Save As prompt, select "Just This One." With a screenshot tool, capture only the visible slide.
Why do my exported slides look blurry, and how do I get high-quality images?
PowerPoint saves at ~96 PPI by default, so images look soft when enlarged or printed. To improve quality, export at a higher resolution (see the resolution table) — either with a tool that renders slides at larger dimensions, or by automating the export with VBA or a presentation API (Method 4) for full control over pixel size.
Is it safe to upload my presentation to an online converter?
With CloudXDocs, uploaded files are automatically deleted from the server 24 hours after conversion and are not retained or reused. [VERIFY: confirm CloudXDocs 24h auto-delete policy] Avoid converters that don't state a deletion policy.
Can I export PowerPoint slides as images without losing quality?
Yes. Use PNG format and export at a larger pixel size when possible. Avoid screenshots for professional output, because screen resolution limits image quality — use Method 2 (higher resolution) or Method 4 (custom pixel size) instead.
What is the best image size for PowerPoint slides?
For a 16:9 presentation, 1920 × 1080 pixels is usually suitable for screens. Higher resolutions such as 2560 × 1440 or 3840 × 2160 are better for large displays or printing.
Related: export PowerPoint slides in code (developers)
If you're building a document workflow, server-side processing is usually more reliable than online tools for repetitive or high-volume jobs. Common cases where a library beats a web tool:
- Batch processing — convert thousands of decks on a schedule.
- Automated reports — export generated decks to clean images.
- Document pipelines — render slides as one step in a larger convert/merge/build flow.
- Enterprise applications — embed slide export in your own product or service.
For PDF sources in the same workflow, you can also crop a PDF or merge PDF files.
Spire.Presentation for .NET renders every slide to PNG/JPG with the exact dimensions you set, on Windows or Linux, with no Microsoft Office. See the Spire.Presentation sample project for runnable code. [VERIFY: link to current sample/tutorial]
After export, open the images (or the original .pptx) in CloudXDocs AI Chat to auto-generate speaker notes, a bilingual glossary, or a meeting-minutes to-do list — a fast way to repurpose exported content, no design or coding required. The AI works with the content; it does not create the images.