
Knowledgebase (2417)
Children categories
How to Mannually Add Spire.PDF as Dependency in a .NET Core Application
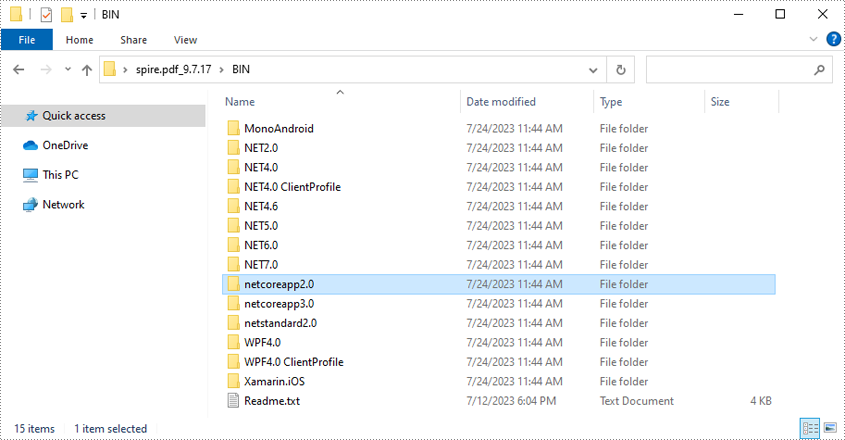
2019-10-17 07:44:00 Written by KoohjiStep 1: Download the latest version of Spire.PDF Pack from the link below, unzip it, and you'll get the DLL files for .NET Core in the "netcoreapp2.0" folder. If you already have this folder in your disk, go straight to step two.
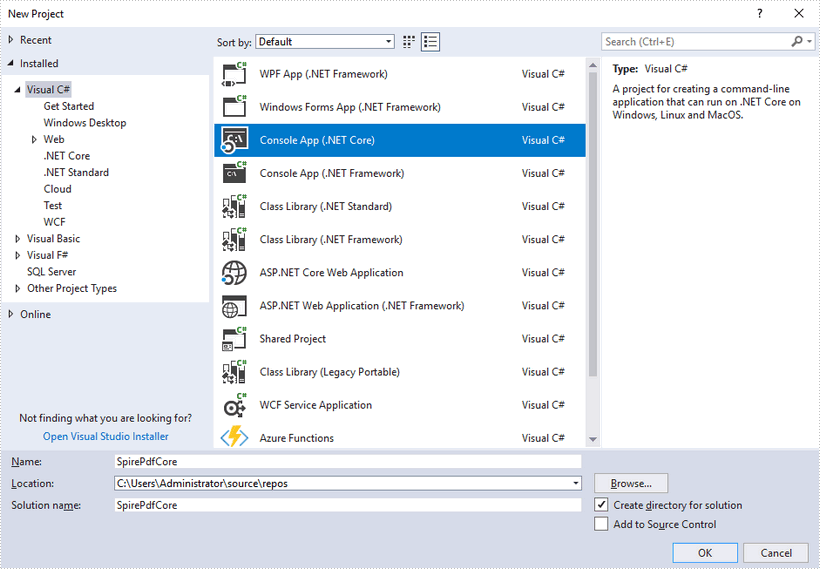
Step 2: Create a .NET Core application in your Visual Studio.
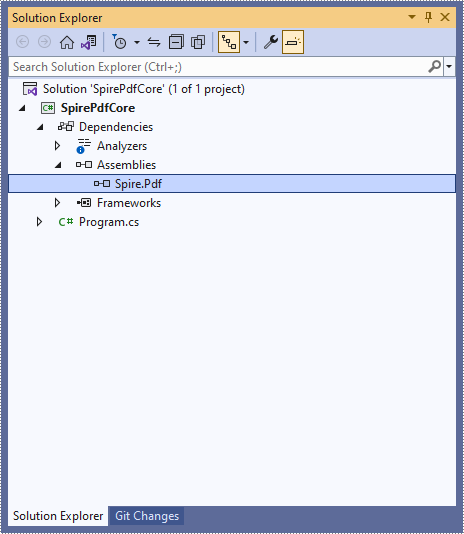
Step 3: Add all DLL files under the "netcoreapp2.0" folder as dependencies in your project.
Right-click "Dependencies" – select "Add Reference" – click "Browse" – selcet all DLLs under "netcoreapp2.0" folder – click "Add".
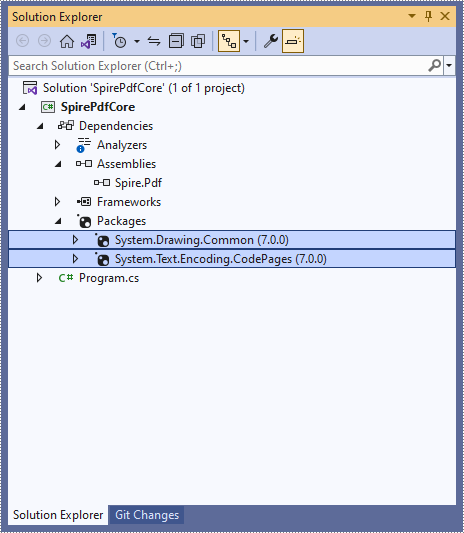
Step 4: Install the other two packages in your project via the NuGet Package Manager. They are System.Drawing.Common and System.Text.Encoding.CodePages.
Right-click "Dependencies" – select "Manage NuGet Packages" – click "Browse" –type the package name – select the package from the search results – click "Install".
Step 5: Now that you’ve added all the dependences successfully, you can start to code. The following code snippet gives you an exmaple of how to create a simple PDF document using Spire.PDF.
using Spire.Pdf;
using Spire.Pdf.Graphics;
using System.Drawing;

namespace SpirePdfCore
{
    class Program
    {
        static void Main(string[] args)
        {
            //Create a PdfDocument object
            PdfDocument doc = new PdfDocument();

            //Add a page
            PdfPageBase page = doc.Pages.Add();

            //Draw text on the page at the specified position
            page.Canvas.DrawString("Hello World",
                                    new PdfFont(PdfFontFamily.Helvetica, 13f),
                                    new PdfSolidBrush(Color.Black),
                                    new PointF(50, 50));

            //Save the document
            doc.SaveToFile("Output.pdf");
        }
    }
}
Tables in Word are a useful feature for organizing and presenting data. While the default table has an equal number of cells in each column or row, there are times when you may need to combine multiple cells to create a header, or split a cell to accommodate additional data. This article will introduce how to programmatically merge or split cells in a Word table using Spire.Doc for Java.
Install Spire.Doc for Java
First of all, you're required to add the Spire.Doc.jar file as a dependency in your Java program. The JAR file can be downloaded from this link. If you use Maven, you can easily import the JAR file in your application by adding the following code to your project's pom.xml file.
<repositories>
    <repository>
        <id>com.e-iceblue</id>
        <name>e-iceblue</name>
        <url>https://repo.e-iceblue.com/nexus/content/groups/public/</url>
    </repository>
</repositories>
<dependencies>
    <dependency>
        <groupId>e-iceblue</groupId>
        <artifactId>spire.doc</artifactId>
        <version>14.8.4</version>
    </dependency>
</dependencies>
Merge Table Cells in Word in Java
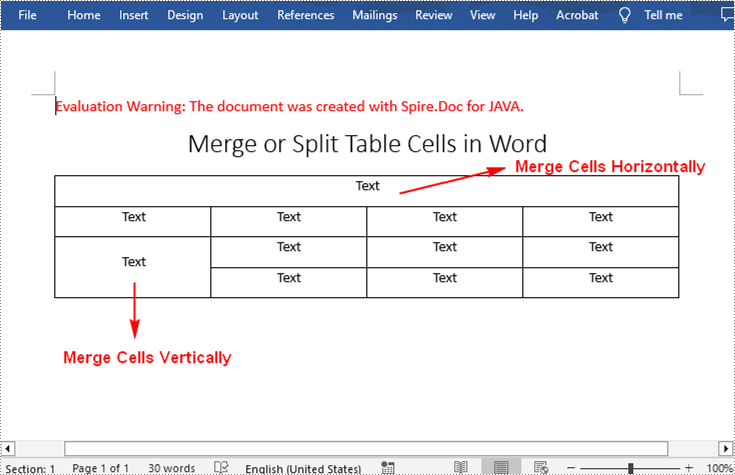
With Spire.Doc for .NET, you can merge two or more adjacent cells horizontally or vertically using the Table.applyHorizontalMerge() or Table.applyVerticalMerge() method. The following are the detailed steps.
- Create a Document instance.
- Load a Word document using Document.loadFromFile() method.
- Get a specified section in the document using Document.getSections().get() method.
- Add a table to the section using Section.addTable() method.
- Specify the number of rows and columns of the table using Table.resetCells(int rowsNum, int columnsNum) method.
- Horizontally merge specified cells in the table using Table.applyHorizontalMerge(int rowIndex, int startCellIndex, int endCellIndex) method.
- Vertically merge specified cells in the table using Table.applyVerticalMerge(int columnIndex, int startRowIndex, int endRowIndex) method.
- Add some data to the table.
- Save the result document using Document.saveToFile() method.
- Java
import com.spire.doc.*;
import com.spire.doc.documents.HorizontalAlignment;
import com.spire.doc.documents.Paragraph;
import com.spire.doc.documents.VerticalAlignment;

public class MergeTableCell {
    public static void main(String[] args) throws Exception {

        //Create a Document instance
        Document document = new Document();

        //Load a sample Word document
        document.loadFromFile("input.docx");

        //Get the first section
        Section section = document.getSections().get(0);

        //Add a 4 x 4 table to the section
        Table table = section.addTable(true);
        table.resetCells(4, 4);

        //Horizontally merge cells 1, 2, 3, and 4 in the first row
        table.applyHorizontalMerge(0, 0, 3);

        //Vertically merge cells 3 and 4 in the first column
        table.applyVerticalMerge(0, 2, 3);

        //Add some data to the table
        for (int row = 0; row < table.getRows().getCount(); row++) {
            for (int col = 0; col < table.getRows().get(row).getCells().getCount(); col++) {
                TableCell cell = table.get(row, col);
                cell.getCellFormat().setVerticalAlignment(VerticalAlignment.Middle);
                Paragraph paragraph = cell.addParagraph();
                paragraph.getFormat().setHorizontalAlignment(HorizontalAlignment.Center);
                paragraph.setText("Text");
            }
        }

        //Save the result document
        document.saveToFile("MergeTableCells.docx", FileFormat.Docx);
    }
}
Split Table Cells in Word in Java
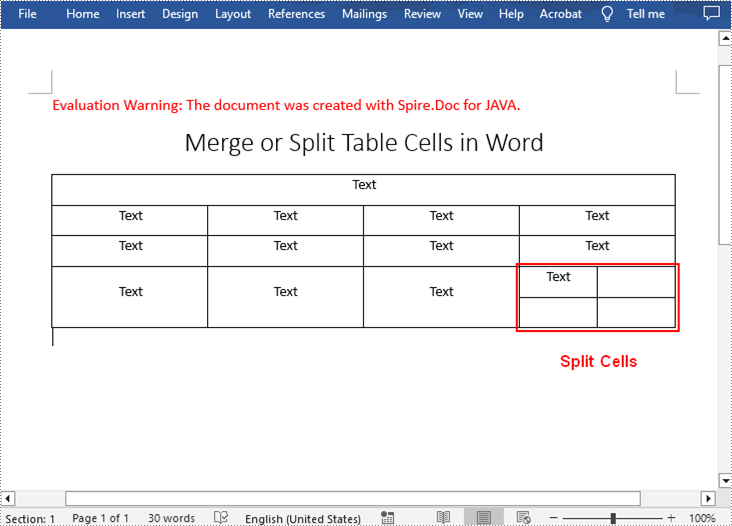
To divide a cell in a Word table into multiple cells, Spire.Doc for .NET offers the TableCell.splitCell(int columnNum, int rowNum) method. The following are the detailed steps.
- Create a Document instance.
- Load a Word document using Document.loadFromFile() method.
- Get a specified section in the document using Document.getSections().get() method.
- Get a specified table in the section using Section.getTables().get() method.
- Get the table cell that need to be split using Table.getRows().get().getCells().get() method.
- Split the cell into specific number of columns and rows using TableCell.splitCell(int columnNum, int rowNum) method.
- Save the result document using Document.saveToFile() method.
- Java
import com.spire.doc.*;

public class SplitTableCell {
    public static void main(String[] args) throws Exception {

        //Create a Document instance
        Document document = new Document();

        //Load a sample Word document
        document.loadFromFile("MergeTableCells.docx");

        //Get the first section
        Section section = document.getSections().get(0);

        //Get the first table in the section
        Table table = section.getTables().get(0);

        //Get the 4th cell in the 4th row
        TableCell cell1 = table.getRows().get(3).getCells().get(3);

        //Split the cell into 2 columns and 2 rows
        cell1.splitCell(2, 2);

        //save the result document
        document.saveToFile("SplitTableCells.docx", FileFormat.Docx);
    }
}
Apply for a Temporary License
If you'd like to remove the evaluation message from the generated documents, or to get rid of the function limitations, please request a 30-day trial license for yourself.
How to Mannually Add Spire.Doc as Dependency in a .NET Core Application
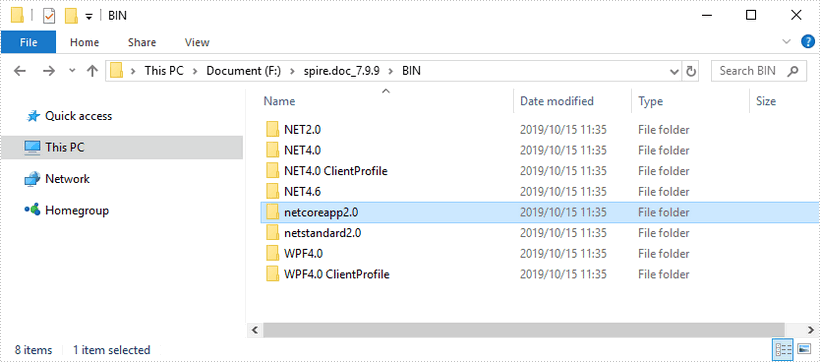
2019-10-16 02:56:57 Written by KoohjiStep 1: Download the latest version of Spire.Doc Pack from the link below, unzip it, and you'll get the DLL files for .NET Core in the “netcoreapp2.0” folder. If you already have this folder in your disk, go straight to step two.
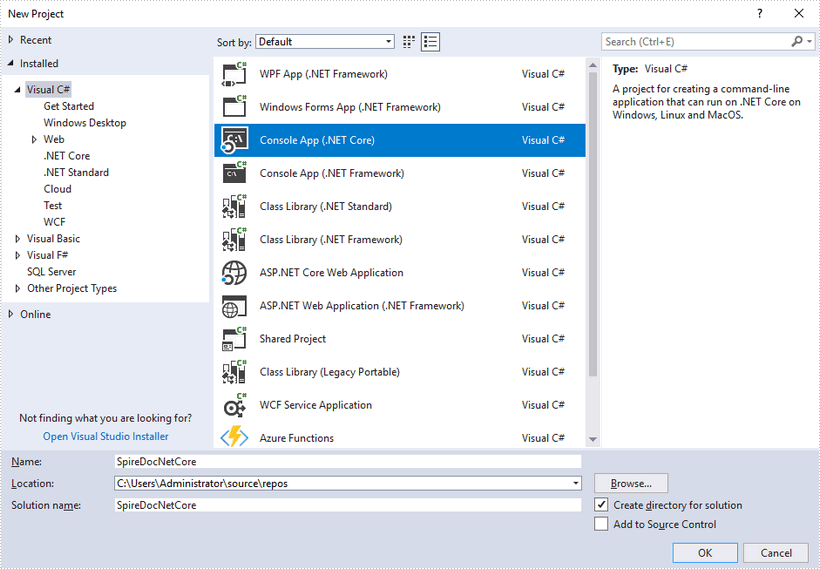
Step 2: Create a .Net Core application in your Visual Studio.
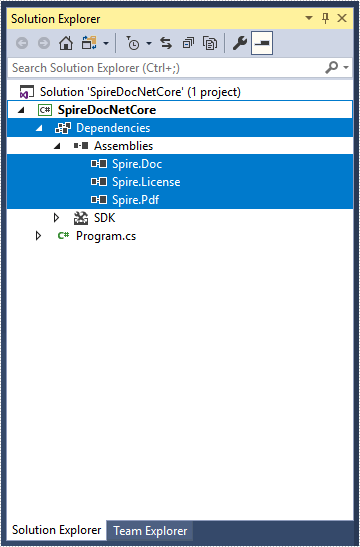
Step 3: Add all DLL files under the "netcoreapp2.0" folder as dependencies in your project.
Right-click "Dependencies" – select "Add Reference" – click "Browse" – selcet all DLLs under "netcoreapp2.0" folder – click "Add".
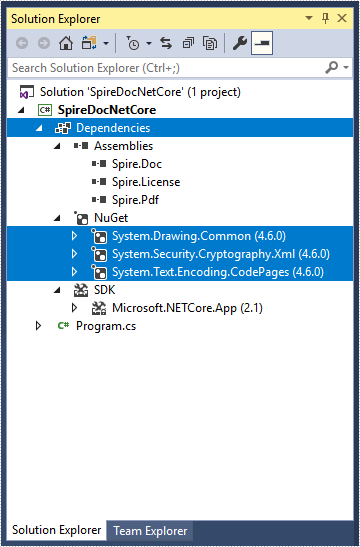
Step 4: Install the other three packages in your project via the NuGet Package Manager. They are System.Drawing.Common, System.Text.Encoding.CodePages and System.Security.Cryptography.Xml.
Right-click "Dependencies" – select "Manage NuGet Packages" – click "Browse" –type the package name – select the package from the search results – click "Install".
Step 5: Now that you've added all the dependences successfully, you can start to code. The following code snippet gives you an exmaple of how to create a simple Word document using Spire.Doc.
using Spire.Doc;
using Spire.Doc.Documents;

namespace SpireDocNetCore
{
    class Program
    {
        static void Main(string[] args)
        {
            //Create a document object
            Document doc = new Document();

            //Add a section
            Section section = doc.AddSection();

            //Add a paragrah
            Paragraph paragraph = section.AddParagraph();

            //Append text to the paragraph
            paragraph.AppendText("This article shows you how to mannually add Spire.Doc as dependency in a .NET Core application.");

            //Save to file
            doc.SaveToFile("Output.docx", FileFormat.Docx2013);
        }
    }
}
