Converter HTML para JPG (ou PNG) – Ferramentas gratuitas e fáceis
Índice
- Por que você pode precisar converter HTML em uma imagem – desde arquivar páginas da web até criar cartões de mídia social automatizados.
- JPG vs. PNG: qual formato escolher – comparação detalhada de compressão, transparência, tamanho do arquivo, etc.
- 3 métodos comprovados para converter HTML para JPG ou PNG
- Dicas profissionais para conversões de alta qualidade – otimizando HTML, definindo resolução, lidando com fontes e compactando imagens finais.
A conversão de HTML para formatos de imagem como JPG ou PNG tornou-se uma tarefa essencial para desenvolvedores, designers e criadores de conteúdo. Se você precisa gerar pré-visualizações para mídias sociais, capturar painéis de dados para relatórios, criar miniaturas de sites ou automatizar fluxos de trabalho de captura de tela, conhecer o método certo de conversão de HTML para JPG ou HTML para PNG é fundamental para entregar resultados de alta qualidade com eficiência.
Este guia abrangente cobre tudo o que você precisa saber sobre a conversão de HTML para imagem, incluindo:
- Por que você pode precisar converter HTML em uma imagem – desde arquivar páginas da web até criar cartões de mídia social automatizados.
- JPG vs. PNG: qual formato escolher – comparação detalhada de compressão, transparência, tamanho do arquivo, etc.
- 3 métodos comprovados para converter HTML para JPG ou PNG:
- Conversores online – soluções rápidas para conversões únicas.
- Ferramentas de captura de tela integradas ao navegador – aproveite o Chrome, Edge ou Firefox para capturas de alta fidelidade.
- C# com Free Spire.Doc for .NET – uma biblioteca gratuita e confiável para automação do lado do servidor.
- Dicas profissionais para conversões de alta qualidade – otimizando HTML, definindo resolução, lidando com fontes e compactando imagens finais.
Ao final deste guia, você terá uma compreensão clara de como escolher a abordagem certa com base no seu nível de habilidade técnica, infraestrutura e necessidades de automação.
Por que converter HTML em uma imagem?
O HTML (HyperText Markup Language) é a espinha dorsal das páginas da web, mas nem sempre é o formato mais portátil ou compartilhável. Converter um arquivo HTML para JPG ou PNG resolve vários problemas comuns:
- Preservar Layout e Design: Os navegadores renderizam HTML de maneiras diferentes, e a conversão para uma imagem fixa o layout, garantindo que seu conteúdo tenha a mesma aparência em todos os lugares.
- Compartilhamento Fácil: As imagens são universalmente suportadas em mídias sociais, e-mails, apresentações e documentos — não há necessidade de os destinatários abrirem um navegador ou terem acesso ao arquivo HTML original.
- Arquivamento e Documentação: As páginas da web mudam ou desaparecem com o tempo. Converter uma página da web em uma imagem cria um instantâneo permanente do conteúdo para registros.
- Design e Mockups: Web designers frequentemente convertem protótipos HTML para JPG/PNG para compartilhar com clientes, exibir trabalhos em portfólios ou integrar em sistemas de design.
- Otimização de Desempenho: Para conteúdo simples (por exemplo, infográficos, widgets estáticos), as imagens carregam mais rápido que o HTML, especialmente em dispositivos com baixa largura de banda.
JPG vs. PNG: Qual formato você deve escolher?
A escolha do formato de saída correto afeta diretamente o tamanho do arquivo, a qualidade e o suporte à transparência. Aqui está uma comparação rápida:
| Característica | PNG | JPG |
|---|---|---|
| Compressão | Sem perdas | Com perdas |
| Tamanho do arquivo | Maior | Menor |
| Transparência | Suporta canal alfa (áreas transparentes) | Sem transparência (preenche com branco ou preto) |
| Melhor para | Logotipos, ícones, UIs com muito texto, capturas de tela | Fotografias, banners, imagens grandes |
Regra geral: Use PNG quando precisar de texto nítido, detalhes finos ou um fundo transparente. Use JPG quando você prioriza o tamanho pequeno do arquivo e o conteúdo é fotográfico.
3 Métodos para Converter HTML em Imagens (Para Todos os Níveis de Habilidade)
Seja você um iniciante sem experiência em codificação ou um desenvolvedor em busca de soluções automatizadas, existe um método para atender às suas necessidades. Abordaremos as ferramentas e técnicas mais confiáveis, desde simples conversores online até soluções baseadas em código.
1. Conversores Online de HTML para JPG/PNG
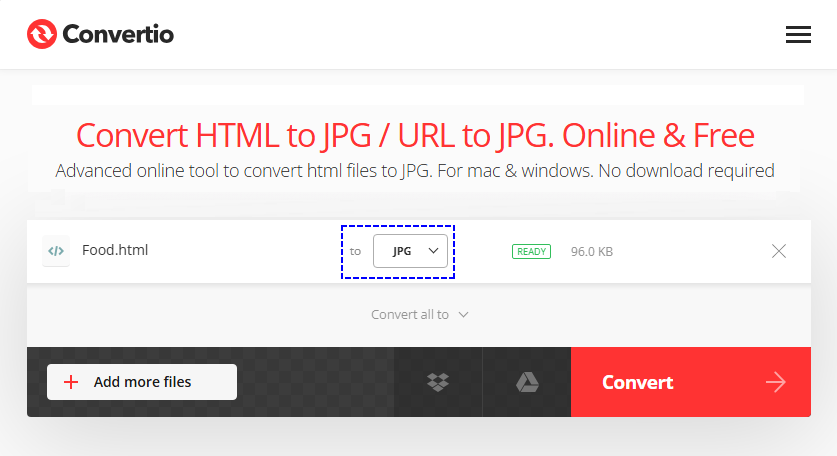
Conversores online são a maneira mais simples de mudar HTML para JPG ou HTML para PNG sem qualquer software ou codificação. Eles funcionam diretamente no seu navegador e suportam arquivos HTML ou URLs. Ferramentas de ponta como Convertio e CloudxDocs entregam resultados de conversão rápidos e confiáveis.
Passo a passo com o Convertio:
- Vá para a ferramenta de HTML para JPG/PNG do Convertio.
- Envie seu arquivo HTML/URL.
- Selecione o formato de saída (JPG, JPEG ou PNG) no menu suspenso.
- Clique em "Converter" e espere o processo terminar.
- Baixe a imagem convertida para o seu dispositivo.
Prós: Nenhuma configuração, fácil de usar.
Contras: Requer conexão com a internet; os níveis gratuitos podem ter limites de tamanho de arquivo.
Converter HTML para imagens preserva o layout visual, mas às vezes você só precisa do conteúdo subjacente. Aprenda a extrair texto simples de documentos HTML com nosso guia passo a passo, perfeito para mineração de dados, migração de conteúdo ou indexação de pesquisa.
2. Ferramentas de Captura de Tela Integradas ao Navegador (Rápido e Gratuito)
Todos os navegadores modernos (Chrome, Firefox, Safari, Edge) possuem ferramentas de captura de tela integradas que podem converter HTML para PNG. Isso é ideal para capturar páginas da web ou elementos HTML específicos sem ferramentas de terceiros.
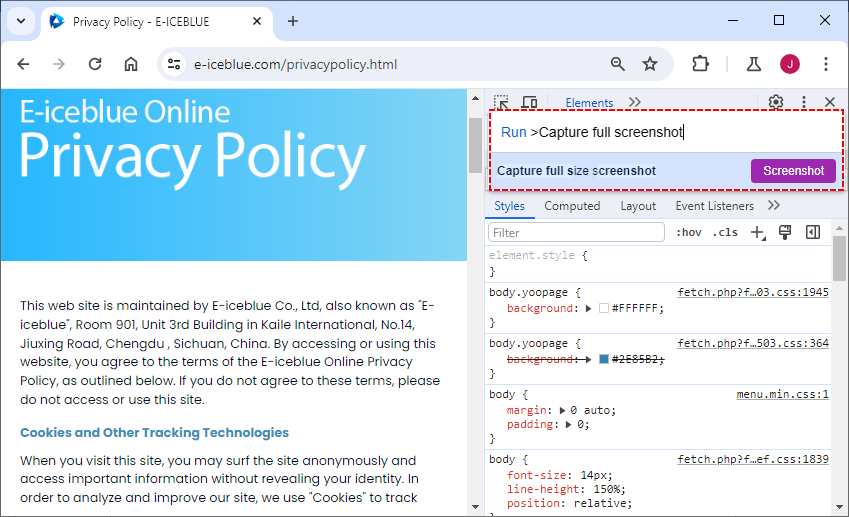
Exemplo de Conversão de HTML para PNG no Chrome (os passos são semelhantes para outros navegadores):
- Abra a página HTML no seu navegador (arquivo local ou URL).
- Pressione "F12" para abrir as Ferramentas de Desenvolvedor.
- Nas Ferramentas de Desenvolvedor, pressione "Ctrl + Shift + P" (Windows) ou "Cmd + Shift + P" (Mac) para abrir a paleta de comandos.
- Digite "Capturar captura de tela inteira" (ou "Capturar captura de tela de tamanho completo") e pressione "Enter".
- A captura de tela será baixada automaticamente como um PNG. Para converter para JPG, use um editor de imagens para salvar o PNG como JPG.
Prós: Fidelidade visual perfeita, nenhuma configuração, ótimo para depuração/verificações de UI, 100% gratuito.
Contras: Processo manual (não automatizável), produz apenas PNG nativamente.
Dica Profissional: Embora as imagens sejam ideais para compartilhar visuais, converter HTML para PDF preserva tanto o layout quanto o texto para documentos, relatórios e arquivamento, oferecendo um formato de saída complementar.
3. C# com Free Spire.Doc for .NET
Para desenvolvedores .NET que criam aplicativos do lado do servidor, Free Spire.Doc for .NET é uma biblioteca gratuita e confiável que suporta a conversão de HTML para JPG, PNG e outros formatos de imagem. Ele lida com conteúdo HTML complexo (incluindo estilos CSS, tabelas e imagens) sem depender de um navegador, tornando-o ideal para fluxos de trabalho .NET automatizados.
Instalação via NuGet:
A maneira mais fácil de instalar o Free Spire.Doc é através do Gerenciador de Pacotes NuGet no Visual Studio:
Install-Package FreeSpire.Doc
Código C# para Converter HTML para PNG
Este código converte um arquivo HTML local para PNG (troque ImageFormat.Png por ImageFormat.Jpeg para gerar JPG) e personaliza as margens da página para uma renderização ideal:
using Spire.Doc;
using Spire.Doc.Documents;
using System.Drawing;
using System.Drawing.Imaging;

namespace ConvertHtmlFileToPng
{
    class Program
    {
        static void Main(string[] args)
        {
            // Create a Document object
            Document document = new Document();

            // Load an HTML file
            document.LoadFromFile("input.html", FileFormat.Html, XHTMLValidationType.None);

            // Get the first section
            Section section = document.Sections[0];

            // Set the page margins
            section.PageSetup.Margins.All = 2;

            // Convert the document to an array of bitmap images
            Image[] images = document.SaveToImages(ImageType.Bitmap);

            // Iterate through the images
            for (int index = 0; index < images.Length; index++)
            {
                // Specify the output file name
                string fileName = string.Format( @"Output\image_{0}.png", index);

                // Save each image as a PNG file
                images[index].Save(fileName, ImageFormat.Png);

            }

            // Dispose resources
            document.Dispose();
        }
    }
}
Resultado da conversão: A biblioteca alinha o layout HTML com o modelo de página padrão de um documento do Word. Consequentemente, o conteúdo HTML longo será paginado e exportado como várias imagens.
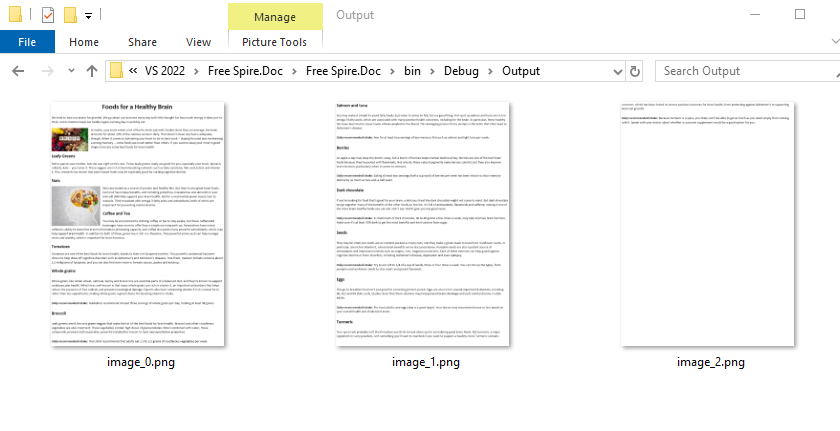
Prós: Alta escalabilidade, amigável ao servidor, controle total sobre a renderização, suporta conversão em lote.
Contras: Requer conhecimento de codificação .NET.
Referência: Converter Arquivo HTML ou String HTML para Imagem em C#
Dicas Profissionais para Conversões de HTML para Imagem de Alta Qualidade
Para garantir que suas imagens convertidas sejam nítidas, claras e profissionais, siga estas dicas:
- Otimize o HTML Primeiro: Remova código desnecessário, comprima imagens e garanta que os estilos sejam consistentes.
- Use Alta Resolução: Ao converter, defina a resolução para pelo menos 1920x1080 (Full HD) para evitar desfoque.
- Teste a Responsividade: Se o HTML de origem for responsivo, teste diferentes tamanhos de tela para garantir que o layout não quebre na imagem.
- Manuseie as Fontes com Cuidado: Incorpore fontes personalizadas em seu HTML; fontes ausentes causam texto distorcido e renderização inconsistente.
- Comprima as Imagens Finais: Use ferramentas como TinyPNG ou Squoosh para reduzir o tamanho dos arquivos JPG/PNG sem perder qualidade.
Considerações Finais
Converter HTML para JPG ou PNG preenche a lacuna entre o conteúdo dinâmico da web e a mídia estática e universalmente compartilhável. Seja você um iniciante usando ferramentas online, um designer usando capturas de tela do navegador ou um desenvolvedor automatizando conversões com código, os métodos neste guia cobrem todos os casos de uso.
Lembre-se de escolher o formato certo (JPG para fotos, PNG para transparência) e siga as dicas profissionais para otimizar o HTML e as imagens pós-conversão para qualidade e desempenho.
Perguntas Frequentes (FAQs)
Q1. Posso converter HTML para JPG/PNG sem perder qualidade?
Sim. Use PNG para qualidade sem perdas ou JPG com alta qualidade (90–100%) para fotos e páginas inteiras. Evite conversões repetidas de JPG, pois cada edição degrada ligeiramente a qualidade.
Q2. Existe uma maneira de converter em lote vários arquivos HTML para JPG/PNG?
Sim. Use ferramentas online como o Convertio com suporte para uploads em lote. Para desenvolvedores, escreva um script para percorrer os arquivos HTML e convertê-los automaticamente.
Q3. Posso converter e-mails HTML para JPG/PNG?
Sim. Abra o e-mail HTML em um navegador e, em seguida, use a ferramenta de captura de tela do navegador ou um conversor online para capturar o e-mail como uma imagem. Isso é útil para testar a renderização de e-mails em diferentes dispositivos.
Q4. Posso converter apenas um elemento HTML específico (não a página inteira) sem cortar a imagem depois?
Sim. As Ferramentas de Desenvolvedor do Chrome/Firefox são projetadas para isso:
- Nas Ferramentas de Desenvolvedor (F12), use o Seletor de Elementos (ícone de seta no canto superior esquerdo) para clicar no elemento HTML específico (por exemplo, uma div, tabela ou banner).
- Abra a paleta de comandos (Ctrl/Cmd + Shift + P) e selecione Capturar captura de tela do nó—a ferramenta capturará apenas o elemento selecionado como um PNG, sem necessidade de corte.
Veja Também
- Como Converter Imagens em Texto: As Melhores Ferramentas de OCR para Iniciantes
- Converter Word para PNG: 3 Maneiras Práticas que Você Pode Realmente Usar
- Conversor de PNG para Word: As 5 Melhores Maneiras de Converter PNG para Word
- Python: Converter HTML para Imagem
- Java: Converter HTML para Imagens
HTML을 JPG(또는 PNG)로 변환 – 쉽고 간편한 무료 도구
목차
- HTML을 이미지로 변환해야 하는 이유 – 웹 페이지 보관부터 자동화된 소셜 미디어 카드 생성까지.
- JPG와 PNG: 어떤 형식을 선택해야 할까요? – 압축, 투명도, 파일 크기 등에 대한 상세 비교.
- HTML을 JPG 또는 PNG로 변환하는 3가지 검증된 방법
- 고품질 변환을 위한 전문가 팁 – HTML 최적화, 해상도 설정, 글꼴 처리 및 최종 이미지 압축.
HTML을 JPG나 PNG와 같은 이미지 형식으로 변환하는 것은 개발자, 디자이너, 콘텐츠 제작자에게 필수적인 작업이 되었습니다. 소셜 미디어 미리보기를 생성하거나, 보고서를 위한 데이터 대시보드를 캡처하거나, 웹사이트 썸네일을 만들거나, 스크린샷 워크플로우를 자동화해야 할 때, 올바른 HTML을 JPG로 또는 HTML을 PNG로 변환 방법을 아는 것이 고품질 결과를 효율적으로 제공하는 핵심입니다.
이 포괄적인 가이드는 HTML을 이미지로 변환에 대해 알아야 할 모든 것을 다룹니다. 포함된 내용:
- HTML을 이미지로 변환해야 하는 이유 – 웹 페이지 보관부터 자동화된 소셜 미디어 카드 생성까지.
- JPG와 PNG: 어떤 형식을 선택해야 할까요? – 압축, 투명도, 파일 크기 등에 대한 상세 비교.
- HTML을 JPG 또는 PNG로 변환하는 3가지 검증된 방법:
- 온라인 변환기 – 일회성 변환을 위한 빠른 해결책.
- 브라우저 내장 스크린샷 도구 – 고화질 캡처를 위해 Chrome, Edge 또는 Firefox 활용.
- C#과 Free Spire.Doc for .NET – 서버 측 자동화를 위한 신뢰할 수 있는 무료 라이브러리.
- 고품질 변환을 위한 전문가 팁 – HTML 최적화, 해상도 설정, 글꼴 처리 및 최종 이미지 압축.
이 가이드를 마치면 기술 수준, 인프라 및 자동화 요구에 따라 올바른 접근 방식을 선택하는 방법에 대해 명확하게 이해하게 될 것입니다.
HTML을 이미지로 변환하는 이유는 무엇일까요?
HTML(HyperText Markup Language)은 웹 페이지의 근간이지만 항상 가장 휴대하기 쉽거나 공유하기 좋은 형식은 아닙니다. HTML 파일을 JPG 또는 PNG로 변환하면 몇 가지 일반적인 문제점을 해결할 수 있습니다:
- 레이아웃 및 디자인 보존: 브라우저는 HTML을 다르게 렌더링하며, 이미지로 변환하면 레이아웃이 고정되어 콘텐츠가 어디서나 동일하게 보이도록 보장합니다.
- 쉬운 공유: 이미지는 소셜 미디어, 이메일, 프레젠테이션 및 문서 전반에서 보편적으로 지원됩니다. 수신자가 브라우저를 열거나 원본 HTML 파일에 액세스할 필요가 없습니다.
- 보관 및 문서화: 웹 페이지는 시간이 지남에 따라 변경되거나 사라집니다. 웹 페이지를 이미지로 변환하면 기록을 위해 콘텐츠의 영구적인 스냅샷을 생성합니다.
- 디자인 및 목업: 웹 디자이너는 종종 HTML 프로토타입을 JPG/PNG로 변환하여 클라이언트와 공유하거나, 포트폴리오에 작업을 선보이거나, 디자인 시스템에 통합합니다.
- 성능 최적화: 간단한 콘텐츠(예: 인포그래픽, 정적 위젯)의 경우, 특히 저대역폭 장치에서 이미지가 HTML보다 빠르게 로드됩니다.
JPG와 PNG: 어떤 형식을 선택해야 할까요?
올바른 출력 형식을 선택하는 것은 파일 크기, 품질 및 투명도 지원에 직접적인 영향을 미칩니다. 다음은 간단한 비교입니다:
| 기능 | PNG | JPG |
|---|---|---|
| 압축 | 무손실 | 손실 |
| 파일 크기 | 더 큼 | 더 작음 |
| 투명도 | 알파 채널 지원 (투명 영역) | 투명도 없음 (흰색 또는 검은색으로 채워짐) |
| 최적 대상 | 로고, 아이콘, 텍스트가 많은 UI, 스크린샷 | 사진, 배너, 큰 이미지 |
경험 법칙: 선명한 텍스트, 세밀한 디테일 또는 투명한 배경이 필요할 때는 PNG를 사용하세요. 작은 파일 크기를 우선시하고 콘텐츠가 사진일 때는 JPG를 사용하세요.
HTML을 이미지로 변환하는 3가지 방법 (모든 기술 수준 대상)
코딩 경험이 없는 초보자이든 자동화된 솔루션을 찾는 개발자이든, 여러분의 필요에 맞는 방법이 있습니다. 간단한 온라인 변환기부터 코드 기반 솔루션까지 가장 신뢰할 수 있는 도구와 기술을 다룰 것입니다.
1. 온라인 HTML to JPG/PNG 변환기
온라인 변환기는 소프트웨어나 코딩 없이 HTML을 JPG로 또는 HTML을 PNG로 변경하는 가장 간단한 방법입니다. 브라우저에서 직접 작동하며 HTML 파일이나 URL을 지원합니다. Convertio 및 CloudxDocs와 같은 최고의 도구는 빠르고 신뢰할 수 있는 변환 결과를 제공합니다.
Convertio로 단계별 진행:
- Convertio의 HTML to JPG/PNG 도구로 이동합니다.
- HTML/URL 파일을 업로드합니다.
- 드롭다운 메뉴에서 출력 형식(JPG, JPEG 또는 PNG)을 선택합니다.
- "변환"을 클릭하고 프로세스가 완료될 때까지 기다립니다.
- 변환된 이미지를 장치에 다운로드합니다.
장점: 설정 불필요, 사용하기 쉬움.
단점: 인터넷 연결 필요; 무료 버전은 파일 크기 제한이 있을 수 있음.
HTML을 이미지로 변환하면 시각적 레이아웃이 보존되지만, 때로는 기본 콘텐츠만 필요할 수 있습니다. 데이터 마이닝, 콘텐츠 마이그레이션 또는 검색 인덱싱에 완벽한 단계별 가이드를 통해 HTML 문서에서 일반 텍스트를 추출하는 방법을 알아보세요.
2. 브라우저 내장 스크린샷 도구 (빠르고 무료)
모든 최신 브라우저(Chrome, Firefox, Safari, Edge)에는 HTML을 PNG로 변환할 수 있는 내장 스크린샷 도구가 있습니다. 이는 타사 도구 없이 웹 페이지나 특정 HTML 요소를 캡처하는 데 이상적입니다.
Chrome HTML to PNG 변환 예시 (다른 브라우저도 단계는 유사합니다):
- 브라우저에서 HTML 페이지를 엽니다 (로컬 파일 또는 URL).
- "F12"를 눌러 개발자 도구를 엽니다.
- 개발자 도구에서 "Ctrl + Shift + P"(Windows) 또는 "Cmd + Shift + P"(Mac)를 눌러 명령 팔레트를 엽니다.
- "전체 스크린샷 캡처"(또는 "전체 크기 스크린샷 캡처")를 입력하고 "Enter"를 누릅니다.
- 스크린샷이 자동으로 PNG로 다운로드됩니다. JPG로 변환하려면 이미지 편집기를 사용하여 PNG를 JPG로 저장하세요.
장점: 완벽한 시각적 충실도, 설정 불필요, 디버깅/UI 확인에 적합, 100% 무료.
단점: 수동 프로세스 (자동화 불가), 기본적으로 PNG만 출력.
전문가 팁: 이미지는 시각 자료를 공유하는 데 이상적이지만, HTML을 PDF로 변환하면 문서, 보고서 및 보관을 위해 레이아웃과 텍스트를 모두 보존하여 보완적인 출력 형식을 제공합니다.
3. C#과 Free Spire.Doc for .NET
서버 측 애플리케이션을 구축하는 .NET 개발자를 위해, Free Spire.Doc for .NET은 HTML을 JPG, PNG 및 기타 이미지 형식으로 변환하는 것을 지원하는 신뢰할 수 있는 무료 라이브러리입니다. 복잡한 HTML 콘텐츠(CSS 스타일, 테이블 및 이미지 포함)를 브라우저에 의존하지 않고 처리하므로 자동화된 .NET 워크플로우에 이상적입니다.
NuGet을 통한 설치:
Free Spire.Doc를 설치하는 가장 쉬운 방법은 Visual Studio의 NuGet 패키지 관리자를 통하는 것입니다:
Install-Package FreeSpire.Doc
HTML을 PNG로 변환하는 C# 코드
이 코드는 로컬 HTML 파일을 PNG로 변환하고(JPG를 출력하려면 ImageFormat.Png를 ImageFormat.Jpeg로 교체) 최적의 렌더링을 위해 페이지 여백을 사용자 정의합니다:
using Spire.Doc;
using Spire.Doc.Documents;
using System.Drawing;
using System.Drawing.Imaging;

namespace ConvertHtmlFileToPng
{
    class Program
    {
        static void Main(string[] args)
        {
            // Document 객체 생성
            Document document = new Document();

            // HTML 파일 로드
            document.LoadFromFile("input.html", FileFormat.Html, XHTMLValidationType.None);

            // 첫 번째 섹션 가져오기
            Section section = document.Sections[0];

            // 페이지 여백 설정
            section.PageSetup.Margins.All = 2;

            // 문서를 비트맵 이미지 배열로 변환
            Image[] images = document.SaveToImages(ImageType.Bitmap);

            // 이미지 반복
            for (int index = 0; index < images.Length; index++)
            {
                // 출력 파일 이름 지정
                string fileName = string.Format( @"Output\image_{0}.png", index);

                // 각 이미지를 PNG 파일로 저장
                images[index].Save(fileName, ImageFormat.Png);

            }

            // 리소스 해제
            document.Dispose();
        }
    }
}
변환 결과: 라이브러리는 HTML 레이아웃을 Word 문서의 표준 페이지 모델에 맞춥니다. 따라서 긴 HTML 콘텐츠는 페이지로 나뉘어 여러 이미지로 내보내집니다.
장점: 높은 확장성, 서버 친화적, 렌더링에 대한 완전한 제어, 대량 변환 지원.
단점: .NET 코딩 지식 필요.
참조: C#에서 HTML 파일 또는 HTML 문자열을 이미지로 변환하는 방법
고품질 HTML-이미지 변환을 위한 전문가 팁
변환된 이미지가 선명하고 깨끗하며 전문적으로 보이도록 하려면 다음 팁을 따르세요:
- HTML 먼저 최적화: 불필요한 코드를 제거하고, 이미지를 압축하고, 스타일이 일관되도록 합니다.
- 고해상도 사용: 변환 시 해상도를 최소 1920x1080(Full HD)으로 설정하여 흐림을 방지합니다.
- 반응형 테스트: 소스 HTML이 반응형인 경우, 다른 화면 크기를 테스트하여 이미지에서 레이아웃이 깨지지 않도록 합니다.
- 글꼴 신중하게 처리: HTML에 사용자 정의 글꼴을 포함시키세요. 누락된 글꼴은 텍스트 왜곡 및 일관성 없는 렌더링을 유발합니다.
- 최종 이미지 압축: TinyPNG 또는 Squoosh와 같은 도구를 사용하여 품질 손실 없이 JPG/PNG 파일 크기를 줄입니다.
마무리 생각
HTML을 JPG 또는 PNG로 변환하는 것은 동적 웹 콘텐츠와 정적이고 보편적으로 공유 가능한 미디어 사이의 간극을 메웁니다. 온라인 도구를 사용하는 초보자, 브라우저 스크린샷을 사용하는 디자이너, 코드로 변환을 자동화하는 개발자 등 이 가이드의 방법은 모든 사용 사례를 다룹니다.
올바른 형식(사진은 JPG, 투명도는 PNG)을 선택하고, 품질과 성능을 위해 HTML 및 변환 후 이미지를 최적화하는 전문가 팁을 따르는 것을 잊지 마세요.
자주 묻는 질문 (FAQs)
Q1. 품질 손실 없이 HTML을 JPG/PNG로 변환할 수 있나요?
네. 무손실 품질을 원하면 PNG를 사용하거나, 사진 및 전체 페이지에는 고품질(90–100%)의 JPG를 사용하세요. 반복적인 JPG 변환은 각 편집 시 품질이 약간 저하되므로 피하세요.
Q2. 여러 HTML 파일을 JPG/PNG로 일괄 변환하는 방법이 있나요?
네. 일괄 업로드를 지원하는 Convertio와 같은 온라인 도구를 사용하세요. 개발자의 경우, HTML 파일을 반복하여 자동으로 변환하는 스크립트를 작성하세요.
Q3. HTML 이메일을 JPG/PNG로 변환할 수 있나요?
네. 브라우저에서 HTML 이메일을 연 다음, 브라우저의 스크린샷 도구나 온라인 변환기를 사용하여 이메일을 이미지로 캡처하세요. 이는 여러 장치에서 이메일 렌더링을 테스트하는 데 유용합니다.
Q4. 나중에 이미지를 자르지 않고 특정 HTML 요소(전체 페이지가 아닌)만 변환할 수 있나요?
네. Chrome/Firefox 개발자 도구는 이를 위해 설계되었습니다:
- 개발자 도구(F12)에서 요소 선택기(왼쪽 상단의 화살표 아이콘)를 사용하여 특정 HTML 요소(예: div, 테이블 또는 배너)를 클릭합니다.
- 명령 팔레트(Ctrl/Cmd + Shift + P)를 열고 노드 스크린샷 캡처를 선택하면 도구가 선택한 요소만 PNG로 캡처하므로 자를 필요가 없습니다.
참고 항목
Convertire HTML in JPG (o PNG) – Strumenti gratuiti e facili
Indice
- Perché potresti aver bisogno di convertire HTML in un'immagine – dall'archiviazione di pagine web alla creazione di schede social media automatizzate.
- JPG vs. PNG: quale formato scegliere – confronto dettagliato di compressione, trasparenza, dimensioni del file, ecc.
- 3 metodi comprovati per convertire HTML in JPG o PNG
- Consigli professionali per conversioni di alta qualità – ottimizzazione dell'HTML, impostazione della risoluzione, gestione dei caratteri e compressione delle immagini finali.
La conversione di HTML in formati di immagine come JPG o PNG è diventata un compito essenziale per sviluppatori, designer e creatori di contenuti. Che tu abbia bisogno di generare anteprime per i social media, catturare dashboard di dati per i report, creare miniature di siti web o automatizzare flussi di lavoro di screenshot, conoscere il metodo giusto di conversione da HTML a JPG o HTML a PNG è fondamentale per ottenere risultati di alta qualità in modo efficiente.
Questa guida completa copre tutto ciò che devi sapere sulla conversione da HTML a immagine, includendo:
- Perché potresti aver bisogno di convertire HTML in un'immagine – dall'archiviazione di pagine web alla creazione di schede social media automatizzate.
- JPG vs. PNG: quale formato scegliere – confronto dettagliato di compressione, trasparenza, dimensioni del file, ecc.
- 3 metodi comprovati per convertire HTML in JPG o PNG:
- Convertitori online – soluzioni rapide per conversioni occasionali.
- Strumenti di screenshot integrati nel browser – sfrutta Chrome, Edge o Firefox per catture ad alta fedeltà.
- C# con Free Spire.Doc per .NET – una libreria gratuita e affidabile per l'automazione lato server.
- Consigli professionali per conversioni di alta qualità – ottimizzazione dell'HTML, impostazione della risoluzione, gestione dei caratteri e compressione delle immagini finali.
Alla fine di questa guida, avrai una chiara comprensione di come scegliere l'approccio giusto in base al tuo livello di competenza tecnica, all'infrastruttura e alle esigenze di automazione.
Perché Convertire HTML in un'Immagine?
L'HTML (HyperText Markup Language) è la spina dorsale delle pagine web, ma non è sempre il formato più portabile o condivisibile. La conversione di file HTML in JPG o PNG risolve diversi problemi comuni:
- Conserva Layout e Design: I browser rendono l'HTML in modo diverso e la conversione in un'immagine blocca il layout, garantendo che i tuoi contenuti appaiano uguali ovunque.
- Condivisione Facile: Le immagini sono universalmente supportate su social media, email, presentazioni e documenti: non è necessario che i destinatari aprano un browser o abbiano accesso al file HTML originale.
- Archiviazione e Documentazione: Le pagine web cambiano o scompaiono nel tempo. La conversione di una pagina web in un'immagine crea un'istantanea permanente del contenuto per i registri.
- Design e Mockup: I web designer spesso convertono prototipi HTML in JPG/PNG per condividerli con i clienti, mostrare il lavoro nei portfolio o integrarli nei sistemi di design.
- Ottimizzazione delle Prestazioni: Per contenuti semplici (ad es. infografiche, widget statici), le immagini si caricano più velocemente dell'HTML, specialmente su dispositivi a bassa larghezza di banda.
JPG vs. PNG: Quale Formato Scegliere?
La scelta del formato di output corretto influisce direttamente sulle dimensioni del file, sulla qualità e sul supporto alla trasparenza. Ecco un rapido confronto:
| Caratteristica | PNG | JPG |
|---|---|---|
| Compressione | Senza perdita | Con perdita |
| Dimensione del file | Più grande | Più piccolo |
| Trasparenza | Supporta il canale alfa (aree trasparenti) | Nessuna trasparenza (riempie con bianco o nero) |
| Ideale per | Loghi, icone, interfacce utente con molto testo, screenshot | Fotografie, banner, immagini di grandi dimensioni |
Regola generale: Usa PNG quando hai bisogno di testo nitido, dettagli fini o uno sfondo trasparente. Usa JPG quando dai la priorità a dimensioni di file ridotte e il contenuto è fotografico.
3 Metodi per Convertire HTML in Immagini (Per Tutti i Livelli di Abilità)
Che tu sia un principiante senza esperienza di programmazione o uno sviluppatore alla ricerca di soluzioni automatizzate, c'è un metodo adatto alle tue esigenze. Tratteremo gli strumenti e le tecniche più affidabili, dai semplici convertitori online alle soluzioni basate su codice.
1. Convertitori Online da HTML a JPG/PNG
I convertitori online sono il modo più semplice per cambiare HTML in JPG o HTML in PNG senza alcun software o codifica. Funzionano direttamente nel tuo browser e supportano file HTML o URL. Strumenti di punta come Convertio e CloudxDocs offrono risultati di conversione rapidi e affidabili.
Passo dopo passo con Convertio:
- Vai a strumento da HTML a JPG/PNG di Convertio.
- Carica il tuo file HTML/URL.
- Seleziona il formato di output (JPG, JPEG o PNG) dal menu a discesa.
- Fai clic su "Converti" e attendi il completamento del processo.
- Scarica l'immagine convertita sul tuo dispositivo.
Pro: Nessuna configurazione, facile da usare.
Contro: Richiede una connessione a Internet; i livelli gratuiti possono avere limiti di dimensione del file.
La conversione di HTML in immagini preserva il layout visivo, ma a volte hai solo bisogno del contenuto sottostante. Impara come estrarre testo semplice da documenti HTML con la nostra guida passo passo, perfetta per il data mining, la migrazione dei contenuti o l'indicizzazione per la ricerca.
2. Strumenti di Screenshot Integrati nel Browser (Rapidi e Gratuiti)
Tutti i browser moderni (Chrome, Firefox, Safari, Edge) dispongono di strumenti di screenshot integrati in grado di convertire HTML in PNG. Questo è ideale per catturare pagine web o elementi HTML specifici senza strumenti di terze parti.
Esempio di Conversione da HTML a PNG con Chrome (i passaggi sono simili per altri browser):
- Apri la pagina HTML nel tuo browser (file locale o URL).
- Premi "F12" per aprire gli Strumenti per Sviluppatori (DevTools).
- Negli Strumenti per Sviluppatori, premi "Ctrl + Shift + P" (Windows) o "Cmd + Shift + P" (Mac) per aprire la tavolozza dei comandi.
- Digita "Capture full screenshot" (o "Capture full size screenshot") e premi "Invio".
- Lo screenshot verrà scaricato automaticamente come PNG. Per convertire in JPG, utilizza un editor di immagini per salvare il PNG come JPG.
Pro: Fedeltà visiva perfetta, nessuna configurazione, ottimo per il debug/controllo dell'interfaccia utente, 100% gratuito.
Contro: Processo manuale (non automatizzabile), produce solo PNG in modo nativo.
Consiglio Pro: Sebbene le immagini siano ideali per la condivisione di elementi visivi, la conversione da HTML a PDF conserva sia il layout che il testo per documenti, report e archiviazione, offrendo un formato di output complementare.
3. C# con Free Spire.Doc per .NET
Per gli sviluppatori .NET che creano applicazioni lato server, Free Spire.Doc per .NET è una libreria gratuita e affidabile che supporta la conversione di HTML in JPG, PNG e altri formati di immagine. Gestisce contenuti HTML complessi (inclusi stili CSS, tabelle e immagini) senza fare affidamento su un browser, rendendolo ideale per flussi di lavoro .NET automatizzati.
Installazione tramite NuGet:
Il modo più semplice per installare Free Spire.Doc è tramite NuGet Package Manager in Visual Studio:
Install-Package FreeSpire.Doc
Codice C# per Convertire HTML in PNG
Questo codice converte un file HTML locale in PNG (sostituisci ImageFormat.Png con ImageFormat.Jpeg per produrre JPG) e personalizza i margini della pagina per un rendering ottimale:
using Spire.Doc;
using Spire.Doc.Documents;
using System.Drawing;
using System.Drawing.Imaging;

namespace ConvertHtmlFileToPng
{
    class Program
    {
        static void Main(string[] args)
        {
            // Crea un oggetto Document
            Document document = new Document();

            // Carica un file HTML
            document.LoadFromFile("input.html", FileFormat.Html, XHTMLValidationType.None);

            // Ottieni la prima sezione
            Section section = document.Sections[0];

            // Imposta i margini della pagina
            section.PageSetup.Margins.All = 2;

            // Converti il documento in un array di immagini bitmap
            Image[] images = document.SaveToImages(ImageType.Bitmap);

            // Itera attraverso le immagini
            for (int index = 0; index < images.Length; index++)
            {
                // Specifica il nome del file di output
                string fileName = string.Format( @"Output\image_{0}.png", index);

                // Salva ogni immagine come file PNG
                images[index].Save(fileName, ImageFormat.Png);

            }

            // Rilascia le risorse
            document.Dispose();
        }
    }
}
Risultato della conversione: La libreria allinea il layout HTML con il modello di pagina standard di un documento Word. Di conseguenza, i contenuti HTML lunghi verranno impaginati ed esportati come immagini multiple.
Pro: Alta scalabilità, compatibile con il server, pieno controllo sul rendering, supporta la conversione di massa.
Contro: Richiede conoscenze di programmazione .NET.
Riferimento: Convertire File HTML o Stringa HTML in Immagine in C#
Consigli Professionali per Conversioni di Alta Qualità da HTML a Immagine
Per garantire che le tue immagini convertite siano nitide, chiare e professionali, segui questi suggerimenti:
- Ottimizza Prima l'HTML: Rimuovi il codice non necessario, comprimi le immagini e assicurati che gli stili siano coerenti.
- Usa Alta Risoluzione: Durante la conversione, imposta la risoluzione ad almeno 1920x1080 (Full HD) per evitare sfocature.
- Testa la Responsività: Se l'HTML di origine è responsivo, testa diverse dimensioni dello schermo per assicurarti che il layout non si rompa nell'immagine.
- Gestisci i Caratteri con Cura: Incorpora i caratteri personalizzati nel tuo HTML; i caratteri mancanti causano testo distorto e rendering incoerente.
- Comprimi le Immagini Finali: Usa strumenti come TinyPNG o Squoosh per ridurre le dimensioni dei file JPG/PNG senza perdere qualità.
Considerazioni Finali
La conversione da HTML a JPG o PNG colma il divario tra i contenuti web dinamici e i media statici e universalmente condivisibili. Che tu sia un principiante che utilizza strumenti online, un designer che utilizza screenshot del browser o uno sviluppatore che automatizza le conversioni con il codice, i metodi in questa guida coprono ogni caso d'uso.
Ricorda di scegliere il formato giusto (JPG for le foto, PNG per la trasparenza) e segui i consigli professionali per ottimizzare l'HTML e le immagini post-conversione per qualità e prestazioni.
Domande Frequenti (FAQ)
D1. Posso convertire HTML in JPG/PNG senza perdere qualità?
Sì. Usa PNG per una qualità senza perdita o JPG ad alta qualità (90–100%) per foto e pagine intere. Evita conversioni JPG ripetute, poiché ogni modifica degrada leggermente la qualità.
D2. Esiste un modo per convertire in batch più file HTML in JPG/PNG?
Sì. Usa strumenti online come Convertio con supporto per caricamenti in batch. Per gli sviluppatori, scrivi uno script per scorrere i file HTML e convertirli automaticamente.
D3. Posso convertire email HTML in JPG/PNG?
Sì. Apri l'email HTML in un browser, quindi utilizza lo strumento di screenshot del browser o un convertitore online per catturare l'email come immagine. Ciò è utile per testare il rendering delle email su diversi dispositivi.
D4. Posso convertire solo un elemento HTML specifico (non l'intera pagina) senza dover ritagliare l'immagine in seguito?
Sì. Gli Strumenti per Sviluppatori di Chrome/Firefox sono progettati per questo:
- Negli Strumenti per Sviluppatori (F12), usa il Selettore di Elementi (icona a forma di freccia in alto a sinistra) per fare clic sull'elemento HTML specifico (ad es. un div, una tabella o un banner).
- Apri la tavolozza dei comandi (Ctrl/Cmd + Shift + P) e seleziona Cattura screenshot del nodo—lo strumento catturerà solo l'elemento selezionato come PNG, senza bisogno di ritagliare.
Vedi Anche
Convertir HTML en JPG (ou PNG) – Outils gratuits et simples
Table des matières
- Pourquoi vous pourriez avoir besoin de convertir du HTML en image – de l'archivage de pages web à la création de cartes automatisées pour les réseaux sociaux.
- JPG vs. PNG : quel format choisir – comparaison détaillée de la compression, de la transparence, de la taille du fichier, etc.
- 3 méthodes éprouvées pour convertir du HTML en JPG ou PNG
- Conseils de pro pour des conversions de haute qualité – optimiser le HTML, définir la résolution, gérer les polices et compresser les images finales.
La conversion de HTML en format d'image comme JPG ou PNG est devenue une tâche essentielle pour les développeurs, les concepteurs et les créateurs de contenu. Que vous ayez besoin de générer des aperçus pour les réseaux sociaux, de capturer des tableaux de bord de données pour des rapports, de créer des miniatures de sites web ou d'automatiser des flux de travail de capture d'écran, connaître la bonne méthode de conversion HTML en JPG ou HTML en PNG est la clé pour obtenir des résultats de haute qualité de manière efficace.
Ce guide complet couvre tout ce que vous devez savoir sur la conversion HTML en image, y compris :
- Pourquoi vous pourriez avoir besoin de convertir du HTML en image – de l'archivage de pages web à la création de cartes automatisées pour les réseaux sociaux.
- JPG vs. PNG : quel format choisir – comparaison détaillée de la compression, de la transparence, de la taille du fichier, etc.
- 3 méthodes éprouvées pour convertir du HTML en JPG ou PNG:
- Convertisseurs en ligne – solutions rapides pour les conversions ponctuelles.
- Outils de capture d'écran intégrés au navigateur – utilisez Chrome, Edge ou Firefox pour des captures haute fidélité.
- C# avec Free Spire.Doc for .NET – une bibliothèque gratuite et fiable pour l'automatisation côté serveur.
- Conseils de pro pour des conversions de haute qualité – optimiser le HTML, définir la résolution, gérer les polices et compresser les images finales.
À la fin de ce guide, vous comprendrez clairement comment choisir la bonne approche en fonction de votre niveau de compétence technique, de votre infrastructure et de vos besoins d'automatisation.
Pourquoi convertir du HTML en image ?
Le HTML (HyperText Markup Language) est l'épine dorsale des pages web, mais ce n'est pas toujours le format le plus portable ou le plus partageable. La conversion d'un fichier HTML en JPG ou PNG résout plusieurs problèmes courants :
- Préserver la mise en page et le design : Les navigateurs affichent le HTML différemment, et la conversion en image verrouille la mise en page, garantissant que votre contenu ait le même aspect partout.
- Partage facile : Les images sont universellement prises en charge sur les réseaux sociaux, les e-mails, les présentations et les documents — pas besoin pour les destinataires d'ouvrir un navigateur ou d'avoir accès au fichier HTML d'origine.
- Archivage et documentation : Les pages web changent ou disparaissent avec le temps. La conversion d'une page web en image crée un instantané permanent du contenu pour les archives.
- Design et maquettes : Les concepteurs web convertissent souvent les prototypes HTML en JPG/PNG pour les partager avec les clients, présenter leur travail dans des portfolios ou les intégrer dans des systèmes de design.
- Optimisation des performances : Pour du contenu simple (par exemple, des infographies, des widgets statiques), les images se chargent plus rapidement que le HTML, en particulier sur les appareils à faible bande passante.
JPG vs. PNG : Quel format devriez-vous choisir ?
Le choix du format de sortie correct affecte directement la taille du fichier, la qualité et la prise en charge de la transparence. Voici une comparaison rapide :
| Caractéristique | PNG | JPG |
|---|---|---|
| Compression | Sans perte | Avec perte |
| Taille du fichier | Plus grande | Plus petite |
| Transparence | Prend en charge le canal alpha (zones transparentes) | Pas de transparence (remplit avec du blanc ou du noir) |
| Idéal pour | Logos, icônes, interfaces utilisateur riches en texte, captures d'écran | Photographies, bannières, grandes images |
Règle générale : Utilisez PNG lorsque vous avez besoin de texte net, de détails fins ou d'un arrière-plan transparent. Utilisez JPG lorsque vous privilégiez une petite taille de fichier et que le contenu est photographique.
3 méthodes pour convertir du HTML en images (pour tous les niveaux de compétence)
Que vous soyez un débutant sans expérience en codage ou un développeur à la recherche de solutions automatisées, il existe une méthode adaptée à vos besoins. Nous couvrirons les outils et techniques les plus fiables, des simples convertisseurs en ligne aux solutions basées sur le code.
1. Convertisseurs HTML en JPG/PNG en ligne
Les convertisseurs en ligne sont le moyen le plus simple de changer du HTML en JPG ou HTML en PNG sans aucun logiciel ni codage. Ils fonctionnent directement dans votre navigateur et prennent en charge les fichiers HTML ou les URL. Des outils de premier plan comme Convertio et CloudxDocs fournissent des résultats de conversion rapides et fiables.
Étape par étape avec Convertio :
- Allez sur l'outil de conversion HTML en JPG/PNG de Convertio.
- Téléchargez votre fichier HTML/URL.
- Sélectionnez le format de sortie (JPG, JPEG ou PNG) dans le menu déroulant.
- Cliquez sur "Convertir" et attendez la fin du processus.
- Téléchargez l'image convertie sur votre appareil.
Avantages : Aucune configuration, facile à utiliser.
Inconvénients : Nécessite une connexion Internet ; les niveaux gratuits peuvent avoir des limites de taille de fichier.
La conversion de HTML en images préserve la mise en page visuelle, mais parfois vous n'avez besoin que du contenu sous-jacent. Apprenez à extraire du texte brut de documents HTML avec notre guide étape par étape, parfait pour l'exploration de données, la migration de contenu ou l'indexation de recherche.
2. Outils de capture d'écran intégrés au navigateur (rapide et gratuit)
Tous les navigateurs modernes (Chrome, Firefox, Safari, Edge) disposent d'outils de capture d'écran intégrés qui peuvent convertir du HTML en PNG. C'est idéal pour capturer des pages web ou des éléments HTML spécifiques sans outils tiers.
Exemple de conversion HTML en PNG avec Chrome (les étapes sont similaires pour les autres navigateurs) :
- Ouvrez la page HTML dans votre navigateur (fichier local ou URL).
- Appuyez sur "F12" pour ouvrir les DevTools.
- Dans les DevTools, appuyez sur "Ctrl + Shift + P" (Windows) ou "Cmd + Shift + P" (Mac) pour ouvrir la palette de commandes.
- Tapez "Capture full screenshot" (ou "Capture full size screenshot") et appuyez sur "Entrée".
- La capture d'écran sera automatiquement téléchargée en tant que PNG. Pour la convertir en JPG, utilisez un éditeur d'images pour enregistrer le PNG en tant que JPG.
Avantages : Fidélité visuelle parfaite, aucune configuration, idéal pour le débogage/les vérifications de l'interface utilisateur, 100% gratuit.
Inconvénients : Processus manuel (non automatisable), ne produit nativement que du PNG.
Conseil de pro: Bien que les images soient idéales pour partager des visuels, la conversion de HTML en PDF préserve à la fois la mise en page et le texte pour les documents, les rapports et l'archivage, offrant un format de sortie complémentaire.
3. C# avec Free Spire.Doc for .NET
Pour les développeurs .NET qui créent des applications côté serveur, Free Spire.Doc for .NET est une bibliothèque gratuite et fiable qui prend en charge la conversion de HTML en JPG, PNG et autres formats d'image. Elle gère le contenu HTML complexe (y compris les styles CSS, les tableaux et les images) sans dépendre d'un navigateur, ce qui la rend idéale pour les flux de travail .NET automatisés.
Installation via NuGet :
Le moyen le plus simple d'installer Free Spire.Doc est via le gestionnaire de paquets NuGet dans Visual Studio :
Install-Package FreeSpire.Doc
Code C# pour convertir du HTML en PNG
Ce code convertit un fichier HTML local en PNG (échangez ImageFormat.Png par ImageFormat.Jpeg pour produire du JPG) et personnalise les marges de la page pour un rendu optimal :
using Spire.Doc;
using Spire.Doc.Documents;
using System.Drawing;
using System.Drawing.Imaging;

namespace ConvertHtmlFileToPng
{
    class Program
    {
        static void Main(string[] args)
        {
            // Create a Document object
            Document document = new Document();

            // Load an HTML file
            document.LoadFromFile("input.html", FileFormat.Html, XHTMLValidationType.None);

            // Get the first section
            Section section = document.Sections[0];

            // Set the page margins
            section.PageSetup.Margins.All = 2;

            // Convert the document to an array of bitmap images
            Image[] images = document.SaveToImages(ImageType.Bitmap);

            // Iterate through the images
            for (int index = 0; index < images.Length; index++)
            {
                // Specify the output file name
                string fileName = string.Format( @"Output\image_{0}.png", index);

                // Save each image as a PNG file
                images[index].Save(fileName, ImageFormat.Png);

            }

            // Dispose resources
            document.Dispose();
        }
    }
}
Résultat de la conversion : La bibliothèque aligne la mise en page HTML sur le modèle de page standard d'un document Word. Par conséquent, le contenu HTML long sera paginé et exporté en plusieurs images.
Avantages : Haute scalabilité, compatible avec les serveurs, contrôle total sur le rendu, prend en charge la conversion en masse.
Inconvénients : Nécessite des connaissances en codage .NET.
Référence : Convertir un fichier HTML ou une chaîne HTML en image en C#
Conseils de pro pour des conversions HTML en image de haute qualité
Pour vous assurer que vos images converties sont nettes, claires et professionnelles, suivez ces conseils :
- Optimisez d'abord le HTML : Supprimez le code inutile, compressez les images et assurez-vous que les styles sont cohérents.
- Utilisez une haute résolution : Lors de la conversion, définissez la résolution sur au moins 1920x1080 (Full HD) pour éviter le flou.
- Testez la réactivité : Si le HTML source est réactif, testez différentes tailles d'écran pour vous assurer que la mise en page ne se casse pas dans l'image.
- Gérez les polices avec soin : Intégrez des polices personnalisées dans votre HTML ; les polices manquantes provoquent un texte déformé et un rendu incohérent.
- Compressez les images finales : Utilisez des outils comme TinyPNG ou Squoosh pour réduire la taille des fichiers JPG/PNG sans perte de qualité.
Réflexions finales
La conversion de HTML en JPG ou PNG comble le fossé entre le contenu web dynamique et les médias statiques et universellement partageables. Que vous soyez un débutant utilisant des outils en ligne, un concepteur utilisant des captures d'écran de navigateur ou un développeur automatisant les conversions avec du code, les méthodes de ce guide couvrent tous les cas d'utilisation.
N'oubliez pas de choisir le bon format (JPG pour les photos, PNG pour la transparence) et de suivre les conseils de pro pour optimiser le HTML et les images post-conversion pour la qualité et les performances.
Foire aux questions (FAQ)
Q1. Puis-je convertir du HTML en JPG/PNG sans perte de qualité ?
Oui. Utilisez le PNG pour une qualité sans perte ou le JPG avec une haute qualité (90–100%) pour les photos et les pages entières. Évitez les conversions JPG répétées, car chaque modification dégrade légèrement la qualité.
Q2. Existe-t-il un moyen de convertir par lots plusieurs fichiers HTML en JPG/PNG ?
Oui. Utilisez des outils en ligne comme Convertio qui prennent en charge les téléchargements par lots. Pour les développeurs, écrivez un script pour parcourir les fichiers HTML et les convertir automatiquement.
Q3. Puis-je convertir des e-mails HTML en JPG/PNG ?
Oui. Ouvrez l'e-mail HTML dans un navigateur, puis utilisez l'outil de capture d'écran du navigateur ou un convertisseur en ligne pour capturer l'e-mail en tant qu'image. C'est utile pour tester le rendu des e-mails sur différents appareils.
Q4. Puis-je convertir uniquement un élément HTML spécifique (pas la page entière) sans recadrer l'image plus tard ?
Oui. Les DevTools de Chrome/Firefox sont conçus pour cela :
- Dans les DevTools (F12), utilisez le Sélecteur d'éléments (icône de flèche en haut à gauche) pour cliquer sur l'élément HTML spécifique (par exemple, une div, un tableau ou une bannière).
- Ouvrez la palette de commandes (Ctrl/Cmd + Shift + P) et sélectionnez Capture node screenshot—l'outil ne capturera que l'élément sélectionné en tant que PNG, aucun recadrage n'est nécessaire.
Voir aussi
- Comment convertir des images en texte : les meilleurs outils d'OCR pour les débutants
- Convertir Word en PNG : 3 façons pratiques que vous pouvez réellement utiliser
- Convertisseur PNG en Word : les 5 meilleures façons de convertir un PNG en Word
- Python : Convertir du HTML en image
- Java : Convertir du HTML en images
Convertir HTML a JPG (o PNG): herramientas gratuitas y sencillas
Tabla de Contenidos
- Por qué podrías necesitar convertir HTML a una imagen – desde archivar páginas web hasta crear tarjetas automatizadas para redes sociales.
- JPG vs. PNG: qué formato elegir – comparación detallada de compresión, transparencia y tamaño de archivo, etc.
- 3 métodos probados para convertir HTML a JPG o PNG
- Consejos profesionales para conversiones de alta calidad – optimizar HTML, establecer la resolución, manejar fuentes y comprimir imágenes finales.
Convertir HTML a formatos de imagen como JPG o PNG se ha convertido en una tarea esencial para desarrolladores, diseñadores y creadores de contenido. Ya sea que necesites generar vistas previas para redes sociales, capturar paneles de datos para informes, crear miniaturas de sitios web o automatizar flujos de trabajo de capturas de pantalla, conocer el método correcto de conversión de HTML a JPG o HTML a PNG es clave para entregar resultados de alta calidad de manera eficiente.
Esta guía completa cubre todo lo que necesitas saber sobre la conversión de HTML a imagen, incluyendo:
- Por qué podrías necesitar convertir HTML a una imagen – desde archivar páginas web hasta crear tarjetas automatizadas para redes sociales.
- JPG vs. PNG: qué formato elegir – comparación detallada de compresión, transparencia y tamaño de archivo, etc.
- 3 métodos probados para convertir HTML a JPG o PNG:
- Conversores en línea – soluciones rápidas para conversiones únicas.
- Herramientas de captura de pantalla integradas en el navegador – aprovecha Chrome, Edge o Firefox para capturas de alta fidelidad.
- C# con Free Spire.Doc for .NET – una biblioteca gratuita y confiable para la automatización del lado del servidor.
- Consejos profesionales para conversiones de alta calidad – optimizar HTML, establecer la resolución, manejar fuentes y comprimir imágenes finales.
Al final de esta guía, tendrás una comprensión clara de cómo elegir el enfoque correcto según tu nivel de habilidad técnica, infraestructura y necesidades de automatización.
¿Por qué convertir HTML a una imagen?
HTML (HyperText Markup Language) es la columna vertebral de las páginas web, pero no siempre es el formato más portátil o compartible. Convertir un archivo HTML a JPG o PNG resuelve varios problemas comunes:
- Preservar Diseño y Maquetación: Los navegadores renderizan HTML de manera diferente, y convertirlo a una imagen fija el diseño, asegurando que tu contenido se vea igual en todas partes.
- Fácil de Compartir: Las imágenes son universalmente compatibles en redes sociales, correos electrónicos, presentaciones y documentos, sin necesidad de que los destinatarios abran un navegador o tengan acceso al archivo HTML original.
- Archivado y Documentación: Las páginas web cambian o desaparecen con el tiempo. Convertir una página web a una imagen crea una instantánea permanente del contenido para los registros.
- Diseño y Maquetas: Los diseñadores web a menudo convierten prototipos HTML a JPG/PNG para compartir con clientes, mostrar trabajos en portafolios o integrar en sistemas de diseño.
- Optimización del Rendimiento: Para contenido simple (por ejemplo, infografías, widgets estáticos), las imágenes se cargan más rápido que el HTML, especialmente en dispositivos con poco ancho de banda.
JPG vs. PNG: ¿Qué formato deberías elegir?
Elegir el formato de salida correcto afecta directamente el tamaño del archivo, la calidad y el soporte de transparencia. Aquí tienes una comparación rápida:
| Característica | PNG | JPG |
|---|---|---|
| Compresión | Sin pérdida | Con pérdida |
| Tamaño del archivo | Más grande | Más pequeño |
| Transparencia | Soporta canal alfa (áreas transparentes) | Sin transparencia (se rellena con blanco o negro) |
| Ideal para | Logotipos, iconos, interfaces con mucho texto, capturas de pantalla | Fotografías, banners, imágenes grandes |
Regla de oro: Usa PNG cuando necesites texto nítido, detalles finos o un fondo transparente. Usa JPG cuando priorices un tamaño de archivo pequeño y el contenido sea fotográfico.
3 Métodos para Convertir HTML a Imágenes (Para Todos los Niveles)
Ya seas un principiante sin experiencia en codificación o un desarrollador que busca soluciones automatizadas, hay un método que se adapta a tus necesidades. Cubriremos las herramientas y técnicas más confiables, desde simples conversores en línea hasta soluciones basadas en código.
1. Conversores en línea de HTML a JPG/PNG
Los conversores en línea son la forma más sencilla de cambiar HTML a JPG o HTML a PNG sin necesidad de software ni codificación. Funcionan directamente en tu navegador y admiten archivos HTML o URL. Herramientas destacadas como Convertio y CloudxDocs ofrecen resultados de conversión rápidos y confiables.
Paso a paso con Convertio:
- Ve a la herramienta de HTML a JPG/PNG de Convertio.
- Sube tu archivo HTML/URL.
- Selecciona el formato de salida (JPG, JPEG o PNG) en el menú desplegable.
- Haz clic en "Convertir" y espera a que termine el proceso.
- Descarga la imagen convertida a tu dispositivo.
Pros: Cero configuración, fácil de usar.
Contras: Requieren conexión a internet; los niveles gratuitos pueden tener límites de tamaño de archivo.
Convertir HTML a imágenes preserva el diseño visual, pero a veces solo necesitas el contenido subyacente. Aprende a extraer texto plano de documentos HTML con nuestra guía paso a paso, perfecta para la minería de datos, la migración de contenido o la indexación de búsquedas.
2. Herramientas de Captura de Pantalla Integradas en el Navegador (Rápido y Gratis)
Todos los navegadores modernos (Chrome, Firefox, Safari, Edge) tienen herramientas de captura de pantalla integradas que pueden convertir HTML a PNG. Esto es ideal para capturar páginas web o elementos HTML específicos sin herramientas de terceros.
Ejemplo de conversión de HTML a PNG en Chrome (los pasos son similares para otros navegadores):
- Abre la página HTML en tu navegador (archivo local o URL).
- Presiona "F12" para abrir las DevTools.
- En las DevTools, presiona "Ctrl + Shift + P" (Windows) o "Cmd + Shift + P" (Mac) para abrir la paleta de comandos.
- Escribe "Capture full screenshot" (o "Capture full size screenshot") y presiona "Enter".
- La captura de pantalla se descargará automáticamente como un PNG. Para convertir a JPG, usa un editor de imágenes para guardar el PNG como JPG.
Pros: Fidelidad visual perfecta, cero configuración, ideal para depuración/verificaciones de UI, 100% gratis.
Contras: Proceso manual (no automatizable), solo genera PNG de forma nativa.
Consejo Profesional: Aunque las imágenes son ideales para compartir elementos visuales, convertir HTML a PDF preserva tanto el diseño como el texto para documentos, informes y archivado, ofreciendo un formato de salida complementario.
3. C# con Free Spire.Doc for .NET
Para los desarrolladores de .NET que crean aplicaciones del lado del servidor, Free Spire.Doc for .NET es una biblioteca gratuita y confiable que admite la conversión de HTML a JPG, PNG y otros formatos de imagen. Maneja contenido HTML complejo (incluidos estilos CSS, tablas e imágenes) sin depender de un navegador, lo que la hace ideal para flujos de trabajo automatizados de .NET.
Instalación a través de NuGet:
La forma más fácil de instalar Free Spire.Doc es a través del Administrador de Paquetes NuGet en Visual Studio:
Install-Package FreeSpire.Doc
Código C# para Convertir HTML a PNG
Este código convierte un archivo HTML local a PNG (cambia ImageFormat.Png por ImageFormat.Jpeg para generar JPG) y personaliza los márgenes de la página para una renderización óptima:
using Spire.Doc;
using Spire.Doc.Documents;
using System.Drawing;
using System.Drawing.Imaging;

namespace ConvertHtmlFileToPng
{
    class Program
    {
        static void Main(string[] args)
        {
            // Crear un objeto Document
            Document document = new Document();

            // Cargar un archivo HTML
            document.LoadFromFile("input.html", FileFormat.Html, XHTMLValidationType.None);

            // Obtener la primera sección
            Section section = document.Sections[0];

            // Establecer los márgenes de la página
            section.PageSetup.Margins.All = 2;

            // Convertir el documento a una matriz de imágenes de mapa de bits
            Image[] images = document.SaveToImages(ImageType.Bitmap);

            // Iterar a través de las imágenes
            for (int index = 0; index < images.Length; index++)
            {
                // Especificar el nombre del archivo de salida
                string fileName = string.Format( @"Output\image_{0}.png", index);

                // Guardar cada imagen como un archivo PNG
                images[index].Save(fileName, ImageFormat.Png);

            }

            // Liberar recursos
            document.Dispose();
        }
    }
}
Resultado de la conversión: La biblioteca alinea el diseño HTML con el modelo de página estándar de un documento de Word. En consecuencia, el contenido HTML extenso se paginará y se exportará como múltiples imágenes.
Pros: Alta escalabilidad, amigable con el servidor, control total sobre la renderización, admite conversión por lotes.
Contras: Requiere conocimientos de codificación en .NET.
Referencia: Convertir Archivo HTML o Cadena HTML a Imagen en C#
Consejos Profesionales para Conversiones de HTML a Imagen de Alta Calidad
Para asegurarte de que tus imágenes convertidas sean nítidas, claras y profesionales, sigue estos consejos:
- Optimiza el HTML Primero: Elimina el código innecesario, comprime las imágenes y asegúrate de que los estilos sean consistentes.
- Usa Alta Resolución: Al convertir, establece la resolución en al menos 1920x1080 (Full HD) para evitar que se vea borroso.
- Prueba la Responsividad: Si el HTML de origen es responsivo, prueba diferentes tamaños de pantalla para asegurarte de que el diseño no se rompa en la imagen.
- Maneja las Fuentes con Cuidado: Incrusta fuentes personalizadas en tu HTML; las fuentes faltantes causan texto distorsionado y una renderización inconsistente.
- Comprime las Imágenes Finales: Usa herramientas como TinyPNG o Squoosh para reducir el tamaño de los archivos JPG/PNG sin perder calidad.
Conclusiones Finales
Convertir HTML a JPG o PNG cierra la brecha entre el contenido web dinámico y los medios estáticos y universalmente compartibles. Ya seas un principiante que usa herramientas en línea, un diseñador que usa capturas de pantalla del navegador o un desarrollador que automatiza conversiones con código, los métodos de esta guía cubren todos los casos de uso.
Recuerda elegir el formato correcto (JPG para fotos, PNG para transparencia) y seguir los consejos profesionales para optimizar el HTML y las imágenes posteriores a la conversión para obtener calidad y rendimiento.
Preguntas Frecuentes (FAQs)
P1. ¿Puedo convertir HTML a JPG/PNG sin perder calidad?
Sí. Usa PNG para una calidad sin pérdidas o JPG con alta calidad (90–100%) para fotos y páginas completas. Evita las conversiones repetidas de JPG, ya que cada edición degrada ligeramente la calidad.
P2. ¿Hay alguna forma de convertir por lotes múltiples archivos HTML a JPG/PNG?
Sí. Usa herramientas en línea como Convertio que admiten cargas por lotes. Para los desarrolladores, escribe un script para recorrer los archivos HTML y convertirlos automáticamente.
P3. ¿Puedo convertir correos electrónicos HTML a JPG/PNG?
Sí. Abre el correo electrónico HTML en un navegador, luego usa la herramienta de captura de pantalla del navegador o un conversor en línea para capturar el correo electrónico como una imagen. Esto es útil para probar la renderización de correos electrónicos en diferentes dispositivos.
P4. ¿Puedo convertir solo un elemento HTML específico (no la página completa) sin tener que recortar la imagen después?
Sí. Las DevTools de Chrome/Firefox están diseñadas para esto:
- En las DevTools (F12), usa el Selector de Elementos (icono de flecha en la esquina superior izquierda) para hacer clic en el elemento HTML específico (por ejemplo, un div, una tabla o un banner).
- Abre la paleta de comandos (Ctrl/Cmd + Shift + P) y selecciona Capturar captura de pantalla del nodo—la herramienta capturará solo el elemento seleccionado como un PNG, sin necesidad de recortar.
Ver También
HTML in JPG (oder PNG) konvertieren – Kostenlose & einfache Tools
Inhaltsverzeichnis
- Warum Sie möglicherweise HTML in ein Bild konvertieren müssen – von der Archivierung von Webseiten bis zur Erstellung automatisierter Social-Media-Karten.
- JPG vs. PNG: Welches Format soll man wählen – detaillierter Vergleich von Komprimierung, Transparenz, Dateigröße usw.
- 3 bewährte Methoden zur Konvertierung von HTML in JPG oder PNG
- Profi-Tipps für hochwertige Konvertierungen – Optimierung von HTML, Einstellung der Auflösung, Umgang mit Schriftarten und Komprimierung der endgültigen Bilder.
Die Konvertierung von HTML in Bildformate wie JPG oder PNG ist zu einer wesentlichen Aufgabe für Entwickler, Designer und Inhaltsersteller geworden. Ob Sie Social-Media-Vorschauen generieren, Daten-Dashboards für Berichte erfassen, Website-Thumbnails erstellen oder Screenshot-Workflows automatisieren müssen, die Kenntnis der richtigen HTML in JPG oder HTML in PNG Konvertierungsmethode ist der Schlüssel zur effizienten Bereitstellung hochwertiger Ergebnisse.
Dieser umfassende Leitfaden behandelt alles, was Sie über die HTML-zu-Bild Konvertierung wissen müssen, einschließlich:
- Warum Sie möglicherweise HTML in ein Bild konvertieren müssen – von der Archivierung von Webseiten bis zur Erstellung automatisierter Social-Media-Karten.
- JPG vs. PNG: Welches Format soll man wählen – detaillierter Vergleich von Komprimierung, Transparenz, Dateigröße usw.
- 3 bewährte Methoden zur Konvertierung von HTML in JPG oder PNG:
- Online-Konverter – schnelle Lösungen für einmalige Konvertierungen.
- Integrierte Screenshot-Tools des Browsers – nutzen Sie Chrome, Edge oder Firefox für hochauflösende Aufnahmen.
- C# mit Free Spire.Doc for .NET – eine zuverlässige kostenlose Bibliothek für serverseitige Automatisierung.
- Profi-Tipps für hochwertige Konvertierungen – Optimierung von HTML, Einstellung der Auflösung, Umgang mit Schriftarten und Komprimierung der endgültigen Bilder.
Am Ende dieses Leitfadens werden Sie ein klares Verständnis dafür haben, wie Sie den richtigen Ansatz basierend auf Ihrem technischen Kenntnisstand, Ihrer Infrastruktur und Ihren Automatisierungsanforderungen auswählen.
Warum HTML in ein Bild konvertieren?
HTML (HyperText Markup Language) ist das Rückgrat von Webseiten, aber es ist nicht immer das portabelste oder am einfachsten zu teilende Format. Die Konvertierung von HTML-Dateien in JPG oder PNG löst mehrere häufige Probleme:
- Layout & Design beibehalten: Browser rendern HTML unterschiedlich, und die Konvertierung in ein Bild fixiert das Layout, sodass Ihr Inhalt überall gleich aussieht.
- Einfaches Teilen: Bilder werden universell über soziale Medien, E-Mails, Präsentationen und Dokumente hinweg unterstützt – Empfänger müssen keinen Browser öffnen oder auf die ursprüngliche HTML-Datei zugreifen.
- Archivierung & Dokumentation: Webseiten ändern sich oder verschwinden im Laufe der Zeit. Die Konvertierung einer Webseite in ein Bild erstellt eine dauerhafte Momentaufnahme des Inhalts für die Aufzeichnungen.
- Design & Mockups: Webdesigner konvertieren oft HTML-Prototypen in JPG/PNG, um sie mit Kunden zu teilen, Arbeiten in Portfolios zu präsentieren oder in Designsysteme zu integrieren.
- Leistungsoptimierung: Bei einfachen Inhalten (z. B. Infografiken, statische Widgets) laden Bilder schneller als HTML, insbesondere auf Geräten mit geringer Bandbreite.
JPG vs. PNG: Welches Format sollten Sie wählen?
Die Wahl des richtigen Ausgabeformats wirkt sich direkt auf Dateigröße, Qualität und Transparenzunterstützung aus. Hier ist ein kurzer Vergleich:
| Merkmal | PNG | JPG |
|---|---|---|
| Kompression | Verlustfrei | Verlustbehaftet |
| Dateigröße | Größer | Kleiner |
| Transparenz | Unterstützt Alpha-Kanal (transparente Bereiche) | Keine Transparenz (füllt mit Weiß oder Schwarz) |
| Am besten für | Logos, Symbole, textlastige UIs, Screenshots | Fotografien, Banner, große Bilder |
Faustregel: Verwenden Sie PNG wenn Sie scharfen Text, feine Details oder einen transparenten Hintergrund benötigen. Verwenden Sie JPG wenn Sie eine kleine Dateigröße priorisieren und der Inhalt fotografisch ist.
3 Methoden zur Konvertierung von HTML in Bilder (für alle Kenntnisstufen)
Egal, ob Sie ein Anfänger ohne Programmiererfahrung oder ein Entwickler auf der Suche nach automatisierten Lösungen sind, es gibt eine Methode, die Ihren Bedürfnissen entspricht. Wir werden die zuverlässigsten Werkzeuge und Techniken behandeln, von einfachen Online-Konvertern bis hin zu codebasierten Lösungen.
1. Online-HTML-zu-JPG/PNG-Konverter
Online-Konverter sind der einfachste Weg, um HTML in JPG zu ändern oder HTML in PNG ohne Software oder Programmierung. Sie funktionieren direkt in Ihrem Browser und unterstützen HTML-Dateien oder URLs. Top-Tools wie Convertio und CloudxDocs liefern schnelle und zuverlässige Konvertierungsergebnisse.
Schritt-für-Schritt mit Convertio:
- Gehen Sie zu Convertios HTML-zu-JPG/PNG-Tool.
- Laden Sie Ihre HTML/URL-Datei hoch.
- Wählen Sie das Ausgabeformat (JPG, JPEG oder PNG) aus dem Dropdown-Menü.
- Klicken Sie auf "Konvertieren" und warten Sie, bis der Vorgang abgeschlossen ist.
- Laden Sie das konvertierte Bild auf Ihr Gerät herunter.
Vorteile: Keine Einrichtung, einfach zu bedienen.
Nachteile: Erfordert eine Internetverbindung; kostenlose Stufen können Dateigrößenbeschränkungen haben.
Die Konvertierung von HTML in Bilder bewahrt das visuelle Layout, aber manchmal benötigen Sie nur den zugrunde liegenden Inhalt. Erfahren Sie, wie Sie einfachen Text aus HTML-Dokumenten extrahieren mit unserer Schritt-für-Schritt-Anleitung, perfekt für Data Mining, Inhaltsmigration oder Suchindexierung.
2. Integrierte Screenshot-Tools des Browsers (schnell & kostenlos)
Alle modernen Browser (Chrome, Firefox, Safari, Edge) verfügen über integrierte Screenshot-Tools, die HTML in PNG konvertieren können. Dies ist ideal zum Erfassen von Webseiten oder bestimmten HTML-Elementen ohne Tools von Drittanbietern.
Beispiel für die Konvertierung von Chrome HTML in PNG (die Schritte sind für andere Browser ähnlich):
- Öffnen Sie die HTML-Seite in Ihrem Browser (lokale Datei oder URL).
- Drücken Sie "F12", um die DevTools zu öffnen.
- Drücken Sie in den DevTools "Strg + Umschalt + P" (Windows) oder "Cmd + Umschalt + P" (Mac), um die Befehlspalette zu öffnen.
- Geben Sie "Vollständigen Screenshot aufnehmen" (oder "Screenshot in voller Größe aufnehmen") ein und drücken Sie "Enter".
- Der Screenshot wird automatisch als PNG heruntergeladen. Um ihn in JPG zu konvertieren, verwenden Sie einen Bildeditor, um das PNG als JPG zu speichern.
Vorteile: Perfekte visuelle Wiedergabetreue, keine Einrichtung, ideal für Debugging/UI-Prüfungen, 100 % kostenlos.
Nachteile: Manueller Prozess (nicht automatisierbar), gibt nativ nur PNG aus.
Profi-Tipp: Während Bilder ideal zum Teilen von visuellen Inhalten sind, die Konvertierung von HTML in PDF bewahrt sowohl Layout als auch Text für Dokumente, Berichte und Archivierung und bietet ein ergänzendes Ausgabeformat.
3. C# mit Free Spire.Doc for .NET
Für .NET-Entwickler, die serverseitige Anwendungen erstellen, ist Free Spire.Doc for .NET eine zuverlässige, kostenlose Bibliothek, die die Konvertierung von HTML in JPG, PNG und andere Bildformate unterstützt. Sie verarbeitet komplexe HTML-Inhalte (einschließlich CSS-Stile, Tabellen und Bilder), ohne auf einen Browser angewiesen zu sein, was sie ideal für automatisierte .NET-Workflows macht.
Installation über NuGet:
Der einfachste Weg, Free Spire.Doc zu installieren, ist über den NuGet Package Manager in Visual Studio:
Install-Package FreeSpire.Doc
C#-Code zum Konvertieren von HTML in PNG
Dieser Code konvertiert eine lokale HTML-Datei in PNG (tauschen Sie ImageFormat.Png gegen ImageFormat.Jpeg aus, um JPG auszugeben) und passt die Seitenränder für eine optimale Wiedergabe an:
using Spire.Doc;
using Spire.Doc.Documents;
using System.Drawing;
using System.Drawing.Imaging;

namespace ConvertHtmlFileToPng
{
    class Program
    {
        static void Main(string[] args)
        {
            // Create a Document object
            Document document = new Document();

            // Load an HTML file
            document.LoadFromFile("input.html", FileFormat.Html, XHTMLValidationType.None);

            // Get the first section
            Section section = document.Sections[0];

            // Set the page margins
            section.PageSetup.Margins.All = 2;

            // Convert the document to an array of bitmap images
            Image[] images = document.SaveToImages(ImageType.Bitmap);

            // Iterate through the images
            for (int index = 0; index < images.Length; index++)
            {
                // Specify the output file name
                string fileName = string.Format( @"Output\image_{0}.png", index);

                // Save each image as a PNG file
                images[index].Save(fileName, ImageFormat.Png);

            }

            // Dispose resources
            document.Dispose();
        }
    }
}
Konvertierungsergebnis: Die Bibliothek richtet das HTML-Layout am Standardseitenmodell eines Word-Dokuments aus. Dementsprechend werden lange HTML-Inhalte paginiert und als mehrere Bilder exportiert.
Vorteile: Hohe Skalierbarkeit, serverfreundlich, volle Kontrolle über das Rendering, unterstützt die Stapelkonvertierung.
Nachteile: Erfordert .NET-Programmierkenntnisse.
Referenz: HTML-Datei oder HTML-String in Bild in C# konvertieren
Profi-Tipps für hochwertige HTML-zu-Bild-Konvertierungen
Um sicherzustellen, dass Ihre konvertierten Bilder scharf, klar und professionell sind, befolgen Sie diese Tipps:
- Zuerst HTML optimieren: Entfernen Sie unnötigen Code, komprimieren Sie Bilder und stellen Sie sicher, dass die Stile konsistent sind.
- Hohe Auflösung verwenden: Stellen Sie beim Konvertieren die Auflösung auf mindestens 1920x1080 (Full HD) ein, um Unschärfe zu vermeiden.
- Auf Responsivität testen: Wenn das Quell-HTML responsiv ist, testen Sie verschiedene Bildschirmgrößen, um sicherzustellen, dass das Layout im Bild nicht bricht.
- Schriftarten sorgfältig behandeln: Betten Sie benutzerdefinierte Schriftarten in Ihr HTML ein; fehlende Schriftarten verursachen verzerrten Text und inkonsistente Wiedergabe.
- Endgültige Bilder komprimieren: Verwenden Sie Tools wie TinyPNG oder Squoosh, um die Dateigrößen von JPG/PNG zu reduzieren, ohne an Qualität zu verlieren.
Abschließende Gedanken
Die Konvertierung von HTML in JPG oder PNG schließt die Lücke zwischen dynamischen Webinhalten und statischen, universell teilbaren Medien. Egal, ob Sie ein Anfänger sind, der Online-Tools verwendet, ein Designer, der Browser-Screenshots verwendet, oder ein Entwickler, der Konvertierungen mit Code automatisiert, die Methoden in diesem Handbuch decken jeden Anwendungsfall ab.
Denken Sie daran, das richtige Format zu wählen (JPG für Fotos, PNG für Transparenz), und befolgen Sie die Profi-Tipps, um HTML und nach der Konvertierung erstellte Bilder für Qualität und Leistung zu optimieren.
Häufig gestellte Fragen (FAQs)
F1. Kann ich HTML in JPG/PNG konvertieren, ohne an Qualität zu verlieren?
Ja. Verwenden Sie PNG für verlustfreie Qualität oder JPG mit hoher Qualität (90–100 %) für Fotos und ganze Seiten. Vermeiden Sie wiederholte JPG-Konvertierungen, da jede Bearbeitung die Qualität geringfügig verschlechtert.
F2. Gibt es eine Möglichkeit, mehrere HTML-Dateien stapelweise in JPG/PNG zu konvertieren?
Ja. Verwenden Sie Online-Tools wie Convertio mit Unterstützung für Stapel-Uploads. Für Entwickler schreiben Sie ein Skript, um durch HTML-Dateien zu iterieren und sie automatisch zu konvertieren.
F3. Kann ich HTML-E-Mails in JPG/PNG konvertieren?
Ja. Öffnen Sie die HTML-E-Mail in einem Browser und verwenden Sie dann das Screenshot-Tool des Browsers oder einen Online-Konverter, um die E-Mail als Bild zu erfassen. Dies ist nützlich zum Testen der E-Mail-Wiedergabe auf verschiedenen Geräten.
F4. Kann ich nur ein bestimmtes HTML-Element (nicht die ganze Seite) konvertieren, ohne das Bild später zuschneiden zu müssen?
Ja. Chrome/Firefox DevTools sind dafür ausgelegt:
- Verwenden Sie in den DevTools (F12) den Element-Selektor (Pfeilsymbol oben links), um auf das spezifische HTML-Element zu klicken (z. B. ein Div, eine Tabelle oder ein Banner).
- Öffnen Sie die Befehlspalette (Strg/Cmd + Umschalt + P) und wählen Sie Knoten-Screenshot aufnehmen—das Tool erfasst nur das ausgewählte Element als PNG, kein Zuschneiden erforderlich.
Siehe auch
- So konvertieren Sie Bilder in Text: Die besten OCR-Tools für Anfänger
- Word in PNG konvertieren: 3 praktische Möglichkeiten, die Sie tatsächlich nutzen können
- PNG-zu-Word-Konverter: Die 5 besten Möglichkeiten, PNG in Word zu konvertieren
- Python: HTML in Bild konvertieren
- Java: HTML in Bilder konvertieren
Конвертация HTML в JPG (или PNG) — бесплатные и простые инструменты
Содержание
- Зачем может понадобиться конвертировать HTML в изображение – от архивации веб-страниц до создания автоматических карточек для социальных сетей.
- JPG против PNG: какой формат выбрать – подробное сравнение сжатия, прозрачности, размера файла и т.д.
- 3 проверенных метода конвертации HTML в JPG или PNG
- Профессиональные советы для высококачественных преобразований – оптимизация HTML, установка разрешения, обработка шрифтов и сжатие конечных изображений.
Преобразование HTML в форматы изображений, такие как JPG или PNG, стало важной задачей для разработчиков, дизайнеров и создателей контента. Независимо от того, нужно ли вам создавать превью для социальных сетей, захватывать информационные панели для отчетов, создавать миниатюры веб-сайтов или автоматизировать рабочие процессы создания скриншотов, знание правильного метода преобразования HTML в JPG или HTML в PNG является ключом к эффективному достижению высококачественных результатов.
Это подробное руководство охватывает все, что вам нужно знать о преобразовании HTML в изображение, включая:
- Зачем может понадобиться конвертировать HTML в изображение – от архивации веб-страниц до создания автоматических карточек для социальных сетей.
- JPG против PNG: какой формат выбрать – подробное сравнение сжатия, прозрачности, размера файла и т.д.
- 3 проверенных метода конвертации HTML в JPG или PNG:
- Онлайн-конвертеры – быстрые решения для разовых преобразований.
- Встроенные в браузер инструменты для создания скриншотов – используйте Chrome, Edge или Firefox для высококачественных снимков.
- C# с Free Spire.Doc for .NET – надежная бесплатная библиотека для автоматизации на стороне сервера.
- Профессиональные советы для высококачественных преобразований – оптимизация HTML, установка разрешения, обработка шрифтов и сжатие конечных изображений.
К концу этого руководства у вас будет четкое понимание того, как выбрать правильный подход в зависимости от вашего технического уровня, инфраструктуры и потребностей в автоматизации.
Зачем конвертировать HTML в изображение?
HTML (HyperText Markup Language) является основой веб-страниц, но это не всегда самый портативный или удобный для обмена формат. Преобразование HTML-файла в JPG или PNG решает несколько распространенных проблем:
- Сохранение макета и дизайна: Браузеры по-разному отображают HTML, и преобразование в изображение фиксирует макет, гарантируя, что ваш контент будет выглядеть одинаково везде.
- Простота обмена: Изображения универсально поддерживаются в социальных сетях, электронной почте, презентациях и документах — получателям не нужно открывать браузер или иметь доступ к исходному HTML-файлу.
- Архивация и документация: Веб-страницы со временем меняются или исчезают. Преобразование веб-страницы в изображение создает постоянный снимок контента для записей.
- Дизайн и макеты: Веб-дизайнеры часто преобразуют HTML-прототипы в JPG/PNG, чтобы поделиться ими с клиентами, продемонстрировать работу в портфолио или интегрировать в системы дизайна.
- Оптимизация производительности: Для простого контента (например, инфографики, статических виджетов) изображения загружаются быстрее, чем HTML, особенно на устройствах с низкой пропускной способностью.
JPG против PNG: какой формат выбрать?
Выбор правильного выходного формата напрямую влияет на размер файла, качество и поддержку прозрачности. Вот краткое сравнение:
| Характеристика | PNG | JPG |
|---|---|---|
| Сжатие | Без потерь | С потерями |
| Размер файла | Больше | Меньше |
| Прозрачность | Поддерживает альфа-канал (прозрачные области) | Нет прозрачности (заполняется белым или черным) |
| Лучше всего подходит для | Логотипы, иконки, интерфейсы с большим количеством текста, скриншоты | Фотографии, баннеры, большие изображения |
Основное правило: Используйте PNG, когда вам нужен четкий текст, мелкие детали или прозрачный фон. Используйте JPG, когда вы отдаете предпочтение небольшому размеру файла, а контент является фотографическим.
3 метода преобразования HTML в изображения (для всех уровней квалификации)
Независимо от того, являетесь ли вы новичком без опыта программирования или разработчиком, ищущим автоматизированные решения, найдется метод, соответствующий вашим потребностям. Мы рассмотрим самые надежные инструменты и методы, от простых онлайн-конвертеров до решений на основе кода.
1. Онлайн-конвертеры HTML в JPG/PNG
Онлайн-конвертеры — это самый простой способ преобразовать HTML в JPG или HTML в PNG без какого-либо программного обеспечения или программирования. Они работают прямо в вашем браузере и поддерживают HTML-файлы или URL-адреса. Ведущие инструменты, такие как Convertio и CloudxDocs, обеспечивают быстрые и надежные результаты преобразования.
Пошаговая инструкция с Convertio:
- Перейдите к инструменту Convertio для преобразования HTML в JPG/PNG.
- Загрузите свой HTML-файл/URL.
- Выберите выходной формат (JPG, JPEG или PNG) из выпадающего меню.
- Нажмите «Конвертировать» и дождитесь завершения процесса.
- Загрузите преобразованное изображение на свое устройство.
Плюсы: Нулевая настройка, простота в использовании.
Минусы: Требуется подключение к Интернету; бесплатные тарифы могут иметь ограничения на размер файла.
Преобразование HTML в изображения сохраняет визуальный макет, но иногда вам нужен только основной контент. Узнайте, как извлечь обычный текст из HTML-документов с помощью нашего пошагового руководства, идеально подходящего для интеллектуального анализа данных, миграции контента или индексации поиска.
2. Встроенные в браузер инструменты для создания скриншотов (быстро и бесплатно)
Все современные браузеры (Chrome, Firefox, Safari, Edge) имеют встроенные инструменты для создания скриншотов, которые могут преобразовывать HTML в PNG. Это идеально подходит для захвата веб-страниц или определенных элементов HTML без сторонних инструментов.
Пример преобразования HTML в PNG в Chrome (шаги аналогичны для других браузеров):
- Откройте HTML-страницу в браузере (локальный файл или URL).
- Нажмите «F12», чтобы открыть инструменты разработчика.
- В инструментах разработчика нажмите «Ctrl + Shift + P» (Windows) или «Cmd + Shift + P» (Mac), чтобы открыть палитру команд.
- Введите «Capture full screenshot» (или «Capture full size screenshot») и нажмите «Enter».
- Скриншот будет автоматически загружен в формате PNG. Чтобы преобразовать в JPG, используйте редактор изображений, чтобы сохранить PNG как JPG.
Плюсы: Идеальная визуальная точность, нулевая настройка, отлично подходит для отладки/проверки пользовательского интерфейса, 100% бесплатно.
Минусы: Ручной процесс (не автоматизируется), по умолчанию выводит только PNG.
Профессиональный совет: Хотя изображения идеально подходят для обмена визуальными эффектами, преобразование HTML в PDF сохраняет как макет, так и текст для документов, отчетов и архивирования, предлагая дополнительный выходной формат.
3. C# с Free Spire.Doc for .NET
Для .NET-разработчиков, создающих серверные приложения, Free Spire.Doc for .NET — это надежная бесплатная библиотека, которая поддерживает преобразование HTML в JPG, PNG и другие форматы изображений. Она обрабатывает сложный HTML-контент (включая стили CSS, таблицы и изображения), не полагаясь на браузер, что делает ее идеальной для автоматизированных рабочих процессов .NET.
Установка через NuGet:
Самый простой способ установить Free Spire.Doc — через диспетчер пакетов NuGet в Visual Studio:
Install-Package FreeSpire.Doc
Код C# для преобразования HTML в PNG
Этот код преобразует локальный HTML-файл в PNG (замените ImageFormat.Png на ImageFormat.Jpeg для вывода в JPG) и настраивает поля страницы для оптимального рендеринга:
using Spire.Doc;
using Spire.Doc.Documents;
using System.Drawing;
using System.Drawing.Imaging;

namespace ConvertHtmlFileToPng
{
    class Program
    {
        static void Main(string[] args)
        {
            // Create a Document object
            Document document = new Document();

            // Load an HTML file
            document.LoadFromFile("input.html", FileFormat.Html, XHTMLValidationType.None);

            // Get the first section
            Section section = document.Sections[0];

            // Set the page margins
            section.PageSetup.Margins.All = 2;

            // Convert the document to an array of bitmap images
            Image[] images = document.SaveToImages(ImageType.Bitmap);

            // Iterate through the images
            for (int index = 0; index < images.Length; index++)
            {
                // Specify the output file name
                string fileName = string.Format( @"Output\image_{0}.png", index);

                // Save each image as a PNG file
                images[index].Save(fileName, ImageFormat.Png);

            }

            // Dispose resources
            document.Dispose();
        }
    }
}
Результат преобразования: Библиотека выравнивает макет HTML со стандартной моделью страницы документа Word. Соответственно, длинный HTML-контент будет разбит на страницы и экспортирован в виде нескольких изображений.
Плюсы: Высокая масштабируемость, удобство для сервера, полный контроль над рендерингом, поддержка массового преобразования.
Минусы: Требуются знания в области программирования на .NET.
Справка: Преобразование HTML-файла или HTML-строки в изображение на C#
Профессиональные советы по высококачественному преобразованию HTML в изображение
Чтобы ваши преобразованные изображения были четкими, ясными и профессиональными, следуйте этим советам:
- Сначала оптимизируйте HTML: Удалите ненужный код, сожмите изображения и убедитесь, что стили согласованы.
- Используйте высокое разрешение: При преобразовании установите разрешение не менее 1920x1080 (Full HD), чтобы избежать размытости.
- Проверьте на адаптивность: Если исходный HTML является адаптивным, протестируйте различные размеры экрана, чтобы убедиться, что макет не ломается в изображении.
- Осторожно обращайтесь со шрифтами: Встраивайте пользовательские шрифты в свой HTML; отсутствующие шрифты вызывают искажение текста и несогласованный рендеринг.
- Сжимайте конечные изображения: Используйте такие инструменты, как TinyPNG или Squoosh, чтобы уменьшить размер файлов JPG/PNG без потери качества.
Заключительные мысли
Преобразование HTML в JPG или PNG устраняет разрыв между динамическим веб-контентом и статическими, универсально распространяемыми медиа. Независимо от того, являетесь ли вы новичком, использующим онлайн-инструменты, дизайнером, использующим скриншоты браузера, или разработчиком, автоматизирующим преобразования с помощью кода, методы, описанные в этом руководстве, охватывают все варианты использования.
Не забудьте выбрать правильный формат (JPG для фотографий, PNG для прозрачности) и следуйте профессиональным советам по оптимизации HTML и изображений после преобразования для обеспечения качества и производительности.
Часто задаваемые вопросы (FAQ)
В1. Могу ли я преобразовать HTML в JPG/PNG без потери качества?
Да. Используйте PNG для качества без потерь или JPG с высоким качеством (90–100%) для фотографий и полных страниц. Избегайте повторных преобразований JPG, так как каждое редактирование незначительно ухудшает качество.
В2. Есть ли способ пакетного преобразования нескольких файлов HTML в JPG/PNG?
Да. Используйте онлайн-инструменты, такие как Convertio, с поддержкой пакетной загрузки. Для разработчиков напишите скрипт для перебора HTML-файлов и их автоматического преобразования.
В3. Могу ли я преобразовать электронные письма в формате HTML в JPG/PNG?
Да. Откройте электронное письмо в формате HTML в браузере, затем используйте инструмент для создания скриншотов браузера или онлайн-конвертер, чтобы захватить электронное письмо в виде изображения. Это полезно для тестирования рендеринга электронной почты на разных устройствах.
В4. Могу ли я преобразовать только определенный элемент HTML (а не всю страницу) без последующей обрезки изображения?
Да. Инструменты разработчика Chrome/Firefox предназначены для этого:
- В инструментах разработчика (F12) используйте селектор элементов (значок стрелки в верхнем левом углу), чтобы щелкнуть определенный элемент HTML (например, div, таблицу или баннер).
- Откройте палитру команд (Ctrl/Cmd + Shift + P) и выберите Сделать снимок экрана узла — инструмент захватит только выбранный элемент в виде PNG, обрезка не потребуется.
Смотрите также
- Как преобразовать изображения в текст: лучшие инструменты OCR для начинающих
- Преобразование Word в PNG: 3 практических способа, которые вы действительно можете использовать
- Конвертер PNG в Word: 5 лучших способов преобразования PNG в Word
- Python: преобразование HTML в изображение
- Java: преобразование HTML в изображения
Remover permissões de PDF – online, offline e via código
Índice
- O que são permissões de PDF?
- Método 1: Usando o truque de imprimir para PDF
- Método 2: Usando o Adobe Acrobat Pro
- Método 3: Usando um removedor de permissões de PDF online
- Método 4: Usando a ferramenta de linha de comando QPDF
- Método 5: Usando o Free Spire.PDF para .NET (C#)
- Comparação de todos os métodos de remoção de permissão de PDF
- Perguntas Frequentes (FAQ)
Você já baixou um PDF crucial apenas para descobrir que não pode editá-lo, copiar texto dele ou até mesmo imprimi-lo? Você provavelmente está lidando com um PDF que possui restrições de permissões (frequentemente rotulado como “Seguro” ou “Protegido”). Quando essas restrições atrapalham, você precisa de uma maneira confiável de remover as permissões dos arquivos PDF para poder trabalhar com o documento livremente.
Este artigo o guiará por cinco métodos confiáveis para remover permissões de PDF — desde ferramentas online gratuitas e truques de navegador até software de desktop profissional e soluções programáticas para desenvolvedores.
- O que são permissões de PDF?
- Método 1: Usando o truque de imprimir para PDF
- Método 2: Usando o Adobe Acrobat Pro
- Método 3: Usando um removedor de permissões de PDF online
- Método 4: Usando a ferramenta de linha de comando QPDF
- Método 5: Usando o Free Spire.PDF para .NET (C#)
- Comparação de todos os métodos de remoção de permissão de PDF
- Perguntas Frequentes (FAQ)
O que são permissões de PDF?
As permissões de PDF (também chamadas de “senhas de proprietário” ou “restrições”) são configurações de segurança que controlam o que os usuários podem fazer com um documento depois de aberto. Ao contrário de uma senha de abertura de documento que impede totalmente a visualização, uma senha de permissões permite a visualização, mas limita ações como:
- Impressão
- Edição ou modificação de conteúdo
- Cópia de texto ou imagens
- Adição de comentários ou anotações
- Preenchimento de campos de formulário
Razões comuns para aplicar permissões:
- Proteção de documentos comerciais confidenciais (por exemplo, relatórios financeiros, contratos legais)
- Prevenção de modificações não autorizadas em formulários oficiais
- Controle da distribuição de conteúdo proprietário
- Restringir o preenchimento de formulários para usuários não aprovados
No entanto, essas restrições podem se tornar frustrantes quando você precisa colaborar ou extrair informações — e é aí que nosso guia entra.
⚠️ Importante: Você só deve remover permissões de PDFs que possui ou tem autorização legal para modificar. A remoção não autorizada de restrições de PDF pode violar leis de direitos autorais ou termos de serviço.
Método 1: Usando o truque de imprimir para PDF
A solução alternativa “Imprimir para PDF” é o método gratuito mais popular para contornar as permissões de PDF. Não requer software adicional e funciona na maioria dos dispositivos de desktop (Windows/Mac).
Por que isso funciona
A função "Imprimir para PDF" cria um arquivo totalmente novo que não herda restrições do original. Mas esteja ciente de que elementos interativos como hiperlinks, campos de formulário preenchíveis, marcadores e assinaturas digitais podem ser perdidos no processo.
Requisito crítico: O PDF original deve permitir a impressão. Se o arquivo tiver uma restrição de “não impressão”, a opção de impressão ficará esmaecida e esse truque falhará.
Passos para Imprimir para PDF:
- Abra o PDF restrito em um visualizador (Microsoft Edge, Chrome).
- Clique no ícone Imprimir no canto superior direito (ou use Ctrl + P / Cmd + P).
- Na caixa de diálogo de impressão, clique no menu suspenso "Destino".
- Selecione “Microsoft Print to PDF” (ou “Salvar como PDF”) como a impressora.
- Clique em “Imprimir” e escolha um local para salvar o novo arquivo PDF.
- O novo arquivo não terá restrições de permissões (mas pode perder alguma formatação).
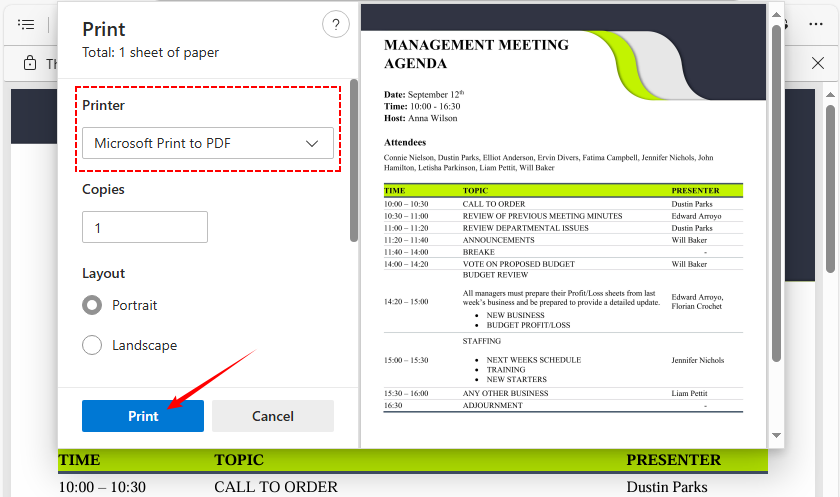
Quando você usa a solução alternativa Imprimir para PDF para remover permissões, todos os campos de formulário preenchíveis no documento original desaparecem — deixando você com um arquivo plano e não interativo. Consulte este guia para criar um PDF preenchível e restaurar esses campos perdidos.
Método 2: Usando o Adobe Acrobat Pro
Se você tem uma assinatura do Adobe Acrobat Pro DC ou Standard, este é o método mais confiável. O Adobe Acrobat é o padrão da indústria para gerenciamento de PDF e torna a remoção de permissões rápida e direta.
✅ Melhor para: Profissionais, edição diária de PDF e arquivos confidenciais (processamento offline).
Passos para usar o Adobe:
- Abra o PDF restrito no Adobe Acrobat Pro.
- Clique em "Arquivo" > "Propriedades" e selecione a guia "Segurança".
- Clique no menu suspenso "Método de segurança".
- Altere a configuração de "Segurança por senha" para "Sem segurança."
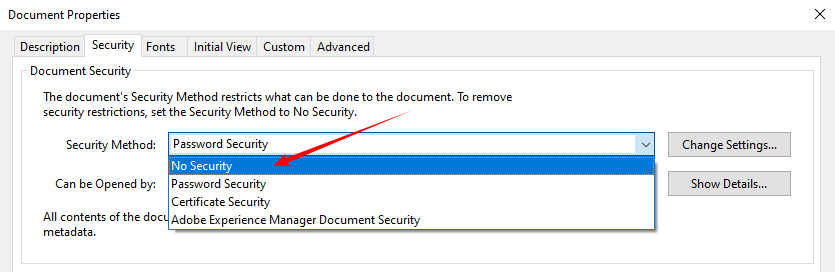
- Uma caixa de diálogo aparecerá solicitando a senha de permissões. Digite-a e clique em OK.
- Clique em OK novamente para salvar as alterações. Agora você pode editar e copiar livremente.
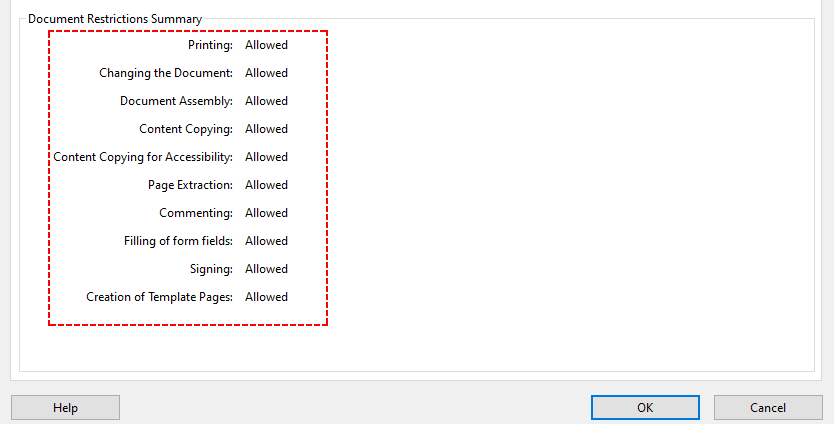
Nota: Se você não souber a senha de permissões, o Adobe Acrobat Pro não permitirá que você remova as restrições. Você precisará usar um dos métodos alternativos abaixo.
Método 3: Usando um removedor de permissões de PDF online
Se você não tem acesso a um navegador de desktop ou prefere uma solução de um clique, as ferramentas gratuitas de remoção de permissão de PDF online são uma boa alternativa. Essas ferramentas removem as restrições de permissão diretamente e funcionam em qualquer dispositivo (Windows, Mac, iPhone, Android)
Nota de segurança importante:
Nunca envie documentos confidenciais, sigilosos ou legalmente protegidos para um site em que você não confia. Para arquivos não confidenciais, os seguintes serviços são respeitáveis:
- Smallpdf (Desbloquear PDF) – Interface simples, sem instalação, funciona no navegador.
- ILovePDF – Oferece processamento em lote com uma conta gratuita.
- Soda PDF – Fornece versões online e de desktop.
Passos para desbloquear permissões de PDF online:
- Acesse o site da ferramenta de desbloqueio de PDF de sua escolha.
- Carregue seu arquivo PDF (arraste e solte ou clique em “ESCOLHER ARQUIVOS”).
- Aguarde a ferramenta remover as restrições automaticamente.
- Baixe o PDF desbloqueado — agora você pode editar, imprimir ou copiar seu conteúdo.
A maioria dos desbloqueadores de PDF online não exige que você saiba a senha de permissões — eles removem as restrições recriptografando o arquivo sem elas.
Exemplo do SmallPDF:
Depois de desbloquear um PDF restrito, extrair seu conteúdo para fins analíticos costuma ser um próximo passo fundamental. Aqui está um mergulho profundo nas principais ferramentas e técnicas comprovadas para extrair texto de documentos PDF.
Método 4: Usando a ferramenta de linha de comando
Se você se sente à vontade com interfaces de linha de comando (CLI), ferramentas como o QPDF permitem remover permissões de PDF de forma rápida e eficiente. O QPDF é de código aberto, multiplataforma e funciona totalmente offline, tornando-o ideal para documentos confidenciais ou processamento em lote.
Passos para usar o QPDF:
- Baixe o QPDF em qpdf.sourceforge.io e instale-o em seu sistema (Windows, Mac, Linux).
- Abra o Prompt de Comando (Windows) ou o Terminal (Mac/Linux).
- Navegue até a pasta onde seu PDF está salvo.
- Digite o comando de descriptografia (substitua os nomes dos arquivos pelos seus):
qpdf --decrypt "Restricted.pdf" "Unlocked.pdf"
- Pressione Enter. O QPDF removerá todas as permissões e salvará o arquivo desbloqueado.
Por que usar o QPDF?
A melhor parte? Ele funciona totalmente offline, então seus arquivos confidenciais nunca saem do seu dispositivo. Você pode até mesmo criar um script para desbloquear uma pasta inteira de PDFs de uma só vez. E, ao contrário do truque de impressão, funciona mesmo que a impressão esteja bloqueada.
Método 5: Usando o Free Spire.PDF para .NET (C#)
Para desenvolvedores .NET ou qualquer pessoa que trabalhe com aplicativos C#, o Free Spire.PDF for .NET é uma biblioteca gratuita que permite remover programaticamente as permissões de PDF. Funciona offline e também suporta a criptografia padrão de PDF.
Instalar via NuGet: Install-Package FreeSpire.PDF
Código C# para remover permissões de PDF
O código a seguir carrega um PDF com a senha do proprietário (senha de permissão) e, em seguida, chama o método Decrypt() para remover toda a criptografia e restrições.
using Spire.Pdf;

namespace RemovePermissions
{
    class Program
    {
        static void Main(string[] args)
        {
            // Create a PdfDocument object
            PdfDocument pdf = new PdfDocument();

            // Load the PDF with the owner (permission) password.
            pdf.LoadFromFile( @"F:\Restricted.pdf", "123abc");

            // Decrypt the PDF – this removes all encryption and permissions
            pdf.Decrypt();

            // Save as a new PDF without any restrictions
            pdf.SaveToFile("RemovedPermissions.pdf");
        }
    }
}
Principais vantagens deste método
- Programabilidade total: integre a lógica de desbloqueio diretamente em seus aplicativos .NET existentes.
- Processamento em lote: desbloqueie centenas de PDFs restritos com algumas linhas de código.
- Preserva todos os elementos do PDF: mantém hiperlinks, formulários preenchíveis, marcadores, assinaturas digitais e formatação.
- Suporte multiplataforma: funciona com .NET Framework (4.8+)/ .NET Standard (2.0) e é compatível com Windows, Linux e macOS.
Dica profissional: se você precisar apenas ajustar as permissões existentes em vez de removê-las totalmente, o Free Spire.PDF for .NET permite que você altere as permissões do PDF diretamente.
Comparação de todos os métodos de remoção de permissão de PDF
Use esta tabela de referência rápida para escolher o melhor método para suas necessidades. Destacamos custo, dificuldade, casos de uso e requisitos de senha para cada um:
| Método | Custo | Dificuldade | Melhor para | Senha necessária? |
|---|---|---|---|---|
| Truque de imprimir para PDF | 100% Gratuito | Muito fácil | Soluções rápidas quando a impressão é permitida | Não |
| Adobe Acrobat Pro | Pago (Assinatura) | Fácil | Profissionais, edição diária, arquivos confidenciais | Sim |
| Ferramentas online gratuitas | Gratuito (geralmente) | Muito fácil | Arquivos únicos (não confidenciais) | Às vezes |
| QPDF (Linha de Comando) | 100% Gratuito | Moderado | usuários de tecnologia, processamento em lote, arquivos confidenciais | Não |
| Free Spire.PDF para .NET | Gratuito (com limites) | Moderado (C#) | Desenvolvedores que integram em aplicativos .NET | Sim |
Perguntas Frequentes (FAQ)
Q1: É legal remover permissões de arquivos PDF?
R: Sim, se você for o proprietário do PDF ou tiver permissão explícita do proprietário. A remoção de permissões de um PDF que você não possui ou não tem direitos pode violar leis de direitos autorais, termos de serviço ou regras de proteção de dados.
Q2: A remoção de permissões afetará a qualidade do PDF?
R: Não. A maioria das ferramentas (Adobe Acrobat, QPDF, Smallpdf, Free Spire.PDF) remove permissões sem alterar o conteúdo, a formatação ou a resolução. A única exceção é o método “Imprimir para PDF”, que pode perder elementos interativos ou causar pequenas alterações na formatação.
Q3: Posso remover permissões de vários PDFs de uma vez?
R: Sim. O Adobe Acrobat Pro (processamento em lote), o QPDF (via script) e o Free Spire.PDF (usando loops) suportam operações em massa. As ferramentas online geralmente limitam o processamento em lote a planos pagos
Q4: Não sei a senha de permissões. Ainda posso remover as restrições?
R: Em muitos casos, sim. O truque de imprimir para PDF, os desbloqueadores online e o QPDF podem remover restrições sem exigir a senha do proprietário, porque funcionam recriando o arquivo. No entanto, algumas criptografias de alto nível podem exigir a senha.
Palavras Finais
A remoção de permissões de PDF depende de suas necessidades. Para arquivos rápidos e não confidenciais, use ferramentas online como o Smallpdf ou o truque de imprimir para PDF. Para trabalhos confidenciais ou profissionais, as opções offline como o Adobe Acrobat Pro ou o QPDF são as melhores. Os desenvolvedores podem integrar o desbloqueio via Free Spire.PDF for .NET.
Seguindo os passos deste guia, você poderá desbloquear qualquer PDF e acessar seu conteúdo livremente. Lembre-se de remover apenas as permissões de PDFs que você possui ou tem permissão para modificar e sempre priorize ferramentas que protejam seus dados (especialmente para arquivos confidenciais).
Veja também
PDF 권한 제거 – 온라인, 오프라인 및 코드를 통해
중요한 PDF를 다운로드했는데 편집, 텍스트 복사, 심지어 인쇄조차 할 수 없었던 적이 있나요? 아마도 권한 제한(종종 "보안됨" 또는 "보호됨"으로 표시됨)이 있는 PDF를 다루고 있을 가능성이 높습니다. 이러한 제한이 방해가 될 때, 문서를 자유롭게 다룰 수 있도록 PDF 파일에서 권한을 제거하는 신뢰할 수 있는 방법이 필요합니다.
이 기사에서는 무료 온라인 도구와 브라우저 트릭부터 전문 데스크톱 소프트웨어 및 개발자를 위한 프로그래밍 방식 솔루션에 이르기까지 PDF 권한을 제거하는 다섯 가지 신뢰할 수 있는 방법을 안내합니다.
- PDF 권한이란 무엇인가요?
- 방법 1: PDF로 인쇄 트릭 사용하기
- 방법 2: Adobe Acrobat Pro 사용하기
- 방법 3: 온라인 PDF 권한 제거기 사용하기
- 방법 4: QPDF 명령줄 도구 사용하기
- 방법 5: Free Spire.PDF for .NET (C#) 사용하기
- 모든 PDF 권한 제거 방법 비교
- 자주 묻는 질문 (FAQ)
PDF 권한이란 무엇인가요?
PDF 권한("소유자 암호" 또는 "제한"이라고도 함)은 문서가 열린 후 사용자가 할 수 있는 작업을 제어하는 보안 설정입니다. 보기를 완전히 막는 문서 열기 암호와 달리, 권한 암호는 보기는 허용하지만 다음과 같은 작업을 제한합니다:
- 인쇄
- 내용 편집 또는 수정
- 텍스트 또는 이미지 복사
- 주석 또는 주해 추가
- 양식 필드 채우기
권한을 적용하는 일반적인 이유:
- 기밀 비즈니스 문서 보호 (예: 재무 보고서, 법률 계약서)
- 공식 양식의 무단 수정 방지
- 독점 콘텐츠의 배포 제어
- 승인되지 않은 사용자의 양식 작성 제한
하지만 이러한 제한은 협업하거나 정보를 추출해야 할 때 답답해질 수 있으며, 바로 이 지점에서 저희 가이드가 도움이 됩니다.
⚠️ 중요: 소유하고 있거나 수정할 법적 권한이 있는 PDF에서만 권한을 제거해야 합니다. PDF 제한을 무단으로 제거하면 저작권법이나 서비스 약관을 위반할 수 있습니다.
방법 1: PDF로 인쇄 트릭 사용하기
"PDF로 인쇄" 해결 방법은 PDF 권한을 우회하는 가장 인기 있는 무료 방법입니다. 추가 소프트웨어가 필요 없으며 대부분의 데스크톱 장치(Windows/Mac)에서 작동합니다.
이 방법이 작동하는 이유
"PDF로 인쇄" 기능은 원본의 제한을 상속하지 않는 새로운 파일을 만듭니다. 하지만 하이퍼링크, 채울 수 있는 양식 필드, 북마크, 디지털 서명과 같은 대화형 요소는 이 과정에서 손실될 수 있다는 점에 유의하세요.
중요 요구 사항: 원본 PDF는 인쇄를 허용해야 합니다. 파일에 "인쇄 금지" 제한이 있는 경우 인쇄 옵션이 회색으로 표시되고 이 트릭은 실패합니다.
PDF로 인쇄하는 단계:
- 제한된 PDF를 뷰어(Microsoft Edge, Chrome)에서 엽니다.
- 오른쪽 상단의 인쇄 아이콘을 클릭하거나 Ctrl + P / Cmd + P를 사용합니다.
- 인쇄 대화 상자에서 "대상" 드롭다운 메뉴를 클릭합니다.
- 프린터로 "Microsoft Print to PDF"(또는 "PDF로 저장")를 선택합니다.
- "인쇄"를 클릭하고 새 PDF 파일을 저장할 위치를 선택합니다.
- 새 파일에는 권한 제한이 없지만 일부 서식이 손실될 수 있습니다.
PDF로 인쇄 해결 방법을 사용하여 권한을 제거하면 원본 문서의 모든 채울 수 있는 양식 필드가 사라져 평평하고 비대화형 파일만 남게 됩니다. 이 가이드를 참조하여 채울 수 있는 PDF를 만들고 손실된 필드를 복원하세요.
방법 2: Adobe Acrobat Pro 사용하기
Adobe Acrobat Pro DC 또는 Standard 구독이 있는 경우, 이것이 가장 신뢰할 수 있는 방법입니다. Adobe Acrobat은 PDF 관리의 업계 표준이며, 권한 제거를 빠르고 간단하게 만듭니다.
✅ 가장 적합한 대상: 전문가, 일상적인 PDF 편집, 민감한 파일(오프라인 처리).
Adobe 사용 단계:
- Adobe Acrobat Pro에서 제한된 PDF를 엽니다.
- "파일" > "속성"을 클릭하고 "보안" 탭을 선택합니다.
- "보안 방법" 드롭다운 메뉴를 클릭합니다.
- 설정을 "암호 보안"에서 "보안 없음"으로 변경합니다.
- 권한 암호를 묻는 대화 상자가 나타납니다. 암호를 입력하고 확인을 클릭합니다.
- 다시 확인을 클릭하여 변경 사항을 저장합니다. 이제 자유롭게 편집하고 복사할 수 있습니다.
참고: 권한 암호를 모르는 경우 Adobe Acrobat Pro는 제한을 제거하도록 허용하지 않습니다. 아래의 대체 방법 중 하나를 사용해야 합니다.
방법 3: 온라인 PDF 권한 제거기 사용하기
데스크톱 브라우저에 액세스할 수 없거나 원클릭 솔루션을 선호하는 경우, 무료 온라인 PDF 권한 제거 도구가 좋은 대안입니다. 이러한 도구는 권한 제한을 직접 제거하며 모든 장치(Windows, Mac, iPhone, Android)에서 작동합니다.
중요 보안 참고 사항:
신뢰하지 않는 웹사이트에 민감하거나, 기밀이거나, 법적으로 보호되는 문서를 절대 업로드하지 마세요. 민감하지 않은 파일의 경우 다음 서비스는 평판이 좋습니다:
- Smallpdf (PDF 잠금 해제) – 간단한 인터페이스, 설치 불필요, 브라우저에서 작동.
- ILovePDF – 무료 계정으로 일괄 처리를 제공합니다.
- Soda PDF – 온라인 및 데스크톱 버전을 모두 제공합니다.
온라인으로 PDF 권한을 잠금 해제하는 단계:
- 선택한 PDF 잠금 해제 도구 웹사이트로 이동합니다.
- PDF 파일을 업로드합니다(드래그 앤 드롭 또는 "파일 선택" 클릭).
- 도구가 자동으로 제한을 제거할 때까지 기다립니다.
- 잠금 해제된 PDF를 다운로드합니다. 이제 내용을 편집, 인쇄 또는 복사할 수 있습니다.
대부분의 온라인 PDF 잠금 해제기는 권한 암호를 알 필요가 없습니다. 암호 없이 파일을 다시 암호화하여 제한을 제거합니다.
SmallPDF 예시:
제한된 PDF의 잠금을 해제한 후에는 분석 목적으로 콘텐츠를 추출하는 것이 종종 중요한 다음 단계입니다. PDF 문서에서 텍스트를 추출하기 위한 최고의 도구와 검증된 기술에 대해 자세히 알아보세요.
방법 4: 명령줄 도구 사용하기
명령줄 인터페이스(CLI)에 익숙하다면 QPDF와 같은 도구를 사용하여 PDF 권한을 빠르고 효율적으로 제거할 수 있습니다. QPDF는 오픈 소스이며, 크로스 플랫폼이고, 완전히 오프라인으로 작동하므로 민감한 문서나 일괄 처리에 이상적입니다.
QPDF 사용 단계:
- qpdf.sourceforge.io에서 QPDF를 다운로드하여 시스템(Windows, Mac, Linux)에 설치합니다.
- 명령 프롬프트(Windows) 또는 터미널(Mac/Linux)을 엽니다.
- PDF가 저장된 폴더로 이동합니다.
- 암호 해독 명령을 입력합니다(파일 이름을 자신의 것으로 교체):
qpdf --decrypt "Restricted.pdf" "Unlocked.pdf"
- Enter 키를 누릅니다. QPDF가 모든 권한을 제거하고 잠금 해제된 파일을 저장합니다.
QPDF를 사용하는 이유?
가장 좋은 점은? 완전히 오프라인으로 실행되므로 민감한 파일이 장치를 떠나지 않습니다. 스크립트를 작성하여 한 번에 전체 PDF 폴더의 잠금을 해제할 수도 있습니다. 그리고 인쇄 트릭과 달리 인쇄가 잠겨 있어도 작동합니다.
방법 5: Free Spire.PDF for .NET (C#) 사용하기
.NET 개발자나 C# 애플리케이션으로 작업하는 모든 사람에게 Free Spire.PDF for .NET은 프로그래밍 방식으로 PDF 권한을 제거할 수 있는 무료 라이브러리입니다. 오프라인으로 작동하며 표준 PDF 암호화도 지원합니다.
NuGet을 통해 설치: Install-Package FreeSpire.PDF
PDF에서 권한을 제거하는 C# 코드
다음 코드는 소유자 암호(권한 암호)로 PDF를 로드한 다음 Decrypt() 메서드를 호출하여 모든 암호화 및 제한을 제거합니다.
using Spire.Pdf;

namespace RemovePermissions
{
    class Program
    {
        static void Main(string[] args)
        {
            // PdfDocument 객체 생성
            PdfDocument pdf = new PdfDocument();

            // 소유자(권한) 암호로 PDF 로드
            pdf.LoadFromFile( @"F:\Restricted.pdf", "123abc");

            // PDF 암호 해독 – 모든 암호화 및 권한 제거
            pdf.Decrypt();

            // 제한 없는 새 PDF로 저장
            pdf.SaveToFile("RemovedPermissions.pdf");
        }
    }
}
이 방법의 핵심 장점
- 완전한 프로그래밍 가능성: 잠금 해제 로직을 기존 .NET 앱에 직접 통합합니다.
- 일괄 처리: 몇 줄의 코드로 수백 개의 제한된 PDF 잠금을 해제합니다.
- 모든 PDF 요소 보존: 하이퍼링크, 채울 수 있는 양식, 북마크, 디지털 서명 및 서식을 유지합니다.
- 크로스 플랫폼 지원: .NET Framework (4.8+)/ .NET Standard (2.0)와 함께 작동하며 Windows, Linux 및 macOS와 호환됩니다.
전문가 팁: 권한을 완전히 제거하는 대신 기존 권한을 조정해야 하는 경우, Free Spire.PDF for .NET을 사용하면 PDF 권한을 직접 변경할 수 있습니다.
모든 PDF 권한 제거 방법 비교
이 빠른 참조 표를 사용하여 필요에 가장 적합한 방법을 선택하세요. 각 방법에 대한 비용, 난이도, 사용 사례 및 암호 요구 사항을 강조했습니다:
| 방법 | 비용 | 난이도 | 가장 적합한 대상 | 암호 필요 여부? |
|---|---|---|---|---|
| PDF로 인쇄 트릭 | 100% 무료 | 매우 쉬움 | 인쇄가 허용될 때 빠른 수정 | 아니요 |
| Adobe Acrobat Pro | 유료 (구독) | 쉬움 | 전문가, 일상적인 편집, 민감한 파일 | 예 |
| 무료 온라인 도구 | 무료 (보통) | 매우 쉬움 | 일회성 파일 (민감하지 않음) | 때때로 |
| QPDF (명령줄) | 100% 무료 | 중간 | 기술 사용자, 일괄 처리, 민감한 파일 | 아니요 |
| Free Spire.PDF for .NET | 무료 (제한 있음) | 중간 (C#) | .NET 앱에 통합하는 개발자 | 예 |
자주 묻는 질문 (FAQ)
Q1: PDF 파일에서 권한을 제거하는 것이 합법적인가요?
A: 예, PDF를 소유하고 있거나 소유자로부터 명시적인 허가를 받은 경우 합법입니다. 소유하지 않거나 권리가 없는 PDF에서 권한을 제거하면 저작권법, 서비스 약관 또는 데이터 보호 규칙을 위반할 수 있습니다.
Q2: 권한을 제거하면 PDF의 품질에 영향을 미치나요?
A: 아니요. 대부분의 도구(Adobe Acrobat, QPDF, Smallpdf, Free Spire.PDF)는 내용, 서식 또는 해상도를 변경하지 않고 권한을 제거합니다. 유일한 예외는 "PDF로 인쇄" 방법으로, 대화형 요소를 잃거나 사소한 서식 변경이 발생할 수 있습니다.
Q3: 한 번에 여러 PDF에서 권한을 제거할 수 있나요?
A: 예. Adobe Acrobat Pro(일괄 처리), QPDF(스크립팅을 통해) 및 Free Spire.PDF(루프 사용)는 대량 작업을 지원합니다. 온라인 도구는 일반적으로 유료 플랜에 일괄 처리를 제한합니다.
Q4: 권한 암호를 모릅니다. 그래도 제한을 제거할 수 있나요?
A: 많은 경우에 예. PDF로 인쇄 트릭, 온라인 잠금 해제기 및 QPDF는 파일을 다시 생성하여 작동하므로 소유자 암호 없이 제한을 제거할 수 있습니다. 그러나 일부 높은 수준의 암호화는 암호가 필요할 수 있습니다.
마지막 말
PDF에서 권한을 제거하는 것은 필요에 따라 다릅니다. 빠르고 민감하지 않은 파일의 경우 Smallpdf와 같은 온라인 도구나 PDF로 인쇄 트릭을 사용하세요. 민감하거나 전문적인 작업의 경우 Adobe Acrobat Pro 또는 QPDF와 같은 오프라인 옵션이 가장 좋습니다. 개발자는 Free Spire.PDF for .NET을 통해 잠금 해제를 통합할 수 있습니다.
이 가이드의 단계를 따르면 모든 PDF의 잠금을 해제하고 콘텐츠에 자유롭게 액세스할 수 있습니다. 소유하거나 수정할 권한이 있는 PDF에서만 권한을 제거하고, 항상 데이터를 보호하는 도구를 우선적으로 사용하세요(특히 민감한 파일의 경우).
참고 항목
Rimuovere le autorizzazioni dal PDF – online, offline e tramite codice
Indice
- Cosa sono le autorizzazioni PDF?
- Metodo 1: Utilizzare il trucco della stampa in PDF
- Metodo 2: Utilizzare Adobe Acrobat Pro
- Metodo 3: Utilizzare un dispositivo di rimozione delle autorizzazioni PDF online
- Metodo 4: Utilizzare lo strumento da riga di comando QPDF
- Metodo 5: Utilizzare Free Spire.PDF per .NET (C#)
- Confronto di tutti i metodi di rimozione delle autorizzazioni PDF
- Domande frequenti (FAQ)
Hai mai scaricato un PDF cruciale solo per scoprire che non puoi modificarlo, copiarne il testo o persino stamparlo? Probabilmente hai a che fare con un PDF con restrizioni di autorizzazione (spesso etichettato come "Protetto"). Quando queste restrizioni ti ostacolano, hai bisogno di un modo affidabile per rimuovere le autorizzazioni dai file PDF in modo da poter lavorare liberamente con il documento.
Questo articolo ti guiderà attraverso cinque metodi affidabili per rimuovere le autorizzazioni PDF, che vanno da strumenti online gratuiti e trucchi del browser a software desktop professionali e soluzioni programmatiche per sviluppatori.
- Cosa sono le autorizzazioni PDF?
- Metodo 1: Utilizzare il trucco della stampa in PDF
- Metodo 2: Utilizzare Adobe Acrobat Pro
- Metodo 3: Utilizzare un dispositivo di rimozione delle autorizzazioni PDF online
- Metodo 4: Utilizzare lo strumento da riga di comando QPDF
- Metodo 5: Utilizzare Free Spire.PDF per .NET (C#)
- Confronto di tutti i metodi di rimozione delle autorizzazioni PDF
- Domande frequenti (FAQ)
Cosa sono le autorizzazioni PDF?
Le autorizzazioni PDF (chiamate anche "password del proprietario" o "restrizioni") sono impostazioni di sicurezza che controllano ciò che gli utenti possono fare con un documento dopo che è stato aperto. A differenza di una password di apertura del documento che impedisce completamente la visualizzazione, una password di autorizzazione consente la visualizzazione ma limita azioni come:
- Stampa
- Modifica o modifica del contenuto
- Copia di testo o immagini
- Aggiunta di commenti o annotazioni
- Compilazione dei campi del modulo
Motivi comuni per l'applicazione delle autorizzazioni:
- Protezione di documenti aziendali riservati (ad es. rapporti finanziari, contratti legali)
- Prevenzione di modifiche non autorizzate ai moduli ufficiali
- Controllo della distribuzione di contenuti proprietari
- Limitare la compilazione dei moduli per gli utenti non approvati
Tuttavia, queste restrizioni possono diventare frustranti quando è necessario collaborare o estrarre informazioni, ed è qui che entra in gioco la nostra guida.
⚠️ Importante: dovresti rimuovere le autorizzazioni solo dai PDF di tua proprietà o per i quali hai l'autorizzazione legale alla modifica. La rimozione non autorizzata delle restrizioni PDF può violare le leggi sul copyright o i termini di servizio.
Metodo 1: Utilizzare il trucco della stampa in PDF
La soluzione alternativa "Stampa in PDF" è il metodo gratuito più popolare per bypassare le autorizzazioni PDF. Non richiede software aggiuntivo e funziona sulla maggior parte dei dispositivi desktop (Windows/Mac).
Perché funziona
La funzione "Stampa in PDF" crea un file nuovo di zecca che non eredita alcuna restrizione dall'originale. Ma tieni presente che elementi interattivi come collegamenti ipertestuali, campi modulo compilabili, segnalibri e firme digitali potrebbero andare persi nel processo.
Requisito critico: il PDF originale deve consentire la stampa. Se il file ha una restrizione "nessuna stampa", l'opzione di stampa sarà disattivata e questo trucco fallirà.
Passaggi per stampare in PDF:
- Apri il PDF con restrizioni in un visualizzatore (Microsoft Edge, Chrome).
- Fai clic sull'icona Stampa nell'angolo in alto a destra (o usa Ctrl + P / Cmd + P).
- Nella finestra di dialogo di stampa, fai clic sul menu a discesa "Destinazione".
- Seleziona “Microsoft Print to PDF” (o “Salva come PDF”) come stampante.
- Fai clic su “Stampa” e scegli una posizione per salvare il nuovo file PDF.
- Il nuovo file non avrà restrizioni di autorizzazione (ma potrebbe perdere parte della formattazione).
Quando si utilizza la soluzione alternativa Stampa in PDF per rimuovere le autorizzazioni, tutti i campi modulo compilabili nel documento originale scompaiono, lasciando un file piatto e non interattivo. Fare riferimento a questa guida per creare un PDF compilabile e ripristinare i campi persi.
Metodo 2: Utilizzare Adobe Acrobat Pro
Se hai un abbonamento ad Adobe Acrobat Pro DC o Standard, questo è il metodo più affidabile. Adobe Acrobat è lo standard del settore per la gestione dei PDF e rende la rimozione delle autorizzazioni rapida e semplice.
✅ Ideale per: professionisti, modifica quotidiana di PDF e file sensibili (elaborazione offline).
Passaggi per utilizzare Adobe:
- Apri il PDF con restrizioni in Adobe Acrobat Pro.
- Fai clic su "File" > "Proprietà" e seleziona la scheda "Sicurezza".
- Fai clic sul menu a discesa "Metodo di sicurezza".
- Modifica l'impostazione da "Sicurezza password" a "Nessuna sicurezza".
- Apparirà una finestra di dialogo che richiede la password delle autorizzazioni. Inseriscila e fai clic su OK.
- Fai di nuovo clic su OK per salvare le modifiche. Ora puoi modificare e copiare liberamente.
Nota: se non conosci la password delle autorizzazioni, Adobe Acrobat Pro non ti consentirà di rimuovere le restrizioni. Dovrai utilizzare uno dei metodi alternativi di seguito.
Metodo 3: Utilizzare un dispositivo di rimozione delle autorizzazioni PDF online
Se non hai accesso a un browser desktop o preferisci una soluzione con un clic, gli strumenti gratuiti per la rimozione delle autorizzazioni PDF online sono una buona alternativa. Questi strumenti rimuovono direttamente le restrizioni di autorizzazione e funzionano su qualsiasi dispositivo (Windows, Mac, iPhone, Android)
Nota importante sulla sicurezza:
Non caricare mai documenti sensibili, riservati o legalmente protetti su un sito Web di cui non ti fidi. Per i file non sensibili, i seguenti servizi sono affidabili:
- Smallpdf (Sblocca PDF) – Interfaccia semplice, nessuna installazione, funziona nel browser.
- ILovePDF – Offre l'elaborazione in batch con un account gratuito.
- Soda PDF – Fornisce versioni sia online che desktop.
Passaggi per sbloccare le autorizzazioni PDF online:
- Vai al sito Web dello strumento di sblocco PDF scelto.
- Carica il tuo file PDF (trascina e rilascia o fai clic su "SCEGLI FILE").
- Attendi che lo strumento rimuova automaticamente le restrizioni.
- Scarica il PDF sbloccato: ora puoi modificarne, stamparne o copiarne il contenuto.
La maggior parte degli sbloccatori di PDF online non richiede la conoscenza della password delle autorizzazioni: rimuovono le restrizioni crittografando nuovamente il file senza di esse.
Esempio di SmallPDF:
Una volta sbloccato un PDF con restrizioni, l'estrazione del suo contenuto a scopo di analisi è spesso un passaggio chiave successivo. Ecco un'analisi approfondita dei migliori strumenti e delle tecniche collaudate per estrarre testo da documenti PDF.
Metodo 4: Utilizzare gli strumenti da riga di comando
Se hai familiarità con le interfacce a riga di comando (CLI), strumenti come QPDF ti consentono di rimuovere le autorizzazioni PDF in modo rapido ed efficiente. QPDF è open source, multipiattaforma e funziona completamente offline, rendendolo ideale per documenti sensibili o elaborazione batch.
Passaggi per utilizzare QPDF:
- Scarica QPDF da qpdf.sourceforge.io e installalo sul tuo sistema (Windows, Mac, Linux).
- Apri il prompt dei comandi (Windows) o il terminale (Mac/Linux).
- Vai alla cartella in cui è salvato il tuo PDF.
- Immetti il comando di decrittografia (sostituisci i nomi dei file con i tuoi):
qpdf --decrypt "Restricted.pdf" "Unlocked.pdf"
- Premi Invio. QPDF rimuoverà tutte le autorizzazioni e salverà il file sbloccato.
Perché usare QPDF?
La parte migliore? Funziona completamente offline, quindi i tuoi file sensibili non lasciano mai il tuo dispositivo. Puoi persino creare uno script per sbloccare un'intera cartella di PDF in una volta sola. E a differenza del trucco della stampa, funziona anche se la stampa è bloccata.
Metodo 5: Utilizzare Free Spire.PDF per .NET (C#)
Per gli sviluppatori .NET o chiunque lavori con applicazioni C#, Free Spire.PDF per .NET è una libreria gratuita che consente di rimuovere programmaticamente le autorizzazioni PDF. Funziona offline e supporta anche la crittografia PDF standard.
Installa tramite NuGet: Install-Package FreeSpire.PDF
Codice C# per rimuovere le autorizzazioni dal PDF
Il codice seguente carica un PDF con la password del proprietario (password di autorizzazione) e quindi chiama il metodo Decrypt() per rimuovere tutte le crittografie e le restrizioni.
using Spire.Pdf;

namespace RemovePermissions
{
    class Program
    {
        static void Main(string[] args)
        {
            // Create a PdfDocument object
            PdfDocument pdf = new PdfDocument();

            // Load the PDF with the owner (permission) password.
            pdf.LoadFromFile( @"F:\Restricted.pdf", "123abc");

            // Decrypt the PDF – this removes all encryption and permissions
            pdf.Decrypt();

            // Save as a new PDF without any restrictions
            pdf.SaveToFile("RemovedPermissions.pdf");
        }
    }
}
Vantaggi principali di questo metodo
- Completa programmabilità: integra la logica di sblocco direttamente nelle tue app .NET esistenti.
- Elaborazione batch: sblocca centinaia di PDF con restrizioni con poche righe di codice.
- Conserva tutti gli elementi PDF: mantiene collegamenti ipertestuali, moduli compilabili, segnalibri, firme digitali e formattazione.
- Supporto multipiattaforma: funziona con .NET Framework (4.8+)/ .NET Standard (2.0) ed è compatibile con Windows, Linux e macOS.
Suggerimento professionale: se hai solo bisogno di regolare le autorizzazioni esistenti anziché rimuoverle completamente, Free Spire.PDF per .NET ti consente di modificare direttamente le autorizzazioni PDF.
Confronto di tutti i metodi di rimozione delle autorizzazioni PDF
Utilizza questa tabella di riferimento rapido per scegliere il metodo migliore per le tue esigenze. Abbiamo evidenziato costi, difficoltà, casi d'uso e requisiti di password per ciascuno:
| Metodo | Costo | Difficoltà | Ideale per | Password richiesta? |
|---|---|---|---|---|
| Trucco della stampa in PDF | 100% gratuito | Molto facile | Correzioni rapide quando la stampa è consentita | No |
| Adobe Acrobat Pro | A pagamento (abbonamento) | Facile | Professionisti, editing quotidiano, file sensibili | Sì |
| Strumenti online gratuiti | Gratuito (di solito) | Molto facile | File una tantum (non sensibili) | A volte |
| QPDF (riga di comando) | 100% gratuito | Moderato | utenti esperti, elaborazione batch, file sensibili | No |
| Free Spire.PDF per .NET | Gratuito (con limiti) | Moderato (C#) | Sviluppatori che si integrano nelle app .NET | Sì |
Domande frequenti (FAQ)
D1: È legale rimuovere le autorizzazioni dai file PDF?
R: Sì, se sei il proprietario del PDF o hai l'autorizzazione esplicita del proprietario. La rimozione delle autorizzazioni da un PDF di cui non sei proprietario o di cui non hai i diritti può violare le leggi sul copyright, i termini di servizio o le norme sulla protezione dei dati.
D2: La rimozione delle autorizzazioni influirà sulla qualità del PDF?
R: No. La maggior parte degli strumenti (Adobe Acrobat, QPDF, Smallpdf, Free Spire.PDF) rimuove le autorizzazioni senza alterare il contenuto, la formattazione o la risoluzione. L'unica eccezione è il metodo "Stampa in PDF", che potrebbe perdere elementi interattivi o causare lievi spostamenti di formattazione.
D3: Posso rimuovere le autorizzazioni da più PDF contemporaneamente?
R: Sì. Adobe Acrobat Pro (elaborazione batch), QPDF (tramite scripting) e Free Spire.PDF (utilizzando i loop) supportano le operazioni in blocco. Gli strumenti online di solito limitano l'elaborazione batch ai piani a pagamento
D4: Non conosco la password delle autorizzazioni. Posso comunque rimuovere le restrizioni?
R: In molti casi, sì. Il trucco Stampa in PDF, gli sbloccatori online e QPDF possono rimuovere le restrizioni senza richiedere la password del proprietario perché funzionano ricreando il file. Tuttavia, alcune crittografie di alto livello potrebbero richiedere la password.
Parole finali
La rimozione delle autorizzazioni dal PDF dipende dalle tue esigenze. Per file veloci e non sensibili, utilizza strumenti online come Smallpdf o il trucco Stampa in PDF. Per lavori sensibili o professionali, le opzioni offline come Adobe Acrobat Pro o QPDF sono le migliori. Gli sviluppatori possono integrare lo sblocco tramite Free Spire.PDF per .NET.
Seguendo i passaggi di questa guida, sarai in grado di sbloccare qualsiasi PDF e accedere liberamente al suo contenuto. Ricorda di rimuovere le autorizzazioni solo dai PDF di tua proprietà o per i quali hai il permesso di modificare e di dare sempre la priorità agli strumenti che proteggono i tuoi dati (specialmente per i file sensibili).