Knowledgebase (2417)
Children categories
Printing Word documents is a fundamental aspect of document management, allowing you to transform digital files into tangible, physical copies. Whether you need to produce hard copies for reference, distribution, or archival purposes, the ability to print Word documents is a valuable skill that remains relevant in various professional and personal settings.
In this article, you will learn how to print Word documents in Java using the Spire.Doc for Java library and java.awt.print package.
- Print Word with the Default Printer in Java
- Print Word with a Specified Printer in Java
- Print Word with a Print Dialog Box in Java
- Print a Range of Pages in Word in Java
- Print Word in Duplex Mode in Java
Install Spire.Doc for Java
First, you're required to add the Spire.Doc.jar file as a dependency in your Java program. The JAR file can be downloaded from this link. If you use Maven, you can easily import the JAR file in your application by adding the following code to your project's pom.xml file.
<repositories>
    <repository>
        <id>com.e-iceblue</id>
        <name>e-iceblue</name>
        <url>https://repo.e-iceblue.com/nexus/content/groups/public/</url>
    </repository>
</repositories>
<dependencies>
    <dependency>
        <groupId>e-iceblue</groupId>
        <artifactId>spire.doc</artifactId>
        <version>14.8.4</version>
    </dependency>
</dependencies>
Print Word with the Default Printer in Java
Printing Word documents with the default printer is a convenient and straightforward method. This approach is often suitable for regular printing tasks when specific printer settings are not necessary or when users prefer to utilize the default configurations set in their printer.
The following are the steps to print Word documents with the default printer using Spire.Doc for Java and java.awt.print.
- Create a PrinterJob object, and call the methods under it to set up a print job.
- Create a Document object, and load a Word document using Document.LoadFromFile() method.
- Render each page of the document in the specified format using PrinterJob.setPrintable() method.
- Call PrinterJob.print() method to print the Word document.
- Java
import com.spire.doc.Document;

import java.awt.print.PageFormat;
import java.awt.print.Paper;
import java.awt.print.PrinterException;
import java.awt.print.PrinterJob;

public class PrintWithDefaultPrinter {

    public static void main(String[] args) {

        // Create a Document object
        Document document = new Document();

        // Load a Word file
        document.loadFromFile("C:\\Users\\Administrator\\Desktop\\Input.docx");

        // Create a PrinterJob object
        PrinterJob printerJob = PrinterJob.getPrinterJob();

        // Create a PageFormat object and set it to the default size and orientation
        PageFormat pageFormat = printerJob.defaultPage();

        // Return a copy of the Paper object associated with this PageFormat
        Paper paper = pageFormat.getPaper();

        // Set the imageable area of this Paper
        paper.setImageableArea(0, 0, pageFormat.getWidth(), pageFormat.getHeight());

        // Set the number of copies to be printed
        printerJob.setCopies(1);

        // Set the Paper object for this PageFormat
        pageFormat.setPaper(paper);

        // Call painter to render the pages in the specified format
        printerJob.setPrintable(document, pageFormat);

        // Print document
        try {
            printerJob.print();
        } catch (PrinterException e) {
            e.printStackTrace();
        }
    }
}
Print Word with a Specified Printer in Java
Printing a Word document with a specified printer in Java allows you to choose a specific printer device to handle the printing task. This approach can be useful in scenarios where you have multiple printers available and want to direct the print output to a specific one.
The following are the steps to print Word documents with a specified printer using Spire.Doc for Java and java.awt.print.
- Create a PrinterJob object, and call the methods under it to set up a print job.
- Find the print service by the printer name using the custom method findPrintService().
- Apply the print service using PrinterJob.setPrintService() method.
- Create a Document object, and load a Word document using Document.LoadFromFile() method.
- Render each page of the document in the specified format using PrinterJob.setPrintable() method.
- Call PrinterJob.print() method to print the Word document.
- Java
import com.spire.doc.Document;

import javax.print.PrintService;
import java.awt.print.PageFormat;
import java.awt.print.Paper;
import java.awt.print.PrinterException;
import java.awt.print.PrinterJob;

public class PrintWithSpecifiedPrinter {

    public static void main(String[] args) throws PrinterException {

        // Create a PrinterJob object which is initially associated with the default printer
        PrinterJob printerJob = PrinterJob.getPrinterJob();

        // Specify printer name
        PrintService myPrintService = findPrintService("\\\\192.168.1.104\\HP LaserJet P1007");
        printerJob.setPrintService(myPrintService);

        // Create a PageFormat instance and set it to a default size and orientation
        PageFormat pageFormat = printerJob.defaultPage();

        // Return a copy of the Paper object associated with this PageFormat.
        Paper paper = pageFormat.getPaper();

        // Set the imageable area of this Paper.
        paper.setImageableArea(0, 0, pageFormat.getWidth(), pageFormat.getHeight());

        // Set the Paper object for this PageFormat.
        pageFormat.setPaper(paper);

        // Create a Document object
        Document document = new Document();

        // Load a Word file
        document.loadFromFile("C:\\Users\\Administrator\\Desktop\\Input.docx");

        // Call painter to render the pages in the specified format
        printerJob.setPrintable(document, pageFormat);

        // Print document
        try {
            printerJob.print();
        } catch (PrinterException e) {
            e.printStackTrace();
        }
    }

    // Find print service
    private static PrintService findPrintService(String printerName) {

        PrintService[] printServices = PrinterJob.lookupPrintServices();
        for (PrintService printService : printServices) {
            if (printService.getName().equals(printerName)) {
                return printService;
            }
        }
        return null;
    }
}
Print Word with a Print Dialog Box in Java
Printing a Word document with a print dialog box enables users to select a printer and customize print settings before initiating the process. By presenting a print dialog box, you provide users with flexibility and control over the printing operation.
To print Word document with a print dialog box in Java, follow these step:
- Create a PrinterJob object, and call methods under it to set up a print job.
- Create a Document object, and load a Word document using Document.LoadFromFile() method.
- Render each page of the document in the specified format using PrinterJob.setPrintable() method.
- Call PrinterJob.printDialog() method to display print dialog.
- Call PrinterJob.print() method to print the Word document.
- Java
import com.spire.doc.Document;

import java.awt.print.PageFormat;
import java.awt.print.Paper;
import java.awt.print.PrinterException;
import java.awt.print.PrinterJob;

public class PrintWithDialogBox {

    public static void main(String[] args) {

        // Create a PrinterJob object which is initially associated with the default printer
        PrinterJob printerJob = PrinterJob.getPrinterJob();

        // Create a PageFormat object and set it to a default size and orientation
        PageFormat pageFormat = printerJob.defaultPage();

        // Return a copy of the Paper object associated with this PageFormat
        Paper paper = pageFormat.getPaper();

        // Set the imageable area of this Paper
        paper.setImageableArea(0, 0, pageFormat.getWidth(), pageFormat.getHeight());

        // Set the Paper object for this PageFormat
        pageFormat.setPaper(paper);

        // Create a Document object
        Document document = new Document();

        // Load a Word file
        document.loadFromFile("C:\\Users\\Administrator\\Desktop\\Math.docx");

        // Call painter to render the pages in the specified format
        printerJob.setPrintable(document, pageFormat);

        // Display the print dialog
        if (printerJob.printDialog()) {
            try {

// Print document
                printerJob.print();
            } catch (PrinterException e) {
                e.printStackTrace();
            }
        }
    }
}
Print a Range of Pages in Word in Java
Printing a range of pages in Microsoft Word is a useful feature that allows you to select specific pages from a document and print only those pages, rather than printing the entire document. This can be particularly handy when you're working with lengthy documents or when you only need to print a specific section.
The steps to set print range while printing Word documents in Java are as follows.
- Create a PrinterJob object, and call the methods under it to set up a print job.
- Create a Document object, and load a Word document using Document.LoadFromFile() method.
- Render each page of the document in the specified format using PrinterJob.setPrintable() method.
- Create a PrintRequestAttributeSet object, and add the print range to the attribute set.
- Call PrinterJob.print() method to print the range of pages.
- Java
import com.spire.doc.Document;

import javax.print.attribute.HashPrintRequestAttributeSet;
import javax.print.attribute.PrintRequestAttributeSet;
import javax.print.attribute.standard.PageRanges;
import java.awt.print.PageFormat;
import java.awt.print.Paper;
import java.awt.print.PrinterException;
import java.awt.print.PrinterJob;

public class PrintPageRange {

    public static void main(String[] args) {

        // Create a Document object
        Document document = new Document();

        // Load a Word file
        document.loadFromFile("C:\\Users\\Administrator\\Desktop\\Input.docx");

        // Create a PrinterJob object
        PrinterJob printerJob = PrinterJob.getPrinterJob();

        // Create a PageFormat object and set it to the default size and orientation
        PageFormat pageFormat = printerJob.defaultPage();

        // Return a copy of the Paper object associated with this PageFormat
        Paper paper = pageFormat.getPaper();

        // Set the imageable area of this Paper
        paper.setImageableArea(0, 0, pageFormat.getWidth(), pageFormat.getHeight());

        // Set the number of copies
        printerJob.setCopies(1);

        // Set the Paper object for this PageFormat
        pageFormat.setPaper(paper);

        // Call painter to render the pages in the specified format
        printerJob.setPrintable(document, pageFormat);

        // Create a PrintRequestAttributeSet object
        PrintRequestAttributeSet attributeSet = new HashPrintRequestAttributeSet();

        // Set print range
        attributeSet.add(new PageRanges(1,5));

        // Print document
        try {
            printerJob.print(attributeSet);
        } catch (PrinterException e) {
            e.printStackTrace();
        }
    }
}
Print Word in Duplex Mode in Java
Duplex printing, also known as two-sided printing, allows you to print on both sides of a sheet of paper automatically, which can be beneficial for lengthy reports, presentations, or handouts.
The steps to print Word documents in duplex mode in Java are as follows.
- Create a PrinterJob object, and call the methods under it to set up a print job.
- Create a Document object, and load a Word document using Document.LoadFromFile() method.
- Render each page of the document in the specified format using PrinterJob.setPrintable() method.
- Create a PrintRequestAttributeSet object, and add the two-sided printing mode to the attribute set.
- Call PrinterJob.print() method to print the Word document.
- Java
import com.spire.doc.Document;

import javax.print.attribute.HashPrintRequestAttributeSet;
import javax.print.attribute.PrintRequestAttributeSet;
import javax.print.attribute.standard.Sides;
import java.awt.print.PageFormat;
import java.awt.print.Paper;
import java.awt.print.PrinterException;
import java.awt.print.PrinterJob;

public class PrintInDuplexMode {

    public static void main(String[] args) {

        // Create a Document object
        Document document = new Document();

        // Load a Word file
        document.loadFromFile("C:\\Users\\Administrator\\Desktop\\Input.docx");

        // Create a PrinterJob object which is initially associated with the default printer
        PrinterJob printerJob = PrinterJob.getPrinterJob();

        // Create a PageFormat object and set it to a default size and orientation
        PageFormat pageFormat = printerJob.defaultPage();

        // Return a copy of the Paper object associated with this PageFormat
        Paper paper = pageFormat.getPaper();

        // Set the imageable area of this Paper
        paper.setImageableArea(0, 0, pageFormat.getWidth(), pageFormat.getHeight());

        // Set the Paper object for this PageFormat
        pageFormat.setPaper(paper);

        // Call painter to render the pages in the specified format
        printerJob.setPrintable(document, pageFormat);

        // Create a PrintRequestAttributed object
        PrintRequestAttributeSet attributeSet = new HashPrintRequestAttributeSet();

        // Enable duplex printing mode
        attributeSet.add(Sides.TWO_SIDED_SHORT_EDGE);

        // Print document
        try {
            printerJob.print(attributeSet);
        } catch (PrinterException e) {
            e.printStackTrace();
        }
    }
}
Apply for a Temporary License
If you'd like to remove the evaluation message from the generated documents, or to get rid of the function limitations, please request a 30-day trial license for yourself.
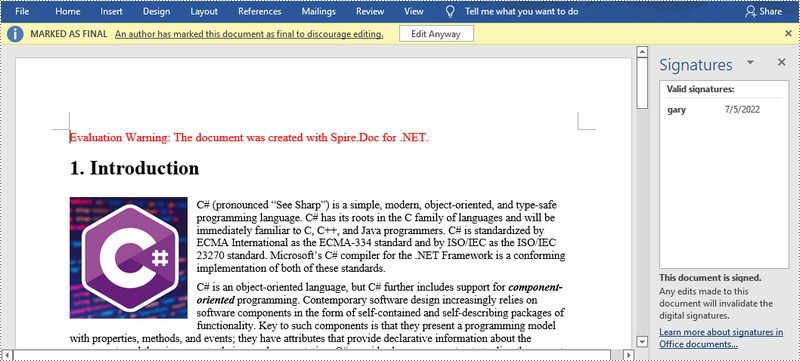
A signature confirms that the digital document originated from the signer and has not been tampered with during transit. The use of digital signatures eliminates the need for sending paper documents, and reduces the number of the documents that need to be printed, mailed, and stored, saving you time and money. In this article, you will learn how to digitally sign a Word document in C# and VB.NET using Spire.Doc for .NET.
Install Spire.Doc for .NET
To begin with, you need to add the DLL files included in the Spire.Doc for.NET package as references in your .NET project. The DLL files can be either downloaded from this link or installed via NuGet.
PM> Install-Package Spire.Doc
Add a Digital Signature to Word in C#, VB.NET
The steps are as follows.
- Create a Document object.
- Load a Word document using Document.LoadFromFile() method.
- Specify the path and the password of a .pfx certificate.
- Digitally sign the document while saving the document using Document.SaveToFile(string fileName, FileFormat fileFormat, string certificatePath, string securePassword) method. Here are some other methods that you can use to digitally sign a Word document.
- public void SaveToFile(string fileName, FileFormat fileFormat, byte[] certificateData, string securePassword);
- public void SaveToStream(Stream stream, FileFormat fileFormat, byte[] certificateData, string securePassword);
- public void SaveToStream(Stream stream, FileFormat fileFormat, string certificatePath, string securePassword);
- public static byte[] Document.Sign(Stream sourceStream, byte[] certificateData, string securePassword);
- public static byte[] Document.Sign(Stream sourceStream, string certificatePath, string securePassword);
- C#
- VB.NET
using Spire.Doc;

namespace DigitallySignWord
{
    class Program
    {
        static void Main(string[] args)
        {
            //Create a Document object
            Document doc = new Document();

            //Load a Word file
            doc.LoadFromFile("C:\\Users\\Administrator\\Desktop\\sample.docx");

            //Specify the certificate path
            string certificatePath = "C:\\Users\\Administrator\\Desktop\\gary.pfx";

            //Specify the password of the certificate
            string password = "e-iceblue";

            //Digitally sign the document while saving it to a .docx file
            doc.SaveToFile("AddDigitalSignature.docx", FileFormat.Docx2013, certificatePath, password);
        }
    }
}
Apply for a Temporary License
If you'd like to remove the evaluation message from the generated documents, or to get rid of the function limitations, please request a 30-day trial license for yourself.
Add checkbox and picture content control to word document in C#
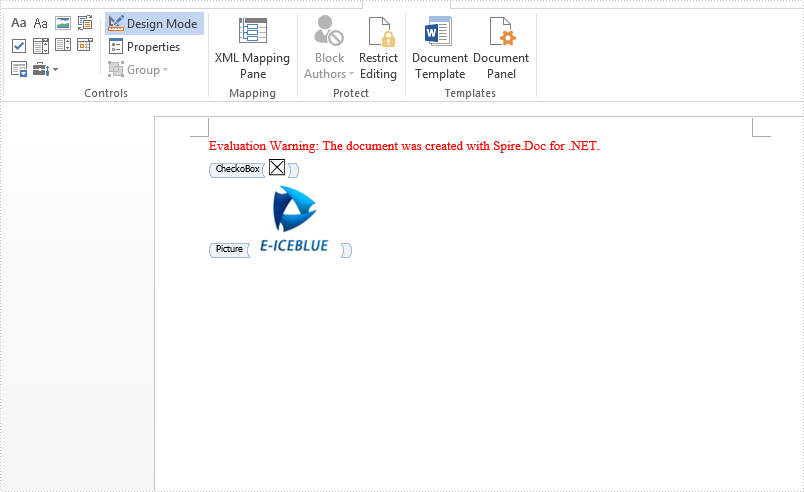
2019-05-29 07:31:42 Written by KoohjiBesides the Combo Box, Text, Date Picker and Drop-Down List content controls, Checkbox and picture content control also are the mostly used content control in word document. Spire.Doc supports to add many kinds of content controls to the word document. This article will show you how to add checkbox and picture content control to word document by Spire.Doc for .NET.
Code snippets of how to add checkbox and picture content control:
using System;
using System.Drawing;
namespace AddCheckbox
{

    class Program
    {

        static void Main(string[] args)
        {
            //Create a new word document
            Document document = new Document();

            //Add a section to the document
            Section section = document.AddSection();

            //Add a document to the section
            Paragraph paragraph = section.AddParagraph();

            //Add checkbox content control
            StructureDocumentTagInline sdt = new StructureDocumentTagInline(document);
            paragraph = section.AddParagraph();
            sdt = new StructureDocumentTagInline(document);
            sdt.CharacterFormat.FontSize = 20;
            paragraph.ChildObjects.Add(sdt);
            sdt.SDTProperties.SDTType = SdtType.CheckBox;
            SdtCheckBox scb = new SdtCheckBox();
            sdt.SDTProperties.ControlProperties = scb;
            TextRange tr = new TextRange(document);
            tr.CharacterFormat.FontName = "MS Gothic";
            tr.CharacterFormat.FontSize = 20;
            sdt.ChildObjects.Add(tr);
            scb.Checked = true;

            sdt.SDTProperties.Alias = "CheckoBox";
            sdt.SDTProperties.Tag = "Checkbox";

            //Add picture content control
            paragraph = section.AddParagraph();
            sdt = new StructureDocumentTagInline(document);
            paragraph.ChildObjects.Add(sdt);
            sdt.SDTProperties.ControlProperties = new SdtPicture();

            sdt.SDTProperties.Alias = "Picture";
            sdt.SDTProperties.Tag = "Picture";

            DocPicture pic = new DocPicture(document) { Width = 10, Height = 10 };
            pic.LoadImage(Image.FromFile("Logo.jpg"));
            sdt.SDTContent.ChildObjects.Add(pic);

            document.SaveToFile("Sample.docx", FileFormat.Docx2013);

        }
    }
}
Effective screenshot after adding checkbox and picture content control to word document: