
Knowledgebase (2344)
Children categories
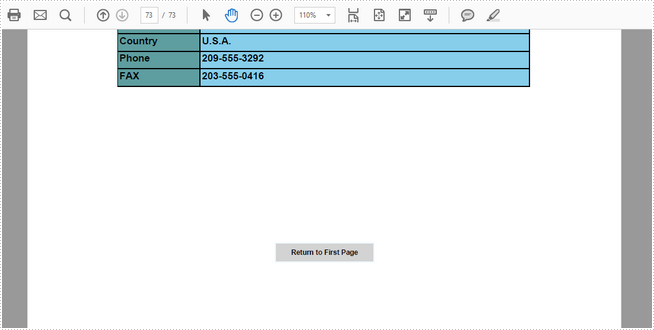
A navigation button in a PDF document can redirect users from one page to another. For instance, when a navigation button is clicked, we can jump to the next/last page or return to the previous/first page. This article will introduce how to create such a navigation button in PDF using Spire.PDF.
Step 1: Initialize an instance of PdfDocument class and load a PDF document.
PdfDocument doc = new PdfDocument();
doc.LoadFromFile(@"C:\Users\Administrator\Desktop\Sales Report.pdf");
Step 2: Enable creation of form fields in the document.
doc.AllowCreateForm = true;
Step 3: Get the last page.
PdfPageBase page = doc.Pages[doc.Pages.Count-1];
Step 4: Create a button field and specify the button name, tooltip and border style.
PdfButtonField button = new PdfButtonField(page, "Return to First Page");
button.Bounds = new RectangleF(page.ActualSize.Width/2-50, 400, 100, 20);
button.BorderColor = new PdfRGBColor(Color.AliceBlue);
button.BorderStyle = PdfBorderStyle.Solid;
button.ToolTip = "First Page";
button.Font = new PdfFont(PdfFontFamily.Helvetica, 7f,PdfFontStyle.Bold);
Step 5: Create a PdfNamedAction that goes to the named destination (previous, next, first or last page) and add the action to the button field.
PdfNamedAction namedAction = new PdfNamedAction(PdfActionDestination.FirstPage);
button.Actions.GotFocus = namedAction;
Step 6: Add the button to the document.
doc.Form.Fields.Add(button);
doc.SaveToFile("NavigationButton.pdf", FileFormat.PDF);
Output:
Full Code:
using Spire.Pdf;
using Spire.Pdf.Actions;
using Spire.Pdf.Fields;
using Spire.Pdf.Graphics;
using System.Drawing;

namespace NavigationButtons
{
    class Program
    {
        static void Main(string[] args)
        {
            PdfDocument doc = new PdfDocument();
            doc.LoadFromFile(@"C:\Users\Administrator\Desktop\Sales Report.pdf");
            doc.AllowCreateForm = true;
            PdfPageBase page = doc.Pages[doc.Pages.Count - 1];

            PdfButtonField button = new PdfButtonField(page, "Return to First Page");
            button.Bounds = new RectangleF(page.ActualSize.Width / 2 - 50, 400, 100, 20);
            button.BorderColor = new PdfRGBColor(Color.AliceBlue);
            button.BorderStyle = PdfBorderStyle.Solid;
            button.ToolTip = "First Page";
            button.Font = new PdfFont(PdfFontFamily.Helvetica, 7f, PdfFontStyle.Bold);

            PdfNamedAction namedAction = new PdfNamedAction(PdfActionDestination.FirstPage);
            button.Actions.GotFocus = namedAction;

            doc.Form.Fields.Add(button);
            doc.SaveToFile("NavigationButton.pdf", FileFormat.PDF);
        }
    }
}
Imports Spire.Pdf
Imports Spire.Pdf.Actions
Imports Spire.Pdf.Fields
Imports Spire.Pdf.Graphics
Imports System.Drawing

Namespace NavigationButtons
	Class Program
		Private Shared Sub Main(args As String())
			Dim doc As New PdfDocument()
			doc.LoadFromFile("C:\Users\Administrator\Desktop\Sales Report.pdf")
			doc.AllowCreateForm = True
			Dim page As PdfPageBase = doc.Pages(doc.Pages.Count - 1)

			Dim button As New PdfButtonField(page, "Return to First Page")
			button.Bounds = New RectangleF(page.ActualSize.Width / 2 - 50, 400, 100, 20)
			button.BorderColor = New PdfRGBColor(Color.AliceBlue)
			button.BorderStyle = PdfBorderStyle.Solid
			button.ToolTip = "First Page"
			button.Font = New PdfFont(PdfFontFamily.Helvetica, 7F, PdfFontStyle.Bold)

			Dim namedAction As New PdfNamedAction(PdfActionDestination.FirstPage)
			button.Actions.GotFocus = namedAction

			doc.Form.Fields.Add(button)
			doc.SaveToFile("NavigationButton.pdf", FileFormat.PDF)
		End Sub
	End Class
End Namespace
In Excel, the worksheet names can serve as a form of metadata about the workbook's contents. By retrieving a list of these names, it is possible to have a rough understanding of what each worksheet is used for and provide an overview of where a certain type of data is stored. This is particularly useful for larger workbooks or when collaborating with others. In this article, you will learn how to get sheet names in Excel in C# using Spire.XLS for .NET.
Install Spire.XLS for .NET
To begin with, you need to add the DLL files included in the Spire.XLS for .NET package as references in your .NET project. The DLL files can be either downloaded from this link or installed via NuGet.
PM> Install-Package Spire.XLS
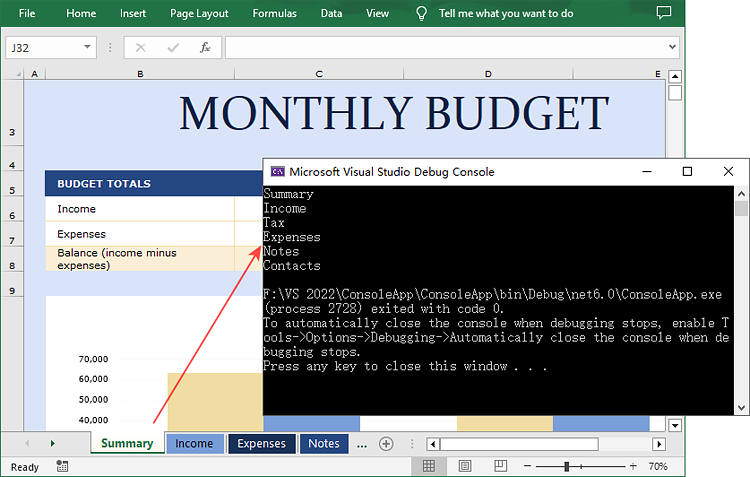
Get All Worksheet Names in Excel in C#
The Worksheet.Name property returns the name of a Worksheet. To retrieve the names of all the worksheets in Excel (including hidden ones), you can iterate through each worksheet and use this property to get their names. The detailed steps are as follows:
- Create a Workbook object.
- Load an Excel file using Workbook.LoadFromFile() method.
- Get all the worksheets in the Excel workbook through Workbook.Worksheets property.
- Iterate through each worksheet.
- Get the name of each worksheet through Worksheet.Name property and then output the results.
- C#
using Spire.Xls;
using Spire.Xls.Collections;

namespace WorksheetName
{
    class Program
    {
        static void Main(string[] args)
        {
            // Create a Workbook object
            Workbook workbook = new Workbook();

            // Load an Excel document
            workbook.LoadFromFile("Budget.xlsx");

            // Get all the worksheets in Excel
            WorksheetsCollection worksheets = workbook.Worksheets;

            // Iterate through each worksheet
            foreach (Worksheet sheet in worksheets)
            {
                // Get worksheet name
                Console.WriteLine(sheet.Name);
            }
        }
    }
}
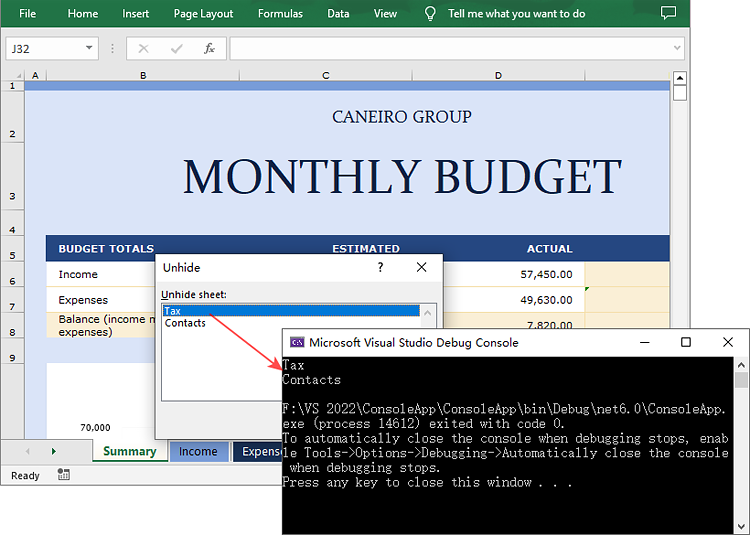
Get Hidden Worksheet Names in Excel in C#
If you only need to retrieve the names of the hidden worksheets, you can first iterate through each worksheet to determine whether a worksheet is hidden, and if so, get its name through the Worksheet.Name property. The detailed steps are as follows:
- Create a Workbook object.
- Load an Excel file using Workbook.LoadFromFile() method.
- Get all the worksheets in the Excel workbook through Workbook.Worksheets property.
- Iterate through each worksheet and find the hidden worksheets.
- Get the names of the hidden worksheets through Worksheet.Name property and then output the results.
- C#
using Spire.Xls;
using Spire.Xls.Collections;

namespace HiddenSheetsName
{
    class Program
    {
        static void Main(string[] args)
        {
            // Create a Workbook object
            Workbook workbook = new Workbook();

            // Load an Excel document
            workbook.LoadFromFile("E:\\PythonExcel\\Monthly company budget.xlsx");

            // Get all the worksheets in Excel
            WorksheetsCollection worksheets = workbook.Worksheets;

            // Iterate through each worksheet
            foreach (Worksheet sheet in worksheets)
            {
                // Detect the hidden worksheet
                if (sheet.Visibility == WorksheetVisibility.Hidden)
                {
                    // Get the hidden worksheet name
                    Console.WriteLine(sheet.Name);
                }
            }
        }
    }
}
Apply for a Temporary License
If you'd like to remove the evaluation message from the generated documents, or to get rid of the function limitations, please request a 30-day trial license for yourself.
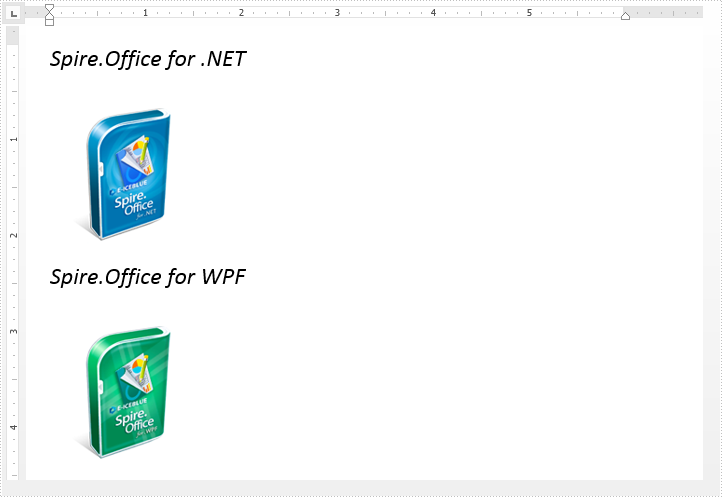
Replacing image with text or image in a Word document is possible in Spire.Doc. We've already illustrated how to replace image with text, in this tutorial, we will show you how to replace a specified image with another image using Spire.Doc and C#.
Below is the original Word document before replacing image:
Code Snippet:
Step 1: Load the Word document.
Document document = new Document("Input.docx");
Step 2: Replace the image which title is "Figure 1" with new image.
//Loop through the paragraphs of the section
foreach (Paragraph paragraph in document.Sections[0].Paragraphs)
{
    //Loop through the child elements of paragraph
    foreach (DocumentObject docObj in paragraph.ChildObjects)
    {
        if (docObj.DocumentObjectType == DocumentObjectType.Picture)
        {
            DocPicture picture = docObj as DocPicture;
            if (picture.Title == "Figure 1")
            {
                //Replace the image
                picture.LoadImage(Image.FromFile("PinkRoses.jpg"));
            }
        }
    }
}
Step 3: Save and close the document.
document.SaveToFile("ReplaceImage.docx");
document.Close();
The resultant document looks as follows:
Full code:
using System.Drawing;
using Spire.Doc;
using Spire.Doc.Documents;
using Spire.Doc.Fields;

namespace Replace_Image
{
    class Program
    {
        static void Main(string[] args)
        {
            //Load the Word document
            Document document = new Document("Input.docx");

            //Loop through the paragraphs of the section
            foreach (Paragraph paragraph in document.Sections[0].Paragraphs)
            {
                //Loop through the child elements of paragraph
                foreach (DocumentObject docObj in paragraph.ChildObjects)
                {
                    if (docObj.DocumentObjectType == DocumentObjectType.Picture)
                    {
                        DocPicture picture = docObj as DocPicture;
                        if (picture.Title == "Figure 1")
                        {
                            //Replace the image
                            picture.LoadImage(Image.FromFile("PinkRoses.jpg"));
                        }
                    }
                }
            }

            //Save and close the document
            document.SaveToFile("ReplaceImage.docx");
            document.Close();
        }
    }
}
