
Knowledgebase (2344)
Children categories
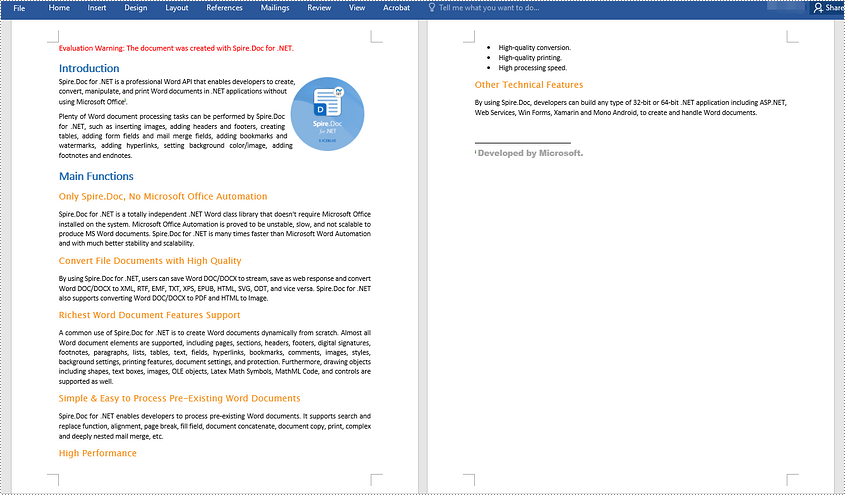
Footnotes and endnotes are short notes that can be used to provide explanations, comments or references to certain words or sentences in a document. Footnotes usually appear at the bottom of the page containing their reference numbers, while endnotes appear at the end of the document or section. If you are writing an academic paper in Word, inserting footnotes or endnotes may be essential. This article will demonstrate how to insert footnotes and endnotes in Word documents in C# and VB.NET using Spire.Doc for .NET.
Install Spire.Doc for .NET
To begin with, you need to add the DLL files included in the Spire.Doc for .NET package as references in your .NET project. The DLLs files can be either downloaded from this link or installed via NuGet.
PM> Install-Package Spire.Doc
Insert a Footnote in Word in C# and VB.NET
A footnote consists of two parts - a footnote reference mark and the corresponding footnote text. To insert a footnote for a specific text, you need to search for the text and get the paragraph where the text is located, after that add a footnote to the paragraph, then insert the footnote reference mark after the found text and set the footnote text. The detailed steps are as follows:
- Initialize an instance of the Document class.
- Load a Word document using Document.LoadFromFile() method.
- Search for a specific text in the document using Document.FindString() method and get the found text as a single text range using TextSelection.GetAsOneRange() method.
- Access the owner paragraph of the text range through TextRange.OwnerParagraph property and get the index of the text range in the paragraph using Paragraph.ChildObjects.IndexOf() method.
- Add a footnote to the paragraph using Paragraph.AppendFootnote(FootnoteType.Footnote) method.
- Insert the footnote reference mark after the text range using Paragraph.ChildObjects.Insert() method.
- Set the footnote text using Footnote.TextBody.AddParagraph().AppendText() method.
- Set formatting such as font name, font size and text color for the footnote text and reference mark.
- Save the result document using Document.SaveToFile() method.
- C#
- VB.NET
using Spire.Doc;
using Spire.Doc.Documents;
using Spire.Doc.Fields;
using System.Drawing;

namespace InsertFootnote
{
    internal class Program
    {
        static void Main(string[] args)
        {
            //Initialize an instance of the Document class
            Document document = new Document();
            //Load a Word document
            document.LoadFromFile(@"Sample.docx");

            //Find a specific text in the document
            TextSelection selection = document.FindString("Spire.Doc for .NET", false, true);
            //Get the found text as a single text range
            TextRange textRange = selection.GetAsOneRange();
            //Get the owner paragraph of the text range
            Paragraph paragraph = textRange.OwnerParagraph;
            //Get the index of the text range in the paragraph
            int index = paragraph.ChildObjects.IndexOf(textRange);

            //Add a footnote to the paragraph
            Footnote footnote = paragraph.AppendFootnote(FootnoteType.Footnote);
            //Insert the footnote reference mark after the text range
            paragraph.ChildObjects.Insert(index + 1, footnote);
            //Set the footnote text
            textRange = footnote.TextBody.AddParagraph().AppendText("Developed by E-iceblue Co., LTD.");

            //Set format for the footnote text
            textRange.CharacterFormat.FontName = "Arial Black";
            textRange.CharacterFormat.FontSize = 12;
            textRange.CharacterFormat.TextColor = Color.DarkGray;

            //Set format for the footnote reference mark
            footnote.MarkerCharacterFormat.FontName = "Calibri";
            footnote.MarkerCharacterFormat.FontSize = 12;
            footnote.MarkerCharacterFormat.Bold = true;
            footnote.MarkerCharacterFormat.TextColor = Color.DarkGreen;

            //Save the result document
            document.SaveToFile("InsertFootnote.docx", FileFormat.Docx2013);
            document.Close();
        }
    }
}
Insert an Endnote in Word in C# and VB.NET
An endnote also consists of two parts - an endnote reference mark and the corresponding endnote text. The steps to insert an endnote for a specific text are very similar to that of the above example:
- Initialize an instance of the Document class.
- Load a Word document using Document.LoadFromFile() method.
- Search for a specific text in the document using Document.FindString() method and get the found text as a single text range using TextSelection.GetAsOneRange() method.
- Access the owner paragraph of the text range through TextRange.OwnerParagraph property and get the index of the text range in the paragraph using Paragraph.ChildObjects.IndexOf() method.
- Add an endnote to the paragraph using Paragraph.AppendFootnote(FootnoteType.Endnote) method.
- Insert the endnote reference mark after the text range using Paragraph.ChildObjects.Insert() method.
- Set the endnote text using Footnote.TextBody.AddParagraph().AppendText() method.
- Set formatting such as font name, font size and text color for the endnote text and reference mark.
- Save the result document using Document.SaveToFile() method.
- C#
- VB.NET
using Spire.Doc;
using Spire.Doc.Documents;
using Spire.Doc.Fields;
using System.Drawing;

namespace InsertEndnote
{
    internal class Program
    {
        static void Main(string[] args)
        {
            //Initialize an instance of the Document class
            Document document = new Document();
            //Load a Word document
            document.LoadFromFile(@"Sample.docx");

            //Find a specific text in the document
            TextSelection selection = document.FindString("Microsoft Office", false, true);
            //Get the found text as a single text range
            TextRange textRange = selection.GetAsOneRange();
            //Get the owner paragraph of the text range
            Paragraph paragraph = textRange.OwnerParagraph;
            //Get the index of the text range in the paragraph
            int index = paragraph.ChildObjects.IndexOf(textRange);

            //Add an endnote to the paragraph
            Footnote endnote = paragraph.AppendFootnote(FootnoteType.Endnote);
            //Insert the endnote reference mark after the text range
            paragraph.ChildObjects.Insert(index + 1, endnote);
            //Set the endnote text
            textRange = endnote.TextBody.AddParagraph().AppendText("Developed by Microsoft.");

            //Set format for the endnote text
            textRange.CharacterFormat.FontName = "Arial Black";
            textRange.CharacterFormat.FontSize = 12;
            textRange.CharacterFormat.TextColor = Color.DarkGray;

            //Set format for the endnote reference mark
            endnote.MarkerCharacterFormat.FontName = "Calibri";
            endnote.MarkerCharacterFormat.FontSize = 12;
            endnote.MarkerCharacterFormat.Bold = true;
            endnote.MarkerCharacterFormat.TextColor = Color.DarkGreen;

            //Save the result document
            document.SaveToFile("InsertEndnote.docx", FileFormat.Docx2013);
            document.Close();
        }
    }
}
Apply for a Temporary License
If you'd like to remove the evaluation message from the generated documents, or to get rid of the function limitations, please request a 30-day trial license for yourself.
This section will introduce a solution to export data from database to Excel for WPF. The whole solution is easily performed by this WPF Excel component Spire.XLS for WPF.

In the task of database to Excel, first we need to connect with database by this class provided by Microsoft: System.Data.Oledb.OledbConnection. Here we use an MS access database. Then, OleDbCommand can help us specify a datatable from database in order to save the data in Dataset later. Finally fill the data into dataset table. After all the connection, we can see the key source code provided by Spire.XLS to export data columns from datatable to Excel: Spire.Xls.Worksheet.InsertDataTable(System.Data.DataTable dataTable, bool columnHeaders, int firstRow, int firstColumn).
There are four parameters passed.
- dataTable: The first parameter is to export the data column;
- columnHeaders: the second is to indicate whether to import field names;
- firstRow, firstColumn: the third and fourth parameters are index of first row and first column.
Here we can download Spire.XLS for WPF. After installing it on system, and start our database to excel task as below code:
//export datatable to excel
Workbook book = new Workbook();
Worksheet sheet = book.Worksheets[0];
sheet.InsertDataTable(t, true, 1, 1);
book.SaveToFile("insertTableToExcel.xls");
System.Diagnostics.Process.Start("insertTableToExcel.xls");
//export datatable to excel
Dim book As New Workbook()
Dim sheet As Worksheet = book.Worksheets(0)
sheet.InsertDataTable(t, True, 1, 1)
book.SaveToFile("insertTableToExcel.xls")
System.Diagnostics.Process.Start("insertTableToExcel.xls")
End Sub
End Class
End Namespace
In people's daily life, we can open a PDF document by right clicking the open option as well as using C#, VB.NET or other programming languages. Both methods are available as long as you have a PDF Document, but for PDF itself, it has no viewing function, thus, we need to use PDF Viewer to help us view it. This article is designed to open a PDF Document with C#, VB.NET via PDF Viewer by two methods.
Spire. PDFViewer is designed for viewing PDF files from .NET application. It does NOT require Adobe Read or any other 3rd party software/library installed on system. By using Spire.PDFViewer, we can do this job easily. Please just follow the below procedure.
Step 1: Create a new project
- Freely Download Spire.PDFViewer
- Create a new project in Visual Studio and add a toolScript in Form1
- Set its target Framework to be .NET Framework 4
- Add Spire.PdfViewer. Forms as reference in Project. And add using at the top of the method. Please see below:
using System.IO;
using Spire.PdfViewer.Forms;
Imports Sytem. IO
Imports Spire.PdfViewer.Forms
Step 2: Open a PDF Document with C#, VB.NET via Spire.PDFViewer
Method one: This method is to directly load a PDF file from system, then open it.
        public partial class Form1 : Form
    {

        public Form1()
        {
            InitializeComponent();

        }

        private void Form1_Load(object sender, EventArgs e)
        {

        }

        private void toolStripButton1_Click(object sender, EventArgs e)
        {
            string pdfDoc = @"D:\michelle\e-iceblue\Spire.Office.pdf";
            if (File.Exists(pdfDoc))
            {
                this.pdfDocumentViewer1.LoadFromFile(pdfDoc);
            }

        }
    }
 }
Public Partial Class Form1
		Inherits Form

		Public Sub New()

			InitializeComponent()
		End Sub

		Private Sub Form1_Load(sender As Object, e As EventArgs)

		End Sub

		Private Sub toolStripButton1_Click(sender As Object, e As EventArgs)
			Dim pdfDoc As String = "D:\michelle\e-iceblue\Spire.Office.pdf"
			If File.Exists(pdfDoc) Then
				Me.pdfDocumentViewer1.LoadFromFile(pdfDoc)
			End If

		End Sub
	End Class
End Namespace
Method Two: This method allows you to choose the PDF file you want to open in a dialog box from your computer.
public partial class Form1 : Form
 {

        public Form1()
        {
            InitializeComponent();

        }

        private void Form1_Load(object sender, EventArgs e)
        {

        }

        private void toolStripButton1_Click(object sender, EventArgs e)
        {
            OpenFileDialog dialog = new OpenFileDialog();
            dialog.Filter = "PDF document (*.pdf)|*.pdf";
            DialogResult result = dialog.ShowDialog();
            if (result == DialogResult.OK)
            {
                try
                {
                    string pdfFile = dialog.FileName;
                    this.pdfDocumentViewer1.LoadFromFile(pdfFile);
                }
                catch (Exception exe)
                {
                    MessageBox.Show(exe.Message, "Spire.PdfViewer Demo", MessageBoxButtons.OK, MessageBoxIcon.Error);
                }

            }

        }
   }
Public Partial Class Form1
	Inherits Form

	Public Sub New()

		InitializeComponent()
	End Sub

	Private Sub Form1_Load(sender As Object, e As EventArgs)

	End Sub

	Private Sub toolStripButton1_Click(sender As Object, e As EventArgs)
		Dim dialog As New OpenFileDialog()
		dialog.Filter = "PDF document (*.pdf)|*.pdf"
		Dim result As DialogResult = dialog.ShowDialog()
		If result = DialogResult.OK Then
			Try
				Dim pdfFile As String = dialog.FileName
				Me.pdfDocumentViewer1.LoadFromFile(pdfFile)
			Catch exe As Exception
				MessageBox.Show(exe.Message, "Spire.PdfViewer Demo", MessageBoxButtons.OK, MessageBoxIcon.[Error])

			End Try
		End If

	End Sub
End Class
Step 3: Launch the file
Press F5, you can see Form1 display itself as picture below:
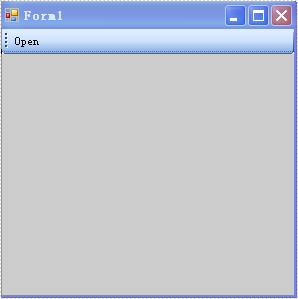
Then click "open" in the Form. When you use method one, you can see the PDF document content shows in the Form1. Also you can set the size of the form according to your own preference. When you use method two, you can choose the PDF Document by yourself in a dialog box. And then preview it in Form1.
Note: I set the default name of toolScript to be "open".
Effective Screenshot:

