
Knowledgebase (2344)
Children categories
The advantages of using an online document editor over a traditional desktop application include enhanced accessibility, seamless collaboration, automatic version control, cross-platform compatibility, and reduced hardware requirements. These features make online document editors a versatile and efficient choice for users who require the ability to access, edit, and share documents from anywhere.
This article demonstrates how to create and edit MS Word, Excel and PowerPoint documents online using the Spire.Cloud.Office document editor library.
- Spire.Cloud.Office Document Editor
- Create a New Document
- Edit an Existing Document
- Co-Edit a Document
Spire.Cloud.Office Document Editor
Spire.Cloud.Office is a feature-rich HTML-5 based document editor component that can be easily integrated into web applications. With the document editor component, your end-users can view, create, edit, and collaborate on diverse document types within a web browser.
To utilize the services offered by Spire.Cloud.Office, you will need to first install it on your system.
- Install Spire.Cloud.Office for .NET on Windows
- Install Spire.Cloud.Office for Linux on Ubuntu
- Install Spire.Cloud.Office for Linux on CentOS
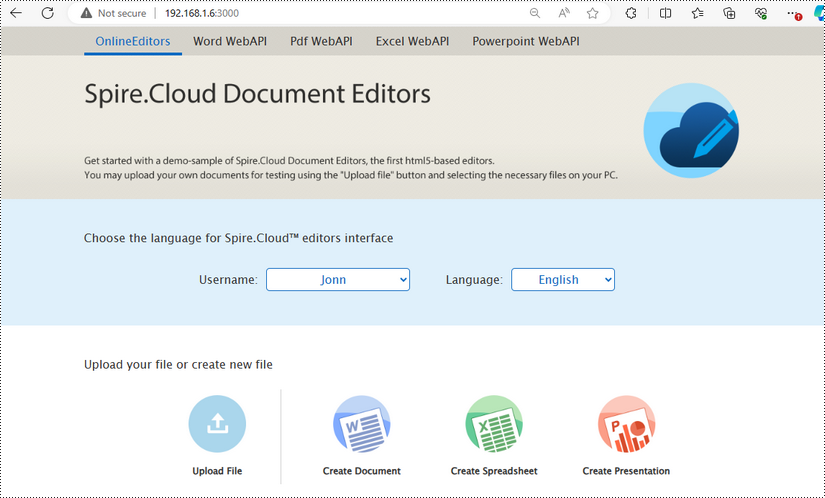
After the installation is complete, you can integrate Spire.Cloud.Office editor in your own web application or visit the example application hosted on port 3000 to explore the editor’s functionality.
The example page offers options to upload existing documents or create new ones. Spire.Office.Cloud supports loading DOC/DOCX, XLS/XLSX, and PPT/PPTX files, and exporting files to DOCX, XLSX, and PPTX formats.
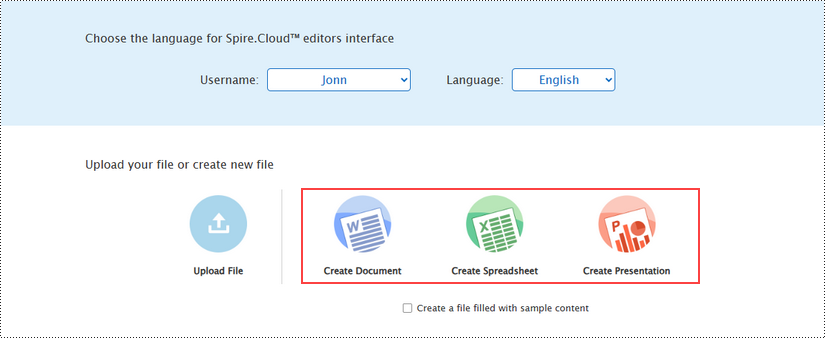
Create a New Document
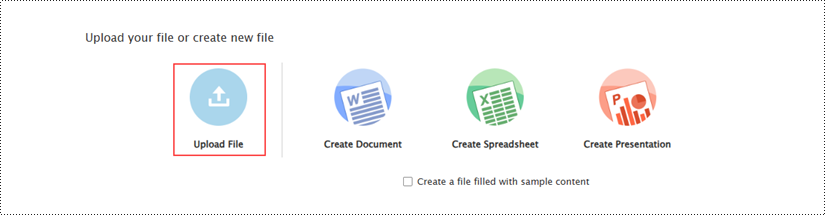
With the "Create Document", "Create Spreadsheet", and "Create Presentation" buttons on the example page, users can create a new Word document, a new Excel spreadsheet, and a new PowerPoint presentation, respectively.
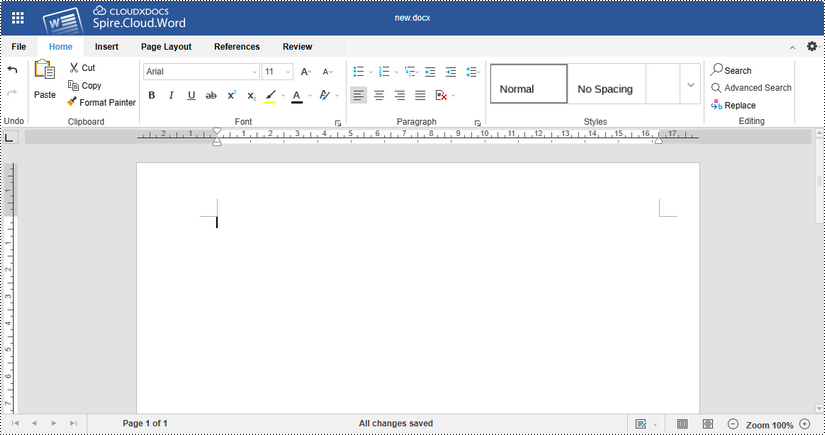
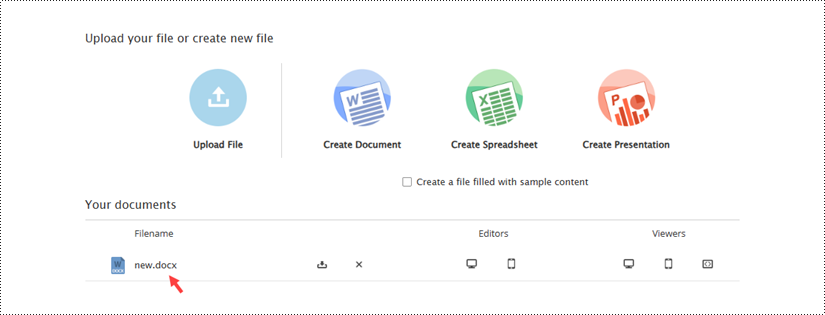
Upon clicking "Create Document", a new Word document named "new.docx" will be generated, and the editor will launch with the blank document ready for editing.
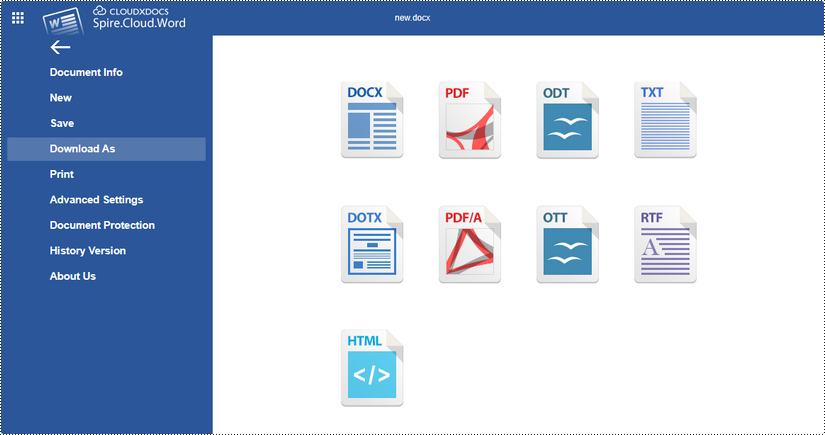
Once you've finished editing the document, click "File" on the menu and you'll get the options to download the file and save it to your local folder in the desired format.
Alternatively, you can click "Save" to preserve the changes made to the "new.docx" document, which can be found on the example page.
Edit an Existing Document
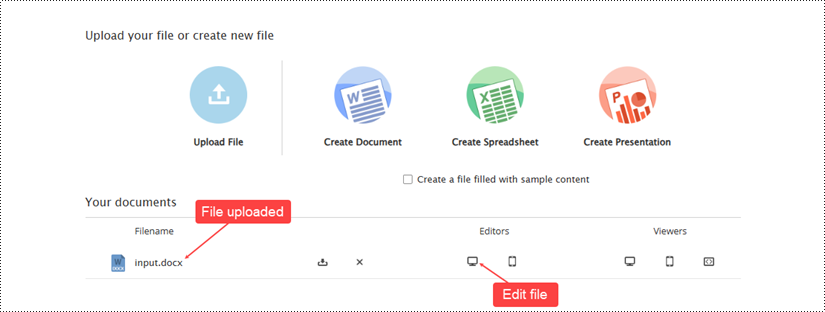
On the example page, click the "Upload File" button to load an existing document for editing.
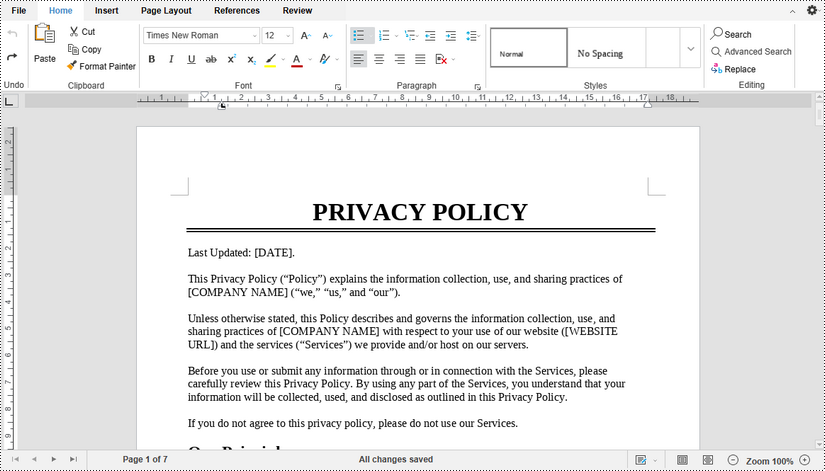
Once the file has been uploaded, it will appear on the example page. To open the document in the editor, click the computer icon in the "Editors" section.
Use the editing tools provided in the document editor to make any desired modifications to the file. Once you have finished making changes, save the updated document by clicking "File" and then selecting "Save".
Co-Edit a Document
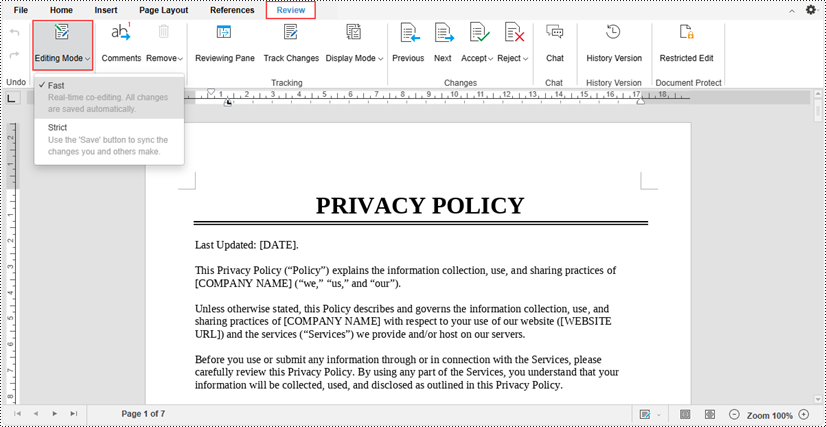
Spire.Cloud.Office's real-time collaboration features enable multiple users to work on the same document simultaneously. Two different collaborative editing modes are available under the "Review" tab - "Editing Mode".
- Fast Mode: All editors can see the changes made to the document in real-time as they are being typed or made.
- Strict Mode: Changes made by editors are protected and only become visible to other editors after the document has been explicitly saved.
By default, the Fast mode is enabled.
When a document is being collaboratively edited by multiple users, any changes made by one editor are instantly reflected in the document interface for all other editors in real-time.
Adding and removing watermarks in PDF documents play a crucial role in document management, copyright protection, and information security. A watermark can serve as a visual marker, such as a company logo, copyright notice, or the word "Confidential", indicating the source, status, or ownership of the document.
Spire.PDF provides a method for adding watermarks by embedding watermark annotations within the PDF document. This approach affords the flexibility to remove the watermark post-insertion, offering users greater control and options. This article will introduce how to add or remove watermark annotations in PDF documents using Spire.PDF for Java in Java projects.
Install Spire.PDF for Java
First of all, you're required to add the Spire.Pdf.jar file as a dependency in your Java program. The JAR file can be downloaded from this link. If you use Maven, you can easily import the JAR file in your application by adding the following code to your project's pom.xml file.
<repositories>
    <repository>
        <id>com.e-iceblue</id>
        <name>e-iceblue</name>
        <url>https://repo.e-iceblue.com/nexus/content/groups/public/</url>
    </repository>
</repositories>
<dependencies>
    <dependency>
        <groupId>e-iceblue</groupId>
        <artifactId>spire.pdf</artifactId>
        <version>12.6.4</version>
    </dependency>
</dependencies>
Add Watermark Annotations to PDF in Java
Spire.PDF provides a method to add watermark annotations to PDF pages using the PdfWatermarkAnnotation object. Notably, watermarks added by this method can be easily removed later. Here are the key steps involved:
- Initialize an instance of the PdfDocument class.
- Load a PDF document using the PdfDocument.loadFromFile() method.
- Create a PdfTrueTypeFont font object to draw the watermark text.
- Create a Rectangle2D type object to define the boundary of the page.
- Use a for loop to iterate over all PdfPageBase objects in the PDF document.
- Create a PdfTemplate object for drawing the watermark, setting its size to match the current page.
- Call a custom insertWatermark() method to draw the watermark content onto the PdfTemplate object.
- Create a PdfWatermarkAnnotation object and define the position where the watermark should be placed.
- Create a PdfAppearance object to configure the visual effects of the watermark.
- Use the PdfAppearance.setNormal(PdfTemplate) method to associate the PdfTemplate object with the PdfAppearance object.
- Use the PdfWatermarkAnnotation.setAppearance(PdfAppearance) method to associate the PdfAppearance object with the PdfWatermarkAnnotation object.
- Add the watermark annotation to the page by calling PdfPageBase.getAnnotationsWidget().add(PdfWatermarkAnnotation).
- Save the changes to a file using the PdfDocument.saveToFile() method.
- Java
import com.spire.pdf.*;
import com.spire.pdf.annotations.*;
import com.spire.pdf.annotations.appearance.*;
import com.spire.pdf.graphics.*;
import java.awt.*;
import java.awt.geom.*;
public class AddWatermarkInPDF {
public static void main(String[] args) {
// Create a PdfDocument object
PdfDocument pdfDocument = new PdfDocument();
// Load the PDF document from a file
pdfDocument.loadFromFile("Sample1.pdf");
// Set the font style
Font font = new Font("Arial", Font.PLAIN, 22);
// Create a PdfTrueTypeFont object for subsequent text rendering
PdfTrueTypeFont trueTypeFont = new PdfTrueTypeFont(font);
// Get the page object
PdfPageBase page;
// Define the watermark text
String watermarkAnnotationText = "ID_0";
// Create a size object
Dimension2D dimension2D = new Dimension();
// Create a rectangle object
Rectangle2D loRect = new Rectangle2D.Float();
// Iterate through each page in the PDF
for (int i = 0; i < pdfDocument.getPages().getCount(); i++) {
// Get the current page
page = pdfDocument.getPages().get(i);
// Set the size object to the size of the current page
dimension2D.setSize(page.getClientSize().getWidth(), page.getClientSize().getHeight());
// Set the rectangle object frame, which is the entire page range
loRect.setFrame(new Point2D.Float(0, 0), dimension2D);
// Create a PdfTemplate object to draw the watermark
PdfTemplate template = new PdfTemplate(page.getClientSize().getWidth(), page.getClientSize().getHeight());
// Insert the watermark
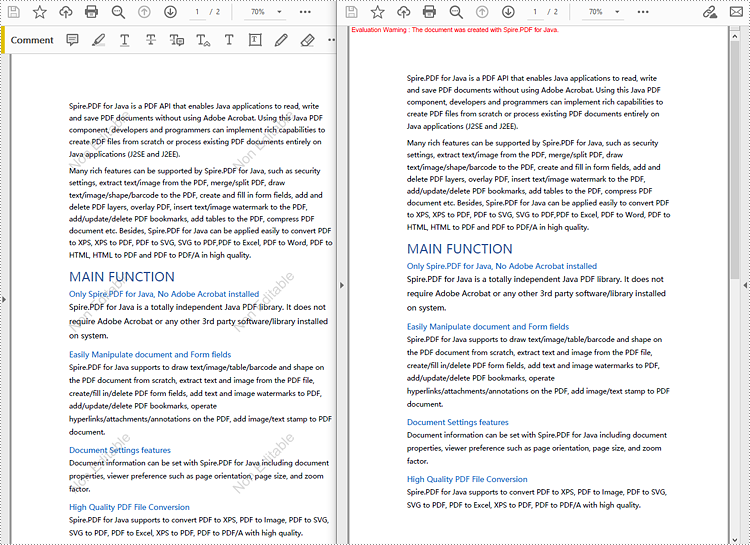
insertWatermark(template, trueTypeFont, "Non Editable");
// Create a PdfWatermarkAnnotation object to define the watermark position
PdfWatermarkAnnotation watermarkAnnotation = new PdfWatermarkAnnotation(loRect);
// Create a PdfAppearance object to set the watermark appearance
PdfAppearance appearance = new PdfAppearance(watermarkAnnotation);
// Set the normal state template of the watermark
appearance.setNormal(template);
// Set the appearance to the watermark object
watermarkAnnotation.setAppearance(appearance);
// Set the watermark text
watermarkAnnotation.setText(watermarkAnnotationText);
// Set the watermark print matrix to control the watermark's position and size
watermarkAnnotation.getFixedPrint().setMatrix(new float[]{1, 0, 0, 1, 0, 0});
// Set the horizontal offset
watermarkAnnotation.getFixedPrint().setHorizontalTranslation(0.5f);
// Set the vertical offset
watermarkAnnotation.getFixedPrint().setVerticalTranslation(0.5f);
// Add the watermark to the page's annotation widget
page.getAnnotationsWidget().add(watermarkAnnotation);
}
// Save the PDF document to a file
pdfDocument.saveToFile("AddWatermark.pdf");
// Close and release the PDF document resources
pdfDocument.dispose();
}
static void insertWatermark(PdfTemplate template, PdfTrueTypeFont font, String watermark) {
// Create a Dimension2D object to set the size of the watermark
Dimension2D dimension2D = new Dimension();
// Set the size of the watermark to half the width and one third the height of the template
dimension2D.setSize(template.getWidth() / 2, template.getHeight() / 3);
// Create a PdfTilingBrush object for repeating pattern fill of the watermark
PdfTilingBrush brush = new PdfTilingBrush(dimension2D);
// Set the transparency of the watermark to 0.3
brush.getGraphics().setTransparency(0.3F);
// Start a group of graphic state saves
brush.getGraphics().save();
// Translate the graphics context so its center aligns with the center of the watermark tile
brush.getGraphics().translateTransform((float) brush.getSize().getWidth() / 2, (float) brush.getSize().getHeight() / 2);
// Rotate the graphics context to tilt the watermark at 45 degrees
brush.getGraphics().rotateTransform(-45);
// Draw the watermark text in the graphics context using the specified font, color, and centered alignment
brush.getGraphics().drawString(watermark, font, PdfBrushes.getGray(), 0, 0, new PdfStringFormat(PdfTextAlignment.Center));
// End the group of graphic state saves and restore
brush.getGraphics().restore();
// Reset the watermark transparency to 1, i.e., completely opaque
brush.getGraphics().setTransparency(1);
// Create a Rectangle2D object to define the area for filling the watermark
Rectangle2D loRect = new Rectangle2D.Float();
// Set the fill area for the watermark to cover the entire size of the template
loRect.setFrame(new Point2D.Float(0, 0), template.getSize());
// Draw the watermark on the template using the watermark tile
template.getGraphics().drawRectangle(brush, loRect);
}
}

Remove Watermark Annotations from PDF in Java
Spire.PDF can remove watermark annotations added to PDF pages via the PdfWatermarkAnnotation object. Here are the detailed steps:
- Initialize an instance of the PdfDocument class.
- Load a PDF document using the PdfDocument.loadFromFile() method.
- Iterate over every PdfPageBase object in the PDF document using a for loop.
- Retrieve all annotations on the current page using the PdfPageBase.getAnnotationsWidget() method.
- Again, use a for loop to iterate over every annotation object on the current page, filtering out annotations of type PdfWatermarkAnnotationWidget.
- Determine the target watermark annotation by invoking the PdfWatermarkAnnotationWidget.getText() method and perform the deletion operation.
- Save the changes to a file using the PdfDocument.saveToFile() method.
- Java
import com.spire.pdf.*;
import com.spire.pdf.annotations.*;

public class RemoveWatermarkFromPDF {
    public static void main(String[] args) {
        // Create a PdfDocument object
        PdfDocument pdfDocument = new PdfDocument();

        // Load the PDF document from a file
        pdfDocument.loadFromFile("Sample2.pdf");

        // Define a string ID to match and remove a specific watermark
        String id = "ID_0";

        // Iterate through every page in the PDF document
        for (int i = 0; i < pdfDocument.getPages().getCount(); i++) {
            // Get all annotations on the current page
            PdfAnnotationCollection annotationWidget = pdfDocument.getPages().get(i).getAnnotationsWidget();

            // Iterate through all annotations on the current page
            for (int j = 0; j < annotationWidget.getCount(); j++) {
                // Check if the current annotation is a watermark annotation
                if (annotationWidget.get(j) instanceof PdfWatermarkAnnotationWidget) {
                    // If the watermark text equals the ID, remove the watermark
                    if (annotationWidget.get(j).getText().equals(id)) {
                        annotationWidget.remove(annotationWidget.get(j));
                    }
                }
            }
        }

        // Save the modified PDF document to a new file
        pdfDocument.saveToFile("RemoveWatermark.pdf");

        // Dispose of the PdfDocument object resources
        pdfDocument.dispose();
    }
}
Apply for a Temporary License
If you'd like to remove the evaluation message from the generated documents, or to get rid of the function limitations, please request a 30-day trial license for yourself.
Markdown is a lightweight markup language that is becoming increasingly popular for writing content on the web. It offers a simple and human-readable syntax for formatting text, adding links, images, lists, and more. Many websites and content management systems support Markdown, as it can be easily converted to HTML. On the other hand, Microsoft Word is a widely used word-processing software that utilizes its own proprietary file format. While Word offers robust formatting options, its files are not always compatible with other platforms or content management systems.
In certain scenarios, it is useful to convert between Word and Markdown file formats. It allows you to take advantage of Word's advanced editing tools while also being able to publish your content in a web-friendly Markdown format. In this article, we will demonstrate how to convert Markdown to Word DOC or DOCX and convert Word DOC or DOCX to Markdown in Python using Spire.Doc for Python.
Install Spire.Doc for Python
This scenario requires Spire.Doc for Python and plum-dispatch v1.7.4. They can be easily installed in your Windows through the following pip command.
pip install Spire.Doc
If you are unsure how to install, please refer to this tutorial: How to Install Spire.Doc for Python on Windows
Convert Markdown to Word in Python
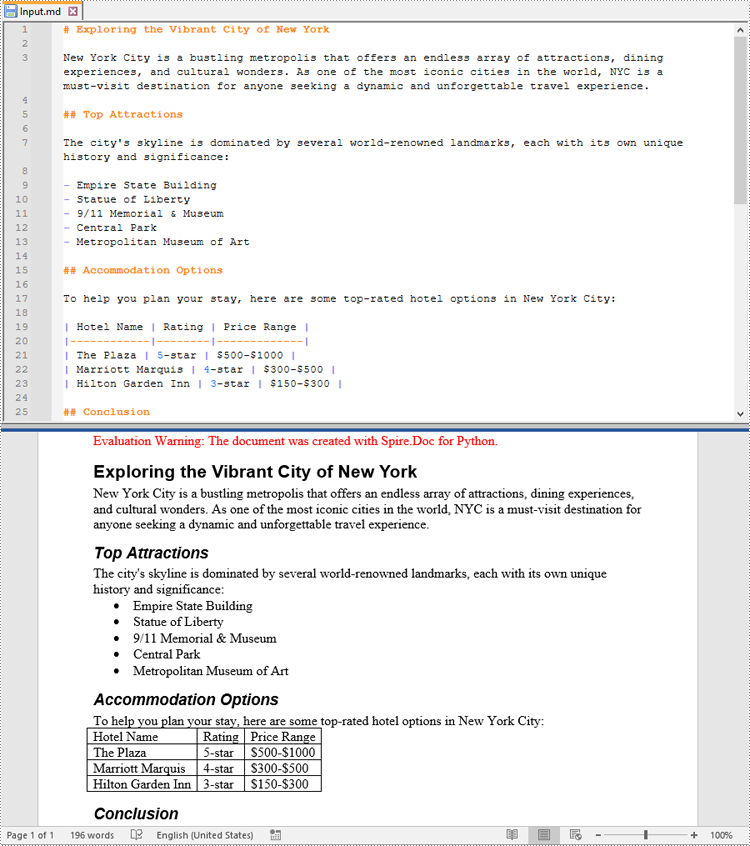
You can load a Markdown file using the Document.LoadFromFile(fileName, FileFormat.Markdown) method and then convert it to Word DOC or DOCX format using the Document.SaveToFile(fileName, FileFormat.Doc) or Document.SaveToFile(fileName, FileFormat.Docx) method. The detailed steps are as follows.
- Create an object of the Document class.
- Load a Markdown file using the Document.LoadFromFile(fileName, FileFormat.Markdown) method.
- Save the Markdown file to a Word DOC or DOCX file using Document.SaveToFile(fileName, FileFormat.Doc) or Document.SaveToFile(fileName, FileFormat.Docx) method.
- Python
from spire.doc import *
from spire.doc.common import *

# Create an object of the Document class
document = Document()
# Load a Markdown file
document.LoadFromFile("input.md")

# Save the Markdown file to a Word DOCX file
document.SaveToFile("MdToDocx.docx", FileFormat.Docx)
# Save the Markdown file to a Word DOC file
document.SaveToFile("MdToDoc.doc", FileFormat.Doc)
document.Close()
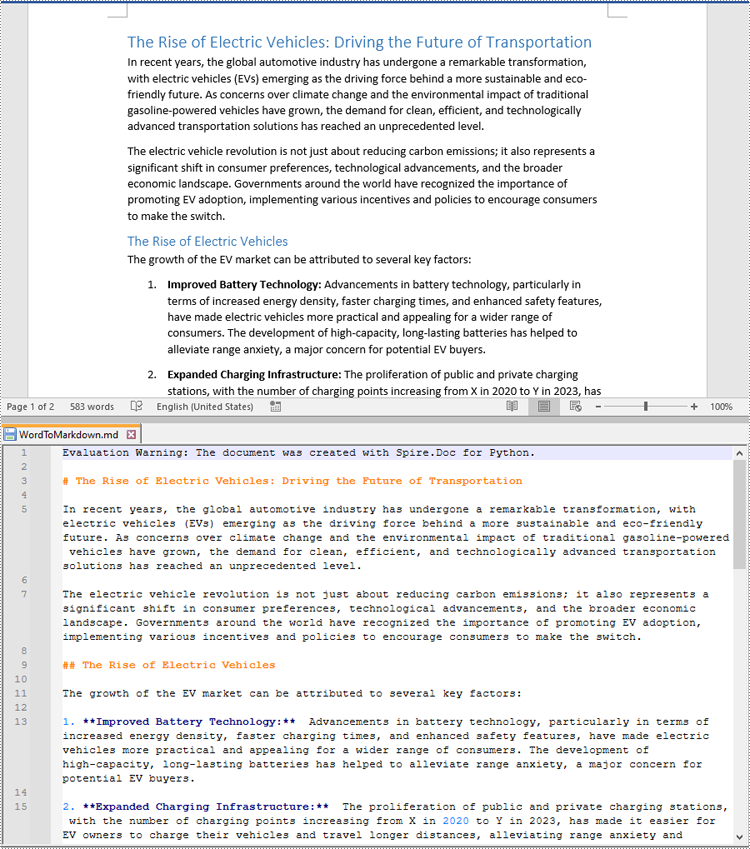
Convert Word to Markdown in Python
You are also able to convert a Word DOC or DOCX file to Markdown format using the Document.SaveToFile(fileName, FileFormat.Markdown) method. The detailed steps are as follows.
- Create an object of the Document class.
- Load a Word DOC or DOCX file using the Document.LoadFromFile(fileName) method.
- Save the Word DOC or DOCX file to a Markdown file using Document.SaveToFile(fileName, FileFormat.Markdown) method.
- Python
from spire.doc import *
from spire.doc.common import *

# Create an object of the Document class
document = Document()
# Load a Word DOCX file
document.LoadFromFile("input.docx")
# Or load a Word DOC file
#document.LoadFromFile("input.doc")

# Save the Word file to a Markdown file
document.SaveToFile("WordToMarkdown.md", FileFormat.Markdown)
document.Close()
Get a Free License
To fully experience the capabilities of Spire.Doc for Python without any evaluation limitations, you can request a free 30-day trial license.
