Knowledgebase (2417)
Children categories
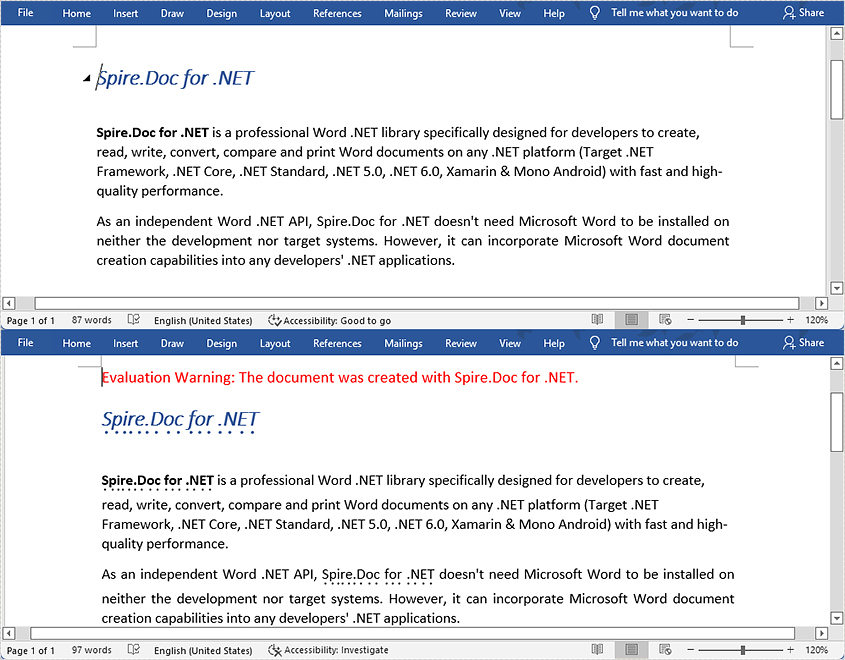
The emphasis mark is used in Word documents to emphasize words and make them more noticeable. It is usually a dot or a circle placed above or under the emphasized words. However, manually selecting words and applying emphasis marks on them takes a lot of work. Fortunately, Spire.Doc for .NET provides a much easier way to apply emphasis marks by codes. This article will show you how to apply emphasis marks to text in Word documents using Spire.Doc for .NET.
Install Spire.Doc for .NET
To begin with, you need to add the DLL files included in the Spire.Doc for.NET package as references in your .NET project. The DLL files can be either downloaded from this link or installed via NuGet.
PM> Install-Package Spire.Doc
Apply Emphasis Mark to Specified Text
The detailed steps are as follows:
- Create a Document instance.
- Load the Word document from disk using Document.LoadFromFile() method.
- Find the text you need to emphasize using Document.FindAllString() method.
- Apply emphasis mark to the found text through CharacterFormat.EmphasisMark property.
- Save the document to another Word file using Document.SaveToFile() method.
- C#
- VB.NET
using System;
using Spire.Doc;
using Spire.Doc.Documents;

namespace applyemphasismark
{
    class Program
    {
        static void Main(string[] args)
        {
            //Create a Document instance
            Document document = new Document();

            //Load the Word document from disk
            document.LoadFromFile(@"D:\testp\test.docx");

            //Find text you want to emphasize
            TextSelection[] textSelections = document.FindAllString("Spire.Doc for .NET", false, true);

            //Apply emphasis mark to the found text
            foreach (TextSelection selection in textSelections)
            {
                selection.GetAsOneRange().CharacterFormat.EmphasisMark = Emphasis.Dot;
            }

            //Save the document to another Word file
            string output = "ApllyEmphasisMark.docx";
            document.SaveToFile(output, FileFormat.Docx);
        }
    }
}
Apply for a Temporary License
If you'd like to remove the evaluation message from the generated documents, or to get rid of the function limitations, please request a 30-day trial license for yourself.
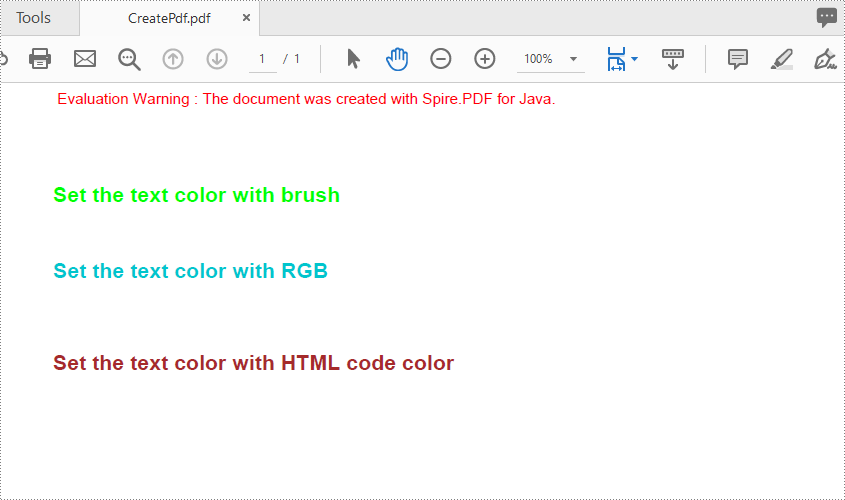
When you are drawing text into a PDF, you may need to define colorful brushes or pens in order to make the page more vivid. This article shows how to set the text string’s color space in a PDF document using Spire.PDF for Java.
Install Spire.PDF for Java
First, you need to add the Spire.Pdf.jar file as a dependency in your Java program. The JAR file can be downloaded from this link. If you use Maven, you can easily import the JAR file by adding the following code to your project's pom.xml file.
<repositories>
    <repository>
        <id>com.e-iceblue</id>
        <name>e-iceblue</name>
        <url>https://repo.e-iceblue.com/nexus/content/groups/public/</url>
    </repository>
</repositories>
<dependencies>
    <dependency>
        <groupId>e-iceblue</groupId>
        <artifactId>spire.pdf</artifactId>
        <version>12.9.0</version>
    </dependency>
</dependencies>
Set the Font Color for the Text String on PDF
Spire.PDF for Java offers PdfSolidBrush class to set the brush color for the text. It supports to define the brush color based on a particular RGB color space or a HTML color code.
- Create a PdfDocument object.
- Add a new page in the PDF using PdfDocument.getPages().add() method.
- Create a PdfSolidBrush object based on a particular RGB color space or a HTML color code.
- Create an object of PdfTrueTypeFont to set the font name, size and style.
- Draw text on the page at the specified location using PdfPageBase.getCanvas().drawString() method.
- Save the document to another PDF using PdfDocument.saveToFile() method.
- Java
import com.spire.pdf.PdfDocument;
import com.spire.pdf.PdfPageBase;
import com.spire.pdf.graphics.PdfRGBColor;
import com.spire.pdf.graphics.PdfSolidBrush;
import com.spire.pdf.graphics.PdfTrueTypeFont;

import java.awt.*;

       public class pdfBrush {
            public static void main(String[] args) throws Exception {


                //Create a PdfDocument object
                PdfDocument doc = new PdfDocument();
                //Add a page
                PdfPageBase page = doc.getPages().add();

                //Set the location
                float y = 30;

                //Create solid brush object and define the color
                PdfRGBColor rgb1 = new PdfRGBColor(Color.green);
                PdfSolidBrush brush1 = new PdfSolidBrush(rgb1);

                //RGB Color
                PdfRGBColor rgb2 = new PdfRGBColor(0,197,205);
                PdfSolidBrush brush2 = new PdfSolidBrush(rgb2);

                //HTML code color
                Color color = Color.decode("#A52A2A");
                PdfSolidBrush brush3 = new PdfSolidBrush(new PdfRGBColor(color));

                //Create true type font object
                Font font = new Font("Arial", java.awt.Font.BOLD, 14);
                PdfTrueTypeFont trueTypeFont = new PdfTrueTypeFont(font);

                //Draw text
                page.getCanvas().drawString("Set the text color with brush", trueTypeFont, brush1, 0, (y = y + 30f));
                page.getCanvas().drawString("Set the text color with RGB", trueTypeFont, brush2, 0, (y = y + 50f));
                page.getCanvas().drawString("Set the text color with HTML code color", trueTypeFont, brush3, 0, (y = y + 60f));

                //Save to file
                doc.saveToFile("output/CreatePdf.pdf");

            }
        }
Apply for a Temporary License
If you'd like to remove the evaluation message from the generated documents, or to get rid of the function limitations, please request a 30-day trial license for yourself.
Spire.Cloud.Office is a HTML5-based document editor that allows users to view and edit Word and Excel documents in a web browser. After installing it on your server, you'll be able to embed the editor in your own web application. This article will show you how to install Spire.Cloud.Office for Linux on CentOS 7.
Step 1. Configure the Environment
1) Turn off the firewall
Run the script firewall-cmd --state as root to view the firewall status. If the status is "not running", no other settings required; if the status is "running", run the script systemctl stop firewalld.service to shut down the firewall.

2) Configure a static IP
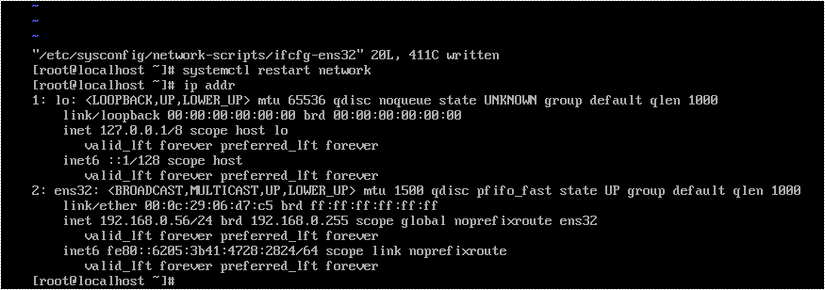
Run the script vi /etc/sysconfig/network-scripts/ifcfg-ens32 (ens32 can be replaced by your network name) to open the network configuration file to configure a static IP address.
Press I to enter the editing mode, change the value of BOOSPROTO to "static", and add IP address, net mask, gateway, and DNS server at the end. After edits are completed, press Esc and then enter the script :wq to save the changes and exit.
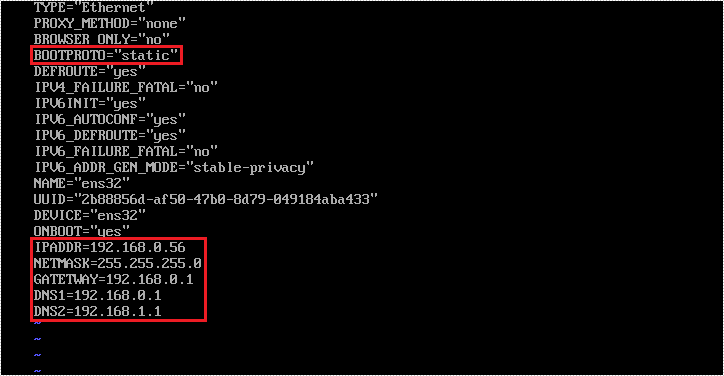
Enter the script systemctl restart network to restart the network service, and then run the script ip addr to check whether the IP address has been successfully applied.
Step 2. Copy Spire.Cloud.Office to CentOS
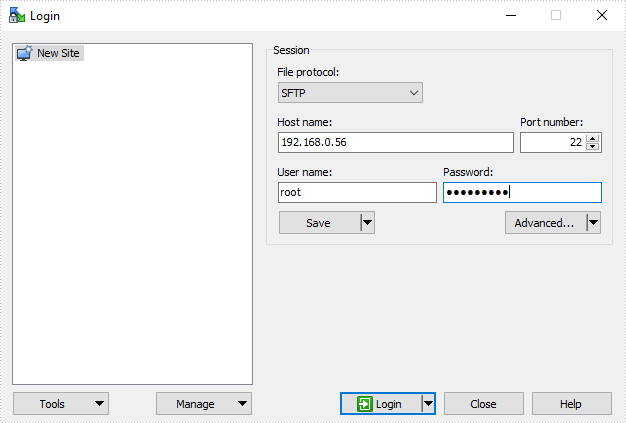
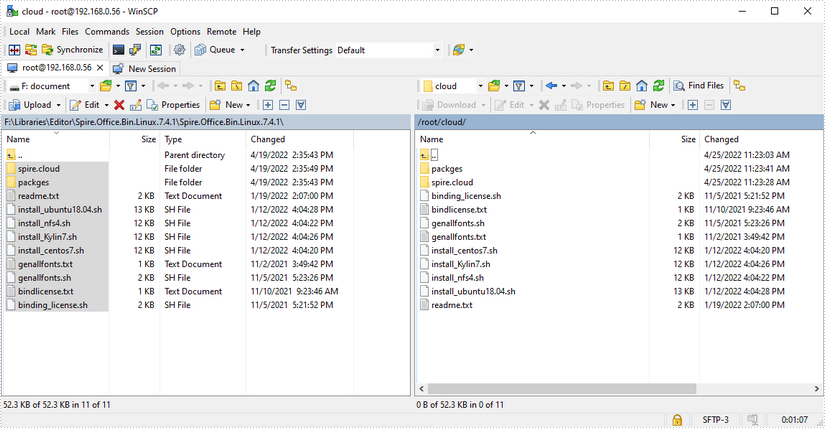
Download Spire.Cloud.Office for Linux package, and unzip it somewhere on your disk. We use WinSCP to copy files from Windows system to the root of CentOS system.
1) Log in to WinSCP
2) Copy files
After the connection is successful, copy the files contained in Spire.Cloud.Office for Linux package to the /root/cloud/ directory of the CentOS system. The "cloud" folder here is a newly created folder and can be named arbitrarily.
Step 3. Install Spire.Cloud.Office for Linux
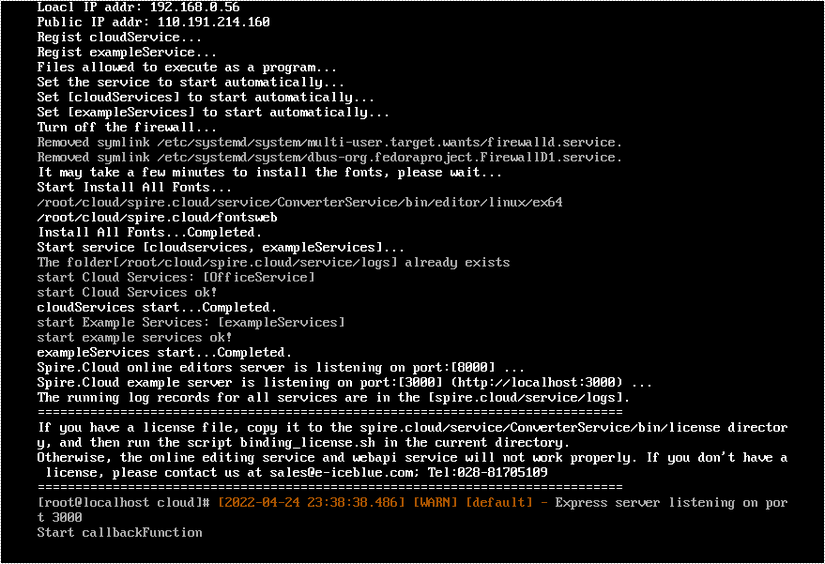
Enter the folder where the file "install_centos7.sh" is located, then run the script sh install_centos7.sh to install Spire.Cloud.Office on CentOS.

After the installation is completed, you'll get the following output.
Step 4. Bind License
Copy your license file to the /root/cloud/spire.cloud/service/ConverterService/bin/license/ directory through WinSCP. If you need a temporary license to evaluate our product, please contact sales.
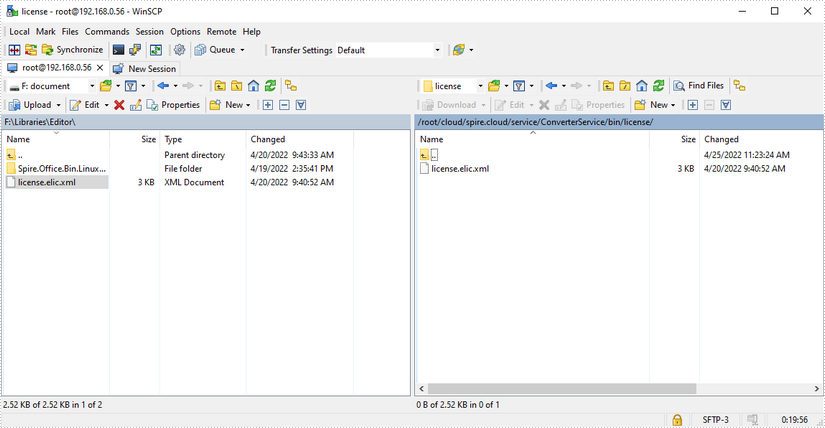
Enter the folder that contains the file "binding_license.sh", then run the script sh binding_license.sh to bind the license.

After the license is successfully bound, you'll get the following output.

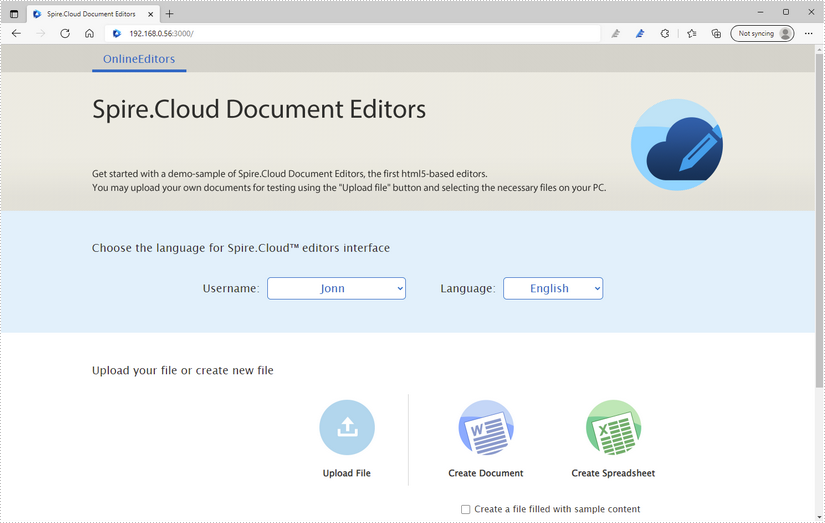
Now that you've successfully installed Spire.Cloud.Office for Linux on CentOS, you can visit our example on port 3000, and embed the document editor in your HTML page using JavaScript.