
Knowledgebase (2344)
Children categories
In Spire.Presentation, when we add a common animation effect that belongs to both entrance and exit types, it’s applied as entrance effect by default. This article is going to show you how to add exit animation effect to a shape in PowerPoint using Spire.Presentation.
Detail steps:
Step 1: Create a Presentation instance and get the first slide.
Presentation ppt = new Presentation();
ISlide slide = ppt.Slides[0];
Step 2: Add a shape to the slide.
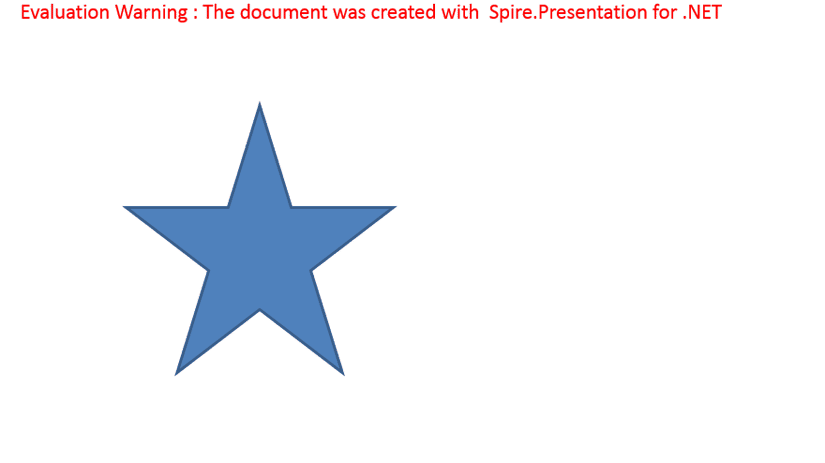
IShape starShape = slide.Shapes.AppendShape(ShapeType.FivePointedStar, new RectangleF(100, 100, 200, 200));
Step 3: Add random bars effect to the shape.
AnimationEffect effect = slide.Timeline.MainSequence.AddEffect(starShape, AnimationEffectType.RandomBars);
Step 4: Change the type of the effect from entrance to exit.
effect.PresetClassType = TimeNodePresetClassType.Exit;
Step 5: Save the file.
ppt.SaveToFile("ExitAnimationEffect.pptx", FileFormat.Pptx2013);
Screenshot:
Full code:
using Spire.Presentation;
using Spire.Presentation.Drawing.Animation;
using System.Drawing;

namespace AddExitAnimationEffect
{

    class Program
    {

        static void Main(string[] args)
        {
            {
                //Create a Presentation instance
                Presentation ppt = new Presentation();

                //Get the first slide
                ISlide slide = ppt.Slides[0];

                //Add a shape to the slide
                IShape starShape = slide.Shapes.AppendShape(ShapeType.FivePointedStar, new RectangleF(100, 100, 200, 200));

                //Add random bars effect to the shape
                AnimationEffect effect = slide.Timeline.MainSequence.AddEffect(starShape, AnimationEffectType.RandomBars);

                //Change effect type from entrance to exit
                effect.PresetClassType = TimeNodePresetClassType.Exit;

                //Save the file
                ppt.SaveToFile("ExitAnimationEffect.pptx", FileFormat.Pptx2013);


            }
        }

    }
}
This program guide focus on helping you how to make Spire.Doc workable on Windows and Linux.
Starts from V 6.7.4, Spire.Doc supports .NET Core 2.0. Spire.Doc uses System.Drawing.Common, which depends on Libgdiplus library. So when you use Spire.Doc on .NET core, you need to install Libgdiplus library.
On Windows, we recommend you to get Spire.Doc package via Nuget. The Libgdiplus library will be installed automatically.

On Linux, you need to install Libgdiplus library independently. Please follow the below three steps to install it successfully.
Step1: Open xxxx.csproj file and write the code snippet into it.
<ItemGroup>
<PackageReference Include=”Spire.Doc” Version=”6.7.13”/>
</ItemGroup>
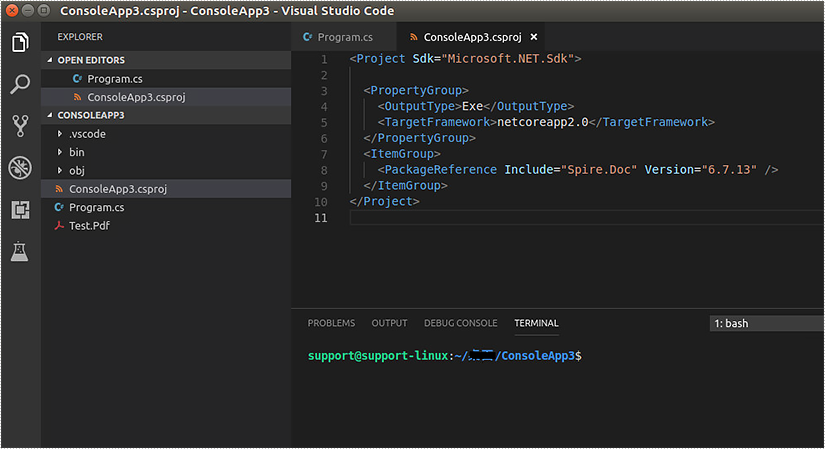
Step 2. Execute "dotnet build" command on terminal window of Visual Studio Code. It will install Spire.Doc package.

Step 3. Open terminal window on Linux and execute Libgdiplus library installation command, for example, the command on Linux Ubuntu is "sudo apt-get install libgdiplus".

Then you can use Spire.Doc on .NET core.
If you have any question, please feel free to contact us.
Spire.Doc provides several overloaded Replace methods to replace text in different scenarios. This article is going to show you how to replace a specified text in a template document with another document using Spire.Doc.
The template document:
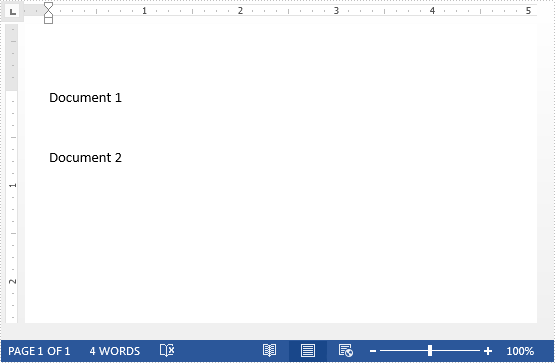
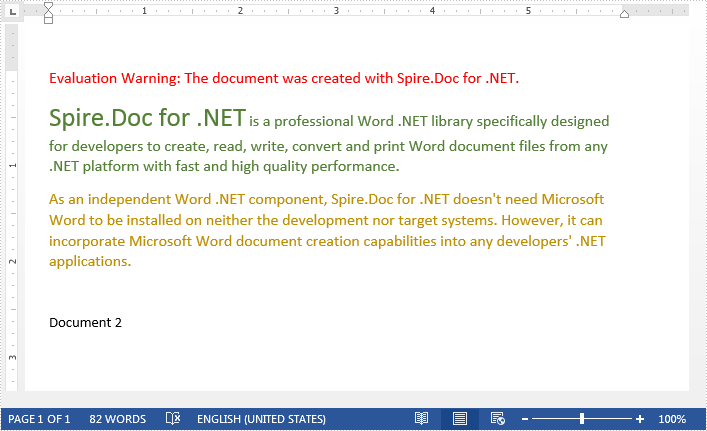
The document to replace text:
Detail steps:
Step 1: Load a template document.
Document document = new Document("Template.docx");
Step 2: Load another document to replace text.
IDocument replaceDocument = new Document("Document1.docx");
Step 3: Replace specified text with the other document.
document.Replace("Document 1", replaceDocument, false, true);
Step 4: Save the file.
document.SaveToFile("Output.docx", FileFormat.Docx2013);
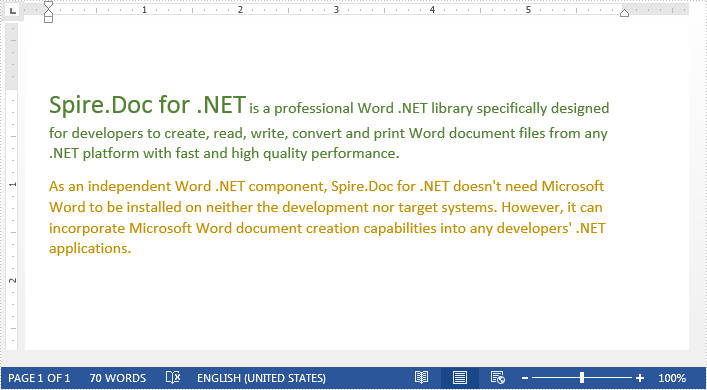
Output:
Full code:
using Spire.Doc;
using Spire.Doc.Interface;

namespace Replace_Text_With_Document
{
    class Program
    {
        static void Main(string[] args)
        {
            //Load a template document
            Document document = new Document("Template.docx");

            //Load another document to replace text
            IDocument replaceDocument = new Document("Document1.docx");

            //Replace specified text with the other document
            document.Replace("Document 1", replaceDocument, false, true);

            //Save the file
            document.SaveToFile("Output.docx", FileFormat.Docx2013);
        }
    }
}
