
Knowledgebase (2344)
Children categories
Grouping and ungrouping in PowerPoint are two useful features when working with shapes. Grouping allows you to join multiple shapes together so you can move, format, resize, and rotate them at once as if they were a single shape. Ungrouping lets you break the connection between grouped shapes so you can work on them individually again. In this article, you will learn how to use Spire.Presentation for .NET to group or ungroup shapes in PowerPoint in C# and VB.NET.
Install Spire.Presentation for .NET
To begin with, you need to add the DLL files included in the Spire.Presentation for.NET package as references in your .NET project. The DLL files can be either downloaded from this link or installed via NuGet.
PM> Install-Package Spire.Presentation
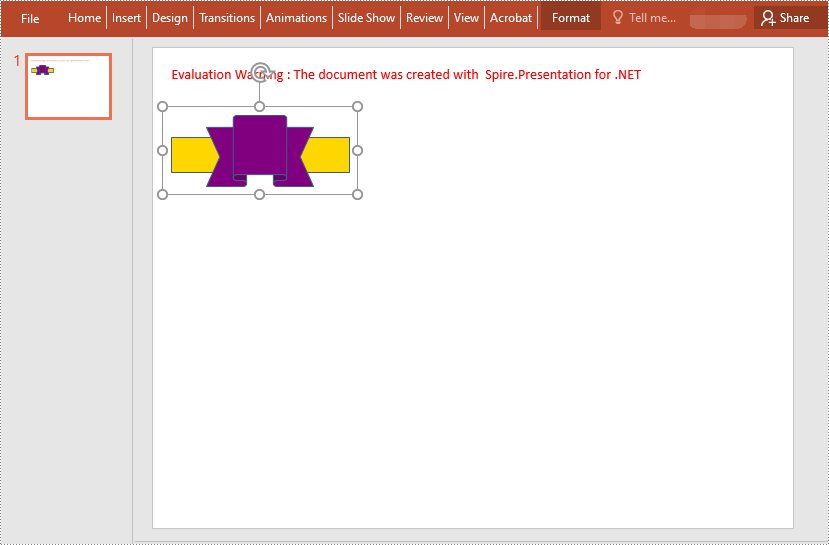
Group Shapes in PowerPoint in C# and VB.NET
Spire.Presentation for .NET provides the ISlide.GroupShapes(ArrayList shapeList) method to group two or more shapes on a specific slide. The following are the detailed steps:
- Initialize an instance of the Presentation class.
- Get the first slide by its index through Presentation.Slides[0] property.
- Add two shapes to the slide using ISlide.Shapes.AppendShape() method.
- Initialize an instance of the ArrayList class.
- Add the two shapes to the ArrayList.
- Group the two shapes in the ArrayList using ISlide.GroupShapes(ArrayList shapeList) method.
- Save the result document using Presentation.SaveToFile() method.
- C#
- VB.NET
using Spire.Presentation;
using Spire.Presentation.Drawing;
using System.Collections;
using System.Drawing;

namespace GroupShapes
{
    internal class Program
    {
        static void Main(string[] args)
        {
            //Initialize an instance of the Presentation class
            Presentation ppt = new Presentation();
            //Get the first slide
            ISlide slide = ppt.Slides[0];

            //Add two shapes to the slide
            IShape rectangle = slide.Shapes.AppendShape(ShapeType.Rectangle, new RectangleF(20, 100, 200, 40));
            rectangle.Fill.FillType = FillFormatType.Solid;
            rectangle.Fill.SolidColor.KnownColor = KnownColors.Gold;
            rectangle.Line.Width = 0.1f;
            IShape ribbon = slide.Shapes.AppendShape(ShapeType.Ribbon2, new RectangleF(60, 75, 120, 80));
            ribbon.Fill.FillType = FillFormatType.Solid;
            ribbon.Fill.SolidColor.KnownColor = KnownColors.Purple;
            ribbon.Line.Width = 0.1f;

            //Initialize an instance of the ArrayList class
            ArrayList list = new ArrayList();
            //Add the two shapes to the ArrayList
            list.Add(rectangle);
            list.Add(ribbon);

            //Group the two shapes
            slide.GroupShapes(list);

            //Save the result document
            ppt.SaveToFile("GroupShapes.pptx", FileFormat.Pptx2010);
            ppt.Dispose();
        }
    }
}
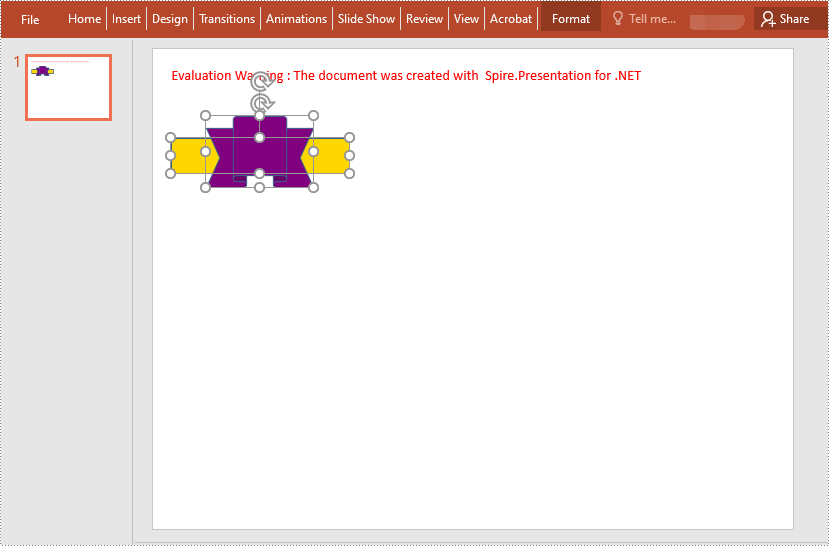
Ungroup Shapes in PowerPoint in C# and VB.NET
To ungroup the grouped shapes in a PowerPoint document, you need to iterate through all slides in the document and all shapes on each slide, find the grouped shapes and then ungroup them using ISlide.Ungroup(GroupShape) method. The following are the detailed steps:
- Initialize an instance of the Presentation class.
- Load the PowerPoint document using Presentation.LoadFromFile() method.
- Iterate through all slides in the document.
- Iterate through all shapes on each slide.
- Check if the current shape is of GroupShape type. If the result is true, ungroup it using ISlide.Ungroup(GroupShape) method.
- Save the result document using Presentation.SaveToFile() method.
- C#
- VB.NET
using Spire.Presentation;
using Spire.Presentation.Drawing;
using System.Collections;
using System.Drawing;

namespace UngroupShapes
{
    internal class Program
    {
        static void Main(string[] args)
        {
            //Initialize an instance of the Presentation class
            Presentation ppt = new Presentation();
            //Load the PowerPoint document
            ppt.LoadFromFile("GroupShapes.pptx");

            //Iterate through all slides in the document
            for (int i = 0; i < ppt.Slides.Count; i++)
            {
                ISlide slide = ppt.Slides[i];
                //Iterate through all shapes on each slide
                for (int j = 0; j < slide.Shapes.Count; j++)
                {
                    IShape shape = slide.Shapes[j];
                    //Detect if the shape is a grouped shape
                    if (shape is GroupShape)
                    {
                        GroupShape groupShape = shape as GroupShape;
                        //Ungroup the grouped shape
                        slide.Ungroup(groupShape);
                    }
                }
            }

            //Save the result document
            ppt.SaveToFile("UngroupShapes.pptx", FileFormat.Pptx2013);
            ppt.Dispose();
        }
    }
}
Apply for a Temporary License
If you'd like to remove the evaluation message from the generated documents, or to get rid of the function limitations, please request a 30-day trial license for yourself.
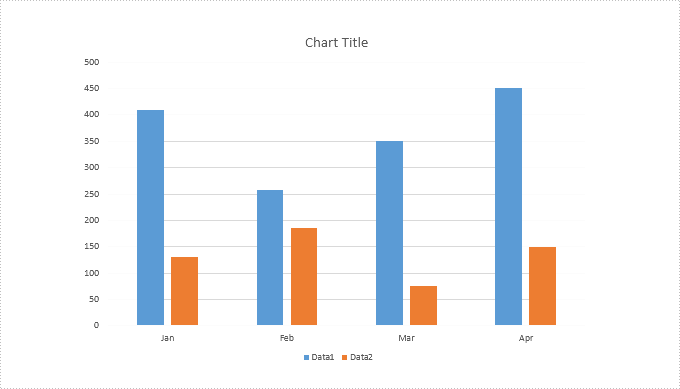
Spire.Presentation provides a property "IsHidden" to enable developers to hide or show a specific series of a chart. This article demonstrates how we can accomplish this function using Spire.Presentation and C#.
Below is the screenshot of the original chart:
Detail steps:
Step 1: Instantiate a Presentation object and load the PowerPoint file.
Presentation ppt = new Presentation();
ppt.LoadFromFile("Input.pptx");
Step 2: Get the first slide.
ISlide slide = ppt.Slides[0];
Step 3: Get the first chart.
IChart chart = slide.Shapes[0] as IChart;
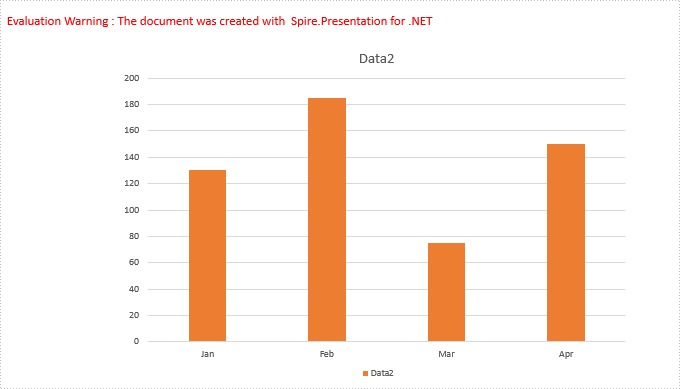
Step 4: Hide the first series of the chart.
//Hide the first series of the chart
chart.Series[0].IsHidden = true;

//Show the first series of the chart
//chart.Series[0].IsHidden = false;
Step 5: Save the file.
ppt.SaveToFile("Output.pptx", FileFormat.Pptx2013);
Screenshot after hiding the first series:
using Spire.Presentation;
using Spire.Presentation.Charts;

namespace Hide_Chart_Series_in_PPT
{
    class Program
    {
        static void Main(string[] args)
        {
            //Instantiate a Presentation object
            Presentation ppt = new Presentation();
            //Load the PowerPoint file
            ppt.LoadFromFile("Input.pptx");

            //Get the first slide
            ISlide slide = ppt.Slides[0];

            //Get the first chart
            IChart chart = slide.Shapes[0] as IChart;

            //Hide the first series of the chart
            chart.Series[0].IsHidden = true;

            //Show the first series of the chart
            //chart.Series[0].IsHidden = false;

            //Save the file
            ppt.SaveToFile("Output.pptx", FileFormat.Pptx2013);
        }
    }
}
By using Spire.Doc, you can not only retrieve the style names of all paragraphs in a Word document, but also get the paragraphs with a specific style name. This is useful especially when you need to get the text in Title, Heading 1, Subtitle, etc.
| Paragraph Style Names in Word | Paragraph Style Names in Spire.Doc |
| Title | Title |
| Heading 1 | Heading1 |
| Heading 2 | Heading2 |
| Heading 3 | Heading3 |
| Heading 4 | Heading3 |
| Subtitle | Subtitle |
Step 1: Load a sample Word file when initializing the Document object.
Document doc = new Document("sample.docx");
Step 2: Traverse the sections and paragraphs in the document and determine if the paragraph style name is "Heading1", if so, write the paragraph text on screen.
foreach (Section section in doc.Sections)
{
    foreach (Paragraph paragraph in section.Paragraphs)
    {
        if (paragraph.StyleName == "Heading1")
        {
            Console.WriteLine(paragraph.Text);
        }
    }
}
Output:
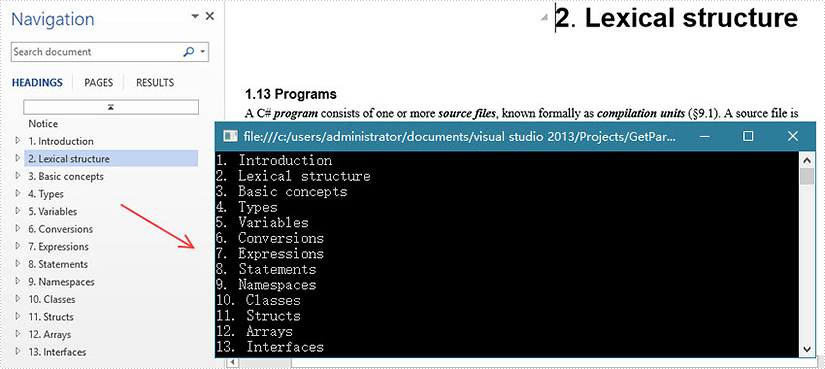
Full Code:
using Spire.Doc;
using Spire.Doc.Documents;
using System;
namespace GetParagh
{
 class Program
    {

     static void Main(string[] args)
     {
         Document doc = new Document("sample.docx");
         foreach (Section section in doc.Sections)
         {
             foreach (Paragraph paragraph in section.Paragraphs)
             {
                 if (paragraph.StyleName == "Heading1")
                 {
                     Console.WriteLine(paragraph.Text);
                 }
             }
         }
     }

    }
}
Imports Spire.Doc
Imports Spire.Doc.Documents
Namespace GetParagh
	Class Program

		Private Shared Sub Main(args As String())
			Dim doc As New Document("sample.docx")
			For Each section As Section In doc.Sections
				For Each paragraph As Paragraph In section.Paragraphs
					If paragraph.StyleName = "Heading1" Then
						Console.WriteLine(paragraph.Text)
					End If
				Next
			Next
		End Sub

	End Class
End Namespace
