Como adicionar marca d'água a um PDF: 4 formas eficazes
Sumário
- Quando usar marcas d'água em PDF?
- Método 1: Adicionar marca d'água a PDF usando Adobe Acrobat Pro
- Método 2: Adicionar marca d'água a PDF online
- Método 3: Adicionar marca d'água a PDF usando LibreOffice Draw
- Método 4: Adicionar marca d'água a PDF usando Spire.PDF para Python
- Comparação de todos os métodos
- Conclusão
- Perguntas frequentes sobre marca d'água em PDF
Marcas d'água em PDF são amplamente utilizadas para proteção de direitos autorais, branding, rastreamento de documentos e avisos de confidencialidade. Se você deseja adicionar um simples rótulo "CONFIDENCIAL" ou colocar o logotipo de uma empresa em cada página, a marca d'água ajuda a prevenir a distribuição não autorizada e deixa clara a propriedade do documento.
Neste guia, você aprenderá várias maneiras práticas de adicionar marcas d'água a documentos PDF — desde ferramentas profissionais de desktop até soluções online gratuitas e automação com Python.
Navegação Rápida:
- Método 1: Adicionar marca d'água a PDF usando Adobe Acrobat Pro
- Método 2: Adicionar marca d'água a PDF online
- Método 3: Adicionar marca d'água a PDF usando LibreOffice Draw
- Método 4: Adicionar marca d'água a PDF usando Spire.PDF para Python
Quando usar marcas d'água em PDF?
Marcas d'água em PDF são úteis sempre que você precisar identificar, proteger ou dar uma marca a um documento. Elas ajudam os leitores a entender imediatamente o status ou a propriedade do documento sem alterar o conteúdo original. Tanto empresas quanto usuários individuais usam marcas d'água comumente para fins de segurança, direitos autorais e gerenciamento de fluxo de trabalho.
Aqui estão algumas situações comuns em que marcas d'água em PDF são úteis:
- Proteger arquivos confidenciais
- Prevenir distribuição não autorizada
- Marcar versões rascunho
- Adicionar branding da empresa
- Identificar a propriedade do documento
Dependendo do seu fluxo de trabalho, você pode adicionar marcas d'água manualmente usando ferramentas de desktop ou automatizar o processo usando bibliotecas Python para processamento de PDF em larga escala.
Método 1: Adicionar marca d'água a PDF usando Adobe Acrobat Pro
Ideal para: Usuários profissionais que precisam de controle preciso e resultados de alta qualidade.
Quando se trata de editar PDFs, o Adobe Acrobat Pro ainda é considerado o padrão da indústria. Seu recurso de marca d'água é altamente estável e oferece aos usuários controle detalhado sobre como as marcas d'água aparecem nas páginas. Você pode adicionar marcas d'água de texto e imagem, ajustar a opacidade, girá-las diagonalmente e até aplicá-las apenas a intervalos de páginas específicos.
Para empresas que lidam com contratos, relatórios ou documentos confidenciais, o Acrobat oferece uma das maneiras mais confiáveis de adicionar marcas d'água a PDFs, preservando o layout e a formatação originais.
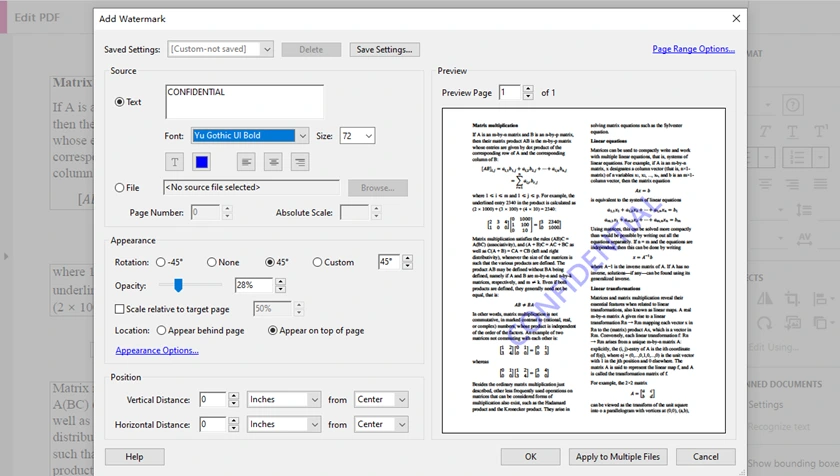
Passo a Passo: Adicionar marca d'água no Adobe Acrobat Pro
- Abra seu PDF no Adobe Acrobat Pro.
- Vá para Ferramentas → Editar PDF → Marca d'água → Adicionar.
- Escolha o tipo de marca d'água:
- Marca d'água de texto, ou
- Marca d'água de imagem (Arquivo)
- Dependendo da sua escolha:
- Se Texto: digite o texto, depois personalize a fonte, cor, opacidade, rotação
- Se Imagem: selecione a imagem, depois ajuste escala, opacidade, posição
- Visualize o resultado.
- Clique em OK e salve o documento.
Prós
- Resultados de qualidade profissional
- Excelente preservação da formatação
- Opções de personalização poderosas
Contras
- Requer assinatura paga
- Caro para usuários ocasionais
Método 2: Adicionar marca d'água a PDF online
Ideal para: Usuários que desejam uma solução rápida sem instalar software.
Se você só precisa adicionar marca d'água a um PDF ocasionalmente, as ferramentas online são geralmente a opção mais rápida. A maioria dos editores de PDF baseados na web permite que você carregue um arquivo, insira uma marca d'água de texto ou imagem e baixe o PDF atualizado em minutos. Todo o processo acontece no navegador, tornando-o conveniente para usuários em diferentes sistemas operacionais.
Ferramentas online são especialmente úteis para tarefas leves, como adicionar um rótulo "Rascunho", colocar o logotipo de uma empresa ou marcar documentos internos antes de compartilhá-los. No entanto, como os arquivos precisam ser carregados em servidores remotos, eles podem não ser ideais para PDFs confidenciais ou altamente sensíveis.
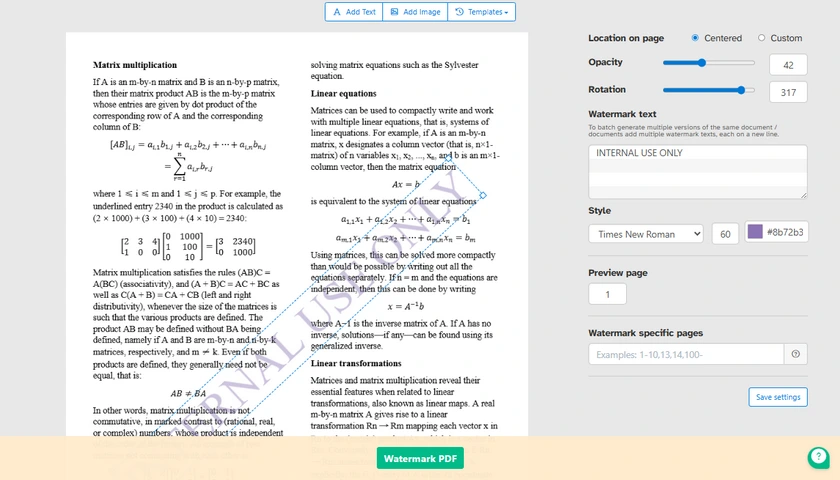
Passos Gerais para Adicionar Marca d'água a PDF Online
- Abra uma ferramenta online de marca d'água em PDF.
- Carregue seu arquivo PDF.
- Escolha o tipo de marca d'água:
- Marca d'água de texto, ou
- Marca d'água de imagem
- Dependendo da sua escolha:
- Se Texto: digite o texto da sua marca d'água
- Se Imagem: carregue seu logotipo ou arquivo de imagem
- Personalize as configurações da marca d'água:
- Tamanho
- Rotação
- Transparência
- Posição
- Visualize o resultado.
- Baixe o PDF processado.
Prós
- Muito fácil de usar
- Nenhuma instalação necessária
- Funciona em Windows, macOS, Linux e dispositivos móveis
Contras
- Preocupações com privacidade para arquivos sensíveis
- Limitações de tamanho de upload
- Conexão com a internet necessária
Método 3: Adicionar marca d'água a PDF usando LibreOffice Draw
Ideal para: Usuários que procuram uma solução de desktop totalmente gratuita.
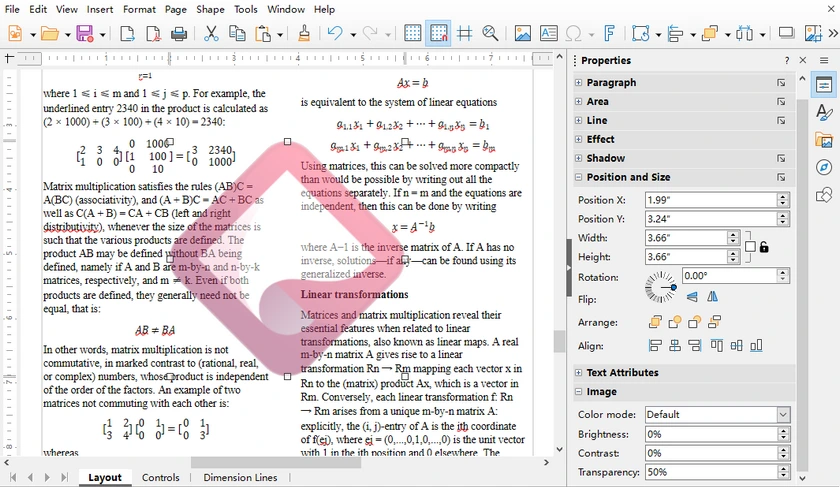
Para usuários que preferem ferramentas offline, mas não querem pagar por editores de PDF premium, o LibreOffice Draw oferece uma alternativa prática. Embora não seja projetado especificamente para marca d'água em PDF, ele pode abrir arquivos PDF diretamente e permite que os usuários coloquem texto ou imagens sobre as páginas existentes.
Este método funciona particularmente bem para tarefas simples de marca d'água, especialmente ao lidar com documentos curtos. Como o LibreOffice Draw é totalmente gratuito e de código aberto, ele continua sendo uma escolha popular entre estudantes, freelancers e usuários de Linux que precisam de recursos de edição de PDF ocasionais.
Passos para Adicionar Marca d'água a PDF usando LibreOffice
-
Inicie o LibreOffice Draw.
-
Vá para Arquivo → Abrir, selecione e abra seu arquivo PDF de destino.
-
Adicione sua marca d'água conforme apropriado:
- Para marca d'água de texto: Clique em Inserir → Caixa de Texto, arraste para desenhar uma caixa e digite o conteúdo da sua marca d'água.
- Para marca d'água de imagem: Clique em Inserir → Imagem para importar seu logotipo ou foto.
-
Ajuste a transparência e outras configurações:
- Transparência do Texto: Clique duas vezes para selecionar todo o texto, clique com o botão direito → Caractere, abra a guia Efeitos da Fonte, e arraste o controle deslizante para ajustar a transparência do texto.
- Transparência da Imagem: Clique uma vez para selecionar a imagem inserida, clique com o botão direito → Área, arraste diretamente o controle deslizante de transparência para tornar a imagem semitransparente.
- Personalize tamanho da fonte, cor, ângulo de rotação e posicionamento livremente.
-
Copie e cole a marca d'água editada para cobrir todas as páginas.
-
Quando terminar, navegue até Arquivo → Exportar como → Exportar como PDF para salvar seu arquivo PDF final.
Prós
- Totalmente gratuito
- Código aberto
- Nenhuma assinatura necessária
Contras
- Mais lento ao lidar com PDFs grandes
- Menos conveniente para processamento em lote
Método 4: Adicionar marca d'água a PDF usando Spire.PDF para Python
Ideal para: Desenvolvedores que precisam de marca d'água em PDF automatizada com preservação confiável da formatação.
Os métodos acima funcionam bem para edição manual, mas tornam-se ineficientes quando você precisa processar um grande número de arquivos PDF automaticamente. Em fluxos de trabalho de desenvolvimento, a marca d'água é frequentemente parte de um pipeline de automação maior — como gerar faturas, proteger relatórios internos ou dar marca a documentos exportados.
É aqui que o Spire.PDF para Python se torna útil. Ele permite que os desenvolvedores adicionem marcas d'água de texto e imagem programaticamente, mantendo a renderização precisa do PDF. Comparado com muitas bibliotecas de PDF leves, ele oferece melhor controle sobre a aparência da marca d'água, incluindo transparência, rotação, estilo de fonte e posicionamento.
Instalar Spire.PDF para Python
Instale a biblioteca usando pip:
pip install spire.pdf
Adicionar marca d'água de texto a PDF em Python
O exemplo a seguir adiciona uma marca d'água de texto semitransparente rotacionada a cada página em um documento PDF.
from spire.pdf import *
from spire.pdf.common import *
import math

# Crie um objeto da classe PdfDocument
doc = PdfDocument()

# Carregue um documento PDF do caminho especificado
doc.LoadFromFile("Input.pdf")

# Crie um objeto da classe PdfTrueTypeFont para a fonte da marca d'água
font = PdfTrueTypeFont("Times New Roman", 48.0, 0, True)

# Especifique o texto da marca d'água
text = "NÃO COPIE"

# Meça as dimensões do texto para garantir o posicionamento correto
text_width = font.MeasureString(text).Width
text_height = font.MeasureString(text).Height

# Itere por cada página do documento
for i in range(doc.Pages.Count):

    # Obtenha a página atual
    page = doc.Pages.get_Item(i)

    # Salve o estado atual da tela
    state = page.Canvas.Save()

    # Calcule as coordenadas centrais da página
    x = page.Canvas.Size.Width / 2
    y = page.Canvas.Size.Height / 2

    # Translade o sistema de coordenadas para o centro
    page.Canvas.TranslateTransform(x, y)

    # Rotacione a marca d'água
    page.Canvas.RotateTransform(-45.0)

    # Defina a transparência
    page.Canvas.SetTransparency(0.7)

    # Desenhe o texto da marca d'água
    page.Canvas.DrawString(
        text,
        font,
        PdfBrushes.get_Blue(),
        PointF(-text_width / 2, -text_height / 2)
    )

    # Restaure o estado da tela
    page.Canvas.Restore(state)

# Salve o PDF modificado
doc.SaveToFile("output/TextWatermark.pdf")

# Libere os recursos
doc.Dispose()
Opções de Personalização
Este exemplo demonstra várias configurações de marca d'água comumente usadas:
- Personalização da fonte
Altere a família da fonte, tamanho e estilo para corresponder ao design do seu documento.
- Ângulo de rotação
A marca d'água é rotacionada em -45° para criar uma aparência diagonal na página.
- Controle de transparência
O método SetTransparency() permite que a marca d'água permaneça visível sem bloquear o conteúdo do documento.
- Posicionamento centralizado
O código coloca automaticamente a marca d'água no centro de cada página.
Essas configurações podem ser facilmente ajustadas dependendo se você deseja uma marca d'água sutil de fundo ou um rótulo de segurança mais proeminente.
Adicionar marca d'água de imagem a PDF em Python
Além de marcas d'água de texto, você também pode colocar logotipos, carimbos ou imagens de branding em páginas PDF.
# Carregue a imagem da marca d'água do caminho especificado
image = PdfImage.FromFile("logo.png")

# Obtenha a largura e a altura da imagem carregada para posicionamento
imageWidth = float(image.Width)
imageHeight = float(image.Height)

# Itere por cada página do documento para aplicar a marca d'água
for i in range(doc.Pages.Count):

    # Obtenha a página atual
    page = doc.Pages.get_Item(i)

    # Defina a transparência da marca d'água para 50%
    page.Canvas.SetTransparency(0.5)

    # Obtenha as dimensões da página atual
    pageWidth = page.ActualSize.Width
    pageHeight = page.ActualSize.Height

    # Calcule as coordenadas x e y para centralizar a imagem na página
    x = (pageWidth - imageWidth) / 2
    y = (pageHeight - imageHeight) / 2

    # Desenhe a imagem na posição central calculada na página
    page.Canvas.DrawImage(image, x, y, imageWidth, imageHeight)
O que você pode personalizar?
Com marcas d'água de imagem, você pode personalizar facilmente:
- Nível de transparência
- Tamanho da marca d'água
- Posição na página
- Logotipo ou imagem de branding
- Posicionamento da marca d'água em várias páginas
Além de adicionar marcas d'água, o Spire.PDF para Python também oferece uma ampla gama de recursos de processamento de PDF. Você pode usá-lo para criar, editar, mesclar, dividir e converter documentos PDF programaticamente. Isso o torna uma solução versátil para construir fluxos de trabalho completos de automação de PDF em aplicativos Python.
Comparação de todos os métodos
| Método | Facilidade de Uso | Custo | Ideal para | Automação |
|---|---|---|---|---|
| Adobe Acrobat Pro | Fácil | Pago | Edição profissional | Não |
| Ferramentas Online | Muito Fácil | Grátis/Freemium | Tarefas rápidas | Não |
| LibreOffice Draw | Médio | Grátis | Edição gratuita em desktop | Não |
| Spire.PDF para Python | Médio | Grátis/Comercial | Desenvolvedores e automação | Sim |
Conclusão
Adicionar marcas d'água a PDFs pode variar de uma tarefa simples e única a um fluxo de trabalho de processamento de documentos totalmente automatizado. Ferramentas como Adobe Acrobat e editores online são adequadas para edição manual ocasional, enquanto o LibreOffice Draw oferece uma alternativa gratuita capaz para uso offline.
Para desenvolvedores e empresas que lidam com PDFs em escala, soluções programáticas oferecem muito mais flexibilidade. O Spire.PDF para Python permite adicionar marcas d'água de texto e imagem com controle preciso sobre transparência, rotação, fontes e posicionamento, tornando-o bem adequado para fluxos de trabalho automatizados de geração de PDF e proteção de documentos.
Perguntas frequentes sobre marca d'água em PDF
Posso adicionar uma marca d'água a um PDF gratuitamente?
Absolutamente. Você pode usar software de desktop gratuito, como o LibreOffice Draw, ou vários editores de PDF online gratuitos para inserir marcas d'água de texto e imagem sem necessidade de assinatura paga. Além disso, a edição gratuita do Spire.PDF também permite a inserção de marcas d'água em PDF, com um limite de até 10 páginas por documento.
Posso adicionar uma marca d'água de imagem em vez de texto?
Sim. A maioria das ferramentas de PDF suporta marcas d'água de texto e imagem, incluindo logotipos, carimbos e gráficos de marca.
Como adiciono uma marca d'água a todas as páginas de um PDF?
A maioria dos editores de PDF inclui uma opção para aplicar a marca d'água a todas as páginas automaticamente. Em Python, isso geralmente é feito iterando por todas as páginas.
Adicionar uma marca d'água reduzirá a qualidade do PDF?
Geralmente não. Marcas d'água de texto têm impacto mínimo, enquanto marcas d'água de imagem podem aumentar ligeiramente o tamanho do arquivo, dependendo da imagem usada.
Qual método é melhor para marca d'água em lote de PDFs?
Soluções programáticas são melhores para processamento em lote. Bibliotecas como Spire.PDF para Python podem automatizar a marca d'água em um grande número de arquivos PDF.
Veja também
PDF 워터마크 추가 방법: 4가지 효과적인 방법
PDF 워터마크는 저작권 보호, 브랜딩, 문서 추적 및 기밀 유지 공지에 널리 사용됩니다. 간단한 "기밀" 라벨을 추가하거나 모든 페이지에 회사 로고를 배치하려는 경우 워터마킹은 무단 배포를 방지하고 문서 소유권을 명확히 하는 데 도움이 됩니다.
이 가이드에서는 전문 데스크톱 도구부터 무료 온라인 솔루션 및 Python 자동화에 이르기까지 PDF 문서에 워터마크를 추가하는 몇 가지 실용적인 방법을 배웁니다.
빠른 탐색:
- 방법 1: Adobe Acrobat Pro를 사용하여 PDF에 워터마크 추가하기
- 방법 2: 온라인으로 PDF에 워터마크 추가하기
- 방법 3: LibreOffice Draw를 사용하여 PDF에 워터마크 추가하기
- 방법 4: Spire.PDF for Python을 사용하여 PDF에 워터마크 추가하기
PDF 워터마크는 언제 사용해야 할까요?
PDF 워터마크는 문서를 식별, 보호 또는 브랜딩해야 할 때 유용합니다. 원래 콘텐츠 자체를 변경하지 않고도 독자가 문서의 상태 또는 소유권을 즉시 이해하도록 돕습니다. 비즈니스 및 개인 사용자 모두 보안, 저작권 및 워크플로 관리를 위해 워터마크를 일반적으로 사용합니다.
PDF 워터마크가 유용한 몇 가지 일반적인 상황은 다음과 같습니다.
- 기밀 파일 보호
- 무단 배포 방지
- 초안 버전 표시
- 회사 브랜딩 추가
- 문서 소유권 식별
워크플로에 따라 데스크톱 도구를 사용하여 수동으로 워터마크를 추가하거나 Python 라이브러리를 사용하여 대규모 PDF 처리를 자동화할 수 있습니다.
방법 1: Adobe Acrobat Pro를 사용하여 PDF에 워터마크 추가하기
최적: 정확한 제어와 고품질 출력이 필요한 전문 사용자.
PDF 편집에 있어서 Adobe Acrobat Pro는 여전히 업계 표준으로 간주됩니다. 워터마킹 기능은 매우 안정적이며 사용자에게 페이지 전체에 워터마크가 표시되는 방식에 대한 세부적인 제어를 제공합니다. 텍스트 및 이미지 워터마크를 모두 추가하고, 불투명도를 조정하고, 대각선으로 회전하고, 특정 페이지 범위에만 적용할 수도 있습니다.
계약서, 보고서 또는 기밀 문서를 처리하는 비즈니스의 경우 Acrobat은 원본 레이아웃과 서식을 유지하면서 PDF에 워터마크를 추가하는 가장 안정적인 방법 중 하나를 제공합니다.
단계별: Adobe Acrobat Pro에서 워터마크 추가하기
- Adobe Acrobat Pro에서 PDF를 엽니다.
- 도구 → PDF 편집 → 워터마크 → 추가로 이동합니다.
- 워터마크 유형을 선택합니다.
- 텍스트 워터마크 또는
- 이미지 워터마크 (파일)
- 선택에 따라:
- 텍스트인 경우: 텍스트를 입력한 다음 글꼴, 색상, 불투명도, 회전을 사용자 지정합니다.
- 이미지인 경우: 이미지를 선택한 다음 크기, 불투명도, 위치를 조정합니다.
- 결과를 미리 봅니다.
- 확인을 클릭하고 문서를 저장합니다.
장점
- 전문적인 품질의 결과
- 뛰어난 서식 유지
- 강력한 사용자 지정 옵션
단점
- 유료 구독 필요
- 가끔 사용하는 사용자에게는 비쌈
방법 2: 온라인으로 PDF에 워터마크 추가하기
최적: 소프트웨어를 설치하지 않고 빠른 솔루션을 원하는 사용자.
PDF에 워터마크를 가끔 추가해야 하는 경우 온라인 도구가 가장 빠른 옵션인 경우가 많습니다. 대부분의 웹 기반 PDF 편집기를 사용하면 파일을 업로드하고, 텍스트 또는 이미지 워터마크를 삽입하고, 몇 분 안에 업데이트된 PDF를 다운로드할 수 있습니다. 전체 프로세스가 브라우저에서 이루어지므로 다양한 운영 체제의 사용자에게 편리합니다.
온라인 도구는 "초안" 라벨 추가, 회사 로고 배치 또는 공유 전에 내부 문서 표시와 같은 가벼운 작업에 특히 유용합니다. 그러나 파일을 원격 서버에 업로드해야 하므로 기밀 또는 매우 민감한 PDF에는 이상적이지 않을 수 있습니다.
온라인으로 PDF에 워터마크를 추가하는 일반적인 단계
- 온라인 PDF 워터마크 도구를 엽니다.
- PDF 파일을 업로드합니다.
- 워터마크 유형을 선택합니다.
- 텍스트 워터마크 또는
- 이미지 워터마크
- 선택에 따라:
- 텍스트인 경우: 워터마크 텍스트를 입력합니다.
- 이미지인 경우: 로고 또는 이미지 파일을 업로드합니다.
- 워터마크 설정을 사용자 지정합니다.
- 크기
- 회전
- 투명도
- 위치
- 결과를 미리 봅니다.
- 처리된 PDF를 다운로드합니다.
장점
- 사용하기 매우 쉬움
- 설치 불필요
- Windows, macOS, Linux 및 모바일 장치에서 작동
단점
- 민감한 파일에 대한 개인 정보 보호 문제
- 업로드 크기 제한
- 인터넷 연결 필요
방법 3: LibreOffice Draw를 사용하여 PDF에 워터마크 추가하기
최적: 완전히 무료인 데스크톱 솔루션을 찾는 사용자.
오프라인 도구를 선호하지만 프리미엄 PDF 편집기에 비용을 지불하고 싶지 않은 사용자의 경우 LibreOffice Draw는 실용적인 대안을 제공합니다. PDF 워터마킹을 위해 특별히 설계된 것은 아니지만 PDF 파일을 직접 열 수 있으며 사용자가 기존 페이지 위에 텍스트 또는 이미지를 배치할 수 있습니다.
이 방법은 특히 짧은 문서로 작업할 때 간단한 워터마킹 작업에 매우 효과적입니다. LibreOffice Draw는 완전히 무료이며 오픈 소스이므로 가끔 PDF 편집 기능이 필요한 학생, 프리랜서 및 Linux 사용자들 사이에서 인기 있는 선택입니다.
LibreOffice를 사용하여 PDF에 워터마크를 추가하는 단계
-
LibreOffice Draw를 실행합니다.
-
파일 → 열기로 이동한 다음 대상 PDF 파일을 선택하고 엽니다.
-
워터마크를 적절하게 추가합니다.
- 텍스트 워터마크의 경우: 삽입 → 텍스트 상자를 클릭하고 드래그하여 상자를 그린 다음 워터마크 내용을 입력합니다.
- 이미지 워터마크의 경우: 삽입 → 이미지를 클릭하여 로고 또는 사진을 가져옵니다.
-
투명도 및 기타 설정을 조정합니다.
- 텍스트 투명도: 두 번 클릭하여 모든 텍스트를 강조 표시하고 마우스 오른쪽 버튼을 클릭 → 문자를 선택한 다음 글꼴 효과 탭을 열고 슬라이더를 드래그하여 텍스트 투명도를 조정합니다.
- 이미지 투명도: 한 번 클릭하여 삽입된 이미지를 선택하고 마우스 오른쪽 버튼을 클릭 → 영역을 선택한 다음 투명도 슬라이더를 직접 드래그하여 이미지를 반투명하게 만듭니다.
- 글꼴 크기, 색상, 회전 각도 및 배치를 자유롭게 사용자 지정합니다.
-
편집된 워터마크를 복사하여 모든 페이지에 붙여넣습니다.
-
완료되면 파일 → 다른 이름으로 내보내기 → PDF로 내보내기로 이동하여 최종 PDF 파일을 저장합니다.
장점
- 완전히 무료
- 오픈 소스
- 구독 불필요
단점
- 대용량 PDF 처리 시 느림
- 일괄 처리에 덜 편리함
방법 4: Spire.PDF for Python을 사용하여 PDF에 워터마크 추가하기
최적: 안정적인 서식 유지를 통해 자동화된 PDF 워터마킹이 필요한 개발자.
위의 방법은 수동 편집에 적합하지만 대량의 PDF 파일을 자동으로 처리해야 할 때는 비효율적입니다. 개발 워크플로에서 워터마킹은 종종 더 큰 자동화 파이프라인의 일부입니다. 예를 들어 송장을 생성하거나, 내부 보고서를 보호하거나, 내보낸 문서를 브랜딩하는 경우입니다.
이때 Spire.PDF for Python이 유용합니다. 개발자가 텍스트 및 이미지 워터마크를 프로그래밍 방식으로 추가할 수 있도록 하여 정확한 PDF 렌더링을 유지합니다. 많은 경량 PDF 라이브러리에 비해 투명도, 회전, 글꼴 스타일 및 위치를 포함한 워터마크 모양에 대한 더 나은 제어를 제공합니다.
Spire.PDF for Python 설치
pip를 사용하여 라이브러리를 설치합니다.
pip install spire.pdf
Python에서 PDF에 텍스트 워터마크 추가하기
다음 예는 PDF 문서의 모든 페이지에 회전된 반투명 텍스트 워터마크를 추가합니다.
from spire.pdf import *
from spire.pdf.common import *
import math

# PdfDocument 클래스의 객체 생성
doc = PdfDocument()

# 지정된 경로에서 PDF 문서 로드
doc.LoadFromFile("Input.pdf")

# 워터마크 글꼴에 대한 PdfTrueTypeFont 클래스의 객체 생성
font = PdfTrueTypeFont("Times New Roman", 48.0, 0, True)

# 워터마크 텍스트 지정
text = "DO NOT COPY"

# 텍스트의 치수를 측정하여 올바른 위치 지정 보장
text_width = font.MeasureString(text).Width
text_height = font.MeasureString(text).Height

# 문서의 각 페이지를 반복
for i in range(doc.Pages.Count):

    # 현재 페이지 가져오기
    page = doc.Pages.get_Item(i)

    # 현재 캔버스 상태 저장
    state = page.Canvas.Save()

    # 페이지의 중앙 좌표 계산
    x = page.Canvas.Size.Width / 2
    y = page.Canvas.Size.Height / 2

    # 좌표계를 중앙으로 이동
    page.Canvas.TranslateTransform(x, y)

    # 워터마크 회전
    page.Canvas.RotateTransform(-45.0)

    # 투명도 설정
    page.Canvas.SetTransparency(0.7)

    # 워터마크 텍스트 그리기
    page.Canvas.DrawString(
        text,
        font,
        PdfBrushes.get_Blue(),
        PointF(-text_width / 2, -text_height / 2)
    )

    # 캔버스 상태 복원
    page.Canvas.Restore(state)

# 수정된 PDF 저장
doc.SaveToFile("output/TextWatermark.pdf")

# 리소스 해제
doc.Dispose()
사용자 지정 옵션
이 예는 일반적으로 사용되는 몇 가지 워터마크 설정을 보여줍니다.
- 글꼴 사용자 지정
문서 디자인에 맞게 글꼴 패밀리, 크기 및 스타일을 변경합니다.
- 회전 각도
워터마크는 -45°로 회전하여 페이지 전체에 대각선 모양을 만듭니다.
- 투명도 제어
SetTransparency() 메서드를 사용하면 워터마크가 문서 내용을 가리지 않고 보이도록 할 수 있습니다.
- 중앙 정렬
코드는 각 페이지의 중앙에 워터마크를 자동으로 배치합니다.
이러한 설정은 미묘한 배경 워터마크를 원하든 더 눈에 띄는 보안 라벨을 원하든 쉽게 조정할 수 있습니다.
Python에서 PDF에 이미지 워터마크 추가하기
텍스트 워터마크 외에도 로고, 스탬프 또는 브랜딩 이미지를 PDF 페이지에 배치할 수도 있습니다.
# 지정된 경로에서 워터마크 이미지 로드
image = PdfImage.FromFile("logo.png")

# 위치 지정을 위해 로드된 이미지의 너비와 높이 가져오기
imageWidth = float(image.Width)
imageHeight = float(image.Height)

# 문서의 각 페이지를 반복하여 워터마크 적용
for i in range(doc.Pages.Count):

    # 현재 페이지 가져오기
    page = doc.Pages.get_Item(i)

    # 워터마크의 투명도를 50%로 설정
    page.Canvas.SetTransparency(0.5)

    # 현재 페이지의 치수 가져오기
    pageWidth = page.ActualSize.Width
    pageHeight = page.ActualSize.Height

    # 페이지 중앙에 이미지를 배치하기 위한 x 및 y 좌표 계산
    x = (pageWidth - imageWidth) / 2
    y = (pageHeight - imageHeight) / 2

    # 페이지의 계산된 중앙 위치에 이미지 그리기
    page.Canvas.DrawImage(image, x, y, imageWidth, imageHeight)
무엇을 사용자 지정할 수 있나요?
이미지 워터마크를 사용하면 다음을 쉽게 사용자 지정할 수 있습니다.
- 투명도 수준
- 워터마크 크기
- 페이지상의 위치
- 로고 또는 브랜딩 이미지
- 여러 페이지에 걸친 워터마크 배치
워터마크 추가 외에도 Spire.PDF for Python은 광범위한 PDF 처리 기능을 제공합니다. 이를 사용하여 PDF 문서를 프로그래밍 방식으로 생성, 편집, 병합, 분할 및 변환할 수 있습니다. 이를 통해 Python 애플리케이션에서 완전한 PDF 자동화 워크플로를 구축할 수 있는 다목적 솔루션이 됩니다.
모든 방법 비교
| 방법 | 사용 편의성 | 비용 | 최적 | 자동화 |
|---|---|---|---|---|
| Adobe Acrobat Pro | 쉬움 | 유료 | 전문적인 편집 | 아니요 |
| 온라인 도구 | 매우 쉬움 | 무료/부분 유료 | 빠른 작업 | 아니요 |
| LibreOffice Draw | 보통 | 무료 | 무료 데스크톱 편집 | 아니요 |
| Spire.PDF for Python | 보통 | 무료/상업용 | 개발자 및 자동화 | 예 |
결론
PDF에 워터마크를 추가하는 것은 간단한 일회성 작업부터 완전 자동화된 문서 처리 워크플로까지 다양합니다. Adobe Acrobat 및 온라인 편집기와 같은 도구는 가끔 수동 편집에 적합하며, LibreOffice Draw는 오프라인 사용을 위한 유능한 무료 대안을 제공합니다.
대규모로 PDF를 처리하는 개발자 및 비즈니스의 경우 프로그래밍 방식 솔루션은 훨씬 더 큰 유연성을 제공합니다. Spire.PDF for Python을 사용하면 투명도, 회전, 글꼴 및 위치에 대한 정밀한 제어를 통해 텍스트 및 이미지 워터마크를 모두 추가할 수 있으므로 자동화된 PDF 생성 및 문서 보호 워크플로에 적합합니다.
PDF 워터마크에 대한 FAQ
PDF에 워터마크를 무료로 추가할 수 있나요?
물론입니다. LibreOffice Draw와 같은 무료 데스크톱 소프트웨어나 다양한 무료 온라인 PDF 편집기를 사용하여 유료 구독 없이 텍스트 및 이미지 워터마크를 삽입할 수 있습니다. 또한 Spire.PDF의 무료 버전을 사용하면 문서당 최대 10페이지까지 제한이 있지만 PDF 워터마크 삽입이 가능합니다.
텍스트 대신 이미지 워터마크를 추가할 수 있나요?
예. 대부분의 PDF 도구는 로고, 스탬프 및 브랜딩 그래픽을 포함한 텍스트 및 이미지 워터마크를 모두 지원합니다.
PDF의 모든 페이지에 워터마크를 추가하려면 어떻게 해야 하나요?
대부분의 PDF 편집기에는 워터마크를 모든 페이지에 자동으로 적용하는 옵션이 포함되어 있습니다. Python에서는 일반적으로 모든 페이지를 반복하여 수행합니다.
워터마크를 추가하면 PDF 품질이 저하되나요?
일반적으로 그렇지 않습니다. 텍스트 워터마크는 영향이 최소화되는 반면, 이미지 워터마크는 사용된 이미지에 따라 파일 크기가 약간 증가할 수 있습니다.
PDF 일괄 워터마킹에 가장 적합한 방법은 무엇인가요?
프로그래밍 방식 솔루션이 일괄 처리에 가장 적합합니다. Spire.PDF for Python과 같은 라이브러리는 대량의 PDF 파일에 대한 워터마킹을 자동화할 수 있습니다.
참고 자료
Come aggiungere una filigrana a un PDF: 4 metodi efficaci
Indice
- Quando usare le filigrane sui PDF?
- Metodo 1: Aggiungere una filigrana a un PDF con Adobe Acrobat Pro
- Metodo 2: Aggiungere una filigrana a un PDF online
- Metodo 3: Aggiungere una filigrana a un PDF con LibreOffice Draw
- Metodo 4: Aggiungere una filigrana a un PDF con Spire.PDF per Python
- Confronto di tutti i metodi
- Conclusione
- Domande frequenti sulle filigrane PDF
Le filigrane sui PDF sono ampiamente utilizzate per la protezione del copyright, il branding, il tracciamento dei documenti e le notifiche di riservatezza. Sia che tu voglia aggiungere una semplice etichetta "RISERVATO" o posizionare il logo di un'azienda su ogni pagina, la filigrana aiuta a prevenire la distribuzione non autorizzata e a chiarire la proprietà del documento.
In questa guida, imparerai diversi modi pratici per aggiungere filigrane ai documenti PDF, dagli strumenti desktop professionali alle soluzioni online gratuite e all'automazione con Python.
Navigazione rapida:
- Metodo 1: Aggiungere una filigrana a un PDF con Adobe Acrobat Pro
- Metodo 2: Aggiungere una filigrana a un PDF online
- Metodo 3: Aggiungere una filigrana a un PDF con LibreOffice Draw
- Metodo 4: Aggiungere una filigrana a un PDF con Spire.PDF per Python
Quando usare le filigrane sui PDF?
Le filigrane sui PDF sono utili ogni volta che è necessario identificare, proteggere o marchiare un documento. Aiutano i lettori a comprendere immediatamente lo stato o la proprietà del documento senza alterare il contenuto originale. Sia le aziende che gli utenti individuali utilizzano comunemente le filigrane per scopi di sicurezza, copyright e gestione del flusso di lavoro.
Ecco alcune situazioni comuni in cui le filigrane sui PDF sono utili:
- Proteggere file riservati
- Prevenire la distribuzione non autorizzata
- Segnare versioni provvisorie
- Aggiungere il branding aziendale
- Identificare la proprietà del documento
A seconda del tuo flusso di lavoro, puoi aggiungere filigrane manualmente utilizzando strumenti desktop o automatizzare il processo utilizzando librerie Python per l'elaborazione di PDF su larga scala.
Metodo 1: Aggiungere una filigrana a un PDF con Adobe Acrobat Pro
Ideale per: Utenti professionali che necessitano di controllo preciso e output di alta qualità.
Quando si tratta di modificare PDF, Adobe Acrobat Pro è ancora considerato lo standard del settore. La sua funzione di filigrana è altamente stabile e offre agli utenti un controllo dettagliato su come appaiono le filigrane nelle pagine. Puoi aggiungere filigrane di testo e immagine, regolare l'opacità, ruotarle diagonalmente e persino applicarle solo a intervalli di pagine specifici.
Per le aziende che gestiscono contratti, report o documenti riservati, Acrobat offre uno dei modi più affidabili per aggiungere filigrane ai PDF preservando il layout e la formattazione originali.
Passo dopo passo: Aggiungere una filigrana in Adobe Acrobat Pro
- Apri il tuo PDF in Adobe Acrobat Pro.
- Vai su Strumenti → Modifica PDF → Filigrana → Aggiungi.
- Scegli il tipo di filigrana:
- Filigrana di testo, o
- Filigrana immagine (File)
- A seconda della tua scelta:
- Se Testo: inserisci il testo, quindi personalizza font, colore, opacità, rotazione
- Se Immagine: seleziona l'immagine, quindi regola scala, opacità, posizione
- Anteprima del risultato.
- Fai clic su OK e salva il documento.
Pro
- Risultati di qualità professionale
- Eccellente conservazione della formattazione
- Potenti opzioni di personalizzazione
Contro
- Richiede un abbonamento a pagamento
- Costoso per utenti occasionali
Metodo 2: Aggiungere una filigrana a un PDF online
Ideale per: Utenti che desiderano una soluzione rapida senza installare software.
Se hai solo bisogno di aggiungere una filigrana a un PDF occasionalmente, gli strumenti online sono spesso l'opzione più veloce. La maggior parte degli editor PDF basati sul web ti consente di caricare un file, inserire una filigrana di testo o immagine e scaricare il PDF aggiornato in pochi minuti. L'intero processo avviene nel browser, rendendolo conveniente per gli utenti su diversi sistemi operativi.
Gli strumenti online sono particolarmente utili per attività leggere come l'aggiunta di un'etichetta "Bozza", il posizionamento di un logo aziendale o la marcatura di documenti interni prima della condivisione. Tuttavia, poiché i file devono essere caricati su server remoti, potrebbero non essere ideali per PDF riservati o altamente sensibili.
Passaggi generali per aggiungere una filigrana a un PDF online
- Apri uno strumento online per filigrane PDF.
- Carica il tuo file PDF.
- Scegli il tipo di filigrana:
- Filigrana di testo, o
- Filigrana immagine
- A seconda della tua scelta:
- Se Testo: inserisci il testo della filigrana
- Se Immagine: carica il tuo logo o file immagine
- Personalizza le impostazioni della filigrana:
- Dimensione
- Rotazione
- Trasparenza
- Posizione
- Anteprima del risultato.
- Scarica il PDF elaborato.
Pro
- Molto facile da usare
- Nessuna installazione richiesta
- Funziona su Windows, macOS, Linux e dispositivi mobili
Contro
- Preoccupazioni sulla privacy per file sensibili
- Limitazioni sulla dimensione del caricamento
- Connessione Internet richiesta
Metodo 3: Aggiungere una filigrana a un PDF con LibreOffice Draw
Ideale per: Utenti che cercano una soluzione desktop completamente gratuita.
Per gli utenti che preferiscono strumenti offline ma non vogliono pagare per editor PDF premium, LibreOffice Draw offre un'alternativa pratica. Sebbene non sia progettato specificamente per le filigrane PDF, può aprire direttamente i file PDF e consente agli utenti di posizionare testo o immagini sopra le pagine esistenti.
Questo metodo funziona particolarmente bene per semplici attività di filigranatura, specialmente quando si tratta di documenti brevi. Poiché LibreOffice Draw è completamente gratuito e open source, rimane una scelta popolare tra studenti, freelance e utenti Linux che necessitano di funzionalità occasionali di modifica PDF.
Passaggi per aggiungere una filigrana a un PDF con LibreOffice
-
Avvia LibreOffice Draw.
-
Vai su File → Apri, quindi seleziona e apri il tuo file PDF di destinazione.
-
Aggiungi la tua filigrana di conseguenza:
- Per la filigrana di testo: fai clic su Inserisci → Casella di testo, trascina per disegnare una casella e digita il contenuto della filigrana.
- Per la filigrana immagine: fai clic su Inserisci → Immagine per importare il tuo logo o immagine.
-
Regola la trasparenza e altre impostazioni:
- Trasparenza testo: fai doppio clic per evidenziare tutto il testo, fai clic destro → Carattere, apri la scheda Effetti carattere, quindi trascina il cursore per regolare la trasparenza del testo.
- Trasparenza immagine: fai clic singolo per selezionare l'immagine inserita, fai clic destro → Area, trascina direttamente il cursore di trasparenza per rendere l'immagine semitrasparente.
- Personalizza liberamente dimensione del carattere, colore, angolo di rotazione e posizionamento.
-
Copia e incolla la filigrana modificata per coprire tutte le pagine.
-
Al termine, vai su File → Esporta come → Esporta come PDF per salvare il tuo file PDF finale.
Pro
- Completamente gratuito
- Open-source
- Nessun abbonamento richiesto
Contro
- Più lento nella gestione di PDF di grandi dimensioni
- Meno conveniente per l'elaborazione batch
Metodo 4: Aggiungere una filigrana a un PDF con Spire.PDF per Python
Ideale per: Sviluppatori che necessitano di filigranatura PDF automatizzata con conservazione affidabile della formattazione.
I metodi sopra descritti funzionano bene per la modifica manuale, ma diventano inefficienti quando è necessario elaborare automaticamente un gran numero di file PDF. Nei flussi di lavoro di sviluppo, la filigranatura fa spesso parte di una pipeline di automazione più ampia, come la generazione di fatture, la protezione di report interni o il branding di documenti esportati.
È qui che Spire.PDF per Python diventa utile. Consente agli sviluppatori di aggiungere filigrane di testo e immagine programmaticamente mantenendo un rendering PDF accurato. Rispetto a molte librerie PDF leggere, offre un migliore controllo sull'aspetto della filigrana, inclusa trasparenza, rotazione, stile del carattere e posizionamento.
Installa Spire.PDF per Python
Installa la libreria usando pip:
pip install spire.pdf
Aggiungere una filigrana di testo a un PDF in Python
L'esempio seguente aggiunge una filigrana di testo semitrasparente e ruotata a ogni pagina di un documento PDF.
from spire.pdf import *
from spire.pdf.common import *
import math

# Crea un oggetto della classe PdfDocument
doc = PdfDocument()

# Carica un documento PDF dal percorso specificato
doc.LoadFromFile("Input.pdf")

# Crea un oggetto della classe PdfTrueTypeFont per il font della filigrana
font = PdfTrueTypeFont("Times New Roman", 48.0, 0, True)

# Specifica il testo della filigrana
text = "NON COPIARE"

# Misura le dimensioni del testo per garantire un posizionamento corretto
text_width = font.MeasureString(text).Width
text_height = font.MeasureString(text).Height

# Cicla attraverso ogni pagina del documento
for i in range(doc.Pages.Count):

    # Ottieni la pagina corrente
    page = doc.Pages.get_Item(i)

    # Salva lo stato corrente della tela
    state = page.Canvas.Save()

    # Calcola le coordinate centrali della pagina
    x = page.Canvas.Size.Width / 2
    y = page.Canvas.Size.Height / 2

    # Trasla il sistema di coordinate al centro
    page.Canvas.TranslateTransform(x, y)

    # Ruota la filigrana
    page.Canvas.RotateTransform(-45.0)

    # Imposta la trasparenza
    page.Canvas.SetTransparency(0.7)

    # Disegna il testo della filigrana
    page.Canvas.DrawString(
        text,
        font,
        PdfBrushes.get_Blue(),
        PointF(-text_width / 2, -text_height / 2)
    )

    # Ripristina lo stato della tela
    page.Canvas.Restore(state)

# Salva il PDF modificato
doc.SaveToFile("output/TextWatermark.pdf")

# Libera le risorse
doc.Dispose()
Opzioni di personalizzazione
Questo esempio dimostra diverse impostazioni di filigrana comunemente utilizzate:
- Personalizzazione del font
Cambia la famiglia del font, la dimensione e lo stile per adattarli al design del tuo documento.
- Angolo di rotazione
La filigrana è ruotata di -45° per creare un aspetto diagonale sulla pagina.
- Controllo della trasparenza
Il metodo SetTransparency() consente alla filigrana di rimanere visibile senza bloccare il contenuto del documento.
- Posizionamento centrato
Il codice posiziona automaticamente la filigrana al centro di ogni pagina.
Queste impostazioni possono essere facilmente regolate a seconda che tu desideri una filigrana di sfondo discreta o un'etichetta di sicurezza più evidente.
Aggiungere una filigrana immagine a un PDF in Python
Oltre alle filigrane di testo, puoi anche posizionare loghi, timbri o immagini di branding sulle pagine PDF.
# Carica l'immagine della filigrana dal percorso specificato
image = PdfImage.FromFile("logo.png")

# Ottieni larghezza e altezza dell'immagine caricata per il posizionamento
imageWidth = float(image.Width)
imageHeight = float(image.Height)

# Cicla attraverso ogni pagina del documento per applicare la filigrana
for i in range(doc.Pages.Count):

    # Ottieni la pagina corrente
    page = doc.Pages.get_Item(i)

    # Imposta la trasparenza della filigrana al 50%
    page.Canvas.SetTransparency(0.5)

    # Ottieni le dimensioni della pagina corrente
    pageWidth = page.ActualSize.Width
    pageHeight = page.ActualSize.Height

    # Calcola le coordinate x e y per centrare l'immagine sulla pagina
    x = (pageWidth - imageWidth) / 2
    y = (pageHeight - imageHeight) / 2

    # Disegna l'immagine nella posizione centrale calcolata sulla pagina
    page.Canvas.DrawImage(image, x, y, imageWidth, imageHeight)
Cosa puoi personalizzare?
Con le filigrane immagine, puoi facilmente personalizzare:
- Livello di trasparenza
- Dimensione della filigrana
- Posizione sulla pagina
- Logo o immagine di branding
- Posizionamento della filigrana su più pagine
Oltre ad aggiungere filigrane, Spire.PDF per Python offre anche una vasta gamma di funzionalità di elaborazione PDF. Puoi usarlo per creare, modificare, unire, dividere e convertire documenti PDF programmaticamente. Questo lo rende una soluzione versatile per la creazione di flussi di lavoro completi di automazione PDF nelle applicazioni Python.
Confronto di tutti i metodi
| Metodo | Facilità d'uso | Costo | Ideale per | Automazione |
|---|---|---|---|---|
| Adobe Acrobat Pro | Facile | A pagamento | Modifica professionale | No |
| Strumenti online | Molto facile | Gratuito/Freemium | Attività rapide | No |
| LibreOffice Draw | Medio | Gratuito | Modifica desktop gratuita | No |
| Spire.PDF per Python | Medio | Gratuito/Commerciale | Sviluppatori e automazione | Sì |
Conclusione
L'aggiunta di filigrane ai PDF può variare da un semplice compito una tantum a un flusso di lavoro di elaborazione documenti completamente automatizzato. Strumenti come Adobe Acrobat e gli editor online sono adatti per modifiche manuali occasionali, mentre LibreOffice Draw offre un'alternativa gratuita e capace per l'uso offline.
Per sviluppatori e aziende che gestiscono PDF su larga scala, le soluzioni programmatiche offrono molta più flessibilità. Spire.PDF per Python consente di aggiungere filigrane di testo e immagine con un controllo preciso su trasparenza, rotazione, font e posizionamento, rendendolo adatto per flussi di lavoro automatizzati di generazione PDF e protezione dei documenti.
Domande frequenti sulle filigrane PDF
Posso aggiungere una filigrana a un PDF gratuitamente?
Assolutamente. Puoi utilizzare software desktop gratuiti come LibreOffice Draw o vari editor PDF online gratuiti per inserire filigrane di testo e immagine senza alcun abbonamento a pagamento. Inoltre, l'edizione gratuita di Spire.PDF consente anche l'inserimento di filigrane PDF, con un limite di fino a 10 pagine per documento.
Posso aggiungere una filigrana immagine invece del testo?
Sì. La maggior parte degli strumenti PDF supporta sia filigrane di testo che immagine, inclusi loghi, timbri e grafiche di marca.
Come aggiungo una filigrana a tutte le pagine di un PDF?
La maggior parte degli editor PDF include un'opzione per applicare automaticamente la filigrana a ogni pagina. In Python, ciò viene solitamente fatto ciclando attraverso tutte le pagine.
L'aggiunta di una filigrana ridurrà la qualità del PDF?
Di solito no. Le filigrane di testo hanno un impatto minimo, mentre le filigrane immagine potrebbero aumentare leggermente la dimensione del file a seconda dell'immagine utilizzata.
Quale metodo è migliore per l'elaborazione batch di PDF con filigrane?
Le soluzioni programmatiche sono le migliori per l'elaborazione batch. Librerie come Spire.PDF per Python possono automatizzare la filigranatura su un gran numero di file PDF.
Vedi anche
Comment ajouter un filigrane à un PDF : 4 méthodes efficaces
Table des matières
- Quand utiliser des filigranes PDF ?
- Méthode 1 : Ajouter un filigrane à un PDF à l'aide d'Adobe Acrobat Pro
- Méthode 2 : Ajouter un filigrane à un PDF en ligne
- Méthode 3 : Ajouter un filigrane à un PDF à l'aide de LibreOffice Draw
- Méthode 4 : Ajouter un filigrane à un PDF à l'aide de Spire.PDF pour Python
- Comparaison de toutes les méthodes
- Conclusion
- FAQ sur les filigranes PDF
Les filigranes PDF sont largement utilisés pour la protection du droit d'auteur, l'image de marque, le suivi des documents et les avis de confidentialité. Que vous souhaitiez ajouter une simple étiquette « CONFIDENTIEL » ou placer un logo d'entreprise sur chaque page, le filigrane permet d'empêcher la distribution non autorisée et de clarifier la propriété du document.
Dans ce guide, vous apprendrez plusieurs façons pratiques d'ajouter des filigranes à des documents PDF, des outils de bureau professionnels aux solutions en ligne gratuites et à l'automatisation Python.
Navigation rapide :
- Méthode 1 : Ajouter un filigrane à un PDF à l'aide d'Adobe Acrobat Pro
- Méthode 2 : Ajouter un filigrane à un PDF en ligne
- Méthode 3 : Ajouter un filigrane à un PDF à l'aide de LibreOffice Draw
- Méthode 4 : Ajouter un filigrane à un PDF à l'aide de Spire.PDF pour Python
Quand utiliser des filigranes PDF ?
Les filigranes PDF sont utiles chaque fois que vous avez besoin d'identifier, de protéger ou de marquer un document. Ils aident les lecteurs à comprendre immédiatement le statut ou la propriété du document sans modifier le contenu original lui-même. Les entreprises et les utilisateurs individuels utilisent couramment les filigranes à des fins de sécurité, de droit d'auteur et de gestion des flux de travail.
Voici quelques situations courantes où les filigranes PDF sont utiles :
- Protéger les fichiers confidentiels
- Empêcher la distribution non autorisée
- Marquer les versions brouillons
- Ajouter l'image de marque de l'entreprise
- Identifier la propriété du document
Selon votre flux de travail, vous pouvez ajouter des filigranes manuellement à l'aide d'outils de bureau ou automatiser le processus à l'aide de bibliothèques Python pour le traitement de PDF à grande échelle.
Méthode 1 : Ajouter un filigrane à un PDF à l'aide d'Adobe Acrobat Pro
Idéal pour : Les utilisateurs professionnels qui ont besoin d'un contrôle précis et d'un rendu de haute qualité.
En matière d'édition de PDF, Adobe Acrobat Pro est toujours considéré comme la norme de l'industrie. Sa fonction de filigrane est très stable et offre aux utilisateurs un contrôle détaillé sur la façon dont les filigranes apparaissent sur les pages. Vous pouvez ajouter des filigranes textuels et d'image, ajuster l'opacité, les faire pivoter en diagonale, et même les appliquer uniquement à des plages de pages spécifiques.
Pour les entreprises qui traitent des contrats, des rapports ou des documents confidentiels, Acrobat offre l'un des moyens les plus fiables de filigraner des PDF tout en préservant la mise en page et le formatage d'origine.
Étapes : Ajouter un filigrane dans Adobe Acrobat Pro
- Ouvrez votre PDF dans Adobe Acrobat Pro.
- Accédez à Outils → Modifier le PDF → Filigrane → Ajouter.
- Choisissez votre type de filigrane :
- Filigrane texte, ou
- Filigrane image (Fichier)
- Selon votre choix :
- Si Texte : saisissez le texte, puis personnalisez la police, la couleur, l'opacité, la rotation
- Si Image : sélectionnez l'image, puis ajustez l'échelle, l'opacité, la position
- Prévisualisez le résultat.
- Cliquez sur OK et enregistrez le document.
Avantages
- Résultats de qualité professionnelle
- Excellente préservation du formatage
- Options de personnalisation puissantes
Inconvénients
- Nécessite un abonnement payant
- Cher pour les utilisateurs occasionnels
Méthode 2 : Ajouter un filigrane à un PDF en ligne
Idéal pour : Les utilisateurs qui souhaitent une solution rapide sans installer de logiciel.
Si vous n'avez besoin de filigraner un PDF qu'occasionnellement, les outils en ligne sont souvent l'option la plus rapide. La plupart des éditeurs de PDF basés sur le Web vous permettent de télécharger un fichier, d'insérer un filigrane textuel ou d'image, et de télécharger le PDF mis à jour en quelques minutes. L'ensemble du processus se déroule dans le navigateur, ce qui le rend pratique pour les utilisateurs de différents systèmes d'exploitation.
Les outils en ligne sont particulièrement utiles pour les tâches légères telles que l'ajout d'une étiquette « Brouillon », le placement d'un logo d'entreprise ou le marquage de documents internes avant de les partager. Cependant, comme les fichiers doivent être téléchargés sur des serveurs distants, ils peuvent ne pas être idéaux pour les PDF confidentiels ou très sensibles.
Étapes générales pour ajouter un filigrane à un PDF en ligne
- Ouvrez un outil de filigrane PDF en ligne.
- Téléchargez votre fichier PDF.
- Choisissez votre type de filigrane :
- Filigrane texte, ou
- Filigrane image
- Selon votre choix :
- Si Texte : saisissez votre texte de filigrane
- Si Image : téléchargez votre logo ou votre fichier image
- Personnalisez les paramètres du filigrane :
- Taille
- Rotation
- Transparence
- Position
- Prévisualisez le résultat.
- Téléchargez le PDF traité.
Avantages
- Très facile à utiliser
- Aucune installation requise
- Fonctionne sur Windows, macOS, Linux et appareils mobiles
Inconvénients
- Préoccupations concernant la confidentialité des fichiers sensibles
- Limitations de taille de téléchargement
- Connexion Internet requise
Méthode 3 : Ajouter un filigrane à un PDF à l'aide de LibreOffice Draw
Idéal pour : Les utilisateurs à la recherche d'une solution de bureau entièrement gratuite.
Pour les utilisateurs qui préfèrent les outils hors ligne mais ne veulent pas payer pour des éditeurs PDF premium, LibreOffice Draw offre une alternative pratique. Bien qu'il ne soit pas spécifiquement conçu pour le filigrane PDF, il peut ouvrir directement des fichiers PDF et permet aux utilisateurs de placer du texte ou des images sur les pages existantes.
Cette méthode fonctionne particulièrement bien pour les tâches de filigrane simples, en particulier lors du traitement de documents courts. Comme LibreOffice Draw est entièrement gratuit et open source, il reste un choix populaire parmi les étudiants, les indépendants et les utilisateurs Linux qui ont besoin de fonctionnalités d'édition PDF occasionnelles.
Étapes pour filigraner un PDF à l'aide de LibreOffice
-
Lancez LibreOffice Draw.
-
Accédez à Fichier → Ouvrir, puis sélectionnez et ouvrez votre fichier PDF cible.
-
Ajoutez votre filigrane en conséquence :
- Pour un filigrane texte : Cliquez sur Insérer → Zone de texte, faites glisser pour dessiner une boîte et tapez le contenu de votre filigrane.
- Pour un filigrane image : Cliquez sur Insérer → Image pour importer votre logo ou votre image.
-
Ajustez la transparence et d'autres paramètres :
- Transparence du texte : Double-cliquez pour sélectionner tout le texte, faites un clic droit → Caractère, ouvrez l'onglet Effets de police, puis faites glisser le curseur pour ajuster la transparence du texte.
- Transparence de l'image : Cliquez une fois pour sélectionner l'image insérée, faites un clic droit → Zone, faites glisser directement le curseur de transparence pour rendre l'image semi-transparente.
- Personnalisez la taille de la police, la couleur, l'angle de rotation et le placement librement.
-
Copiez et collez le filigrane édité pour couvrir toutes les pages.
-
Une fois terminé, accédez à Fichier → Exporter sous → Exporter au format PDF pour enregistrer votre fichier PDF final.
Avantages
- Entièrement gratuit
- Open source
- Aucun abonnement requis
Inconvénients
- Plus lent lors du traitement de gros PDF
- Moins pratique pour le traitement par lots
Méthode 4 : Ajouter un filigrane à un PDF à l'aide de Spire.PDF pour Python
Idéal pour : Les développeurs qui ont besoin d'un filigrane PDF automatisé avec une préservation fiable du formatage.
Les méthodes ci-dessus fonctionnent bien pour l'édition manuelle, mais elles deviennent inefficaces lorsque vous devez traiter un grand nombre de fichiers PDF automatiquement. Dans les flux de travail de développement, le filigrane fait souvent partie d'un pipeline d'automatisation plus large, tel que la génération de factures, la protection de rapports internes ou l'image de marque de documents exportés.
C'est là que Spire.PDF pour Python devient utile. Il permet aux développeurs d'ajouter des filigranes textuels et d'image par programmation tout en maintenant un rendu PDF précis. Comparé à de nombreuses bibliothèques PDF légères, il offre un meilleur contrôle sur l'apparence du filigrane, y compris la transparence, la rotation, le style de police et le positionnement.
Installer Spire.PDF pour Python
Installez la bibliothèque à l'aide de pip :
pip install spire.pdf
Ajouter un filigrane texte à un PDF en Python
L'exemple suivant ajoute un filigrane texte semi-transparent et rotatif à chaque page d'un document PDF.
from spire.pdf import *
from spire.pdf.common import *
import math

# Crée un objet de la classe PdfDocument
doc = PdfDocument()

# Charge un document PDF à partir du chemin spécifié
doc.LoadFromFile("Input.pdf")

# Crée un objet de la classe PdfTrueTypeFont pour la police du filigrane
font = PdfTrueTypeFont("Times New Roman", 48.0, 0, True)

# Spécifie le texte du filigrane
text = "NE PAS COPIER"

# Mesure les dimensions du texte pour assurer un positionnement correct
text_width = font.MeasureString(text).Width
text_height = font.MeasureString(text).Height

# Boucle à travers chaque page du document
for i in range(doc.Pages.Count):

    # Obtient la page actuelle
    page = doc.Pages.get_Item(i)

    # Sauvegarde l'état actuel du canevas
    state = page.Canvas.Save()

    # Calcule les coordonnées centrales de la page
    x = page.Canvas.Size.Width / 2
    y = page.Canvas.Size.Height / 2

    # Translate le système de coordonnées vers le centre
    page.Canvas.TranslateTransform(x, y)

    # Fait pivoter le filigrane
    page.Canvas.RotateTransform(-45.0)

    # Définit la transparence
    page.Canvas.SetTransparency(0.7)

    # Dessine le texte du filigrane
    page.Canvas.DrawString(
        text,
        font,
        PdfBrushes.get_Blue(),
        PointF(-text_width / 2, -text_height / 2)
    )

    # Restaure l'état du canevas
    page.Canvas.Restore(state)

# Sauvegarde le PDF modifié
doc.SaveToFile("output/TextWatermark.pdf")

# Libère les ressources
doc.Dispose()
Options de personnalisation
Cet exemple démontre plusieurs paramètres de filigrane couramment utilisés :
- Personnalisation de la police
Changez la famille de polices, la taille et le style pour correspondre à la conception de votre document.
- Angle de rotation
Le filigrane est pivoté de -45° pour créer une apparence diagonale sur la page.
- Contrôle de la transparence
La méthode SetTransparency() permet au filigrane de rester visible sans bloquer le contenu du document.
- Positionnement centré
Le code place automatiquement le filigrane au centre de chaque page.
Ces paramètres peuvent être facilement ajustés selon que vous souhaitez un filigrane de fond subtil ou une étiquette de sécurité plus proéminente.
Ajouter un filigrane image à un PDF en Python
En plus des filigranes texte, vous pouvez également placer des logos, des tampons ou des images de marque sur les pages PDF.
# Charge l'image du filigrane à partir du chemin spécifié
image = PdfImage.FromFile("logo.png")

# Obtient la largeur et la hauteur de l'image chargée pour le positionnement
imageWidth = float(image.Width)
imageHeight = float(image.Height)

# Boucle à travers chaque page du document pour appliquer le filigrane
for i in range(doc.Pages.Count):

    # Obtient la page actuelle
    page = doc.Pages.get_Item(i)

    # Définit la transparence du filigrane à 50 %
    page.Canvas.SetTransparency(0.5)

    # Obtient les dimensions de la page actuelle
    pageWidth = page.ActualSize.Width
    pageHeight = page.ActualSize.Height

    # Calcule les coordonnées x et y pour centrer l'image sur la page
    x = (pageWidth - imageWidth) / 2
    y = (pageHeight - imageHeight) / 2

    # Dessine l'image à la position centrale calculée sur la page
    page.Canvas.DrawImage(image, x, y, imageWidth, imageHeight)
Que pouvez-vous personnaliser ?
Avec les filigranes d'image, vous pouvez facilement personnaliser :
- Niveau de transparence
- Taille du filigrane
- Position sur la page
- Logo ou image de marque
- Placement du filigrane sur plusieurs pages
En plus d'ajouter des filigranes, Spire.PDF pour Python offre également une large gamme de fonctionnalités de traitement PDF. Vous pouvez l'utiliser pour créer, modifier, fusionner, diviser et convertir des documents PDF par programmation. Cela en fait une solution polyvalente pour créer des flux de travail d'automatisation PDF complets dans les applications Python.
Comparaison de toutes les méthodes
| Méthode | Facilité d'utilisation | Coût | Idéal pour | Automatisation |
|---|---|---|---|---|
| Adobe Acrobat Pro | Facile | Payant | Édition professionnelle | Non |
| Outils en ligne | Très facile | Gratuit/Freemium | Tâches rapides | Non |
| LibreOffice Draw | Moyen | Gratuit | Édition de bureau gratuite | Non |
| Spire.PDF pour Python | Moyen | Gratuit/Commercial | Développeurs et automatisation | Oui |
Conclusion
L'ajout de filigranes aux PDF peut aller d'une simple tâche unique à un flux de travail de traitement de documents entièrement automatisé. Des outils comme Adobe Acrobat et les éditeurs en ligne conviennent à l'édition manuelle occasionnelle, tandis que LibreOffice Draw offre une alternative gratuite et performante pour une utilisation hors ligne.
Pour les développeurs et les entreprises qui traitent des PDF à grande échelle, les solutions programmatiques offrent une bien plus grande flexibilité. Spire.PDF pour Python permet d'ajouter des filigranes texte et image avec un contrôle précis sur la transparence, la rotation, les polices et le positionnement, ce qui le rend bien adapté aux flux de travail automatisés de génération de PDF et de protection de documents.
FAQ sur les filigranes PDF
Puis-je ajouter un filigrane à un PDF gratuitement ?
Absolument. Vous pouvez utiliser des logiciels de bureau gratuits tels que LibreOffice Draw ou divers éditeurs PDF en ligne gratuits pour insérer des filigranes texte et image sans abonnement payant. De plus, l'édition gratuite de Spire.PDF permet également l'insertion de filigranes PDF, avec une limite de 10 pages par document.
Puis-je ajouter un filigrane image au lieu de texte ?
Oui. La plupart des outils PDF prennent en charge les filigranes texte et image, y compris les logos, les tampons et les graphiques de marque.
Comment ajouter un filigrane à toutes les pages d'un PDF ?
La plupart des éditeurs PDF incluent une option pour appliquer automatiquement le filigrane à chaque page. En Python, cela se fait généralement en parcourant toutes les pages.
L'ajout d'un filigrane réduira-t-il la qualité du PDF ?
Généralement non. Les filigranes texte ont un impact minimal, tandis que les filigranes image peuvent légèrement augmenter la taille du fichier en fonction de l'image utilisée.
Quelle méthode est la meilleure pour le filigrane de PDF par lots ?
Les solutions programmatiques sont les meilleures pour le traitement par lots. Des bibliothèques comme Spire.PDF pour Python peuvent automatiser le filigrane sur un grand nombre de fichiers PDF.
Voir aussi
Cómo añadir una marca de agua a un PDF: 4 formas eficaces
Tabla de Contenidos
- ¿Cuándo deberías usar marcas de agua en PDF?
- Método 1: Añadir marca de agua a PDF usando Adobe Acrobat Pro
- Método 2: Añadir marca de agua a PDF en línea
- Método 3: Añadir marca de agua a PDF usando LibreOffice Draw
- Método 4: Añadir marca de agua a PDF usando Spire.PDF para Python
- Comparación de todos los métodos
- Conclusión
- Preguntas frecuentes sobre marcas de agua en PDF
Las marcas de agua en PDF se utilizan ampliamente para la protección de derechos de autor, la marca, el seguimiento de documentos y los avisos de confidencialidad. Ya sea que desees añadir una simple etiqueta de "CONFIDENCIAL" o colocar el logotipo de una empresa en cada página, las marcas de agua ayudan a prevenir la distribución no autorizada y dejan clara la propiedad del documento.
En esta guía, aprenderás varias formas prácticas de añadir marcas de agua a documentos PDF, desde herramientas profesionales de escritorio hasta soluciones en línea gratuitas y automatización con Python.
Navegación rápida:
- Método 1: Añadir marca de agua a PDF usando Adobe Acrobat Pro
- Método 2: Añadir marca de agua a PDF en línea
- Método 3: Añadir marca de agua a PDF usando LibreOffice Draw
- Método 4: Añadir marca de agua a PDF usando Spire.PDF para Python
¿Cuándo deberías usar marcas de agua en PDF?
Las marcas de agua en PDF son útiles siempre que necesites identificar, proteger o marcar un documento. Ayudan a los lectores a comprender de inmediato el estado o la propiedad del documento sin cambiar el contenido original. Tanto las empresas como los usuarios individuales utilizan comúnmente marcas de agua para fines de seguridad, derechos de autor y gestión de flujos de trabajo.
Aquí tienes algunas situaciones comunes en las que las marcas de agua en PDF son útiles:
- Proteger archivos confidenciales
- Prevenir la distribución no autorizada
- Marcar versiones preliminares
- Añadir marca corporativa
- Identificar la propiedad del documento
Dependiendo de tu flujo de trabajo, puedes añadir marcas de agua manualmente utilizando herramientas de escritorio o automatizar el proceso utilizando bibliotecas de Python para el procesamiento de PDF a gran escala.
Método 1: Añadir marca de agua a PDF usando Adobe Acrobat Pro
Ideal para: Usuarios profesionales que necesitan un control preciso y resultados de alta calidad.
Cuando se trata de editar PDFs, Adobe Acrobat Pro sigue siendo considerado el estándar de la industria. Su función de marca de agua es muy estable y ofrece a los usuarios un control detallado sobre cómo aparecen las marcas de agua en las páginas. Puedes añadir marcas de agua de texto e imagen, ajustar la opacidad, rotarlas en diagonal e incluso aplicarlas solo a rangos de páginas específicos.
Para las empresas que manejan contratos, informes o documentos confidenciales, Acrobat ofrece una de las formas más fiables de añadir marcas de agua a los PDF, preservando al mismo tiempo el diseño y el formato originales.
Paso a paso: Añadir marca de agua en Adobe Acrobat Pro
- Abre tu PDF en Adobe Acrobat Pro.
- Ve a Herramientas → Editar PDF → Marca de agua → Añadir.
- Elige tu tipo de marca de agua:
- Marca de agua de texto, o
- Marca de agua de imagen (Archivo)
- Dependiendo de tu elección:
- Si es Texto: introduce el texto, luego personaliza la fuente, el color, la opacidad, la rotación
- Si es Imagen: selecciona la imagen, luego ajusta la escala, la opacidad, la posición
- Previsualiza el resultado.
- Haz clic en OK y guarda el documento.
Ventajas
- Resultados de calidad profesional
- Excelente preservación del formato
- Potentes opciones de personalización
Desventajas
- Requiere suscripción de pago
- Caro para usuarios ocasionales
Método 2: Añadir marca de agua a PDF en línea
Ideal para: Usuarios que desean una solución rápida sin instalar software.
Si solo necesitas añadir una marca de agua a un PDF ocasionalmente, las herramientas en línea suelen ser la opción más rápida. La mayoría de los editores de PDF basados en web te permiten subir un archivo, insertar una marca de agua de texto o imagen y descargar el PDF actualizado en cuestión de minutos. Todo el proceso se realiza en el navegador, lo que lo hace conveniente para usuarios de diferentes sistemas operativos.
Las herramientas en línea son especialmente útiles para tareas ligeras como añadir una etiqueta de "Borrador", colocar el logotipo de una empresa o marcar documentos internos antes de compartirlos. Sin embargo, dado que los archivos deben subirse a servidores remotos, pueden no ser ideales para PDF confidenciales o muy sensibles.
Pasos generales para añadir marca de agua a PDF en línea
- Abre una herramienta en línea para marcas de agua en PDF.
- Sube tu archivo PDF.
- Elige tu tipo de marca de agua:
- Marca de agua de texto, o
- Marca de agua de imagen
- Dependiendo de tu elección:
- Si es Texto: introduce tu texto de marca de agua
- Si es Imagen: sube tu logotipo o archivo de imagen
- Personaliza la configuración de la marca de agua:
- Tamaño
- Rotación
- Transparencia
- Posición
- Previsualiza el resultado.
- Descarga el PDF procesado.
Ventajas
- Muy fácil de usar
- No requiere instalación
- Funciona en Windows, macOS, Linux y dispositivos móviles
Desventajas
- Preocupaciones de privacidad para archivos sensibles
- Limitaciones de tamaño de carga
- Requiere conexión a Internet
Método 3: Añadir marca de agua a PDF usando LibreOffice Draw
Ideal para: Usuarios que buscan una solución de escritorio completamente gratuita.
Para los usuarios que prefieren herramientas sin conexión pero no quieren pagar por editores de PDF premium, LibreOffice Draw ofrece una alternativa práctica. Aunque no está diseñado específicamente para añadir marcas de agua a PDF, puede abrir archivos PDF directamente y permite a los usuarios colocar texto o imágenes sobre las páginas existentes.
Este método funciona especialmente bien para tareas sencillas de marca de agua, especialmente cuando se trata de documentos cortos. Dado que LibreOffice Draw es completamente gratuito y de código abierto, sigue siendo una opción popular entre estudiantes, autónomos y usuarios de Linux que necesitan funciones de edición de PDF ocasionales.
Pasos para añadir marca de agua a PDF usando LibreOffice
-
Inicia LibreOffice Draw.
-
Ve a Archivo → Abrir, luego selecciona y abre tu archivo PDF de destino.
-
Añade tu marca de agua según corresponda:
- Para marca de agua de texto: Haz clic en Insertar → Cuadro de texto, arrastra para dibujar un cuadro y escribe el contenido de tu marca de agua.
- Para marca de agua de imagen: Haz clic en Insertar → Imagen para importar tu logotipo o imagen.
-
Ajusta la transparencia y otras configuraciones:
- Transparencia del texto: Haz doble clic para resaltar todo el texto, haz clic derecho → Carácter, abre la pestaña Efectos de fuente, luego arrastra el control deslizante para ajustar la transparencia del texto.
- Transparencia de la imagen: Haz clic una vez para seleccionar la imagen insertada, haz clic derecho → Área, arrastra directamente el control deslizante de transparencia para hacer que la imagen sea semitransparente.
- Personaliza el tamaño de la fuente, el color, el ángulo de rotación y la colocación libremente.
-
Copia y pega la marca de agua editada para cubrir todas las páginas.
-
Cuando hayas terminado, navega a Archivo → Exportar como → Exportar como PDF para guardar tu archivo PDF final.
Ventajas
- Completamente gratuito
- Código abierto
- No requiere suscripción
Desventajas
- Más lento al manejar PDF grandes
- Menos conveniente para procesamiento por lotes
Método 4: Añadir marca de agua a PDF usando Spire.PDF para Python
Ideal para: Desarrolladores que necesitan marcas de agua automatizadas en PDF con preservación fiable del formato.
Los métodos anteriores funcionan bien para la edición manual, pero se vuelven ineficientes cuando necesitas procesar un gran número de archivos PDF automáticamente. En los flujos de trabajo de desarrollo, las marcas de agua a menudo forman parte de una canalización de automatización más grande, como la generación de facturas, la protección de informes internos o la marca de documentos exportados.
Aquí es donde Spire.PDF para Python resulta útil. Permite a los desarrolladores añadir marcas de agua de texto e imagen mediante programación manteniendo una representación precisa del PDF. En comparación con muchas bibliotecas de PDF ligeras, ofrece un mejor control sobre la apariencia de la marca de agua, incluida la transparencia, la rotación, el estilo de fuente y la posición.
Instalar Spire.PDF para Python
Instala la biblioteca usando pip:
pip install spire.pdf
Añadir marca de agua de texto a PDF en Python
El siguiente ejemplo añade una marca de agua de texto semitransparente y rotada a cada página de un documento PDF.
from spire.pdf import *
from spire.pdf.common import *
import math

# Crea un objeto de la clase PdfDocument
doc = PdfDocument()

# Carga un documento PDF desde la ruta especificada
doc.LoadFromFile("Input.pdf")

# Crea un objeto de la clase PdfTrueTypeFont para la fuente de la marca de agua
font = PdfTrueTypeFont("Times New Roman", 48.0, 0, True)

# Especifica el texto de la marca de agua
text = "NO COPIAR"

# Mide las dimensiones del texto para asegurar un posicionamiento adecuado
text_width = font.MeasureString(text).Width
text_height = font.MeasureString(text).Height

# Itera por cada página del documento
for i in range(doc.Pages.Count):

    # Obtiene la página actual
    page = doc.Pages.get_Item(i)

    # Guarda el estado actual del lienzo
    state = page.Canvas.Save()

    # Calcula las coordenadas centrales de la página
    x = page.Canvas.Size.Width / 2
    y = page.Canvas.Size.Height / 2

    # Transforma el sistema de coordenadas al centro
    page.Canvas.TranslateTransform(x, y)

    # Rota la marca de agua
    page.Canvas.RotateTransform(-45.0)

    # Establece la transparencia
    page.Canvas.SetTransparency(0.7)

    # Dibuja el texto de la marca de agua
    page.Canvas.DrawString(
        text,
        font,
        PdfBrushes.get_Blue(),
        PointF(-text_width / 2, -text_height / 2)
    )

    # Restaura el estado del lienzo
    page.Canvas.Restore(state)

# Guarda el PDF modificado
doc.SaveToFile("output/TextWatermark.pdf")

# Libera los recursos
doc.Dispose()
Opciones de personalización
Este ejemplo demuestra varias configuraciones de marca de agua comúnmente utilizadas:
- Personalización de la fuente
Cambia la familia de fuentes, el tamaño y el estilo para que coincidan con el diseño de tu documento.
- Ángulo de rotación
La marca de agua se rota -45° para crear una apariencia diagonal en la página.
- Control de transparencia
El método SetTransparency() permite que la marca de agua permanezca visible sin bloquear el contenido del documento.
- Posicionamiento centrado
El código coloca automáticamente la marca de agua en el centro de cada página.
Estas configuraciones se pueden ajustar fácilmente según si deseas una marca de agua sutil en segundo plano o una etiqueta de seguridad más prominente.
Añadir marca de agua de imagen a PDF en Python
Además de las marcas de agua de texto, también puedes colocar logotipos, sellos o imágenes de marca en las páginas PDF.
# Carga la imagen de marca de agua desde la ruta especificada
image = PdfImage.FromFile("logo.png")

# Obtiene el ancho y alto de la imagen cargada para el posicionamiento
imageWidth = float(image.Width)
imageHeight = float(image.Height)

# Itera por cada página del documento para aplicar la marca de agua
for i in range(doc.Pages.Count):

    # Obtiene la página actual
    page = doc.Pages.get_Item(i)

    # Establece la transparencia de la marca de agua al 50%
    page.Canvas.SetTransparency(0.5)

    # Obtiene las dimensiones de la página actual
    pageWidth = page.ActualSize.Width
    pageHeight = page.ActualSize.Height

    # Calcula las coordenadas x e y para centrar la imagen en la página
    x = (pageWidth - imageWidth) / 2
    y = (pageHeight - imageHeight) / 2

    # Dibuja la imagen en la posición central calculada en la página
    page.Canvas.DrawImage(image, x, y, imageWidth, imageHeight)
¿Qué puedes personalizar?
Con las marcas de agua de imagen, puedes personalizar fácilmente:
- Nivel de transparencia
- Tamaño de la marca de agua
- Posición en la página
- Logotipo o imagen de marca
- Colocación de la marca de agua en varias páginas
Además de añadir marcas de agua, Spire.PDF para Python también proporciona una amplia gama de capacidades de procesamiento de PDF. Puedes usarlo para crear, editar, fusionar, dividir y convertir documentos PDF mediante programación. Esto lo convierte en una solución versátil para construir flujos de trabajo completos de automatización de PDF en aplicaciones Python.
Comparación de todos los métodos
| Método | Facilidad de uso | Costo | Ideal para | Automatización |
|---|---|---|---|---|
| Adobe Acrobat Pro | Fácil | De pago | Edición profesional | No |
| Herramientas en línea | Muy fácil | Gratis/Freemium | Tareas rápidas | No |
| LibreOffice Draw | Medio | Gratis | Edición gratuita de escritorio | No |
| Spire.PDF para Python | Medio | Gratis/Comercial | Desarrolladores y automatización | Sí |
Conclusión
Añadir marcas de agua a los PDF puede variar desde una simple tarea única hasta un flujo de trabajo de procesamiento de documentos completamente automatizado. Herramientas como Adobe Acrobat y los editores en línea son adecuadas para la edición manual ocasional, mientras que LibreOffice Draw ofrece una alternativa gratuita capaz para uso sin conexión.
Para desarrolladores y empresas que manejan PDF a escala, las soluciones programáticas proporcionan mucha mayor flexibilidad. Spire.PDF para Python permite añadir marcas de agua de texto e imagen con un control preciso sobre la transparencia, la rotación, las fuentes y la posición, lo que lo hace muy adecuado para flujos de trabajo automatizados de generación de PDF y protección de documentos.
Preguntas frecuentes sobre marcas de agua en PDF
¿Puedo añadir una marca de agua a un PDF de forma gratuita?
Absolutamente. Puedes usar software de escritorio gratuito como LibreOffice Draw o varios editores de PDF en línea gratuitos para insertar marcas de agua de texto e imagen sin necesidad de una suscripción de pago. Además, la edición gratuita de Spire.PDF también permite la inserción de marcas de agua en PDF, con un límite de hasta 10 páginas por documento.
¿Puedo añadir una marca de agua de imagen en lugar de texto?
Sí. La mayoría de las herramientas de PDF admiten marcas de agua de texto e imagen, incluidos logotipos, sellos y gráficos de marca.
¿Cómo añado una marca de agua a todas las páginas de un PDF?
La mayoría de los editores de PDF incluyen una opción para aplicar la marca de agua a todas las páginas automáticamente. En Python, esto generalmente se hace iterando por todas las páginas.
¿Añadir una marca de agua reducirá la calidad del PDF?
Generalmente no. Las marcas de agua de texto tienen un impacto mínimo, mientras que las marcas de agua de imagen pueden aumentar ligeramente el tamaño del archivo dependiendo de la imagen utilizada.
¿Qué método es mejor para añadir marcas de agua a PDF por lotes?
Las soluciones programáticas son las mejores para el procesamiento por lotes. Bibliotecas como Spire.PDF para Python pueden automatizar la adición de marcas de agua a un gran número de archivos PDF.
Ver también
Wie man ein Wasserzeichen zu einem PDF hinzufügt: 4 effektive Methoden
Inhaltsverzeichnis
- Wann sollten Sie PDF-Wasserzeichen verwenden?
- Methode 1: Wasserzeichen mit Adobe Acrobat Pro zu PDF hinzufügen
- Methode 2: Wasserzeichen online zu PDF hinzufügen
- Methode 3: Wasserzeichen mit LibreOffice Draw zu PDF hinzufügen
- Methode 4: Wasserzeichen mit Spire.PDF für Python zu PDF hinzufügen
- Vergleich aller Methoden
- Fazit
- FAQs zu PDF-Wasserzeichen
PDF-Wasserzeichen werden häufig zum Schutz des Urheberrechts, für Branding, zur Dokumentenverfolgung und für Vertraulichkeitshinweise verwendet. Egal, ob Sie eine einfache „VERTRAULICH“-Beschriftung hinzufügen oder ein Firmenlogo seitenübergreifend platzieren möchten, Wasserzeichen helfen, unbefugte Verbreitung zu verhindern und die Dokumentenbesitzerschaft klarzustellen.
In diesem Leitfaden lernen Sie mehrere praktische Möglichkeiten kennen, Wasserzeichen zu PDF-Dokumenten hinzuzufügen – von professionellen Desktop-Tools über kostenlose Online-Lösungen bis hin zur Python-Automatisierung.
Schnellnavigation:
- Methode 1: Wasserzeichen mit Adobe Acrobat Pro zu PDF hinzufügen
- Methode 2: Wasserzeichen online zu PDF hinzufügen
- Methode 3: Wasserzeichen mit LibreOffice Draw zu PDF hinzufügen
- Methode 4: Wasserzeichen mit Spire.PDF für Python zu PDF hinzufügen
Wann sollten Sie PDF-Wasserzeichen verwenden?
PDF-Wasserzeichen sind nützlich, wenn Sie ein Dokument identifizieren, schützen oder branden müssen. Sie helfen den Lesern, den Status oder die Eigentümerschaft des Dokuments sofort zu verstehen, ohne den ursprünglichen Inhalt selbst zu ändern. Sowohl Unternehmen als auch Einzelpersonen verwenden Wasserzeichen häufig zu Sicherheits-, Urheberrechts- und Workflow-Management-Zwecken.
Hier sind einige gängige Situationen, in denen PDF-Wasserzeichen hilfreich sind:
- Vertrauliche Dateien schützen
- Unbefugte Verbreitung verhindern
- Entwurfsversionen kennzeichnen
- Firmen-Branding hinzufügen
- Dokumentenbesitz identifizieren
Abhängig von Ihrem Workflow können Sie Wasserzeichen manuell mit Desktop-Tools hinzufügen oder den Prozess mit Python-Bibliotheken für die groß angelegte PDF-Verarbeitung automatisieren.
Methode 1: Wasserzeichen mit Adobe Acrobat Pro zu PDF hinzufügen
Am besten geeignet für: Professionelle Benutzer, die präzise Kontrolle und hochwertige Ergebnisse benötigen.
Wenn es um die Bearbeitung von PDFs geht, gilt Adobe Acrobat Pro immer noch als Industriestandard. Seine Wasserzeichenfunktion ist sehr stabil und bietet Benutzern detaillierte Kontrolle darüber, wie Wasserzeichen auf den Seiten erscheinen. Sie können sowohl Text- als auch Bildwasserzeichen hinzufügen, die Deckkraft anpassen, sie diagonal drehen und sie sogar nur auf bestimmte Seitenbereiche anwenden.
Für Unternehmen, die Verträge, Berichte oder vertrauliche Dokumente bearbeiten, bietet Acrobat eine der zuverlässigsten Möglichkeiten, PDFs mit Wasserzeichen zu versehen und gleichzeitig das ursprüngliche Layout und die Formatierung beizubehalten.
Schritt-für-Schritt: Wasserzeichen in Adobe Acrobat Pro hinzufügen
- Öffnen Sie Ihr PDF in Adobe Acrobat Pro.
- Gehen Sie zu Werkzeuge → PDF bearbeiten → Wasserzeichen → Hinzufügen.
- Wählen Sie Ihren Wasserzeichentyp:
- Textwasserzeichen oder
- Bildwasserzeichen (Datei)
- Je nach Ihrer Wahl:
- Wenn Text: Geben Sie den Text ein, passen Sie dann Schriftart, Farbe, Deckkraft und Drehung an
- Wenn Bild: Wählen Sie das Bild aus, passen Sie dann Skalierung, Deckkraft und Position an
- Vorschau des Ergebnisses anzeigen.
- Klicken Sie auf OK und speichern Sie das Dokument.
Vorteile
- Professionelle Ergebnisse
- Hervorragende Beibehaltung der Formatierung
- Leistungsstarke Anpassungsoptionen
Nachteile
- Erfordert kostenpflichtiges Abonnement
- Teuer für gelegentliche Benutzer
Methode 2: Wasserzeichen online zu PDF hinzufügen
Am besten geeignet für: Benutzer, die eine schnelle Lösung ohne Softwareinstallation wünschen.
Wenn Sie nur gelegentlich ein PDF mit einem Wasserzeichen versehen müssen, sind Online-Tools oft die schnellste Option. Die meisten webbasierten PDF-Editoren ermöglichen es Ihnen, eine Datei hochzuladen, ein Text- oder Bildwasserzeichen einzufügen und das aktualisierte PDF innerhalb von Minuten herunterzuladen. Der gesamte Vorgang findet im Browser statt, was ihn für Benutzer auf verschiedenen Betriebssystemen praktisch macht.
Online-Tools sind besonders nützlich für leichte Aufgaben wie das Hinzufügen einer „Entwurf“-Beschriftung, das Platzieren eines Firmenlogos oder das Kennzeichnen interner Dokumente vor der Weitergabe. Da Dateien jedoch auf entfernte Server hochgeladen werden müssen, sind sie möglicherweise nicht ideal für vertrauliche oder hochsensible PDFs.
Allgemeine Schritte zum Hinzufügen von Wasserzeichen zu PDF online
- Öffnen Sie ein Online-Tool für PDF-Wasserzeichen.
- Laden Sie Ihre PDF-Datei hoch.
- Wählen Sie Ihren Wasserzeichentyp:
- Textwasserzeichen oder
- Bildwasserzeichen
- Je nach Ihrer Wahl:
- Wenn Text: Geben Sie Ihren Wasserzeichentext ein
- Wenn Bild: Laden Sie Ihr Logo oder Bilddatei hoch
- Passen Sie die Wasserzeicheneinstellungen an:
- Größe
- Drehung
- Transparenz
- Position
- Vorschau des Ergebnisses anzeigen.
- Laden Sie das bearbeitete PDF herunter.
Vorteile
- Sehr einfach zu bedienen
- Keine Installation erforderlich
- Funktioniert unter Windows, macOS, Linux und Mobilgeräten
Nachteile
Methode 3: Wasserzeichen mit LibreOffice Draw zu PDF hinzufügen
Am besten geeignet für: Benutzer, die eine komplett kostenlose Desktop-Lösung suchen.
Für Benutzer, die Offline-Tools bevorzugen, aber keine Premium-PDF-Editoren bezahlen möchten, bietet LibreOffice Draw eine praktische Alternative. Obwohl es nicht speziell für das Wasserzeichen von PDFs entwickelt wurde, kann es PDF-Dateien direkt öffnen und Benutzern ermöglichen, Text oder Bilder über vorhandene Seiten zu legen.
Diese Methode eignet sich besonders gut für einfache Wasserzeichenaufgaben, insbesondere bei kurzen Dokumenten. Da LibreOffice Draw völlig kostenlos und Open Source ist, bleibt es eine beliebte Wahl unter Studenten, Freiberuflern und Linux-Benutzern, die gelegentlich PDF-Bearbeitungsfunktionen benötigen.
Schritte zum Wasserzeichen von PDF mit LibreOffice
-
Starten Sie LibreOffice Draw.
-
Gehen Sie zu Datei → Öffnen, wählen Sie dann Ihre Zieldatei aus und öffnen Sie sie.
-
Fügen Sie Ihr Wasserzeichen entsprechend hinzu:
- Für Textwasserzeichen: Klicken Sie auf Einfügen → Textfeld, ziehen Sie, um ein Feld zu zeichnen, und geben Sie Ihren Wasserzeicheninhalt ein.
- Für Bildwasserzeichen: Klicken Sie auf Einfügen → Bild, um Ihr Logo oder Bild zu importieren.
-
Transparenz und andere Einstellungen anpassen:
- Texttransparenz: Doppelklicken Sie, um den gesamten Text hervorzuheben, klicken Sie mit der rechten Maustaste → Zeichen, öffnen Sie die Registerkarte Schrifteffekte und ziehen Sie dann den Schieberegler, um die Texttransparenz anzupassen.
- Bildtransparenz: Klicken Sie einmal, um das eingefügte Bild auszuwählen, klicken Sie mit der rechten Maustaste → Fläche, ziehen Sie direkt den Transparenzschieberegler, um das Bild halbtransparent zu machen.
- Passen Sie Schriftgröße, Farbe, Drehwinkel und Platzierung frei an.
-
Kopieren und fügen Sie das bearbeitete Wasserzeichen ein, um alle Seiten abzudecken.
-
Wenn Sie fertig sind, navigieren Sie zu Datei → Exportieren als → Als PDF exportieren, um Ihre endgültige PDF-Datei zu speichern.
Vorteile
- Völlig kostenlos
- Open Source
- Kein Abonnement erforderlich
Nachteile
Methode 4: Wasserzeichen mit Spire.PDF für Python zu PDF hinzufügen
Am besten geeignet für: Entwickler, die automatisiertes PDF-Wasserzeichen mit zuverlässiger Formatierungserhaltung benötigen.
Die oben genannten Methoden eignen sich gut für die manuelle Bearbeitung, werden aber ineffizient, wenn Sie eine große Anzahl von PDF-Dateien automatisch verarbeiten müssen. In Entwicklungsworkflows ist das Wasserzeichen oft Teil einer größeren Automatisierungspipeline – wie z. B. die Erstellung von Rechnungen, der Schutz interner Berichte oder das Branding von exportierten Dokumenten.
Hier ist Spire.PDF for Python nützlich. Es ermöglicht Entwicklern, sowohl Text- als auch Bildwasserzeichen programmatisch hinzuzufügen und dabei eine genaue PDF-Wiedergabe beizubehalten. Im Vergleich zu vielen leichten PDF-Bibliotheken bietet es eine bessere Kontrolle über das Erscheinungsbild des Wasserzeichens, einschließlich Transparenz, Drehung, Schriftart und Positionierung.
Spire.PDF für Python installieren
Installieren Sie die Bibliothek mit pip:
pip install spire.pdf
Textwasserzeichen zu PDF in Python hinzufügen
Das folgende Beispiel fügt ein gedrehtes, halbtransparentes Textwasserzeichen zu jeder Seite eines PDF-Dokuments hinzu.
from spire.pdf import *
from spire.pdf.common import *
import math

# Erstellen Sie ein Objekt der Klasse PdfDocument
doc = PdfDocument()

# Laden Sie ein PDF-Dokument aus dem angegebenen Pfad
doc.LoadFromFile("Input.pdf")

# Erstellen Sie ein Objekt der Klasse PdfTrueTypeFont für die Wasserzeichenschriftart
font = PdfTrueTypeFont("Times New Roman", 48.0, 0, True)

# Geben Sie den Wasserzeichentext an
text = "NICHT KOPIEREN"

# Messen Sie die Abmessungen des Textes, um eine ordnungsgemäße Positionierung zu gewährleisten
text_width = font.MeasureString(text).Width
text_height = font.MeasureString(text).Height

# Schleife durch jede Seite im Dokument
for i in range(doc.Pages.Count):

    # Holen Sie sich die aktuelle Seite
    page = doc.Pages.get_Item(i)

    # Speichern Sie den aktuellen Canvas-Zustand
    state = page.Canvas.Save()

    # Berechnen Sie die Mittelkoordinaten der Seite
    x = page.Canvas.Size.Width / 2
    y = page.Canvas.Size.Height / 2

    # Übersetzen Sie das Koordinatensystem zur Mitte
    page.Canvas.TranslateTransform(x, y)

    # Drehen Sie das Wasserzeichen
    page.Canvas.RotateTransform(-45.0)

    # Transparenz einstellen
    page.Canvas.SetTransparency(0.7)

    # Zeichnen Sie den Wasserzeichentext
    page.Canvas.DrawString(
        text,
        font,
        PdfBrushes.get_Blue(),
        PointF(-text_width / 2, -text_height / 2)
    )

    # Stellen Sie den Canvas-Zustand wieder her
    page.Canvas.Restore(state)

# Speichern Sie das geänderte PDF
doc.SaveToFile("output/TextWatermark.pdf")

# Ressourcen freigeben
doc.Dispose()
Anpassungsoptionen
Dieses Beispiel zeigt mehrere häufig verwendete Wasserzeicheneinstellungen:
- Schriftart-Anpassung
Ändern Sie die Schriftfamilie, Größe und den Stil, um sie an Ihr Dokumentendesign anzupassen.
- Drehwinkel
Das Wasserzeichen wird um -45° gedreht, um ein diagonales Erscheinungsbild über die Seite zu erzeugen.
- Transparenzregelung
Die Methode SetTransparency() ermöglicht es dem Wasserzeichen, sichtbar zu bleiben, ohne den Dokumenteninhalt zu verdecken.
- Zentrierte Positionierung
Der Code platziert das Wasserzeichen automatisch in der Mitte jeder Seite.
Diese Einstellungen können einfach angepasst werden, je nachdem, ob Sie ein subtiles Hintergrundwasserzeichen oder ein auffälligeres Sicherheitslabel wünschen.
Bildwasserzeichen zu PDF in Python hinzufügen
Neben Textwasserzeichen können Sie auch Logos, Stempel oder Branding-Bilder auf PDF-Seiten platzieren.
# Laden Sie das Wasserzeichenbild aus dem angegebenen Pfad
image = PdfImage.FromFile("logo.png")

# Holen Sie sich die Breite und Höhe des geladenen Bildes für die Positionierung
imageWidth = float(image.Width)
imageHeight = float(image.Height)

# Schleife durch jede Seite im Dokument, um das Wasserzeichen anzuwenden
for i in range(doc.Pages.Count):

    # Holen Sie sich die aktuelle Seite
    page = doc.Pages.get_Item(i)

    # Stellen Sie die Transparenz des Wasserzeichens auf 50% ein
    page.Canvas.SetTransparency(0.5)

    # Holen Sie sich die Abmessungen der aktuellen Seite
    pageWidth = page.ActualSize.Width
    pageHeight = page.ActualSize.Height

    # Berechnen Sie die x- und y-Koordinaten, um das Bild auf der Seite zu zentrieren
    x = (pageWidth - imageWidth) / 2
    y = (pageHeight - imageHeight) / 2

    # Zeichnen Sie das Bild an der berechneten Mittelposition auf der Seite
    page.Canvas.DrawImage(image, x, y, imageWidth, imageHeight)
Was können Sie anpassen?
Bei Bildwasserzeichen können Sie einfach anpassen:
- Transparenzniveau
- Wasserzeichengröße
- Position auf der Seite
- Logo oder Branding-Bild
- Platzierung des Wasserzeichens auf mehreren Seiten
Zusätzlich zum Hinzufügen von Wasserzeichen bietet Spire.PDF für Python auch eine breite Palette von PDF-Verarbeitungsfunktionen. Sie können es verwenden, um PDF-Dokumente programmatisch zu erstellen, zu bearbeiten, zusammenzuführen, aufzuteilen und zu konvertieren. Dies macht es zu einer vielseitigen Lösung für die Erstellung vollständiger PDF-Automatisierungsworkflows in Python-Anwendungen.
Vergleich aller Methoden
| Methode | Benutzerfreundlichkeit | Kosten | Am besten geeignet für | Automatisierung |
|---|---|---|---|---|
| Adobe Acrobat Pro | Einfach | Kostenpflichtig | Professionelle Bearbeitung | Nein |
| Online-Tools | Sehr einfach | Kostenlos/Freemium | Schnelle Aufgaben | Nein |
| LibreOffice Draw | Mittel | Kostenlos | Kostenlose Desktop-Bearbeitung | Nein |
| Spire.PDF für Python | Mittel | Kostenlos/Kommerziell | Entwickler & Automatisierung | Ja |
Fazit
Das Hinzufügen von Wasserzeichen zu PDFs kann von einer einfachen einmaligen Aufgabe bis hin zu einem vollständig automatisierten Dokumentenverarbeitungsworkflow reichen. Tools wie Adobe Acrobat und Online-Editoren eignen sich für gelegentliche manuelle Bearbeitungen, während LibreOffice Draw eine fähige kostenlose Alternative für die Offline-Nutzung bietet.
Für Entwickler und Unternehmen, die PDFs in großem Umfang verarbeiten, bieten programmatische Lösungen eine wesentlich größere Flexibilität. Spire.PDF für Python ermöglicht das Hinzufügen von Text- und Bildwasserzeichen mit präziser Kontrolle über Transparenz, Drehung, Schriftarten und Positionierung, wodurch es sich gut für automatisierte PDF-Generierungs- und Dokumentenschutz-Workflows eignet.
FAQs zu PDF-Wasserzeichen
Kann ich kostenlos ein Wasserzeichen zu einem PDF hinzufügen?
Absolut. Sie können kostenlose Desktop-Software wie LibreOffice Draw oder verschiedene kostenlose Online-PDF-Editoren verwenden, um Text- und Bildwasserzeichen ohne kostenpflichtiges Abonnement einzufügen. Außerdem ermöglicht die kostenlose Version von Spire.PDF das Einfügen von PDF-Wasserzeichen mit einer Begrenzung von bis zu 10 Seiten pro Dokument.
Kann ich anstelle von Text ein Bildwasserzeichen hinzufügen?
Ja. Die meisten PDF-Tools unterstützen sowohl Text- als auch Bildwasserzeichen, einschließlich Logos, Stempeln und Branding-Grafiken.
Wie füge ich allen Seiten in einem PDF ein Wasserzeichen hinzu?
Die meisten PDF-Editoren verfügen über eine Option, um das Wasserzeichen automatisch auf jeder Seite anzuwenden. In Python geschieht dies normalerweise durch Schleifen durch alle Seiten.
Wird das Hinzufügen eines Wasserzeichens die PDF-Qualität verringern?
Normalerweise nicht. Textwasserzeichen haben minimale Auswirkungen, während Bildwasserzeichen die Dateigröße je nach verwendetem Bild leicht erhöhen können.
Welche Methode ist am besten für die Stapelverarbeitung von PDF-Wasserzeichen geeignet?
Programmatische Lösungen sind am besten für die Stapelverarbeitung geeignet. Bibliotheken wie Spire.PDF für Python können das Wasserzeichen über eine große Anzahl von PDF-Dateien automatisieren.
Siehe auch
Как добавить водяной знак в PDF: 4 эффективных способа
Содержание
- Когда следует использовать водяные знаки в PDF?
- Метод 1: Добавление водяного знака в PDF с помощью Adobe Acrobat Pro
- Метод 2: Добавление водяного знака в PDF онлайн
- Метод 3: Добавление водяного знака в PDF с помощью LibreOffice Draw
- Метод 4: Добавление водяного знака в PDF с помощью Spire.PDF для Python
- Сравнение всех методов
- Заключение
- Часто задаваемые вопросы о водяных знаках в PDF
Водяные знаки в PDF широко используются для защиты авторских прав, брендинга, отслеживания документов и уведомлений о конфиденциальности. Независимо от того, хотите ли вы добавить простую метку «КОНФИДЕНЦИАЛЬНО» или разместить логотип компании на каждой странице, водяные знаки помогают предотвратить несанкционированное распространение и четко определить право собственности на документ.
В этом руководстве вы узнаете несколько практических способов добавления водяных знаков в PDF-документы — от профессиональных настольных инструментов до бесплатных онлайн-решений и автоматизации с помощью Python.
Быстрая навигация:
- Метод 1: Добавление водяного знака в PDF с помощью Adobe Acrobat Pro
- Метод 2: Добавление водяного знака в PDF онлайн
- Метод 3: Добавление водяного знака в PDF с помощью LibreOffice Draw
- Метод 4: Добавление водяного знака в PDF с помощью Spire.PDF для Python
Когда следует использовать водяные знаки в PDF?
Водяные знаки в PDF полезны всякий раз, когда вам нужно идентифицировать, защитить или брендировать документ. Они помогают читателям немедленно понять статус или право собственности документа, не изменяя сам исходный контент. Как предприятия, так и индивидуальные пользователи часто используют водяные знаки для обеспечения безопасности, защиты авторских прав и управления рабочими процессами.
Вот некоторые распространенные ситуации, когда водяные знаки в PDF полезны:
- Защита конфиденциальных файлов
- Предотвращение несанкционированного распространения
- Маркировка черновиков
- Добавление фирменного стиля компании
- Определение права собственности на документ
В зависимости от вашего рабочего процесса вы можете добавлять водяные знаки вручную с помощью настольных инструментов или автоматизировать процесс с помощью библиотек Python для крупномасштабной обработки PDF.
Метод 1: Добавление водяного знака в PDF с помощью Adobe Acrobat Pro
Лучше всего подходит для: Профессиональных пользователей, которым нужен точный контроль и высокое качество вывода.
Когда дело доходит до редактирования PDF, Adobe Acrobat Pro по-прежнему считается отраслевым стандартом. Его функция водяных знаков очень стабильна и предоставляет пользователям детальный контроль над тем, как водяные знаки отображаются на страницах. Вы можете добавлять как текстовые, так и графические водяные знаки, настраивать непрозрачность, поворачивать их по диагонали и даже применять только к определенным диапазонам страниц.
Для компаний, работающих с контрактами, отчетами или конфиденциальными документами, Acrobat предлагает один из самых надежных способов добавления водяных знаков в PDF с сохранением исходного макета и форматирования.
Пошаговая инструкция: Добавление водяного знака в Adobe Acrobat Pro
- Откройте ваш PDF в Adobe Acrobat Pro.
- Перейдите в Инструменты → Редактировать PDF → Водяной знак → Добавить.
- Выберите тип водяного знака:
- Текстовый водяной знак, или
- Графический водяной знак (Файл)
- В зависимости от вашего выбора:
- Если Текст: введите текст, затем настройте шрифт, цвет, непрозрачность, поворот
- Если Изображение: выберите изображение, затем настройте масштаб, непрозрачность, положение
- Предварительный просмотр результата.
- Нажмите OK и сохраните документ.
Плюсы
- Профессиональное качество результатов
- Отличное сохранение форматирования
- Мощные возможности настройки
Минусы
- Требуется платная подписка
- Дорого для случайных пользователей
Метод 2: Добавление водяного знака в PDF онлайн
Лучше всего подходит для: Пользователей, которым нужно быстрое решение без установки программного обеспечения.
Если вам нужно добавлять водяные знаки в PDF только время от времени, онлайн-инструменты часто являются самым быстрым вариантом. Большинство веб-редакторов PDF позволяют загрузить файл, вставить текстовый или графический водяной знак и скачать обновленный PDF за считанные минуты. Весь процесс происходит в браузере, что удобно для пользователей разных операционных систем.
Онлайн-инструменты особенно полезны для простых задач, таких как добавление метки «Черновик», размещение логотипа компании или маркировка внутренних документов перед их отправкой. Однако, поскольку файлы должны быть загружены на удаленные серверы, они могут быть не идеальны для конфиденциальных или очень чувствительных PDF-файлов.
Общие шаги по добавлению водяного знака в PDF онлайн
- Откройте онлайн-инструмент для добавления водяных знаков в PDF.
- Загрузите ваш PDF-файл.
- Выберите тип водяного знака:
- Текстовый водяной знак, или
- Графический водяной знак
- В зависимости от вашего выбора:
- Если Текст: введите текст водяного знака
- Если Изображение: загрузите ваш логотип или файл изображения
- Настройте параметры водяного знака:
- Размер
- Поворот
- Прозрачность
- Положение
- Предварительный просмотр результата.
- Скачайте обработанный PDF.
Плюсы
- Очень прост в использовании
- Не требует установки
- Работает на Windows, macOS, Linux и мобильных устройствах
Минусы
- Проблемы с конфиденциальностью для чувствительных файлов
- Ограничения по размеру загрузки
- Требуется подключение к Интернету
Метод 3: Добавление водяного знака в PDF с помощью LibreOffice Draw
Лучше всего подходит для: Пользователей, ищущих полностью бесплатное настольное решение.
Для пользователей, которые предпочитают офлайн-инструменты, но не хотят платить за премиальные редакторы PDF, LibreOffice Draw предлагает практичную альтернативу. Хотя он не предназначен специально для добавления водяных знаков в PDF, он может открывать PDF-файлы напрямую и позволяет пользователям размещать текст или изображения поверх существующих страниц.
Этот метод особенно хорошо работает для простых задач по добавлению водяных знаков, особенно при работе с короткими документами. Поскольку LibreOffice Draw полностью бесплатен и имеет открытый исходный код, он остается популярным выбором среди студентов, фрилансеров и пользователей Linux, которым нужны периодические функции редактирования PDF.
Шаги по добавлению водяного знака в PDF с помощью LibreOffice
-
Запустите LibreOffice Draw.
-
Перейдите в Файл → Открыть, затем выберите и откройте целевой PDF-файл.
-
Добавьте водяной знак соответствующим образом:
- Для текстового водяного знака: Нажмите Вставка → Текстовое поле, перетащите, чтобы нарисовать поле, и введите содержимое водяного знака.
- Для графического водяного знака: Нажмите Вставка → Изображение, чтобы импортировать ваш логотип или изображение.
-
Настройте прозрачность и другие параметры:
- Прозрачность текста: Дважды щелкните, чтобы выделить весь текст, щелкните правой кнопкой мыши → Символ, откройте вкладку Эффекты шрифта, затем перетащите ползунок, чтобы настроить прозрачность текста.
- Прозрачность изображения: Щелкните один раз, чтобы выбрать вставленное изображение, щелкните правой кнопкой мыши → Область, напрямую перетащите ползунок прозрачности, чтобы сделать изображение полупрозрачным.
- Свободно настраивайте размер шрифта, цвет, угол поворота и размещение.
-
Скопируйте и вставьте отредактированный водяной знак, чтобы он охватывал все страницы.
-
Когда закончите, перейдите в Файл → Экспорт как → Экспорт в PDF, чтобы сохранить окончательный PDF-файл.
Плюсы
- Полностью бесплатно
- Открытый исходный код
- Подписка не требуется
Минусы
- Медленнее при работе с большими PDF-файлами
- Менее удобно для пакетной обработки
Метод 4: Добавление водяного знака в PDF с помощью Spire.PDF для Python
Лучше всего подходит для: Разработчиков, которым требуется автоматическое добавление водяных знаков в PDF с надежным сохранением форматирования.
Приведенные выше методы хорошо подходят для ручного редактирования, но они становятся неэффективными, когда вам нужно автоматически обрабатывать большое количество PDF-файлов. В рабочих процессах разработки добавление водяных знаков часто является частью более крупного конвейера автоматизации — например, при создании счетов, защите внутренних отчетов или брендировании экспортированных документов.
Вот где Spire.PDF для Python становится полезным. Он позволяет разработчикам программно добавлять как текстовые, так и графические водяные знаки, сохраняя при этом точное отображение PDF. По сравнению со многими легковесными библиотеками для работы с PDF, он предлагает лучший контроль над внешним видом водяного знака, включая непрозрачность, поворот, стили шрифтов и размещение.
Установка Spire.PDF для Python
Установите библиотеку с помощью pip:
pip install spire.pdf
Добавление текстового водяного знака в PDF на Python
Следующий пример добавляет повернутый полупрозрачный текстовый водяной знак на каждую страницу PDF-документа.
from spire.pdf import *
from spire.pdf.common import *
import math

# Создать объект класса PdfDocument
doc = PdfDocument()

# Загрузить PDF-документ из указанного пути
doc.LoadFromFile("Input.pdf")

# Создать объект класса PdfTrueTypeFont для шрифта водяного знака
font = PdfTrueTypeFont("Times New Roman", 48.0, 0, True)

# Указать текст водяного знака
text = "НЕ КОПИРОВАТЬ"

# Измерить размеры текста для обеспечения правильного позиционирования
text_width = font.MeasureString(text).Width
text_height = font.MeasureString(text).Height

# Пройти по каждой странице документа
for i in range(doc.Pages.Count):

    # Получить текущую страницу
    page = doc.Pages.get_Item(i)

    # Сохранить текущее состояние холста
    state = page.Canvas.Save()

    # Рассчитать центральные координаты страницы
    x = page.Canvas.Size.Width / 2
    y = page.Canvas.Size.Height / 2

    # Перенести систему координат в центр
    page.Canvas.TranslateTransform(x, y)

    # Повернуть водяной знак
    page.Canvas.RotateTransform(-45.0)

    # Установить прозрачность
    page.Canvas.SetTransparency(0.7)

    # Нарисовать текст водяного знака
    page.Canvas.DrawString(
        text,
        font,
        PdfBrushes.get_Blue(),
        PointF(-text_width / 2, -text_height / 2)
    )

    # Восстановить состояние холста
    page.Canvas.Restore(state)

# Сохранить измененный PDF
doc.SaveToFile("output/TextWatermark.pdf")

# Освободить ресурсы
doc.Dispose()
Параметры настройки
Этот пример демонстрирует несколько часто используемых настроек водяных знаков:
- Настройка шрифта
Измените семейство шрифтов, размер и стиль, чтобы они соответствовали дизайну вашего документа.
- Угол поворота
Водяной знак повернут на -45°, чтобы создать диагональное отображение на странице.
- Управление прозрачностью
Метод SetTransparency() позволяет водяному знаку оставаться видимым, не блокируя содержимое документа.
- Центрированное позиционирование
Код автоматически размещает водяной знак в центре каждой страницы.
Эти настройки можно легко изменить в зависимости от того, хотите ли вы тонкий фоновый водяной знак или более заметную метку безопасности.
Добавление графического водяного знака в PDF на Python
Помимо текстовых водяных знаков, вы также можете размещать логотипы, штампы или брендинговые изображения на страницах PDF.
# Загрузить изображение водяного знака из указанного пути
image = PdfImage.FromFile("logo.png")

# Получить ширину и высоту загруженного изображения для позиционирования
imageWidth = float(image.Width)
imageHeight = float(image.Height)

# Пройти по каждой странице документа, чтобы применить водяной знак
for i in range(doc.Pages.Count):

    # Получить текущую страницу
    page = doc.Pages.get_Item(i)

    # Установить прозрачность водяного знака на 50%
    page.Canvas.SetTransparency(0.5)

    # Получить размеры текущей страницы
    pageWidth = page.ActualSize.Width
    pageHeight = page.ActualSize.Height

    # Рассчитать координаты x и y для центрирования изображения на странице
    x = (pageWidth - imageWidth) / 2
    y = (pageHeight - imageHeight) / 2

    # Нарисовать изображение в рассчитанном центральном положении на странице
    page.Canvas.DrawImage(image, x, y, imageWidth, imageHeight)
Что можно настроить?
С графическими водяными знаками вы можете легко настроить:
- Уровень прозрачности
- Размер водяного знака
- Положение на странице
- Логотип или брендинговое изображение
- Размещение водяного знака на нескольких страницах
Помимо добавления водяных знаков, Spire.PDF для Python также предоставляет широкий спектр возможностей для обработки PDF. Вы можете использовать его для создания, редактирования, слияния, разделения и конвертации PDF-документов программно. Это делает его универсальным решением для создания полных рабочих процессов автоматизации PDF в приложениях Python.
Сравнение всех методов
| Метод | Простота использования | Стоимость | Лучше всего подходит для | Автоматизация |
|---|---|---|---|---|
| Adobe Acrobat Pro | Легко | Платно | Профессиональное редактирование | Нет |
| Онлайн-инструменты | Очень легко | Бесплатно/Freemium | Быстрые задачи | Нет |
| LibreOffice Draw | Средне | Бесплатно | Бесплатное настольное редактирование | Нет |
| Spire.PDF для Python | Средне | Бесплатно/Коммерческое | Разработчики и автоматизация | Да |
Заключение
Добавление водяных знаков в PDF может варьироваться от простой одноразовой задачи до полностью автоматизированного рабочего процесса обработки документов. Инструменты, такие как Adobe Acrobat и онлайн-редакторы, подходят для периодического ручного редактирования, в то время как LibreOffice Draw предлагает функциональную бесплатную альтернативу для офлайн-использования.
Для разработчиков и компаний, работающих с PDF в больших объемах, программные решения предоставляют гораздо большую гибкость. Spire.PDF для Python позволяет добавлять как текстовые, так и графические водяные знаки с точным контролем над непрозрачностью, поворотом, шрифтами и размещением, что делает его хорошо подходящим для автоматизированного создания PDF и рабочих процессов защиты документов.
Часто задаваемые вопросы о водяных знаках в PDF
Могу ли я бесплатно добавить водяной знак в PDF?
Абсолютно. Вы можете использовать бесплатное настольное программное обеспечение, такое как LibreOffice Draw, или различные бесплатные онлайн-редакторы PDF для вставки текстовых и графических водяных знаков без платной подписки. Кроме того, бесплатная версия Spire.PDF также позволяет добавлять водяные знаки в PDF с ограничением до 10 страниц на документ.
Могу ли я добавить графический водяной знак вместо текстового?
Да. Большинство инструментов для работы с PDF поддерживают как текстовые, так и графические водяные знаки, включая логотипы, штампы и брендинговые изображения.
Как добавить водяной знак на все страницы PDF?
Большинство редакторов PDF включают опцию автоматического применения водяного знака ко всем страницам. В Python это обычно делается путем перебора всех страниц.
Уменьшит ли добавление водяного знака качество PDF?
Обычно нет. Текстовые водяные знаки оказывают минимальное влияние, в то время как графические водяные знаки могут незначительно увеличить размер файла в зависимости от используемого изображения.
Какой метод лучше всего подходит для пакетного добавления водяных знаков в PDF?
Программные решения лучше всего подходят для пакетной обработки. Библиотеки, такие как Spire.PDF для Python, могут автоматизировать добавление водяных знаков в большое количество PDF-файлов.
См. также
Adicionar um índice ao PDF: Adobe, ferramentas online e Python

Ler um documento PDF de 100 páginas sem nenhuma navegação pode ser frustrante e ineficiente. Seja um relatório de negócios, um e-book ou um manual técnico, um sumário bem estruturado melhora significativamente a navegação. Ele também ajuda os leitores a entenderem rapidamente a estrutura do documento.
No entanto, como o PDF é um formato de layout fixo, modificar suas páginas após a geração é complicado. Este guia apresenta três métodos populares para ajudá-lo a adicionar um sumário a arquivos PDF de forma eficiente com editores online, Adobe Acrobat e Python.
- Comparação de Metodologias: Escolha a Sua Abordagem
- Adicionar um Sumário Clicável em PDF Online
- Criar um Sumário em Adobe PDF
- Adicionar Sumário em PDF Automaticamente via Python
- Dicas para Criar um Sumário
Comparação de Metodologias: Escolha a Sua Abordagem
Antes de mergulhar nos tutoriais passo a passo, você pode ter uma visão geral dos métodos apresentados neste artigo. Dependendo do estado atual do seu documento e do seu conhecimento técnico, sempre há uma solução que se adapta às suas necessidades.
| Método | Ideal para | Lógica Técnica | Prós | Contras |
|---|---|---|---|---|
| Editores Online | PDFs finalizados, prazos apertados | Geração Reversa: Escaneia automaticamente o texto para criar marcadores, depois imprime uma página de sumário. | Incrivelmente rápido; Nenhuma instalação necessária. | Versões gratuitas têm limites de tamanho; Erros de layout de IA. |
| Adobe Acrobat Pro | Precisão de nível profissional, layouts de impressão | Camadas Visuais: Layout de texto manual ou conversão de volta à origem. | Padrão da indústria; Links perfeitos entre plataformas. | Licença cara; Alto trabalho manual para arquivos longos. |
| Spire.PDF (Código) | Desenvolvedores, automação de servidor em lote | Geração Programática de Marcadores: Renderiza fontes através de coordenadas X/Y exatas. | Escalabilidade infinita; Fluxos de trabalho 100% automatizados. | Requer base de programação básica. |
Como Adicionar um Sumário a um PDF Online
Se você está lidando com um documento PDF e precisa de uma solução rápida, ferramentas baseadas na web podem ser a melhor escolha. Editores online como o PDFelement são leves e fáceis de usar, permitindo que você realize várias edições diretamente no seu navegador simplesmente carregando seu documento.
Em seguida, demonstraremos como criar um sumário clicável em um PDF usando ferramentas online, tomando o PDFelement como exemplo.
- Passo 1. Acesse PDFelement e carregue seu documento PDF.
- Passo 2. Navegue até as ferramentas do painel de navegação e selecione Marcador Automático. O motor web irá escanear os tamanhos das fontes e as quebras de linha para mapear a hierarquia do seu documento.
- Passo 3. Clique no menu suspenso de opções de marcador e escolha Criar Página de Conteúdo. A ferramenta gerará uma nova página de sumário no início do documento.
Nota: Embora as ferramentas online sejam excelentes para correções rápidas, sempre revise seu documento após o download. Layouts complexos com imagens flutuantes podem, às vezes, confundir os algoritmos de detecção automática, exigindo alguns ajustes manuais de texto.
Como Criar um Sumário Clicável em Adobe PDF
O Adobe Acrobat é um dos editores de PDF mais utilizados e é comumente usado em ambientes de publicação profissional. Ao contrário das ferramentas web leves, ele oferece recursos avançados de edição, compatibilidade e gerenciamento de documentos. O Adobe Acrobat suporta edição direta de PDF e fluxos de trabalho de conversão de documentos. Você pode criar manualmente links de navegação dentro do PDF ou converter o arquivo de volta para Word para gerar um sumário dinâmico automaticamente.
Vamos dar uma olhada em como adicionar um sumário a um PDF usando o Adobe Acrobat Pro através dessas duas abordagens.
Criar um Sumário em PDF no Adobe
O Adobe ajuda você a mapear os links de conteúdo diretamente na tela do PDF usando alvos de toque invisíveis. Aqui estão as instruções passo a passo.
- Passo 1. Abra a ferramenta Organizar Páginas. Clique em Inserir > Página em Branco e posicione-a logo após sua folha de rosto para criar espaço para seu novo índice.
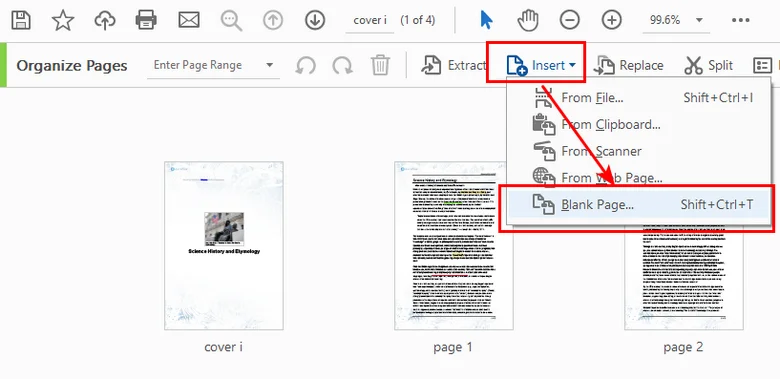
- Passo 2. Mude para a ferramenta Editar PDF. Desenhe uma caixa de texto em sua nova página em branco e digite o layout do seu índice de capítulos (por exemplo, Capítulo 1: Tendências de Mercado .......... Página 4).
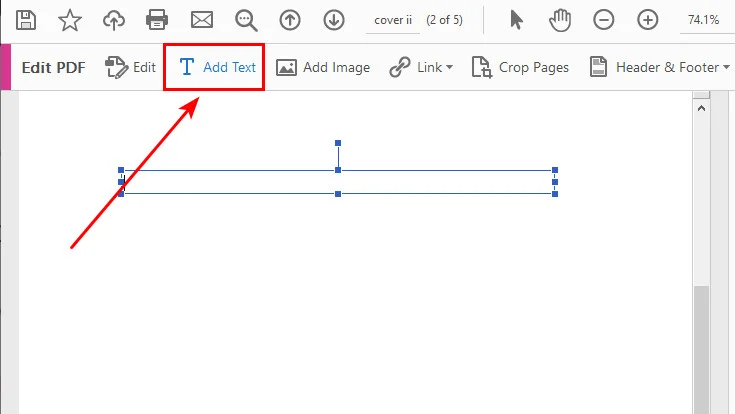
- Passo 3. Selecione a ferramenta Link na barra de ferramentas superior, clique em Adicionar/Editar Link Web ou de Documento e arraste uma caixa retangular invisível diretamente sobre a camada de texto "Capítulo 1" que você digitou.
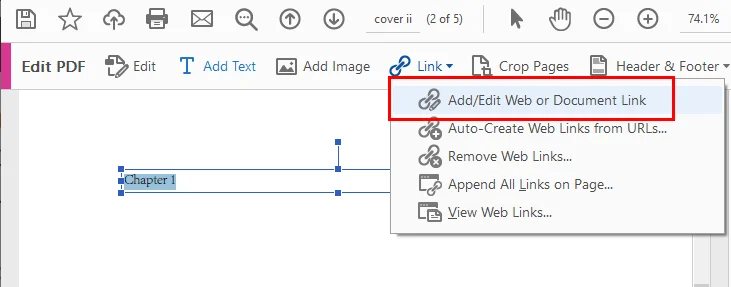
- Passo 4. Na janela de configuração de link pop-up, defina a ação do link como Ir para uma visualização de página. Percorra seu documento em segundo plano até que o Capítulo 1 preencha sua tela de forma agradável, em seguida, clique em Definir Link. Repita este processo para os capítulos restantes.

Converter de Volta para Word e Adicionar Sumário
Além de criar um sumário diretamente dentro do PDF, você também pode converter o arquivo de volta para um documento Word e gerar um índice. Comparado ao método anterior, essa abordagem requer menos esforço manual, especialmente ao lidar com documentos longos.
- Passo 1: Abra seu documento no Acrobat, navegue até o painel Exportar PDF e selecione Documento do Microsoft Word.
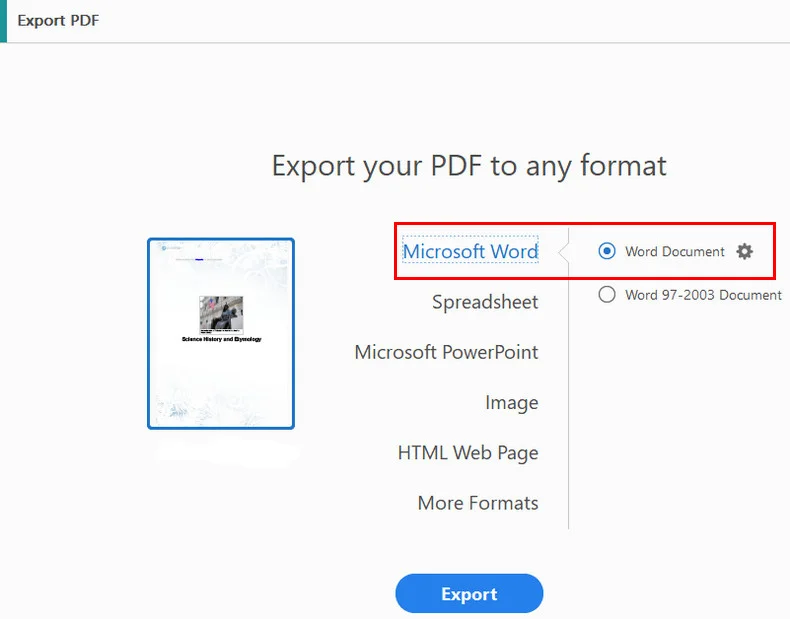
- Passo 2: Abra o arquivo Word recém-gerado, selecione seus cabeçalhos de seção e aplique os estilos padrão Título 1 / Título 2 na faixa de opções Início.
- Passo 3: Mova o cursor para a primeira página, vá para Referências > Sumário e insira uma página de índice nativa e dinâmica.
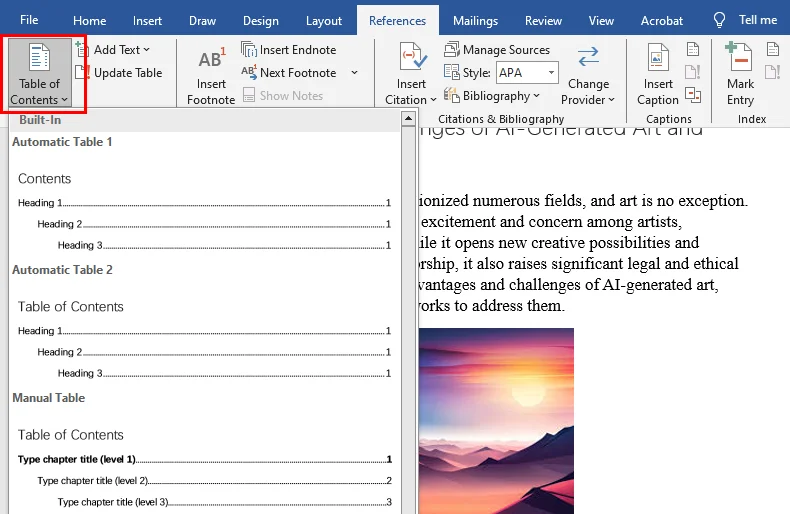
- Passo 4: Escolha Salvar como e selecione PDF. Nas opções da janela de salvamento, certifique-se de verificar se Criar marcadores usando títulos está marcado para selar automaticamente sua navegação em várias camadas.
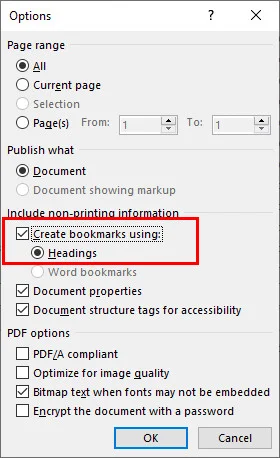
Leia Também: Como Alterar o Tamanho da Página PDF: Online, Adobe e Com Código
Como Adicionar Marcadores de Navegação em PDF Automaticamente via Python
Se você precisa processar grandes volumes de relatórios, faturas ou documentos técnicos automaticamente, métodos manuais geralmente consomem muito tempo. Ao contrário das ferramentas online ou fluxos de trabalho do Adobe Acrobat, as bibliotecas Python podem gerar marcadores e estruturas de navegação programaticamente, tornando-as ideais para automação em larga escala.
Este método cria marcadores de PDF programaticamente em vez de gerar uma página de sumário visível dentro do documento. Os marcadores aparecem no painel de navegação do leitor de PDF e permitem que os usuários saltem rapidamente para seções específicas.
Usando o Free Spire.PDF for Python, os desenvolvedores podem criar estruturas de marcadores através de suas APIs simples e vinculá-las a páginas ou coordenadas específicas dentro do documento.
Abaixo está o exemplo de código completo:
from spire.pdf.common import *
from spire.pdf import *

# Criar um objeto PdfDocument
doc = PdfDocument()

# Carregar um arquivo PDF
doc.LoadFromFile("/input/sample.pdf")

# Loop através das páginas no arquivo PDF
for i in range(doc.Pages.Count):
    page = doc.Pages.get_Item(i)

    # Definir o título e o destino para o marcador
    bookmarkTitle = "Marcador-{0}".format(i+1)
    bookmarkDest = PdfDestination(page, PointF(0.0, 0.0))

    # Criar e configurar o marcador
    bookmark = doc.Bookmarks.Add(bookmarkTitle)
    bookmark.Color = PdfRGBColor(Color.get_SaddleBrown())
    bookmark.DisplayStyle = PdfTextStyle.Bold
    bookmark.Action = PdfGoToAction(bookmarkDest)

    # Criar uma coleção para manter os marcadores filhos
    bookmarkCollection = PdfBookmarkCollection(bookmark)

    # Definir o título e o destino para o marcador filho
    childBookmarkTitle = "Sub-Marcador-{0}".format(i+1)
    childBookmarkDest = PdfDestination(page, PointF(0.0, 100.0))

    # Criar e configurar o marcador filho
    childBookmark = bookmarkCollection.Add(childBookmarkTitle)
    childBookmark.Color = PdfRGBColor(Color.get_Coral())
    childBookmark.DisplayStyle = PdfTextStyle.Italic
    childBookmark.Action = PdfGoToAction(childBookmarkDest)

# Salvar o arquivo PDF
doc.SaveToFile("/output/Bookmark.pdf")

# Fechar o documento
doc.Close()
Abaixo está uma prévia do sumário do PDF criado usando o Free Spire.PDF:
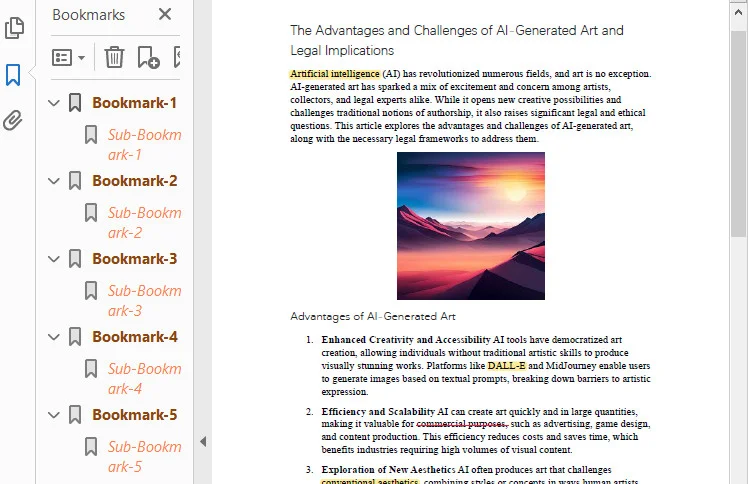
Dicas para Criar um Sumário de PDF Amigável ao Usuário
- Não se Esqueça dos Pontos de Conexão: Sempre adicione uma sequência de pontos (
. . . . .) entre o título do capítulo e o número da página. Em monitores largos, os olhos do leitor terão dificuldade em conectar o texto à esquerda com os números à direita sem uma linha guia visual. - Mantenha os Marcadores e o Sumário da Página Sincronizados: Certifique-se de que sua página de índice visual corresponda exatamente ao painel de marcadores da barra lateral esquerda. Quando um usuário clica em um marcador, ele deve ser levado para a mesma coordenada exata de quando clica no link de texto na primeira página.
- Preenchimento da Caixa de Alvo Clicável: Ao mapear anotações de link com código ou a ferramenta de link do Acrobat, torne suas caixas delimitadoras ligeiramente mais altas e mais largas do que as palavras reais. Esse preenchimento extra torna o toque nos alvos significativamente mais fácil para leitores que navegam em telas de celular.
Conclusão
Adicionar um sumário claro a PDFs transforma um arquivo confuso em um documento profissional. Entre os métodos apresentados, as ferramentas online são as melhores para tarefas rápidas, enquanto o Adobe Acrobat é adequado para aqueles que preferem software de desktop com compatibilidade e segurança de arquivo rigorosas. Para processar arquivos massivos ou integrar navegação em fluxos de trabalho automatizados, o Free Spire.PDF para Python é a escolha definitiva. Escolha a ferramenta certa para sua carga de trabalho e comece a organizar seus PDFs hoje mesmo!
Leia Também
PDF에 목차 추가: Adobe, 온라인 도구 및 Python
탐색 기능이 없는 100페이지 분량의 PDF 문서를 읽는 것은 좌절스럽고 비효율적일 수 있습니다. 비즈니스 보고서, 전자책 또는 기술 매뉴얼이든 잘 구성된 목차는 탐색을 크게 개선합니다. 또한 독자가 문서 구조를 빠르게 이해하는 데 도움이 됩니다.
그러나 PDF는 고정 레이아웃 형식이기 때문에 생성 후 페이지를 수정하는 것은 까다롭습니다. 이 가이드에서는 온라인 편집기, Adobe Acrobat 및 Python을 사용하여 PDF 파일에 목차를 효율적으로 추가하는 세 가지 인기 있는 방법을 소개합니다.
방법론 비교: 접근 방식 선택
단계별 튜토리얼을 자세히 살펴보기 전에 이 기사에서 소개된 방법에 대한 일반적인 개요를 먼저 얻을 수 있습니다. 현재 문서 상태와 기술적 배경에 따라 요구 사항에 맞는 솔루션이 항상 있습니다.
| 방법 | 가장 적합한 경우 | 기술적 논리 | 장점 | 단점 |
|---|---|---|---|---|
| 온라인 편집기 | 완성된 PDF, 촉박한 마감일 | 역방향 생성: 텍스트를 자동 스캔하여 북마크를 생성한 다음 TOC 페이지를 인쇄합니다. | 매우 빠름; 설치 불필요. | 무료 등급에는 크기 제한이 있음; AI 레이아웃 오류. |
| Adobe Acrobat Pro | 출판사 수준의 정확도, 인쇄 레이아웃 | 시각적 계층화: 수동 텍스트 레이아웃 또는 원본으로의 변환. | 업계 표준; 완벽한 크로스 플랫폼 링크. | 비싼 라이선스; 긴 파일의 경우 수동 작업이 많음. |
| Spire.PDF (코드) | 개발자, 배치 서버 자동화 | 프로그래밍 방식 북마크 생성: 정확한 X/Y 좌표를 통해 글꼴을 렌더링합니다. | 무한 확장; 100% 자동화된 워크플로우. | 기본 프로그래밍 기준선 필요. |
온라인에서 PDF에 목차 추가하는 방법
PDF 문서를 다루고 빠른 처리가 필요한 경우 웹 기반 도구가 최선의 선택이 될 수 있습니다. PDFelement와 같은 온라인 편집기는 가볍고 사용하기 쉬워 문서를 업로드하기만 하면 브라우저에서 다양한 편집을 쉽게 수행할 수 있습니다.
다음으로, PDFelement를 예로 들어 온라인 도구를 사용하여 PDF에 클릭 가능한 목차를 만드는 방법을 보여드리겠습니다.
- 1단계. PDFelement로 이동하여 PDF 문서를 업로드합니다.
- 2단계. 탐색 패널 도구로 이동하여 자동 북마크를 선택합니다. 웹 엔진은 글꼴 크기와 줄 바꿈을 스캔하여 문서 계층 구조를 매핑합니다.
- 3단계. 북마크 옵션 드롭다운 메뉴를 클릭하고 목차 페이지 만들기를 선택합니다. 이 도구는 문서 시작 부분에 새 목차 페이지를 생성합니다.
참고: 온라인 도구는 빠른 수정에 탁월하지만 다운로드 후 항상 문서를 검토하십시오. 부동 이미지가 있는 복잡한 레이아웃은 자동 감지 알고리즘을 혼동시켜 몇 가지 수동 텍스트 조정을 요구할 수 있습니다.
Adobe PDF에서 클릭 가능한 목차 만드는 방법
Adobe Acrobat은 가장 널리 사용되는 PDF 편집기 중 하나이며 전문 출판 환경에서 일반적으로 사용됩니다. 가벼운 웹 기반 도구와 달리 고급 편집, 호환성 및 문서 관리 기능을 제공합니다. Adobe Acrobat은 직접 PDF 편집 및 문서 변환 워크플로우를 모두 지원합니다. PDF 내에서 수동으로 탐색 링크를 만들거나 파일을 Word로 다시 변환하여 동적 TOC를 자동으로 생성할 수 있습니다.
이 두 가지 접근 방식을 통해 Adobe Acrobat Pro를 사용하여 PDF에 목차를 추가하는 방법을 살펴보겠습니다.
Adobe에서 PDF 목차 만들기
Adobe는 보이지 않는 터치 타겟을 사용하여 PDF 캔버스에서 직접 콘텐츠 링크를 매핑하는 데 도움이 됩니다. 다음은 단계별 지침입니다.
- 1단계. 페이지 구성 도구로 이동합니다. 삽입 > 빈 페이지를 클릭하고 표지 바로 뒤에 배치하여 새 인덱스를 위한 공간을 만듭니다.
- 2단계. PDF 편집 도구로 전환합니다. 새 빈 페이지에 텍스트 상자를 그리고 챕터 인덱스 레이아웃을 입력합니다(예: 챕터 1: 시장 동향 .......... 페이지 4).
- 3단계. 상단 도구 모음에서 링크 도구를 선택하고 웹 또는 문서 링크 추가/편집을 클릭한 다음 입력한 "챕터 1" 텍스트 레이어 위에 직접 보이지 않는 사각형 상자를 드래그합니다.
- 4단계. 팝업 링크 구성 창에서 링크 작업을 페이지 보기로 이동으로 설정합니다. 백그라운드에서 문서를 스크롤하여 챕터 1이 화면에 잘 맞도록 한 다음 링크 설정을 클릭합니다. 나머지 챕터에 대해서도 이 과정을 반복합니다.
Word로 다시 변환하여 TOC 추가
PDF 내에서 직접 목차를 만드는 것 외에도 파일을 Word 문서로 변환하여 인덱스를 생성할 수도 있습니다. 이전 방법과 비교하여 이 접근 방식은 특히 긴 문서를 다룰 때 수동 노력이 덜 필요합니다.
- 1단계: Acrobat에서 문서를 열고 PDF 내보내기 창으로 이동한 다음 Microsoft Word 문서를 선택합니다.
- 2단계: 새로 생성된 Word 파일을 열고 섹션 헤더를 선택한 다음 홈 리본에서 표준 제목 1 / 제목 2 스타일을 적용합니다.
- 3단계: 커서를 첫 페이지로 이동하고 참조 > 목차로 이동한 다음 동적 기본 인덱스 페이지를 삽입합니다.
- 4단계: 다른 이름으로 저장을 선택하고 PDF를 선택합니다. 저장 창 옵션에서 제목을 사용하여 책갈피 만들기가 선택되어 있는지 확인하여 다층 탐색을 자동으로 봉인합니다.
또한 읽기: PDF 페이지 크기 변경 방법: 온라인, Adobe 및 코드 사용
Python을 통해 PDF 탐색 북마크 자동 추가하는 방법
대량의 보고서, 송장 또는 기술 문서를 자동으로 처리해야 하는 경우 수동 방법은 종종 시간이 많이 소요됩니다. 온라인 도구나 Adobe Acrobat 워크플로우와 달리 Python 라이브러리는 프로그래밍 방식으로 북마크 및 탐색 구조를 생성할 수 있으므로 대규모 자동화에 이상적입니다.
이 방법은 문서 내에 표시되는 목차 페이지를 생성하는 대신 프로그래밍 방식으로 PDF 북마크를 생성합니다. 북마크는 PDF 리더의 탐색 패널에 표시되며 사용자가 특정 섹션으로 빠르게 이동할 수 있습니다.
Free Spire.PDF for Python을 사용하면 개발자는 간단한 API를 통해 북마크 구조를 생성하고 문서 내의 특정 페이지 또는 좌표에 연결할 수 있습니다.
아래는 전체 코드 예제입니다.
from spire.pdf.common import *
from spire.pdf import *

# PdfDocument 객체 생성
doc = PdfDocument()

# PDF 파일 로드
doc.LoadFromFile("/input/sample.pdf")

# PDF 파일의 페이지를 반복
for i in range(doc.Pages.Count):
    page = doc.Pages.get_Item(i)

    # 북마크의 제목 및 대상 설정
    bookmarkTitle = "Bookmark-{0}".format(i+1)
    bookmarkDest = PdfDestination(page, PointF(0.0, 0.0))

    # 북마크 생성 및 구성
    bookmark = doc.Bookmarks.Add(bookmarkTitle)
    bookmark.Color = PdfRGBColor(Color.get_SaddleBrown())
    bookmark.DisplayStyle = PdfTextStyle.Bold
    bookmark.Action = PdfGoToAction(bookmarkDest)

    # 하위 북마크를 저장할 컬렉션 생성
    bookmarkCollection = PdfBookmarkCollection(bookmark)

    # 하위 북마크의 제목 및 대상 설정
    childBookmarkTitle = "Sub-Bookmark-{0}".format(i+1)
    childBookmarkDest = PdfDestination(page, PointF(0.0, 100.0))

    # 하위 북마크 생성 및 구성
    childBookmark = bookmarkCollection.Add(childBookmarkTitle)
    childBookmark.Color = PdfRGBColor(Color.get_Coral())
    childBookmark.DisplayStyle = PdfTextStyle.Italic
    childBookmark.Action = PdfGoToAction(childBookmarkDest)

# PDF 파일 저장
doc.SaveToFile("/output/Bookmark.pdf")

# 문서 닫기
doc.Close()
아래는 Free Spire.PDF를 사용하여 생성된 PDF 목차 미리 보기입니다.
사용자 친화적인 PDF 목차 만들기 팁
- 점선 리더를 잊지 마세요: 챕터 제목과 페이지 번호 사이에 항상 점(
. . . . .)을 추가하세요. 넓은 모니터에서는 시각적 안내 레일 없이는 독자의 눈이 왼쪽의 텍스트와 오른쪽의 숫자를 연결하는 데 어려움을 겪을 것입니다. - 북마크와 페이지 TOC 동기화 유지: 시각적 인덱스 페이지가 왼쪽 사이드바 북마크 패널과 정확히 일치하는지 확인하세요. 사용자가 북마크를 클릭하면 첫 페이지의 텍스트 링크를 클릭하는 것과 정확히 동일한 좌표로 이동해야 합니다.
- 클릭 가능한 대상 상자 패딩: 코드 또는 Acrobat 링크 도구를 사용하여 링크 주석을 매핑할 때 경계 상자를 실제 단어보다 약간 더 높고 넓게 만드세요. 이 추가 패딩은 모바일 화면에서 탐색하는 독자가 터치 타겟을 훨씬 쉽게 맞출 수 있도록 합니다.
결론
PDF에 명확한 목차를 추가하면 복잡한 파일을 전문적인 문서로 바꿀 수 있습니다. 소개된 방법 중에서 온라인 도구는 빠른 작업에 가장 적합하며, Adobe Acrobat은 엄격한 파일 호환성 및 보안을 갖춘 데스크톱 소프트웨어를 선호하는 사람들에게 적합합니다. 대량 파일을 처리하거나 자동화된 워크플로우에 탐색을 통합하는 경우 Free Spire.PDF for Python이 최고의 선택입니다. 작업에 맞는 도구를 선택하고 지금 바로 PDF를 정리하세요!
또한 읽기
Aggiungere un sommario al PDF: Adobe, strumenti online e Python
Indice
Leggere un documento PDF di 100 pagine senza alcuna navigazione può essere frustrante e inefficiente. Che si tratti di un report aziendale, di un e-book o di un manuale tecnico, un indice ben strutturato migliora significativamente la navigazione. Aiuta inoltre i lettori a comprendere rapidamente la struttura del documento.
Tuttavia, poiché il PDF è un formato a layout fisso, modificarne le pagine dopo la generazione è complicato. Questa guida introduce tre metodi popolari per aiutarti ad aggiungere un indice ai file PDF in modo efficiente con editor online, Adobe Acrobat e Python.
- Confronto delle metodologie: scegli il tuo approccio
- Aggiungere un indice cliccabile in PDF online
- Creare un indice in Adobe PDF
- Aggiungere l'indice in PDF automaticamente tramite Python
- Suggerimenti per la progettazione di un indice
Confronto delle metodologie: scegli il tuo approccio
Prima di addentrarci nei tutorial passo passo, puoi ottenere una panoramica generale dei metodi introdotti in questo articolo. A seconda dello stato attuale del tuo documento e del tuo background tecnico, c'è sempre una soluzione adatta alle tue esigenze.
| Metodo | Ideale per | Logica tecnica | Pro | Contro |
|---|---|---|---|---|
| Editor online | PDF completati, scadenze ravvicinate | Generazione inversa: scansiona automaticamente il testo per creare segnalibri, quindi stampa una pagina di indice. | Incredibilmente veloce; Nessuna installazione richiesta. | I piani gratuiti hanno limiti di dimensione; Errori di layout AI. |
| Adobe Acrobat Pro | Accuratezza di livello editoriale, layout di stampa | Sovrapposizione visiva: layout di testo manuale o conversione back-to-source. | Standard del settore; Collegamenti multipiattaforma impeccabili. | Licenza costosa; Elevato lavoro manuale per file lunghi. |
| Spire.PDF (Codice) | Sviluppatori, automazione server batch | Generazione programmatica di segnalibri: esegue il rendering dei font tramite coordinate X/Y esatte. | Scalabilità infinita; Flussi di lavoro automatizzati al 100%. | Richiede una base di programmazione di base. |
Come aggiungere un indice a un PDF online
Se hai a che fare con un documento PDF e hai bisogno di una rapida elaborazione, gli strumenti basati sul web possono essere la scelta migliore. Editor online come PDFelement sono leggeri e facili da usare, consentendoti di eseguire facilmente varie modifiche direttamente nel tuo browser semplicemente caricando il tuo documento.
Successivamente, ti mostreremo come creare un indice cliccabile in un PDF utilizzando strumenti online, prendendo PDFelement come esempio.
- Passaggio 1. Vai su PDFelement e carica il tuo documento PDF.
- Passaggio 2. Naviga negli strumenti del pannello di navigazione e seleziona Segnalibro automatico. Il motore web analizzerà le dimensioni dei font e le interruzioni di riga per mappare la gerarchia del tuo documento.
- Passaggio 3. Fai clic sul menu a discesa delle opzioni dei segnalibri e scegli Crea pagina dei contenuti. Lo strumento genererà una nuova pagina di indice all'inizio del documento.
Nota: Mentre gli strumenti online sono eccellenti per correzioni rapide, rivedi sempre il tuo documento dopo averlo scaricato. Layout complessi con immagini fluttuanti possono talvolta confondere gli algoritmi di rilevamento automatico, richiedendo alcune modifiche manuali al testo.
Come creare un indice cliccabile in Adobe PDF
Adobe Acrobat è uno degli editor PDF più utilizzati ed è comunemente impiegato in ambienti di pubblicazione professionale. A differenza degli strumenti web leggeri, offre funzionalità avanzate di editing, compatibilità e gestione dei documenti. Adobe Acrobat supporta sia la modifica diretta del PDF che i flussi di lavoro di conversione dei documenti. Puoi creare manualmente collegamenti di navigazione all'interno del PDF o convertire il file in Word per generare automaticamente un indice dinamico.
Diamo un'occhiata a come aggiungere un indice a un PDF utilizzando Adobe Acrobat Pro attraverso questi due approcci.
Creare un indice PDF in Adobe
Adobe ti aiuta a mappare i collegamenti dei contenuti direttamente sulla tela del PDF utilizzando aree sensibili al tocco invisibili. Ecco le istruzioni passo passo.
- Passaggio 1. Apri lo strumento Organizza pagine. Fai clic su Inserisci > Pagina vuota e posizionala subito dopo la tua copertina per creare spazio per il tuo nuovo indice.
- Passaggio 2. Passa allo strumento Modifica PDF. Disegna una casella di testo sulla tua nuova pagina vuota e digita il layout del tuo indice dei capitoli (ad esempio, Capitolo 1: Tendenze di mercato .......... Pagina 4).
- Passaggio 3. Seleziona lo strumento Collegamento dalla barra degli strumenti superiore, fai clic su Aggiungi/modifica collegamento Web o documento e trascina un riquadro rettangolare invisibile direttamente sul livello di testo "Capitolo 1" digitato.
- Passaggio 4. Nella finestra di configurazione del collegamento pop-up, imposta l'azione del collegamento su Vai a una visualizzazione di pagina. Scorri il tuo documento in background finché il Capitolo 1 non riempie bene lo schermo, quindi fai clic su Imposta collegamento. Ripeti questo processo per i capitoli rimanenti.
Convertire nuovamente in Word e aggiungere l'indice
Oltre a creare un indice direttamente all'interno del PDF, puoi anche convertire il file in un documento Word e generare un indice. Rispetto al metodo precedente, questo approccio richiede meno sforzo manuale, soprattutto quando si tratta di documenti lunghi.
- Passaggio 1: Apri il tuo documento in Acrobat, naviga nel pannello Esporta PDF e seleziona Documento Microsoft Word.
- Passaggio 2: Apri il file Word appena generato, seleziona le intestazioni delle tue sezioni e applica gli stili standard Intestazione 1 / Intestazione 2 dalla barra multifunzione Home.
- Passaggio 3: Sposta il cursore sulla prima pagina, vai su Riferimenti > Sommario e inserisci una pagina di indice nativa e dinamica.
- Passaggio 4: Scegli Salva con nome e seleziona PDF. Nelle opzioni della finestra di salvataggio, assicurati di verificare che Crea segnalibri utilizzando le intestazioni sia selezionato per sigillare automaticamente la tua navigazione multistrato.
Leggi anche: Come cambiare le dimensioni delle pagine PDF: online, Adobe e con codice
Come aggiungere segnalibri di navigazione PDF automaticamente tramite Python
Se è necessario elaborare grandi volumi di report, fatture o documenti tecnici automaticamente, i metodi manuali richiedono spesso molto tempo. A differenza degli strumenti online o dei flussi di lavoro di Adobe Acrobat, le librerie Python possono generare segnalibri e strutture di navigazione programmaticamente, rendendole ideali per l'automazione su larga scala.
Questo metodo crea segnalibri PDF programmaticamente anziché generare una pagina di indice visibile all'interno del documento. I segnalibri appaiono nel pannello di navigazione del lettore PDF e consentono agli utenti di passare rapidamente a sezioni specifiche.
Utilizzando Free Spire.PDF per Python, gli sviluppatori possono creare strutture di segnalibri tramite le sue semplici API e collegarle a pagine o coordinate specifiche all'interno del documento.
Di seguito è riportato l'esempio di codice completo:
from spire.pdf.common import *
from spire.pdf import *

# Crea un oggetto PdfDocument
doc = PdfDocument()

# Carica un file PDF
doc.LoadFromFile("/input/sample.pdf")

# Cicla attraverso le pagine del file PDF
for i in range(doc.Pages.Count):
    page = doc.Pages.get_Item(i)

    # Imposta il titolo e la destinazione per il segnalibro
    bookmarkTitle = "Segnalibro-{0}".format(i+1)
    bookmarkDest = PdfDestination(page, PointF(0.0, 0.0))

    # Crea e configura il segnalibro
    bookmark = doc.Bookmarks.Add(bookmarkTitle)
    bookmark.Color = PdfRGBColor(Color.get_SaddleBrown())
    bookmark.DisplayStyle = PdfTextStyle.Bold
    bookmark.Action = PdfGoToAction(bookmarkDest)

    # Crea una raccolta per contenere i segnalibri figli
    bookmarkCollection = PdfBookmarkCollection(bookmark)

    # Imposta il titolo e la destinazione per il segnalibro figlio
    childBookmarkTitle = "Sottosegnibro-{0}".format(i+1)
    childBookmarkDest = PdfDestination(page, PointF(0.0, 100.0))

    # Crea e configura il segnalibro figlio
    childBookmark = bookmarkCollection.Add(childBookmarkTitle)
    childBookmark.Color = PdfRGBColor(Color.get_Coral())
    childBookmark.DisplayStyle = PdfTextStyle.Italic
    childBookmark.Action = PdfGoToAction(childBookmarkDest)

# Salva il file PDF
doc.SaveToFile("/output/Bookmark.pdf")

# Chiudi il documento
doc.Close()
Di seguito è riportata un'anteprima dell'indice PDF creato utilizzando Free Spire.PDF:
Suggerimenti per la creazione di un indice PDF intuitivo
- Non dimenticare i puntini di riempimento: aggiungi sempre una serie di puntini (
. . . . .) tra il titolo del capitolo e il numero di pagina. Su monitor ampi, gli occhi del lettore avranno difficoltà a collegare il testo a sinistra con i numeri a destra senza una guida visiva. - Mantieni sincronizzati segnalibri e indice della pagina: assicurati che la tua pagina di indice visiva corrisponda esattamente al pannello dei segnalibri della barra laterale sinistra. Quando un utente fa clic su un segnalibro, dovrebbe essere indirizzato alla stessa coordinata esatta di quando fa clic sul collegamento di testo nella prima pagina.
- Imbottitura della casella di destinazione cliccabile: quando mappi le annotazioni dei collegamenti con il codice o lo strumento di collegamento di Acrobat, rendi i tuoi riquadri leggermente più alti e più larghi delle parole effettive. Questa imbottitura extra rende molto più facile colpire le aree sensibili al tocco per i lettori che navigano su schermi mobili.
Conclusione
Aggiungere un indice chiaro ai PDF trasforma un file disordinato in un documento professionale. Tra i metodi introdotti, gli strumenti online sono i migliori per attività rapide, mentre Adobe Acrobat è adatto a coloro che preferiscono software desktop con rigorosa compatibilità e sicurezza dei file. Per l'elaborazione di file enormi o l'integrazione della navigazione in flussi di lavoro automatizzati, Free Spire.PDF per Python è la scelta definitiva. Scegli lo strumento giusto per il tuo carico di lavoro e inizia oggi stesso a organizzare i tuoi PDF!