
Knowledgebase (2343)
Children categories
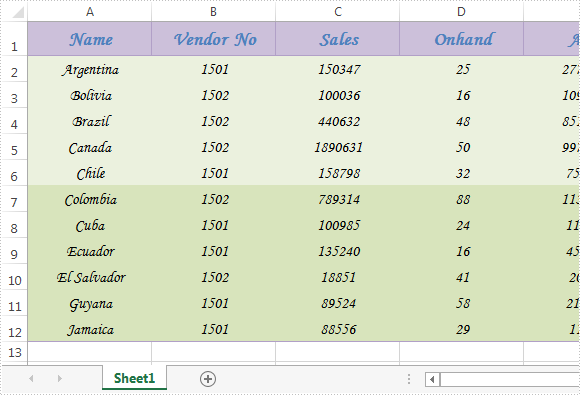
Sometimes, hide row and column can make the data processing job easier and more efficient when working with a large excel file. However, hidden rows and columns are always hidden and invisible, for this reason, you need to unhide them before showing the whole excel file.
Spire.XLS for WPF provides developers four methods: HideRow(), HideColumn(), ShowRow() and ShowColumn() to hide or unhide excel row and column in WPF.
Please check the screenshot of the original excel worksheet:
Before using the code, make sure that Spire.XLS is installed on system correctly, next create a WPF application project and add the dll file from the installation folder as reference, after that use following namespace:
using System.Windows;
using Spire.Xls;
Code snippets:
Step 1: Initialize a new instance of Workbook class and load the original excel file.
Workbook workbook = new Workbook();
workbook.LoadFromFile("Excel.xlsx");
Step 2: Get the first worksheet of the file.
Worksheet sheet = workbook.Worksheets[0];
Step 3: Hide or unhide row and column.
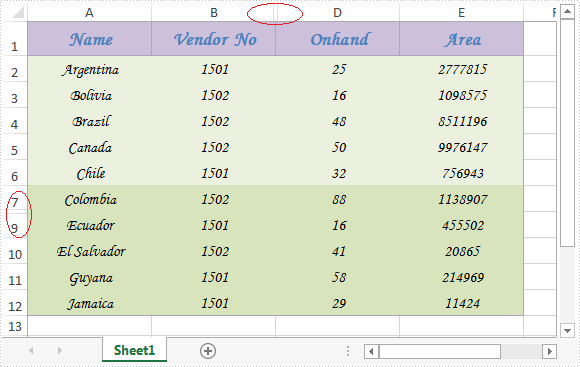
Hide the 8th row and the 3rd column:
sheet.HideRow(8);
sheet.HideColumn(3);
Unhide:
sheet.ShowRow(8);
sheet.ShowColumn(3);
Step 4: Save and launch the file.
Effective screenshot after hiding:
Full codes:
using Spire.Xls;
using System.Windows;

namespace WpfApplication1
{
    public partial class MainWindow : Window
    {
        public MainWindow()
        {
            InitializeComponent();
        }
        private void button1_Click(object sender, RoutedEventArgs e)
        {
            //initialize a new instance
            Workbook workbook = new Workbook();
            //load the sample excel file
            workbook.LoadFromFile("Excel.xlsx");
            //get its first worksheet
            Worksheet sheet = workbook.Worksheets[0];

            //hide the 8th row and the 3rd column of the first worksheet
            sheet.HideRow(8);
            sheet.HideColumn(3);
            /*//unhide
            sheet.ShowRow(8);
            sheet.ShowColumn(3);*/

            //save and launch the file
            workbook.SaveToFile("Sample.xlsx", ExcelVersion.Version2010);
            System.Diagnostics.Process.Start(workbook.FileName);
        }

    }
}
Creating, Writing and Saving Excel file are basic tasks in our daily life. This guide will demonstrate how to create an Excel file, insert some data and save the file with specified file format using Spire.XLS for WPF.
Apart from creating Excel from scratch, Spire.XLS also supports to load an existing Excel file, modify the data and do a large range of manipulations in Excel.
Code Snippets:
Step 1: Initialize a new instance of Workbook class. By default, three blank worksheets will be added into the workbook accordingly.
Workbook workbook = new Workbook();
Step 2: Get the first worksheet from workbook and rename the sheet as "Test”.
Worksheet sheet = workbook.Worksheets[0];
sheet.Name = "Test";
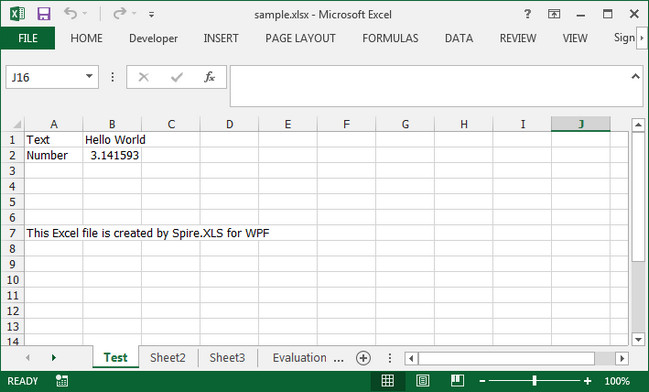
Step 3: Insert some text value and number value into the specified cells.
sheet.Range["A1"].Text = "Text";
sheet.Range["A2"].Text = "Number";
sheet.Range["B1"].Text = "Hello World";
sheet.Range["B2"].NumberValue = 3.1415926;
sheet.Range["A7"].Text = "This Excel file is created by Spire.XLS for WPF";
Step 4: Save the file in the format of Excel 2013.
workbook.SaveToFile("sample.xlsx",ExcelVersion.Version2013);
Output:
Full Code:
using Spire.Xls;
using System.Windows;

namespace WpfApplication1
{
    public partial class MainWindow : Window
    {
        public MainWindow()
        {
            InitializeComponent();
        }
        private void button1_Click(object sender, RoutedEventArgs e)
        {
            Workbook workbook = new Workbook();
            Worksheet sheet = workbook.Worksheets[0];
            sheet.Name = "Test";

            sheet.Range["A1"].Text = "Text";
            sheet.Range["A2"].Text = "Number";
            sheet.Range["B1"].Text = "Hello World";
            sheet.Range["B2"].NumberValue = 3.1415926;
            sheet.Range["A7"].Text = "This Excel file is created by Spire.XLS for WPF";

            workbook.SaveToFile("sample.xlsx", ExcelVersion.Version2013);
            System.Diagnostics.Process.Start("sample.xlsx");

        }
    }
}
Imports Spire.Xls
Imports System.Windows

Namespace WpfApplication1
	Public Partial Class MainWindow
		Inherits Window
		Public Sub New()
			InitializeComponent()
		End Sub
		Private Sub button1_Click(sender As Object, e As RoutedEventArgs)
			Dim workbook As New Workbook()
			Dim sheet As Worksheet = workbook.Worksheets(0)
			sheet.Name = "Test"

			sheet.Range("A1").Text = "Text"
			sheet.Range("A2").Text = "Number"
			sheet.Range("B1").Text = "Hello World"
			sheet.Range("B2").NumberValue = 3.1415926
			sheet.Range("A7").Text = "This Excel file is created by Spire.XLS for WPF"

			workbook.SaveToFile("sample.xlsx", ExcelVersion.Version2013)
			System.Diagnostics.Process.Start("sample.xlsx")

		End Sub
	End Class
End Namespace
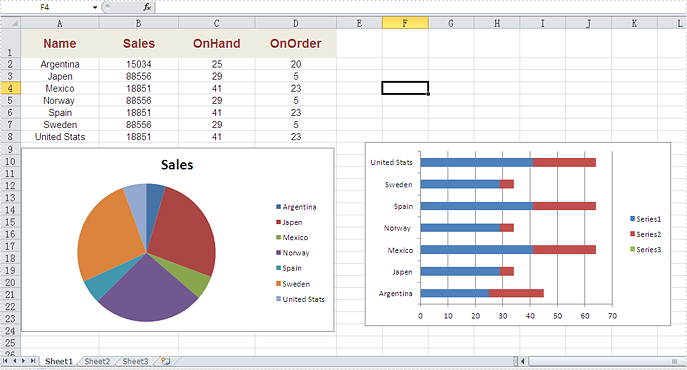
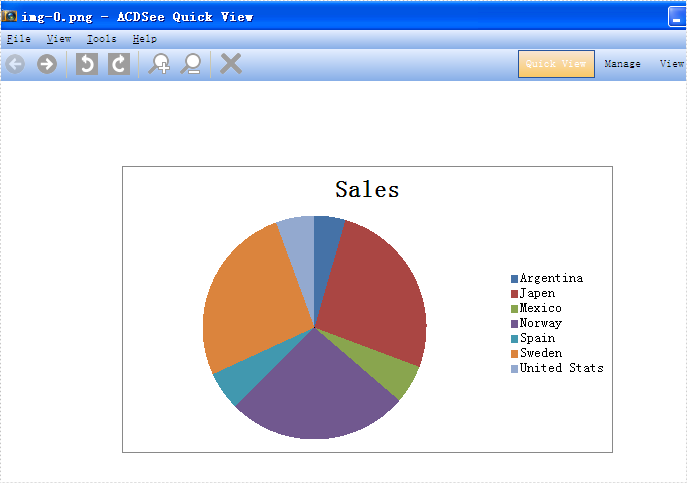
With the help of Spire.XLS for WPF, developers can easily save the whole Excel Worksheet to Image for their WPF applications. Sometimes we don’t want to share the whole Excel file with data to others and only want to show some charts on the Excel. Spire.XLS for WPF offers a method of workbook.SaveChartAsImage(); to enable us to save the Excel chart to image easily. In the following section, we will demonstrate how to save the Excel chart as image in .png for example for WPF applications.
Firstly, please view the whole Excel worksheet with data and two charts, a pie chart and a bar chart:
Note: Before Start, please download the latest version of Spire.XLS and add Spire.Xls.Wpf.dll in the bin folder as the reference of Visual Studio.
Here comes to the code snippets of how to save excel chart as image:
Step 1: Create a new Excel workbook and load from file.
Workbook workbook = new Workbook();
workbook.LoadFromFile("Sample.xlsx", ExcelVersion.Version2010);
Step 2: Get the first worksheet from workbook.
Worksheet sheet = workbook.Worksheets[0];
Step 3: Save all the charts in the first worksheet as images.
System.Drawing.Image[] imgs = workbook.SaveChartAsImage(sheet);

for (int i = 0; i < imgs.Length; i++)
{

    imgs[i].Save(string.Format("img-{0}.png", i), ImageFormat.Png);

}
Effective screenshots:

Full codes:
using Spire.Xls;
using System.Drawing.Imaging;
using System.Windows;

namespace WpfApplication1
{
    public partial class MainWindow : Window
    {
        public MainWindow()
        {
            InitializeComponent();
        }
        private void button2_Click(object sender, RoutedEventArgs e)
        {
            Workbook workbook = new Workbook();
            workbook.LoadFromFile("Sample.xlsx", ExcelVersion.Version2010);

            Worksheet sheet = workbook.Worksheets[0];
            System.Drawing.Image[] imgs = workbook.SaveChartAsImage(sheet);

            for (int i = 0; i < imgs.Length; i++)
            {

                imgs[i].Save(string.Format("img-{0}.png", i), ImageFormat.Png);

            }
        }
    }
}
