
Knowledgebase (2345)
Children categories
Introduction to SQL CLR and Spire.PDF
SQL CLR is technology for hosting of the Microsoft .NET common language runtime engine within SQL Server. The SQLCLR allows managed code to be hosted by, and run in, the Microsoft SQL Server environment.
This technology, introduced in Microsoft SQL Server 2005, allow users for example to create the following types of managed code objects in SQL Server in .NET languages such as C# or VB.NET.
- Stored Procedures
- User defined aggregates
- Triggers
- User defined types
- User defined functions
Spire.PDF is a PDF library which contains an incredible wealth of features to create, read, edit and manipulate PDF documents on .NET, Silverlight and WPF Platform. As an independent PDF library, it does not need users to install Adobe Acrobat or any other third party libraries. Spire.PDF for .NET is completely written in C#, but also supports VB.NET, Windows Forms and ASP.NET Applications.
How to Utilize Spire.PDF in SQL CLR?
In this article we will see, how to create a simple PDF document in SQL CLR using Spire.PDF and how to deploy it in SQL Server. Just follow following steps and it will get done.
Enabling SQL CLR Integration
For SQL Server is, SQL CLR assembly is an external code, so in SQL Server default installation configuration, SQL CLR is blocked not used, to use it, we must first open it.
- Open SQL Server Management Studio, connect and create a new database named SpirePDFCLR.
- Enable the SQL CLR with the following code.
sp_configure 'clr enabled', 1
GO
RECONFIGURE
GO
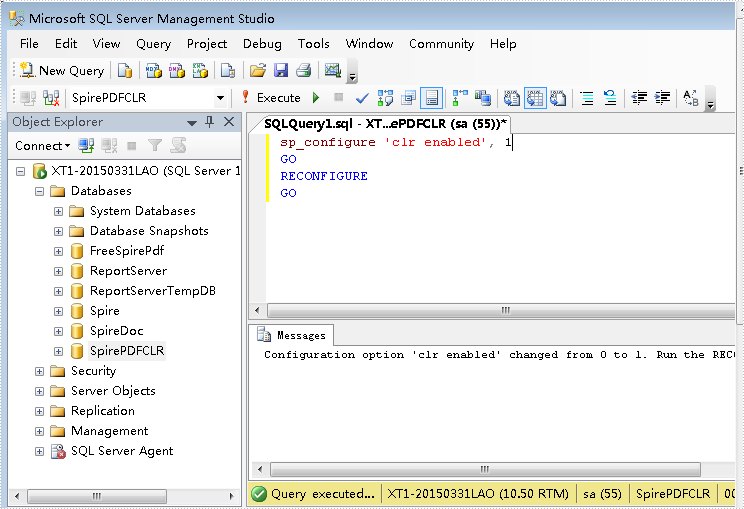
Now the SQL Server is ready to execute the database objects that are built using the C# programming language.
Adding Dependency Assemblies
For the sake of using non-SAFE CLR Assemblies, firstly we need to turn Trustworthy on.
ALTER DATABASE SpirePDFCLR SET TRUSTWORTHY ON
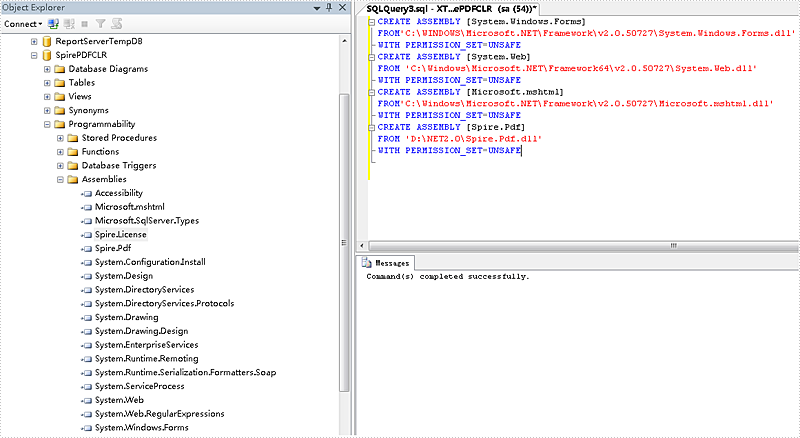
Now, we can add the dependency assemblies by following code.
CREATE ASSEMBLY [System.Windows.Forms]
FROM'C:\WINDOWS\Microsoft.NET\Framework\v2.0.50727\System.Windows.Forms.dll'
WITH PERMISSION_SET=UNSAFE
CREATE ASSEMBLY [System.Web]
FROM 'C:\Windows\Microsoft.NET\Framework\v2.0.50727\System.Web.dll'
WITH PERMISSION_SET=UNSAFE
CREATE ASSEMBLY [Microsoft.mshtml]
FROM'C:\Windows\Microsoft.NET\Framework\v2.0.50727\Microsoft.mshtml.dll'
WITH PERMISSION_SET=UNSAFE
Once these assemblies are added, we can add the Spire.Pdf.Dll.
CREATE ASSEMBLY [Spire.Pdf]
FROM 'D:\NET2.0\Spire.Pdf.dll'
WITH PERMISSION_SET=UNSAFE
Then go to the Object Browser, select the SpirePDFCLR database, right-click and choose "Refresh". They will be shown under Assemblies as below.
Creating and Manipulate PDF document in SQL CLR
Once the Spire.Pdf.dll is added into the database, we can create and manipulate the PDF document in SQL CLR. Here we will take a Stored Procedure as an example.
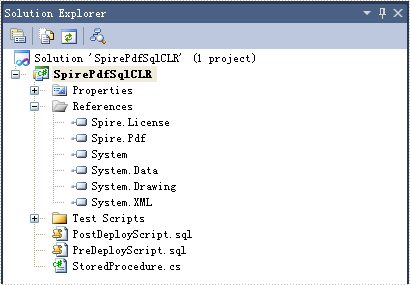
Put the following code in the Stored Procedure. It will create a PDF document when we execute the Stored Procedure.
using System;
using System.Data;
using System.Data.SqlClient;
using System.Data.SqlTypes;
using Microsoft.SqlServer.Server;
using Spire.Pdf;
using Spire.Pdf.Graphics;

public partial class UserDefinedFunctions
{
    [Microsoft.SqlServer.Server.SqlProcedure]
    public static void StoreProcedure()
    {
        PdfDocument doc = new PdfDocument();
        PdfPageBase page = doc.Pages.Add();
        page.Canvas.DrawString("Hello world", new PdfFont(PdfFontFamily.Courier, 100), PdfBrushes.Black, 0, 0);
        doc.SaveToFile("d:\\result.pdf");
    }
};
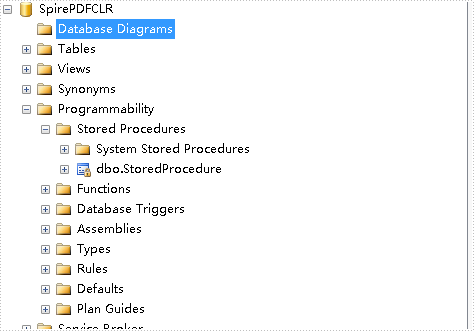
Next build and deploy the solution. If everything is fine then it will say that the deployment was successful. Then we will see the Store Procedure in the SpirePDFCLR database.
Now we will run the Stored Procedure from SQL Server, but here we will get an error as below.
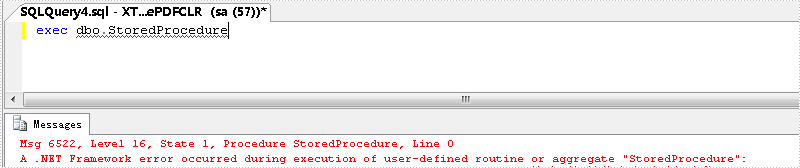
We need to change the permission level of the CLR project as unsafe and deploy it again.

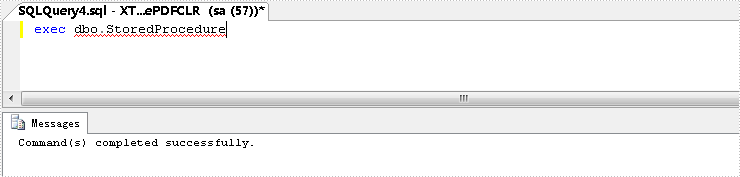
Now run it again, it will work fine and we will get the PDF document.
One of our customers has a requirement to insert text to a Word document in an exact location (horizontal and vertical coordinates). Generally, people position text in a Word document by using other tools such as tables and text boxes, since the positioning of tables and text boxes is much easier to control. In this article, we'll introduce how to position text in Word through text box in C#, VB.NET.
Firstly download Spire.Doc for .NET and reference the dll file to your project. Before we start to code, we also need following namespaces to be extra added.
using System.Drawing;
using Spire.Doc;
using Spire.Doc.Documents;
using Spire.Doc.Fields;
using Spire.Doc.Formatting;
Code Snippet:
Step 1: Create a new Word document, add a section for it, and then add a paragraph on the section.
Document doc = new Document();
Section sec = doc.AddSection();
Paragraph par = sec.AddParagraph();
Step 2: Append a new text box to the paragraph. Here we logically set VerticalOrigin and HorizontalOrigin as Margin because horizontal and vertical coordinate is a relative value to his reference object. By giving the variable VerticalPosition and HorizontalPosition a certain value, the text box will be fixed at the position.
TextBox textBox = par.AppendTextBox(180, 30);
textBox.Format.VerticalOrigin = VerticalOrigin.Margin;
textBox.Format.VerticalPosition = 100;
textBox.Format.HorizontalOrigin = HorizontalOrigin.Margin;
textBox.Format.HorizontalPosition = 50;
textBox.Format.NoLine = true;
Step 3: Define a new format style.
CharacterFormat format = new CharacterFormat(doc);
format.FontName = "Calibri";
format.FontSize = 15;
format.Bold = true;
Step 4: Add text to text box, and apply the preset format to the text.
Paragraph par1 = textBox.Body.AddParagraph();
par1.AppendText("This is my new string").ApplyCharacterFormat(format);
Step 5: Save the file.
doc.SaveToFile("result.docx", FileFormat.Docx);
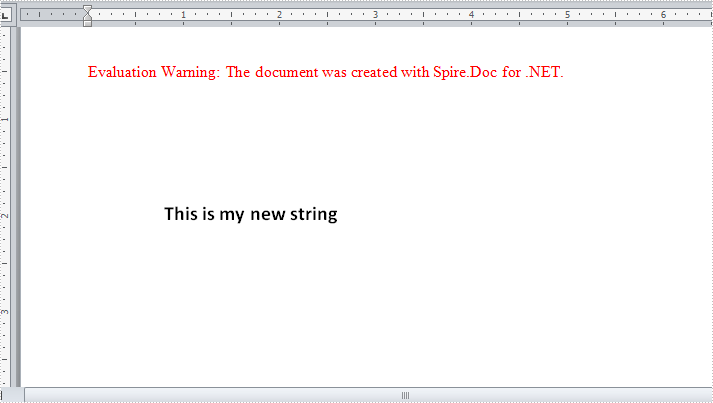
Result:
The border line of text box has been set as invisible, therefore we only see the text being added at the specified horizontal and vertical coordinates.
Full Code:
using Spire.Doc;
using Spire.Doc.Documents;
using Spire.Doc.Fields;
using Spire.Doc.Formatting;
using System.Collections.Generic;
namespace InsertText
{

    class Program
    {
        static void Main(string[] args)
        {
            Document doc = new Document();
            Section sec = doc.AddSection();
            Paragraph par = sec.AddParagraph();

            TextBox textBox = par.AppendTextBox(180, 30);
            textBox.Format.VerticalOrigin = VerticalOrigin.Margin;
            textBox.Format.VerticalPosition = 100;
            textBox.Format.HorizontalOrigin = HorizontalOrigin.Margin;
            textBox.Format.HorizontalPosition = 50;
            textBox.Format.NoLine = true;

            CharacterFormat format = new CharacterFormat(doc);
            format.FontName = "Calibri";
            format.FontSize = 15;
            format.Bold = true;

            Paragraph par1 = textBox.Body.AddParagraph();
            par1.AppendText("This is my new string").ApplyCharacterFormat(format);
            doc.SaveToFile("result.docx", FileFormat.Docx);
        }
    }
}
Imports Spire.Doc
Imports Spire.Doc.Documents
Imports Spire.Doc.Fields
Imports Spire.Doc.Formatting
Imports System.Collections.Generic
Namespace InsertText

	Class Program
		Private Shared Sub Main(args As String())
			Dim doc As New Document()
			Dim sec As Section = doc.AddSection()
			Dim par As Paragraph = sec.AddParagraph()

			Dim textBox As TextBox = par.AppendTextBox(180, 30)
			textBox.Format.VerticalOrigin = VerticalOrigin.Margin
			textBox.Format.VerticalPosition = 100
			textBox.Format.HorizontalOrigin = HorizontalOrigin.Margin
			textBox.Format.HorizontalPosition = 50
			textBox.Format.NoLine = True

			Dim format As New CharacterFormat(doc)
			format.FontName = "Calibri"
			format.FontSize = 15
			format.Bold = True

			Dim par1 As Paragraph = textBox.Body.AddParagraph()
			par1.AppendText("This is my new string").ApplyCharacterFormat(format)
			doc.SaveToFile("result.docx", FileFormat.Docx)
		End Sub
	End Class
End Namespace
Insert audio to PowerPoint document at specified position in C#, VB.NET
2015-04-30 07:58:39 Written by KoohjiAudio can be used in PowerPoint document to create a more interesting and dynamic PowerPoint effect. Using the Spire.presention you can now use the Shapes.AppendVideoMedia() method to insert audio in your PowerPoint document at specific position with C#, VB.NET. There is guide will introduce the method.
Here are the steps:
Step 1: Create a new PowerPoint document first.
Presentation presentation = new Presentation();
Step 2: Then set the backgroung image before inserting Audio file.
string ImageFile = "2.jpg";
RectangleF rect = new RectangleF(0, 0, presentation.SlideSize.Size.Width, presentation.SlideSize.Size.Height);
presentation.Slides[0].Shapes.AppendEmbedImage(ShapeType.Rectangle, ImageFile, rect);
presentation.Slides[0].Shapes[0].Line.FillFormat.SolidFillColor.Color = Color.FloralWhite;
Step 3: Load the Audio file from disk and set properties of AutoShape
presentation.Slides[0].Shapes.AppendAudioMedia(@"1.mp3",500,100,true);
IAutoShape shape = presentation.Slides[0].Shapes.AppendShape(ShapeType.Rectangle, new RectangleF(500, 100, 100, 150));
shape.ShapeStyle.LineColor.Color = Color.White;
shape.Fill.FillType = Spire.Presentation.Drawing.FillFormatType.None;
Step 4: Save the PowerPoint file and review.
presentation.SaveToFile("audio.pptx", FileFormat.Pptx2010);
System.Diagnostics.Process.Start("audio.pptx");
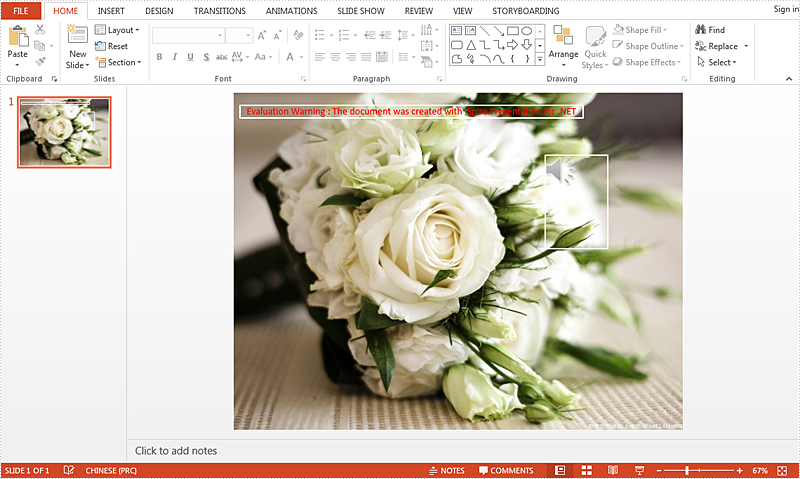
Effect Screenshot:
Full code:
using Spire.Presentation;
using System.Drawing;

namespace InsertAudio
{

    class Program
    {

        static void Main(string[] args)
        {
            Presentation presentation = new Presentation();

            string ImageFile = "2.jpg";
            RectangleF rect = new RectangleF(0, 0, presentation.SlideSize.Size.Width, presentation.SlideSize.Size.Height);
            presentation.Slides[0].Shapes.AppendEmbedImage(ShapeType.Rectangle, ImageFile, rect);
            presentation.Slides[0].Shapes[0].Line.FillFormat.SolidFillColor.Color = Color.FloralWhite;

            presentation.Slides[0].Shapes.AppendAudioMedia(@"1.mp3", 500, 100, true);
            IAutoShape shape = presentation.Slides[0].Shapes.AppendShape(ShapeType.Rectangle, new RectangleF(500, 100, 100, 150));
            shape.ShapeStyle.LineColor.Color = Color.White;
            shape.Fill.FillType = Spire.Presentation.Drawing.FillFormatType.None;

            presentation.SaveToFile("audio.pptx", FileFormat.Pptx2010);
            System.Diagnostics.Process.Start("audio.pptx");

        }

    }
}
Imports Spire.Presentation
Imports System.Drawing

Namespace InsertAudio

	Class Program

		Private Shared Sub Main(args As String())
			Dim presentation As New Presentation()

			Dim ImageFile As String = "2.jpg"
			Dim rect As New RectangleF(0, 0, presentation.SlideSize.Size.Width, presentation.SlideSize.Size.Height)
			presentation.Slides(0).Shapes.AppendEmbedImage(ShapeType.Rectangle, ImageFile, rect)
			presentation.Slides(0).Shapes(0).Line.FillFormat.SolidFillColor.Color = Color.FloralWhite

			presentation.Slides(0).Shapes.AppendAudioMedia("1.mp3", 500, 100, True)
			Dim shape As IAutoShape = presentation.Slides(0).Shapes.AppendShape(ShapeType.Rectangle, New RectangleF(500, 100, 100, 150))
			shape.ShapeStyle.LineColor.Color = Color.White
			shape.Fill.FillType = Spire.Presentation.Drawing.FillFormatType.None

			presentation.SaveToFile("audio.pptx", FileFormat.Pptx2010)
			System.Diagnostics.Process.Start("audio.pptx")

		End Sub

	End Class
End Namespace
