
Knowledgebase (2344)
Children categories
Spire.OCR for Java is a professional OCR library to read text from Images in JPG, PNG, GIF, BMP and TIFF formats. Developers can easily add OCR functionalities on Java applications (J2SE and J2EE). It supports commonly used image formats and provides functionalities like reading multiple characters and fonts from images, bold and italic styles and much more.
Spire.OCR for Java provides a very easy way to extract text from images. With just three lines of code in Java, Spire.OCR supports read texts from variable common image formats, such as Bitmap, JPG, PNG, TIFF and GIF.
Java: Extract Text from Images Using the New Model of Spire.OCR for Java
2024-09-14 00:59:31 Written by hayes LiuSpire.OCR for Java offers developers a new model for extracting text from images. In this article, we will demonstrate how to extract text from images in Java using the new model of Spire.OCR for Java.
The detailed steps are as follows.
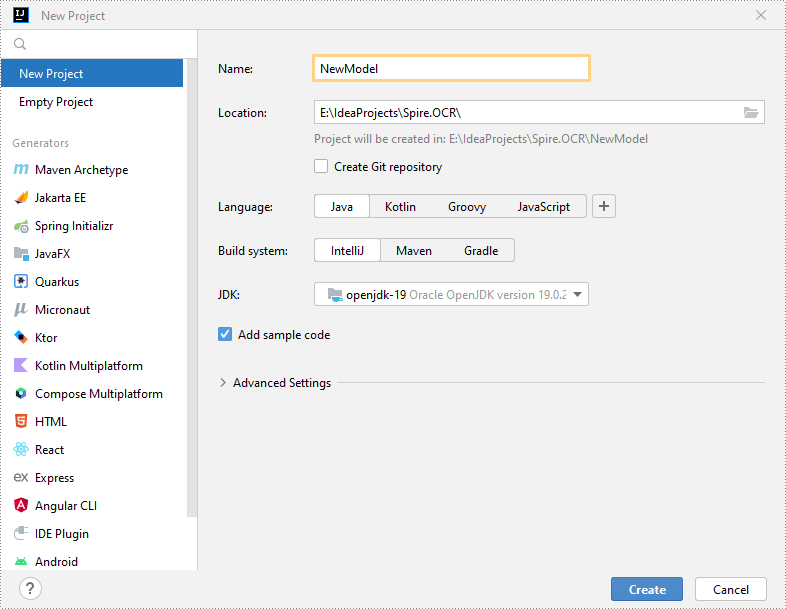
Step 1: Create a Java Project in IntelliJ IDEA.
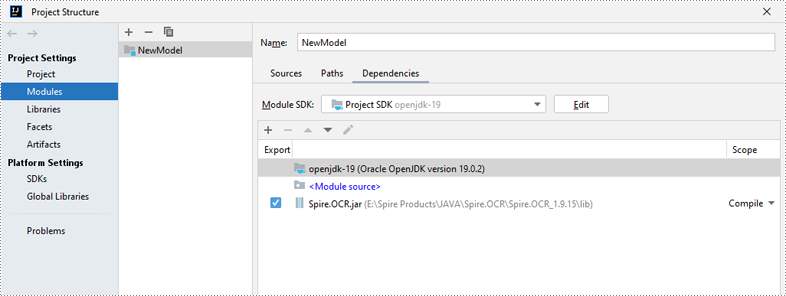
Step 2: Add Spire.OCR.jar to Your Project.
Option 1: Install Spire.OCR for Java via Maven.
If you're using Maven, you can install Spire.OCR for Java by adding the following code to your project's pom.xml file:
<repositories>
    <repository>
        <id>com.e-iceblue</id>
        <name>e-iceblue</name>
        <url>https://repo.e-iceblue.com/nexus/content/groups/public/</url>
    </repository>
</repositories>
<dependencies>
    <dependency>
        <groupId>e-iceblue</groupId>
        <artifactId>spire.ocr</artifactId>
        <version>2.1.5</version>
    </dependency>
</dependencies>
Option 2: Manually Import Spire.OCR.jar.
First, download Spire.OCR for Java from the following link and extract it to a specific directory:
https://www.e-iceblue.com/Download/ocr-for-java.html
Next, in IntelliJ IDEA, go to File > Project Structure > Modules > Dependencies. In the Dependencies pane, click the "+" button and select JARs or Directories. Navigate to the directory where Spire.OCR for Java is located, open the lib folder and select the Spire.OCR.jar file, then click OK to add it as the project’s dependency.
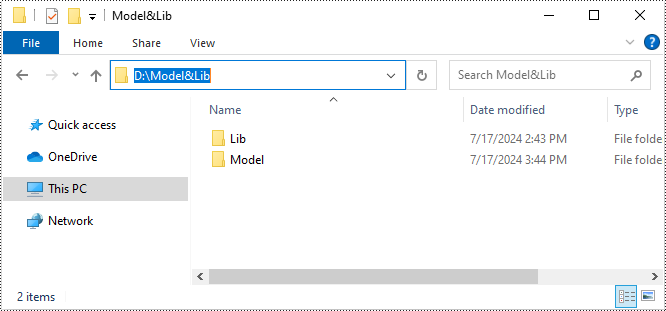
Step 3: Download the New Model of Spire.OCR for Java.
Download the model that fits in with your operating system from one of the following links.
Linux x64 (CentOS 8, Ubuntu 18 and above versions are required)
Then extract the package and save it to a specific directory on your computer. In this example, we saved the package to "D:\".
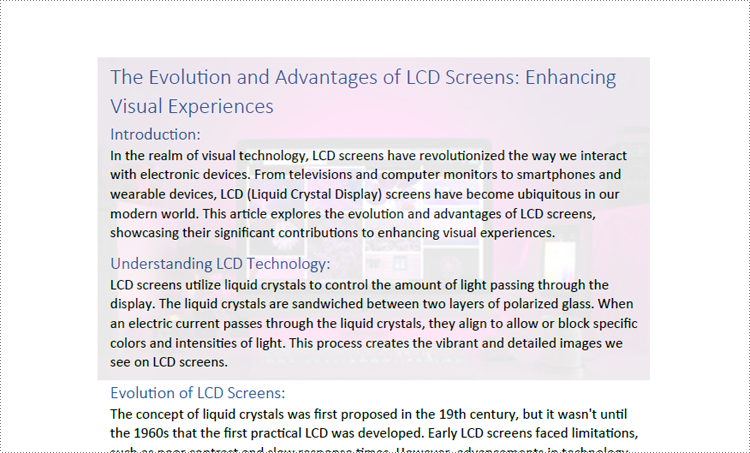
Step 4: Implement Text Extraction from Images Using the New Model of Spire.OCR for Java.
Use the following code to extract text from images with the new OCR model of Spire.OCR for Java:
- Java
import com.spire.ocr.*;
import java.io.BufferedWriter;
import java.io.FileWriter;
import java.io.IOException;

public class Main {
    public static void main(String[] args) {
        try {
            // Create an instance of the OcrScanner class
            OcrScanner scanner = new OcrScanner();

            // Create an instance of the ConfigureOptions class to set up the scanner configurations
            ConfigureOptions configureOptions = new ConfigureOptions();

            // Set the path to the new model
            configureOptions.setModelPath("D:\\win-x64");

            // Set the language for text recognition. The default is English.
            // Supported languages include English, Chinese, Chinesetraditional, French, German, Japanese, and Korean.
            configureOptions.setLanguage("English");

            // Apply the configuration options to the scanner
            scanner.ConfigureDependencies(configureOptions);

            // Extract text from an image
            scanner.scan("Sample.png");

            // Save the extracted text to a text file
            saveTextToFile(scanner, "output.txt");

        } catch (OcrException e) {
            e.printStackTrace();
        }
    }

    private static void saveTextToFile(OcrScanner scanner, String filePath) {
        try {
            String text = scanner.getText().toString();
            try (BufferedWriter writer = new BufferedWriter(new FileWriter(filePath))) {
                writer.write(text);
            }
        } catch (IOException | OcrException e) {
            e.printStackTrace();
        }
    }
}
Apply for a Temporary License
If you'd like to remove the evaluation message from the generated documents, or to get rid of the function limitations, please request a 30-day trial license for yourself.
Setting the transparency of images in PDF documents is crucial for achieving professional-grade output, which allows for layering images without hard edges and creating a seamless integration with the background or underlying content. This not only enhances the visual appeal but also creates a polished and cohesive look, especially in graphics-intensive documents. This article will demonstrate how to effectively set the transparency of PDF images using Spire.PDF for Python in Python programs.
Install Spire.PDF for Python
This scenario requires Spire.PDF for Python and plum-dispatch v1.7.4. They can be easily installed in your Windows through the following pip command.
pip install Spire.PDF
If you are unsure how to install, please refer to: How to Install Spire.PDF for Python on Windows
Add Images with Specified Transparency to PDF
Developers can utilize the PdfPageBase.Canvas.DrawImage() method in Spire.PDF for Python to draw an image at a specified location on a PDF page. Before drawing, developers can set the transparency of the canvas using PdfPageBase.Canvas.SetTransparency() method, which in turn sets the transparency level of the image being drawn. Below are the detailed steps:
- Create an object of PdfDocument class and load a PDF document using PdfDocument.LoadFromFile() method.
- Get a page in the document using PdfDocument.Pages.get_Item() method.
- Load an image using PdfImage.FromFile() method.
- Set the transparency of the canvas using PdfPageBase.Canvas.SetTransparency() method.
- Draw the image on the page using PdfPageBase.Canvas.DrawImage() method.
- Save the document using PdfDocument.SaveToFile() method.
- Python
from spire.pdf import *

# Create a PdfDocument instance
pdf = PdfDocument()

# Load a PDF file
pdf.LoadFromFile("Sample.pdf")

# Get the first page
page = pdf.Pages.get_Item(0)

# Load an image
image = PdfImage.FromFile("Screen.jpg")

# Set the transparency of the canvas
page.Canvas.SetTransparency(0.2)

# Draw the image at the specified location
page.Canvas.DrawImage(image, PointF(80.0, 80.0))

# Save the document
pdf.SaveToFile("output/AddTranslucentPicture.pdf")
pdf.Close()
Adjust the Transparency of Existing Images in PDF
To adjust the transparency of an existing image on a PDF page, developers can retrieve the image along with its bounds, delete the image, and finally redraw the image in the same location with the specified transparency. This process allows for the adjustment of the image's opacity while maintaining its original placement. The detailed steps are as follows:
- Create an object of PdfDocument class and load a PDF document using PdfDocument.LoadFromFile() method.
- Get a page in the document using PdfDocument.Pages.get_Item() method.
- Get an image on the page as a stream through PdfPageBase.ImagesInfo[].Image property and get the bounds of the image through PdfPageBase.ImagesInfo[].Bounds property.
- Remove the image from the page using PdfPageBase.DeleteImage() method.
- Create a PdfImage instance with the stream using PdfImage.FromStream() method.
- Set the transparency of the canvas using PdfPageBase.Canvas.SetTransparency() method.
- Redraw the image in the same location with the specified transparency using PdfPageBase.Canvas.DrawImage() method.
- Save the document using PdfDocument.SaveToFile() method.
- Python
from spire.pdf import *

# Create a PdfDocument instance
pdf = PdfDocument()

# Load a PDF file
pdf.LoadFromFile("Sample1.pdf")

# Get the first page
page = pdf.Pages.get_Item(0)

# Get the first image on the page as a stream and the bounds of the image
imageHelper = PdfImageHelper()
imageInformation = imageHelper.GetImagesInfo(page)
bounds = imageInformation[0].Bounds
imageStream =imageInformation[0].Image

# Delete the original image
imageHelper.DeleteImage(imageInformation[0])

# Create a PdfImage instance using the image stream
image = PdfImage.FromStream(imageStream)

# Create a PdfImage instance using the image stream
image = PdfImage.FromStream(imageStream)

# Set the transparency of the canvas
page.Canvas.SetTransparency(0.3)

# Draw the new image at the same location using the canvas
page.Canvas.DrawImage(image, bounds)

# Save the document
pdf.SaveToFile("output/SetExistingImageTransparency.pdf")
pdf.Close()

Apply for a Temporary License
If you'd like to remove the evaluation message from the generated documents, or to get rid of the function limitations, please request a 30-day trial license for yourself.
