
Knowledgebase (2344)
Children categories
QR codes are a type of two-dimensional barcode that can store a variety of information, including URLs, contact details, and even payment information. QR codes have become increasingly popular, allowing for quick and convenient access to digital content, making them a useful tool in our modern, technology-driven world.
In this article, you will learn how to create and scan QR codes in Python using Spire.Barcode for Python.
Get a Free Trial License
The trial version of Spire.Barcode for Python does not support scanning QR code images without a valid license being applied. Additionally, it displays an evaluation message on any QR code images that are generated.
To remove these limitations, you can get a 30-day trial license for free.
Create a QR Code in Python
Spire.Barcode for Python offers the BarcodeSettings class, which enables you to configure the settings for generating a barcode. These settings encompass the barcode type, the data to be encoded, the color, the margins, and the horizontal and vertical resolution.
After you have set up the desired settings, you can create a BarcodeGenerator instance using those configurations. Subsequently, you can invoke the GenerateImage() method of the generator to produce the barcode image.
The following are the steps to create a QR code in Python.
- Create a BarcodeSettings object.
- Set the barcode type to QR code using BarcodeSettings.Type property.
- Set the data of the 2D barcode using BarcodeSettings.Data2D property.
- Set other attributes of the barcode using the properties under the BarcodeSettings object.
- Create a BarCodeGenerator object based on the settings.
- Create a QR code image using BarCodeGenerator.GenerateImage() method.
- Python
from spire.barcode import *

# Write all bytes to a file
def WriteAllBytes(fname: str, data):
    with open(fname, "wb") as fp:
        fp.write(data)
    fp.close()

# Apply license key
License.SetLicenseKey("license key")

# Create a BarcodeSettings object
barcodeSettings = BarcodeSettings()

# Set the type of barcode to QR code
barcodeSettings.Type = BarCodeType.QRCode

# Set the data for the 2D barcode
barcodeSettings.Data2D = "Hello, World"

# Set margins
barcodeSettings.LeftMargin = 0.2
barcodeSettings.RightMargin = 0.2
barcodeSettings.TopMargin = 0.2
barcodeSettings.BottomMargin = 0.2

# Set the horizontal resolution
barcodeSettings.DpiX = 500

# Set the vertical resolution
barcodeSettings.DpiY = 500

# Set error correction level
barcodeSettings.QRCodeECL = QRCodeECL.M

# Do not display text on barcode
barcodeSettings.ShowText = False

# Add a logo at the center of the QR code
barcodeSettings.SetQRCodeLogoImage("C:\\Users\\Administrator\\Desktop\\logo.png")

# Create an instance of BarCodeGenerator with the specified settings
barCodeGenerator = BarCodeGenerator(barcodeSettings)

# Generate the image for the barcode
image = barCodeGenerator.GenerateImage()

# Write the PNG image to disk
WriteAllBytes("output/QRCode.png", image)

Scan a QR Code Image in Python
Spire.Barcode provides the BarcodeScanner class, which is responsible for barcode image recognition. This class offers several methods to extract data from barcodes, including:
- ScanOneFile(): Scans a single barcode image file and returns the extracted data.
- ScanFile(): Scans all barcodes present in a specified image file and returns the extracted data.
- ScanStream(): Scans barcodes from a stream of image data and returns the extracted information.
The following code demonstrates how to scan a QR code image using it.
- Python
from spire.barcode import *

# Apply license key
License.SetLicenseKey("license key")

# Scan an image file that contains one barcode
result = BarcodeScanner.ScanOneFile("C:\\Users\\Administrator\\Desktop\\QRCode.png")

# Scan an image file that contains multiple barcodes
# results = BarcodeScanner.ScanFile("C:\\Users\\Administrator\\Desktop\\Image.png")

# Print the result
print(result)
Highlighting important text in your PowerPoint slides can be an effective way to draw your audience's attention and emphasize key points. Whether you are presenting complex information or delivering a persuasive pitch, using text highlighting can make your slides more visually engaging and help your message stand out. In this article, we will demonstrate how to highlight text in a PowerPoint presentation in Python using Spire.Presentation for Python.
Install Spire.Presentation for Python
This scenario requires Spire.Presentation for Python. It can be easily installed in your Windows through the following pip command.
pip install Spire.Presentation
If you are unsure how to install, please refer to this tutorial: How to Install Spire.Presentation for Python on Windows
Highlight Text in PowerPoint Presentation in Python
Spire.Presentation for Python provides a method called IAutoShape.TextFrame.HighLightText(text: str, color: Color, options: TextHighLightingOptions) to highlight specific text within the shapes of a PowerPoint presentation.
Follow the steps below to highlight specified text in your presentation using Spire.Presentation for Python:
- Create an instance of the Presentation class.
- Load a PowerPoint presentation using the Presentation.LoadFromFile() method.
- Create an instance of the TextHighLightingOptions class, and set the text highlighting options such as whole words only and case sensitive through the TextHighLightingOptions.WholeWordsOnly and TextHighLightingOptions.CaseSensitive properties.
- Loop through the slides in the presentation and the shapes on each slide.
- Check if the current shape is of IAutoShape type.
- If the result is true, typecast it to an IAutoShape object.
- Highlight all matches of specific text in the shape using the IAutoShape.TextFrame.HighLightText(text: str, color: Color, options: TextHighLightingOptions) method.
- Save the result presentation to a new file using the Presentation.SaveToFile() method.
- Python
from spire.presentation.common import *
from spire.presentation import *

# Specify the input and output file paths
input_file = "Example.pptx"
output_file = "HighlightText.pptx"

# Create an instance of the Presentation class
ppt = Presentation()
# Load the PowerPoint presentation
ppt.LoadFromFile(input_file)

# Specify the text to highlight
text_to_highlight = "Spire.Presentation"
# Specify the highlight color
highlight_color = Color.get_Yellow()

# Create an instance of the TextHighLightingOptions class
options = TextHighLightingOptions()
# Set the highlight options (case sensitivity and whole word highlighting)
options.WholeWordsOnly = True
options.CaseSensitive = True

# Loop through the slides in the presentation
for slide in ppt.Slides:
    # Loop through the shapes on each slide
    for shape in slide.Shapes:
            # Check if the shape is of IAutoShape type
            if isinstance (shape, IAutoShape):
                # Typecast the shape to an IAutoShape object
                auto_shape = IAutoShape(shape)
                # Search and highlight specified text within the shape
                auto_shape.TextFrame.HighLightText(text_to_highlight, highlight_color, options)

# Save the result presentation to a new PPTX file
ppt.SaveToFile(output_file, FileFormat.Pptx2013)
ppt.Dispose()

Apply for a Temporary License
If you'd like to remove the evaluation message from the generated documents, or to get rid of the function limitations, please request a 30-day trial license for yourself.
Python: Get Coordinates of the Specified Text or Image in PDF
2024-05-21 01:58:08 Written by AdministratorRetrieving the coordinates of text or images within a PDF document can quickly locate specific elements, which is valuable for extracting content from PDFs. This capability also enables adding annotations, marks, or stamps to the desired locations in a PDF, allowing for more advanced document processing and manipulation.
In this article, you will learn how to get coordinates of the specified text or image in a PDF document using Spire.PDF for Python.
- Get Coordinates of the Specified Text in PDF in Python
- Get Coordinates of the Specified Image in PDF in Python
Install Spire.PDF for Python
This scenario requires Spire.PDF for Python and plum-dispatch v1.7.4. They can be easily installed in your Windows through the following pip command.
pip install Spire.PDF
If you are unsure how to install, please refer to this tutorial: How to Install Spire.PDF for Python on Windows
Coordinate System in Spire.PDF
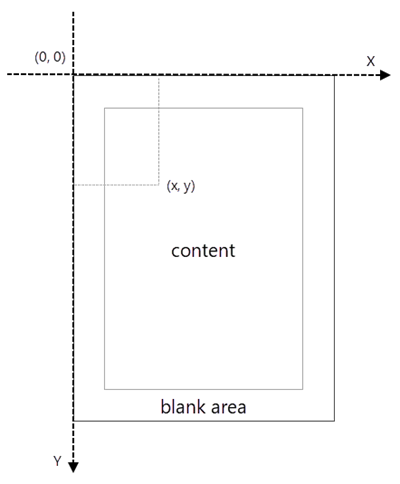
When using Spire.PDF to process an existing PDF document, the origin of the coordinate system is located at the top left corner of the page. The X-axis extends horizontally from the origin to the right, and the Y-axis extends vertically downward from the origin (shown as below).
Get Coordinates of the Specified Text in PDF in Python
To find the coordinates of a specific piece of text within a PDF document, you must first use the PdfTextFinder.Find() method to locate all instances of the target text on a particular page. Once you have found these instances, you can then access the PdfTextFragment.Positions property to retrieve the precise (X, Y) coordinates for each instance of the text.
The steps to get coordinates of the specified text in PDF are as follows.
- Create a PdfDocument object.
- Load a PDF document from a specified path.
- Get a specific page from the document.
- Create a PdfTextFinder object.
- Specify find options through PdfTextFinder.Options property.
- Search for a string within the page using PdfTextFinder.Find() method.
- Get a specific instance of the search results.
- Get X and Y coordinates of the text through PdfTextFragment.Positions[0].X and PdfTextFragment.Positions[0].Y properties.
- Python
from spire.pdf.common import *
from spire.pdf import *
# Create a PdfDocument object
doc = PdfDocument()
# Load a PDF document
doc.LoadFromFile("C:\\Users\\Administrator\\Desktop\\Privacy Policy.pdf")
# Get a specific page
page = doc.Pages.get_Item(0)
# Create a PdfTextFinder object
textFinder = PdfTextFinder(page)
# Specify find options
findOptions = PdfTextFindOptions()
findOptions.Parameter = TextFindParameter.IgnoreCase
findOptions.Parameter = TextFindParameter.WholeWord
textFinder.Options = findOptions
# Search for the string "PRIVACY POLICY" within the page
findResults = textFinder.Find("PRIVACY POLICY")
# Get the first instance of the results
result = findResults[0]
# Get X/Y coordinates of the found text
x = int(result.Positions[0].X)
y = int(result.Positions[0].Y)
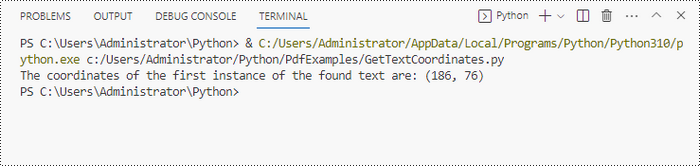
print("The coordinates of the first instance of the found text are:", (x, y))
# Dispose resources
doc.Dispose()
Get Coordinates of the Specified Image in PDF in Python
Spire.PDF for Python provides the PdfImageHelper class, which allows users to extract image details from a specific page within a PDF file. By doing so, you can leverage the PdfImageInfo.Bounds property to retrieve the (X, Y) coordinates of an individual image.
The steps to get coordinates of the specified image in PDF are as follows.
- Create a PdfDocument object.
- Load a PDF document from a specified path.
- Get a specific page from the document.
- Create a PdfImageHelper object.
- Get the image information from the page using PdfImageHelper.GetImagesInfo() method.
- Get X and Y coordinates of a specific image through PdfImageInfo.Bounds property.
- Python
from spire.pdf.common import *
from spire.pdf import *
# Create a PdfDocument object
doc = PdfDocument()
# Load a PDF document
doc.LoadFromFile("C:\\Users\\Administrator\\Desktop\\Privacy Policy.pdf")
# Get a specific page
page = doc.Pages.get_Item(0)
# Create a PdfImageHelper object
imageHelper = PdfImageHelper()
# Get image information from the page
imageInformation = imageHelper.GetImagesInfo(page)
# Get X/Y coordinates of a specific image
x = int(imageInformation[0].Bounds.X)
y = int(imageInformation[0].Bounds.Y)
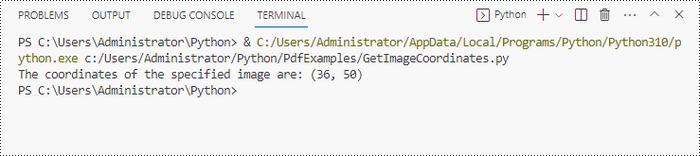
print("The coordinates of the specified image are:", (x, y))
# Dispose resources
doc.Dispose()
Apply for a Temporary License
If you'd like to remove the evaluation message from the generated documents, or to get rid of the function limitations, please request a 30-day trial license for yourself.
