
Knowledgebase (2344)
Children categories
Spire.OfficeJS is a WebAssembly-based Office document editor that enables users to open, view, and edit Word, Excel, and PowerPoint documents directly in the browser. In this tutorial, we will walk through how to integrate Spire.OfficeJS into a Vue 3 application (Vue 3 + Vite), and build a fully client-side web application that supports online Office document editing—without relying on server-side document conversion.
By the end of this guide, you will have a runnable Vue project that allows users to upload Office documents and edit them directly in the browser using Spire.OfficeJS.
On this page:
- What Is Spire.OfficeJS
- How Spire.OfficeJS Works
- Preparation
- Integrating Spire.OfficeJS
- FAQs
- Conclusion
- Sample Project Download
What Is Spire.OfficeJS
Spire.OfficeJS is a web-based online Office document editing component that consists of four modules: Spire.WordJS, Spire.ExcelJS, Spire.PresentationJS, and Spire.PDFJS. It provides viewing and real-time editing capabilities for documents such as Word files, Excel spreadsheets, and PowerPoint presentations.
Spire.OfficeJS runs directly in the browser and can be deployed in any web project without installing plugins or relying on client-side software.
Key Features
- Pure front-end rendering: Based on WebAssembly, allowing document editing without server-side conversion.
- Rich editing capabilities: Supports document editing, comments, annotations, review, and saving.
- Multi-format support: DOC, DOCX, XLS, XLSX, PPT, PPTX, PDF (view), and more.
- High integrability: Can be flexibly embedded into Vue, React, Angular, or pure HTML projects.
- High customizability: Supports toolbar configuration, user permissions, save callbacks, plugin extensions, and more.
Spire.OfficeJS is suitable for enterprise systems, document management systems (DMS), collaboration platforms, online learning systems, and form-based applications.
How Spire.OfficeJS Works
Spire.OfficeJS is built on WebAssembly-based Office rendering engines that execute directly in the browser. The simplified workflow is:
- A user uploads an Office document via the browser.
- The file is read as binary data (Uint8Array).
- The binary data is passed directly to the WebAssembly runtime.
- The document is parsed, rendered, and edited client-side.
- Save actions trigger callbacks for custom persistence logic.
Unlike traditional server-based Office editors, no server-side document conversion or rendering is required, significantly reducing infrastructure complexity and latency.
Preparation
Install Node.js
Download and install Node.js 22.12.0 or later from the official Node.js website. Node.js 22+ is recommended to ensure compatibility with Vite, modern ES module tooling, and WebAssembly-related workflows.
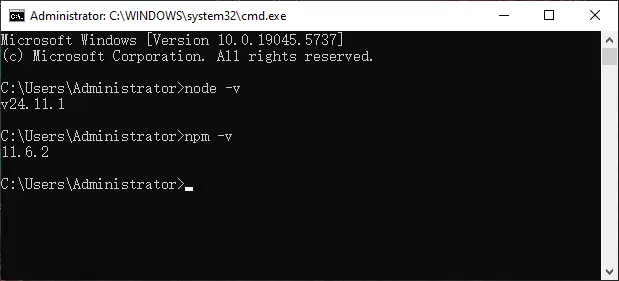
Verify the installation:
node -v
npm -v
Create a Vue 3 Project
Step 1: Create a project folder
Create a new folder to store the project files.
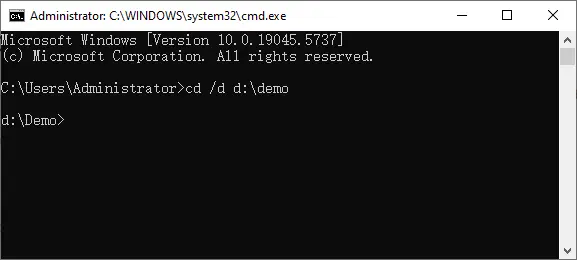
Step 2: Enter the folder via Command Line
cd /d d:\demo
Step 3: Initialize a Vue 3 project
npm init vue@latest
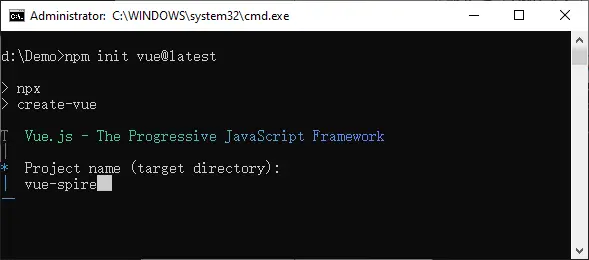
Rename the project to vue-spire and skip optional features to create a minimal Vue 3 project.
Step 4: Start the development server
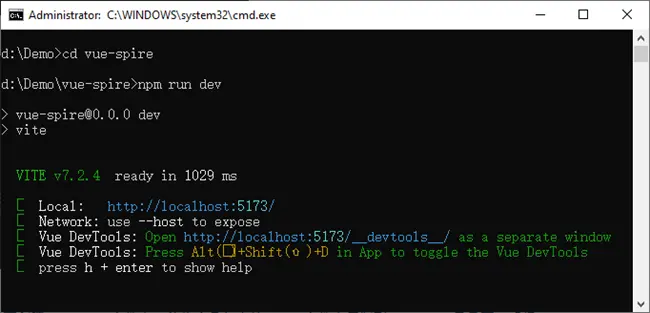
cd vue-spire
npm run dev
Integrating Spire.OfficeJS
Step 1: Download the product package
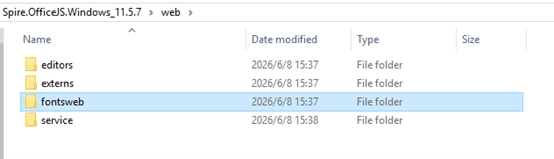
Download Spire.OfficeJSproduct package from our website. On Windows, after extracting the package, you will see a run_genallfonts.bat file. Double-click to run this script. On Linux, use the command sh run_genallfonts.sh start to run the run_genallfonts.sh file in the extracted product package folder. After the script completes, a fontsweb folder will appear inside the web folder.
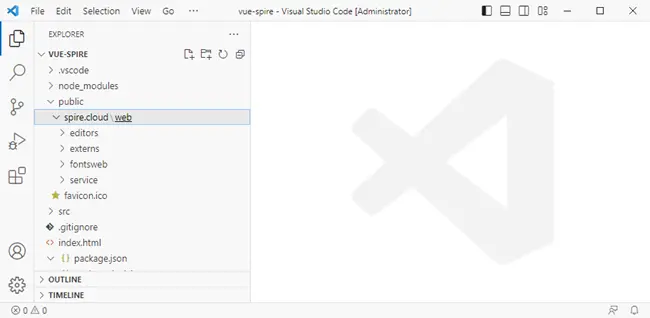
Step 2: Copy static resources to the Public directory
In your Vue project:
- Open the project in VS Code.
- Create a folder: public/spire.cloud .
- Copy the entire web folder into it. This allows the editor resources to be accessed via /spire.cloud/web/....
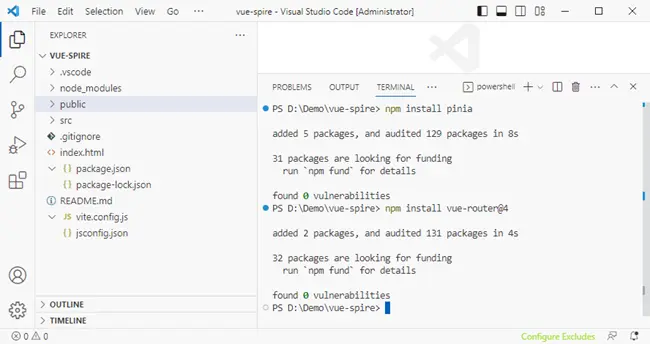
Step 3: Install required dependencies
Install Pinia and Vue Router manually to keep the project setup explicit and easy to follow.
npm install pinia
npm install vue-router@4
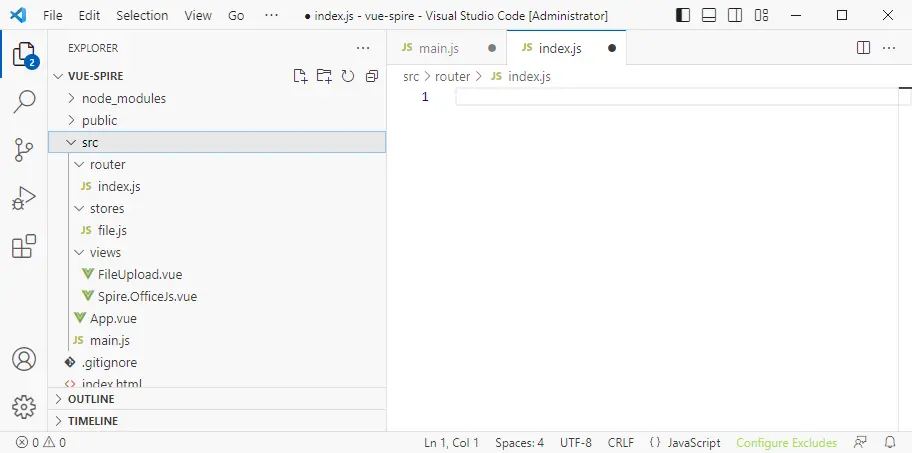
Step 4: Create the project structure
Create the following structure under src :
src/
├── router/
│   ├── index.js
├── stores/
│   ├── file.js
├── views/
│   ├── FileUpload.vue
│   └── Spire.OfficeJS.vue
Step 5: Setup application
- main.js — Application initialization
- App.vue — Root component
- Router index.js — Page navigation
- Pinia Store (file.js) — File state management
- FileUpload.vue — File upload page
- Spire.OfficeJs.vue — Online editor integration
This file initializes the Vue application and registers Pinia and Vue Router. Pinia is used to manage shared document data, while Vue Router controls page navigation between the file upload view and the document editor view.
import { createApp } from 'vue'
// Import Pinia
import { createPinia } from 'pinia'
import App from './App.vue'
import router from './router'

const app = createApp(App)

// Create Pinia instance
const pinia = createPinia()

// Register Pinia and Router to the Vue application
app.use(pinia)
app.use(router)
app.mount('#app')
App.vue serves as the root container of the application. It renders different pages dynamically using RouterView, allowing the file upload page and the document editor to be loaded as separate routes without reloading the application.
<script setup>
import { RouterView } from 'vue-router'
</script>

<template>
    <RouterView/>
</template>
The router defines the navigation flow of the application. The root route (/) is used for file upload, while /document loads the Spire.OfficeJS editor. This separation allows users to upload a document first and then open it in the editor with shared state preserved.
import { createRouter, createWebHistory } from 'vue-router'
import FileUpload from '../views/FileUpload.vue'
import SpireOfficeJs from '../views/Spire.OfficeJS.vue'

const router = createRouter({
    history: createWebHistory(),
    routes: [
        {
            path: '/',
            name: 'upload',
            component: FileUpload
        },
        {
            path: '/document',
            name: 'document',
            component: SpireOfficeJs
        },
        {
            path: '/:pathMatch(.*)*',
            redirect: '/'
        }
    ]
})
The Pinia store is responsible for sharing file metadata and binary data between different views. The uploaded file is converted into a Uint8Array and stored here so that it can be passed directly to Spire.OfficeJS in serverless mode.
import { ref } from 'vue'
// Import defineStore from Pinia to define a state management store
import { defineStore } from 'pinia'

// Define a file state management store
export const useFileStore = defineStore('file', () => {
  // Store the uploaded file object (File type)
  let file = ref(null)
  // Store the file binary data (Uint8Array format) for editor loading
  let fileUint8Data = ref(null);

  // Set the file object
  function setFileData(data) {
    file.value = data;
  }
  // Set the file binary data
  function setFileUint8Data(data) {
    fileUint8Data.value = data;
  }
  // Export state and methods for component usage
  return { file, fileUint8Data, setFileData, setFileUint8Data }
})
FileUpload.vue is responsible for handling user-selected Office documents before they are passed to the editor. It reads the uploaded file using the browser File API and converts it into a Uint8Array, which is required by Spire.OfficeJS in serverless mode.
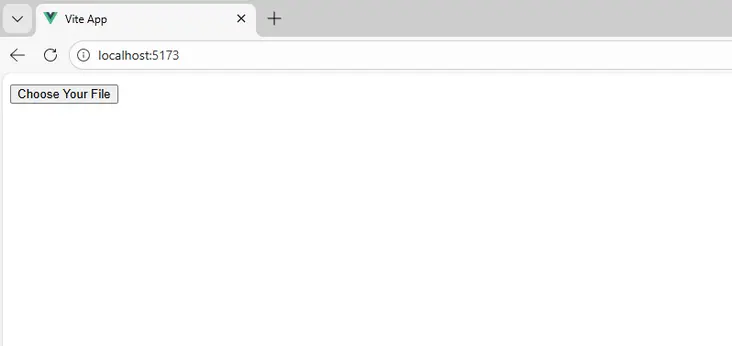
<template>
    <main>
        <button @click="btnClick">Choose Your File</button>
        <label>
            <input id="input" type="file" @change="handleFileChange" style="display: none;" />
        </label>
    </main>
</template>

<script setup>
import { useRouter } from 'vue-router'
import { useFileStore } from '../stores/file'

// Router instance: redirect to /document after successful upload
const router = useRouter()
// Pinia Store: store the user-uploaded file and binary data
const fileStore = useFileStore()

// Handle file upload
async function handleFileChange(event) {
    // Get the file selected by the user through the input change event
    const selectedFile = event.target.files?.[0]
    if (!selectedFile) {
        return
    }

    // Save the original File object and binary data for the editor to read
    fileStore.setFileData(selectedFile)
    const buffer = await selectedFile.arrayBuffer()
    fileStore.setFileUint8Data(new Uint8Array(buffer))

    // Redirect to the document editing page after successful upload
    router.push('/document')
}
function btnClick() {
    var btn = document.querySelector('#input');
    btn.click()
}
</script>
Spire.OfficeJs.vue is the core integration component where the Spire.OfficeJS editor is initialized and rendered. It dynamically loads the Spire.OfficeJS runtime, configures editor behavior, and passes the document binary data to the WebAssembly engine using serverless mode.
<template>
    <div class="form">
        <div id="iframeEditor">
        </div>
    </div>
</template>

<script setup>
import { ref, onMounted, onUnmounted } from 'vue';
import { storeToRefs } from 'pinia';
import { useFileStore } from '../stores/file.js'
import { useRouter } from 'vue-router';

const fileStore = useFileStore()
// Data stored in Pinia
const { file, fileUint8Data } = storeToRefs(fileStore)
const router = useRouter()
const config = ref({});
const isOpened = ref(false);
const editorInstance = ref(null);
const apiInstance = ref(null);
const originUrl = window.location.origin

onMounted(() => {
    // Redirect back to upload page if no file exists
    if (!file.value) {
        router.replace('/');
        return;
    }
    // Load editor script dynamically
    loadScript();
    window.addEventListener('resize', OnWindowReSize);
})

onUnmounted(() => {
    window.removeEventListener('resize', OnWindowReSize);
})

// Initialize the configuration object required by the editor
function initConfig() {
    if (!file.value) {
        throw new Error('File not found, please upload again');
    }

    if (!fileUint8Data.value) {
        throw new Error('File data not found, please upload again');
    }

    config.value = {
        "fileAttrs": {
            "fileInfo": {
                "name": file.value.name,
                "ext": getFileExtension(),
                "primary": String(new Date().getTime()),
                "creator": "Jonn",
                "createTime": "2022-04-18 11:30:43"
            },
            "sourceUrl": originUrl + "/files/__ffff_192.168.2.134/" + file.value.name,
            "createUrl": originUrl + "/open",
            "mergeFolderUrl": "",
            "fileChoiceUrl": "",
            "templates": {}

        },
        "user": {
            "id": "uid-1",
            "name": "Jonn",
            "canSave": true,
        },
        "editorAttrs": {
            "editorMode": "edit",
            "editorWidth": "100%",
            "editorHeight": "100%",
            "editorType": "document",
            "platform": "desktop", // desktop / mobile / embedded
            "viewLanguage": "en", // en / zh
            "isReadOnly": false,
            "canChat": true,
            "canComment": true,
            "canReview": true,
            "canDownload": true,
            "canEdit": true,
            "canForcesave": true,
            "embedded": {
                "saveUrl": "",
                "embedUrl": "",
                "shareUrl": "",
                "toolbarDocked": "top"
            },
            "useWebAssemblyDoc": true,
            "useWebAssemblyExcel": true,
            "useWebAssemblyPpt": true,
            "spireDocJsLicense": "",
            "spireXlsJsLicense": "",
            "spirePresentationJsLicense": "",
            "spirePdfJsLicense": "",
            "serverless": {
                "useServerless": true,
                "baseUrl": originUrl,
                "fileData": fileUint8Data.value,
            },
            "events": {
                "onSave": onFileSave
            },
            "plugins": {
                "pluginsData": []
            }
        }
    };
}

// Create and render the SpireCloudEditor instance
function initEditor() {
    let iframeId = 'iframeEditor';

    initConfig();
    isOpened.value = true;
    editorInstance.value = new SpireCloudEditor.OpenApi(iframeId, config.value); // Create editor instance
    window.Api = apiInstance.value = editorInstance.value.GetOpenApi(); // Expose OpenApi for debugging/saving
    OnWindowReSize();
}

// Get the uploaded file extension for fileInfo.ext
function getFileExtension() {
    const filename = file.value.name.split(/[\\/]/).pop();
    // Get the substring after the last dot
    return filename.substring(filename.lastIndexOf('.') + 1).toLowerCase() || '';
}

// Adjust editor container size to fit the window
function OnWindowReSize() {
    let wrapEl = document.getElementsByClassName("form");
    if (wrapEl.length) {
        wrapEl[0].style.height = screen.availHeight + "px";
        window.scrollTo(0, -1);
        wrapEl[0].style.height = window.innerHeight + "px";
    }
}

// Dynamically load the SpireCloudEditor script to avoid duplicate injection
function loadScript() {
    if (window.SpireCloudEditor) {
        initEditor()
        return
    }
    const script = document.createElement('script');
    script.setAttribute('src', '/spire.cloud/web/editors/spireapi/SpireCloudEditor.js');
    script.onload = () => initEditor()
    document.head.appendChild(script);
}

// Save callback for the Spire editor, can be connected to custom save logic
function onFileSave(data) {
    console.log('save data', data)
}

</script>

<style>
.form,
iframe,
body {
    min-height: 100vh !important;
    min-width: 100vh !important;
}
</style>
Step 6: Run the project
Start the development server:
npm run dev
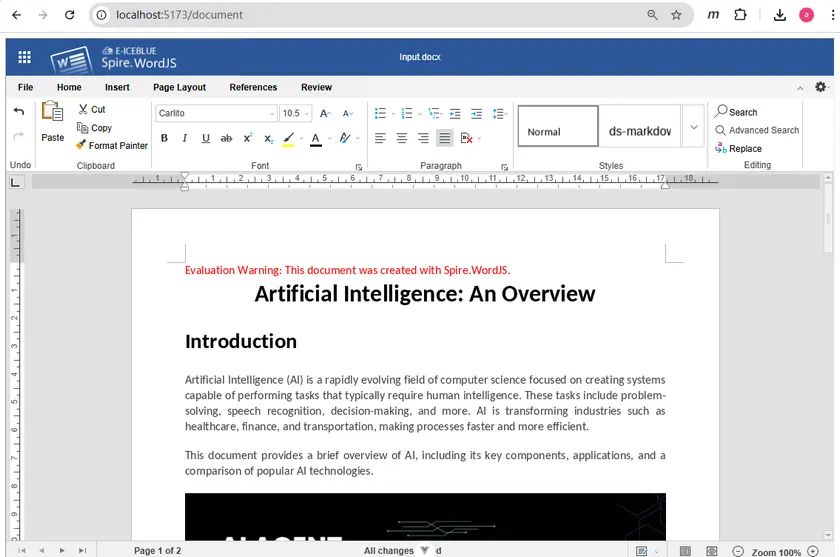
Open the browser and navigate to: http://localhost:5173/
Upload a document and start editing it directly in the browser.
FAQs
Q1. Why does the editor load a blank page?
This usually occurs when static resource paths are incorrect or required WebAssembly files are missing. Ensure the web directory is correctly placed under public/spire.cloud and that SpireCloudEditor.js is accessible.
Q2. Why doesn’t the document open after uploading?
The editor requires the file to be passed as a Uint8Array. Verify that the file data is correctly read, stored in Pinia, and assigned to serverless.fileData.
Q3. Can Spire.OfficeJS run without a backend server?
Yes. When serverless.useServerless is enabled, all document loading, rendering, and editing are performed entirely in the browser using WebAssembly.
Q4. Which file formats are supported by Spire.OfficeJS?
Spire.OfficeJS supports Word (.doc, .docx), Excel (.xls, .xlsx), PowerPoint (.ppt, .pptx), and PDF (.pdf) files.
Q5. How can I save the edited document?
Use the onSave event to capture the edited document data and implement custom logic to upload, store, or download the file.
Conclusion
By following this tutorial, you have successfully integrated Spire.OfficeJS into a Vue 3 application and built a fully client-side Office document editor powered by WebAssembly. This approach eliminates server-side document conversion while providing a rich, responsive editing experience directly in the browser.
Demo Download
In many web applications, PDF files are more than just downloadable documents—they are often the final output of business processes. Common examples include invoices, financial reports, contracts, certificates, and data exports that must preserve layout and formatting across devices.
For developers working with ASP.NET, the ability to create PDF files directly on the server side is a frequent requirement. Whether you are building a traditional ASP.NET MVC application or a modern ASP.NET Core service, generating PDFs programmatically allows you to deliver consistent, print-ready documents to end users.
However, implementing PDF generation in ASP.NET is not always straightforward. Developers often encounter challenges such as:
- Managing document layout and pagination
- Handling fonts and international text
- Returning PDF files efficiently to the browser
- Supporting both ASP.NET Framework and ASP.NET Core
This article focuses on practical solutions for creating PDF documents in ASP.NET and ASP.NET Core scenarios using Spire.PDF for .NET. You will learn how to generate PDFs using C# in:
- ASP.NET Framework applications
- ASP.NET Core applications
- MVC and Web API–based projects
By the end of this guide, you will have a clear understanding of how ASP.NET PDF generation works and how to apply it in real-world projects.
Quick Navigation
- Overview: Common Approaches to Create PDF in ASP.NET
- Environment Setup for ASP.NET PDF Generation
- How to Create PDF in ASP.NET (Framework) Using C#
- Generate PDF in ASP.NET Core Applications
- Advanced Scenarios for ASP.NET PDF Generation
- Choosing an ASP.NET PDF Library
- Why Use Spire.PDF for ASP.NET PDF Creation
- FAQ: Frequently Asked Questions
1. Overview: Creating PDF Directly in ASP.NET Using C#
In ASP.NET and ASP.NET Core applications, PDF files are often generated as the final output of server-side processes, such as reports, invoices, and data exports.
One of the most reliable ways to achieve this is creating PDF documents directly through C# code. In this approach, the application controls:
- Page creation and pagination
- Text formatting and layout
- File output and response handling
This tutorial focuses on this code-driven PDF generation approach, which works consistently across ASP.NET Framework and ASP.NET Core and is well suited for server-side scenarios where predictable output and layout control are required.
2. Environment Setup for ASP.NET PDF Generation
Before you start generating PDFs in ASP.NET or ASP.NET Core applications, it is important to ensure that your development environment is properly configured. This will help you avoid common issues and get your projects running smoothly.
2.1. .NET SDK Requirements
- ASP.NET Framework: Ensure your project targets .NET Framework 4.6.1 or higher.
- ASP.NET Core: Install .NET 6 or .NET 7 SDK, depending on your project target.
- Verify your installed SDK version using:
dotnet --version
2.2. Installing the Spire.PDF for .NET Library
To generate PDFs, you need a PDF library compatible with your project. One widely used option is Spire.PDF for .NET, which supports both ASP.NET Framework and ASP.NET Core.
- Install via NuGet Package Manager in Visual Studio:
Install-Package Spire.PDF
You can also download Spire.PDF for .NET and install it manually.
- Verify the installation by checking that the Spire.Pdf.dll is referenced in your project.
2.3. Project Template Considerations
- ASP.NET Framework: Use an MVC or Web Forms project and ensure required assemblies (e.g., System.Web) are referenced.
- ASP.NET Core: Use an MVC or API project and configure any required services for the PDF library.
Ensure the environment allows writing files if needed and supports necessary fonts for your documents.
3. How to Create PDF in ASP.NET (Framework) Using C#
This section demonstrates how to create PDF files in ASP.NET Framework applications using C#. These examples apply to classic ASP.NET Web Forms and ASP.NET MVC projects.
3.1 Create a Simple PDF File in ASP.NET
The basic workflow for creating PDF in ASP.NET is:
- Create a PdfDocument instance.
- Add pages and content.
- Save the document using PdfDocument.SaveToFile() method, or return it to the client.
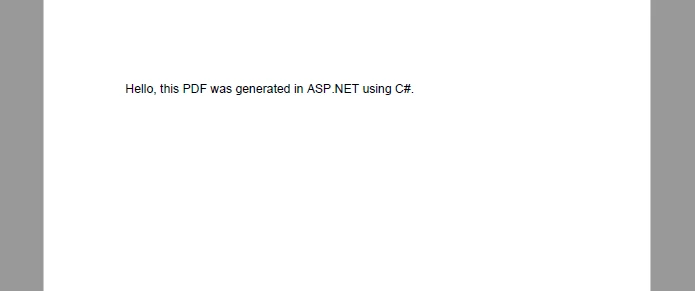
Below is a simple C# example that creates a PDF file and saves it on the server.
using Spire.Pdf;
using Spire.Pdf.Graphics;
using System.Drawing;

PdfDocument document = new PdfDocument();
PdfPageBase page = document.Pages.Add();

PdfFont font = new PdfFont(PdfFontFamily.Helvetica, 12f);
page.Canvas.DrawString(
    "Hello, this PDF was generated in ASP.NET using C#.",
    font,
    PdfBrushes.Black,
    new PointF(40, 40)
);

document.SaveToFile(Server.MapPath("~/Output/Sample.pdf"));
document.Close();
This example demonstrates the core idea of PDF generation in ASP.NET using C#: everything is created programmatically, giving you full control over content and layout.
In real applications, this approach is commonly used to generate:
- Confirmation documents
- Server-side reports
- System-generated notices
If you also want to include images in your PDFs, you can check out our guide on inserting images into PDF files using C# for a step-by-step example.
3.2 Generate PDF in ASP.NET MVC
In ASP.NET MVC projects, PDFs are usually generated inside controller actions and returned directly to the browser. This allows users to download or preview the document without saving it permanently on the server.
A typical PDF generation in MVC implementation looks like this:
using Spire.Pdf;
using Spire.Pdf.Graphics;
using System.Drawing;
using System.IO;
using System.Web.Mvc;

namespace WebApplication.Controllers
{
    public class DefaultController : Controller
    {
        public ActionResult GeneratePdf()
        {
            // Create a PDF document
            using (PdfDocument document = new PdfDocument())
            {
                PdfPageBase page = document.Pages.Add();

                PdfFont font = new PdfFont(PdfFontFamily.Helvetica, 12f);
                page.Canvas.DrawString(
                    "PDF generated in ASP.NET MVC.",
                    font,
                    PdfBrushes.Black,
                    new PointF(40, 40)
                );

                // Save the document to stream and return to browser
                using (MemoryStream stream = new MemoryStream())
                {
                    document.SaveToStream(stream);

                    return File(
                        stream.ToArray(),
                        "application/pdf",
                        "MvcSample.pdf"
                    );
                }
            }
        }
    }
}
Below is the preview of the generated PDF document:
Practical Notes for MVC Projects
- Returning a
FileResultis the most common pattern - Memory streams help avoid unnecessary disk I/O
- This approach works well for on-demand PDF generation triggered by user actions
With this method, you can seamlessly integrate ASP.NET PDF generation into existing MVC workflows such as exporting reports or generating invoices.
Tip: If you need to present PDFs to users in a ASP.NET application, you can use Spire.PDFViewer for ASP.NET, a component that allows you to display PDF documents in a web environment.
4. Generate PDF in ASP.NET Core Applications
With the rise of cross-platform development and cloud-native architectures, ASP.NET Core has become the default choice for many new projects. Although the core idea of PDF generation remains similar, there are several implementation details that differ from the traditional ASP.NET Framework.
This section explains how to generate PDF in ASP.NET Core using C#, covering both MVC-style web applications and Web API–based services.
4.1 Generate PDF in ASP.NET Core Web Application
In an ASP.NET Core web application, PDF files are commonly generated inside controller actions and returned as downloadable files. Unlike ASP.NET Framework, ASP.NET Core does not rely on System.Web, so file handling is typically done using streams.
Below is a simple example demonstrating ASP.NET Core PDF generation in a controller.
Create a new ASP.NET Core Web App (Model-View-Controller) project in your IDE and add a new controller named PdfController with an action named CreatePdf() in the Controllers folder.
using Microsoft.AspNetCore.Mvc;
using Spire.Pdf;
using Spire.Pdf.Graphics;
using System.Drawing;
namespace CoreWebApplication.Controllers
{
public class PdfController : Controller
{
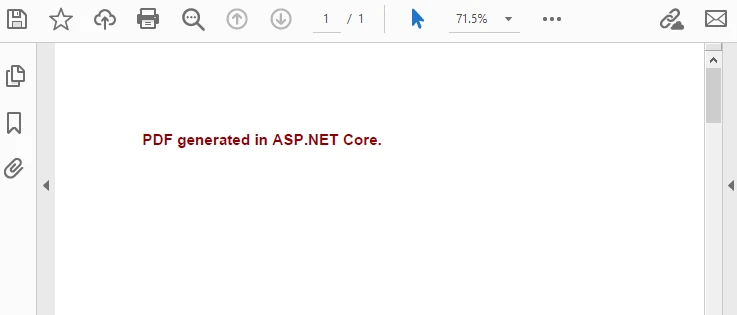
public IActionResult CreatePdf()
{
using (PdfDocument document = new PdfDocument())
{
PdfPageBase page = document.Pages.Add();
PdfFont font = new PdfFont(PdfFontFamily.Helvetica, 14f, PdfFontStyle.Bold);
page.Canvas.DrawString(
"PDF generated in ASP.NET Core.",
font,
PdfBrushes.DarkRed,
new PointF(40, 40)
);
using (MemoryStream stream = new MemoryStream())
{
document.SaveToStream(stream);
return File(
stream.ToArray(),
"application/pdf",
"AspNetCoreSample.pdf"
);
}
}
}
}
}
Below is the preview of the generated PDF document:
Key Differences from ASP.NET Framework
- No dependency on Server.MapPath
- Stream-based file handling is the recommended pattern
- Works consistently across Windows, Linux, and Docker environments
This approach is suitable for dashboards, admin panels, and internal systems where users trigger ASP.NET Core PDF generation directly from the UI.
If you want to create structured tables in your PDFs, you can check out our guide on generating tables in PDF using ASP.NET Core and C# for a step-by-step example.
4.2 Generate PDF in ASP.NET Core Web API
For front-end and back-end separated architectures, PDF generation is often implemented in ASP.NET Core Web API projects. In this scenario, the API endpoint returns a PDF file as a binary response, which can be consumed by web clients, mobile apps, or other services.
A typical ASP.NET PDF generation in Web API example looks like this:
Add this code inside a controller named PdfApiController in the Controllers folder.
using Microsoft.AspNetCore.Mvc;
using Spire.Pdf;
using Spire.Pdf.Graphics;
using System.Drawing;

[ApiController]
[Route("api/pdf")]
public class PdfApiController : ControllerBase
{
    [HttpGet("generate")]
    public IActionResult GeneratePdf()
    {
        PdfDocument document = new PdfDocument();
        PdfPageBase page = document.Pages.Add();

        PdfFont font = new PdfFont(PdfFontFamily.Helvetica, 14f, PdfFontStyle.Bold);
        page.Canvas.DrawString(
            "PDF generated by ASP.NET Core Web API.",
            font,
            PdfBrushes.BlueViolet,
            new PointF(40, 40)
        );

        using (MemoryStream stream = new MemoryStream())
        {
            document.SaveToStream(stream);
            document.Close();

            return File(
                stream.ToArray(),
                "application/pdf",
                "ApiGenerated.pdf"
            );
        }
    }
}
Below is the preview of the generated PDF document:

Practical Considerations for Web API
- Always set the correct
Content-Type(application/pdf) - Use streams to avoid unnecessary disk access
- Suitable for microservices and distributed systems
This pattern is widely used when ASP.NET PDF generation is part of an automated workflow rather than a user-driven action.
5. Advanced Scenarios for ASP.NET PDF Generation
Basic examples are useful for learning, but real-world applications often require more advanced PDF features. This section focuses on scenarios that commonly appear in production systems and demonstrate the practical value of server-side PDF generation.
5.1 Export Dynamic Data to PDF
One of the most frequent use cases is exporting dynamic data—such as database query results—into a structured PDF document.
Typical scenarios include:
- Sales reports
- Order summaries
- Financial statements
The example below demonstrates generating a simple table-like layout using dynamic data.
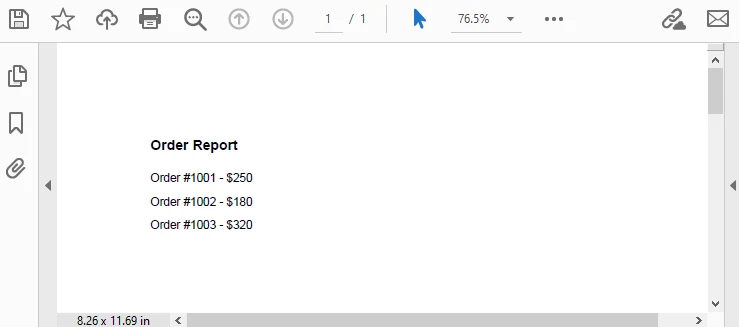
PdfDocument document = new PdfDocument();
PdfPageBase page = document.Pages.Add();

PdfFont headerFont = new PdfFont(PdfFontFamily.Helvetica, 12f, PdfFontStyle.Bold);
PdfFont bodyFont = new PdfFont(PdfFontFamily.Helvetica, 10f);

float y = 40;

// Header
page.Canvas.DrawString("Order Report", headerFont, PdfBrushes.Black, 40, y);
y += 30;

// Sample dynamic data
string[] orders = { "Order #1001 - $250", "Order #1002 - $180", "Order #1003 - $320" };

foreach (string order in orders)
{
    page.Canvas.DrawString(order, bodyFont, PdfBrushes.Black, 40, y);
    y += 20;
}

document.SaveToFile("OrderReport.pdf");
document.Close();
Output Preview:
This approach allows you to:
- Populate PDFs from databases or APIs
- Generate documents dynamically per request
- Maintain consistent formatting regardless of data size
5.2 Styling and Layout Control in Generated PDFs
Another important aspect of ASP.NET PDF generation is layout control. In many business documents, appearance matters as much as content.
Common layout requirements include:
- Page margins and alignment
- Headers and footers
- Multi-page content handling
For example, adding a simple header and footer:
PdfPageBase page = document.Pages.Add();

PdfFont font = new PdfFont(PdfFontFamily.Helvetica, 12f);

page.Canvas.DrawString(
    "Company Confidential",
    font,
    PdfBrushes.Gray,
    new PointF(40, 15)
);

page.Canvas.DrawString(
    "Page 1",
    font,
    PdfBrushes.Gray,
    new PointF(page.Canvas.ClientSize.Width - 60, page.Canvas.ClientSize.Height - 30)
);
Output Preview:
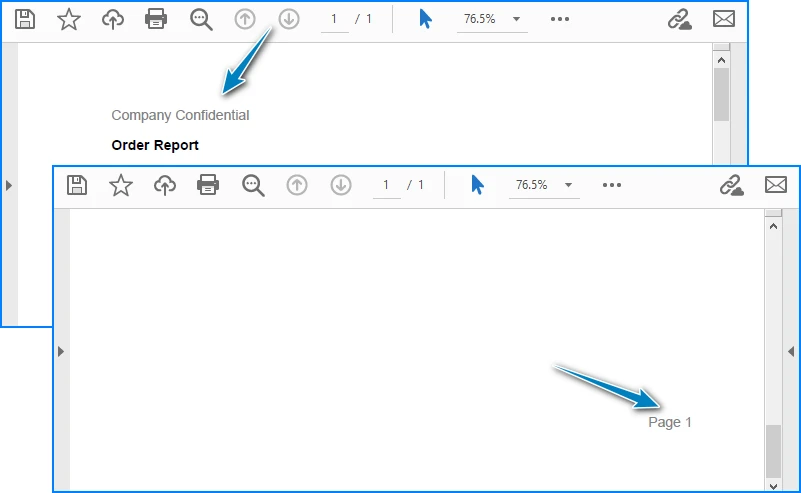
When working with multi-page documents, it is important to:
- Track vertical position (
ycoordinate) - Add new pages when content exceeds page height
- Keep layout logic consistent across pages
These considerations help ensure that generated PDFs are suitable for both on-screen viewing and printing.
5.3 Related PDF Generation Scenarios
In addition to creating PDF files directly via C# code, some ASP.NET applications use other PDF workflows depending on their requirements. Check out the following articles for more examples:
- How to Convert HTML to PDF Using C#
- How to Convert Word DOC/DOCX to PDF Using C#
- How to Convert Excel Workbooks to PDF Using C#
6. Choosing an ASP.NET PDF Library
When implementing PDF generation in ASP.NET or ASP.NET Core, selecting the right PDF library is a critical decision. The choice directly affects development efficiency, long-term maintainability, and runtime performance.
Instead of focusing only on feature lists, it is more practical to evaluate an ASP.NET PDF library based on how it fits real application requirements.
Key Factors to Consider
- API Usability
A good PDF library should provide:
- Clear object models (documents, pages, fonts, graphics)
- Intuitive APIs for drawing text and layout
- Minimal boilerplate code for common tasks
This is especially important for projects where PDF generation logic evolves over time.
- ASP.NET and ASP.NET Core Compatibility
Many teams maintain both legacy ASP.NET applications and newer ASP.NET Core services. Choosing a library that works consistently across:
- ASP.NET Framework
- ASP.NET Core
- MVC and Web API projects
can significantly reduce migration and maintenance costs.
3. Performance and Stability
In production environments, PDF generation often runs:
- On-demand under user requests
- As background jobs
- Inside high-concurrency services
An ASP.NET PDF generator should be stable under load and capable of handling multi-page documents without excessive memory usage.
In practice, libraries generally fall into categories such as HTML-based converters or code-driven PDF APIs. For applications that require predictable output and fine-grained control, direct PDF creation via C# code is often the preferred approach.
7. Why Use Spire.PDF for ASP.NET PDF Creation
For developers who need to create PDF files in ASP.NET using C#, Spire.PDF for .NET provides a balanced solution that fits both tutorial examples and real-world projects.
Practical Advantages in ASP.NET Scenarios
-
Native support for ASP.NET and ASP.NET Core The same API can be used across classic ASP.NET, MVC, ASP.NET Core Web Apps, and Web API projects.
-
Code-driven PDF creation PDFs can be generated directly through C# without relying on external rendering engines or browser components.
-
Rich PDF features Supports text, images, tables, pagination, headers and footers, making it suitable for reports, invoices, and business documents.
-
Deployment-friendly Works well in server environments, including containerized and cloud-hosted ASP.NET Core applications.
Because of these characteristics, Spire.PDF fits naturally into PDF generation in ASP.NET workflows where stability, layout control, and cross-version compatibility matter more than quick HTML rendering.
For a complete reference of all available methods and classes, you can consult the official API documentation: Spire.PDF for .NET API Reference.
8. Frequently Asked Questions (FAQ)
Can I generate PDF in ASP.NET Core without MVC?
Yes. PDF generation in ASP.NET Core does not strictly require MVC. In addition to MVC controllers, PDFs can also be generated and returned from:
- ASP.NET Core Web API controllers
- Minimal APIs
- Background services
As long as the application returns a valid PDF byte stream with the correct Content-Type, the approach works reliably.
What is the difference between generating PDF in ASP.NET and ASP.NET Core?
The core PDF creation logic is similar, but there are some differences:
- ASP.NET Framework relies on
System.Webfeatures such asServer.MapPath - ASP.NET Core uses stream-based file handling
- ASP.NET Core is cross-platform and better suited for modern deployment models
From a PDF API perspective, most logic can be shared between the two.
Is it possible to generate PDF directly from C# code in ASP.NET?
Yes. Many production systems generate PDFs entirely through C# code. This approach:
- Avoids HTML rendering inconsistencies
- Provides precise layout control
- Works well for structured documents such as reports and invoices
It is a common pattern in ASP.NET PDF solutions where consistency and reliability are required.
Conclusion
Generating PDF files is a common requirement in ASP.NET and ASP.NET Core applications, especially for scenarios such as reports, invoices, and data exports. By creating PDFs directly through C# code, you gain full control over document structure, layout, and output behavior.
This guide demonstrated how to generate PDFs in both ASP.NET Framework and ASP.NET Core, covering MVC and Web API scenarios, dynamic data output, and basic layout control. It also discussed how to evaluate PDF libraries based on real application requirements.
If you plan to test these examples in a real project environment without functional limitations, you can apply for a temporary license to unlock all full features during evaluation.
PDF parsing in Java is commonly required when applications need to extract usable information from PDF files, rather than simply render them for display. Typical use cases include document indexing, automated report processing, invoice analysis, and data ingestion pipelines.
Unlike structured formats such as JSON or XML, PDFs are designed for visual fidelity. Text, tables, images, and other elements are stored as positioned drawing instructions instead of logical data structures. As a result, effective PDF parsing in Java depends on understanding how content is represented internally and how Java-based libraries expose that content through their APIs.
This article focuses on practical PDF parsing operations in real Java applications using Spire.PDF for Java, with each section covering a specific extraction task—text, tables, images, or metadata—rather than presenting PDF parsing as a single linear workflow.
Table of Contents
- Understanding PDF Parsing from an Implementation Perspective
- A Practical PDF Parsing Workflow in Java
- Loading and Validating PDF Documents in Java
- Parsing Text from PDF Pages Using Java
- Parsing Tables from PDF Pages Using Java
- Parsing Images from PDF Pages Using Java
- Parsing PDF Metadata Using Java
- Implementation Considerations for PDF Parsing in Java
- Frequently Asked Questions
Understanding PDF Parsing from an Implementation Perspective
From an implementation perspective, PDF parsing in Java is not a single operation, but a set of extraction tasks applied to the same document, depending on the type of data the application needs to obtain.
In real systems, PDF parsing is typically used to retrieve:
- Plain text content for indexing, search, or analysis
- Structured data such as tables for further processing or storage
- Embedded resources such as images for archiving or downstream processing
- Document metadata for classification, auditing, or version tracking
The complexity of PDF parsing comes from the way PDF files store content. Unlike structured document formats, PDFs do not preserve logical elements such as paragraphs, rows, or tables. Instead, most content is represented as:
- Page-level content streams
- Text fragments positioned using coordinates
- Graphical elements (images, lines, spacing, borders) that visually imply structure
As a result, Java-based PDF parsing focuses on reconstructing meaning from layout information, rather than reading predefined data structures. This is why practical Java implementations rely on a dedicated PDF parsing library that exposes low-level page content while also providing higher-level utilities—such as text extraction and table detection—to reduce the amount of custom logic required.
A Practical PDF Parsing Workflow in Java
In production environments, PDF parsing is best designed as a set of independent parsing operations that can be applied selectively, rather than as a strict step-by-step pipeline. This design improves fault isolation and allows applications to apply only the parsing logic they actually need.
At this stage, we will use Spire.PDF for Java, a Java PDF library that provides APIs for text extraction, table detection, image exporting, metadata access, and more. It is suitable for backend services, batch processing jobs, and document automation systems.
Installing Spire.PDF for Java
You can download the library from the Spire.PDF for Java download page and manually include it in your project dependencies. If you are using Maven, you can also install it by adding the following dependency to your project:
<repositories>
    <repository>
        <id>com.e-iceblue</id>
        <name>e-iceblue</name>
        <url>https://repo.e-iceblue.com/nexus/content/groups/public/</url>
    </repository>
</repositories>
<dependencies>
    <dependency>
        <groupId>e-iceblue</groupId>
        <artifactId>spire.doc</artifactId>
        <version>14.6.0</version>
    </dependency>
</dependencies>
After installation, you can load and analyze PDF documents using Java code without relying on external tools.
Loading and Validating PDF Documents in Java
Before performing any parsing operation, the PDF document should be loaded and validated. This step is best treated as a standalone operation that confirms the document can be safely processed by downstream parsing logic.
import com.spire.pdf.PdfDocument;

public class loadPDF {
    public static void main(String[] args) {

        // Create a PdfDocument instance
        PdfDocument pdf = new PdfDocument();
        // Load the PDF document
        pdf.loadFromFile("sample.pdf");

        // Get the total number of pages
        int pageCount = pdf.getPages().getCount();
        System.out.println("Total pages: " + pageCount);
    }
}
Console Output Preview
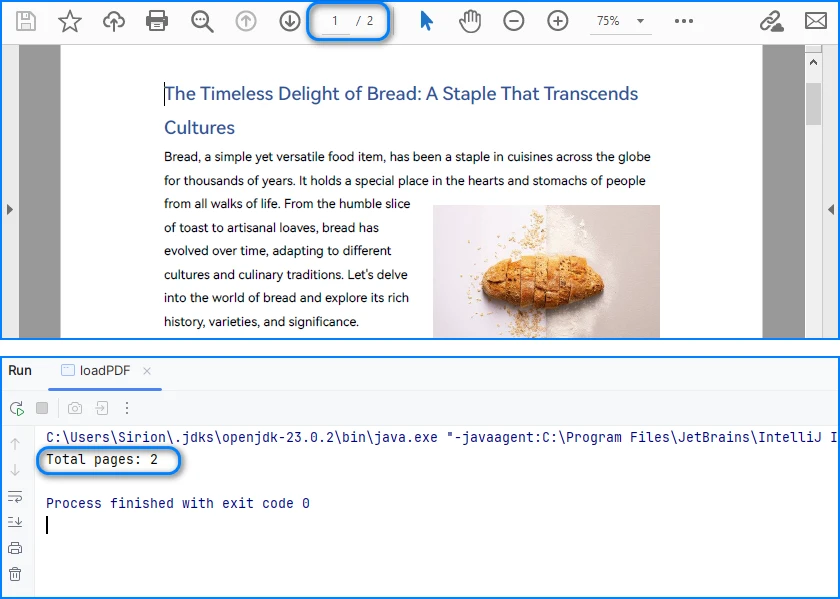
From an implementation perspective, successful loading and page access already verify several critical conditions:
- The file conforms to a supported PDF format
- The document structure can be parsed without fatal errors
- The page tree is present and accessible
In production systems, this validation step is often used as a gatekeeper. Documents that fail to load or expose a valid page collection can be rejected early.
Real world applications often need developers to parse PDFs in other formats, like bytes or streams. You can refer to How to Load PDF Documents from Bytes Using Java for details.
Separating document validation from extraction logic helps prevent cascading failures, especially in batch or automated parsing workflows.
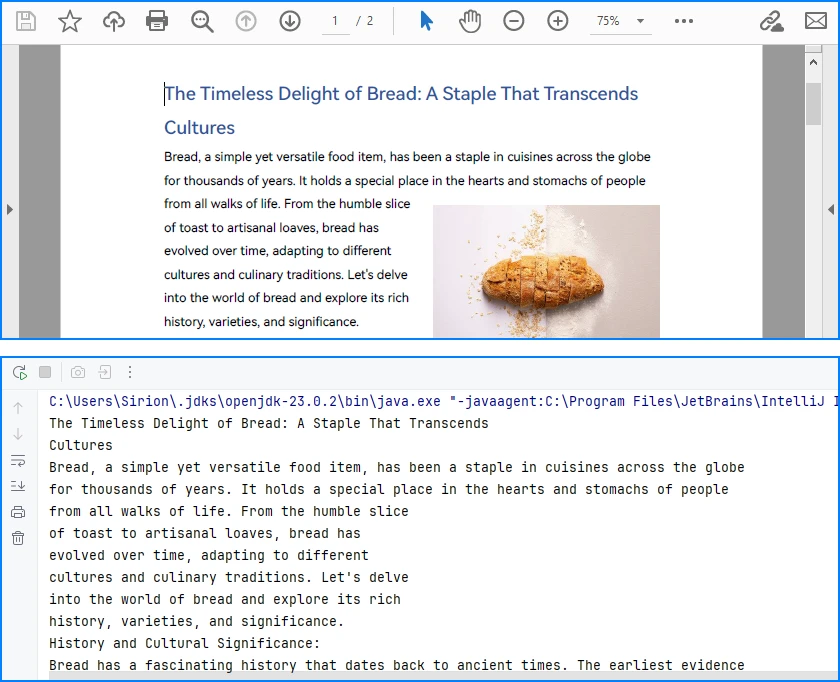
Parsing Text from PDF Pages Using Java
Text parsing is one of the most common PDF processing tasks in Java and typically involves extracting and reconstructing readable text from PDF pages. When working with Spire.PDF for Java, text extraction should be implemented using the PdfTextExtractor class together with configurable extraction options, rather than relying on a single high-level API call.
Treating text parsing as an independent operation allows developers to extract and process textual content flexibly whenever it is required, such as indexing, analysis, or content migration.
How Text Parsing and Extraction Work in Java
In a typical Java implementation, text parsing is performed through a small set of clearly defined operations, each of which is reflected directly in the code:
- Load the PDF document into a PdfDocument instance
- Configure text parsing behavior using PdfTextExtractOptions
- Create a PdfTextExtractor for each page
- Parse and collect page-level text results
This page-based design maps cleanly to the underlying PDF structure and provides better control when processing multi-page documents.
Java Example: Extracting Text from PDF
The following example demonstrates how to extract text from a PDF file using PdfTextExtractor and PdfTextExtractOptions in Spire.PDF for Java.
import com.spire.pdf.PdfDocument;
import com.spire.pdf.texts.PdfTextExtractOptions;
import com.spire.pdf.texts.PdfTextExtractor;

public class extractPdfText {
    public static void main(String[] args) {

        // Create and load the PDF document
        PdfDocument pdf = new PdfDocument();
        pdf.loadFromFile("sample.pdf");

        // Use StringBuilder to efficiently accumulate extracted text
        StringBuilder extractedText = new StringBuilder();

        // Configure text extraction options
        PdfTextExtractOptions options = new PdfTextExtractOptions();

        // Enable simple extraction mode for more readable text output
        options.setSimpleExtraction(true);

        // Iterate through each page in the PDF
        for (int i = 0; i < pdf.getPages().getCount(); i++) {

            // Create a PdfTextExtractor for the current page
            PdfTextExtractor extractor =
                    new PdfTextExtractor(pdf.getPages().get(i));

            // Extract text content from the current page using the options
            String pageText = extractor.extract(options);

            // Append the extracted page text to the result buffer
            extractedText.append(pageText).append("\n");
        }

        // At this point, extractedText contains the full textual content
        // and can be stored, indexed, or further processed
        System.out.println(extractedText.toString());
    }
}
Console Output Preview
Explanation of Key Points in PDF Text Parsing
-
PdfTextExtractor: Operates at the page level and provides finer control over how text is reconstructed.
-
PdfTextExtractOptions: Allows you to control extraction behavior. Enabling
setSimpleExtraction(true)helps produce cleaner, more readable text by simplifying layout reconstruction. -
Page-by-page processing: Improves scalability and makes it easier to handle large PDF files or isolate problematic pages.
Technical Considerations
- Text is reconstructed from positioned glyphs rather than stored as paragraphs
- Extraction behavior can be tuned using PdfTextExtractOptions
- Page-level extraction improves fault tolerance and flexibility
- Extracted text often requires additional normalization for downstream systems
This method works well for reports, contracts, and other text-centric documents with relatively consistent layouts and is the recommended approach for parsing text from PDF pages in Java using Spire.PDF for Java. You can check out How to Extract Text from PDF Pages Using Java for more text extraction examples.
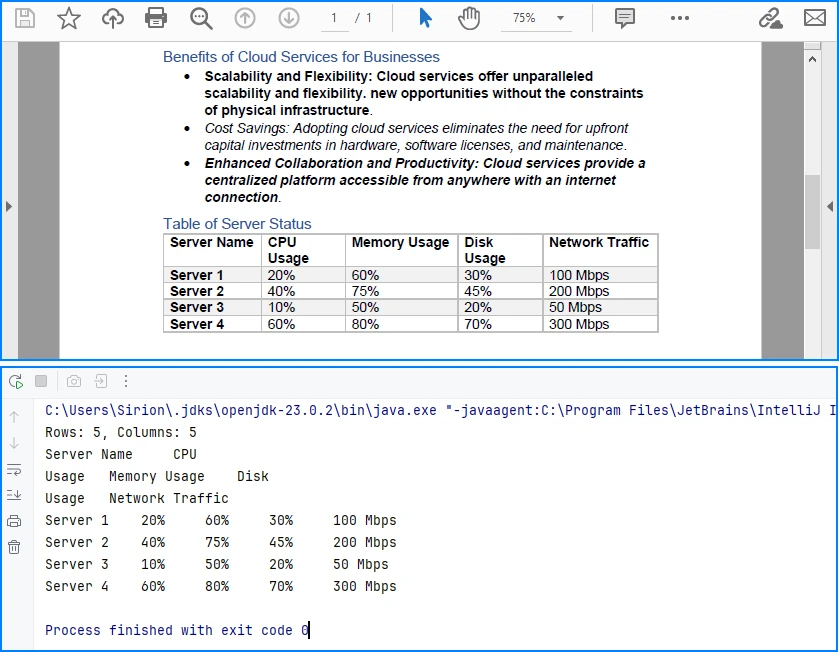
Parsing Tables from PDF Pages Using Java
Table parsing is an advanced PDF parsing operation that focuses on identifying tabular structures within PDF pages and reconstructing them into structured rows and columns. Compared to plain text parsing, table parsing preserves semantic relationships between data cells and is commonly used in scenarios such as invoices, financial statements, and operational reports.
When performing PDF parsing in Java, table parsing allows applications to transform visually aligned content into structured data that can be programmatically processed, stored, or exported.
How Table Parsing Works in Java Practice
When parsing tables, the implementation shifts from plain text extraction to structure inference based on visual alignment and layout consistency.
- Load the PDF document into a PdfDocument instance
- Create a PdfTableExtractor bound to the document
- Parse table structures from a specific page
- Reconstruct rows and columns from the parsed table model
- Validate and normalize parsed cell data for downstream use
Unlike plain text parsing, table parsing infers structure from visual alignment and layout consistency, allowing row-and-column access to data that is otherwise represented as positioned text.
Java Example: Parsing Tables from a PDF Page
The following example demonstrates how to parse tables from a PDF page using PdfTableExtractor in Spire.PDF for Java. The extracted tables are converted into structured row-and-column data that can be further processed or exported.
import com.spire.pdf.PdfDocument;
import com.spire.pdf.utilities.PdfTable;
import com.spire.pdf.utilities.PdfTableExtractor;

public class extractPdfTable {
    public static void main(String[] args) {

        // Load the PDF document
        PdfDocument pdf = new PdfDocument();
        pdf.loadFromFile("sample1.pdf");

        // Create a table extractor bound to the document
        PdfTableExtractor extractor = new PdfTableExtractor(pdf);

        // Parse tables from the first page (page index starts at 0)
        PdfTable[] tables = extractor.extractTable(0);

        if (tables != null) {
            for (PdfTable table : tables) {

                // Retrieve parsed table structure
                int rowCount = table.getRowCount();
                int columnCount = table.getColumnCount();

                System.out.println("Rows: " + rowCount +
                        ", Columns: " + columnCount);

                // Reconstruct table cell data row by row
                StringBuilder tableData = new StringBuilder();
                for (int i = 0; i < rowCount; i++) {
                    for (int j = 0; j < columnCount; j++) {

                        // Retrieve text from each parsed table cell
                        tableData.append(table.getText(i, j));

                        if (j < columnCount - 1) {
                            tableData.append("\t");
                        }
                    }
                    if (i < rowCount - 1) {
                        tableData.append("\n");
                    }
                }

                // Parsed table data is now available for export or storage
                System.out.println(tableData.toString());
            }
        }
    }
}
Console Output Preview
Explanation of Key Implementation Details
-
PdfTableExtractor: Analyzes page-level content and detects tabular regions based on visual alignment and layout features.
-
Structure reconstruction: Rows and columns are inferred from the relative positioning of text elements, allowing cell-level access through row and column indices.
-
Page-scoped parsing: Tables are parsed on a per-page basis, which improves accuracy and makes it easier to handle layout variations across pages.
Practical Considerations When Parsing PDF Tables
- Table boundaries are inferred from visual layout, not from an explicit schema
- Header rows may require additional detection or handling logic
- Parsed cell content often needs normalization before storage or export
- Complex or inconsistent layouts may affect parsing accuracy
Despite these limitations, table parsing remains one of the most valuable PDF parsing capabilities in Java, especially for automating data extraction from structured business documents.
After parsing table structures from PDF pages, the extracted data is often exported to structured formats such as CSV for further use, as shown in Convert PDF Tables to CSV in Java.
Parsing Images from PDF Pages Using Java
Image parsing is a specialized PDF parsing capability that focuses on extracting embedded image resources from PDF pages. Unlike text or table parsing, which operates on content streams or layout inference, image parsing works by analyzing page-level resources and identifying image objects embedded within each page.
In Java-based PDF processing systems, parsing images is commonly used for archiving visual content, auditing document composition, or passing image data to downstream processing pipelines.
How Image Parsing Works in Java
At the implementation level, image parsing operates on page-level resources rather than text content streams.
- Load the PDF document into a PdfDocument instance
- Initialize a PdfImageHelper utility
- Iterate through pages and retrieve image resource information
- Parse each embedded image and export it as a standard image format
Because images are stored as independent page resources, this parsing operation does not depend on text flow, layout reconstruction, or table detection logic.
Java Example: Parsing Images from PDF Pages
The following example demonstrates how to parse images embedded in PDF pages using PdfImageHelper and PdfImageInfo in Spire.PDF for Java. Each detected image is extracted and saved as a PNG file.
import com.spire.pdf.PdfDocument;
import com.spire.pdf.utilities.PdfImageHelper;
import com.spire.pdf.utilities.PdfImageInfo;

import javax.imageio.ImageIO;
import java.awt.image.BufferedImage;
import java.io.File;
import java.io.IOException;

public class ExtractPdfImages {
    public static void main(String[] args) throws IOException {

        // Load the PDF document
        PdfDocument pdf = new PdfDocument();
        pdf.loadFromFile("sample.pdf");

        // Create a PdfImageHelper instance
        PdfImageHelper imageHelper = new PdfImageHelper();

        // Iterate through each page in the document
        for (int i = 0; i < pdf.getPages().getCount(); i++) {

            // Retrieve information of all images in the current page
            PdfImageInfo[] imageInfos = imageHelper.getImagesInfo(pdf.getPages().get(i));

            if (imageInfos != null) {
                for (int j = 0; j < imageInfos.length; j++) {

                    // Retrieve image data as BufferedImage
                    BufferedImage image = imageInfos[j].getImage();

                    // Save the parsed image to a file
                    File output = new File(
                            "output/images/page_" + i + "_image_" + j + ".png"
                    );
                    ImageIO.write(image, "PNG", output);
                }
            }
        }
    }
}
Extracted Images Preview
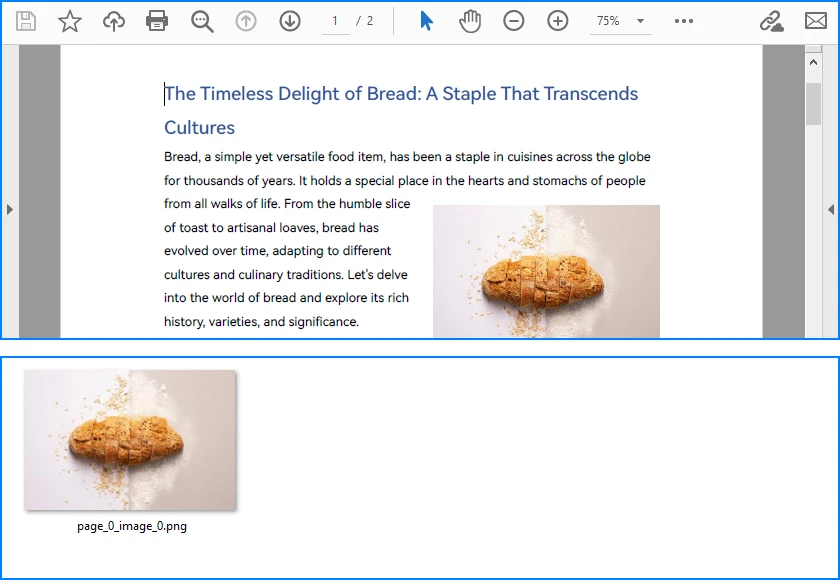
Explanation of Key Details in PDF Image Parsing
-
PdfImageHelper & PdfImageInfo: These classes analyze page-level resources and provide access to embedded images as BufferedImage objects.
-
Page-scoped parsing: Images are parsed on a per-page basis, ensuring accurate extraction even for multi-page PDFs with repeated or reused images.
-
Independent of layout: Parsing does not rely on text flow or table alignment, making it suitable for any visual resources embedded in the document.
Practical Considerations When Parsing PDF Images
- Parsed images may include decorative or background elements
- Image resolution, color space, and format may vary by document
- Large PDFs can contain many images, so memory and storage should be managed
- Image parsing complements text, table, and metadata parsing, completing the PDF parsing workflow in Java
Besides extracting and saving individual images, PDF pages can also be converted directly to images; see Convert PDF Pages to Images in Java for more details.
Parsing PDF Metadata Using Java
Metadata parsing is a foundational PDF parsing capability that focuses on reading document-level information stored separately from visual content. Unlike text or table parsing, metadata parsing does not depend on page layout and can be applied reliably to almost any PDF file.
In Java-based PDF processing systems, parsing metadata is often used as an initial analysis step to support document classification, routing, and indexing decisions.
How Metadata Parsing works with Java
Unlike page-level parsing tasks, metadata parsing is implemented as a document-level operation that accesses information stored outside the rendering content.
- Load the PDF document into a PdfDocument instance
- Access the document information dictionary
- Parse available metadata fields
- Use parsed metadata to support classification, routing, or indexing logic
Since metadata is stored independently of page layout and rendering instructions, this parsing operation is lightweight, fast, and highly consistent across PDF files.
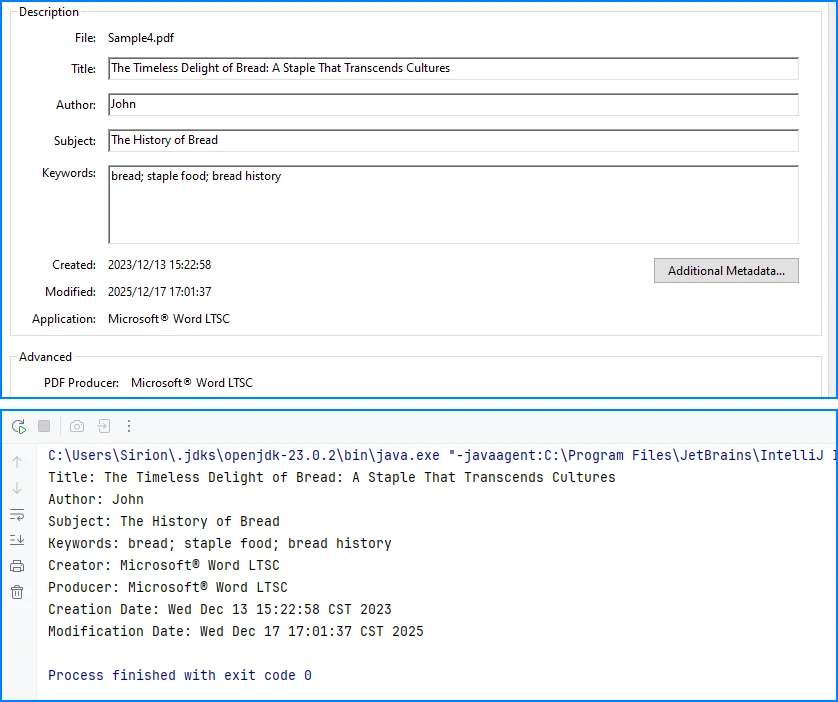
Java Example: Parsing PDF Document Metadata
The following example demonstrates how to parse common metadata fields from a PDF document using Spire.PDF for Java. These fields can be used for indexing, classification, or workflow routing.
import com.spire.pdf.PdfDocument;

public class ParsePdfMetadata {
    public static void main(String[] args) {

        // Load the PDF document
        PdfDocument pdf = new PdfDocument();
        pdf.loadFromFile("sample.pdf");

        // Parse document-level metadata
        String title = pdf.getDocumentInformation().getTitle();
        String author = pdf.getDocumentInformation().getAuthor();
        String subject = pdf.getDocumentInformation().getSubject();
        String keywords = pdf.getDocumentInformation().getKeywords();
        String creator = pdf.getDocumentInformation().getCreator();
        String producer = pdf.getDocumentInformation().getProducer();

        String creationDate = pdf.getDocumentInformation()
                .getCreationDate().toString();
        String modificationDate = pdf.getDocumentInformation()
                .getModificationDate().toString();

        // Parsed metadata can be stored, indexed, or used for routing logic
        System.out.println(
                "Title: " + title +
                "\nAuthor: " + author +
                "\nSubject: " + subject +
                "\nKeywords: " + keywords +
                "\nCreator: " + creator +
                "\nProducer: " + producer +
                "\nCreation Date: " + creationDate +
                "\nModification Date: " + modificationDate
        );
    }
}
Console Output Preview
Explanation of Key Details in PDF Metadata Parsing
-
Document information dictionary: Metadata is parsed from a dedicated structure within the PDF file and is independent of page-level rendering content.
-
Field availability: Not all PDF files contain complete metadata. Parsed values may be empty or null and should be validated before use.
-
Low parsing overhead: Metadata parsing is fast and does not require page iteration, making it suitable as a preliminary parsing step.
For accessing custom PDF properties, see the PdfDocumentInformation API reference.
Common Use Cases for Metadata Parsing
- Document classification and tagging
- Search indexing and filtering
- Workflow routing and access control
- Version tracking and audit logging
Because metadata is parsed independently from visual layout and content streams, it is generally more stable and predictable than text or table parsing in complex PDF documents.
Implementation Considerations for PDF Parsing in Java
While individual parsing operations can be implemented independently, real-world Java applications often combine multiple PDF parsing capabilities within the same processing pipeline.
Combining Multiple Parsing Operations
Common implementation patterns include:
- Parsing text for indexing while parsing tables for structured storage
- Using parsed metadata to route documents to different processing workflows
- Executing parsing operations asynchronously or in scheduled batch jobs
Treating text, table, image, and metadata parsing as independent but composable operations makes PDF processing systems easier to extend, test, and maintain.
Practical Limitations and Constraints
Even with a capable Java PDF parser, certain limitations remain unavoidable:
- Scanned PDF files require OCR before any parsing can occur
- Highly complex or inconsistent layouts can reduce parsing accuracy
- Custom fonts or encodings may affect text reconstruction
Understanding these constraints helps align parsing strategies with realistic technical expectations and reduces error handling complexity in production systems.
Conclusion
PDF parsing in Java is most effective when treated as a collection of independent, purpose-driven extraction operations rather than a single linear workflow. By focusing on text extraction, table parsing, and metadata access as separate concerns, Java applications can reliably transform PDF documents into usable data.
With the help of a dedicated Java PDF parser such as Spire.PDF for Java, developers can build maintainable, production-ready PDF processing solutions that scale with real-world requirements.
To unlock the full potential of PDF parsing in Java using Spire.PDF for Java, you can request a free trial license.
Frequently Asked Questions for PDF Parsing in Java
Q1: How can I parse text from PDF pages in Java?
A1: You can use Spire.PDF for Java with the PdfTextExtractor class and PdfTextExtractOptions to extract page-level text efficiently. This approach allows flexible text parsing for indexing, analysis, or migration.
Q2: How do I extract tables from PDF files in Java?
A2: Use PdfTableExtractor to detect tabular regions and reconstruct rows and columns. Extracted tables can be further processed, exported, or stored as structured data.
Q3: Can I parse images from PDF pages in Java?
A3: Yes. With PdfImageHelper and PdfImageInfo, you can extract embedded images from each page and save them as files. You can also convert entire PDF pages directly to images if needed.
Q4: How do I read PDF metadata in Java?
A4: Access the PdfDocumentInformation object from your PDF document to retrieve standard fields like title, author, creation date, and keywords. This is fast and independent of page content.
Q5: Are there limitations to PDF parsing in Java?
A5: Complex layouts, scanned PDFs, and custom fonts can reduce parsing accuracy. Scanned documents require OCR before text or table extraction.
