
Knowledgebase (2344)
Children categories
Modify or Edit PDF Files in Java: Practical Code Examples Included
2025-10-15 09:35:00 Written by zaki zou
Working with PDF files is a common requirement in many Java applications—whether you’re generating invoices, modifying contracts, or adding annotations to reports. While the PDF format is reliable for sharing documents, editing it programmatically can be tricky without the right library.
In this tutorial, you’ll learn how to add, replace, remove, and secure content in a PDF file using Spire.PDF for Java , a comprehensive and developer-friendly PDF API. We’ll walk through examples of adding pages, text, images, tables, annotations, replacing content, deleting elements, and securing files with watermarks and passwords.
Table of Contents:
- Why Use Spire.PDF to Edit PDF in Java
- Setting Up Your Java Environment
- Adding Content to a PDF File
- Replacing Content in a PDF File
- Removing Content from a PDF File
- Securing Your PDF File
- Conclusion
- FAQs About Editing PDF in Java
Why Use Spire.PDF to Edit PDF in Java
Spire.PDF offers a comprehensive set of features that make it an excellent choice for developers looking to work with PDF files in Java. Here are some reasons why you should consider using Spire.PDF:
- Ease of Use : The API is straightforward and intuitive, allowing you to perform complex operations with minimal code.
- Rich Features : Spire.PDF supports a wide range of functionalities, including text and image manipulation, page management, and security features.
- High Performance : The library is optimized for performance, ensuring that even large PDF files can be processed quickly.
- No Dependencies : Spire.PDF is a standalone library, meaning you won’t have to include any additional dependencies in your project.
By leveraging Spire.PDF, you can easily handle PDF files without getting bogged down in the complexities of the format itself.
Setting Up Your Java Environment
Installation
To begin using Spire.PDF, you'll first need to add it to your project. You can download the library from its official website or include it via Maven:
For Maven users:
<repositories>
    <repository>
        <id>com.e-iceblue</id>
        <name>e-iceblue</name>
        <url>https://repo.e-iceblue.com/nexus/content/groups/public/</url>
    </repository>
</repositories>
<dependencies>
    <dependency>
        <groupId>e-iceblue</groupId>
        <artifactId>spire.pdf</artifactId>
        <version>11.9.6</version>
    </dependency>
</dependencies>
For manual setup:
Download Spire.PDF for Java from the official website and add the JAR file to your project’s classpath.
Initiate Document Loading
Once you have the library set up, you can start loading PDF documents. Here’s how to do it:
PdfDocument doc = new PdfDocument();
doc.loadFromFile("C:\\Users\\Administrator\\Desktop\\sample.pdf");
This snippet initializes a new PdfDocument object and loads a PDF file from the specified path. By calling loadFromFile , you prepare the document for further editing.
Adding Content to a PDF File in Java
Add a New Page
Adding a new page to an existing PDF document is quite simple. Here’s how you can do it:
// Add a new page
PdfPageBase new_page = doc.getPages().add(PdfPageSize.A4, new PdfMargins(54));
// Draw text or do other operations on the page
new_page.getCanvas().drawString("This is a Newly-Added Page.", new PdfTrueTypeFont(new Font("Times New Roman",Font.PLAIN,18)), PdfBrushes.getBlue(), 0, 0);
In this code, we create a new page with A4 size and specified margins using the add method. We then draw a string on the new page using a specified font and color. The drawString method places the text at the top-left corner of the page, allowing you to add content quickly.
Add Text to a PDF File
To insert text into a specific area of an existing page, use the following code:
// Get a specific page
PdfPageBase page = doc.getPages().get(0);
// Define a rectangle for placing the text
Rectangle2D.Float rect = new Rectangle2D.Float(54, 300, (float) page.getActualSize().getWidth() - 108, 100);
// Create a brush and a font
PdfSolidBrush brush = new PdfSolidBrush(new PdfRGBColor(Color.BLUE));
PdfTrueTypeFont font = new PdfTrueTypeFont(new Font("Times New Roman",Font.PLAIN,18));
// Draw text on the page at the specified area
page.getCanvas().drawString("This Line is Created By Spire.PDF for Java.",font, brush, rect);
This snippet retrieves the first page of the document and defines a rectangle where the text will be placed. The Rectangle2D.Float class allows you to specify the exact dimensions for positioning the text. We then draw the specified text with a blue brush and custom font using the drawString method, which ensures that the text is rendered in the defined area.
Add an Image to a PDF File
Inserting images into a PDF is straightforward as well:
// Get a specific page
PdfPageBase page = doc.getPages().get(0);
// Load an image
PdfImage image = PdfImage.fromFile("C:\\Users\\Administrator\\Desktop\\logo.png");
// Specify coordinates for adding image
float x = 54;
float y = 300;
// Draw image on the page at the specified coordinates
page.getCanvas().drawImage(image, x, y);
Here, we load an image from a specified file path and draw it on the first page at the defined coordinates (x, y). The drawImage method allows you to position the image precisely, making it easy to incorporate visuals into your document.
Add a Table to a PDF File
Adding tables is also supported in Spire.PDF:
// Get a specific page
PdfPageBase page = doc.getPages().get(0);
// Create a table
PdfTable table = new PdfTable();
// Define table data
String[][] data = {
        new String[]{"Name", "Age", "Country"},
        new String[]{"Alice", "25", "USA"},
        new String[]{"Bob", "30", "UK"},
        new String[]{"Charlie", "28", "Canada"}
};
// Assign data to the table
table.setDataSource(data);
// Set table style
PdfTableStyle style = new PdfTableStyle();
style.getDefaultStyle().setFont(new PdfTrueTypeFont(new Font("Arial", Font.PLAIN, 12)));
table.setStyle(style);
// Draw the table on the page
table.draw(page, new Point2D.Float(50, 80));
In this example, we create a table and define its data source using a 2D array. After assigning the data, we set a style for the table using PdfTableStyle , which allows you to customize the font and appearance of the table. Finally, we use the draw method to render the table on the first page at the specified coordinates.
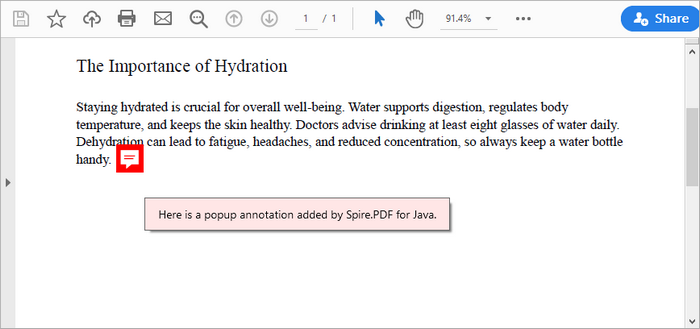
Add an Annotation or Comment
Annotations can enhance the interactivity of PDFs:
// Get a specific page
PdfPageBase page = doc.getPages().get(0);
// Create a free text annotation
PdfPopupAnnotation popupAnnotation = new PdfPopupAnnotation();
popupAnnotation.setLocation(new Point2D.Double(90, 260));
// Set the content of the annotation
popupAnnotation.setText("Here is a popup annotation added by Spire.PDF for Java.");
// Set the icon and color of the annotation
popupAnnotation.setIcon(PdfPopupIcon.Comment);
popupAnnotation.setColor(new PdfRGBColor(Color.RED));
// Add the annotation to the collection of the annotations
page.getAnnotations().add(popupAnnotation);
This snippet creates a popup annotation at a specified location on the page. By calling setLocation , you definewhere the annotation appears. The setText method allows you to specify the content displayed in the annotation, while you can set the icon and color to customize its appearance. Finally, the annotation is added to the page's collection of annotations.
You may also like: Add Page Numbers to a PDF Document in Java
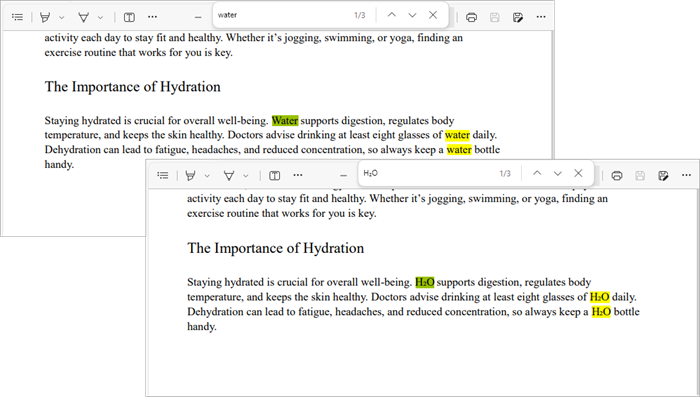
Replacing Content in a PDF File in Java
Replace Text in a PDF File
To replace existing text within a PDF, you can use the following code:
// Create a PdfTextReplaceOptions object
PdfTextReplaceOptions textReplaceOptions = new PdfTextReplaceOptions();
// Specify the options for text replacement
textReplaceOptions.setReplaceType(EnumSet.of(ReplaceActionType.IgnoreCase));
// Iterate through the pages
for (int i = 0; i < doc.getPages().getCount(); i++) {

// Get a specific page
PdfPageBase page = doc.getPages().get(i);
// Create a PdfTextReplacer object based on the page
PdfTextReplacer textReplacer = new PdfTextReplacer(page);
// Set the replace options
textReplacer.setOptions(textReplaceOptions);
// Replace all occurrences of target text with new text
textReplacer.replaceAllText("Water", "H₂O");
}
In this example, we create a PdfTextReplaceOptions object to specify replacement options, such as ignoring case sensitivity. We then iterate through all pages of the document, creating a PdfTextReplacer for each page. The replaceAllText method is called on the text replacer to replace all occurrences of "Water" with "H₂O".
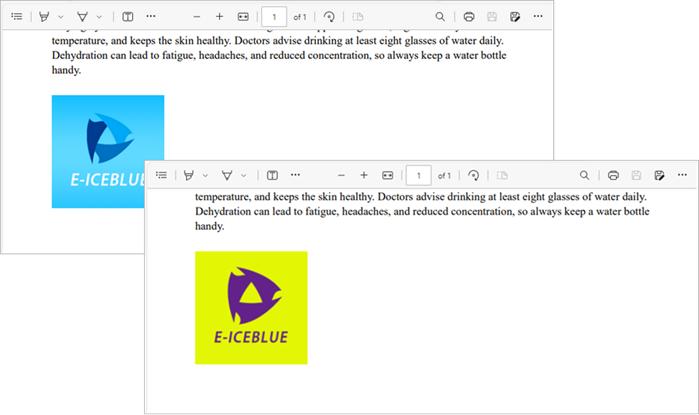
Replace an Image in a PDF File
Replacing an image follows a similar pattern:
// Get a specific page
PdfPageBase page = doc.getPages().get(0);
// Load an image
PdfImage image = PdfImage.fromFile("C:\\Users\\Administrator\\Desktop\\logo.png");
// Get the image information from the page
PdfImageHelper imageHelper = new PdfImageHelper();
PdfImageInfo[] imageInfo = imageHelper.getImagesInfo(page);
// Replace Image
imageHelper.replaceImage(imageInfo[0], image);
This code retrieves the image information from the specified page using the PdfImageHelper class. After loading a new image from a file, we call replaceImage to replace the first image found on the page with the new one.
You may also like: Replace Fonts in PDF Documents in Java
Removing Content from a PDF File in Java
Remove a Page from a PDF File
To remove an entire page from a PDF, use the following code:
// Remove a specific page
doc.getPages().removeAt(0);
This straightforward command removes the first page from the document. By calling removeAt , you specify the index of the page to be removed, simplifying page management in your PDF.
Delete an Image from a PDF File
To remove an image from a page:
// Get a specific page
PdfPageBase page = pdf.getPages().get(0);
// Get the image information from the page
PdfImageHelper imageHelper = new PdfImageHelper();
PdfImageInfo[] imageInfos = imageHelper.getImagesInfo(page);
// Delete the specified image on the page
imageHelper.deleteImage(imageInfos[0]);
This code retrieves all images from the first page and deletes the first image using the deleteImage method from PdfImageHelper .
Delete an Annotation
Removing an annotation is simple as well:
// Get a specific page
PdfPageBase page = pdf.getPages().get(0);
// Remove the specified annotation
page.getAnnotationsWidget().removeAt(0);
This snippet removes the first annotation from the specified page. The removeAt method is used to specify which annotation to remove, ensuring that the document can be kept clean and free of unnecessary comments.
Delete an Attachment
To delete an attachment from a PDF:
// Get the attachments collection
PdfAttachmentCollection attachments = doc.getAttachments();
// Remove a specific attachment
attachments.removeAt(0);
This code retrieves the collection of attachments from the document and removes the first one using the removeAt method.
Securing Your PDF File in Java
Apply a Watermark to a PDF File
Watermarks can be added for branding or copyright purposes:
// Create a font and a brush
PdfTrueTypeFont font = new PdfTrueTypeFont(new Font("Arial Black", Font.PLAIN, 50), true);
PdfBrush brush = PdfBrushes.getBlue();
// Specify the watermark text
String watermarkText = "DO NOT COPY";
// Specify the opacity level
float opacity = 0.6f;
// Iterate through the pages
for (int i = 0; i < doc.getPages().getCount(); i++) {
    PdfPageBase page = doc.getPages().get(i);
    // Set the transparency level for the watermark
    page.getCanvas().setTransparency(opacity);
    // Measure the size of the watermark text
    Dimension2D textSize = font.measureString(watermarkText);
    // Get the width and height of the page
    double pageWidth = page.getActualSize().getWidth();
    double pageHeight = page.getActualSize().getHeight();
    // Calculate the position to center the watermark on the page
    double x = (pageWidth - textSize.getWidth()) / 2;
    double y = (pageHeight - textSize.getHeight()) / 2;
    // Draw the watermark text on the page at the calculated position
    page.getCanvas().drawString(watermarkText, font, brush, x, y);
}
This code configures the appearance of a text watermark and places it at the center of each page in a PDF file using the drawString method, effectively discouraging unauthorized copying.
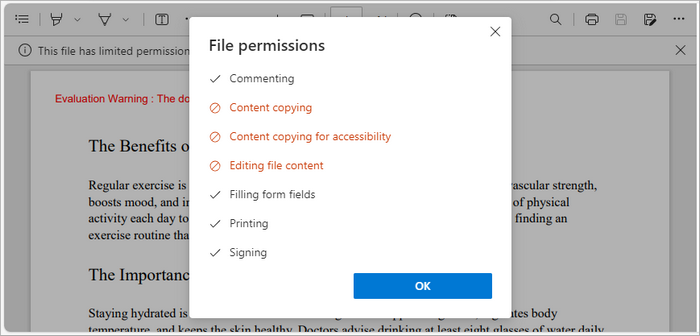
Password Protect a PDF File
To secure your PDF with a password:
// Specify the user and owner passwords
String userPassword = "open_psd";
String ownerPassword = "permission_psd";
// Create a PdfSecurityPolicy object with the two passwords
PdfSecurityPolicy securityPolicy = new PdfPasswordSecurityPolicy(userPassword, ownerPassword);
// Set encryption algorithm
securityPolicy.setEncryptionAlgorithm(PdfEncryptionAlgorithm.AES_256);
// Set document permissions (If you do not set, the default is Forbid All)
securityPolicy.setDocumentPrivilege(PdfDocumentPrivilege.getAllowAll());
// Restrict editing
securityPolicy.getDocumentPrivilege().setAllowModifyContents(false);
securityPolicy.getDocumentPrivilege().setAllowCopyContentAccessibility(false);
securityPolicy.getDocumentPrivilege().setAllowContentCopying(false);
// Encrypt the PDF file
doc.encrypt(securityPolicy);
This code applies password protection and encryption to a PDF document by defining a user password (for opening) and an owner password (for permissions like editing and printing). The PdfSecurityPolicy object manages security settings, including the AES-256 encryption algorithm and permission levels. Finally, doc.encrypt(securityPolicy) encrypts the document, ensuring only authorized users can access or modify it.
You may also like: How to Add Digital Signatures to PDF in Java
Conclusion
Editing PDF files in Java is often seen as challenging, but with Spire.PDF for Java, it becomes a straightforward and efficient process. This library provides developers with the flexibility to create, modify, replace, and secure PDF content using clean, easy-to-understand APIs. From adding pages and images to encrypting sensitive documents, Spire.PDF simplifies every step of the workflow while maintaining professional output quality.
Beyond basic editing, Spire.PDF’s capabilities extend to automation and enterprise-level solutions. Whether you’re integrating PDF manipulation into a document management system, or generating customized reports, the library offers a stable and scalable foundation for long-term projects. With its comprehensive feature set and strong performance, Spire.PDF for Java is a reliable choice for developers seeking precision, efficiency, and control over PDF documents.
FAQs About Editing PDF in Java
Q1. What is the best library for editing PDFs in Java?
Spire.PDF for Java is a popular choice among developers worldwide, which provides comprehensive range of features for effective PDF manipulation.
Q2. Can I edit existing text in a PDF using Java?
With Spire.PDF for Java, you can replace or modify existing text using classes like PdfTextReplacer along with customizable options for case sensitivity and matching behavior.
Q3. How to insert or replace images in a PDF in Java?
With Spire.PDF for Java, you can use drawImage() to insert images and PdfImageHelper.replaceImage() to replace existing ones on a specific page.
Q4. Can I annotate a PDF file in Java?
Yes, annotations such as highlights, comments, and stamps can be added using the appropriate annotation classes provided by Spire.PDF for Java.
Q5. Can I extract text and images from an existing PDF file?
Yes, you can. Spire.PDF for Java provides methods to extract text, images, and other elements from PDFs easily. For detailed instructions and code examples, refer to: How to Read PDFs in Java: Extract Text, Images, and More
Get a Free License
To fully experience the capabilities of Spire.PDF for Java without any evaluation limitations, you can request a free 30-day trial license.
Python TXT to CSV Tutorial | Convert TXT Files to CSV in Python
2025-10-15 07:42:33 Written by zaki zou
When working with data in Python, converting TXT files to CSV is a common and essential task for data analysis, reporting, or sharing data between applications. TXT files often store unstructured plain text, which can be difficult to process, while CSV files organize data into rows and columns, making it easier to work with and prepare for analysis. This tutorial explains how to convert TXT to CSV in Python efficiently, covering single-file conversion, batch conversion, and tips for handling different delimiters.
Table of Contents
- What is a CSV File
- Python TXT to CSV Library - Installation
- Convert a TXT File to CSV in Python (Step-by-Step)
- Automate Batch Conversion of Multiple TXT Files
- Advanced Tips for Python TXT to CSV Conversion
- Conclusion
- FAQs: Python Text to CSV
What is a CSV File?
A CSV (Comma-Separated Values) file is a simple text-based file format used to store tabular data. Each line in a CSV file represents a row, and values within the row are separated by commas (or another delimiter such as tabs or semicolons).
CSV is widely supported by spreadsheet applications, databases, and programming languages like Python. Its simple format makes it easy to import, export, and use across platforms such as Excel, Google Sheets, R, and SQL for data analysis and automation.
An Example CSV File:
Name, Age, City

John, 28, New York

Alice, 34, Los Angeles

Bob, 25, Chicago
Python TXT to CSV Library - Installation
To perform TXT to CSV conversion in Python, we will use Spire.XLS for Python, a powerful library for creating and manipulating Excel and CSV files, without requiring Microsoft Excel to be installed.

You can install it directly from PyPI with the following command:
pip install Spire.XLS
If you need instructions for the installation, visit the guide on How to Install Spire.XLS for Python.
Convert a TXT File to CSV in Python (Step-by-Step)
Converting a text file to CSV in Python is straightforward. You can complete the task in just a few steps. Below is a basic outline of the process:
- Prepare and read the text file: Load your TXT file and read its content line by line.
- Split the text data: Separate each line into fields using a specific delimiter such as a space, tab, or comma.
- Write data to CSV: Use Spire.XLS to write the processed data into a new CSV file.
- Verify the output: Check the CSV in Excel, Google Sheets, or a text editor.
The following code demonstrates how to export a TXT file to CSV using Python:
from spire.xls import *

# Read the txt file
with open("data.txt", "r", encoding="utf-8") as file:
    lines = file.readlines()

# Process each line by splitting based on spaces (you can change the delimiter if needed)
processed_data = [line.strip().split() for line in lines]

# Create an Excel workbook
workbook = Workbook()
# Get the first worksheet
sheet = workbook.Worksheets[0]

# Write data from the processed list to the worksheet
for row_num, row_data in enumerate(processed_data):
    for col_num, cell_data in enumerate(row_data):
        # Write data into cells
        sheet.Range[row_num + 1, col_num + 1].Value = cell_data

# Save the sheet as CSV file (UTF-8 encoded)
sheet.SaveToFile("TxtToCsv.csv", ",", Encoding.get_UTF8())
# Dispose the workbook to release resources
workbook.Dispose()
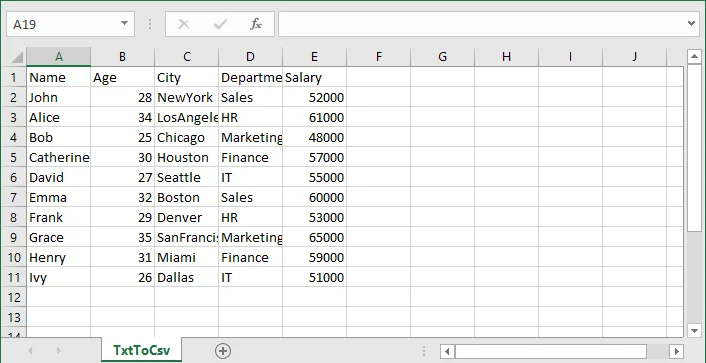
TXT to CSV Output:
If you are also interested in converting a TXT file to Excel, see the guide on converting TXT to Excel in Python.
Automate Batch Conversion of Multiple TXT Files
If you have multiple text files that you want to convert to CSV automatically, you can loop through all .txt files in a folder and convert them one by one.
The following code demonstrates how to batch convert multiple TXT files to CSV in Python:
import os
from spire.xls import *

# Folder containing TXT files
input_folder = "txt_files"
output_folder = "csv_files"

# Create output folder if it doesn't exist
os.makedirs(output_folder, exist_ok=True)

# Function to process a single TXT file
def convert_txt_to_csv(file_path, output_path):
    # Read the TXT file
    with open(file_path, "r", encoding="utf-8") as f:
        lines = f.readlines()

    # Process each line (split by space, modify if your delimiter is different)
    processed_data = [line.strip().split() for line in lines if line.strip()]

    # Create workbook and access the first worksheet
    workbook = Workbook()
    sheet = workbook.Worksheets[0]

    # Write processed data into the sheet
    for row_num, row_data in enumerate(processed_data):
        for col_num, cell_data in enumerate(row_data):
            sheet.Range[row_num + 1, col_num + 1].Value = cell_data

    # Save the sheet as CSV with UTF-8 encoding
    sheet.SaveToFile(output_path, ",", Encoding.get_UTF8())
    workbook.Dispose()
    print(f"Converted '{file_path}' -> '{output_path}'")

# Loop through all TXT files in the folder and convert each to a CSV file with the same file name
for filename in os.listdir(input_folder):
    if filename.lower().endswith(".txt"):
        input_path = os.path.join(input_folder, filename)
        output_name = os.path.splitext(filename)[0] + ".csv"
        output_path = os.path.join(output_folder, output_name)

        convert_txt_to_csv(input_path, output_path)
Advanced Tips for Python TXT to CSV Conversion
Converting text files to CSV can involve variations in text file layout and potential errors, so these tips will help you handle different scenarios more effectively.
1. Handle Different Delimiters
Not all text files use spaces to separate values. If your TXT file uses tabs, commas, or other characters, you can adjust the split() function to match the delimiter.
- For tab-separated files (.tsv):
processed_data = [line.strip().split('\t') for line in lines]
- For comma-separated files:
processed_data = [line.strip().split(',') for line in lines]
- For custom delimiters (e.g., |):
processed_data = [line.strip().split('|') for line in lines]
This ensures that your data is correctly split into columns before writing to CSV.
2. Add Error Handling
When reading or writing files, it's a good practice to use try-except blocks to catch potential errors. This makes your script more robust and prevents unexpected crashes.
try:
    # your code here
except Exception as e:
print("Error:", e)
Tip: Use descriptive error messages to help understand the problem.
- Skip Empty Lines
Sometimes, text files may have empty lines. You can filter out the blank lines to avoid creating empty rows in CSV:
processed_data = [line.strip().split() for line in lines if line.strip()]
Conclusion
In this article, you learned how to convert a TXT file to CSV format in Python using Spire.XLS for Python. This conversion is an essential step in data preparation, helping organize raw text into a structured format suitable for analysis, reporting, and sharing. With Spire.XLS for Python, you can automate the text to CSV conversion, handle different delimiters, and efficiently manage multiple text files.
If you have any questions or need technical assistance about Python TXT to CSV conversion, visit our Support Forum for help.
FAQs: Python Text to CSV
Q1: Can I convert TXT files to CSV without Microsoft Excel installed?
A1: Yes. Spire.XLS for Python works independently of Microsoft Excel, allowing you to create and export CSV files directly.
Q2: How to batch convert multiple TXT files to CSV in Python?
A2: Use a loop to read all TXT files in a folder and apply the conversion function for each. The tutorial includes a ready-to-use Python example for batch conversion.
Q3: How do I handle empty lines or inconsistent rows in TXT files when converting to CSV?
A3: Filter out empty lines during processing and implement checks for consistent column counts to avoid errors or blank rows in the output CSV.
Q4: How do I convert TXT files with tabs or custom delimiters to CSV in Python?
A4: You can adjust the split() function in your Python script to match the delimiter in your TXT file-tabs (\t), commas, or custom characters-before writing to CSV.
PDF (Portable Document Format) is widely used for sharing, distributing, and preserving documents because it maintains a consistent layout and formatting across platforms. Developers often need to edit PDF files in C#, whether it's to replace text, insert images, add watermarks, or extract pages.
In this step-by-step tutorial, you will learn how to programmatically edit PDFs in C# with the Spire.PDF for .NET library.
Table of Contents
- Why Edit PDFs Programmatically in C#
- C# Library to Edit PDFs
- Step-by-Step Guide: Editing PDF in C#
- Tips for Efficient PDF Editing in C#
- Conclusion
- FAQs
Why Edit PDFs Programmatically in C
While tools like Adobe Acrobat provide manual PDF editing, programmatically editing PDFs has significant advantages:
- Automation: Batch process hundreds of documents without human intervention.
- Integration: Edit PDFs as part of a workflow, such as generating reports, invoices, or certificates dynamically.
- Consistency: Apply uniform styling, stamps, or watermarks across multiple PDFs.
- Flexibility: Extract or replace content programmatically to integrate with databases or external data sources.
C# Library to Edit PDFs
Spire.PDF for .NET is a robust .NET PDF library that enables developers to generate, read, edit, and convert PDF files in .NET applications. It's compatible with both .NET Framework and .NET Core applications.
This library provides a rich set of features for developers working with PDFs:
- PDF Creation: Generate new PDFs from scratch or from existing documents.
- Text Editing: Add, replace, or delete text on any page.
- Image Editing: Insert images, resize, or remove them.
- Page Operations: Insert, remove, extract, or reorder pages.
- Annotations: Add stamps, comments, and shapes for marking content.
- Watermarking: Add text or image watermarks for branding or security.
- Form Handling: Create and fill PDF forms programmatically.
- Digital Signatures: Add and validate signatures for authenticity.
- Encryption: Apply password protection and user permissions.
Step-by-Step Guide: Editing PDF in C
Modifying a PDF file in C# involves several steps: setting up a C# project, installing the library, loading the PDF file, making necessary changes, and saving the document. Let's break down each step in detail.
Step 1: Set Up Your C# Project
Before you start editing PDFs, you need to create a new C# project by following the steps below:
- Open Visual Studio.
- Create a new project. You can choose a Console App or a Windows Forms App depending on your use case.
- Name your project (e.g., PdfEditorDemo) and click Create.
Step 2: Install Spire.PDF
Next, you need to install the Spire.PDF library, which provides all the functionality required to read, edit, and save PDF files programmatically.
You can simply install it via the NuGet Package Manager Console with the following command:
Install-Package Spire.PDF
Alternatively, you can use the NuGet Package Manager GUI to search for Spire.PDF and click Install.
Step 3: Load an Existing PDF
Before you can modify an existing PDF file, you need to load it into a PdfDocument object. This gives you access to its pages, text, images, and structure.
using Spire.Pdf;
PdfDocument pdf = new PdfDocument();
pdf.LoadFromFile("example.pdf");
Step 4: Edit PDF Content
Text editing, image insertion, page management, and watermarking are common operations when working with PDFs. This step covers all these editing tasks.
4.1 Edit Text
Text editing is one of the most common operations when working with PDFs. Depending on your needs, you might want to replace existing text or add new text to specific pages.
Replace existing text:
Replacing text in PDF allows you to update content across a single page or an entire PDF while maintaining formatting consistency. Using the PdfTextReplacer class, you can quickly find and replace text programmatically:
// Get the first page
PdfPageBase page = pdf.Pages[0];
// Create a PdfTextReplacer
PdfTextReplacer textReplacer = new PdfTextReplacer(page);

// Replace all occurrences of target text with new text
textReplacer.ReplaceAllText("Old text", "New text");
Add new text:
In addition to replacing existing content, you may need to insert new text into a PDF. With just one line of code, you can add text to any location on a PDF page:
page.Canvas.DrawString(
    "Hello, World!",
    new PdfTrueTypeFont(new Font("Arial Unicode MS", 15f, FontStyle.Bold), true),
    new PdfSolidBrush(Color.Black),
    90, 30
);
4.2 Insert and Update Images
PDFs often contain visual elements such as logos, charts, or illustrations. You can insert new images or update outdated graphics to enhance the document's visual appeal.
Insert an Image:
// Load an image
PdfImage image = PdfImage.FromFile("logo.png");
// Draw the image at a specific location with defined size
page.Canvas.DrawImage(image, 100, 150, 200, 100);
Update an image:
// Load the new image
PdfImage newImage = PdfImage.FromFile("image1.jpg");
// Create a PdfImageHelper instance
PdfImageHelper imageHelper = new PdfImageHelper();
// Get the image information from the page
PdfImageInfo[] imageInfo = imageHelper.GetImagesInfo(page);
// Replace the first image on the page with the new image
imageHelper.ReplaceImage(imageInfo[0], newImage);
4.3 Add, Remove, or Extract Pages
Managing page structure is another important aspect of PDF editing, such as adding new pages, removing unwanted pages, and extracting particular pages to a new document.
Add a new page:
// Add a new page
PdfPageBase newPage = pdf.Pages.Add();
Remove a page:
// Remove the last page
pdf.Pages.RemoveAt(pdf.Pages.Count - 1);
Extract a page to a new document:
// Create a new PDF document
PdfDocument newPdf = new PdfDocument();
// Extract the third page to a new PDF document
newPdf.InsertPage(pdf, pdf.Pages[2]);
// Save the new PDF document
newPdf.SaveToFile("extracted_page.pdf");
4.4 Add Watermarks
Adding Watermarks to PDFs can help indicate confidentiality, add branding, or protect intellectual property. You can easily add them programmatically to any page:
// Iterate through each page in the PDF document
foreach (PdfPageBase page in pdf.Pages)
{
    // Create a tiling brush for the watermark
    // The brush size is set to half the page width and one-third of the page height
    PdfTilingBrush brush = new PdfTilingBrush(
        new SizeF(page.Canvas.ClientSize.Width / 2, page.Canvas.ClientSize.Height / 3));

    // Set the brush transparency to 0.3 for a semi-transparent watermark
    brush.Graphics.SetTransparency(0.3f);

    // Save the current graphics state for later restoration
    brush.Graphics.Save();

    // Move the origin of the brush to its center to prepare for rotation
    brush.Graphics.TranslateTransform(brush.Size.Width / 2, brush.Size.Height / 2);

    // Rotate the coordinate system by -45 degrees to angle the watermark
    brush.Graphics.RotateTransform(-45);

    // Draw the watermark text on the brush
    // Using Helvetica font, size 24, violet color, centered alignment
    brush.Graphics.DrawString(
        "DO NOT COPY",
        new PdfFont(PdfFontFamily.Helvetica, 24),
        PdfBrushes.Violet,
        0, 0,
        new PdfStringFormat(PdfTextAlignment.Center));

    // Restore the previously saved graphics state, undoing rotation and translation
    brush.Graphics.Restore();

    // Reset the transparency to fully opaque
    brush.Graphics.SetTransparency(1);

    // Draw the brush over the entire page area to apply the watermark
    page.Canvas.DrawRectangle(brush, new RectangleF(new PointF(0, 0), page.Canvas.ClientSize));
}
Step 5: Save the Modified PDF
After making all the necessary edits, the final step is to save your changes.
// Save the Modified PDF and release resources
pdf.SaveToFile("modified.pdf");
pdf.Close();
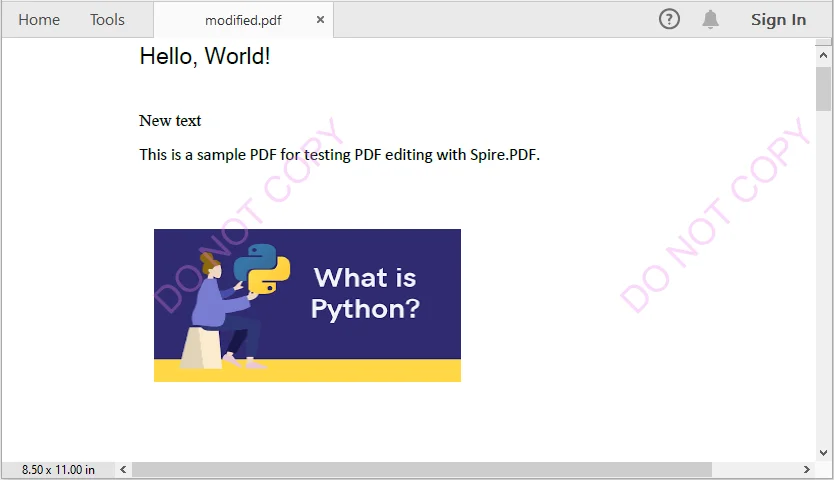
Output PDF
The output modified.pdf looks like this:
Tips for Efficient PDF Editing in C
When editing PDFs programmatically, it's important to keep a few best practices in mind to ensure the output remains accurate, readable, and efficient.
- Batch Processing: For repetitive tasks, process multiple PDF files in a loop rather than handling them individually. This approach improves efficiency and reduces manual effort.
- Text Placement: Use coordinates carefully when inserting new text. Proper positioning prevents content from overlapping with existing elements and maintains a clean layout.
- Fonts and Encoding: Choose fonts that support the characters you need. This is especially critical for languages such as Chinese, Arabic, or other scripts that require extended font support.
- Memory Management: Always release resources by disposing of PdfDocument objects after use. Proper memory management helps avoid performance issues in larger applications.
Conclusion
This tutorial demonstrates how to edit PDF in C# using Spire.PDF. From replacing text, inserting images, and managing pages, to adding watermarks, each step includes practical code examples. Developers can now automate PDF editing, enhance document presentation, and handle PDFs efficiently within professional applications.
FAQs
Q1: How can I programmatically edit text in a PDF using C#?
A1: You can use a C# PDF library like Spire.PDF to replace existing text or add new text to a PDF. Classes such as PdfTextReplacer and page.Canvas.DrawString() provide precise control over text editing while preserving formatting.
Q2: How do I replace or add text in a PDF using C#?
A2: With C#, libraries like Spire.PDF let you search and replace existing text using PdfTextReplacer or add new text anywhere on a page using page.Canvas.DrawString().
Q3: Can I insert or update images in a PDF programmatically?
A3: Yes. You can load images into your project and use classes like PdfImage and PdfImageHelper to draw or replace images on a PDF page.
Q4: Is it possible to add watermarks to a PDF using code?
A4: Absolutely. You can add text or image watermarks programmatically, control transparency, rotation, and position, and apply them to one or all pages of a PDF.
Q5: How can I extract specific pages from a PDF?
A5: You can create a new PDF document and insert selected pages from the original PDF, enabling you to extract single pages or ranges for separate use.
