
Knowledgebase (2344)
Children categories
Python: Create Various Types of Lists in a Word Document
2023-10-27 00:57:31 Written by AdministratorLists are a powerful organizational tool that can be used to present information in a structured and easy-to-follow manner. Whether you want to create numbered lists, bulleted lists, or even custom lists with specific formatting, Word provides flexible options to suit your needs. By utilizing different list styles, you can improve the readability and visual appeal of your documents, making it simpler for readers to grasp key points and navigate through the content. In this article, you will learn how to programmatically create various types of lists in a Word document in Python using Spire.Doc for Python.
- Create a Numbered List in Word in Python
- Create a Bulleted List in Word in Python
- Create a Multi-Level Numbered List in Word in Python
- Create a Multi-Level Mixed-Type List in Word in Python
Install Spire.Doc for Python
This scenario requires Spire.Doc for Python and plum-dispatch v1.7.4. They can be easily installed in your Windows through the following pip command.
pip install Spire.Doc
If you are unsure how to install, please refer to this tutorial: How to Install Spire.Doc for Python on Windows
Create a Numbered List in Word in Python
Spire.Doc for Python provides the ListStyle class, which enables you to establish either a numbered list style or a bulleted style. Subsequently, you can utilize the Paragraph.ListFormat.ApplyStyle() method to apply the defined list style to a paragraph. The steps to create a numbered list are as follows.
- Create a Document object.
- Add a section using Document.AddSection() method.
- Create an instance of ListStyle class, specifying the list type to Numbered.
- Get a specific level of the list through ListStyle.Levels[index] property, and set the numbering type through ListLevel.PatternType property.
- Add the list style to the document using Document.ListStyles.Add() method.
- Add several paragraphs to the document using Section.AddParagraph() method.
- Apply the list style to a specific paragraph using Paragraph.ListFormat.ApplyStyle() method.
- Specify the list level through Paragraph.ListFormat.ListLevelNumber property.
- Save the document to a Word file using Document.SaveToFile() method.
- Python
from spire.doc import *
from spire.doc.common import *
# Create a Document object
doc = Document()
# Add a section
section = doc.AddSection()
# Create a numbered list style
listStyle = doc.Styles.Add(ListType.Numbered,"numberedList")
Levels = listStyle.ListRef.Levels
Levels[0].PatternType = ListPatternType.Arabic
Levels[0].TextPosition = 20
# Add a paragraph
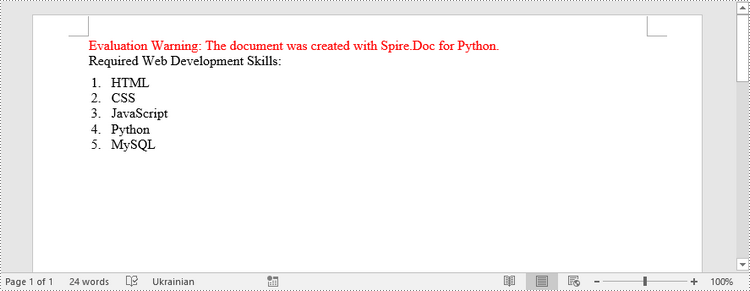
paragraph = section.AddParagraph()
paragraph.AppendText("Required Web Development Skills:")
paragraph.Format.AfterSpacing = 5.0
# Add a paragraph and apply the numbered list style to it
paragraph = section.AddParagraph()
paragraph.AppendText("HTML")
paragraph.ListFormat.ApplyStyle("numberedList")
paragraph.ListFormat.ListLevelNumber = 0
# Add another four paragraphs and apply the numbered list style to them
paragraph = section.AddParagraph()
paragraph.AppendText("CSS")
paragraph.ListFormat.ApplyStyle("numberedList")
paragraph.ListFormat.ListLevelNumber = 0
paragraph = section.AddParagraph()
paragraph.AppendText("JavaScript")
paragraph.ListFormat.ApplyStyle("numberedList")
paragraph.ListFormat.ListLevelNumber = 0
paragraph = section.AddParagraph()
paragraph.AppendText("Python")
paragraph.ListFormat.ApplyStyle("numberedList")
paragraph.ListFormat.ListLevelNumber = 0
paragraph = section.AddParagraph()
paragraph.AppendText("MySQL")
paragraph.ListFormat.ApplyStyle("numberedList")
paragraph.ListFormat.ListLevelNumber = 0
# Save the document to file
doc.SaveToFile("output/NumberedList.docx", FileFormat.Docx)
Create a Bulleted List in Word in Python
Creating a bulleted list follows a similar process to creating a numbered list, with the main difference being that you need to specify the list type as "Bulleted" and assign a bullet symbol to it. The following are the detailed steps.
- Create a Document object.
- Add a section using Document.AddSection() method.
- Create an instance of ListStyle class, specifying the list type to Bulleted.
- Get a specific level of the list through ListStyle.Levels[index] property, and set the bullet symbol through ListLevel.BulletCharacter property.
- Add the list style to the document using Document.ListStyles.Add() method.
- Add several paragraphs to the document using Section.AddParagraph() method.
- Apply the list style to a specific paragraph using Paragraph.ListFormat.ApplyStyle() method.
- Specify the list level through Paragraph.ListFormat.ListLevelNumber property.
- Save the document to a Word file using Document.SaveToFile() method.
- Python
from spire.doc import *
from spire.doc.common import *
# Create a Document object
doc = Document()
# Add a section
section = doc.AddSection()
# Create a bulleted list style
listStyle = doc.Styles.Add(ListType.Bulleted,"bulletedList")
Levels = listStyle.ListRef.Levels
Levels[0].BulletCharacter = "\u00B7"
Levels[0].CharacterFormat.FontName = "Symbol"
Levels[0].TextPosition = 20
# Add a paragraph
paragraph = section.AddParagraph()
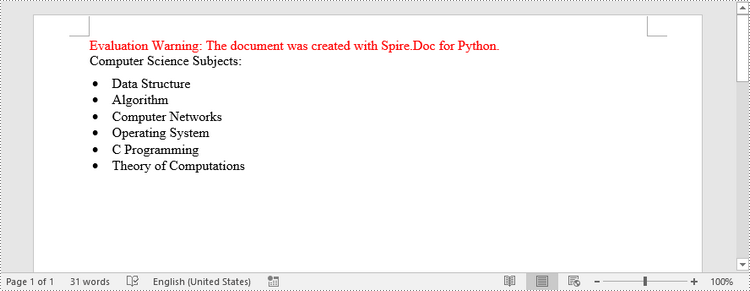
paragraph.AppendText("Computer Science Subjects:")
paragraph.Format.AfterSpacing = 5.0
# Add a paragraph and apply the bulleted list style to it
paragraph = section.AddParagraph()
paragraph.AppendText("Data Structure")
paragraph.ListFormat.ApplyStyle("bulletedList")
paragraph.ListFormat.ListLevelNumber = 0
# Add another five paragraphs and apply the bulleted list style to them
paragraph = section.AddParagraph()
paragraph.AppendText("Algorithm")
paragraph.ListFormat.ApplyStyle("bulletedList")
paragraph.ListFormat.ListLevelNumber = 0
paragraph = section.AddParagraph()
paragraph.AppendText("Computer Networks")
paragraph.ListFormat.ApplyStyle("bulletedList")
paragraph.ListFormat.ListLevelNumber = 0
paragraph = section.AddParagraph()
paragraph.AppendText("Operating System")
paragraph.ListFormat.ApplyStyle("bulletedList")
paragraph.ListFormat.ListLevelNumber = 0
paragraph = section.AddParagraph()
paragraph.AppendText("C Programming")
paragraph.ListFormat.ApplyStyle("bulletedList")
paragraph.ListFormat.ListLevelNumber = 0
paragraph = section.AddParagraph()
paragraph.AppendText("Theory of Computations")
paragraph.ListFormat.ApplyStyle("bulletedList")
paragraph.ListFormat.ListLevelNumber = 0
# Save the document to file
doc.SaveToFile("output/BulletedList.docx", FileFormat.Docx);
Create a Multi-Level Numbered List in Word in Python
A multi-level list consists of at least two different levels. A certain level of a nested list can be accessed by the ListStyle.Levels[index] property, through which you can set the numbering type and prefix. The following are the steps to create a multi-level numbered list in Word.
- Create a Document object.
- Add a section using Document.AddSection() method.
- Create an instance of ListStyle class, specifying the list type to Numbered.
- Get a specific level of the list through ListStyle.Levels[index] property, and set the numbering type and prefix.
- Add the list style to the document using Document.ListStyles.Add() method.
- Add several paragraphs to the document using Section.AddParagraph() method.
- Apply the list style to a specific paragraph using Paragraph.ListFormat.ApplyStyle() method.
- Specify the list level through Paragraph.ListFormat.ListLevelNumber property.
- Save the document to a Word file using Document.SaveToFile() method.
- Python
from spire.doc import *
from spire.doc.common import *
# Create a Document object
doc = Document()
# Add a section
section = doc.AddSection()
# Create a numbered list style, specifying number prefix and pattern type of each level
listStyle = doc.Styles.Add(ListType.Numbered,"levelstyle")
Levels = listStyle.ListRef.Levels
Levels[0].PatternType = ListPatternType.Arabic
Levels[0].TextPosition = 20.0
Levels[1].NumberPrefix = "%1."
Levels[1].PatternType = ListPatternType.Arabic
Levels[2].NumberPrefix = "%1.%2."
Levels[2].PatternType = ListPatternType.Arabic
# Add a paragraph
paragraph = section.AddParagraph()
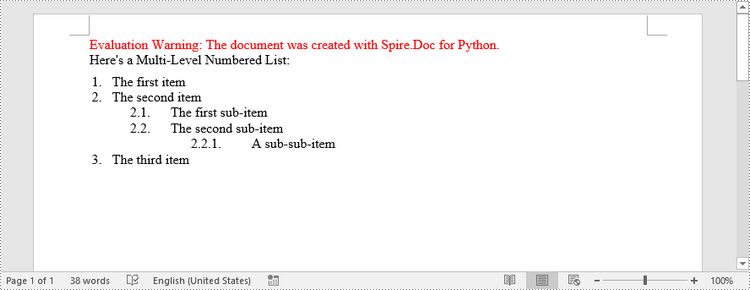
paragraph.AppendText("Here's a Multi-Level Numbered List:")
paragraph.Format.AfterSpacing = 5.0
# Add a paragraph and apply the numbered list style to it
paragraph = section.AddParagraph()
paragraph.AppendText("The first item")
paragraph.ListFormat.ApplyStyle("levelstyle")
paragraph.ListFormat.ListLevelNumber = 0
# Add another five paragraphs and apply the numbered list stype to them
paragraph = section.AddParagraph()
paragraph.AppendText("The second item")
paragraph.ListFormat.ApplyStyle("levelstyle")
paragraph.ListFormat.ListLevelNumber = 0
paragraph = section.AddParagraph()
paragraph.AppendText("The first sub-item")
paragraph.ListFormat.ApplyStyle("levelstyle")
paragraph.ListFormat.ListLevelNumber = 1
paragraph = section.AddParagraph()
paragraph.AppendText("The second sub-item")
paragraph.ListFormat.ContinueListNumbering()
paragraph.ListFormat.ApplyStyle("levelstyle")
paragraph = section.AddParagraph()
paragraph.AppendText("A sub-sub-item")
paragraph.ListFormat.ApplyStyle("levelstyle")
paragraph.ListFormat.ListLevelNumber = 2
paragraph = section.AddParagraph()
paragraph.AppendText("The third item")
paragraph.ListFormat.ApplyStyle("levelstyle")
paragraph.ListFormat.ListLevelNumber = 0
# Save the document to file
doc.SaveToFile("output/MultilevelNumberedList.docx", FileFormat.Docx)
Create a Multi-Level Mixed-Type List in Word in Python
To combine number and symbol bullet points in a multi-level list, create separate list styles (numbered and bulleted) and apply them to different paragraphs. The detailed steps are as follows.
- Create a Document object.
- Add a section using Document.AddSection() method.
- Create a numbered list style and a bulleted list style.
- Add several paragraphs to the document using Section.AddParagraph() method.
- Apply different list style to different paragraphs using Paragraph.ListFormat.ApplyStyle() method.
- Save the document to a Word file using Document.SaveToFile() method.
- Python
from spire.doc import *
from spire.doc.common import *
# Create a Document object
doc = Document()
# Add a section
section = doc.AddSection()
# Create a numbered list style
numberList = doc.Styles.Add(ListType.Numbered, "numberedStyle")
Levels = numberList.ListRef.Levels
Levels[0].PatternType = ListPatternType.Arabic
Levels[0].TextPosition = 20
Levels[1].PatternType = ListPatternType.LowLetter
# Create a bulleted list style
bulletedListStyle = doc.Styles.Add(ListType.Bulleted, "bulletedStyle")
Levels = bulletedListStyle.ListRef.Levels
Levels[2].BulletCharacter = "\u002A"
Levels[2].CharacterFormat.FontName = "Symbol"
# Add a paragraph
paragraph = section.AddParagraph()
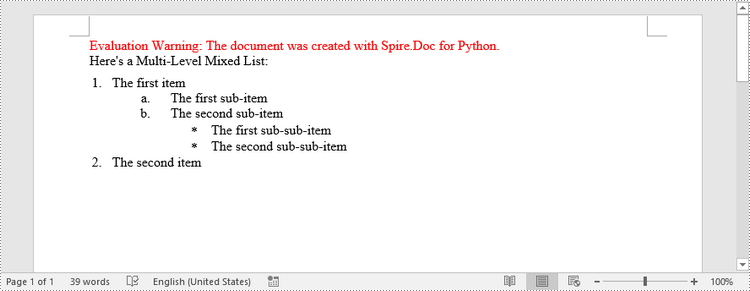
paragraph.AppendText("Here's a Multi-Level Mixed List:")
paragraph.Format.AfterSpacing = 5.0
# Add a paragraph and apply the numbered list style to it
paragraph = section.AddParagraph()
paragraph.AppendText("The first item")
paragraph.ListFormat.ApplyStyle("numberedStyle")
paragraph.ListFormat.ListLevelNumber = 0
# Add the other five paragraphs and apply different list stype to them
paragraph = section.AddParagraph()
paragraph.AppendText("The first sub-item")
paragraph.ListFormat.ApplyStyle("numberedStyle")
paragraph.ListFormat.ListLevelNumber = 1
paragraph = section.AddParagraph()
paragraph.AppendText("The second sub-item")
paragraph.ListFormat.ListLevelNumber = 1
paragraph.ListFormat.ApplyStyle("numberedStyle")
paragraph = section.AddParagraph()
paragraph.AppendText("The first sub-sub-item")
paragraph.ListFormat.ApplyStyle("bulletedStyle")
paragraph.ListFormat.ListLevelNumber = 2
paragraph = section.AddParagraph()
paragraph.AppendText("The second sub-sub-item")
paragraph.ListFormat.ApplyStyle("bulletedStyle")
paragraph.ListFormat.ListLevelNumber = 2
paragraph = section.AddParagraph()
paragraph.AppendText("The second item")
paragraph.ListFormat.ApplyStyle("numberedStyle")
paragraph.ListFormat.ListLevelNumber = 0
# Save the document to file
doc.SaveToFile("output/MultilevelMixedList.docx", FileFormat.Docx)
Apply for a Temporary License
If you'd like to remove the evaluation message from the generated documents, or to get rid of the function limitations, please request a 30-day trial license for yourself.
By default, Excel uses column letters and row numbers to refer to cells and ranges (for example, A1, B2:C5). While this approach is functional, it can become inconvenient, particularly when dealing with large datasets or complex formulas. Named ranges provide a solution to this problem by allowing users to assign custom names to cells or ranges, making them easier to identify, reference, and work with. In this article, we will explain how to create, edit and delete named ranges in Excel in Python using Spire.XLS for Python.
- Create a Named Range in Excel in Python
- Edit an Existing Named Range in Excel in Python
- Delete a Named Range from Excel in Python
Install Spire.XLS for Python
This scenario requires Spire.XLS for Python and plum-dispatch v1.7.4. They can be easily installed in your Windows through the following pip command.
pip install Spire.XLS
If you are unsure how to install, please refer to this tutorial: How to Install Spire.XLS for Python on Windows
Create a Named Range in Excel in Python
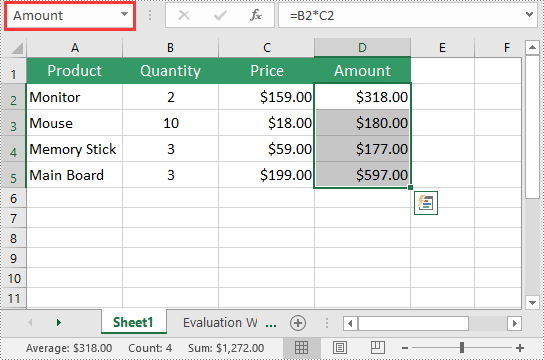
You can use the Workbook.NameRanges.Add() method provided by Spire.XLS for Python to add a named range to an Excel workbook. Once the named range is added, you can define the cell or range of cells it refers to using the INamedRange.RefersToRange property.
The following steps explain how to create a named range in Excel using Spire.XLS for Python:
- Create an object of the Workbook class.
- Load an Excel workbook using the Workbook.LoadFromFile() method.
- Add a named range to the workbook using the Workbook.NameRanges.Add() method.
- Get a specific worksheet in the workbook using the Workbook.Worksheets[] property.
- Set the cell range that the named range refers to using the INamedRange.RefersToRange property.
- Save the resulting file using the Workbook.SaveToFile() method.
- Python
from spire.xls import *
from spire.xls.common import *

# Create an object of the Workbook class
workbook = Workbook()
# Load an Excel workbook
workbook.LoadFromFile("Sample.xlsx")

# Add a named range to the workbook
namedRange = workbook.NameRanges.Add("Amount")

# Get a specific worksheet in the workbook
sheet = workbook.Worksheets[0]

# Set the cell range that the named range references
namedRange.RefersToRange = sheet.Range["D2:D5"]

# Save the resulting file to a specific location
workbook.SaveToFile("CreateNamedRange.xlsx", ExcelVersion.Version2016)

workbook.Dispose()
Edit an Existing Named Range in Excel in Python
After you've created a named range, you may want to modify its name or adjust the cells it refers to.
The following steps explain how to modify the name and cell references of an existing named range in Excel using Spire.XLS for Python:
- Create an object of the Workbook class.
- Load an Excel workbook using the Workbook.LoadFromFile() method.
- Get a specific named range in the workbook using the Workbook.NameRanges[] property.
- Modify the name of the named range using the INamedRange.Name property.
- Modify the cells that the named range refers to using the INamedRange.RefersToRange property.
- Save the resulting file using the Workbook.SaveToFile() method.
- Python
from spire.xls import *
from spire.xls.common import *

# Create an object of the Workbook class
workbook = Workbook()
# Load an Excel workbook
workbook.LoadFromFile("CreateNamedRange.xlsx")

# Get the first named range in the workbook
namedRange = workbook.NameRanges[0]

# Change the name of the named range
namedRange.Name = "MonitorAmount"

# Change the cell range that the named range references
namedRange.RefersToRange = workbook.Worksheets[0].Range["D2"]

# Save the resulting file to a specific location
workbook.SaveToFile("ModifyNamedRange.xlsx", ExcelVersion.Version2016)

workbook.Dispose()

Delete a Named Range from Excel in Python
If you have made significant changes to the structure or layout of your spreadsheet, it might be necessary to delete a named range that is no longer relevant or accurate.
The following steps explain how to delete a named range from Excel using Spire.XLS for Python:
- Create an object of the Workbook class.
- Load an Excel workbook using the Workbook.LoadFromFile() method.
- Remove a specific named range by its index or name using the Workbook.NameRanges.RemoveAt() or Workbook.NameRanges.Remove() method.
- Save the resulting file using the Workbook.SaveToFile() method.
- Python
from spire.xls import *
from spire.common import *

# Create an object of the Workbook class
workbook = Workbook()
# Load an Excel workbook
workbook.LoadFromFile("CreateNamedRange.xlsx")

# Remove the first named range by its index
workbook.NameRanges.RemoveAt(0)

# Remove the first named range by its name
# workbook.NameRanges.Remove("Amount");

# Save the resulting file to a specific location
workbook.SaveToFile("RemoveNamedRange.xlsx", ExcelVersion.Version2016)

workbook.Dispose()

Apply for a Temporary License
If you'd like to remove the evaluation message from the generated documents, or to get rid of the function limitations, please request a 30-day trial license for yourself.
Formulas in Excel are equations or expressions that perform calculations on data within a spreadsheet. They allow you to perform basic arithmetic operations like addition, subtraction, multiplication, and division, as well as more advanced functions like statistical analysis, date and time calculations, and logical evaluations. By incorporating formulas into your Excel spreadsheets, you can save time, eliminate errors, and gain valuable insights from your data. In this article, we will demonstrate how to add or read formulas in Excel in Python using Spire.XLS for Python.
Install Spire.XLS for Python
This scenario requires Spire.XLS for Python and plum-dispatch v1.7.4. They can be easily installed in your Windows through the following pip command.
pip install Spire.XLS
If you are unsure how to install, please refer to this tutorial: How to Install Spire.XLS for Python on Windows
Add Formulas to Excel in Python
Spire.XLS for Python offers the Worksheet.Range[rowIndex, columnIndex].Formula property to add formulas to specific cells in an Excel worksheet. The detailed steps are as follows.
- Create an object of the Workbook class.
- Get a specific worksheet by its index using the Workbook.Worksheets[sheetIndex] property.
- Add some text and numeric data to specific cells of the worksheet using the Worksheet.Range[rowIndex, columnIndex].Text and Worksheet.Range[rowIndex, columnIndex].NumberValue properties.
- Add text and formulas to specific cells of the worksheet using the Worksheet.Range[rowIndex, columnIndex].Text and Worksheet.Range[rowIndex, columnIndex].Formula properties.
- Save the result file using the Workbook.SaveToFile() method.
- Python
from spire.xls import *
from spire.xls.common import *
# Create an object of the Workbook class
workbook = Workbook()
# Get the first worksheet
sheet = workbook.Worksheets[0]
# Declare two variables: currentRow, currentFormula
currentRow = 1
currentFormula = ""
# Add text to the worksheet and set cell style
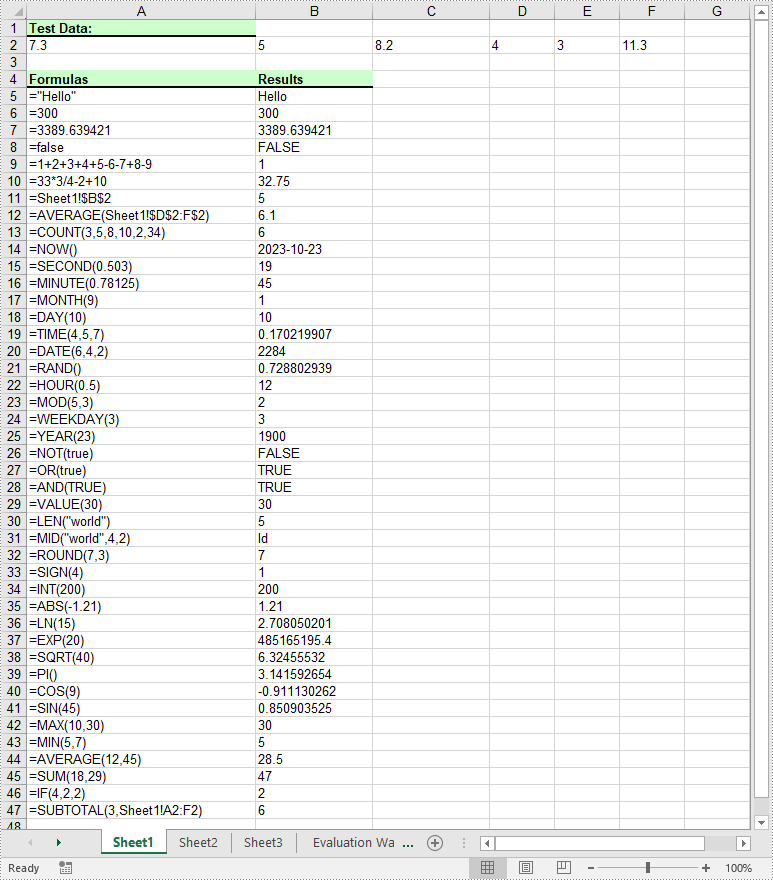
sheet.Range[currentRow, 1].Text = "Test Data:"
sheet.Range[currentRow, 1].Style.Font.IsBold = True
sheet.Range[currentRow, 1].Style.FillPattern = ExcelPatternType.Solid
sheet.Range[currentRow, 1].Style.KnownColor = ExcelColors.LightGreen1
sheet.Range[currentRow, 1].Style.Borders[BordersLineType.EdgeBottom].LineStyle = LineStyleType.Medium
currentRow += 1
# Add some numeric data to the worksheet
sheet.Range[currentRow, 1].NumberValue = 7.3
sheet.Range[currentRow, 2].NumberValue = 5
sheet.Range[currentRow, 3].NumberValue = 8.2
sheet.Range[currentRow, 4].NumberValue = 4
sheet.Range[currentRow, 5].NumberValue = 3
sheet.Range[currentRow, 6].NumberValue = 11.3
currentRow += 2
# Add text to the worksheet and set cell style
sheet.Range[currentRow, 1].Text = "Formulas"
sheet.Range[currentRow, 2].Text = "Results"
sheet.Range[currentRow, 1, currentRow, 2].Style.Font.IsBold = True
sheet.Range[currentRow, 1, currentRow, 2].Style.KnownColor = ExcelColors.LightGreen1
sheet.Range[currentRow, 1, currentRow, 2].Style.FillPattern = ExcelPatternType.Solid
sheet.Range[currentRow, 1, currentRow, 2].Style.Borders[BordersLineType.EdgeBottom].LineStyle = LineStyleType.Medium
currentRow += 1
# Add text and formulas to the worksheet
# Str
currentFormula = "=\"Hello\""
sheet.Range[currentRow, 1].Text = "'" + currentFormula
sheet.Range[currentRow, 2].Formula = currentFormula
currentRow += 1
# Int
currentFormula = "=300"
sheet.Range[currentRow, 1].Text = "'" + currentFormula
sheet.Range[currentRow, 2].Formula = currentFormula
currentRow += 1
# Float
currentFormula = "=3389.639421"
sheet.Range[currentRow, 1].Text = "'" + currentFormula
sheet.Range[currentRow, 2].Formula = currentFormula
currentRow += 1
# Bool
currentFormula = "=false"
sheet.Range[currentRow, 1].Text = "'" + currentFormula
sheet.Range[currentRow, 2].Formula = currentFormula
currentRow += 1
# Expressions
currentFormula = "=1+2+3+4+5-6-7+8-9"
sheet.Range[currentRow, 1].Text = "'" + currentFormula
sheet.Range[currentRow, 2].Formula = currentFormula
currentRow += 1
currentFormula = "=33*3/4-2+10"
sheet.Range[currentRow, 1].Text = "'" + currentFormula
sheet.Range[currentRow, 2].Formula = currentFormula
currentRow += 1
# Cell reference
currentFormula = "=Sheet1!$B$2"
sheet.Range[currentRow, 1].Text = "'" + currentFormula
sheet.Range[currentRow, 2].Formula = currentFormula
currentRow += 1
# Functions
# AVERAGE
currentFormula = "=AVERAGE(Sheet1!$D$2:F$2)"
sheet.Range[currentRow, 1].Text = "'" + currentFormula
sheet.Range[currentRow, 2].Formula = currentFormula
currentRow += 1
# COUNT
currentFormula = "=COUNT(3,5,8,10,2,34)"
sheet.Range[currentRow, 1].Text = "'" + currentFormula
sheet.Range[currentRow, 2].Formula = currentFormula
currentRow += 1
# NOW
currentFormula = "=NOW()"
sheet.Range[currentRow, 1].Text = "'" + currentFormula
sheet.Range[currentRow, 2].Formula = currentFormula
sheet.Range[currentRow, 2].Style.NumberFormat = "yyyy-MM-DD"
currentRow += 1
# SECOND
currentFormula = "=SECOND(0.503)"
sheet.Range[currentRow, 1].Text = "'" + currentFormula
sheet.Range[currentRow, 2].Formula = currentFormula
currentRow += 1
# MINUTE
currentFormula = "=MINUTE(0.78125)"
sheet.Range[currentRow, 1].Text = "'" + currentFormula
sheet.Range[currentRow, 2].Formula = currentFormula
currentRow += 1
# MONTH
currentFormula = "=MONTH(9)"
sheet.Range[currentRow, 1].Text = "'" + currentFormula
sheet.Range[currentRow, 2].Formula = currentFormula
currentRow += 1
# DAY
currentFormula = "=DAY(10)"
sheet.Range[currentRow, 1].Text = "'" + currentFormula
sheet.Range[currentRow, 2].Formula = currentFormula
currentRow += 1
# TIME
currentFormula = "=TIME(4,5,7)"
sheet.Range[currentRow, 1].Text = "'" + currentFormula
sheet.Range[currentRow, 2].Formula = currentFormula
currentRow += 1
# DATE
currentFormula = "=DATE(6,4,2)"
sheet.Range[currentRow, 1].Text = "'" + currentFormula
sheet.Range[currentRow, 2].Formula = currentFormula
currentRow += 1
# RAND
currentFormula = "=RAND()"
sheet.Range[currentRow, 1].Text = "'" + currentFormula
sheet.Range[currentRow, 2].Formula = currentFormula
currentRow += 1
# HOUR
currentFormula = "=HOUR(0.5)"
sheet.Range[currentRow, 1].Text = "'" + currentFormula
sheet.Range[currentRow, 2].Formula = currentFormula
currentRow += 1
# MOD
currentFormula = "=MOD(5,3)"
sheet.Range[currentRow, 1].Text = "'" + currentFormula
sheet.Range[currentRow, 2].Formula = currentFormula
currentRow += 1
# WEEKDAY
currentFormula = "=WEEKDAY(3)"
sheet.Range[currentRow, 1].Text = "'" + currentFormula
sheet.Range[currentRow, 2].Formula = currentFormula
currentRow += 1
# YEAR
currentFormula = "=YEAR(23)"
sheet.Range[currentRow, 1].Text = "'" + currentFormula
sheet.Range[currentRow, 2].Formula = currentFormula
currentRow += 1
# NOT
currentFormula = "=NOT(true)"
sheet.Range[currentRow, 1].Text = "'" + currentFormula
sheet.Range[currentRow, 2].Formula = currentFormula
currentRow += 1
# OR
currentFormula = "=OR(true)"
sheet.Range[currentRow, 1].Text = "'" + currentFormula
sheet.Range[currentRow, 2].Formula = currentFormula
currentRow += 1
# AND
currentFormula = "=AND(TRUE)"
sheet.Range[currentRow, 1].Text = "'" + currentFormula
sheet.Range[currentRow, 2].Formula = currentFormula
currentRow += 1
# VALUE
currentFormula = "=VALUE(30)"
sheet.Range[currentRow, 1].Text = "'" + currentFormula
sheet.Range[currentRow, 2].Formula = currentFormula
currentRow += 1
# LEN
currentFormula = "=LEN(\"world\")"
sheet.Range[currentRow, 1].Text = "'" + currentFormula
sheet.Range[currentRow, 2].Formula = currentFormula
currentRow += 1
# MID
currentFormula = "=MID(\"world\",4,2)"
sheet.Range[currentRow, 1].Text = "'" + currentFormula
sheet.Range[currentRow, 2].Formula = currentFormula
currentRow += 1
# ROUND
currentFormula = "=ROUND(7,3)"
sheet.Range[currentRow, 1].Text = "'" + currentFormula
sheet.Range[currentRow, 2].Formula = currentFormula
currentRow += 1
# SIGN
currentFormula = "=SIGN(4)"
sheet.Range[currentRow, 1].Text = "'" + currentFormula
sheet.Range[currentRow, 2].Formula = currentFormula
currentRow += 1
# INT
currentFormula = "=INT(200)"
sheet.Range[currentRow, 1].Text = "'" + currentFormula
sheet.Range[currentRow, 2].Formula = currentFormula
currentRow += 1
# ABS
currentFormula = "=ABS(-1.21)"
sheet.Range[currentRow, 1].Text = "'" + currentFormula
sheet.Range[currentRow, 2].Formula = currentFormula
currentRow += 1
# LN
currentFormula = "=LN(15)"
sheet.Range[currentRow, 1].Text = "'" + currentFormula
sheet.Range[currentRow, 2].Formula = currentFormula
currentRow += 1
# EXP
currentFormula = "=EXP(20)"
sheet.Range[currentRow, 1].Text = "'" + currentFormula
sheet.Range[currentRow, 2].Formula = currentFormula
currentRow += 1
# SQRT
currentFormula = "=SQRT(40)"
sheet.Range[currentRow, 1].Text = "'" + currentFormula
sheet.Range[currentRow, 2].Formula = currentFormula
currentRow += 1
# PI
currentFormula = "=PI()"
sheet.Range[currentRow, 1].Text = "'" + currentFormula
sheet.Range[currentRow, 2].Formula = currentFormula
currentRow += 1
# COS
currentFormula = "=COS(9)"
sheet.Range[currentRow, 1].Text = "'" + currentFormula
sheet.Range[currentRow, 2].Formula = currentFormula
currentRow += 1
# SIN
currentFormula = "=SIN(45)"
sheet.Range[currentRow, 1].Text = "'" + currentFormula
sheet.Range[currentRow, 2].Formula = currentFormula
currentRow += 1
# MAX
currentFormula = "=MAX(10,30)"
sheet.Range[currentRow, 1].Text = "'" + currentFormula
sheet.Range[currentRow, 2].Formula = currentFormula
currentRow += 1
# MIN
currentFormula = "=MIN(5,7)"
sheet.Range[currentRow, 1].Text = "'" + currentFormula
sheet.Range[currentRow, 2].Formula = currentFormula
currentRow += 1
# AVERAGE
currentFormula = "=AVERAGE(12,45)"
sheet.Range[currentRow, 1].Text = "'" + currentFormula
sheet.Range[currentRow, 2].Formula = currentFormula
currentRow += 1
# SUM
currentFormula = "=SUM(18,29)"
sheet.Range[currentRow, 1].Text = "'" + currentFormula
sheet.Range[currentRow, 2].Formula = currentFormula
currentRow += 1
# IF
currentFormula = "=IF(4,2,2)"
sheet.Range[currentRow, 1].Text = "'" + currentFormula
sheet.Range[currentRow, 2].Formula = currentFormula
currentRow += 1
# SUBTOTAL
currentFormula = "=SUBTOTAL(3,Sheet1!A2:F2)"
sheet.Range[currentRow, 1].Text = "'" + currentFormula
sheet.Range[currentRow, 2].Formula = currentFormula
currentRow += 1
# Set width of the 1st, 2nd and 3rd columns
sheet.SetColumnWidth(1, 32)
sheet.SetColumnWidth(2, 16)
sheet.SetColumnWidth(3, 16)
# Create a cell style
style = workbook.Styles.Add("Style")
# Set the horizontal alignment as left
style.HorizontalAlignment = HorizontalAlignType.Left
# Apply the style to the worksheet
sheet.ApplyStyle(style)
# Save the result file
workbook.SaveToFile("AddFormulas.xlsx", ExcelVersion.Version2016)
workbook.Dispose()
Read Formulas in Excel in Python
To read formulas in an Excel worksheet, you need to loop through all the cells in the worksheet, after that, find the cells containing formulas using the Cell.HasFormula property, and then get the formulas of the cells using the CellRange.Formula property. The detailed steps are as follows.
- Create an object of the Workbook class.
- Load an Excel file using the Workbook.LoadFromFile() method.
- Get a specific worksheet by its index using the Workbook.Worksheets[sheetIndex] property.
- Get the used range of the worksheet using the Worksheet.AllocatedRange property.
- Create an empty list.
- Loop through all the cells in the used range.
- Find the cells containing formulas using the Cell.HasFormula property.
- Get the names and the formulas of the cells using the CellRange.RangeAddressLocal and CellRange.Formula properties.
- Append the cell names and formulas to the list.
- Write the items in the list into a text file.
- Python
from spire.xls import *
from spire.xls.common import *

# Create an object of the Workbook class
workbook = Workbook()
# Load an Excel file
workbook.LoadFromFile("AddFormulas.xlsx")

# Get the first worksheet
sheet = workbook.Worksheets[0]

# Get the used range of the worksheet
usedRange = sheet.AllocatedRange

# Create an empty list
list = []

# Loop through the cells in the used range
for cell in usedRange:
    # Check if the cell has a formula
    if(cell.HasFormula):
        # Get the cell name
        cellName = cell.RangeAddressLocal
        # Get the formula
        formula = cell.Formula
        # Append the cell name and formula to the list
        list.append(cellName + " has a formula: " + formula)

# Write the items in the list into a text file
with open("Formulas.txt", "w", encoding = "utf-8") as text_file:
    for item in list:
        text_file.write(item + "\n")

workbook.Dispose()

Apply for a Temporary License
If you'd like to remove the evaluation message from the generated documents, or to get rid of the function limitations, please request a 30-day trial license for yourself.
