
Knowledgebase (2344)
Children categories
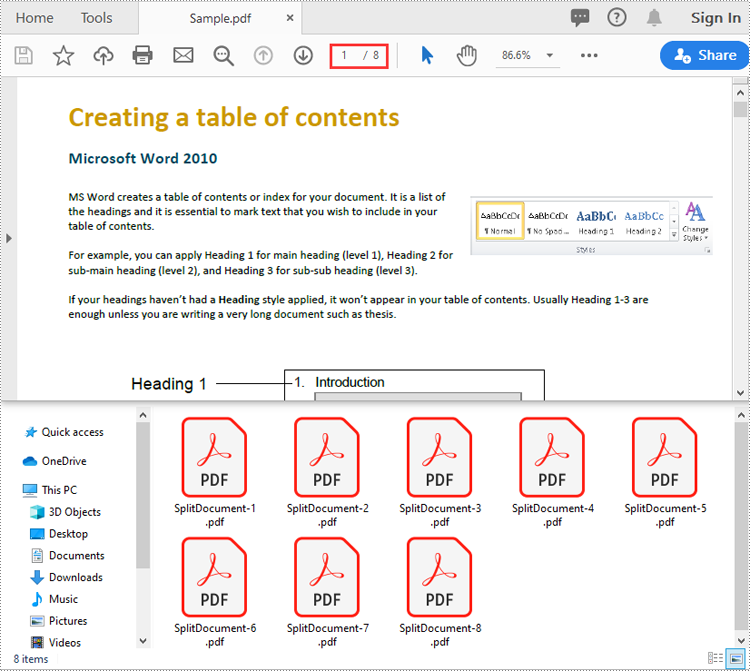
Large PDF files can sometimes be cumbersome to handle, especially when sharing or uploading them. Splitting a large PDF file into multiple smaller PDFs reduces the file size, making it more manageable and quicker to open and process. In this article, we will demonstrate how to split PDF documents in Python using Spire.PDF for Python.
Install Spire.PDF for Python
This scenario requires Spire.PDF for Python and plum-dispatch v1.7.4. They can be easily installed in your Windows through the following pip command.
pip install Spire.PDF
If you are unsure how to install, please refer to this tutorial: How to Install Spire.PDF for Python on Windows
Split a PDF File into Multiple Single-Page PDFs in Python
Spire.PDF for Python offers the PdfDocument.Split() method to divide a multi-page PDF document into multiple single-page PDF files. The following are the detailed steps.
- Create a PdfDocument object.
- Load a PDF document using PdfDocument.LoadFromFile() method.
- Split the document into multiple single-page PDFs using PdfDocument.Split() method.
- Python
from spire.pdf.common import *
from spire.pdf import *

# Create a PdfDocument object
doc = PdfDocument()
# Load a PDF file
doc.LoadFromFile("Sample.pdf")

# Split the PDF file into multiple single-page PDFs
doc.Split("Output/SplitDocument-{0}.pdf", 1)

# Close the PdfDocument object
doc.Close()
Split a PDF File by Page Ranges in Python
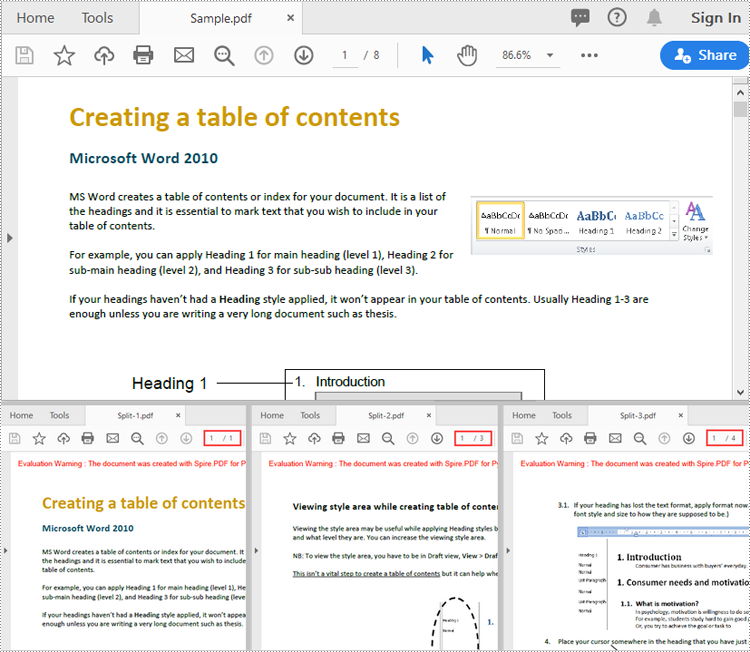
To split a PDF file into two or more PDF files by page ranges, you need to create two or more new PDF files, and then import the specific page or range of pages from the source PDF into the newly created PDF files. The following are the detailed steps.
- Create a PdfDocument object.
- Load a PDF document using PdfDocument.LoadFromFile() method.
- Create three PdfDocument objects.
- Import the first page from the source file into the first document using PdfDocument.InsertPage() method.
- Import pages 2-4 from the source file into the second document using PdfDocument.InsertPageRange() method.
- Import the remaining pages from the source file into the third document using PdfDocument.InsertPageRange() method.
- Save the three documents using PdfDocument.SaveToFile() method.
- Python
from spire.pdf.common import *
from spire.pdf import *

# Create a PdfDocument object
doc = PdfDocument()
# Load a PDF file
doc.LoadFromFile("Sample.pdf")

# Create three PdfDocument objects
newDoc_1 = PdfDocument()
newDoc_2 = PdfDocument()
newDoc_3 = PdfDocument()

# Insert the first page of the source file into the first document
newDoc_1.InsertPage(doc, 0)

# Insert pages 2-4 of the source file into the second document
newDoc_2.InsertPageRange(doc, 1, 3)

# Insert the rest pages of the source file into the third document
newDoc_3.InsertPageRange(doc, 4, doc.Pages.Count - 1)

# Save the three documents
newDoc_1.SaveToFile("Output1/Split-1.pdf")
newDoc_2.SaveToFile("Output1/Split-2.pdf")
newDoc_3.SaveToFile("Output1/Split-3.pdf")

# Close the PdfDocument objects
doc.Close()
newDoc_1.Close()
newDoc_2.Close()
newDoc_3.Close()
Apply for a Temporary License
If you'd like to remove the evaluation message from the generated documents, or to get rid of the function limitations, please request a 30-day trial license for yourself.
The editing restriction function is a feature in Word documents that allows users to control and limit the editing capabilities and editable areas. It is commonly used to protect sensitive or important document from unauthorized or substandard modifications. By applying editing restrictions, the document owner can specify what types of changes can be made and which part of the document can be edited to protect the document and facilitate collaborating, information gathering, etc. This article is going to show how to restrict Word document editing and remove document editing restrictions using Spire.Doc for Python in Python programs.
- Restrict Editing of Entire Word Documents with Passwords
- Set Exceptions to Word Document Editing Restrictions
- Remove Editing Restrictions from Word Documents
Install Spire.Doc for Python
This scenario requires Spire.Doc for Python and plum-dispatch v1.7.4. They can be easily installed in your Windows through the following pip command.
pip install Spire.Doc
If you are unsure how to install, please refer to this tutorial: How to Install Spire.Doc for Python on Windows
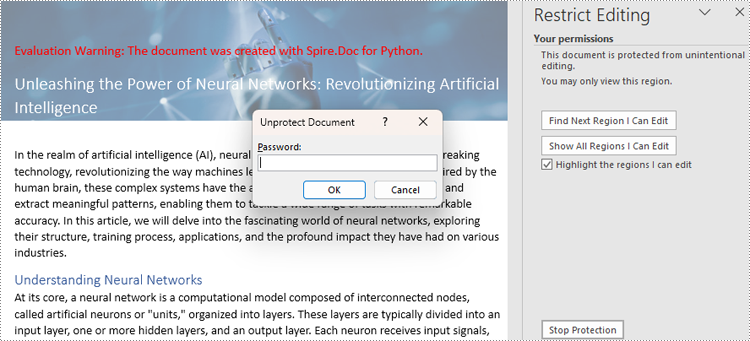
Restrict Editing of Entire Word Documents with Passwords
There are four types or editing restrictions in Word documents: No changes (Read only), Tracked changes, Comments, and Filling in forms. Spire.Doc for Python provides the Document.Protect() method set editing restrictions and ProtectionType Enum to represent the restriction types.
Here is a list of the ProtectionType Enum and the corresponding editing restrictions:
| Enum | Editing Restriction | Description |
| ProtectionType.AllowOnlyReading | No changes (Read only) | Allow reading only. |
| ProtectionType.AllowOnlyRevisions | Tracked changes | Allow tracked changes only. |
| ProtectionType.AllowOnlyComments | Comments | Allow comments only. |
| ProtectionType.AllowOnlyFormFields | Filling in forms | Allow filling out forms only. |
| ProtectionType.NoProtection | None | No restrictions. |
The steps for setting editing restrictions with a password on Word documents are as follows:
- Create an object of Document class.
- Load a Word document using Document.LoadFromFile() method.
- Set specified editing restrictions on the document using Document.Protect(type:ProtectionType, password:str) method.
- Save the document using Document.SaveToFile() method.
- Python
from spire.doc import *
from spire.doc.common import *

# Create an object of Document class
doc = Document()

# Load a Word document
doc.LoadFromFile("Sample.docx")

# Set the editing restriction type to No changes (Read only)
doc.Protect(ProtectionType.AllowOnlyReading, "password")

# Set the editing restriction type to Tracked changes
# doc.Protect(ProtectionType.AllowOnlyRevisions, "password")

# Set the editing restriction type to Comments
# doc.Protect(ProtectionType.AllowOnlyComments, "password")

# Set the editing restriction type to Filling in forms
# doc.Protect(ProtectionType.AllowOnlyFormFields, "password")

# Save the document
doc.SaveToFile("output/EditingRestrictions.docx")
doc.Close()
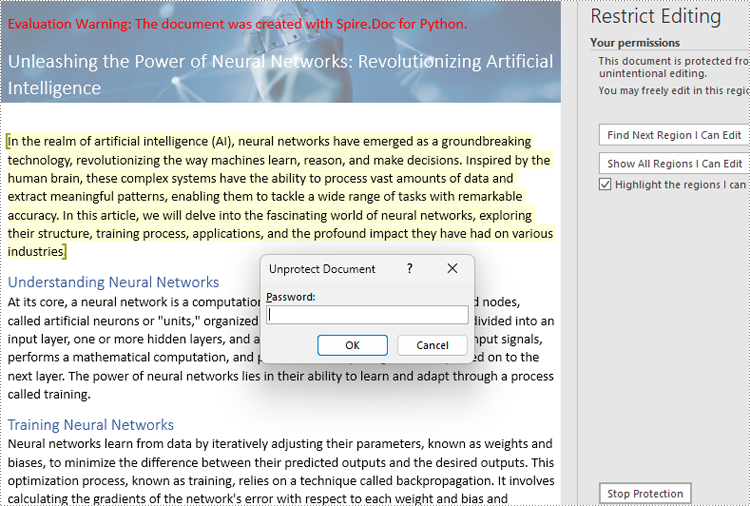
Set Exceptions to Word Document Editing Restrictions
Users can add exceptions (unrestricted areas) when setting editing restrictions on Word documents by inserting permission starting and ending tags. The details steps are as follows:
- Create an object of Document class.
- Load a Word document using Document.LoadFromFile() method.
- Get the first section using Document.Sections.get_Item() method.
- Create an object of PermissionStart class and an object of PermissionEnd class.
- Insert the permission start tag and the end tag to the document using Paragraph.ChildObjects.Insert() method and Paragraph.ChildObjects.Add() method.
- Set the editing restriction using Document.Protect() method.
- Save the document using Document.SaveToFile() method.
- Python
from spire.doc import *
from spire.doc.common import *

# Create an object of Document class
doc = Document()

# Load a Word document
doc.LoadFromFile("Sample.docx")

# Get the first section
section = doc.Sections.get_Item(0)

# Create a permission start tag and an end tag
start = PermissionStart(doc, "exception1")
end = PermissionEnd(doc, "exception1")

# Insert the permission start tag and the end tag to the first section
paragraph = section.Paragraphs.get_Item(1)
paragraph.ChildObjects.Insert(0,start)
paragraph.ChildObjects.Add(end)

# Set the editing restriction
doc.Protect(ProtectionType.AllowOnlyReading, "password")

# Save the document
doc.SaveToFile("output/RestrictionException.docx")
doc.Close()
Remove Editing Restrictions from Word Documents
To remove the editing restrictions of a document, simply set the editing restriction type to no restriction using the Document.Protect() method. The detailed steps are as follows:
- Create an object of Document class.
- Load a Word document using Document.LoadFromFile() method.
- Remove the restriction by setting the restriction type to None using Document.Protect() method.
- Save the document using Document.SaveToFile() method.
- Python
from spire.doc import *
from spire.doc.common import *

# Create an object of Document class
doc = Document()

# Load a Word document
doc.LoadFromFile("output/EditingRestrictions.docx")

# Remove the editing restriction by set the restriction type to None
doc.Protect(ProtectionType.NoProtection)

# Save the document
doc.SaveToFile("output/RemoveEditingRestriction.docx")
doc.Close()
Apply for a Temporary License
If you'd like to remove the evaluation message from the generated documents, or to get rid of the function limitations, please request a 30-day trial license for yourself.
Python Image to PDF Conversion: Best Practices and Code Examples
2023-09-27 01:15:52 Written by Administrator
Converting images to PDF programmatically is a common task in document management, as it enhances organization, facilitates sharing, and ensures efficient archiving. By consolidating various image formats into a single PDF document, users can easily manage and distribute their visual content.
In this article, we will explore how to convert a variety of image formats —including PNG , JPEG , TIFF , and SVG —into PDF files using Spire.PDF for Python. We’ll provide detailed instructions and code examples to guide you through the conversion process, highlighting the flexibility and power of this library for handling different image types.
Table of Contents:
- Why Convert Image to PDF?
- Introducing Spire.PDF: Python Image-to-PDF Library
- Convert PNG or JPEG to PDF
- Convert Multi-Page TIFF to PDF
- Convert Scalable SVG to PDF
- Merge Multiple Images into One PDF
- Conclusion
- FAQs
1. Why Convert Image to PDF?
PDFs are preferred for their portability, security, and consistent formatting across devices. Converting images to PDF offers several benefits:
- Preservation of Quality: PDFs retain image resolution, ensuring no loss in clarity.
- Easier Sharing: A single PDF can combine multiple images, simplifying distribution.
- Document Standardization: Converting images to PDF ensures compatibility with most document management systems.
Whether you're archiving scanned documents or preparing a portfolio, converting images to PDF enhances usability.
2. Introducing Spire.PDF: Python Image-to-PDF Library
Spire.PDF for Python is a robust library that enables PDF creation, manipulation, and conversion. Key features include:
- Support for multiple image formats (PNG, JPEG, BMP, SVG, and more).
- Flexible page customization (size, margins, orientation).
- Batch processing and multi-image merging.
- Advanced options like watermarking and encryption (beyond basic conversion).
To install the library, use:
pip install Spire.PDF
3. Convert PNG or JPEG to PDF in Python
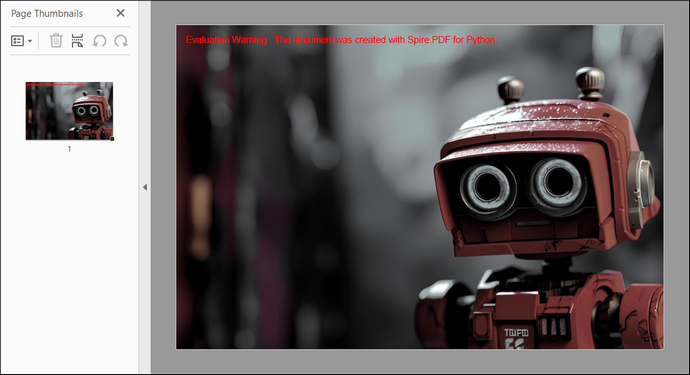
3.1 Generate PDF Matching Image Dimensions
To convert a PNG or JPEG image to PDF while preserving its original size, we start by creating a PdfDocument object, which serves as the container for our PDF. We set the page margins to zero, ensuring that the image will fill the entire page.
After loading the image, we obtain its dimensions to create a new page that matches these dimensions. Finally, we draw the image on the page and save the document to a PDF file. This approach guarantees pixel-perfect conversion without resizing or distortion.
The following code demonstrates how to generate a PDF that perfectly matches your image’s size:
from spire.pdf.common import *
from spire.pdf import *

# Create a PdfDocument object
document = PdfDocument()

# Set the page margins to 0
document.PageSettings.SetMargins(0.0)

# Load an image file
image = PdfImage.FromFile("C:\\Users\\Administrator\\Desktop\\robot.jpg")

# Get the image width and height
imageWidth = image.PhysicalDimension.Width
imageHeight = image.PhysicalDimension.Height

# Add a page that has the same size as the image
page = document.Pages.Add(SizeF(imageWidth, imageHeight))

# Draw image at (0, 0) of the page
page.Canvas.DrawImage(image, 0.0, 0.0)

# Save to file
document.SaveToFile("output/ImageToPdf.pdf")

# Dispose resources
document.Dispose()
Output:
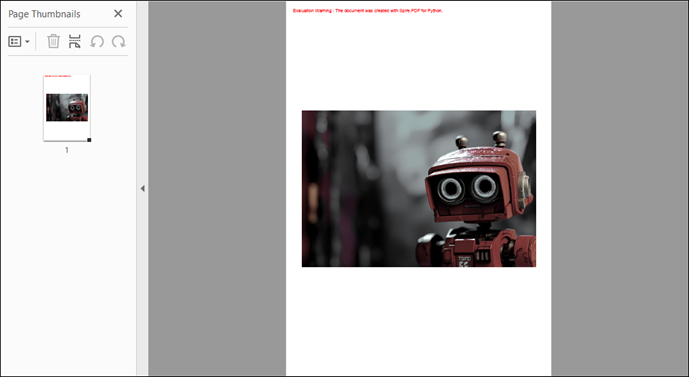
3.2 Custom PDF Layouts and Image Position
To customize the PDF page size and margins, a few modifications to the code are needed. In this example, we set the page size to A4, adjusting the margins accordingly. The image is centered on the page by calculating its position based on the page dimensions. This method creates a more polished layout for the PDF.
The code below shows how to customize PDF settings and position images during conversion:
from spire.pdf.common import *
from spire.pdf import *

# Create a PdfDocument object
document = PdfDocument()

# Set the page margins to 5
document.PageSettings.SetMargins(5.0)

# Define page size (A4 or custom)
document.PageSettings.Size = PdfPageSize.A4()

# Add a new page to the document
page = document.Pages.Add()

# Load the image from file
image = PdfImage.FromFile("C:\\Users\\Administrator\\Desktop\\robot.jpg")

# Get the image dimensions
imageWidth = image.PhysicalDimension.Width
imageHeight = image.PhysicalDimension.Height

# Calculate centered position for the image
x = (page.GetClientSize().Width - imageWidth) / 2
y = (page.GetClientSize().Height - imageHeight) / 2

# Draw the image at the calculated position
page.Canvas.DrawImage(image, x, y, imageWidth, imageHeight)

# Save to a PDF file
document.SaveToFile("output/ImageToPdf.pdf")

# Release resources
document.Dispose()
Output:
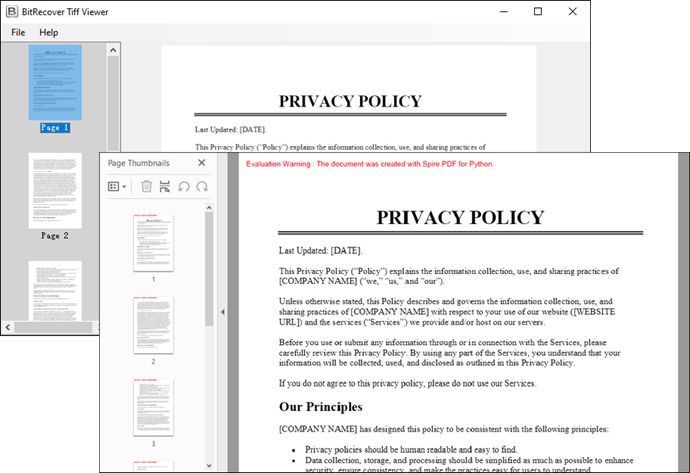
4. Convert Multi-Page TIFF to PDF in Python
TIFF files are widely used for high-resolution images, making them suitable for applications such as document scanning and medical imaging. However, Spire.PDF does not support TIFF images natively. To handle TIFF files, we can use the Python Imaging Library (PIL) , which can be installed with the following command:
pip install Pillow
Using PIL, we can access each frame of a TIFF file, temporarily save it as a PNG, and then draw each PNG onto a PDF. This method ensures that each frame is added as a separate page in the PDF, preserving the original quality and layout.
Here is the code snippet for converting a multi-page TIFF to PDF in Python:
from spire.pdf.common import *
from spire.pdf import *
from PIL import Image
import io

# Create a PdfDocument object
document = PdfDocument()

# Set the page margins to 0
document.PageSettings.SetMargins(0.0)

# Load a TIFF image
tiff_image = Image.open("C:\\Users\\Administrator\\Desktop\\TIFF.tiff")

# Iterate through the frames in it
for i in range(getattr(tiff_image, 'n_frames', 1)):

    # Go to the current frame
    tiff_image.seek(i)

    # Extract the image of the current frame
    frame_image = tiff_image.copy()

    # Save the image to a PNG file
    frame_image.save(f"temp/output_frame_{i}.png")

    # Load the image file to PdfImage
    image = PdfImage.FromFile(f"temp/output_frame_{i}.png")

    # Get image width and height
    imageWidth = image.PhysicalDimension.Width
    imageHeight = image.PhysicalDimension.Height

    # Add a page to the document
    page = document.Pages.Add(SizeF(imageWidth, imageHeight))

    # Draw image at (0, 0) of the page
    page.Canvas.DrawImage(image, 0.0, 0.0)

# Save the document to a PDF file
document.SaveToFile("Output/TiffToPdf.pdf",FileFormat.PDF)

# Dispose resources
document.Dispose()
Output:
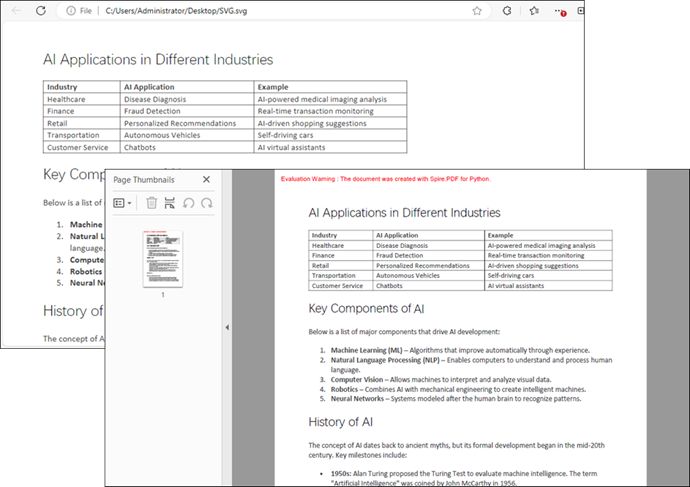
5. Convert Scalable SVG to PDF in Python
SVG files are vector graphics that provide scalability without loss of quality, making them ideal for web graphics and print media. In this example, we create a PdfDocument object and load an SVG file directly into it. Spire.PDF library efficiently handles the conversion, allowing for quick and straightforward saving of the SVG as a PDF with minimal code.
Below is the code snippet for converting an SVG file to a PDF:
from spire.pdf.common import *
from spire.pdf import *

# Create a PdfDocument object
document = PdfDocument()

# Load an SVG file
document.LoadFromSvg("C:\\Users\\Administrator\\Desktop\\SVG.svg")

# Save the SVG file to PDF
document.SaveToFile("output/SvgToPdf.pdf", FileFormat.PDF)

# Dispose resources
document.Dispose()
Tip : To combine multiple SVG files into a single PDF, convert them separately and then merge the resulting PDFs. For guidance, check out this article: How to Merge PDF Documents in Python.
Output:
6. Merge Multiple Images into One PDF
This process involves iterating through images in a specified directory, loading each one, and creating corresponding pages in the PDF document. Each page is formatted to match the image dimensions, preventing any loss or distortion. Finally, each image is drawn onto its respective page.
Code example for combining a folder of images into a single PDF:
from spire.pdf.common import *
from spire.pdf import *
import os

# Create a PdfDocument object
doc = PdfDocument()

# Set the page margins to 0
doc.PageSettings.SetMargins(0.0)

# Get the folder where the images are stored
path = "C:\\Users\\Administrator\\Desktop\\Images\\"
files = os.listdir(path)

# Iterate through the files in the folder
for root, dirs, files in os.walk(path):
    for file in files:

        # Load a particular image
        image = PdfImage.FromFile(os.path.join(root, file))

        # Get the image width and height
        width = image.PhysicalDimension.Width
        height = image.PhysicalDimension.Height

        # Add a page that has the same size as the image
        page = doc.Pages.Add(SizeF(width, height))

        # Draw image at (0, 0) of the page
        page.Canvas.DrawImage(image, 0.0, 0.0, width, height)

# Save to file
doc.SaveToFile("output/CombineImages.pdf")
doc.Dispose()
Output:

7. Conclusion
Converting images to PDF in Python using the Spire.PDF library is a straightforward task that can be accomplished through various methods for different image formats. Whether you need to convert single images, customize layouts, or merge multiple images, Spire.PDF provides the necessary tools to achieve your goals efficiently. With just a few lines of code, you can create high-quality PDFs from images, enhancing your document management capabilities.
8. FAQs
Q1: Can I convert images in bulk using Spire.PDF?
Yes, Spire.PDF allows you to iterate through directories and convert multiple images to a single PDF or individual PDFs, making bulk conversions easy.
Q2: What image formats does Spire.PDF support?
Spire.PDF supports various image formats, including PNG, JPEG, BMP, and SVG, providing versatility for different use cases.
Q3: Can I customize the PDF layout?
Absolutely. You can set margins, page sizes, and positions of images within the PDF for a tailored layout that meets your requirements.
Q4: Does converting an image to PDF reduce its quality?
No - when using Spire.PDF with default settings, the original image data is embedded without compression.
Get a Free License
To fully experience the capabilities of Spire.PDF for Python without any evaluation limitations, you can request a free 30-day trial license.
