PDFs kostenlos ohne Acrobat zusammenfügen (4 Wege)
Inhaltsverzeichnis
- Methode 1: PDFs kostenlos online zusammenführen (mit PDF24)
- Methode 2: PDFs unter Windows mit PDFsam Basic kombinieren
- Methode 3: PDFs auf dem Mac mit Vorschau (integriertes Werkzeug) zusammenführen
- Methode 4: PDF-Zusammenführung in Python automatisieren (mit Free Spire.PDF)
- Zusammenfassung: Die beste Methode zum Zusammenführen von PDFs wählen
- FAQs
Mit Pypi installieren
pip install spire.pdf.free
Verwandte Links
Das Zusammenführen von PDF-Dateien ist zu einer gängigen Notwendigkeit für persönliche und berufliche Aufgaben geworden. Ob Sie Berichte zusammenfassen, Dokumente für eine Präsentation konsolidieren oder einfach nur Dateien organisieren, eine zuverlässige Methode zum Zusammenführen von PDFs ist unerlässlich. Glücklicherweise gibt es verschiedene Möglichkeiten, dies ohne die Notwendigkeit von Adobe Acrobat zu erreichen.
Dieser Artikel untersucht verschiedene Methoden, um PDFs kostenlos ohne Acrobat zusammenzuführen, einschließlich Online-Tools, Desktop-Anwendungen und automatisierter Lösungen mit Python. Jede Methode richtet sich an unterschiedliche Bedürfnisse, sodass Sie diejenige auswählen können, die am besten zu Ihrem Arbeitsablauf passt.
Methode 1: PDFs kostenlos online zusammenführen (mit PDF24)
Eine schnelle und einfache Möglichkeit, PDFs zusammenzuführen, ohne etwas zu installieren, sind Online-Tools. PDF24 ist eine beliebte Option.
Was ist PDF24?
PDF24 bietet eine Reihe kostenloser Werkzeuge in Ihrem Browser (und auch eine Desktop-Version). Zu diesen Werkzeugen gehört „PDF zusammenführen“, mit dem Sie mehrere PDF-Dateien hochladen und kombinieren können.

Wie man PDF24 zum Zusammenführen von PDFs verwendet
- Gehen Sie zur Seite PDF zusammenführen auf PDF24 Tools.
- Laden Sie die PDF-Dateien, die Sie kombinieren möchten, hoch oder ziehen Sie sie per Drag & Drop.
- (Optional) Ordnen Sie die Dateien durch Ziehen und Ablegen in der gewünschten Reihenfolge an.
- Klicken Sie auf die Schaltfläche „PDF zusammenführen“, um den Zusammenführungsprozess zu starten.
- Laden Sie das resultierende kombinierte PDF herunter.
Erweiterte Funktionen
PDF24 bietet einen Seitenmodus, der es Ihnen ermöglicht, einzelne Seiten aus Ihren hochgeladenen PDFs zum Zusammenführen auszuwählen. Sie können die Reihenfolge dieser Seiten im resultierenden Dokument ändern, was Ihnen noch mehr Kontrolle über Ihr zusammengeführtes PDF gibt.
Vor- und Nachteile von PDF24
| Vorteile | Nachteile |
|---|---|
| Keine Installation erforderlich; funktioniert in jedem Browser. | Erfordert eine Internetverbindung. |
| Kostenlos; kein Konto erforderlich. | Das Hochladen von Dateien birgt immer ein gewisses Datenschutzrisiko. |
| Unterstützt die Seitenauswahl beim Zusammenführen. | |
| Bietet zusätzliche nützliche Werkzeuge zur Bearbeitung von PDF-Dateien. |
Methode 2: PDFs unter Windows mit PDFsam Basic kombinieren
Wenn Sie an einem Windows-PC arbeiten und Offline-Tools bevorzugen, ist PDFsam Basic eine sehr empfohlene kostenlose und Open-Source-Desktop-Anwendung zur PDF-Bearbeitung.
Was ist PDFsam Basic?
PDFsam Basic ist ein spezielles Werkzeug, das sich auf die Neuorganisation von PDF-Seiten konzentriert.
- „PDFsam“ steht für PDF Split and Merge (PDF teilen und zusammenführen). Basic ist die kostenlose Ausgabe.
- Es ermöglicht Ihnen, ganze PDF-Dateien zusammenzuführen, Seiten neu anzuordnen, Seiten zu extrahieren, Seiten zu drehen usw.
Wie man mit PDFsam Basic zusammenführt
- Laden Sie PDFsam Basic von der offiziellen Website herunter und installieren Sie es.
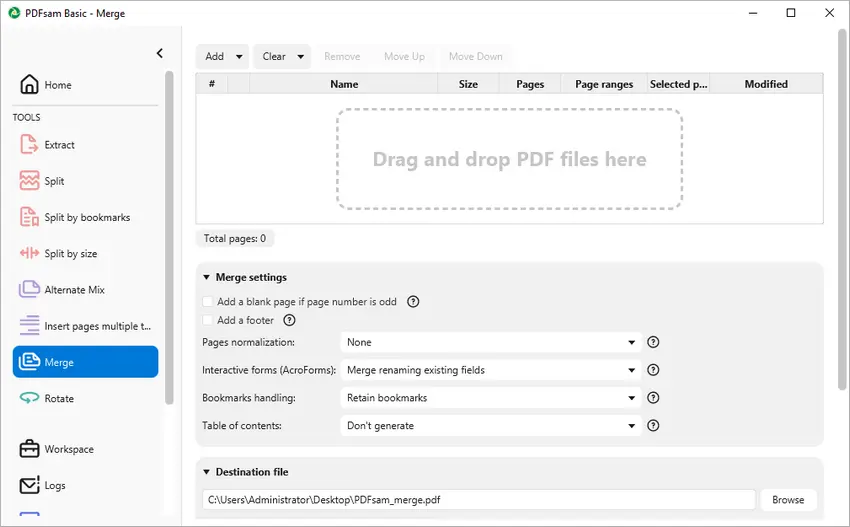
- Starten Sie die App, wählen Sie das Modul „Zusammenführen“ aus dem Hauptmenü.
- Fügen Sie die PDF-Dateien, die Sie kombinieren möchten, per Drag & Drop in die Zusammenführungswarteschlange ein.
- (Optional) Ordnen Sie die Dateien in der gewünschten Reihenfolge an.
- Legen Sie den Namen und den Pfad der resultierenden PDF-Datei fest.
- Klicken Sie auf „Ausführen“, um das kombinierte PDF zu erstellen.
Erweiterte Funktionen
PDFsam Basic bietet mehrere Zusammenführungseinstellungen, um Ihre Ausgabe anzupassen:
- Seitennormalisierung: Passt alle Seitengrößen an die erste Seite an.
- Interaktive Formulare: Wählen Sie, ob Formularfelder zusammengeführt, verworfen oder reduziert werden sollen.
- Lesezeichen-Handhabung: Entscheiden Sie, ob Lesezeichen beibehalten oder entfernt werden sollen.
- Inhaltsverzeichnis: Option zum Erstellen eines Inhaltsverzeichnisses für das zusammengeführte Dokument.
- Dateikomprimierung: Komprimieren Sie Ausgabedateien, um die Größe zu reduzieren.
- PDF-Versionskontrolle: Legen Sie die Ausgabe-PDF-Version auf 1.5, 1.6, 1.7 oder 2.0 fest.
Mit diesen Funktionen bietet PDFsam Basic eine vielseitige Lösung zum Zusammenführen von PDFs nach Ihren spezifischen Bedürfnissen.
Vor- und Nachteile von PDFsam Basic
| Vorteile | Nachteile |
|---|---|
| Funktioniert vollständig offline; keine Uploads erforderlich. | Erfordert eine Installation. |
| Kostenlos; kein Konto erforderlich. | Oberfläche für Anfänger weniger intuitiv. |
| Flexible Optionen für Zusammenführung und Ausgabe. | Kann keine ausgewählten Seiten über Dateien hinweg zusammenführen. |
Methode 3: PDFs auf dem Mac mit Vorschau (integriertes Werkzeug) zusammenführen
Wenn Sie macOS verwenden, kann die integrierte Vorschau-App PDFs ohne zusätzliche Werkzeuge oder Kosten zusammenführen.
Was ist Vorschau?
Vorschau ist Apples integrierte Standardanwendung unter macOS zum Anzeigen und für grundlegende Bearbeitungen von Bildern und PDFs. Sie bietet Funktionen wie das Zusammenführen von PDFs, das Ausfüllen von Formularen und die Bildbearbeitung, alles in einer benutzerfreundlichen Oberfläche. Als vorinstallierte Anwendung bietet Vorschau leistungsstarke Funktionen ohne die Notwendigkeit zusätzlicher Software.
Wie man PDFs mit Vorschau kombiniert
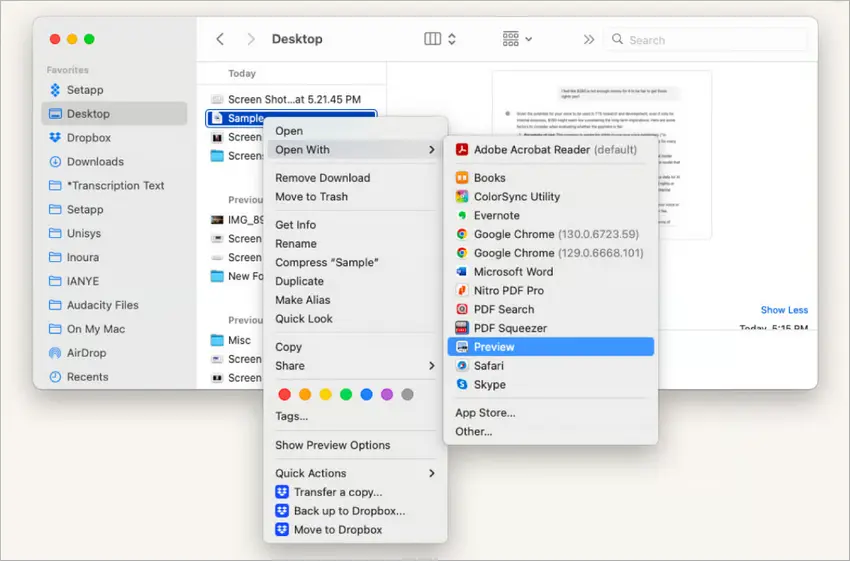
- Öffnen Sie eine der PDFs in Vorschau.
- Wählen Sie Darstellung > Miniaturen, um die Seitenleiste mit allen Seiten anzuzeigen.
- Öffnen Sie die zweite PDF, indem Sie Ablage > Öffnen wählen oder sie in die Miniatur-Seitenleiste ziehen.
- Ziehen Sie Seiten aus der zweiten PDF, um sie innerhalb der ersten PDF zu positionieren.
- Gehen Sie zu Ablage > Als PDF exportieren oder Ablage > Sichern, um das zusammengeführte Dokument zu speichern.
Erweiterte Funktionen
Vorschau ermöglicht es Benutzern, nicht nur ganze Dateien, sondern auch einzelne Seiten zusammenzuführen, indem sie diese zwischen den Dokumenten in der Miniaturansicht ziehen. Sie können Seiten vor dem Speichern neu anordnen, drehen oder löschen, was Ihnen mehr Kontrolle über das endgültige PDF gibt.
Vor- und Nachteile der Verwendung von Vorschau
| Vorteile | Nachteile |
|---|---|
| Auf jedem Mac vorinstalliert. | Begrenzte Bearbeitungsfunktionen. |
| Einfache Drag-and-Drop-Oberfläche. | Keine Stapelverarbeitung ohne zusätzliche Werkzeuge. |
| Funktioniert offline; schützt die Privatsphäre. | Weniger praktisch für große oder viele Dateien. |
Methode 4: PDF-Zusammenführung in Python automatisieren (mit Free Spire.PDF)
Für Programmierer oder alle, die Arbeitsabläufe automatisieren müssen (z. B. nächtliches Zusammenführen von Berichten, Kombinieren vieler Dateien), ist die Verwendung einer Python-Bibliothek wie Free Spire.PDF eine großartige Option.
Was ist Free Spire.PDF for Python?
Free Spire.PDF for Python ist eine leistungsstarke Bibliothek, die für die Arbeit mit PDF-Dateien in Python-Anwendungen entwickelt wurde. Sie ermöglicht Entwicklern die einfache Bearbeitung von PDF-Dokumenten, einschließlich wesentlicher Funktionen wie dem Teilen und Zusammenführen von Dateien. Mit seiner benutzerfreundlichen API ermöglicht Free Spire.PDF eine nahtlose Integration in Projekte und ist somit eine ausgezeichnete Wahl für Aufgaben im Dokumentenmanagement.
Wie man PDFs in Python zusammenführt
- Installieren Sie Free Spire.PDF über pip: pip install spire.pdf.free.
- Importieren Sie die erforderlichen spire.pdf-Module.
- Bereiten Sie eine Liste der PDF-Dateipfade vor, die zusammengeführt werden sollen.
- Rufen Sie PdfDocument.MergeFiles() mit der Liste auf.
- Speichern Sie das zusammengeführte Dokument in einer neuen Datei.
Das folgende ist das Beispiel-Code-Snippet zum Zusammenführen mehrerer PDFs mit Free Spire.PDF:
from spire.pdf.common import *
from spire.pdf import *

# List the PDF files you want to combine
input_files = ["report1.pdf", "report2.pdf", "appendix.pdf"]

# Merge the files into one document
merged_doc = PdfDocument.MergeFiles(input_files)

# Save the combined PDF
merged_doc.Save("merged_output.pdf")

# Clean up / free resources
merged_doc.Close()
Erweiterte Funktionen
- Bestimmte Seiten zusammenführen: Extrahieren und ausgewählte Seiten aus jeder PDF zusammenführen.
- Stapelweises Zusammenführen: Verarbeiten Sie alle PDFs in einem Ordner gleichzeitig.
- Stream-basierte Eingaben: Kombinieren Sie PDFs direkt aus dem Speicher oder Netzwerkquellen anstatt von der Festplatte.
- Erweiterte Logik: Fügen Sie Funktionen wie das Überspringen leerer Seiten, das Hinzufügen von Seitenzahlen und das Verschlüsseln von PDFs mit einem Passwort hinzu.
- Vielseitige Exportoptionen: Exportieren Sie generierte Dokumente als Word, HTML, Bilder und mehr.
Vor- und Nachteile der Automatisierung mit Spire.PDF
| Vorteile | Nachteile |
|---|---|
| Flexibel und vollständig automatisierbar. | Erfordert Programmierkenntnisse. |
| Funktioniert in Skripten, Cron-Jobs und serverseitigen Apps. | Fehler in Skripten können zu falscher Ausgabe führen. |
| Effizient für Massen- oder wiederholbare Aufgaben. | Die kostenlose Version hat Seitenanzahl-Limits. |
| Potenzial für erweiterte Funktionen. |
Wichtiger Hinweis
Die kostenlose Version ist beim Laden oder Erstellen von PDFs auf 10 Seiten beschränkt. Um mit großen PDF-Dokumenten umzugehen, können Sie die kommerzielle Version von Spire.PDF for Python in Betracht ziehen.
Zusammenfassung: Die beste Methode zum Zusammenführen von PDFs wählen
Das Zusammenführen von PDFs ohne Adobe Acrobat ist einfacher, als viele Leute denken, aber die richtige Methode hängt von Ihrer Situation ab. Online-Tools wie PDF24 sind schnell und bequem, während PDFsam Basic Ihnen mehr Kontrolle bei der Offline-Arbeit gibt. Vorschau ist die einfachste Wahl für Mac-Benutzer, und für diejenigen, die Automatisierung benötigen oder regelmäßig große Dateien verarbeiten, ist **Spire.PDF ** die leistungsstärkste Option.
| Ihre Situation | Beste Methode |
|---|---|
| Müssen schnell ein paar Dateien zusammenführen, von jedem Gerät, keine Installation | Online (PDF24 oder ähnlich) |
| Datenschutz-sensible Arbeit, große Dateien, wollen volle Kontrolle offline | Desktop-App (PDFsam Basic oder andere) |
| Verwenden von Mac, wollen etwas Integriertes und Einfaches | Vorschau auf macOS |
| Automatisierung von Stapeln oder Integration in Arbeitsabläufe | Python / Spire.PDF (oder andere Skripte) |
Kurz gesagt, ob Sie Geschwindigkeit, Datenschutz, Bequemlichkeit oder Automatisierung priorisieren, es gibt eine kostenlose Lösung, die zu Ihrem Arbeitsablauf passt – kein Acrobat erforderlich.
FAQs:
F1: Ist es sicher, PDFs online zusammenzuführen?
Viele Online-Tools sind sicher, besonders bekannte. Aber Sie sollten überprüfen, ob sie sichere Übertragungen (HTTPS) verwenden und ob der Dienst die Dateien nach der Verwendung löscht. Wenn Ihre Dokumente sensibel sind, bevorzugen Sie Offline-Tools oder Code, den Sie kontrollieren.
F2: Muss ich Software installieren, um PDFs zusammenzuführen?
Nicht unbedingt. Sie können PDFs online ohne Installation zusammenführen. Desktop-Anwendungen bieten jedoch oft mehr Funktionen und einen besseren Datenschutz. Wählen Sie je nach Ihren Bedürfnissen.
F3: Wird die Qualität durch das Zusammenführen von PDFs verringert?
Normalerweise nicht, solange das Zusammenführen keine Konvertierung oder Komprimierung beinhaltet.
F4: Kann ich mehrere PDFs auf einmal im Stapel zusammenführen?
Ja, viele Desktop-Anwendungen und Programmierbibliotheken wie Spire.PDF ermöglichen es Ihnen, mehrere PDFs gleichzeitig im Stapel zusammenzuführen.
F5: Wie kann man PDFs auf dem Mac kombinieren und zusammenführen?
Verwenden Sie die Vorschau-App, um das erste PDF zu öffnen, fügen Sie weitere PDFs hinzu, indem Sie sie in die Seitenleiste ziehen, ordnen Sie die Seiten nach Bedarf neu an und speichern Sie dann das zusammengeführte Dokument.
Siehe auch
Объединить PDF бесплатно без Acrobat (4 способа)
Содержание
- Метод 1: Объединение PDF онлайн бесплатно (с помощью PDF24)
- Метод 2: Объединение PDF на Windows с помощью PDFsam Basic
- Метод 3: Объединение PDF на Mac с помощью Preview (встроенный инструмент)
- Метод 4: Автоматизация объединения PDF на Python (с помощью Free Spire.PDF)
- Итог: выбор лучшего способа объединения PDF
- Часто задаваемые вопросы
Установить с помощью Pypi
pip install spire.pdf.free
Похожие ссылки
Объединение PDF-файлов стало обычной необходимостью как для личных, так и для профессиональных задач. Независимо от того, объединяете ли вы отчеты, консолидируете документы для презентации или просто организуете файлы, наличие надежного метода для объединения PDF-файлов крайне важно. К счастью, существуют различные способы достижения этой цели без необходимости использования Adobe Acrobat.
В этой статье рассматриваются несколько методов бесплатного объединения PDF-файлов без использования Acrobat, включая онлайн-инструменты, настольные приложения и автоматизированные решения с использованием Python. Каждый метод подходит для разных потребностей, что позволяет вам выбрать тот, который лучше всего соответствует вашему рабочему процессу.
Метод 1: Объединение PDF онлайн бесплатно (с помощью PDF24)
Один из быстрых и простых способов объединить PDF-файлы без установки чего-либо — это онлайн-инструменты. PDF24 — популярный вариант.
Что такое PDF24?
PDF24 предлагает набор бесплатных инструментов в вашем браузере (а также настольную версию). Среди этих инструментов есть «Объединить PDF», который позволяет загружать несколько PDF-файлов и объединять их.
Как использовать PDF24 для объединения PDF-файлов
- Перейдите на страницу Объединить PDF на PDF24 Tools.
- Загрузите или перетащите PDF-файлы, которые вы хотите объединить.
- (Необязательно) Измените порядок файлов, перетаскивая их в нужном порядке.
- Нажмите кнопку «Объединить PDF», чтобы начать процесс объединения.
- Загрузите полученный объединенный PDF-файл.
Расширенные функции
PDF24 предлагает режим страниц, позволяющий выбирать отдельные страницы из загруженных PDF-файлов для объединения. Вы можете изменять порядок этих страниц в результирующем документе, обеспечивая еще больший контроль над вашим объединенным PDF-файлом.
Плюсы и минусы PDF24
| Плюсы | Минусы |
|---|---|
| Не требуется установка; работает в любом браузере. | Требуется подключение к Интернету. |
| Бесплатно; не требуется учетная запись. | Загрузка файлов всегда сопряжена с некоторым риском для конфиденциальности. |
| Поддерживает выбор страниц при объединении. | |
| Предоставляет дополнительные полезные инструменты для редактирования PDF-файлов. |
Метод 2: Объединение PDF на Windows с помощью PDFsam Basic
Если вы работаете на ПК с Windows и предпочитаете офлайн-инструменты, PDFsam Basic — это настоятельно рекомендуемое бесплатное настольное приложение с открытым исходным кодом для работы с PDF.
Что такое PDFsam Basic?
PDFsam Basic — это специализированный инструмент, ориентированный на реорганизацию страниц PDF.
- «PDFsam» означает PDF Split and Merge (Разделение и объединение PDF). Basic — это их бесплатная версия.
- Он позволяет объединять целые PDF-файлы, изменять порядок страниц, извлекать страницы, поворачивать страницы и т.д.
Как объединять с помощью PDFsam Basic
- Скачайте и установите PDFsam Basic с официального сайта.
- Запустите приложение, выберите модуль «Объединить» в главном меню.
- Добавьте или перетащите PDF-файлы, которые вы хотите объединить, в очередь на объединение.
- (Необязательно) Расположите файлы в нужном порядке.
- Укажите имя и путь к результирующему PDF-файлу.
- Нажмите «Выполнить», чтобы создать объединенный PDF-файл.
Расширенные функции
PDFsam Basic предлагает несколько настроек объединения для кастомизации вашего вывода:
- Нормализация страниц: подгоняет размеры всех страниц под размер первой страницы.
- Интерактивные формы: выберите объединение, отбрасывание или сведение полей форм.
- Обработка закладок: решите, сохранять или удалять закладки.
- Содержание: опция для создания содержания для объединенного документа.
- Сжатие файлов: сжимайте выходные файлы для уменьшения размера.
- Контроль версии PDF: установите версию выходного PDF на 1.5, 1.6, 1.7 или 2.0.
С этими функциями PDFsam Basic предоставляет универсальное решение для объединения PDF-файлов в соответствии с вашими конкретными потребностями.
Плюсы и минусы PDFsam Basic
| Плюсы | Минусы |
|---|---|
| Работает полностью офлайн; не требуется загрузка. | Требуется установка. |
| Бесплатно; не требуется учетная запись. | Интерфейс менее интуитивен для новичков. |
| Гибкие опции для объединения и вывода. | Невозможно объединить выборочные страницы из разных файлов. |
Метод 3: Объединение PDF на Mac с помощью Preview (встроенный инструмент)
Если вы используете macOS, встроенное приложение Preview может объединять PDF-файлы без необходимости использования каких-либо внешних инструментов или дополнительных затрат.
Что такое Preview?
Preview — это встроенное стандартное приложение Apple на macOS для просмотра и выполнения базового редактирования изображений и PDF-файлов. Оно предлагает такие функции, как объединение PDF-файлов, заполнение форм и редактирование изображений, все это в удобном интерфейсе. Будучи предустановленным приложением, Preview предоставляет мощную функциональность без необходимости дополнительного программного обеспечения.
Как объединять PDF-файлы с помощью Preview
- Откройте один из PDF-файлов в Preview.
- Выберите Вид > Миниатюры, чтобы отобразить боковую панель со всеми страницами.
- Откройте второй PDF-файл, выбрав Файл > Открыть или перетащив его в боковую панель миниатюр.
- Перетащите страницы из второго PDF-файла, чтобы расположить их внутри первого PDF-файла.
- Перейдите в Файл > Экспортировать как PDF или Файл > Сохранить, чтобы сохранить объединенный документ.
Расширенные функции
Preview позволяет пользователям объединять не только целые файлы, но и отдельные страницы, перетаскивая их между документами в представлении миниатюр. Вы можете изменять порядок, поворачивать или удалять страницы перед сохранением, что дает вам больше контроля над окончательным PDF-файлом.
Плюсы и минусы использования Preview
| Плюсы | Минусы |
|---|---|
| Предустановлено на каждом Mac. | Ограниченные функции редактирования. |
| Простой интерфейс с перетаскиванием. | Нет пакетной автоматизации без дополнительных инструментов. |
| Работает офлайн; сохраняет конфиденциальность. | Менее удобно для больших или множества файлов. |
Метод 4: Автоматизация объединения PDF на Python (с помощью Free Spire.PDF)
Для программистов или тех, кому нужно автоматизировать рабочие процессы (например, объединение отчетов ночью, объединение множества файлов), использование библиотеки Python, такой как Free Spire.PDF, является отличным вариантом.
Что такое Free Spire.PDF for Python?
Free Spire.PDF for Python — это мощная библиотека, предназначенная для работы с PDF-файлами в приложениях Python. Она позволяет разработчикам легко манипулировать PDF-документами, включая такие важные функции, как разделение и объединение файлов. Благодаря удобному API, Free Spire.PDF обеспечивает бесшовную интеграцию в проекты, что делает его отличным выбором для задач, связанных с управлением документами.
Как объединять PDF-файлы на Python
- Установите Free Spire.PDF через pip: pip install spire.pdf.free.
- Импортируйте необходимые модули spire.pdf.
- Подготовьте список путей к PDF-файлам для объединения.
- Вызовите PdfDocument.MergeFiles() со списком.
- Сохраните объединенный документ в новый файл.
Ниже приведен пример фрагмента кода для объединения нескольких PDF-файлов с помощью Free Spire.PDF:
from spire.pdf.common import *
from spire.pdf import *

# List the PDF files you want to combine
input_files = ["report1.pdf", "report2.pdf", "appendix.pdf"]

# Merge the files into one document
merged_doc = PdfDocument.MergeFiles(input_files)

# Save the combined PDF
merged_doc.Save("merged_output.pdf")

# Clean up / free resources
merged_doc.Close()
Расширенные функции
- Объединение определенных страниц: извлечение и объединение выбранных страниц из каждого PDF.
- Пакетное объединение: одновременная обработка всех PDF-файлов в папке.
- Ввод на основе потоков: объединение PDF-файлов непосредственно из памяти или сетевых источников, а не с диска.
- Расширенная логика: включение таких функций, как пропуск пустых страниц, добавление номеров страниц и шифрование PDF-файлов паролем.
- Универсальные опции экспорта: экспорт сгенерированных документов в Word, HTML, изображения и многое другое.
Плюсы и минусы автоматизации с помощью Spire.PDF
| Плюсы | Минусы |
|---|---|
| Гибкий и полностью автоматизируемый. | Требует знаний программирования. |
| Работает в скриптах, cron-заданиях и серверных приложениях. | Ошибки в скриптах могут привести к неправильному выводу. |
| Эффективен для массовых или повторяющихся задач. | Бесплатная версия имеет ограничения по количеству страниц. |
| Потенциал для расширенных функций. |
Важное примечание
Бесплатная версия ограничена 10 страницами при загрузке или создании PDF-файлов. Для работы с большими PDF-документами вы можете рассмотреть использование коммерческой версии Spire.PDF for Python.
Итог: выбор лучшего способа объединения PDF
Объединение PDF-файлов без Adobe Acrobat проще, чем многие думают, но правильный метод зависит от вашей ситуации. Онлайн-инструменты, такие как PDF24, быстры и удобны, в то время как PDFsam Basic дает вам больше контроля при работе в автономном режиме. Preview — самый простой выбор для пользователей Mac, а для тех, кому нужна автоматизация или регулярная обработка большого количества файлов, **Spire.PDF ** — самый мощный вариант.
| Ваша ситуация | Лучший метод |
|---|---|
| Нужно быстро объединить несколько файлов, с любого устройства, без установки | Онлайн (PDF24 или аналоги) |
| Работа с конфиденциальными данными, большие файлы, нужен полный контроль в офлайне | Настольное приложение (PDFsam Basic или другие) |
| Использование Mac, нужно что-то встроенное и простое | Preview на macOS |
| Автоматизация пакетов или интеграция в рабочие процессы | Python / Spire.PDF (или другие скрипты) |
Короче говоря, независимо от того, что вы цените больше — скорость, конфиденциальность, удобство или автоматизацию, — существует бесплатное решение, которое подходит вашему рабочему процессу — Acrobat не требуется.
Часто задаваемые вопросы:
В1: Безопасно ли объединять PDF-файлы онлайн?
Многие онлайн-инструменты безопасны, особенно известные. Но вам следует убедиться, что они используют безопасную передачу данных (HTTPS) и что сервис удаляет файлы после использования. Если ваши документы конфиденциальны, предпочитайте офлайн-инструменты или код, который вы контролируете.
В2: Нужно ли устанавливать программное обеспечение для объединения PDF-файлов?
Не обязательно. Вы можете объединять PDF-файлы онлайн без установки. Однако настольные приложения часто предоставляют больше функций и лучшую конфиденциальность. Выбирайте в зависимости от ваших потребностей.
В3: Снизится ли качество при объединении PDF-файлов?
Обычно нет, если объединение не включает преобразование или сжатие.
В4: Могу ли я объединять несколько PDF-файлов в пакетном режиме?
Да, многие настольные приложения и программные библиотеки, такие как Spire.PDF, позволяют объединять несколько PDF-файлов одновременно в пакетном режиме.
В5: Как объединять PDF-файлы на Mac?
Используйте приложение Preview, чтобы открыть первый PDF-файл, добавьте дополнительные PDF-файлы, перетащив их в боковую панель, измените порядок страниц по мере необходимости, а затем сохраните объединенный документ.
Смотрите также
Merge PDFs for Free Without Acrobat (4 Ways)
Table of Contents
Install with Pypi
pip install spire.pdf.free
Related Links
Merging PDF files has become a common necessity for both personal and professional tasks. Whether you’re combining reports, consolidating documents for a presentation, or simply organizing files, having a reliable method to merge PDFs is essential. Fortunately, there are various ways to achieve this without the need for Adobe Acrobat.
This article explores multiple methods to merge PDFs for free without using Acrobat , including online tools , desktop applications , and automated solutions using Python. Each method caters to different needs, allowing you to choose the one that best fits your workflow.
Method 1: Merge PDFs Online for Free (Using PDF24)
One quick and easy way to merge PDFs without installing anything is via online tools. PDF24 is a popular option.
What is PDF24?
PDF24 offers a suite of free tools in your browser (and also a desktop version). Among those tools is “Merge PDF,” which lets you upload multiple PDF files and combine them.
How to Use PDF24 to Merge PDFs
- Go to the Merge PDF page on PDF24 Tools.
- Upload or drag & drop the PDF files you want to combine.
- (Optional) Rearrange the files by dragging and dropping them into your preferred order.
- Click the “ Merge PDF ” button to start the merging process.
- Download the resulting combined PDF.
Advanced Features
PDF24 offers a Page mode , allowing you to select individual pages from your uploaded PDFs for merging. You can change the order of these pages in the resulting document, providing even greater control over your merged PDF.
Pros & Cons of PDF24
| Pros | Cons |
|---|---|
| No installation required; works in any browser. | Requires internet connection. |
| Free; no account needed. | Uploading files always carries some privacy risk. |
| Supports page selection while merging. | |
| Provides additional useful tools for editing PDF files. |
Method 2: Combine PDFs on Windows with PDFsam Basic
If you’re working on a Windows PC and prefer offline tools, PDFsam Basic is a highly recommended free and open-source desktop application for PDF manipulation.
What is PDFsam Basic?
PDFsam Basic is a dedicated tool focused on reorganizing PDF pages.
- “PDFsam” stands for PDF Split and Merge. Basic is their free edition.
- It allows you to merge entire PDF files, reorder pages, extract pages, rotate pages, etc.
How to Merge Using PDFsam Basic
- Download and install PDFsam Basic from the official site.
- Launch the app, choose “ Merge ” module from the main menu.
- Add or drag & drop the PDF files you want to combine into the merge queue.
- (Optional) Arrange the files in the desired order.
- Set the resulting PDF file name and path.
- Click “ Run ” to produce the combined PDF.
Advanced Features
PDFsam Basic offers several merge settings to customize your output:
- Page Normalization: Adjusts all page sizes to match the first page.
- Interactive Forms: Choose to merge, discard, or flatten form fields.
- Bookmarks Handling: Decide whether to retain or remove bookmarks.
- Table of Contents: Option to generate a table of contents for the merged document.
- File Compression: Compress output files to reduce size.
- PDF Version Control: Set the output PDF version to 1.5, 1.6, 1.7, or 2.0.
With these features, PDFsam Basic provides a versatile solution for merging PDFs according to your specific needs.
Pros & Cons of PDFsam Basic
| Pros | Cons |
|---|---|
| Works fully offline; no uploads needed. | Requires installation. |
| Free; no account required. | Interface less intuitive for beginners. |
| Flexible options for merging and output. | Cannot merge selective pages across files. |
Method 3: Merge PDFs on Mac with Preview (Built-in Tool)
If you use macOS, the built-in Preview app can merge PDFs without needing any external tools or extra cost.
What is Preview?
Preview is Apple's built-in, default application on macOS for viewing and making basic edits to images and PDFs. It offers features such as merging PDFs, filling out forms, and image editing, all within a user-friendly interface. As a pre-installed application, Preview provides powerful functionality without the need for additional software.
How to Combine PDFs with Preview
- Open one of the PDFs in Preview .
- Select View > Thumbnails to display the sidebar with all pages.
- Open the second PDF by selecting File > Open or dragging it into the thumbnail sidebar.
- Drag and drop pages from the second PDF to position them within the first PDF.
- Go to File > Export as PDF or File > Save to save the merged document.
Advanced Features
Preview allows users to merge not just entire files, but also individual pages by dragging them between documents in the thumbnail view. You can reorder, rotate, or delete pages before saving, giving you more control over the final PDF.
Pros & Cons of Using Preview
| Pros | Cons |
|---|---|
| Pre-installed on every Mac. | Limited editing features. |
| Simple drag-and-drop interface. | No batch automation without extra tools. |
| Works offline; preserves privacy. | Less convenient for large or many files. |
Method 4: Automate PDF Merging in Python (with Free Spire.PDF)
For coders or anyone who needs to automate workflows (e.g. merging reports overnight, combining many files), using a Python library like Free Spire.PDF is a great option.
What is Free Spire.PDF for Python?
Free Spire.PDF for Python is a powerful library designed for working with PDF files in Python applications. It allows developers to easily manipulate PDF documents, including essential features like splitting and merging files. With its user-friendly API, Free Spire.PDF enables seamless integration into projects, making it an excellent choice for tasks involving document management.
How to Merge PDFs in Python
- Install Free Spire.PDF through pip: pip install spire.pdf.free.
- Import the required spire.pdf modules.
- Prepare a list of PDF file paths to be merged.
- Call PdfDocument.MergeFiles() with the list.
- Save the merged document to a new file.
The following is the sample code snippet for merging multiple PDFs with Free Spire.PDF:
from spire.pdf.common import *
from spire.pdf import *

# List the PDF files you want to combine
input_files = ["report1.pdf", "report2.pdf", "appendix.pdf"]

# Merge the files into one document
merged_doc = PdfDocument.MergeFiles(input_files)

# Save the combined PDF
merged_doc.Save("merged_output.pdf")

# Clean up / free resources
merged_doc.Close()
Advanced Features
- Merge Specific Pages: Extract and merge selected pages from each PDF.
- Batch Merging: Process all PDFs in a folder simultaneously.
- Stream-Based Inputs: Combine PDFs directly from memory or network sources instead of from disk.
- Enhanced Logic: Include features like skipping empty pages, adding page numbers, and encrypting PDFs with a password.
- Versatile Export Options: Export generated documents as Word, HTML, images, and more.
Pros & Cons of Spire.PDF Automation
| Pros | Cons |
|---|---|
| Flexible and fully automatable. | Requires coding knowledge. |
| Works in scripts, cron jobs, and server-side apps. | Errors in scripts may cause wrong output. |
| Efficient for bulk or repeatable tasks. | Free version has page-count limits. |
| Potential for advanced features. |
Important Note
Free version is limited to 10 pages when loading or creating PDFs. To deal with large PDF documents, you may consider using the commercial version of Spire.PDF for Python.
Summary: Choosing the Best Way to Merge PDFs
Merging PDFs without Adobe Acrobat is easier than many people think, but the right method depends on your situation. Online tools like PDF24 are fast and convenient, while PDFsam Basic gives you more control when working offline. Preview is the most straightforward choice for Mac users, and for those who need automation or handle bulk files regularly, **Spire.PDF **is the most powerful option.
| Your Situation | Best Method |
|---|---|
| Need to merge a few files quickly, from any device, no installation | Online (PDF24 or similar) |
| Privacy-sensitive work, large files, want full control offline | Desktop app (PDFsam Basic, or others) |
| Using Mac, want something built-in and simple | Preview on macOS |
| Automating batches or integrating into workflows | Python / Spire.PDF (or other scripts) |
In short, whether you prioritize speed, privacy, convenience, or automation, there’s a free solution that fits your workflow—no Acrobat required.
FAQs:
Q1: Is it safe to merge PDFs online?
Many online tools are safe, especially well-known ones. But you should check that they use secure transfers (HTTPS), and that the service deletes files after use. If your documents are sensitive, prefer offline tools or code you control.
Q2: Do I need to install software to merge PDFs?
Not necessarily. You can merge PDFs online without installation. However, desktop applications often provide more features and better privacy. Choose based on your needs.
Q3: Will merging PDFs reduce quality?
Usually no, as long as merging doesn’t involve conversion or compression.
Q4: Can I batch merge multiple PDFs at once?
Yes, many desktop applications and programming libraries like Spire.PDF allow you to batch merge multiple PDFs simultaneously.
Q5: How to combine and merge PDFs on Mac?
Use the Preview app to open the first PDF, add additional PDFs by dragging them into the sidebar, rearrange pages as needed, and then save the merged document.
See Also
Parse HTML in Python: Read Strings, Files & Web URLs
When it comes to working with web content and documents, the ability to parse HTML in Python is an essential skill for developers across various domains. HTML parsing involves extracting meaningful information from HTML documents, manipulating content, and processing web data efficiently. Whether you're working on web scraping projects, data extraction tasks, content analysis, or document processing, mastering HTML parsing techniques in Python can significantly enhance your productivity and capabilities.
In this guide, we'll explore how to effectively read HTML in Python using Spire.Doc for Python. You'll learn practical techniques for processing HTML content from strings, local files, and URLs, and implementing best practices for HTML parsing in your projects.
- Why Parse HTML in Python?
- Getting Started: Install HTML Parser in Python
- How Spire.Doc Parses HTML: Core Concepts
- Best Practices for Effective HTML Parsing
- Conclusion
Why Parse HTML in Python?
HTML (HyperText Markup Language) is the backbone of the web, used to structure and present content on websites. Parsing HTML enables you to:
- Extract specific data (text, images, tables, hyperlinks) from web pages or local files.
- Analyze content structure for trends, keywords, or patterns.
- Automate data collection for research, reporting, or content management.
- Clean and process messy HTML into structured data.
While libraries like BeautifulSoup excel at lightweight parsing, Spire.Doc for Python shines when you need to integrate HTML parsing with document creation or conversion. It offers a robust framework to parse and interact with HTML content as a structured document object model (DOM).
Getting Started: Install HTML Parser in Python
Before diving into parsing, you’ll need to install Spire.Doc for Python. The library is available via PyPI, making installation straightforward:
pip install Spire.Doc
This command installs the latest version of the library, along with its dependencies. Once installed, you’re ready to start parsing HTML.
How Spire.Doc Parses HTML: Core Concepts
At its core, Spire.Doc parses HTML by translating HTML’s tag-based structure into a hierarchical document model. This model is composed of objects that represent sections, paragraphs, and other elements, mirroring the original HTML’s organization. Let’s explore how this works in practice.
1. Parsing HTML Strings in Python
If you have a small HTML snippet (e.g., from an API response or user input), parse it directly from a string. This is great for testing or working with short, static HTML.
from spire.doc import *
from spire.doc.common import *
# Define HTML content as a string
html_string = """
<html>
<head>
<title>Sample HTML</title>
</head>
<body>
<h1>Main Heading</h1>
<p>This is a paragraph with <strong>bold text</strong>.</p>
<div>
<p>A nested paragraph inside a div.</p>
</div>
<ul>
<li>List item 1</li>
<li>List item 2</li>
<li>List item 3</li>
</ul>
</body>
</html>
"""
# Initialize a new Document object
doc = Document()
# Add a section and paragraph to the document
section = doc.AddSection()
paragraph = section.AddParagraph()
# Load HTML content from the string
paragraph.AppendHTML(html_string)
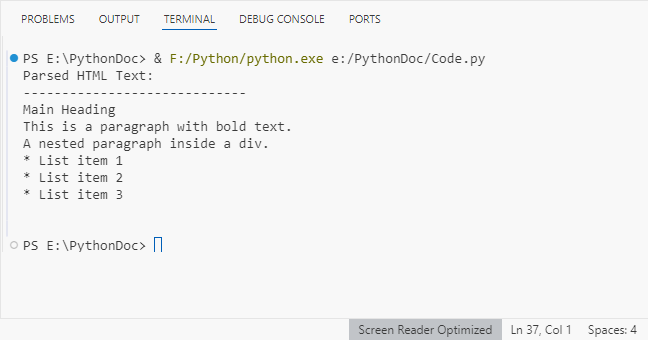
print("Parsed HTML Text:")
print("-----------------------------")
# Extract text content from the parsed HTML
parsed_text = doc.GetText()
# Print the result
print(parsed_text)
# Close the document
doc.Close()
How It Works:
- HTML String: We define a sample HTML snippet with common elements (headings, paragraphs, lists).
- Document Setup: Spire.Doc uses a Word-like structure (sections → paragraphs) to organize parsed HTML.
- Parse HTML:
AppendHTML()converts the string into structured Word elements (e.g.,<h1>becomes a "Heading 1" style,<ul>becomes a list). - Extract Text:
GetText()pulls clean, plain text from the parsed document (no HTML tags).
Output:
Spire.Doc supports exporting parsed HTML content to multiple formats such as TXT, Word via the SaveToFile() method.
2. Parsing HTML Files in Python
For local HTML files, Spire.Doc can load and parse them with a single method. This is useful for offline content (e.g., downloaded web pages, static reports).
from spire.doc import *
from spire.doc.common import *
# Define the path to your local HTML file
html_file_path = "example.html"
# Create a Document instance
doc = Document()
# Load and parse the HTML file
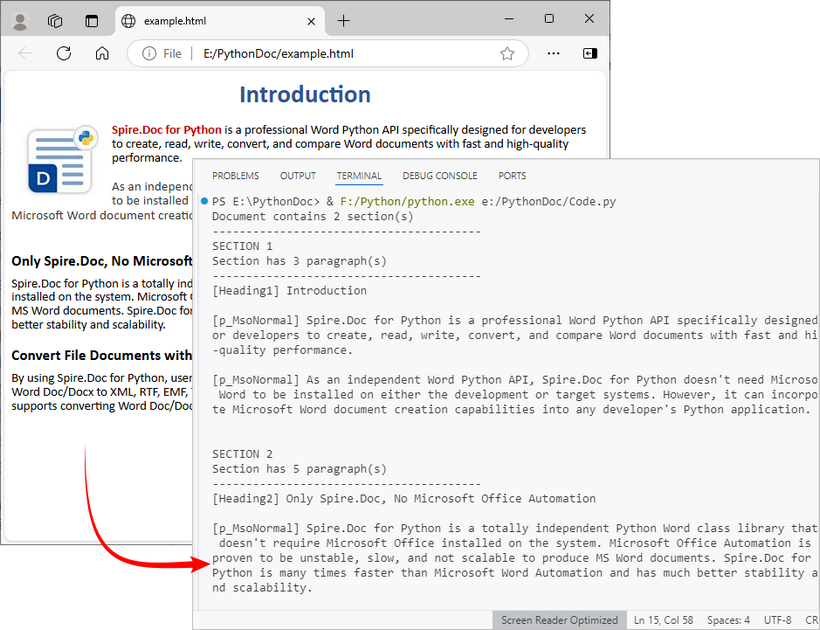
doc.LoadFromFile(html_file_path, FileFormat.Html)
# Analyze document structure
print(f"Document contains {doc.Sections.Count} section(s)")
print("-"*40)
# Process each section
for section_idx in range(doc.Sections.Count):
section = doc.Sections.get_Item(section_idx)
print(f"SECTION {section_idx + 1}")
print(f"Section has {section.Body.Paragraphs.Count} paragraph(s)")
print("-"*40)
# Traverse through paragraphs in the current section
for para_idx in range(section.Paragraphs.Count):
para = section.Paragraphs.get_Item(para_idx)
# Get paragraph style name and text content
style_name = para.StyleName
para_text = para.Text
# Print paragraph information if content exists
if para_text.strip():
print(f"[{style_name}] {para_text}\n")
# Add spacing between sections
print()
# Close the document
doc.Close()
Key Features:
- Load Local Files:
LoadFromFile()reads the HTML file and auto-parses it into a Word structure. - Structure Analysis: Check the number of sections/paragraphs and their styles (critical for auditing content).
- Style Filtering: Identify headings (e.g., "Heading 1") or lists (e.g., "List Paragraph") to organize content.
Output:
After loading the HTML file into the Document object, you can use Spire.Doc to extract specific elements like tables, hyperlinks from HTML.
3. Parsing a URL in Python
To parse HTML directly from a live web page, first fetch the HTML content from the URL using a library like requests, then pass the content to Spire.Doc for parsing. This is core for web scraping and real-time data extraction.
Install the Requests library via pip:
pip install requests
Python code to parse web page:
from spire.doc import *
from spire.doc.common import *
import requests
# Fetch html content from a URL
def fetch_html_from_url(url):
"""Fetch HTML from a URL and handle errors (e.g., 404, network issues)"""
# Mimic a browser with User-Agent (avoids being blocked by websites)
headers = {
"User-Agent": "Mozilla/5.0 (Windows NT 10.0; Win64; x64)"
}
try:
response = requests.get(url, headers=headers)
response.raise_for_status() # Raise exception for HTTP errors
return response.text # Return raw HTML content
except requests.exceptions.RequestException as e:
raise Exception(f"Error fetching HTML: {str(e)}")
# Specify the target URL
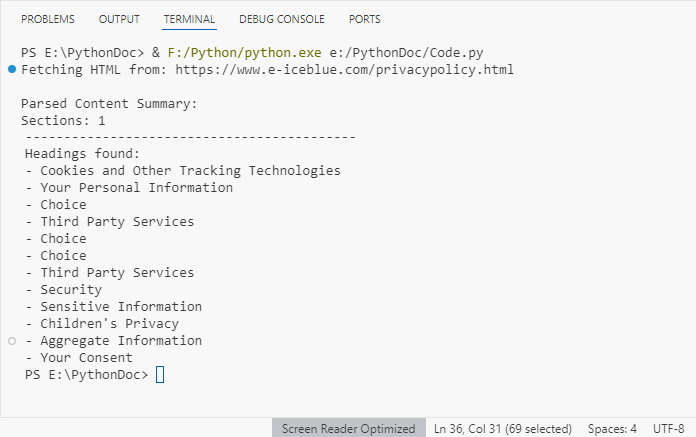
url = "https://www.e-iceblue.com/privacypolicy.html"
print(f"Fetching HTML from: {url}")
# Get HTML content
html_content = fetch_html_from_url(url)
# Create document and insert HTML content into it
doc = Document()
section = doc.AddSection()
paragraph = section.AddParagraph()
paragraph.AppendHTML(html_content)
# Extract and display summary information
print("\nParsed Content Summary:")
print(f"Sections: {doc.Sections.Count}")
print("-------------------------------------------")
# Extract and display headings
print("Headings found:")
for para_idx in range(section.Paragraphs.Count):
para = section.Paragraphs.get_Item(para_idx)
if isinstance(para, Paragraph) and para.StyleName.startswith("Heading"):
print(f"- {para.Text.strip()}")
# Close the document
doc.Close()
Steps Explained:
- Use requests.get() to fetch the HTML content from the URL.
- Pass the raw HTML text to Spire.Doc for parsing.
- Extract specific content (e.g., headings) from live pages for SEO audits or content aggregation.
Output:
Best Practices for Effective HTML Parsing
To optimize your HTML parsing workflow with Spire.Doc, follow these best practices:
- Validate Input Sources: Before parsing, check that HTML content (strings or files) is accessible and not corrupted. This reduces parsing errors:
import os

html_file = "data.html"
if os.path.exists(html_file):
    doc.LoadFromFile(html_file, FileFormat.Html)
else:
    print(f"Error: File '{html_file}' not found.")
- Handle Exceptions: Wrap parsing operations in try-except blocks to catch catch errors (e.g., missing files, invalid HTML):
try:
    doc.LoadFromFile("sample.html", FileFormat.Html)
except Exception as e:
    print(f"Error loading HTML: {e}")
- Optimize for Large Files: For large HTML files, consider loading content in chunks or disabling non-essential parsing features to improve performance.
- Clean Extracted Data: Use Python’s string methods (e.g., strip(), replace()) to remove extra whitespace or unwanted characters from extracted text.
- Keep the Library Updated: Regularly update Spire.Doc with
pip install --upgrade Spire.Docto benefit from improved parsing logic and bug fixes.
Conclusion
Python makes HTML parsing accessible for all skill levels. Whether you’re working with HTML strings, local files, or remote URLs, the combination of Requests (for fetching) and Spire.Doc (for structuring) simplifies complex tasks like web scraping and content extraction.
By following the examples and best practices in this guide, you’ll turn unstructured HTML into actionable, organized data in minutes. To unlock the full potential of Spire.Doc for Python, you can request a 30-day trial license here.
Convert HTML to Text in C#: Easy Methods + Examples
In .NET development, converting HTML to plain text is a common task, whether you need to extract content from web pages, process HTML emails, or generate lightweight text reports. However, HTML’s rich formatting, tags, and structural elements can complicate workflows that require clean, unformatted text. This is why using C# for HTML to text conversion becomes essential.
Spire.Doc for .NET simplifies this process: it’s a robust library for document manipulation that natively supports loading HTML files/strings and converting them to clean plain text. This guide will explore how to convert HTML to plain text in C# using the library, including detailed breakdowns of two core scenarios: converting HTML strings (in-memory content) and HTML files (disk-based content).
- Why Use Spire.Doc for HTML to Text Conversion?
- Installing Spire.Doc
- Convert HTML Strings to Text in C#
- Convert HTML File to Text in C#
- FAQs
- Conclusion
Why Use Spire.Doc for HTML to Text Conversion?
Spire.Doc is a .NET document processing library that stands out for HTML-to-text conversion due to:
- Simplified Code: Minimal lines of code to handle even complex HTML.
- Structure Preservation: Maintains logical formatting (line breaks, list indentation) in the output text.
- Special Character Support: Automatically converts HTML entities to their plain text equivalents.
- Lightweight: Avoids heavy dependencies, making it suitable for both desktop and web applications
Installing Spire.Doc
Spire.Doc is available via NuGet, the easiest way to manage dependencies:
- In Visual Studio, right-click your project > Manage NuGet Packages.
- Search for Spire.Doc and install the latest stable version.
- Alternatively, use the Package Manager Console:
Install-Package Spire.Doc
After installing, you can dive into the C# code to extract text from HTML.
Convert HTML Strings to Text in C#
This example renders an HTML string into a Document object, then uses SaveToFile() to save it as a plain text file.
using Spire.Doc;
using Spire.Doc.Documents;
namespace HtmlToTextSaver
{
class Program
{
static void Main(string[] args)
{
// Define HTML content
string htmlContent = @"
<html>
<body>
<h1>Sample HTML Content</h1>
<p>This is a paragraph with <strong>bold</strong> and <em>italic</em> text.</p>
<p>Another line with a <a href='https://example.com'>link</a>.</p>
<ul>
<li>List item 1</li>
<li>List item 2 (with <em>italic</em> text)</li>
</ul>
<p>Special characters: © & ®</p>
</body>
</html>";
// Create a Document object
Document doc = new Document();
// Add a section to hold content
Section section = doc.AddSection();
// Add a paragraph
Paragraph paragraph = section.AddParagraph();
// Render HTML into the paragraph
paragraph.AppendHTML(htmlContent);
// Save as plain text
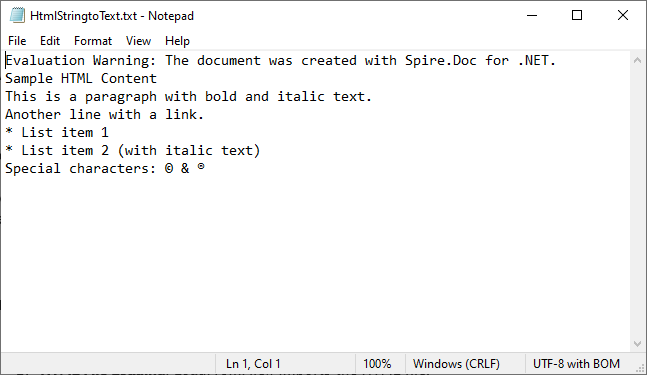
doc.SaveToFile("HtmlStringtoText.txt", FileFormat.Txt);
}
}
}
How It Works:
- HTML String Definition: We start with a sample HTML string containing headings, paragraphs, formatting tags (
<strong>,<em>), links, lists, and special characters. - Document Setup: A
Documentobject is created to manage the content, with aSectionandParagraphto structure the HTML rendering. - HTML Rendering:
AppendHTML()parses the HTML string and converts it into the document's internal structure, preserving content hierarchy. - Text Conversion:
SaveToFile()withFileFormat.Txtconverts the rendered content to plain text, stripping HTML tags while retaining readable structure.
Output:
Extended reading: Parse or Read HTML in C#
Convert HTML File to Text in C#
This example directly loads an HTML file and converts it to text. Ideal for batch processing or working with pre-existing HTML documents (e.g., downloaded web pages, local templates).
using Spire.Doc;
using Spire.Doc.Documents;
namespace HtmlToText
{
class Program
{
static void Main()
{
// Create a Document object
Document doc = new Document();
// Load an HTML file
doc.LoadFromFile("sample.html", FileFormat.Html, XHTMLValidationType.None);
// Convert HTML to plain text
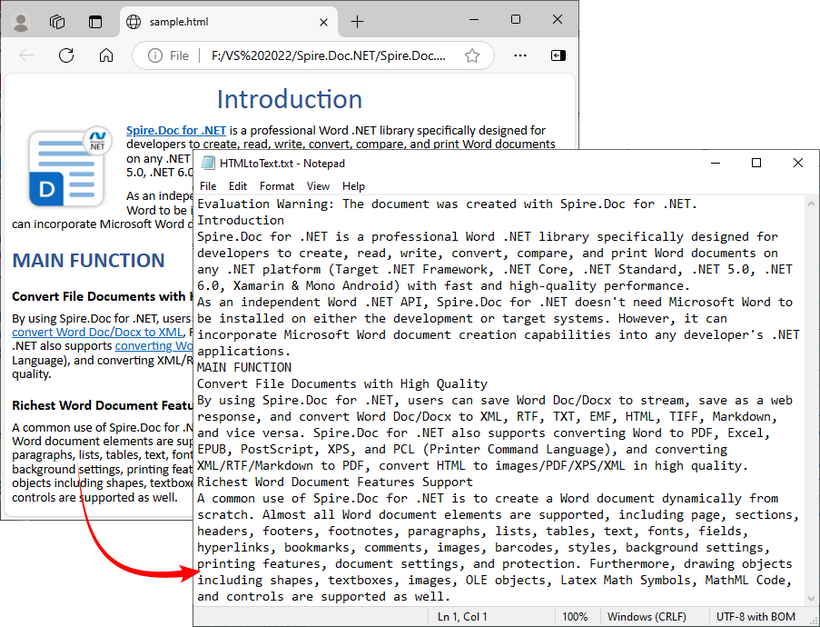
doc.SaveToFile("HTMLtoText.txt", FileFormat.Txt);
doc.Dispose();
}
}
}
How It Works:
- Document Initialization: A
Documentobject is created to handle the file operations. - HTML File Loading:
LoadFromFile()imports the HTML file, withFileFormat.Htmlspecifying the input type.XHTMLValidationType.Noneensures compatibility with non-strict HTML. - Text Conversion:
SaveToFile()withFileFormat.Txtconverts the loaded HTML content to plain text.
To preserve the original formatting and style, you can refer to the C# tutorial to convert the HTML file to Word.
FAQs
Q1: Can Spire.Doc process malformed HTML?
A: Yes. Spire.Doc includes built-in tolerance for malformed HTML, but you may need to disable strict validation to ensure proper parsing.
When loading HTML files, use XHTMLValidationType.None (as shown in the guide) to skip strict XHTML checks:
doc.LoadFromFile("malformed.html", FileFormat.Html, XHTMLValidationType.None);
This setting tells Spire.Doc to parse the HTML like a web browser (which automatically corrects minor issues like unclosed <p> or <li> tags) instead of rejecting non-compliant content.
Q2: Can I extract specific elements from HTML (like only paragraphs or headings)?
A: Yes, after loading the HTML into a Document object, you can access specific elements through the object model (like paragraphs, tables, etc.) and extract text from only those specific elements rather than the entire document.
Q3: Can I convert HTML to other formats besides plain text using Spire.Doc?
A: Yes, Spire.Doc supports conversion to multiple formats, including Word DOC/DOCX, PDF, image, RTF, and more, making it a versatile document processing solution.
Q4: Does Spire.Doc work with .NET Core/.NET 5+?
A: Spire.Doc fully supports .NET Core, .NET 5/6/7/8, and .NET Framework 4.0+. There’s no difference in functionality across these frameworks, which means you can use the same code (e.g., Document, AppendHTML(), SaveToFile()) regardless of which .NET runtime you’re targeting.
Conclusion
Converting HTML to text in C# is straightforward with the Spire.Doc library. Whether you’re working with HTML strings or files, Spire.Doc simplifies the process by handling HTML parsing, structure preservation, and text conversion. By following the examples in this guide, you can seamlessly integrate HTML-to-text conversion into your C# applications.
You can request a free 30-day trial license here to unlock full functionality and remove limitations of the Spire.Doc library.
Convertire C# DataTable in CSV: 3 metodi semplici con esempi
Indice dei contenuti
- Perché Esportare DataTable in CSV in C#
- Metodo 1: Conversione Manuale DataTable C# in CSV Usando StringBuilder
- Metodo 2: Esportazione DataTable C# di Grandi Dimensioni in CSV Usando StreamWriter
- Metodo 3: Usare Spire.XLS for .NET per Convertire DataTable in CSV in C#
- Confronto delle Prestazioni dei Metodi da DataTable a CSV
- Quale Metodo Dovresti Usare?
- Gestione di Casi Speciali e Migliori Pratiche per DataTable in CSV
- Conclusione
- FAQs
Installa con Pypi
Install-Package Spire.XLS
Link Correlati
Esportare DataTable in CSV in C# è un requisito comune per gli sviluppatori che necessitano di salvare, condividere o analizzare dati tabulari in modo efficiente. L'oggetto DataTable in .NET fornisce un modo strutturato per archiviare righe e colonne in memoria, ma spesso è necessario convertire questi dati in un file CSV per Excel, strumenti di reporting o altri sistemi.
Questo tutorial spiega tre semplici metodi per esportare DataTable in CSV in C#, completi di istruzioni dettagliate ed esempi pratici di codice. Sia che tu stia lavorando con piccoli set di dati o tabelle di grandi dimensioni a livello di produzione, questi approcci ti aiuteranno a eseguire la conversione da DataTable a CSV in C# in modo rapido e affidabile.
Indice dei contenuti
- Perché Esportare DataTable in CSV in C#
- Metodo 1: Conversione Manuale DataTable C# in CSV Usando StringBuilder
- Metodo 2: Esportazione DataTable C# di Grandi Dimensioni in CSV Usando StreamWriter
- Metodo 3: Usare Spire.XLS for .NET per Convertire DataTable in CSV in C#
- Confronto delle Prestazioni dei Metodi da DataTable a CSV
- Quale Metodo Dovresti Usare?
- Gestione di Casi Speciali e Migliori Pratiche per DataTable in CSV
- Conclusione
- FAQs
Perché Esportare DataTable in CSV in C#
Esportare un DataTable in CSV in C# offre diversi vantaggi chiave:
- Formato Dati Universale – Il CSV è supportato da Excel, Google Sheets, database e molte applicazioni.
- Leggibile e Semplice – A differenza di JSON o XML, il CSV è leggibile dall'uomo e facile da modificare manualmente.
- Integrazione Perfetta – Molte applicazioni aziendali, CRM e strumenti di reporting accettano file CSV.
- Prestazioni Veloci – La generazione di CSV è leggera ed efficiente.
- Compatibilità Multipiattaforma – I file CSV possono essere aperti ed elaborati su qualsiasi sistema.
Metodo 1: Conversione Manuale DataTable C# in CSV Usando StringBuilder
Esportare manualmente un DataTable in CSV in C# usando StringBuilder ti dà il pieno controllo sulla formattazione e sulle regole di escape, rendendolo ideale per set di dati di piccole e medie dimensioni.
Passaggi per Convertire DataTable in CSV in C# Usando StringBuilder
- Crea o recupera un DataTable dalla tua fonte (database, API o manualmente).
- Inizializza uno StringBuilder per archiviare il contenuto CSV.
- Aggiungi le intestazioni di colonna scorrendo DataTable.Columns.
- Scorri le righe del DataTable e aggiungi il valore di ciascuna cella.
- Esegui l'escape dei caratteri speciali come virgole, virgolette o nuove righe.
- Scrivi la stringa finale in un file CSV usando File.WriteAllText.
Codice di Esempio
using System;
using System.Data;
using System.IO;
using System.Text;
namespace DataTableToCSV
{
internal class Program
{
static void Main(string[] args)
{
// -------------------------------
// Passaggio 1: Creare un DataTable
// -------------------------------
DataTable table = new DataTable("Employees");
// Definire le colonne: ID, Name, Department, Salary, JoinDate, Email
table.Columns.Add("ID", typeof(int));
table.Columns.Add("Name", typeof(string));
table.Columns.Add("Department", typeof(string));
table.Columns.Add("Salary", typeof(decimal));
table.Columns.Add("JoinDate", typeof(DateTime));
table.Columns.Add("Email", typeof(string));
// Aggiungere righe di esempio con dati più ricchi
table.Rows.Add(1, "Alice Johnson", "HR", 60000, new DateTime(2019, 3, 15), "alice.johnson@example.com");
table.Rows.Add(2, "Bob Smith", "IT", 75000, new DateTime(2018, 7, 22), "bob.smith@example.com");
table.Rows.Add(3, "Charlie Brown", "Finance", 82000, new DateTime(2020, 1, 10), "charlie.brown@example.com");
table.Rows.Add(4, "Diana Prince", "Marketing", 67000, new DateTime(2021, 5, 5), "diana.prince@example.com");
table.Rows.Add(5, "Ethan Hunt", "Operations", 90000, new DateTime(2017, 9, 30), "ethan.hunt@example.com");
table.Rows.Add(6, "Fiona Gallagher", "IT", 72000, new DateTime(2019, 11, 12), "fiona.gallagher@example.com");
// -------------------------------
// Passaggio 2: Esportare DataTable in CSV
// -------------------------------
string csvPath = "employees.csv";
DataTableToCsv(table, csvPath);
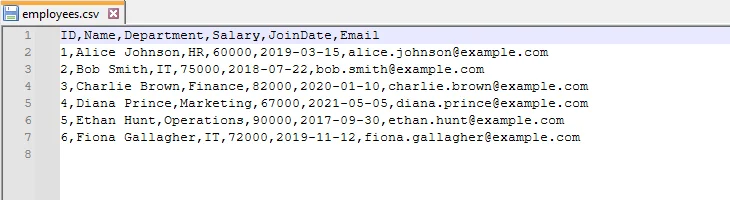
Console.WriteLine($"File CSV creato con successo: {csvPath}");
}
/// <summary>
/// Converte un DataTable in un file CSV.
/// </summary>
/// <param name="dt">Il DataTable da esportare</param>
/// <param name="filePath">Il percorso in cui verrà salvato il file CSV</param>
public static void DataTableToCsv(DataTable dt, string filePath)
{
// Usa StringBuilder per costruire in modo efficiente il contenuto CSV
StringBuilder sb = new StringBuilder();
// -------------------------------
// Passaggio 1: Aggiungere le intestazioni di colonna
// -------------------------------
for (int i = 0; i < dt.Columns.Count; i++)
{
sb.Append(dt.Columns[i].ColumnName);
if (i < dt.Columns.Count - 1) sb.Append(","); // Aggiungi la virgola tranne che per l'ultima colonna
}
sb.AppendLine();
// -------------------------------
// Passaggio 2: Aggiungere le righe
// -------------------------------
foreach (DataRow row in dt.Rows)
{
for (int i = 0; i < dt.Columns.Count; i++)
{
string value;
// Formattare le colonne DateTime come "yyyy-MM-dd"
if (dt.Columns[i].DataType == typeof(DateTime))
{
value = ((DateTime)row[i]).ToString("yyyy-MM-dd");
}
else
{
value = row[i].ToString();
}
// Escape dei caratteri speciali: virgole, virgolette, nuove righe
if (value.Contains(",") || value.Contains("\"") || value.Contains("\n"))
{
value = "\"" + value.Replace("\"", "\"\"") + "\"";
}
sb.Append(value);
if (i < dt.Columns.Count - 1) sb.Append(",");
}
sb.AppendLine();
}
// -------------------------------
// Passaggio 3: Scrivere il file CSV
// -------------------------------
File.WriteAllText(filePath, sb.ToString(), Encoding.UTF8);
}
}
}
Output CSV
Metodo 2: Esportazione DataTable C# di Grandi Dimensioni in CSV Usando StreamWriter
Per DataTable di grandi dimensioni, l'uso di StringBuilder può essere intensivo in termini di memoria. StreamWriter ti permette di scrivere righe riga per riga, il che è efficiente per grandi set di dati.
Passaggi per l'Esportazione CSV di DataTable C# Basata su StreamWriter
- Crea o recupera il tuo DataTable con i dati necessari.
- Inizializza uno StreamWriter con il percorso del file CSV di output e la codifica desiderata (come UTF-8).
- Scrivi la riga di intestazione usando i nomi delle colonne del DataTable.
- Itera attraverso le righe del DataTable e scrivi ogni riga sul file.
- Esegui l'escape dei valori contenenti caratteri speciali (virgole, virgolette, nuove righe) per mantenere l'integrità del CSV.
- Chiudi lo StreamWriter per rilasciare le risorse di sistema.
Codice di Esempio
using System;
using System.Data;
using System.IO;
using System.Text;

namespace DataTableToCSV
{
    internal class Program
    {
        static void Main(string[] args)
        {
            // -------------------------------
            // Passaggio 1: Creare un nuovo DataTable per questo esempio
            // -------------------------------
            DataTable table = new DataTable("Products");

            // Definire le colonne: ProductID, ProductName, Category, Price, Stock, LaunchDate
            table.Columns.Add("ProductID", typeof(int));
            table.Columns.Add("ProductName", typeof(string));
            table.Columns.Add("Category", typeof(string));
            table.Columns.Add("Price", typeof(decimal));
            table.Columns.Add("Stock", typeof(int));
            table.Columns.Add("LaunchDate", typeof(DateTime));

            // Aggiungere righe di esempio con prodotti vari
            table.Rows.Add(101, "Laptop Pro 15", "Electronics", 1500.99, 25, new DateTime(2023, 1, 10));
            table.Rows.Add(102, "Wireless Mouse", "Accessories", 29.95, 200, new DateTime(2022, 11, 5));
            table.Rows.Add(103, "Mechanical Keyboard", "Accessories", 79.99, 150, new DateTime(2022, 12, 1));
            table.Rows.Add(104, "4K Monitor", "Electronics", 399.50, 40, new DateTime(2023, 2, 20));
            table.Rows.Add(105, "USB-C Hub", "Accessories", 49.99, 300, new DateTime(2022, 9, 18));
            table.Rows.Add(106, "Gaming Chair", "Furniture", 259.99, 15, new DateTime(2023, 3, 5));

            // -------------------------------
            // Passaggio 2: Esportare DataTable in CSV usando StreamWriter
            // -------------------------------
            string csvPath = "products_stream.csv";
            DataTableToCsvStream(table, csvPath);

            Console.WriteLine($"File CSV creato con successo: {csvPath}");
        }

        /// <summary>
        /// Esporta un DataTable in CSV usando StreamWriter (efficiente per grandi set di dati)
        /// </summary>
        /// <param name="dt">Il DataTable da esportare</param>
        /// <param name="filePath">Il percorso del file CSV da salvare</param>
        public static void DataTableToCsvStream(DataTable dt, string filePath)
        {
            // Usa StreamWriter per una scrittura efficiente in termini di memoria (riga per riga)
            using (StreamWriter writer = new StreamWriter(filePath, false, Encoding.UTF8))
            {
                // -------------------------------
                // Passaggio 1: Scrivere le intestazioni di colonna
                // -------------------------------
                for (int i = 0; i < dt.Columns.Count; i++)
                {
                    writer.Write(dt.Columns[i].ColumnName);
                    if (i < dt.Columns.Count - 1)
                        writer.Write(","); // Aggiungi la virgola tranne che per l'ultima colonna
                }
                writer.WriteLine();

                // -------------------------------
                // Passaggio 2: Scrivere le righe
                // -------------------------------
                foreach (DataRow row in dt.Rows)
                {
                    for (int i = 0; i < dt.Columns.Count; i++)
                    {
                        string value;

                        // Formattare DateTime come yyyy-MM-dd
                        if (dt.Columns[i].DataType == typeof(DateTime))
                        {
                            value = ((DateTime)row[i]).ToString("yyyy-MM-dd");
                        }
                        else
                        {
                            value = row[i].ToString();
                        }

                        // Escape dei caratteri speciali: virgole, virgolette, nuove righe
                        if (value.Contains(",") || value.Contains("\"") || value.Contains("\n"))
                        {
                            value = "\"" + value.Replace("\"", "\"\"") + "\"";
                        }

                        writer.Write(value);

                        if (i < dt.Columns.Count - 1)
                            writer.Write(",");
                    }
                    writer.WriteLine();
                }
                // StreamWriter viene chiuso automaticamente alla fine del blocco using
            }
        }
    }
}
Output CSV

Metodo 3: Usare Spire.XLS for .NET per Convertire DataTable in CSV in C#
Per applicazioni pronte per la produzione, librerie come Spire.XLS for .NET forniscono un modo affidabile ed efficiente per gestire l'esportazione da DataTable C# a CSV. La libreria gestisce automaticamente caratteri speciali, delimitatori e codifica, riducendo lo sforzo di codifica manuale e garantendo un output coerente e accurato.
Inizia con Spire.XLS for .NET
Per usare Spire.XLS nel tuo progetto C#, installalo tramite NuGet:
- Apri il tuo progetto in Visual Studio.
- Vai su Strumenti -> Gestione pacchetti NuGet -> Gestisci pacchetti NuGet per la soluzione…
- Cerca “Spire.XLS” e fai clic su Installa.
In alternativa, puoi installarlo rapidamente usando la Console di Gestione Pacchetti:
Install-Package Spire.XLS
Una volta installato, puoi esportare senza sforzo DataTable in CSV ed eseguire ulteriori operazioni sui file risultanti, come convertire CSV in Excel o importare CSV di nuovo in un DataTable, tutto in modo efficiente all'interno delle tue applicazioni .NET.
Passaggi per l'Esportazione da Datatable C# a CSV Basata su Spire.XLS
- Prepara il tuo DataTable con i dati da esportare.
- Crea un oggetto Workbook usando Spire.XLS.
- Inserisci il DataTable in un foglio di lavoro.
- Salva il foglio di lavoro come CSV, specificando delimitatore e codifica.
Codice di Esempio
using Spire.Xls;
using System;
using System.Data;
using System.Text;
namespace DataTableToCSV
{
internal class Program
{
static void Main(string[] args)
{
// -------------------------------
// Passaggio 1: Creare un nuovo DataTable per i libri
// -------------------------------
DataTable dt = new DataTable("Books");
// Definire le colonne: BookID, Title, Author, Genre, Price, PublishDate
dt.Columns.Add("BookID", typeof(int));
dt.Columns.Add("Title", typeof(string));
dt.Columns.Add("Author", typeof(string));
dt.Columns.Add("Genre", typeof(string));
dt.Columns.Add("Price", typeof(double));
dt.Columns.Add("PublishDate", typeof(DateTime));
// Aggiungere righe di esempio
dt.Rows.Add(201, "The Great Gatsby", "F. Scott Fitzgerald", "Classic", 10.99, new DateTime(1925, 4, 10));
dt.Rows.Add(202, "1984", "George Orwell", "Dystopian", 9.99, new DateTime(1949, 6, 8));
dt.Rows.Add(203, "To Kill a Mockingbird", "Harper Lee", "Classic", 12.50, new DateTime(1960, 7, 11));
dt.Rows.Add(204, "The Hobbit", "J.R.R. Tolkien", "Fantasy", 15.75, new DateTime(1937, 9, 21));
dt.Rows.Add(205, "Clean Code", "Robert C. Martin", "Programming", 32.99, new DateTime(2008, 8, 1));
dt.Rows.Add(206, "The Pragmatic Programmer", "Andrew Hunt", "Programming", 29.95, new DateTime(1999, 10, 20));
// -------------------------------
// Passaggio 2: Creare un Workbook e inserire il DataTable
// -------------------------------
Workbook workbook = new Workbook();
Worksheet sheet = workbook.Worksheets[0];
// Inserire il DataTable nel foglio di lavoro partendo dalla riga 1, colonna 1
// Includere le intestazioni di colonna
sheet.InsertDataTable(dt, true, 1, 1);
// -------------------------------
// Passaggio 3: Salvare il foglio di lavoro come CSV
// -------------------------------
// Parametri: nome file, delimitatore, codifica
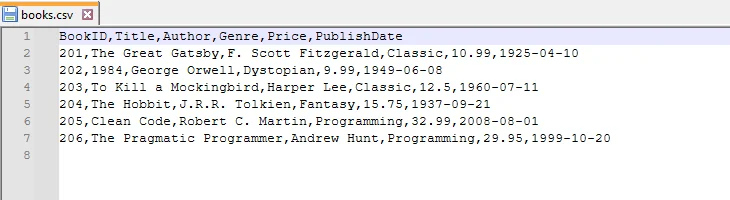
sheet.SaveToFile("books.csv", ",", Encoding.UTF8);
// Rilasciare le risorse
workbook.Dispose();
}
}
}
Output CSV
Vantaggi dell'utilizzo di Spire.XLS
- Gestione automatica di caratteri speciali, delimitatori e codifiche – non è necessario alcun escape manuale.
- Supporta sia l'importazione che l'esportazione di CSV, rendendolo flessibile per diversi flussi di lavoro.
- Semplifica il codice a livello di produzione – meno codice boilerplate e meno errori rispetto ai metodi manuali.
- Scalabile per grandi set di dati – funziona in modo efficiente anche con migliaia di righe.
Confronto delle Prestazioni dei Metodi da DataTable a CSV
Per comprendere meglio i punti di forza e i compromessi di ciascun approccio, ecco un confronto fianco a fianco di StringBuilder, StreamWriter e Spire.XLS durante l'esportazione di un DataTable in CSV.
| Metodo | Ideale Per | Prestazioni | Utilizzo Memoria | Complessità Codice | Note |
|---|---|---|---|---|---|
| StringBuilder | Piccoli set di dati (<10k righe) | Medie | Alto | Moderata | Controllo completo sull'output, ma meno efficiente per file di grandi dimensioni |
| StreamWriter | Grandi set di dati (10k+ righe) | Alte | Basso | Moderata | Scrive riga per riga, previene il sovraccarico di memoria |
| Spire.XLS | Produzione e impresa | Alte | Ottimizzato | Bassa | Gestisce automaticamente escape, codifica e grandi set di dati |
Quale Metodo Dovresti Usare?
Mentre la tabella di confronto evidenzia le differenze tecniche, la scelta del metodo giusto dipende dal tuo scenario specifico, come le dimensioni del set di dati, i requisiti di prestazione e le esigenze di produzione.
- Scegli StringBuilder se hai bisogno di un controllo completo sulla formattazione CSV e stai lavorando con set di dati di piccole e medie dimensioni.
- Scegli StreamWriter se stai esportando grandi set di dati e desideri una soluzione efficiente in termini di memoria.
- Scegli Spire.XLS se hai bisogno di un approccio affidabile, pronto per la produzione e a bassa manutenzione, specialmente quando si gestiscono casi speciali o si integra in flussi di lavoro aziendali.
Gestione di Casi Speciali e Migliori Pratiche per DataTable in CSV
Quando si esporta un DataTable in CSV in C#, è importante seguire le migliori pratiche ed essere consapevoli di alcuni casi speciali che potrebbero influenzare l'output CSV. Gestirli correttamente garantisce che i file siano puliti, affidabili e facili da usare.
- Gestione di Casi Speciali
- Valori nulli – Sostituisci DBNull con stringhe vuote o segnaposto in modo che i dati mancanti non rompano il tuo CSV.
- Delimitatori personalizzati – Se i tuoi dati contengono virgole, considera l'uso di ; o tab (\t) per evitare confusione.
- Caratteri speciali – I valori con virgolette, virgole o interruzioni di riga dovrebbero essere correttamente sottoposti a escape per mantenere l'integrità del CSV.
- Considerazioni sulla codifica – UTF-8 è raccomandato per la maggior parte degli scenari, ma alcuni sistemi potrebbero richiedere UTF-16 o ANSI.
- Set di dati di grandi dimensioni – Per tabelle molto grandi, considera la suddivisione dei file o l'uso di metodi efficienti in termini di memoria come StreamWriter per evitare problemi di prestazioni.
- Migliori Pratiche
- Attieniti alla codifica UTF-8 per la compatibilità tra piattaforme e strumenti.
- Testa con casi speciali come null, virgole, virgolette e valori multilinea per prevenire errori imprevisti.
- Scegli il metodo giusto – StringBuilder va bene per tabelle piccole, StreamWriter è migliore per grandi set di dati e Spire.XLS è ideale per soluzioni pronte per la produzione.
- Documenta chiaramente la tua struttura CSV in modo che altri sappiano come interpretare i dati.
Conclusione
Padroneggiare la conversione da DataTable C# a CSV è un'abilità essenziale per gli sviluppatori che lavorano con dati tabulari. Questa guida ha coperto tre approcci pratici: l'uso di StringBuilder per piccoli set di dati, l'impiego di StreamWriter per una gestione efficiente e rispettosa della memoria di tabelle di grandi dimensioni, e lo sfruttamento della libreria Spire.XLS per una soluzione affidabile e pronta per la produzione che gestisce automaticamente scenari complessi.
Seguendo questi esempi passo-passo, puoi eseguire la conversione da DataTable C# a CSV con sicurezza, assicurando che i tuoi dati siano accurati, condivisibili e pronti per l'integrazione o ulteriori analisi.
FAQs
Q1: Come posso convertire un DataTable in CSV in C# in modo efficiente?
A1: Puoi usare tre metodi: conversione manuale con StringBuilder per piccoli set di dati, StreamWriter per grandi set di dati, o la libreria Spire.XLS per una soluzione pronta per la produzione. Ogni metodo garantisce una gestione corretta di virgole, virgolette e nuove righe.
Q2: Qual è il modo migliore per esportare grandi DataTable C# in CSV?
A2: Per grandi set di dati, si raccomanda StreamWriter perché scrive le righe riga per riga, riducendo l'utilizzo della memoria. Spire.XLS è un'altra opzione affidabile per ambienti di produzione.
Q3: Come gestisco i caratteri speciali e i valori nulli durante l'esportazione di DataTable in CSV in C#?
A3: Esegui sempre l'escape di virgole, virgolette e interruzioni di riga. Sostituisci i valori null o DBNull con stringhe vuote o segnaposto. L'uso di Spire.XLS gestisce automaticamente la maggior parte di questi casi.
Q4: Posso personalizzare i delimitatori e la codifica durante l'esportazione di un DataTable in CSV?
A4: Sì, puoi specificare delimitatori come ,, ; o \t e scegliere la codifica come UTF-8, UTF-16 o ANSI a seconda dei requisiti di sistema.
Q5: Perché dovrei usare Spire.XLS invece dei metodi manuali o StreamWriter?
A5: Spire.XLS semplifica l'esportazione CSV gestendo automaticamente l'escape, i delimitatori e la codifica, riduce la complessità del codice ed è ideale per set di dati di medie e grandi dimensioni o applicazioni a livello di produzione.
Q6: Come mi assicuro che il mio CSV esportato sia compatibile con Excel e altre applicazioni?
A6: Usa la codifica UTF-8, esegui l'escape dei caratteri speciali e formatta le intestazioni in modo coerente. Testare l'output in Excel o altre applicazioni di destinazione aiuta a evitare problemi di compatibilità.
Vedi Anche
Converter C# DataTable para CSV: 3 métodos fáceis com exemplos
Índice
- Por que Exportar DataTable para CSV em C#
- Método 1: Conversão Manual de DataTable C# para CSV Usando StringBuilder
- Método 2: Exportação de DataTable C# Grande para CSV Usando StreamWriter
- Método 3: Usar Spire.XLS for .NET para Converter DataTable para CSV em C#
- Comparação de Desempenho dos Métodos de DataTable para CSV
- Qual Método Você Deve Usar?
- Lidando com Casos Especiais e Melhores Práticas para DataTable para CSV
- Conclusão
- FAQs
Instalar com Pypi
Install-Package Spire.XLS
Links Relacionados
Exportar DataTable para CSV em C# é um requisito comum para desenvolvedores que precisam salvar, compartilhar ou analisar dados tabulares de forma eficiente. O objeto DataTable no .NET fornece uma maneira estruturada de armazenar linhas e colunas na memória, mas muitas vezes você precisa converter esses dados em um arquivo CSV para o Excel, ferramentas de relatórios ou outros sistemas.
Este tutorial explica três métodos fáceis para exportar DataTable para CSV em C#, completos com instruções passo a passo e exemplos práticos de código. Esteja você trabalhando com pequenos conjuntos de dados ou tabelas grandes em nível de produção, essas abordagens ajudarão você a realizar a conversão de DataTable para CSV em C# de forma rápida e confiável.
Índice
- Por que Exportar DataTable para CSV em C#
- Método 1: Conversão Manual de DataTable C# para CSV Usando StringBuilder
- Método 2: Exportação de DataTable C# Grande para CSV Usando StreamWriter
- Método 3: Usar Spire.XLS for .NET para Converter DataTable para CSV em C#
- Comparação de Desempenho dos Métodos de DataTable para CSV
- Qual Método Você Deve Usar?
- Lidando com Casos Especiais e Melhores Práticas para DataTable para CSV
- Conclusão
- FAQs
Por que Exportar DataTable para CSV em C#
Exportar um DataTable para CSV em C# oferece várias vantagens principais:
- Formato de Dados Universal – CSV é suportado pelo Excel, Google Sheets, bancos de dados e muitas aplicações.
- Legível e Simples – Ao contrário de JSON ou XML, CSV é legível por humanos e fácil de editar manualmente.
- Integração Perfeita – Muitas aplicações empresariais, CRMs e ferramentas de relatórios aceitam arquivos CSV.
- Desempenho Rápido – A geração de CSV é leve e eficiente.
- Compatibilidade entre Plataformas – Arquivos CSV podem ser abertos e processados em qualquer sistema.
Método 1: Conversão Manual de DataTable C# para CSV Usando StringBuilder
Exportar manualmente um DataTable para CSV em C# usando StringBuilder oferece controle total sobre as regras de formatação e escape, tornando-o ideal para conjuntos de dados de pequeno a médio porte.
Passos para Converter DataTable para CSV em C# Usando StringBuilder
- Crie ou obtenha um DataTable de sua fonte (banco de dados, API ou manualmente).
- Inicialize um StringBuilder para armazenar o conteúdo CSV.
- Anexe cabeçalhos de coluna percorrendo DataTable.Columns.
- Percorra as linhas do DataTable e anexe o valor de cada célula.
- Faça o escape de caracteres especiais como vírgulas, aspas ou novas linhas.
- Escreva a string final em um arquivo CSV usando File.WriteAllText.
Exemplo de Código
using System;
using System.Data;
using System.IO;
using System.Text;

namespace DataTableToCSV
{
    internal class Program
    {
        static void Main(string[] args)
        {
            // -------------------------------
            // Passo 1: Criar um DataTable
            // -------------------------------
            DataTable table = new DataTable("Employees");

            // Definir colunas: ID, Name, Department, Salary, JoinDate, Email
            table.Columns.Add("ID", typeof(int));
            table.Columns.Add("Name", typeof(string));
            table.Columns.Add("Department", typeof(string));
            table.Columns.Add("Salary", typeof(decimal));
            table.Columns.Add("JoinDate", typeof(DateTime));
            table.Columns.Add("Email", typeof(string));

            // Adicionar linhas de exemplo com dados mais ricos
            table.Rows.Add(1, "Alice Johnson", "HR", 60000, new DateTime(2019, 3, 15), "alice.johnson@example.com");
            table.Rows.Add(2, "Bob Smith", "IT", 75000, new DateTime(2018, 7, 22), "bob.smith@example.com");
            table.Rows.Add(3, "Charlie Brown", "Finance", 82000, new DateTime(2020, 1, 10), "charlie.brown@example.com");
            table.Rows.Add(4, "Diana Prince", "Marketing", 67000, new DateTime(2021, 5, 5), "diana.prince@example.com");
            table.Rows.Add(5, "Ethan Hunt", "Operations", 90000, new DateTime(2017, 9, 30), "ethan.hunt@example.com");
            table.Rows.Add(6, "Fiona Gallagher", "IT", 72000, new DateTime(2019, 11, 12), "fiona.gallagher@example.com");

            // -------------------------------
            // Passo 2: Exportar DataTable para CSV
            // -------------------------------
            string csvPath = "employees.csv";
            DataTableToCsv(table, csvPath);

            Console.WriteLine($"Arquivo CSV criado com sucesso: {csvPath}");
        }

        /// <summary>
        /// Converte um DataTable para um arquivo CSV.
        /// </summary>
        /// <param name="dt">O DataTable a ser exportado</param>
        /// <param name="filePath">O caminho onde o arquivo CSV será salvo</param>
        public static void DataTableToCsv(DataTable dt, string filePath)
        {
            // Use StringBuilder para construir eficientemente o conteúdo CSV
            StringBuilder sb = new StringBuilder();

            // -------------------------------
            // Passo 1: Adicionar cabeçalhos de coluna
            // -------------------------------
            for (int i = 0; i < dt.Columns.Count; i++)
            {
                sb.Append(dt.Columns[i].ColumnName);
                if (i < dt.Columns.Count - 1) sb.Append(","); // Adiciona vírgula, exceto na última coluna
            }
            sb.AppendLine();

            // -------------------------------
            // Passo 2: Adicionar linhas
            // -------------------------------
            foreach (DataRow row in dt.Rows)
            {
                for (int i = 0; i < dt.Columns.Count; i++)
                {
                    string value;

                    // Formatar colunas DateTime como "yyyy-MM-dd"
                    if (dt.Columns[i].DataType == typeof(DateTime))
                    {
                        value = ((DateTime)row[i]).ToString("yyyy-MM-dd");
                    }
                    else
                    {
                        value = row[i].ToString();
                    }

                    // Escape de caracteres especiais: vírgulas, aspas, novas linhas
                    if (value.Contains(",") || value.Contains("\"") || value.Contains("\n"))
                    {
                        value = "\"" + value.Replace("\"", "\"\"") + "\"";
                    }

                    sb.Append(value);

                    if (i < dt.Columns.Count - 1) sb.Append(",");
                }
                sb.AppendLine();
            }

            // -------------------------------
            // Passo 3: Escrever arquivo CSV
            // -------------------------------
            File.WriteAllText(filePath, sb.ToString(), Encoding.UTF8);
        }
    }
}
Saída CSV
Método 2: Exportação de DataTable C# Grande para CSV Usando StreamWriter
Para DataTables grandes, usar o StringBuilder pode consumir muita memória. O StreamWriter permite que você escreva linhas linha por linha, o que é eficiente para grandes conjuntos de dados.
Passos para Exportação CSV de DataTable C# Baseada em StreamWriter
- Crie ou recupere seu DataTable com os dados necessários.
- Inicialize um StreamWriter com o caminho do arquivo CSV de saída e a codificação desejada (como UTF-8).
- Escreva a linha de cabeçalho usando os nomes das colunas do DataTable.
- Itere pelas linhas do DataTable e escreva cada linha no arquivo.
- Faça o escape de valores contendo caracteres especiais (vírgulas, aspas, novas linhas) para manter a integridade do CSV.
- Feche o StreamWriter para liberar recursos do sistema.
Exemplo de Código
using System;
using System.Data;
using System.IO;
using System.Text;

namespace DataTableToCSV
{
    internal class Program
    {
        static void Main(string[] args)
        {
            // -------------------------------
            // Passo 1: Criar um novo DataTable para este exemplo
            // -------------------------------
            DataTable table = new DataTable("Products");

            // Definir colunas: ProductID, ProductName, Category, Price, Stock, LaunchDate
            table.Columns.Add("ProductID", typeof(int));
            table.Columns.Add("ProductName", typeof(string));
            table.Columns.Add("Category", typeof(string));
            table.Columns.Add("Price", typeof(decimal));
            table.Columns.Add("Stock", typeof(int));
            table.Columns.Add("LaunchDate", typeof(DateTime));

            // Adicionar linhas de exemplo com produtos variados
            table.Rows.Add(101, "Laptop Pro 15", "Electronics", 1500.99, 25, new DateTime(2023, 1, 10));
            table.Rows.Add(102, "Wireless Mouse", "Accessories", 29.95, 200, new DateTime(2022, 11, 5));
            table.Rows.Add(103, "Mechanical Keyboard", "Accessories", 79.99, 150, new DateTime(2022, 12, 1));
            table.Rows.Add(104, "4K Monitor", "Electronics", 399.50, 40, new DateTime(2023, 2, 20));
            table.Rows.Add(105, "USB-C Hub", "Accessories", 49.99, 300, new DateTime(2022, 9, 18));
            table.Rows.Add(106, "Gaming Chair", "Furniture", 259.99, 15, new DateTime(2023, 3, 5));

            // -------------------------------
            // Passo 2: Exportar DataTable para CSV usando StreamWriter
            // -------------------------------
            string csvPath = "products_stream.csv";
            DataTableToCsvStream(table, csvPath);

            Console.WriteLine($"Arquivo CSV criado com sucesso: {csvPath}");
        }

        /// <summary>
        /// Exporta um DataTable para CSV usando StreamWriter (eficiente para grandes conjuntos de dados)
        /// </summary>
        /// <param name="dt">O DataTable a ser exportado</param>
        /// <param name="filePath">O caminho do arquivo CSV para salvar</param>
        public static void DataTableToCsvStream(DataTable dt, string filePath)
        {
            // Use StreamWriter para escrita eficiente em termos de memória (linha por linha)
            using (StreamWriter writer = new StreamWriter(filePath, false, Encoding.UTF8))
            {
                // -------------------------------
                // Passo 1: Escrever cabeçalhos de coluna
                // -------------------------------
                for (int i = 0; i < dt.Columns.Count; i++)
                {
                    writer.Write(dt.Columns[i].ColumnName);
                    if (i < dt.Columns.Count - 1)
                        writer.Write(","); // Adiciona vírgula, exceto na última coluna
                }
                writer.WriteLine();

                // -------------------------------
                // Passo 2: Escrever linhas
                // -------------------------------
                foreach (DataRow row in dt.Rows)
                {
                    for (int i = 0; i < dt.Columns.Count; i++)
                    {
                        string value;

                        // Formatar DateTime como yyyy-MM-dd
                        if (dt.Columns[i].DataType == typeof(DateTime))
                        {
                            value = ((DateTime)row[i]).ToString("yyyy-MM-dd");
                        }
                        else
                        {
                            value = row[i].ToString();
                        }

                        // Escape de caracteres especiais: vírgulas, aspas, novas linhas
                        if (value.Contains(",") || value.Contains("\"") || value.Contains("\n"))
                        {
                            value = "\"" + value.Replace("\"", "\"\"") + "\"";
                        }

                        writer.Write(value);

                        if (i < dt.Columns.Count - 1)
                            writer.Write(",");
                    }
                    writer.WriteLine();
                }
                // StreamWriter é fechado automaticamente no final do bloco using
            }
        }
    }
}
Saída CSV
Método 3: Usar Spire.XLS for .NET para Converter DataTable para CSV em C#
Para aplicações prontas para produção, bibliotecas como Spire.XLS for .NET fornecem uma maneira confiável e eficiente de lidar com a exportação de DataTable C# para CSV. A biblioteca lida automaticamente com caracteres especiais, delimitadores e codificação, reduzindo o esforço de codificação manual e garantindo uma saída consistente e precisa.
Comece com o Spire.XLS for .NET
Para usar o Spire.XLS em seu projeto C#, instale-o via NuGet:
- Abra seu projeto no Visual Studio.
- Vá para Ferramentas -> Gerenciador de Pacotes NuGet -> Gerenciar Pacotes NuGet para a Solução…
- Procure por “Spire.XLS” e clique em Instalar.
Alternativamente, você pode instalá-lo rapidamente usando o Console do Gerenciador de Pacotes:
Install-Package Spire.XLS
Uma vez instalado, você pode exportar DataTables para CSV sem esforço e realizar operações adicionais nos arquivos resultantes, como converter CSV para Excel ou importar CSV de volta para um DataTable, tudo de forma eficiente dentro de suas aplicações .NET.
Passos para Exportação de Datatable C# para CSV Baseada no Spire.XLS
- Prepare seu DataTable com os dados a serem exportados.
- Crie um objeto Workbook usando o Spire.XLS.
- Insira o DataTable em uma planilha.
- Salve a planilha como CSV, especificando o delimitador e a codificação.
Exemplo de Código
using Spire.Xls;
using System;
using System.Data;
using System.Text;

namespace DataTableToCSV
{
    internal class Program
    {
        static void Main(string[] args)
        {
            // -------------------------------
            // Passo 1: Criar um novo DataTable para livros
            // -------------------------------
            DataTable dt = new DataTable("Books");

            // Definir colunas: BookID, Title, Author, Genre, Price, PublishDate
            dt.Columns.Add("BookID", typeof(int));
            dt.Columns.Add("Title", typeof(string));
            dt.Columns.Add("Author", typeof(string));
            dt.Columns.Add("Genre", typeof(string));
            dt.Columns.Add("Price", typeof(double));
            dt.Columns.Add("PublishDate", typeof(DateTime));

            // Adicionar linhas de exemplo
            dt.Rows.Add(201, "The Great Gatsby", "F. Scott Fitzgerald", "Classic", 10.99, new DateTime(1925, 4, 10));
            dt.Rows.Add(202, "1984", "George Orwell", "Dystopian", 9.99, new DateTime(1949, 6, 8));
            dt.Rows.Add(203, "To Kill a Mockingbird", "Harper Lee", "Classic", 12.50, new DateTime(1960, 7, 11));
            dt.Rows.Add(204, "The Hobbit", "J.R.R. Tolkien", "Fantasy", 15.75, new DateTime(1937, 9, 21));
            dt.Rows.Add(205, "Clean Code", "Robert C. Martin", "Programming", 32.99, new DateTime(2008, 8, 1));
            dt.Rows.Add(206, "The Pragmatic Programmer", "Andrew Hunt", "Programming", 29.95, new DateTime(1999, 10, 20));

            // -------------------------------
            // Passo 2: Criar um Workbook e inserir o DataTable
            // -------------------------------
            Workbook workbook = new Workbook();
            Worksheet sheet = workbook.Worksheets[0];

            // Inserir o DataTable na planilha começando da linha 1, coluna 1
            // Incluir cabeçalhos de coluna
            sheet.InsertDataTable(dt, true, 1, 1);

            // -------------------------------
            // Passo 3: Salvar a planilha como CSV
            // -------------------------------
            // Parâmetros: nome do arquivo, delimitador, codificação
            sheet.SaveToFile("books.csv", ",", Encoding.UTF8);

            // Liberar recursos
            workbook.Dispose();
        }
    }
}
Saída CSV
Benefícios de Usar o Spire.XLS
- Manuseio automático de caracteres especiais, delimitadores e codificações – não é necessário fazer escape manual.
- Suporta tanto a importação quanto a exportação de CSV, tornando-o flexível para diferentes fluxos de trabalho.
- Simplifica o código em nível de produção – menos código repetitivo e menos erros em comparação com os métodos manuais.
- Escalável para grandes conjuntos de dados – funciona eficientemente mesmo com milhares de linhas.
Comparação de Desempenho dos Métodos de DataTable para CSV
Para entender melhor os pontos fortes e as desvantagens de cada abordagem, aqui está uma comparação lado a lado do StringBuilder, StreamWriter e Spire.XLS ao exportar um DataTable para CSV.
| Método | Melhor Para | Desempenho | Uso de Memória | Complexidade do Código | Notas |
|---|---|---|---|---|---|
| StringBuilder | Pequenos conjuntos de dados (<10k linhas) | Médio | Alto | Moderada | Controle total sobre a saída, mas menos eficiente para arquivos grandes |
| StreamWriter | Grandes conjuntos de dados (10k+ linhas) | Alto | Baixo | Moderada | Escreve linha por linha, evita sobrecarga de memória |
| Spire.XLS | Produção e empresas | Alto | Otimizado | Baixa | Lida com escape, codificação e grandes conjuntos de dados automaticamente |
Qual Método Você Deve Usar?
Embora a tabela de comparação destaque as diferenças técnicas, a escolha do método certo depende do seu cenário específico, como tamanho do conjunto de dados, requisitos de desempenho e necessidades de produção.
- Escolha o StringBuilder se você precisar de controle completo sobre a formatação CSV e estiver trabalhando com conjuntos de dados de pequeno a médio porte.
- Escolha o StreamWriter se você estiver exportando grandes conjuntos de dados e quiser uma solução eficiente em termos de memória.
- Escolha o Spire.XLS se você precisar de uma abordagem pronta para produção, confiável e de baixa manutenção, especialmente ao lidar com casos especiais ou integrar em fluxos de trabalho empresariais.
Lidando com Casos Especiais e Melhores Práticas para DataTable para CSV
Ao exportar um DataTable para CSV em C#, é importante seguir as melhores práticas e também estar ciente de alguns casos especiais que podem afetar sua saída CSV. Lidar com eles adequadamente garante que seus arquivos sejam limpos, confiáveis e fáceis de usar.
- Lidando com Casos Especiais
- Valores nulos – Substitua DBNull por strings vazias ou placeholders para que dados ausentes não quebrem seu CSV.
- Delimitadores personalizados – Se seus dados contêm vírgulas, considere usar ; ou tabs (\t) para evitar confusão.
- Caracteres especiais – Valores com aspas, vírgulas ou quebras de linha devem ter o escape adequado para manter a integridade do CSV.
- Considerações sobre codificação – UTF-8 é recomendado para a maioria dos cenários, mas alguns sistemas podem exigir UTF-16 ou ANSI.
- Grandes conjuntos de dados – Para tabelas muito grandes, considere dividir arquivos ou usar métodos eficientes em termos de memória como o StreamWriter para evitar problemas de desempenho.
- Melhores Práticas
- Mantenha a codificação UTF-8 para compatibilidade entre plataformas e ferramentas.
- Teste com casos especiais como nulos, vírgulas, aspas e valores de várias linhas para evitar erros inesperados.
- Escolha o método certo – StringBuilder funciona bem para tabelas pequenas, StreamWriter é melhor para grandes conjuntos de dados e Spire.XLS é ideal para soluções prontas para produção.
- Documente sua estrutura CSV claramente para que outros saibam como interpretar os dados.
Conclusão
Dominar a conversão de DataTable C# para CSV é uma habilidade essencial para desenvolvedores que trabalham com dados tabulares. Este guia cobriu três abordagens práticas: usar o StringBuilder para pequenos conjuntos de dados, empregar o StreamWriter para manuseio eficiente e amigável à memória de tabelas grandes, e aproveitar a biblioteca Spire.XLS para uma solução confiável e pronta para produção que gerencia automaticamente cenários complexos.
Seguindo estes exemplos passo a passo, você pode realizar a conversão de DataTable C# para CSV com confiança, garantindo que seus dados sejam precisos, compartilháveis e prontos para integração ou análise posterior.
FAQs
Q1: Como posso converter um DataTable para CSV em C# eficientemente?
A1: Você pode usar três métodos: conversão manual com StringBuilder para pequenos conjuntos de dados, StreamWriter para grandes conjuntos de dados, ou a biblioteca Spire.XLS para uma solução pronta para produção. Cada método garante o manuseio adequado de vírgulas, aspas e novas linhas.
Q2: Qual é a melhor maneira de exportar grandes DataTables C# para CSV?
A2: Para grandes conjuntos de dados, o StreamWriter é recomendado porque escreve linhas linha por linha, reduzindo o uso de memória. O Spire.XLS é outra opção confiável para ambientes de produção.
Q3: Como lidar com caracteres especiais e valores nulos ao exportar DataTable para CSV em C#?
A3: Sempre faça o escape de vírgulas, aspas e quebras de linha. Substitua valores nulos ou DBNull por strings vazias ou placeholders. Usar o Spire.XLS lida automaticamente com a maioria desses casos.
Q4: Posso personalizar delimitadores e codificação ao exportar um DataTable para CSV?
A4: Sim, você pode especificar delimitadores como ,, ; ou \t e escolher codificação como UTF-8, UTF-16 ou ANSI, dependendo dos requisitos do sistema.
Q5: Por que devo usar o Spire.XLS em vez dos métodos manuais ou StreamWriter?
A5: O Spire.XLS simplifica a exportação de CSV lidando automaticamente com escape, delimitadores e codificação, reduz a complexidade do código e é ideal para conjuntos de dados de médio a grande porte ou aplicações em nível de produção.
Q6: Como garanto que meu CSV exportado seja compatível com o Excel e outras aplicações?
A6: Use a codificação UTF-8, faça o escape de caracteres especiais e formate os cabeçalhos de forma consistente. Testar a saída no Excel ou em outras aplicações de destino ajuda a evitar problemas de compatibilidade.
Veja Também
C# DataTable을 CSV로 변환하는 3가지 쉬운 방법 (예제 포함)
목차
Pypi로 설치
Install-Package Spire.XLS
관련 링크
C#에서 DataTable을 CSV로 내보내기는 테이블 형식의 데이터를 효율적으로 저장, 공유 또는 분석해야 하는 개발자에게 일반적인 요구 사항입니다. .NET의 DataTable 개체는 행과 열을 메모리에 저장하는 구조화된 방법을 제공하지만, 종종 이 데이터를 Excel, 보고 도구 또는 기타 시스템을 위해 CSV 파일로 변환해야 합니다.
이 튜토리얼은 단계별 지침과 실제 코드 예제를 통해 C#에서 DataTable을 CSV로 내보내는 세 가지 쉬운 방법을 설명합니다. 소규모 데이터 세트로 작업하든 대규모 프로덕션 수준 테이블로 작업하든, 이러한 접근 방식은 C#에서 DataTable을 CSV로 변환하는 작업을 빠르고 안정적으로 수행하는 데 도움이 될 것입니다.
목차
- C#에서 DataTable을 CSV로 내보내는 이유
- 방법 1: StringBuilder를 사용한 수동 C# DataTable에서 CSV로 변환
- 방법 2: StreamWriter를 사용한 대용량 C# DataTable에서 CSV로 내보내기
- 방법 3: Spire.XLS for .NET을 사용하여 C#에서 DataTable을 CSV로 변환
- DataTable을 CSV로 변환하는 방법의 성능 비교
- 어떤 방법을 사용해야 할까요?
- DataTable을 CSV로 변환 시 특수 사례 처리 및 모범 사례
- 결론
- 자주 묻는 질문
C#에서 DataTable을 CSV로 내보내는 이유
C#에서 DataTable을 CSV로 내보내면 몇 가지 주요 이점이 있습니다:
- 범용 데이터 형식 – CSV는 Excel, Google Sheets, 데이터베이스 및 많은 응용 프로그램에서 지원됩니다.
- 가독성 및 단순성 – JSON이나 XML과 달리 CSV는 사람이 읽을 수 있고 수동으로 편집하기 쉽습니다.
- 원활한 통합 – 많은 엔터프라이즈 응용 프로그램, CRM 및 보고 도구가 CSV 파일을 허용합니다.
- 빠른 성능 – CSV 생성은 가볍고 효율적입니다.
- 크로스 플랫폼 호환성 – CSV 파일은 모든 시스템에서 열고 처리할 수 있습니다.
방법 1: StringBuilder를 사용한 수동 C# DataTable에서 CSV로 변환
StringBuilder를 사용하여 C#에서 DataTable을 CSV로 수동으로 내보내면 형식 지정 및 이스케이프 규칙을 완벽하게 제어할 수 있으므로 중소 규모 데이터 세트에 이상적입니다.
StringBuilder를 사용하여 C#에서 DataTable을 CSV로 변환하는 단계
- 소스(데이터베이스, API 또는 수동)에서 DataTable을 생성하거나 가져옵니다.
- CSV 콘텐츠를 저장할 StringBuilder를 초기화합니다.
- DataTable.Columns를 반복하여 열 헤더를 추가합니다.
- DataTable 행을 반복하고 각 셀의 값을 추가합니다.
- 쉼표, 따옴표 또는 줄 바꿈과 같은 특수 문자를 이스케이프 처리합니다.
- File.WriteAllText를 사용하여 최종 문자열을 CSV 파일에 씁니다.
예제 코드
using System;
using System.Data;
using System.IO;
using System.Text;

namespace DataTableToCSV
{
    internal class Program
    {
        static void Main(string[] args)
        {
            // -------------------------------
            // 1단계: DataTable 생성
            // -------------------------------
            DataTable table = new DataTable("Employees");

            // 열 정의: ID, Name, Department, Salary, JoinDate, Email
            table.Columns.Add("ID", typeof(int));
            table.Columns.Add("Name", typeof(string));
            table.Columns.Add("Department", typeof(string));
            table.Columns.Add("Salary", typeof(decimal));
            table.Columns.Add("JoinDate", typeof(DateTime));
            table.Columns.Add("Email", typeof(string));

            // 더 풍부한 데이터로 샘플 행 추가
            table.Rows.Add(1, "Alice Johnson", "HR", 60000, new DateTime(2019, 3, 15), "alice.johnson@example.com");
            table.Rows.Add(2, "Bob Smith", "IT", 75000, new DateTime(2018, 7, 22), "bob.smith@example.com");
            table.Rows.Add(3, "Charlie Brown", "Finance", 82000, new DateTime(2020, 1, 10), "charlie.brown@example.com");
            table.Rows.Add(4, "Diana Prince", "Marketing", 67000, new DateTime(2021, 5, 5), "diana.prince@example.com");
            table.Rows.Add(5, "Ethan Hunt", "Operations", 90000, new DateTime(2017, 9, 30), "ethan.hunt@example.com");
            table.Rows.Add(6, "Fiona Gallagher", "IT", 72000, new DateTime(2019, 11, 12), "fiona.gallagher@example.com");

            // -------------------------------
            // 2단계: DataTable을 CSV로 내보내기
            // -------------------------------
            string csvPath = "employees.csv";
            DataTableToCsv(table, csvPath);

            Console.WriteLine($"CSV 파일이 성공적으로 생성되었습니다: {csvPath}");
        }

        /// <summary>
        /// DataTable을 CSV 파일로 변환합니다.
        /// </summary>
        /// <param name="dt">내보낼 DataTable</param>
        /// <param name="filePath">CSV 파일이 저장될 경로</param>
        public static void DataTableToCsv(DataTable dt, string filePath)
        {
            // StringBuilder를 사용하여 CSV 콘텐츠를 효율적으로 빌드합니다.
            StringBuilder sb = new StringBuilder();

            // -------------------------------
            // 1단계: 열 헤더 추가
            // -------------------------------
            for (int i = 0; i < dt.Columns.Count; i++)
            {
                sb.Append(dt.Columns[i].ColumnName);
                if (i < dt.Columns.Count - 1) sb.Append(","); // 마지막 열을 제외하고 쉼표 추가
            }
            sb.AppendLine();

            // -------------------------------
            // 2단계: 행 추가
            // -------------------------------
            foreach (DataRow row in dt.Rows)
            {
                for (int i = 0; i < dt.Columns.Count; i++)
                {
                    string value;

                    // DateTime 열을 "yyyy-MM-dd"로 형식 지정
                    if (dt.Columns[i].DataType == typeof(DateTime))
                    {
                        value = ((DateTime)row[i]).ToString("yyyy-MM-dd");
                    }
                    else
                    {
                        value = row[i].ToString();
                    }

                    // 특수 문자 이스케이프 처리: 쉼표, 따옴표, 줄 바꿈
                    if (value.Contains(",") || value.Contains("\"") || value.Contains("\n"))
                    {
                        value = "\"" + value.Replace("\"", "\"\"") + "\"";
                    }

                    sb.Append(value);

                    if (i < dt.Columns.Count - 1) sb.Append(",");
                }
                sb.AppendLine();
            }

            // -------------------------------
            // 3단계: CSV 파일 쓰기
            // -------------------------------
            File.WriteAllText(filePath, sb.ToString(), Encoding.UTF8);
        }
    }
}
출력 CSV
방법 2: StreamWriter를 사용한 대용량 C# DataTable에서 CSV로 내보내기
대용량 DataTable의 경우 StringBuilder를 사용하면 메모리를 많이 사용할 수 있습니다. StreamWriter를 사용하면 행을 한 줄씩 쓸 수 있어 대용량 데이터 세트에 효율적입니다.
StreamWriter 기반 C# DataTable CSV 내보내기 단계
- 필요한 데이터로 DataTable을 생성하거나 검색합니다.
- 출력 CSV 파일 경로와 원하는 인코딩(예: UTF-8)으로 StreamWriter를 초기화합니다.
- DataTable 열 이름을 사용하여 헤더 행을 씁니다.
- DataTable 행을 반복하고 각 줄을 파일에 씁니다.
- CSV 무결성을 유지하기 위해 특수 문자(쉼표, 따옴표, 줄 바꿈)가 포함된 값을 이스케이프 처리합니다.
- StreamWriter를 닫아 시스템 리소스를 해제합니다.
예제 코드
using System;
using System.Data;
using System.IO;
using System.Text;

namespace DataTableToCSV
{
    internal class Program
    {
        static void Main(string[] args)
        {
            // -------------------------------
            // 1단계: 이 예제를 위한 새 DataTable 생성
            // -------------------------------
            DataTable table = new DataTable("Products");

            // 열 정의: ProductID, ProductName, Category, Price, Stock, LaunchDate
            table.Columns.Add("ProductID", typeof(int));
            table.Columns.Add("ProductName", typeof(string));
            table.Columns.Add("Category", typeof(string));
            table.Columns.Add("Price", typeof(decimal));
            table.Columns.Add("Stock", typeof(int));
            table.Columns.Add("LaunchDate", typeof(DateTime));

            // 다양한 제품으로 샘플 행 추가
            table.Rows.Add(101, "Laptop Pro 15", "Electronics", 1500.99, 25, new DateTime(2023, 1, 10));
            table.Rows.Add(102, "Wireless Mouse", "Accessories", 29.95, 200, new DateTime(2022, 11, 5));
            table.Rows.Add(103, "Mechanical Keyboard", "Accessories", 79.99, 150, new DateTime(2022, 12, 1));
            table.Rows.Add(104, "4K Monitor", "Electronics", 399.50, 40, new DateTime(2023, 2, 20));
            table.Rows.Add(105, "USB-C Hub", "Accessories", 49.99, 300, new DateTime(2022, 9, 18));
            table.Rows.Add(106, "Gaming Chair", "Furniture", 259.99, 15, new DateTime(2023, 3, 5));

            // -------------------------------
            // 2단계: StreamWriter를 사용하여 DataTable을 CSV로 내보내기
            // -------------------------------
            string csvPath = "products_stream.csv";
            DataTableToCsvStream(table, csvPath);

            Console.WriteLine($"CSV 파일이 성공적으로 생성되었습니다: {csvPath}");
        }

        /// <summary>
        /// StreamWriter를 사용하여 DataTable을 CSV로 내보냅니다 (대용량 데이터 세트에 효율적)
        /// </summary>
        /// <param name="dt">내보낼 DataTable</param>
        /// <param name="filePath">저장할 CSV 파일 경로</param>
        public static void DataTableToCsvStream(DataTable dt, string filePath)
        {
            // 메모리 효율적인 쓰기(한 줄씩)를 위해 StreamWriter 사용
            using (StreamWriter writer = new StreamWriter(filePath, false, Encoding.UTF8))
            {
                // -------------------------------
                // 1단계: 열 헤더 쓰기
                // -------------------------------
                for (int i = 0; i < dt.Columns.Count; i++)
                {
                    writer.Write(dt.Columns[i].ColumnName);
                    if (i < dt.Columns.Count - 1)
                        writer.Write(","); // 마지막 열을 제외하고 쉼표 추가
                }
                writer.WriteLine();

                // -------------------------------
                // 2단계: 행 쓰기
                // -------------------------------
                foreach (DataRow row in dt.Rows)
                {
                    for (int i = 0; i < dt.Columns.Count; i++)
                    {
                        string value;

                        // DateTime을 yyyy-MM-dd로 형식 지정
                        if (dt.Columns[i].DataType == typeof(DateTime))
                        {
                            value = ((DateTime)row[i]).ToString("yyyy-MM-dd");
                        }
                        else
                        {
                            value = row[i].ToString();
                        }

                        // 특수 문자 이스케이프 처리: 쉼표, 따옴표, 줄 바꿈
                        if (value.Contains(",") || value.Contains("\"") || value.Contains("\n"))
                        {
                            value = "\"" + value.Replace("\"", "\"\"") + "\"";
                        }

                        writer.Write(value);

                        if (i < dt.Columns.Count - 1)
                            writer.Write(",");
                    }
                    writer.WriteLine();
                }
                // StreamWriter는 using 블록이 끝날 때 자동으로 닫힙니다.
            }
        }
    }
}
출력 CSV
방법 3: Spire.XLS for .NET을 사용하여 C#에서 DataTable을 CSV로 변환
프로덕션용 응용 프로그램의 경우 Spire.XLS for .NET과 같은 라이브러리는 C# DataTable을 CSV로 내보내는 안정적이고 효율적인 방법을 제공합니다. 이 라이브러리는 특수 문자, 구분 기호 및 인코딩을 자동으로 처리하여 수동 코딩 노력을 줄이고 일관되고 정확한 출력을 보장합니다.
Spire.XLS for .NET 시작하기
C# 프로젝트에서 Spire.XLS를 사용하려면 NuGet을 통해 설치하십시오:
- Visual Studio에서 프로젝트를 엽니다.
- 도구 -> NuGet 패키지 관리자 -> 솔루션용 NuGet 패키지 관리…로 이동합니다.
- “Spire.XLS”를 검색하고 설치를 클릭합니다.
또는 패키지 관리자 콘솔을 사용하여 신속하게 설치할 수 있습니다:
Install-Package Spire.XLS
설치가 완료되면 DataTable을 CSV로 손쉽게 내보내고, CSV를 Excel로 변환하거나 CSV를 다시 DataTable로 가져오는 등 결과 파일에 대한 추가 작업을 .NET 응용 프로그램 내에서 효율적으로 수행할 수 있습니다.
Spire.XLS 기반 C# Datatable에서 CSV로 내보내기 단계
- 내보낼 데이터로 DataTable을 준비합니다.
- Spire.XLS를 사용하여 Workbook 개체를 생성합니다.
- 워크시트에 DataTable을 삽입합니다.
- 구분 기호와 인코딩을 지정하여 워크시트를 CSV로 저장합니다.
예제 코드
using Spire.Xls;
using System;
using System.Data;
using System.Text;

namespace DataTableToCSV
{
    internal class Program
    {
        static void Main(string[] args)
        {
            // -------------------------------
            // 1단계: 책에 대한 새 DataTable 생성
            // -------------------------------
            DataTable dt = new DataTable("Books");

            // 열 정의: BookID, Title, Author, Genre, Price, PublishDate
            dt.Columns.Add("BookID", typeof(int));
            dt.Columns.Add("Title", typeof(string));
            dt.Columns.Add("Author", typeof(string));
            dt.Columns.Add("Genre", typeof(string));
            dt.Columns.Add("Price", typeof(double));
            dt.Columns.Add("PublishDate", typeof(DateTime));

            // 샘플 행 추가
            dt.Rows.Add(201, "The Great Gatsby", "F. Scott Fitzgerald", "Classic", 10.99, new DateTime(1925, 4, 10));
            dt.Rows.Add(202, "1984", "George Orwell", "Dystopian", 9.99, new DateTime(1949, 6, 8));
            dt.Rows.Add(203, "To Kill a Mockingbird", "Harper Lee", "Classic", 12.50, new DateTime(1960, 7, 11));
            dt.Rows.Add(204, "The Hobbit", "J.R.R. Tolkien", "Fantasy", 15.75, new DateTime(1937, 9, 21));
            dt.Rows.Add(205, "Clean Code", "Robert C. Martin", "Programming", 32.99, new DateTime(2008, 8, 1));
            dt.Rows.Add(206, "The Pragmatic Programmer", "Andrew Hunt", "Programming", 29.95, new DateTime(1999, 10, 20));

            // -------------------------------
            // 2단계: Workbook 생성 및 DataTable 삽입
            // -------------------------------
            Workbook workbook = new Workbook();
            Worksheet sheet = workbook.Worksheets[0];

            // 1행 1열부터 시작하여 워크시트에 DataTable 삽입
            // 열 헤더 포함
            sheet.InsertDataTable(dt, true, 1, 1);

            // -------------------------------
            // 3단계: 워크시트를 CSV로 저장
            // -------------------------------
            // 매개변수: 파일 이름, 구분 기호, 인코딩
            sheet.SaveToFile("books.csv", ",", Encoding.UTF8);

            // 리소스 해제
            workbook.Dispose();
        }
    }
}
출력 CSV
Spire.XLS 사용의 이점
- 특수 문자, 구분 기호 및 인코딩 자동 처리 – 수동 이스케이프 처리가 필요 없습니다.
- CSV 가져오기 및 내보내기 모두 지원하여 다양한 워크플로우에 유연하게 적용할 수 있습니다.
- 프로덕션 수준 코드 단순화 – 수동 방법에 비해 상용구 코드가 적고 오류가 적습니다.
- 대용량 데이터 세트에 대한 확장성 – 수천 개의 행이 있어도 효율적으로 작동합니다.
DataTable을 CSV로 변환하는 방법의 성능 비교
각 접근 방식의 강점과 절충점을 더 잘 이해하기 위해 DataTable을 CSV로 내보낼 때 StringBuilder, StreamWriter 및 Spire.XLS를 나란히 비교했습니다.
| 방법 | 적합 대상 | 성능 | 메모리 사용량 | 코드 복잡성 | 참고 |
|---|---|---|---|---|---|
| StringBuilder | 소규모 데이터 세트(<1만 행) | 중간 | 높음 | 보통 | 출력을 완벽하게 제어할 수 있지만 대용량 파일에는 비효율적입니다. |
| StreamWriter | 대용량 데이터 세트(1만+ 행) | 높음 | 낮음 | 보통 | 한 줄씩 쓰므로 메모리 과부하를 방지합니다. |
| Spire.XLS | 프로덕션 및 엔터프라이즈 | 높음 | 최적화됨 | 낮음 | 이스케이프 처리, 인코딩 및 대용량 데이터 세트를 자동으로 처리합니다. |
어떤 방법을 사용해야 할까요?
비교 표는 기술적인 차이점을 강조하지만, 올바른 방법을 선택하는 것은 데이터 세트 크기, 성능 요구 사항 및 프로덕션 요구와 같은 특정 시나리오에 따라 달라집니다.
- CSV 형식을 완벽하게 제어해야 하고 중소 규모 데이터 세트로 작업하는 경우 StringBuilder를 선택하십시오.
- 대용량 데이터 세트를 내보내고 메모리 효율적인 솔루션을 원한다면 StreamWriter를 선택하십시오.
- 특히 특수 사례를 처리하거나 엔터프라이즈 워크플로우에 통합할 때 프로덕션 준비가 완료되고 안정적이며 유지 관리가 적은 접근 방식이 필요한 경우 Spire.XLS를 선택하십시오.
DataTable을 CSV로 변환 시 특수 사례 처리 및 모범 사례
C#에서 DataTable을 CSV로 내보낼 때는 모범 사례를 따르고 CSV 출력에 영향을 줄 수 있는 몇 가지 특수 사례를 인지하는 것이 중요합니다. 이를 올바르게 처리하면 파일이 깨끗하고 안정적이며 사용하기 쉽도록 보장됩니다.
- 특수 사례 처리
- Null 값 – 누락된 데이터가 CSV를 손상시키지 않도록 DBNull을 빈 문자열이나 자리 표시자로 바꿉니다.
- 사용자 지정 구분 기호 – 데이터에 쉼표가 포함된 경우 혼동을 피하기 위해 ; 또는 탭(\t) 사용을 고려하십시오.
- 특수 문자 – 따옴표, 쉼표 또는 줄 바꿈이 포함된 값은 CSV 무결성을 유지하기 위해 적절하게 이스케이프 처리해야 합니다.
- 인코딩 고려 사항 – 대부분의 시나리오에 UTF-8이 권장되지만 일부 시스템에서는 UTF-16 또는 ANSI가 필요할 수 있습니다.
- 대용량 데이터 세트 – 매우 큰 테이블의 경우 성능 문제를 피하기 위해 파일을 분할하거나 StreamWriter와 같은 메모리 효율적인 방법을 사용하는 것을 고려하십시오.
- 모범 사례
- 플랫폼 및 도구 간 호환성을 위해 UTF-8 인코딩을 고수하십시오.
- 예기치 않은 오류를 방지하기 위해 null, 쉼표, 따옴표 및 여러 줄 값과 같은 특수 사례로 테스트하십시오.
- 올바른 방법 선택 – StringBuilder는 작은 테이블에 적합하고 StreamWriter는 대용량 데이터 세트에 더 좋으며 Spire.XLS는 프로덕션 준비 솔루션에 이상적입니다.
- 다른 사람들이 데이터를 해석하는 방법을 알 수 있도록 CSV 구조를 명확하게 문서화하십시오.
결론
C# DataTable을 CSV로 변환하는 기술을 마스터하는 것은 테이블 형식의 데이터로 작업하는 개발자에게 필수적인 기술입니다. 이 가이드는 소규모 데이터 세트에 StringBuilder 사용, 대용량 테이블을 효율적이고 메모리 친화적으로 처리하기 위해 StreamWriter 사용, 복잡한 시나리오를 자동으로 관리하는 안정적인 프로덕션 준비 솔루션을 위해 Spire.XLS 라이브러리 활용 등 세 가지 실용적인 접근 방식을 다룹니다.
이러한 단계별 예제를 따르면 C# DataTable을 CSV로 변환하는 작업을 자신 있게 수행하여 데이터가 정확하고 공유 가능하며 통합 또는 추가 분석 준비가 되었는지 확인할 수 있습니다.
자주 묻는 질문
Q1: C#에서 DataTable을 CSV로 효율적으로 변환하려면 어떻게 해야 합니까?
A1: 세 가지 방법을 사용할 수 있습니다: 소규모 데이터 세트의 경우 StringBuilder로 수동 변환, 대용량 데이터 세트의 경우 StreamWriter, 프로덕션 준비 솔루션의 경우 Spire.XLS 라이브러리. 각 방법은 쉼표, 따옴표 및 줄 바꿈을 올바르게 처리합니다.
Q2: 대용량 C# DataTable을 CSV로 내보내는 가장 좋은 방법은 무엇입니까?
A2: 대용량 데이터 세트의 경우 StreamWriter가 권장됩니다. 메모리 사용량을 줄이면서 한 줄씩 쓰기 때문입니다. Spire.XLS는 프로덕션 환경을 위한 또 다른 신뢰할 수 있는 옵션입니다.
Q3: C#에서 DataTable을 CSV로 내보낼 때 특수 문자와 null 값은 어떻게 처리합니까?
A3: 항상 쉼표, 따옴표, 줄 바꿈을 이스케이프 처리하십시오. null 또는 DBNull 값을 빈 문자열이나 자리 표시자로 바꾸십시오. Spire.XLS를 사용하면 이러한 대부분의 사례가 자동으로 처리됩니다.
Q4: DataTable을 CSV로 내보낼 때 구분 기호와 인코딩을 사용자 지정할 수 있습니까?
A4: 예, 시스템 요구 사항에 따라 ,, ; 또는 \t와 같은 구분 기호를 지정하고 UTF-8, UTF-16 또는 ANSI와 같은 인코딩을 선택할 수 있습니다.
Q5: 수동 또는 StreamWriter 방법 대신 Spire.XLS를 사용해야 하는 이유는 무엇입니까?
A5: Spire.XLS는 이스케이프 처리, 구분 기호 및 인코딩을 자동으로 처리하여 CSV 내보내기를 단순화하고 코드 복잡성을 줄이며 프로덕션 수준 응용 프로그램이나 중대형 데이터 세트에 이상적입니다.
Q6: 내보낸 CSV가 Excel 및 기타 응용 프로그램과 호환되는지 확인하려면 어떻게 해야 합니까?
A6: UTF-8 인코딩을 사용하고 특수 문자를 이스케이프 처리하며 헤더 형식을 일관되게 지정하십시오. Excel 또는 기타 대상 응용 프로그램에서 출력을 테스트하면 호환성 문제를 피하는 데 도움이 됩니다.
참조 항목
Convertir C# DataTable en CSV : 3 méthodes faciles avec exemples
Table des matières
- Pourquoi exporter DataTable en CSV en C#
- Méthode 1 : Conversion manuelle de C# DataTable en CSV à l'aide de StringBuilder
- Méthode 2 : Exportation de C# DataTable volumineux en CSV à l'aide de StreamWriter
- Méthode 3 : Utiliser Spire.XLS for .NET pour convertir DataTable en CSV en C#
- Comparaison des performances des méthodes de DataTable en CSV
- Quelle méthode devriez-vous utiliser ?
- Gestion des cas spéciaux et meilleures pratiques pour DataTable en CSV
- Conclusion
- FAQ
Installer avec Pypi
Install-Package Spire.XLS
Liens connexes
L'exportation de DataTable en CSV en C# est une exigence courante pour les développeurs qui ont besoin de sauvegarder, partager ou analyser efficacement des données tabulaires. L'objet DataTable dans .NET fournit un moyen structuré de stocker des lignes et des colonnes en mémoire, mais vous avez souvent besoin de convertir ces données en un fichier CSV pour Excel, des outils de reporting ou d'autres systèmes.
Ce tutoriel explique trois méthodes faciles pour exporter DataTable en CSV en C#, complétées par des instructions étape par étape et des exemples de code pratiques. Que vous travailliez avec de petits ensembles de données ou de grandes tables de niveau production, ces approches vous aideront à effectuer la conversion de DataTable en CSV en C# rapidement et de manière fiable.
Table des matières
- Pourquoi exporter DataTable en CSV en C#
- Méthode 1 : Conversion manuelle de C# DataTable en CSV à l'aide de StringBuilder
- Méthode 2 : Exportation de C# DataTable volumineux en CSV à l'aide de StreamWriter
- Méthode 3 : Utiliser Spire.XLS for .NET pour convertir DataTable en CSV en C#
- Comparaison des performances des méthodes de DataTable en CSV
- Quelle méthode devriez-vous utiliser ?
- Gestion des cas spéciaux et meilleures pratiques pour DataTable en CSV
- Conclusion
- FAQ
Pourquoi exporter DataTable en CSV en C#
L'exportation d'un DataTable en CSV en C# offre plusieurs avantages clés :
- Format de données universel – CSV est pris en charge par Excel, Google Sheets, les bases de données et de nombreuses applications.
- Lisible et simple – Contrairement à JSON ou XML, CSV est lisible par l'homme et facile à modifier manuellement.
- Intégration transparente – De nombreuses applications d'entreprise, CRM et outils de reporting acceptent les fichiers CSV.
- Performances rapides – La génération de CSV est légère et efficace.
- Compatibilité multiplateforme – Les fichiers CSV peuvent être ouverts et traités sur n'importe quel système.
Méthode 1 : Conversion manuelle de C# DataTable en CSV à l'aide de StringBuilder
L'exportation manuelle d'un DataTable en CSV en C# à l'aide de StringBuilder vous donne un contrôle total sur les règles de formatage et d'échappement, ce qui le rend idéal pour les ensembles de données de petite à moyenne taille.
Étapes pour convertir DataTable en CSV en C# à l'aide de StringBuilder
- Créez ou récupérez un DataTable depuis votre source (base de données, API ou manuellement).
- Initialisez un StringBuilder pour stocker le contenu CSV.
- Ajoutez les en-têtes de colonnes en parcourant DataTable.Columns.
- Parcourez les lignes de DataTable et ajoutez la valeur de chaque cellule.
- Échappez les caractères spéciaux comme les virgules, les guillemets ou les sauts de ligne.
- Écrivez la chaîne finale dans un fichier CSV à l'aide de File.WriteAllText.
Exemple de code
using System;
using System.Data;
using System.IO;
using System.Text;

namespace DataTableToCSV
{
    internal class Program
    {
        static void Main(string[] args)
        {
            // -------------------------------
            // Étape 1 : Créer un DataTable
            // -------------------------------
            DataTable table = new DataTable("Employees");

            // Définir les colonnes : ID, Name, Department, Salary, JoinDate, Email
            table.Columns.Add("ID", typeof(int));
            table.Columns.Add("Name", typeof(string));
            table.Columns.Add("Department", typeof(string));
            table.Columns.Add("Salary", typeof(decimal));
            table.Columns.Add("JoinDate", typeof(DateTime));
            table.Columns.Add("Email", typeof(string));

            // Ajouter des exemples de lignes avec des données plus riches
            table.Rows.Add(1, "Alice Johnson", "HR", 60000, new DateTime(2019, 3, 15), "alice.johnson@example.com");
            table.Rows.Add(2, "Bob Smith", "IT", 75000, new DateTime(2018, 7, 22), "bob.smith@example.com");
            table.Rows.Add(3, "Charlie Brown", "Finance", 82000, new DateTime(2020, 1, 10), "charlie.brown@example.com");
            table.Rows.Add(4, "Diana Prince", "Marketing", 67000, new DateTime(2021, 5, 5), "diana.prince@example.com");
            table.Rows.Add(5, "Ethan Hunt", "Operations", 90000, new DateTime(2017, 9, 30), "ethan.hunt@example.com");
            table.Rows.Add(6, "Fiona Gallagher", "IT", 72000, new DateTime(2019, 11, 12), "fiona.gallagher@example.com");

            // -------------------------------
            // Étape 2 : Exporter DataTable en CSV
            // -------------------------------
            string csvPath = "employees.csv";
            DataTableToCsv(table, csvPath);

            Console.WriteLine($"Fichier CSV créé avec succès : {csvPath}");
        }

        /// <summary>
        /// Convertit un DataTable en fichier CSV.
        /// </summary>
        /// <param name="dt">Le DataTable à exporter</param>
        /// <param name="filePath">Le chemin où le fichier CSV sera enregistré</param>
        public static void DataTableToCsv(DataTable dt, string filePath)
        {
            // Utiliser StringBuilder pour construire efficacement le contenu CSV
            StringBuilder sb = new StringBuilder();

            // -------------------------------
            // Étape 1 : Ajouter les en-têtes de colonnes
            // -------------------------------
            for (int i = 0; i < dt.Columns.Count; i++)
            {
                sb.Append(dt.Columns[i].ColumnName);
                if (i < dt.Columns.Count - 1) sb.Append(","); // Ajouter une virgule sauf pour la dernière colonne
            }
            sb.AppendLine();

            // -------------------------------
            // Étape 2 : Ajouter les lignes
            // -------------------------------
            foreach (DataRow row in dt.Rows)
            {
                for (int i = 0; i < dt.Columns.Count; i++)
                {
                    string value;

                    // Formater les colonnes DateTime en "yyyy-MM-dd"
                    if (dt.Columns[i].DataType == typeof(DateTime))
                    {
                        value = ((DateTime)row[i]).ToString("yyyy-MM-dd");
                    }
                    else
                    {
                        value = row[i].ToString();
                    }

                    // Échapper les caractères spéciaux : virgules, guillemets, sauts de ligne
                    if (value.Contains(",") || value.Contains("\"") || value.Contains("\n"))
                    {
                        value = "\"" + value.Replace("\"", "\"\"") + "\"";
                    }

                    sb.Append(value);

                    if (i < dt.Columns.Count - 1) sb.Append(",");
                }
                sb.AppendLine();
            }

            // -------------------------------
            // Étape 3 : Écrire le fichier CSV
            // -------------------------------
            File.WriteAllText(filePath, sb.ToString(), Encoding.UTF8);
        }
    }
}
CSV de sortie
Méthode 2 : Exportation de C# DataTable volumineux en CSV à l'aide de StreamWriter
Pour les DataTables volumineux, l'utilisation de StringBuilder peut être gourmande en mémoire. StreamWriter vous permet d'écrire les lignes une par une, ce qui est efficace pour les grands ensembles de données.
Étapes pour l'exportation C# DataTable CSV basée sur StreamWriter
- Créez ou récupérez votre DataTable avec les données nécessaires.
- Initialisez un StreamWriter avec le chemin du fichier CSV de sortie et l'encodage souhaité (comme UTF-8).
- Écrivez la ligne d'en-tête en utilisant les noms de colonnes du DataTable.
- Itérez à travers les lignes du DataTable et écrivez chaque ligne dans le fichier.
- Échappez les valeurs contenant des caractères spéciaux (virgules, guillemets, sauts de ligne) pour maintenir l'intégrité du CSV.
- Fermez le StreamWriter pour libérer les ressources système.
Exemple de code
using System;
using System.Data;
using System.IO;
using System.Text;

namespace DataTableToCSV
{
    internal class Program
    {
        static void Main(string[] args)
        {
            // -------------------------------
            // Étape 1 : Créer un nouveau DataTable pour cet exemple
            // -------------------------------
            DataTable table = new DataTable("Products");

            // Définir les colonnes : ProductID, ProductName, Category, Price, Stock, LaunchDate
            table.Columns.Add("ProductID", typeof(int));
            table.Columns.Add("ProductName", typeof(string));
            table.Columns.Add("Category", typeof(string));
            table.Columns.Add("Price", typeof(decimal));
            table.Columns.Add("Stock", typeof(int));
            table.Columns.Add("LaunchDate", typeof(DateTime));

            // Ajouter des exemples de lignes avec des produits variés
            table.Rows.Add(101, "Laptop Pro 15", "Electronics", 1500.99, 25, new DateTime(2023, 1, 10));
            table.Rows.Add(102, "Wireless Mouse", "Accessories", 29.95, 200, new DateTime(2022, 11, 5));
            table.Rows.Add(103, "Mechanical Keyboard", "Accessories", 79.99, 150, new DateTime(2022, 12, 1));
            table.Rows.Add(104, "4K Monitor", "Electronics", 399.50, 40, new DateTime(2023, 2, 20));
            table.Rows.Add(105, "USB-C Hub", "Accessories", 49.99, 300, new DateTime(2022, 9, 18));
            table.Rows.Add(106, "Gaming Chair", "Furniture", 259.99, 15, new DateTime(2023, 3, 5));

            // -------------------------------
            // Étape 2 : Exporter DataTable en CSV à l'aide de StreamWriter
            // -------------------------------
            string csvPath = "products_stream.csv";
            DataTableToCsvStream(table, csvPath);

            Console.WriteLine($"Fichier CSV créé avec succès : {csvPath}");
        }

        /// <summary>
        /// Exporter un DataTable en CSV à l'aide de StreamWriter (efficace pour les grands ensembles de données)
        /// </summary>
        /// <param name="dt">Le DataTable à exporter</param>
        /// <param name="filePath">Le chemin du fichier CSV à enregistrer</param>
        public static void DataTableToCsvStream(DataTable dt, string filePath)
        {
            // Utiliser StreamWriter pour une écriture efficace en mémoire (ligne par ligne)
            using (StreamWriter writer = new StreamWriter(filePath, false, Encoding.UTF8))
            {
                // -------------------------------
                // Étape 1 : Écrire les en-têtes de colonnes
                // -------------------------------
                for (int i = 0; i < dt.Columns.Count; i++)
                {
                    writer.Write(dt.Columns[i].ColumnName);
                    if (i < dt.Columns.Count - 1)
                        writer.Write(","); // Ajouter une virgule sauf pour la dernière colonne
                }
                writer.WriteLine();

                // -------------------------------
                // Étape 2 : Écrire les lignes
                // -------------------------------
                foreach (DataRow row in dt.Rows)
                {
                    for (int i = 0; i < dt.Columns.Count; i++)
                    {
                        string value;

                        // Formater DateTime en yyyy-MM-dd
                        if (dt.Columns[i].DataType == typeof(DateTime))
                        {
                            value = ((DateTime)row[i]).ToString("yyyy-MM-dd");
                        }
                        else
                        {
                            value = row[i].ToString();
                        }

                        // Échapper les caractères spéciaux : virgules, guillemets, sauts de ligne
                        if (value.Contains(",") || value.Contains("\"") || value.Contains("\n"))
                        {
                            value = "\"" + value.Replace("\"", "\"\"") + "\"";
                        }

                        writer.Write(value);

                        if (i < dt.Columns.Count - 1)
                            writer.Write(",");
                    }
                    writer.WriteLine();
                }
                // StreamWriter est automatiquement fermé à la fin du bloc using
            }
        }
    }
}
CSV de sortie
Méthode 3 : Utiliser Spire.XLS for .NET pour convertir DataTable en CSV en C#
Pour les applications prêtes pour la production, des bibliothèques comme Spire.XLS for .NET fournissent un moyen fiable et efficace de gérer l'exportation de C# DataTable en CSV. La bibliothèque gère automatiquement les caractères spéciaux, les délimiteurs et l'encodage, réduisant ainsi l'effort de codage manuel et garantissant une sortie cohérente et précise.
Démarrer avec Spire.XLS for .NET
Pour utiliser Spire.XLS dans votre projet C#, installez-le via NuGet:
- Ouvrez votre projet dans Visual Studio.
- Allez dans Outils -> Gestionnaire de paquets NuGet -> Gérer les paquets NuGet pour la solution…
- Recherchez “Spire.XLS” et cliquez sur Installer.
Alternativement, vous pouvez l'installer rapidement à l'aide de la console du gestionnaire de paquets :
Install-Package Spire.XLS
Une fois installé, vous pouvez exporter sans effort des DataTables en CSV et effectuer d'autres opérations sur les fichiers résultants, telles que la conversion de CSV en Excel ou l'importation de CSV dans un DataTable, le tout efficacement au sein de vos applications .NET.
Étapes pour l'exportation C# Datatable vers CSV basée sur Spire.XLS
- Préparez votre DataTable avec les données à exporter.
- Créez un objet Workbook à l'aide de Spire.XLS.
- Insérez le DataTable dans une feuille de calcul.
- Enregistrez la feuille de calcul au format CSV, en spécifiant le délimiteur et l'encodage.
Exemple de code
using Spire.Xls;
using System;
using System.Data;
using System.Text;

namespace DataTableToCSV
{
    internal class Program
    {
        static void Main(string[] args)
        {
            // -------------------------------
            // Étape 1 : Créer un nouveau DataTable pour les livres
            // -------------------------------
            DataTable dt = new DataTable("Books");

            // Définir les colonnes : BookID, Title, Author, Genre, Price, PublishDate
            dt.Columns.Add("BookID", typeof(int));
            dt.Columns.Add("Title", typeof(string));
            dt.Columns.Add("Author", typeof(string));
            dt.Columns.Add("Genre", typeof(string));
            dt.Columns.Add("Price", typeof(double));
            dt.Columns.Add("PublishDate", typeof(DateTime));

            // Ajouter des exemples de lignes
            dt.Rows.Add(201, "The Great Gatsby", "F. Scott Fitzgerald", "Classic", 10.99, new DateTime(1925, 4, 10));
            dt.Rows.Add(202, "1984", "George Orwell", "Dystopian", 9.99, new DateTime(1949, 6, 8));
            dt.Rows.Add(203, "To Kill a Mockingbird", "Harper Lee", "Classic", 12.50, new DateTime(1960, 7, 11));
            dt.Rows.Add(204, "The Hobbit", "J.R.R. Tolkien", "Fantasy", 15.75, new DateTime(1937, 9, 21));
            dt.Rows.Add(205, "Clean Code", "Robert C. Martin", "Programming", 32.99, new DateTime(2008, 8, 1));
            dt.Rows.Add(206, "The Pragmatic Programmer", "Andrew Hunt", "Programming", 29.95, new DateTime(1999, 10, 20));

            // -------------------------------
            // Étape 2 : Créer un classeur et insérer DataTable
            // -------------------------------
            Workbook workbook = new Workbook();
            Worksheet sheet = workbook.Worksheets[0];

            // Insérer le DataTable dans la feuille de calcul à partir de la ligne 1, colonne 1
            // Inclure les en-têtes de colonnes
            sheet.InsertDataTable(dt, true, 1, 1);

            // -------------------------------
            // Étape 3 : Enregistrer la feuille de calcul au format CSV
            // -------------------------------
            // Paramètres : nom de fichier, délimiteur, encodage
            sheet.SaveToFile("books.csv", ",", Encoding.UTF8);

            // Libérer les ressources
            workbook.Dispose();
        }
    }
}
CSV de sortie
Avantages de l'utilisation de Spire.XLS
- Gestion automatique des caractères spéciaux, des délimiteurs et des encodages – aucun échappement manuel n'est nécessaire.
- Prend en charge à la fois l'importation et l'exportation CSV, ce qui le rend flexible pour différents flux de travail.
- Simplifie le code de niveau production – moins de code standard et moins d'erreurs par rapport aux méthodes manuelles.
- Évolutif pour les grands ensembles de données – fonctionne efficacement même avec des milliers de lignes.
Comparaison des performances des méthodes de DataTable en CSV
Pour mieux comprendre les points forts et les compromis de chaque approche, voici une comparaison côte à côte de StringBuilder, StreamWriter et Spire.XLS lors de l'exportation d'un DataTable en CSV.
| Méthode | Idéal pour | Performance | Utilisation de la mémoire | Complexité du code | Remarques |
|---|---|---|---|---|---|
| StringBuilder | Petits ensembles de données (<10k lignes) | Moyenne | Élevée | Modérée | Contrôle total sur la sortie, mais moins efficace pour les fichiers volumineux |
| StreamWriter | Grands ensembles de données (10k+ lignes) | Élevée | Faible | Modérée | Écrit ligne par ligne, évite la surcharge de mémoire |
| Spire.XLS | Production et entreprise | Élevée | Optimisée | Faible | Gère automatiquement l'échappement, l'encodage et les grands ensembles de données |
Quelle méthode devriez-vous utiliser ?
Bien que le tableau de comparaison mette en évidence les différences techniques, le choix de la bonne méthode dépend de votre scénario spécifique, tel que la taille de l'ensemble de données, les exigences de performance et les besoins de production.
- Choisissez StringBuilder si vous avez besoin d'un contrôle complet sur le formatage CSV et que vous travaillez avec des ensembles de données de petite à moyenne taille.
- Choisissez StreamWriter si vous exportez de grands ensembles de données et souhaitez une solution efficace en mémoire.
- Choisissez Spire.XLS si vous avez besoin d'une approche fiable, prête pour la production et nécessitant peu d'entretien, en particulier lors de la gestion de cas spéciaux ou de l'intégration dans des flux de travail d'entreprise.
Gestion des cas spéciaux et meilleures pratiques pour DataTable en CSV
Lors de l'exportation d'un DataTable en CSV en C#, il est important de suivre les meilleures pratiques et d'être conscient de certains cas spéciaux qui pourraient affecter votre sortie CSV. Une gestion appropriée garantit que vos fichiers sont propres, fiables et faciles à utiliser.
- Gestion des cas spéciaux
- Valeurs nulles – Remplacez DBNull par des chaînes vides ou des espaces réservés afin que les données manquantes ne cassent pas votre CSV.
- Délimiteurs personnalisés – Si vos données contiennent des virgules, envisagez d'utiliser ; ou des tabulations (\t) pour éviter toute confusion.
- Caractères spéciaux – Les valeurs avec des guillemets, des virgules ou des sauts de ligne doivent être correctement échappées pour maintenir l'intégrité du CSV.
- Considérations sur l'encodage – UTF-8 est recommandé pour la plupart des scénarios, mais certains systèmes peuvent nécessiter UTF-16 ou ANSI.
- Grands ensembles de données – Pour les très grandes tables, envisagez de diviser les fichiers ou d'utiliser des méthodes économes en mémoire comme StreamWriter pour éviter les problèmes de performances.
- Meilleures pratiques
- Restez avec l'encodage UTF-8 pour la compatibilité entre les plateformes et les outils.
- Testez avec des cas spéciaux tels que les nuls, les virgules, les guillemets et les valeurs multilignes pour éviter les erreurs inattendues.
- Choisissez la bonne méthode – StringBuilder fonctionne bien pour les petites tables, StreamWriter est meilleur pour les grands ensembles de données, et Spire.XLS est idéal pour les solutions prêtes pour la production.
- Documentez clairement la structure de votre CSV afin que les autres sachent comment interpréter les données.
Conclusion
Maîtriser la conversion C# DataTable en CSV est une compétence essentielle pour les développeurs travaillant avec des données tabulaires. Ce guide a couvert trois approches pratiques : l'utilisation de StringBuilder pour les petits ensembles de données, l'emploi de StreamWriter pour une gestion efficace et économe en mémoire des grandes tables, et l'exploitation de la bibliothèque Spire.XLS pour une solution fiable et prête pour la production qui gère automatiquement les scénarios complexes.
En suivant ces exemples étape par étape, vous pouvez effectuer la conversion C# DataTable en CSV en toute confiance, en vous assurant que vos données sont précises, partageables et prêtes pour l'intégration ou une analyse plus approfondie.
FAQ
Q1 : Comment puis-je convertir efficacement un DataTable en CSV en C# ?
R1 : Vous pouvez utiliser trois méthodes : la conversion manuelle avec StringBuilder pour les petits ensembles de données, StreamWriter pour les grands ensembles de données, ou la bibliothèque Spire.XLS pour une solution prête pour la production. Chaque méthode assure une gestion correcte des virgules, des guillemets et des sauts de ligne.
Q2 : Quel est le meilleur moyen d'exporter de grands DataTables C# en CSV ?
R2 : Pour les grands ensembles de données, StreamWriter est recommandé car il écrit les lignes une par une, réduisant ainsi l'utilisation de la mémoire. Spire.XLS est une autre option fiable pour les environnements de production.
Q3 : Comment gérer les caractères spéciaux et les valeurs nulles lors de l'exportation de DataTable en CSV en C# ?
R3 : Échappez toujours les virgules, les guillemets et les sauts de ligne. Remplacez les valeurs nulles ou DBNull par des chaînes vides ou des espaces réservés. L'utilisation de Spire.XLS gère automatiquement la plupart de ces cas.
Q4 : Puis-je personnaliser les délimiteurs et l'encodage lors de l'exportation d'un DataTable en CSV ?
R4 : Oui, vous pouvez spécifier des délimiteurs comme ,, ; ou \t et choisir un encodage tel que UTF-8, UTF-16 ou ANSI en fonction des exigences du système.
Q5 : Pourquoi devrais-je utiliser Spire.XLS au lieu des méthodes manuelles ou StreamWriter ?
R5 : Spire.XLS simplifie l'exportation CSV en gérant automatiquement l'échappement, les délimiteurs et l'encodage, réduit la complexité du code et est idéal pour les ensembles de données de taille moyenne à grande ou les applications de niveau production.
Q6 : Comment puis-je m'assurer que mon CSV exporté est compatible avec Excel et d'autres applications ?
R6 : Utilisez l'encodage UTF-8, échappez les caractères spéciaux et formatez les en-têtes de manière cohérente. Tester la sortie dans Excel ou d'autres applications cibles aide à éviter les problèmes de compatibilité.
Voir également
Convertir C# DataTable a CSV: 3 métodos fáciles con ejemplos
Tabla de Contenidos
- Por qué exportar DataTable a CSV en C#
- Método 1: Conversión manual de C# DataTable a CSV usando StringBuilder
- Método 2: Exportación de C# DataTable grande a CSV usando StreamWriter
- Método 3: Usar Spire.XLS for .NET para convertir DataTable a CSV en C#
- Comparación de rendimiento de los métodos de DataTable a CSV
- ¿Qué método deberías usar?
- Manejo de casos especiales y mejores prácticas para DataTable a CSV
- Conclusión
- Preguntas frecuentes
Instalar con Pypi
Install-Package Spire.XLS
Enlaces Relacionados
Exportar DataTable a CSV en C# es un requisito común para los desarrolladores que necesitan guardar, compartir o analizar datos tabulares de manera eficiente. El objeto DataTable en .NET proporciona una forma estructurada de almacenar filas y columnas en la memoria, pero a menudo necesitas convertir estos datos en un archivo CSV para Excel, herramientas de informes u otros sistemas.
Este tutorial explica tres métodos sencillos para exportar DataTable a CSV en C#, con instrucciones paso a paso y ejemplos de código prácticos. Ya sea que estés trabajando con conjuntos de datos pequeños o tablas grandes a nivel de producción, estos enfoques te ayudarán a realizar la conversión de DataTable a CSV en C# de forma rápida y fiable.
Tabla de Contenidos
- Por qué exportar DataTable a CSV en C#
- Método 1: Conversión manual de C# DataTable a CSV usando StringBuilder
- Método 2: Exportación de C# DataTable grande a CSV usando StreamWriter
- Método 3: Usar Spire.XLS for .NET para convertir DataTable a CSV en C#
- Comparación de rendimiento de los métodos de DataTable a CSV
- ¿Qué método deberías usar?
- Manejo de casos especiales y mejores prácticas para DataTable a CSV
- Conclusión
- Preguntas frecuentes
Por qué exportar DataTable a CSV en C#
Exportar un DataTable a CSV en C# ofrece varias ventajas clave:
- Formato de datos universal – CSV es compatible con Excel, Google Sheets, bases de datos y muchas aplicaciones.
- Legible y simple – A diferencia de JSON o XML, CSV es legible por humanos y fácil de editar manualmente.
- Integración perfecta – Muchas aplicaciones empresariales, CRMs y herramientas de informes aceptan archivos CSV.
- Rendimiento rápido – La generación de CSV es ligera y eficiente.
- Compatibilidad multiplataforma – Los archivos CSV se pueden abrir y procesar en cualquier sistema.
Método 1: Conversión manual de C# DataTable a CSV usando StringBuilder
Exportar manualmente un DataTable a CSV en C# usando StringBuilder te da control total sobre las reglas de formato y escape, lo que lo hace ideal para conjuntos de datos de tamaño pequeño a mediano.
Pasos para convertir DataTable a CSV en C# usando StringBuilder
- Crea u obtén un DataTable de tu fuente (base de datos, API o manualmente).
- Inicializa un StringBuilder para almacenar el contenido CSV.
- Añade los encabezados de las columnas recorriendo DataTable.Columns.
- Recorre las filas de DataTable y añade el valor de cada celda.
- Escapa caracteres especiales como comas, comillas o saltos de línea.
- Escribe la cadena final en un archivo CSV usando File.WriteAllText.
Ejemplo de código
using System;
using System.Data;
using System.IO;
using System.Text;

namespace DataTableToCSV
{
    internal class Program
    {
        static void Main(string[] args)
        {
            // -------------------------------
            // Paso 1: Crear un DataTable
            // -------------------------------
            DataTable table = new DataTable("Employees");

            // Definir columnas: ID, Name, Department, Salary, JoinDate, Email
            table.Columns.Add("ID", typeof(int));
            table.Columns.Add("Name", typeof(string));
            table.Columns.Add("Department", typeof(string));
            table.Columns.Add("Salary", typeof(decimal));
            table.Columns.Add("JoinDate", typeof(DateTime));
            table.Columns.Add("Email", typeof(string));

            // Añadir filas de muestra con datos más ricos
            table.Rows.Add(1, "Alice Johnson", "HR", 60000, new DateTime(2019, 3, 15), "alice.johnson@example.com");
            table.Rows.Add(2, "Bob Smith", "IT", 75000, new DateTime(2018, 7, 22), "bob.smith@example.com");
            table.Rows.Add(3, "Charlie Brown", "Finance", 82000, new DateTime(2020, 1, 10), "charlie.brown@example.com");
            table.Rows.Add(4, "Diana Prince", "Marketing", 67000, new DateTime(2021, 5, 5), "diana.prince@example.com");
            table.Rows.Add(5, "Ethan Hunt", "Operations", 90000, new DateTime(2017, 9, 30), "ethan.hunt@example.com");
            table.Rows.Add(6, "Fiona Gallagher", "IT", 72000, new DateTime(2019, 11, 12), "fiona.gallagher@example.com");

            // -------------------------------
            // Paso 2: Exportar DataTable a CSV
            // -------------------------------
            string csvPath = "employees.csv";
            DataTableToCsv(table, csvPath);

            Console.WriteLine($"Archivo CSV creado exitosamente: {csvPath}");
        }

        /// <summary>
        /// Convierte un DataTable a un archivo CSV.
        /// </summary>
        /// <param name="dt">El DataTable a exportar</param>
        /// <param name="filePath">La ruta donde se guardará el archivo CSV</param>
        public static void DataTableToCsv(DataTable dt, string filePath)
        {
            // Usar StringBuilder para construir eficientemente el contenido CSV
            StringBuilder sb = new StringBuilder();

            // -------------------------------
            // Paso 1: Añadir encabezados de columna
            // -------------------------------
            for (int i = 0; i < dt.Columns.Count; i++)
            {
                sb.Append(dt.Columns[i].ColumnName);
                if (i < dt.Columns.Count - 1) sb.Append(","); // Añadir coma excepto en la última columna
            }
            sb.AppendLine();

            // -------------------------------
            // Paso 2: Añadir filas
            // -------------------------------
            foreach (DataRow row in dt.Rows)
            {
                for (int i = 0; i < dt.Columns.Count; i++)
                {
                    string value;

                    // Formatear columnas DateTime como "yyyy-MM-dd"
                    if (dt.Columns[i].DataType == typeof(DateTime))
                    {
                        value = ((DateTime)row[i]).ToString("yyyy-MM-dd");
                    }
                    else
                    {
                        value = row[i].ToString();
                    }

                    // Escapar caracteres especiales: comas, comillas, saltos de línea
                    if (value.Contains(",") || value.Contains("\"") || value.Contains("\n"))
                    {
                        value = "\"" + value.Replace("\"", "\"\"") + "\"";
                    }

                    sb.Append(value);

                    if (i < dt.Columns.Count - 1) sb.Append(",");
                }
                sb.AppendLine();
            }

            // -------------------------------
            // Paso 3: Escribir archivo CSV
            // -------------------------------
            File.WriteAllText(filePath, sb.ToString(), Encoding.UTF8);
        }
    }
}
CSV de salida
Método 2: Exportación de C# DataTable grande a CSV usando StreamWriter
Para DataTables grandes, usar StringBuilder puede consumir mucha memoria. StreamWriter te permite escribir filas línea por línea, lo cual es eficiente para grandes conjuntos de datos.
Pasos para la exportación de C# DataTable a CSV basada en StreamWriter
- Crea o recupera tu DataTable con los datos necesarios.
- Inicializa un StreamWriter con la ruta del archivo CSV de salida y la codificación deseada (como UTF-8).
- Escribe la fila de encabezado usando los nombres de las columnas del DataTable.
- Itera a través de las filas del DataTable y escribe cada línea en el archivo.
- Escapa los valores que contienen caracteres especiales (comas, comillas, saltos de línea) para mantener la integridad del CSV.
- Cierra el StreamWriter para liberar recursos del sistema.
Ejemplo de código
using System;
using System.Data;
using System.IO;
using System.Text;

namespace DataTableToCSV
{
    internal class Program
    {
        static void Main(string[] args)
        {
            // -------------------------------
            // Paso 1: Crear un nuevo DataTable para este ejemplo
            // -------------------------------
            DataTable table = new DataTable("Products");

            // Definir columnas: ProductID, ProductName, Category, Price, Stock, LaunchDate
            table.Columns.Add("ProductID", typeof(int));
            table.Columns.Add("ProductName", typeof(string));
            table.Columns.Add("Category", typeof(string));
            table.Columns.Add("Price", typeof(decimal));
            table.Columns.Add("Stock", typeof(int));
            table.Columns.Add("LaunchDate", typeof(DateTime));

            // Añadir filas de muestra con productos variados
            table.Rows.Add(101, "Laptop Pro 15", "Electronics", 1500.99, 25, new DateTime(2023, 1, 10));
            table.Rows.Add(102, "Wireless Mouse", "Accessories", 29.95, 200, new DateTime(2022, 11, 5));
            table.Rows.Add(103, "Mechanical Keyboard", "Accessories", 79.99, 150, new DateTime(2022, 12, 1));
            table.Rows.Add(104, "4K Monitor", "Electronics", 399.50, 40, new DateTime(2023, 2, 20));
            table.Rows.Add(105, "USB-C Hub", "Accessories", 49.99, 300, new DateTime(2022, 9, 18));
            table.Rows.Add(106, "Gaming Chair", "Furniture", 259.99, 15, new DateTime(2023, 3, 5));

            // -------------------------------
            // Paso 2: Exportar DataTable a CSV usando StreamWriter
            // -------------------------------
            string csvPath = "products_stream.csv";
            DataTableToCsvStream(table, csvPath);

            Console.WriteLine($"Archivo CSV creado exitosamente: {csvPath}");
        }

        /// <summary>
        /// Exportar un DataTable a CSV usando StreamWriter (eficiente para grandes conjuntos de datos)
        /// </summary>
        /// <param name="dt">El DataTable a exportar</param>
        /// <param name="filePath">La ruta del archivo CSV a guardar</param>
        public static void DataTableToCsvStream(DataTable dt, string filePath)
        {
            // Usar StreamWriter para una escritura eficiente en memoria (fila por fila)
            using (StreamWriter writer = new StreamWriter(filePath, false, Encoding.UTF8))
            {
                // -------------------------------
                // Paso 1: Escribir encabezados de columna
                // -------------------------------
                for (int i = 0; i < dt.Columns.Count; i++)
                {
                    writer.Write(dt.Columns[i].ColumnName);
                    if (i < dt.Columns.Count - 1)
                        writer.Write(","); // Añadir coma excepto en la última columna
                }
                writer.WriteLine();

                // -------------------------------
                // Paso 2: Escribir filas
                // -------------------------------
                foreach (DataRow row in dt.Rows)
                {
                    for (int i = 0; i < dt.Columns.Count; i++)
                    {
                        string value;

                        // Formatear DateTime como yyyy-MM-dd
                        if (dt.Columns[i].DataType == typeof(DateTime))
                        {
                            value = ((DateTime)row[i]).ToString("yyyy-MM-dd");
                        }
                        else
                        {
                            value = row[i].ToString();
                        }

                        // Escapar caracteres especiales: comas, comillas, saltos de línea
                        if (value.Contains(",") || value.Contains("\"") || value.Contains("\n"))
                        {
                            value = "\"" + value.Replace("\"", "\"\"") + "\"";
                        }

                        writer.Write(value);

                        if (i < dt.Columns.Count - 1)
                            writer.Write(",");
                    }
                    writer.WriteLine();
                }
                // StreamWriter se cierra automáticamente al final del bloque using
            }
        }
    }
}
CSV de salida
Método 3: Usar Spire.XLS for .NET para convertir DataTable a CSV en C#
Para aplicaciones listas para producción, bibliotecas como Spire.XLS for .NET proporcionan una forma fiable y eficiente de manejar la exportación de C# DataTable a CSV. La biblioteca maneja automáticamente caracteres especiales, delimitadores y codificación, reduciendo el esfuerzo de codificación manual y asegurando una salida consistente y precisa.
Comenzar con Spire.XLS for .NET
Para usar Spire.XLS en tu proyecto de C#, instálalo a través de NuGet:
- Abre tu proyecto en Visual Studio.
- Ve a Herramientas -> Administrador de paquetes NuGet -> Administrar paquetes NuGet para la solución…
- Busca “Spire.XLS” y haz clic en Instalar.
Alternativamente, puedes instalarlo rápidamente usando la Consola del Administrador de Paquetes:
Install-Package Spire.XLS
Una vez instalado, puedes exportar DataTables a CSV sin esfuerzo y realizar operaciones adicionales en los archivos resultantes, como convertir CSV a Excel o importar CSV de nuevo a un DataTable, todo de manera eficiente dentro de tus aplicaciones .NET.
Pasos para la exportación de C# Datatable a CSV basada en Spire.XLS
- Prepara tu DataTable con los datos a exportar.
- Crea un objeto Workbook usando Spire.XLS.
- Inserta el DataTable en una hoja de cálculo.
- Guarda la hoja de cálculo como CSV, especificando el delimitador y la codificación.
Ejemplo de código
using Spire.Xls;
using System;
using System.Data;
using System.Text;

namespace DataTableToCSV
{
    internal class Program
    {
        static void Main(string[] args)
        {
            // -------------------------------
            // Paso 1: Crear un nuevo DataTable para libros
            // -------------------------------
            DataTable dt = new DataTable("Books");

            // Definir columnas: BookID, Title, Author, Genre, Price, PublishDate
            dt.Columns.Add("BookID", typeof(int));
            dt.Columns.Add("Title", typeof(string));
            dt.Columns.Add("Author", typeof(string));
            dt.Columns.Add("Genre", typeof(string));
            dt.Columns.Add("Price", typeof(double));
            dt.Columns.Add("PublishDate", typeof(DateTime));

            // Añadir filas de muestra
            dt.Rows.Add(201, "The Great Gatsby", "F. Scott Fitzgerald", "Classic", 10.99, new DateTime(1925, 4, 10));
            dt.Rows.Add(202, "1984", "George Orwell", "Dystopian", 9.99, new DateTime(1949, 6, 8));
            dt.Rows.Add(203, "To Kill a Mockingbird", "Harper Lee", "Classic", 12.50, new DateTime(1960, 7, 11));
            dt.Rows.Add(204, "The Hobbit", "J.R.R. Tolkien", "Fantasy", 15.75, new DateTime(1937, 9, 21));
            dt.Rows.Add(205, "Clean Code", "Robert C. Martin", "Programming", 32.99, new DateTime(2008, 8, 1));
            dt.Rows.Add(206, "The Pragmatic Programmer", "Andrew Hunt", "Programming", 29.95, new DateTime(1999, 10, 20));

            // -------------------------------
            // Paso 2: Crear un Workbook e insertar DataTable
            // -------------------------------
            Workbook workbook = new Workbook();
            Worksheet sheet = workbook.Worksheets[0];

            // Insertar el DataTable en la hoja de cálculo comenzando desde la fila 1, columna 1
            // Incluir encabezados de columna
            sheet.InsertDataTable(dt, true, 1, 1);

            // -------------------------------
            // Paso 3: Guardar la hoja de cálculo como CSV
            // -------------------------------
            // Parámetros: nombre de archivo, delimitador, codificación
            sheet.SaveToFile("books.csv", ",", Encoding.UTF8);

            // Liberar recursos
            workbook.Dispose();
        }
    }
}
CSV de salida
Beneficios de usar Spire.XLS
- Manejo automático de caracteres especiales, delimitadores y codificaciones – no se necesita escape manual.
- Soporta tanto la importación como la exportación de CSV, lo que lo hace flexible para diferentes flujos de trabajo.
- Simplifica el código a nivel de producción – menos código repetitivo y menos errores en comparación con los métodos manuales.
- Escalable para grandes conjuntos de datos – funciona eficientemente incluso con miles de filas.
Comparación de rendimiento de los métodos de DataTable a CSV
Para comprender mejor las fortalezas y desventajas de cada enfoque, aquí hay una comparación lado a lado de StringBuilder, StreamWriter y Spire.XLS al exportar un DataTable a CSV.
| Método | Ideal para | Rendimiento | Uso de memoria | Complejidad del código | Notas |
|---|---|---|---|---|---|
| StringBuilder | Conjuntos de datos pequeños (<10k filas) | Medio | Alto | Moderada | Control total sobre la salida, pero menos eficiente para archivos grandes |
| StreamWriter | Conjuntos de datos grandes (10k+ filas) | Alto | Bajo | Moderada | Escribe fila por fila, previene la sobrecarga de memoria |
| Spire.XLS | Producción y empresa | Alto | Optimizado | Baja | Maneja el escape, la codificación y los grandes conjuntos de datos automáticamente |
¿Qué método deberías usar?
Si bien la tabla de comparación destaca las diferencias técnicas, elegir el método correcto depende de tu escenario específico, como el tamaño del conjunto de datos, los requisitos de rendimiento y las necesidades de producción.
- Elige StringBuilder si necesitas un control completo sobre el formato CSV y estás trabajando con conjuntos de datos de tamaño pequeño a mediano.
- Elige StreamWriter si estás exportando grandes conjuntos de datos y quieres una solución eficiente en memoria.
- Elige Spire.XLS si necesitas un enfoque listo para producción, fiable y de bajo mantenimiento, especialmente al manejar casos especiales o integrarlo en flujos de trabajo empresariales.
Manejo de casos especiales y mejores prácticas para DataTable a CSV
Al exportar un DataTable a CSV en C#, es importante seguir las mejores prácticas y también estar al tanto de algunos casos especiales que podrían afectar tu salida CSV. Manejarlos adecuadamente asegura que tus archivos estén limpios, sean fiables y fáciles de usar.
- Manejo de casos especiales
- Valores nulos – Reemplaza DBNull con cadenas vacías o marcadores de posición para que los datos faltantes no rompan tu CSV.
- Delimitadores personalizados – Si tus datos contienen comas, considera usar ; o tabulaciones (\t) para evitar confusiones.
- Caracteres especiales – Los valores con comillas, comas o saltos de línea deben escaparse adecuadamente para mantener la integridad del CSV.
- Consideraciones de codificación – Se recomienda UTF-8 para la mayoría de los escenarios, pero algunos sistemas pueden requerir UTF-16 o ANSI.
- Conjuntos de datos grandes – Para tablas muy grandes, considera dividir archivos o usar métodos eficientes en memoria como StreamWriter para evitar problemas de rendimiento.
- Mejores prácticas
- Mantente con la codificación UTF-8 para compatibilidad entre plataformas y herramientas.
- Prueba con casos especiales como nulos, comas, comillas y valores multilínea para prevenir errores inesperados.
- Elige el método correcto – StringBuilder funciona bien para tablas pequeñas, StreamWriter es mejor para conjuntos de datos grandes, y Spire.XLS es ideal para soluciones listas para producción.
- Documenta la estructura de tu CSV claramente para que otros sepan cómo interpretar los datos.
Conclusión
Dominar la conversión de C# DataTable a CSV es una habilidad esencial para los desarrolladores que trabajan con datos tabulares. Esta guía cubrió tres enfoques prácticos: usar StringBuilder para conjuntos de datos pequeños, emplear StreamWriter para un manejo eficiente y amigable con la memoria de tablas grandes, y aprovechar la biblioteca Spire.XLS para una solución fiable y lista para producción que gestiona automáticamente escenarios complejos.
Siguiendo estos ejemplos paso a paso, puedes realizar la conversión de C# DataTable a CSV con confianza, asegurando que tus datos sean precisos, compartibles y listos para la integración o análisis posterior.
Preguntas frecuentes
P1: ¿Cómo puedo convertir eficientemente un DataTable a CSV en C#?
R1: Puedes usar tres métodos: conversión manual con StringBuilder para conjuntos de datos pequeños, StreamWriter para conjuntos de datos grandes, o la biblioteca Spire.XLS para una solución lista para producción. Cada método asegura el manejo adecuado de comas, comillas y saltos de línea.
P2: ¿Cuál es la mejor manera de exportar grandes C# DataTables a CSV?
R2: Para grandes conjuntos de datos, se recomienda StreamWriter porque escribe filas línea por línea, reduciendo el uso de memoria. Spire.XLS es otra opción fiable para entornos de producción.
P3: ¿Cómo manejo caracteres especiales y valores nulos al exportar DataTable a CSV en C#?
R3: Siempre escapa comas, comillas y saltos de línea. Reemplaza valores nulos o DBNull con cadenas vacías o marcadores de posición. Usar Spire.XLS maneja automáticamente la mayoría de estos casos.
P4: ¿Puedo personalizar delimitadores y codificación al exportar un DataTable a CSV?
R4: Sí, puedes especificar delimitadores como ,, ; o \t y elegir codificación como UTF-8, UTF-16 o ANSI dependiendo de los requisitos del sistema.
P5: ¿Por qué debería usar Spire.XLS en lugar de métodos manuales o StreamWriter?
R5: Spire.XLS simplifica la exportación CSV al manejar el escape, los delimitadores y la codificación automáticamente, reduce la complejidad del código y es ideal para conjuntos de datos de tamaño mediano a grande o aplicaciones a nivel de producción.
P6: ¿Cómo aseguro que mi CSV exportado sea compatible con Excel y otras aplicaciones?
R6: Usa codificación UTF-8, escapa caracteres especiales y formatea los encabezados de manera consistente. Probar la salida en Excel u otras aplicaciones de destino ayuda a evitar problemas de compatibilidad.