
Knowledgebase (2417)
Children categories
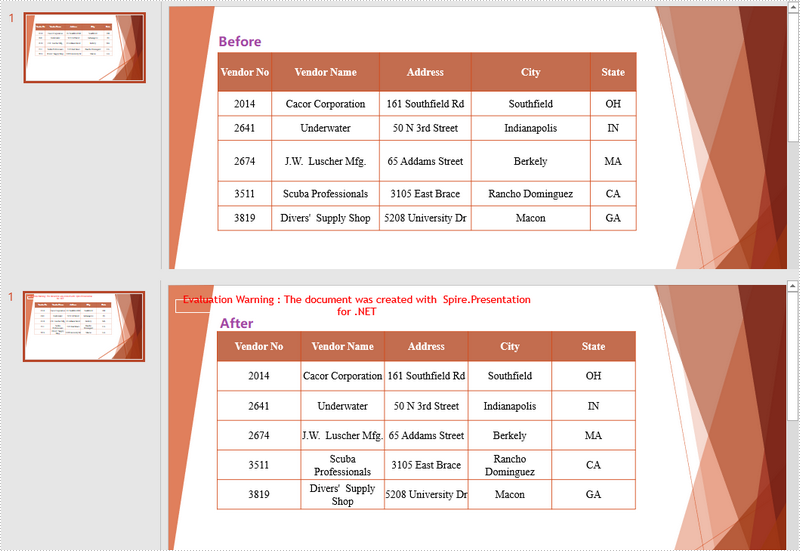
When creating a new table in PowerPoint, the rows and columns are evenly distributed by default. As you insert data into the table cells, the row heights and column widths will be automatically adjusted to fit with the contents. To make the table nicely organized, you may want to re-distribute the rows and columns. This article demonstrates how to accomplish this task in C# and VB.NET using Spire.Presentation for .NET.
Install Spire.Presentation for .NET
To begin with, you need to add the DLL files included in the Spire.Presentation for.NET package as references in your .NET project. The DLL files can be either downloaded from this link or installed via NuGet.
PM> Install-Package Spire.Presentation
Distribute Table Rows and Columns
The following are the steps to distribute table rows and columns evenly in PowerPoint.
- Create a Presentation object, and load the sample PowerPoint document using Presentation.LoadFromFile() method.
- Get the first slide through Presentation.Slides[0] property.
- Loop through the shapes in the first slide, and determine if a certain shape is a table. If yes, convert the shape to an ITable object.
- Distribute the table rows and columns using ITable.DistributeRows() method and ITable.DistributeColumns() method, respectively.
- Save the changes to another file using Presentation.SaveToFile() method.
- C#
- VB.NET
using Spire.Presentation;

namespace DistributeRowsAndColumns
{
    class Program
    {
        static void Main(string[] args)
        {
            //Create a Presentation instance
            Presentation presentation = new Presentation();

            //Load the PowerPoint document
            presentation.LoadFromFile(@"C:\Users\Administrator\Desktop\Table.pptx");

            //Get the first slide
            ISlide slide = presentation.Slides[0];

            //Loop through the shapes
            for (int i = 0; i < slide.Shapes.Count; i++)
            {
                //Determine if a shape is table
                if (slide.Shapes[i] is ITable)
                {
                    //Get the table in the slide
                    ITable table = (ITable)slide.Shapes[i];

                    //Distribute table rows
                    table.DistributeRows(0, table.TableRows.Count-1);

                    //Distribute table columns
                    table.DistributeColumns(0, table.ColumnsList.Count-1);

                }
            }

            //Save the result to file
            presentation.SaveToFile("DistributeRowsAndColumns.pptx", FileFormat.Pptx2013);
        }
    }
}
Imports Spire.Presentation

Namespace DistributeRowsAndColumns
    Class Program
        Shared  Sub Main(ByVal args() As String)
            'Create a Presentation instance
            Dim presentation As Presentation =  New Presentation()

            'Load the PowerPoint document
            presentation.LoadFromFile("C:\Users\Administrator\Desktop\Table.pptx")

            'Get the first slide
            Dim slide As ISlide =  presentation.Slides(0)

            'Loop through the shapes
            Dim i As Integer
            For  i = 0 To  slide.Shapes.Count- 1  Step  i + 1
                'Determine if a shape is table
                If TypeOf slide.Shapes(i) Is ITable Then
                    'Get the table in the slide
                    Dim table As ITable = CType(slide.Shapes(i), ITable)

                    'Distribute table rows
                    table.DistributeRows(0, table.TableRows.Count-1)

                    'Distribute table columns
                    table.DistributeColumns(0, table.ColumnsList.Count-1)

                End If
            Next

            'Save the result to file
            presentation.SaveToFile("DistributeRowsAndColumns.pptx", FileFormat.Pptx2013)
        End Sub
    End Class
End Namespace
Apply for a Temporary License
If you'd like to remove the evaluation message from the generated documents, or to get rid of the function limitations, please request a 30-day trial license for yourself.
Sometimes after you have finished an Excel workbook, you may need to replace some of the existing pictures with better ones for the purpose of making the workbook more appealing and persuasive. In this tutorial, you will learn how to replace a picture in Excel using Spire.XLS for .NET.
Install Spire.XLS for .NET
To begin with, you need to add the DLL files included in the Spire.XLS for .NET package as references in your .NET project. The DLLs files can be either downloaded from this link or installed via NuGet.
- Package Manager
PM> Install-Package Spire.XLS
Replace a Picture in Excel
The following are the detailed steps to replace a picture with another one using Spire.XLS for .NET.
- Create a Workbook object.
- Load a sample file using Workbook.LoadFromFile() method.
- Use Workbook.Worksheets[0] to get the first worksheet.
- Use Worksheet.Pictures[0] property to get the first picture from the first worksheet
- Use Image.FromFile() method to load an image from the specified file, and set it as a new value of ExcelPicture.Picture property. To do so, the original picture will be replaced with the new one.
- Save the document using Workbook.SaveToFile() method.
- C#
- VB.NET
using Spire.Xls;
using Spire.Xls.Collections;
namespace ReplacePictureinExcel
{
    class Program
    {
        static void Main(string[] args)
        {
            //Create a Workbook instance
            Workbook workbook = new Workbook();
            //Load the Excel file
            workbook.LoadFromFile("input.xls");

            //Get the first sheet
            Worksheet sheet = workbook.Worksheets[0];

            //Get Excel picture collection
            PicturesCollection pictureCollection = sheet.Pictures;

            //Get the first picture from the collection
            ExcelPicture excelPicture = pictureCollection[0];

            // Creates an Image from the specified file.
            excelPicture.Picture = System.Drawing.Image.FromFile("input.png");

            //Save the document
            workbook.SaveToFile("ReplaceImage.xlsx", ExcelVersion.Version2013);
        }
    }
}
Imports Spire.Xls
Imports Spire.Xls.Collections
Imports System.Drawing

Namespace ReplacePictureinExcel
	Class Program
		Private Shared Sub Main(args As String())

			'Create a Workbook instance
			Dim workbook As New Workbook()
			'Load the Excel file
			workbook.LoadFromFile(Input.xls)

			'Get the first sheet
			Dim sheet As Worksheet = workbook.Worksheets(0)

			'Get Excel picture collection
			Dim pictureCollection As PicturesCollection = sheet.Pictures

			'Get the first picture from the collection
			Dim excelPicture As ExcelPicture = pictureCollection(0)

			' Creates an Image from the specified file.
			excelPicture.Picture = Image.FromFile(image)

			'Save the document
			workbook.SaveToFile("ReplaceImage.xlsx", ExcelVersion.Version2013)
		End Sub
	End Class
End Namespace
The original file:
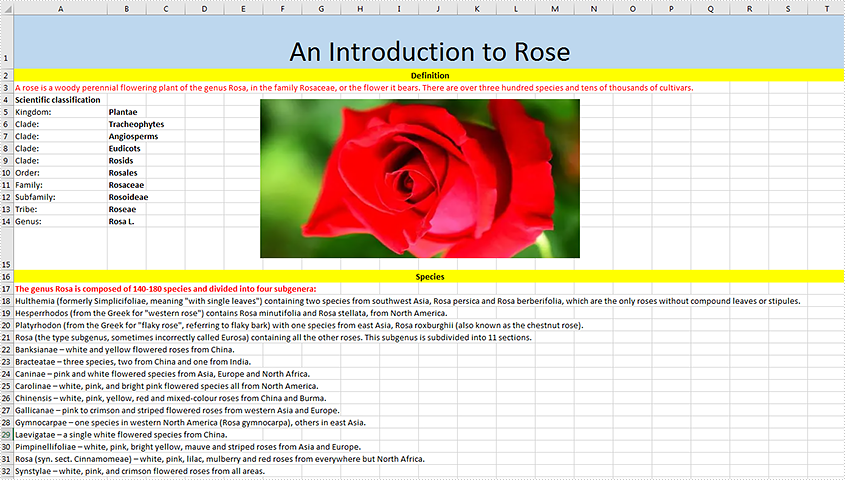
The generated file:

Apply for a Temporary License
If you'd like to remove the evaluation message from the generated documents, or to get rid of the function limitations, please request a 30-day trial license for yourself.
PowerPoint documents signed with digital signatures can help recipients check if they have been altered since they were signed. If any changes are made, the signatures will become invalid immediately. Therefore, before you edit a PowerPoint document, you should check if it has been digitally signed or not. In this article, you will learn how to achieve this task programmatically in Java using Spire.Presentation for Java.
Install Spire.Presentation for Java
First of all, you're required to add the Spire.Presentation.jar file as a dependency in your Java program. The JAR file can be downloaded from this link. If you use Maven, you can easily import the JAR file in your application by adding the following code to your project's pom.xml file.
<repositories>
    <repository>
        <id>com.e-iceblue</id>
        <name>e-iceblue</name>
        <url>https://repo.e-iceblue.com/nexus/content/groups/public/</url>
    </repository>
</repositories>
<dependencies>
    <dependency>
        <groupId>e-iceblue</groupId>
        <artifactId>spire.presentation</artifactId>
        <version>11.8.3</version>
    </dependency>
</dependencies>
Verify if a PowerPoint Document is Digitally Signed
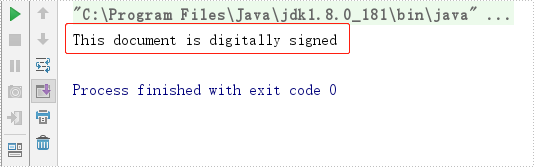
Spire.Presentation for Java provides the Presentation.isDigitallySigned() method to detect if a PowerPoint document is digitally signed or not. If the method returns true, then it means the document is digitally signed.
The following are the detailed steps to implement this function:
- Create a Presentation instance.
- Load a PowerPoint document using Presentation.loadFromFile() method.
- Detect if the document is digitally signed or not using Presentation.isDigitallySigned() method.
- Java
import com.spire.presentation.Presentation;

public class VerifyIfPPTisDigitallySigned {
    public static void main(String []args) throws Exception {
        //Create a Presentation instance
        Presentation ppt = new Presentation();
        //Load a PowerPoint document
        ppt.loadFromFile("Sample.pptx");

        //Verify if the document is digitally signed or not
        if (ppt.isDigitallySigned()) {
            System.out.println("This document is digitally signed");
        } else {
            System.out.println("This document is not digitally signed");
        }
    }
}
Apply for a Temporary License
If you'd like to remove the evaluation message from the generated documents, or to get rid of the function limitations, please request a 30-day trial license for yourself.
