
Knowledgebase (2344)
Children categories
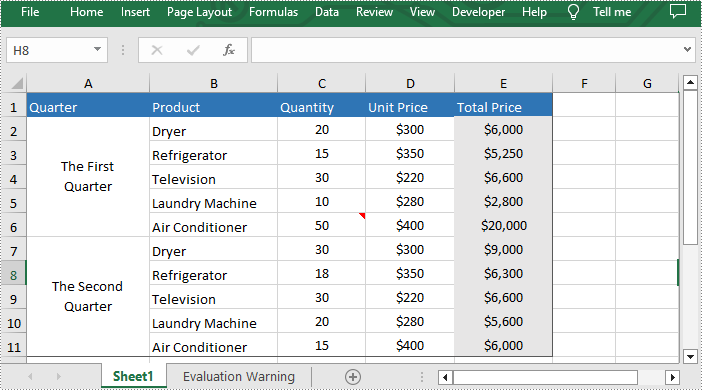
Comments in Excel are blocks of text that can be added to cells, mainly used to provide additional explanation or supplemental information about the cell contents. Users can add comments to the specific cells to better explain the data of worksheets. However, sometimes too many comments will cause visual clutter or obstruct other content. To avoid this issue, existing comments can be hidden programmatically to make the worksheet more organized and readable. Hidden comments can also be easily displayed when necessary. In this article, you will learn how to hide or show comments in excel by using Spire.XLS for .NET.
Install Spire.XLS for .NET
To begin with, you need to add the DLL files included in the Spire.XLS for.NET package as references in your .NET project. The DLLs files can be either downloaded from this link or installed via NuGet.
PM> Install-Package Spire.XLS
Hide Comments in Excel
Spire.XLS for .NET provides the Worksheet.Comments[].IsVisble property to control the visibility of comments. You can easily hide existing comments by setting this property to "false". The following are the detailed steps to hide comments in excel.
- Initialize a Workbook instance.
- Load a sample file using Workbook.LoadFromFile() method.
- Get the desired worksheet through Workbook.Worksheets[] property.
- Hide the specific comment in the worksheet by setting Worksheet.Comments[].IsVisble property to "false".
- Finally, save the result file using Workbook.SavaToFile() method.
- C#
- VB.NET
using Spire.Xls;

namespace ShowExcelComments
{
    class Program
    {
        static void Main(string[] args)
        {
            {
                //Initialize a Workbook instance and load the excel document
                Workbook workbook = new Workbook();
                workbook.LoadFromFile("Comments.xlsx");

                //Get the first worksheet
                Worksheet sheet = workbook.Worksheets[0];

                //Hide the specific comment in the worksheet
                sheet.Comments[0].IsVisible = false;

                //Save the document
                workbook.SaveToFile("HideComment.xlsx", ExcelVersion.Version2013);
                workbook.Dispose();
            }
        }
    }
}
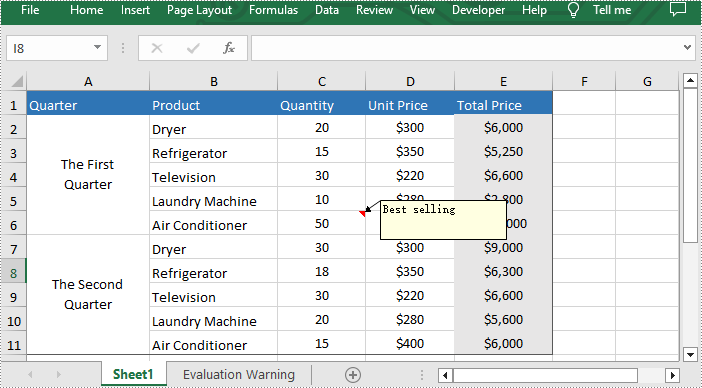
Show Comments in Excel
Hidden comments can also be easily displayed when necessary. If you want to show it again, please set Worksheet.Comments[].IsVisble property to "ture". The following are the steps to show comments in excel.
- Initialize a Workbook instance.
- Load a sample file using Workbook.LoadFromFile() method.
- Get the desired worksheet through Workbook.Worksheets[] property.
- Show the specific comment in the worksheet By setting Worksheet.Comments[].IsVisble property to "true".
- Finally, save the result file using Workbook.SavaToFile() method.
- C#
- VB.NET
using Spire.Xls;

namespace ShowExcelComments
{
    class Program
    {
        static void Main(string[] args)
        {
            {
                //Initialize a Workbook instance and load the excel document
                Workbook workbook = new Workbook();
                workbook.LoadFromFile("HideComment.xlsx");

                //Get the first worksheet
                Worksheet sheet = workbook.Worksheets[0];

                //Show the specific comment in the worksheet
                sheet.Comments[0].IsVisible = true;

                //Save the document
                workbook.SaveToFile("ShowComment.xlsx", ExcelVersion.Version2013);
                workbook.Dispose();
            }
        }
    }
}
Apply for a Temporary License
If you'd like to remove the evaluation message from the generated documents, or to get rid of the function limitations, please request a 30-day trial license for yourself.
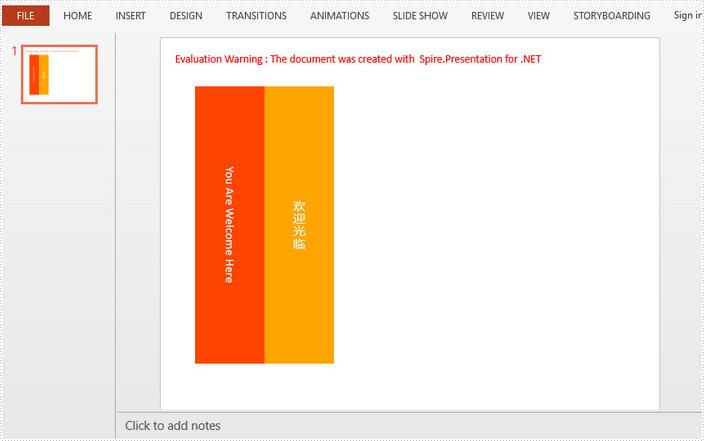
You may sometimes want your text to display vertically (letters stacked one on top of the other), horizontally, or rotated facing the right margin or the left margin. This tutorial shows you how to change the text direction using VerticalTextType property in Spire.Presentation.
Step 1: Initialize an instance of Prensentation class.
Presentation ppt = new Presentation();
Step 2: Append a shape with text to the first slide.
IAutoShape textboxShape = ppt.Slides[0].Shapes.AppendShape(ShapeType.Rectangle, new RectangleF(50, 70, 100, 400));
textboxShape.ShapeStyle.LineColor.Color = Color.Transparent;
textboxShape.Fill.FillType = Spire.Presentation.Drawing.FillFormatType.Solid;
textboxShape.Fill.SolidColor.Color = Color.OrangeRed;
textboxShape.TextFrame.Text = "You Are Welcome Here";
Step 3: Set the text direction to vertical.
textboxShape.TextFrame.VerticalTextType = VerticalTextType.Vertical;
Step 4: Append another shape with text to the slide.
textboxShape = ppt.Slides[0].Shapes.AppendShape(ShapeType.Rectangle, new RectangleF(150, 70, 100, 400));
textboxShape.ShapeStyle.LineColor.Color = Color.Transparent;
textboxShape.Fill.FillType = Spire.Presentation.Drawing.FillFormatType.Solid;
textboxShape.Fill.SolidColor.Color = Color.Orange;
textboxShape.TextFrame.Text = "欢迎光临";
Step 5: For asian characters, you can set the VerticalTextType as EastAsianVertical to aviod rotating text 90 degrees.
textboxShape.TextFrame.VerticalTextType = VerticalTextType.EastAsianVertical;
Step 6: Save the file.
ppt.SaveToFile("output.pptx", FileFormat.Pptx2013);
Output:
Full Code:
using Spire.Presentation;
using System.Drawing;
namespace ChangeTextDirection
{
    class Program
    {
        static void Main(string[] args)
        {

            Presentation ppt = new Presentation();

            IAutoShape textboxShape = ppt.Slides[0].Shapes.AppendShape(ShapeType.Rectangle, new RectangleF(50, 70, 100, 400));
            textboxShape.ShapeStyle.LineColor.Color = Color.Transparent;
            textboxShape.Fill.FillType = Spire.Presentation.Drawing.FillFormatType.Solid;
            textboxShape.Fill.SolidColor.Color = Color.OrangeRed;
            textboxShape.TextFrame.Text = "You Are Welcome Here";
            textboxShape.TextFrame.VerticalTextType = VerticalTextType.Vertical;

            textboxShape = ppt.Slides[0].Shapes.AppendShape(ShapeType.Rectangle, new RectangleF(150, 70, 100, 400));
            textboxShape.ShapeStyle.LineColor.Color = Color.Transparent;
            textboxShape.Fill.FillType = Spire.Presentation.Drawing.FillFormatType.Solid;
            textboxShape.Fill.SolidColor.Color = Color.Orange;
            textboxShape.TextFrame.Text = "欢迎光临";
            textboxShape.TextFrame.VerticalTextType = VerticalTextType.EastAsianVertical;

            ppt.SaveToFile("output.pptx", FileFormat.Pptx2013);

        }
    }
}
Imports Spire.Presentation
Imports System.Drawing
Namespace ChangeTextDirection
	Class Program
		Private Shared Sub Main(args As String())

			Dim ppt As New Presentation()

			Dim textboxShape As IAutoShape = ppt.Slides(0).Shapes.AppendShape(ShapeType.Rectangle, New RectangleF(50, 70, 100, 400))
			textboxShape.ShapeStyle.LineColor.Color = Color.Transparent
			textboxShape.Fill.FillType = Spire.Presentation.Drawing.FillFormatType.Solid
			textboxShape.Fill.SolidColor.Color = Color.OrangeRed
			textboxShape.TextFrame.Text = "You Are Welcome Here"
			textboxShape.TextFrame.VerticalTextType = VerticalTextType.Vertical

			textboxShape = ppt.Slides(0).Shapes.AppendShape(ShapeType.Rectangle, New RectangleF(150, 70, 100, 400))
			textboxShape.ShapeStyle.LineColor.Color = Color.Transparent
			textboxShape.Fill.FillType = Spire.Presentation.Drawing.FillFormatType.Solid
			textboxShape.Fill.SolidColor.Color = Color.Orange
			textboxShape.TextFrame.Text = "欢迎光临"
			textboxShape.TextFrame.VerticalTextType = VerticalTextType.EastAsianVertical

			ppt.SaveToFile("output.pptx", FileFormat.Pptx2013)

		End Sub
	End Class
End Namespace
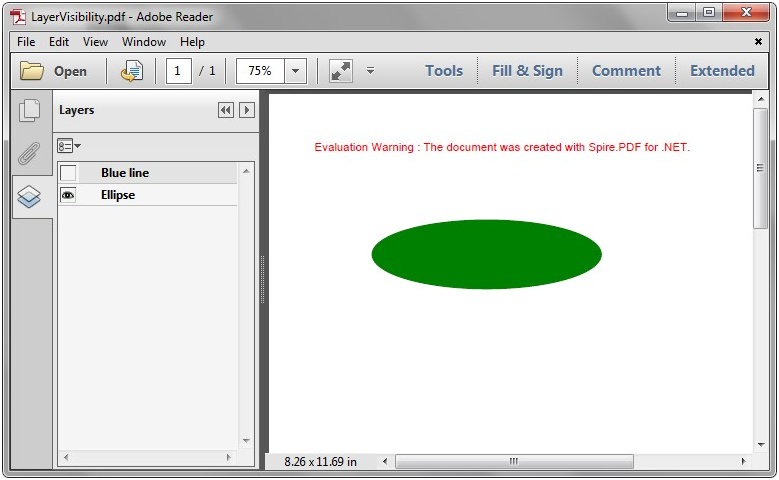
We have already demonstrated how to use Spire.PDF to add multiple layers to PDF file and delete layer in PDF in C#. We can also toggle the visibility of a PDF layer while creating a new page layer with the help of Spire.PDF. In this section, we're going to demonstrate how to toggle the visibility of layers in new PDF document in C#.
Step 1: Create a new PDF document and add a new page to the PDF document.
PdfDocument pdf = new PdfDocument();
PdfPageBase page = pdf.Pages.Add();
Step 2: Add a layer named "Blue line" to the PDF page and set the layer invisible.
PdfLayer layer = pdf.Layers.AddLayer(""Green line"", PdfVisibility.Off);
PdfPen pen = new PdfPen(Color.Green, 1f);
PdfCanvas pcA = layer.CreateGraphics(page.Canvas);
pcA.DrawLine(pen, new PointF(0, 30), new PointF(300, 30));
Step 3: Add a layer named "Ellipse" to the PDF page and set the layer visible.
layer = pdf.Layers.AddLayer(""Ellipse"", PdfVisibility.On);
 PdfPen pen2 = new PdfPen(Color.Green, 1f);
 PdfBrush brush2 = new PdfSolidBrush(Color.Green);
 PdfCanvas pcB = layer.CreateGraphics(page.Canvas);
 pcB.DrawEllipse(pen2, brush2, 50, 70, 200, 60);
Step 4: Save the document to file.
pdf.SaveToFile("LayerVisibility.pdf", FileFormat.PDF);
Effective screenshot after toggle the visibility of PDF layer:
Full codes:
using Spire.Pdf;
using Spire.Pdf.Graphics;
using System.Drawing;


namespace LayerVisibility
{
    class Program
    {
        static void Main(string[] args)
        {
            PdfDocument pdf = new PdfDocument();
            PdfPageBase page = pdf.Pages.Add();

            PdfLayer layer = pdf.Layers.AddLayer("Green line", PdfVisibility.Off);
            PdfPen pen = new PdfPen(Color.Green, 1f);
            PdfCanvas pcA = layer.CreateGraphics(page.Canvas);
            pcA.DrawLine(pen,new PointF(0, 30), new PointF(300, 30));

            layer = pdf.Layers.AddLayer("Ellipse", PdfVisibility.On);
            PdfPen pen2 = new PdfPen(Color.Green, 1f);
            PdfBrush brush2 = new PdfSolidBrush(Color.Green);
            PdfCanvas pcB = layer.CreateGraphics(page.Canvas);
            pcB.DrawEllipse(pen2, brush2, 50, 70, 200, 60);


            pdf.SaveToFile("LayerVisibility.pdf", FileFormat.PDF);
        }
    }
}
