
Knowledgebase (2345)
Children categories
Spire.PDF has a function of adding, removing the blank pages in C#. We have already shown you how to remove the blank page in a PDF file. This article will show you how to insert an empty page in a PDF file in C#. By using the Spire.PDF, we can add the blank page to any place in the PDF file you want, such as at the first, the middle of the PDF file or at the end of the PDF file. It is very easy and you only need three lines of code to accomplish this task.
Make sure Spire.PDF for .NET has been installed correctly and then add Spire.Pdf.dll as reference in the downloaded Bin folder though the below path: "..\Spire.Pdf\Bin\NET4.0\Spire.Pdf.dll".
The following code snippet shows you how to insert an empty page in a PDF file. We will show you how to add the empty page at the end of the file and as the second page of the file.
//create a PDF document and load file
PdfDocument doc = new PdfDocument();
doc.LoadFromFile("sample.pdf");

//insert blank page at the end of the PDF file
doc.Pages.Add();

//insert blank page as the second page
doc.Pages.Insert(1);

//Save the document to file
doc.SaveToFile("result.pdf");
Check the effective screenshots as below:
Add the blank page at the end of the PDF file:
Add the blank page as the second page of the PDF file:
Full codes:
using Spire.Pdf;
using System;

namespace InsertPage
{
    class Program
    {
        static void Main(string[] args)
        {
            //create PdfDocument instance and load file
            PdfDocument doc = new PdfDocument();
            doc.LoadFromFile("sample.pdf");

            //insert blank page as last page
            doc.Pages.Add();

            doc.SaveToFile("result.pdf");
            doc.Close();
            System.Diagnostics.Process.Start("result.pdf");

            //create PdfDocument instance and load file
            PdfDocument doc2 = new PdfDocument();
            doc2.LoadFromFile("sample.pdf");

            //insert blank page as second page
            doc2.Pages.Insert(1);

            doc2.SaveToFile("result2.pdf");
            doc2.Close();
            System.Diagnostics.Process.Start("result2.pdf");
        }
    }
}
PDF files are widely used for sharing and viewing documents across different platforms, while TIFF files are preferred for storing high-quality images with detailed graphics or photographs. Converting a PDF file to TIFF can maintain the quality of images within the file. Similarly, converting a TIFF image to PDF ensures that the image can be easily viewed, shared, and printed without compatibility issues. In this article, you will learn how to programmatically convert PDF to TIFF or TIFF to PDF in C# using Spire.PDF for .NET.
Install Spire.PDF for .NET
To begin with, you need to add the DLL files included in the Spire.PDF for.NET package as references in your .NET project. The DLL files can be either downloaded from this link or installed via NuGet.
PM> Install-Package Spire.PDF
Convert PDF to TIFF in C#
The TIFF format allows multiple images to be stored in a single file. With Spire.PDF for .NET, you can convert each page of a PDF file into a separate image, and then call the custom method JoinTiffImages() to combine these images and save them as a single TIFF image.
The following are the steps to convert a PDF into a multi-page TIFF file using C#.
- Create a PdfDocument object.
- Load a PDF file using PdfDocument.LoadFromFile() method.
- Call custom method SaveAsImage() to convert each page of the PDF to a separate image.
- Call custom method JoinTiffImages() to merge the converted images into a multi-page TIFF image.
- C#
using System;
using System.Drawing;
using System.Drawing.Imaging;
using Spire.Pdf;
namespace SavePdfAsTiff
{
class Program
{
static void Main(string[] args)
{
//Create a PdfDocument object
PdfDocument pdf = new PdfDocument();
//Load a PDF document
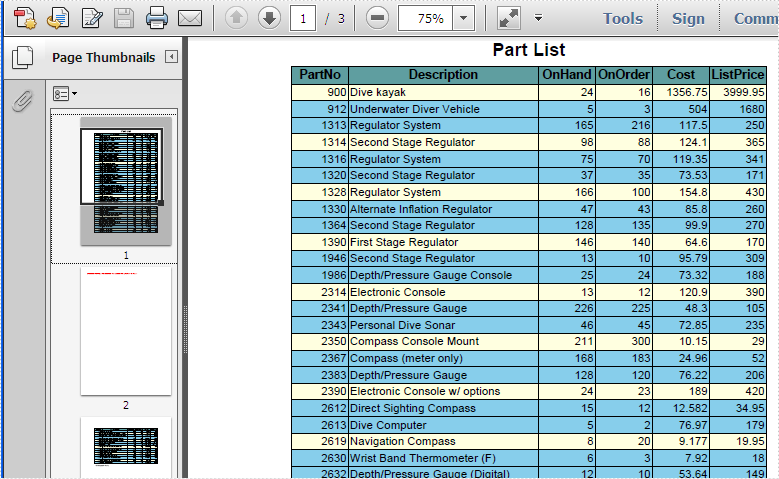
pdf.LoadFromFile("Report.pdf");
//Convert PDF pages to images
Image[] images = SaveAsImage(pdf);
//Combine the images and save them as a multi-page TIFF file
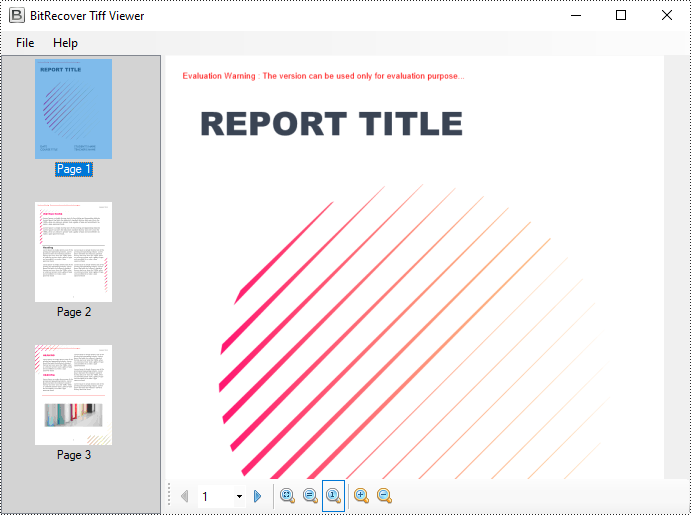
JoinTiffImages(images, "result.tiff", EncoderValue.CompressionLZW);
}
private static Image[] SaveAsImage(PdfDocument document)
{
//Create a new image array
Image[] images = new Image[document.Pages.Count];
//Iterate through all pages in the document
for (int i = 0; i < document.Pages.Count; i++)
{
//Convert a specific page to an image
images[i] = document.SaveAsImage(i);
}
return images;
}
private static ImageCodecInfo GetEncoderInfo(string mimeType)
{
//Get the image encoders
ImageCodecInfo[] encoders = ImageCodecInfo.GetImageEncoders();
for (int j = 0; j < encoders.Length; j++)
{
//Find the encoder that matches the specified MIME type
if (encoders[j].MimeType == mimeType)
return encoders[j];
}
throw new Exception(mimeType + " mime type not found in ImageCodecInfo");
}
public static void JoinTiffImages(Image[] images, string outFile, EncoderValue compressEncoder)
{
//Set the encoder parameters
Encoder enc = Encoder.SaveFlag;
EncoderParameters ep = new EncoderParameters(2);
ep.Param[0] = new EncoderParameter(enc, (long)EncoderValue.MultiFrame);
ep.Param[1] = new EncoderParameter(Encoder.Compression, (long)compressEncoder);
//Get the first image
Image pages = images[0];
//Initialize a frame
int frame = 0;
//Get an ImageCodecInfo object for processing TIFF image codec information
ImageCodecInfo info = GetEncoderInfo("image/tiff");
//Iterate through each Image
foreach (Image img in images)
{
//If it's the first frame, save it to the output file with specified encoder parameters
if (frame == 0)
{
pages = img;
pages.Save(outFile, info, ep);
}
else
{
//Save the intermediate frames
ep.Param[0] = new EncoderParameter(enc, (long)EncoderValue.FrameDimensionPage);
pages.SaveAdd(img, ep);
}
//If it's the last frame, flush the encoder parameters and close the file
if (frame == images.Length - 1)
{
ep.Param[0] = new EncoderParameter(enc, (long)EncoderValue.Flush);
pages.SaveAdd(ep);
}
frame++;
}
}
}
}
Convert TIFF to PDF in C#
To convert a multi-page TIFF image to a PDF file, you need to convert each frame of the TIFF image to a separate PDF image. Then draw each image at a specified location on a PDF page through the PdfPageBase.Canvas.DrawImage() method.
The following are the steps to convert a TIFF image to a PDF file using C#.
- Create a PdfDocument object.
- Load a TIFF image using Image.FromFile() method.
- Call custom method SplitTiffImage() to split the TIFF image into separate images.
- Iterate through the split images, and then convert each into a PDF image.
- Add a page to the PDF document using PdfDocument.Pages.Add() method.
- Draw the PDF image at a specified location on the page using PdfPageBase.Canvas.DrawImage() method.
- Save the result PDF file using PdfDocument.SaveToFile() method.
- C#
using System;
using System.Drawing;
using System.Drawing.Imaging;
using System.IO;
using Spire.Pdf;
using Spire.Pdf.Graphics;
namespace TiffToPdf
{
class Program
{
static void Main(string[] args)
{
//Create a PdfDocument object
PdfDocument pdf = new PdfDocument();
//Load a TIFF image
Image tiffImage = Image.FromFile("result.tiff");
//Split the Tiff image into separate images
Image[] images = SplitTiffImage(tiffImage);
//Iterate through the images
for (int i = 0; i < images.Length; i++)
{
//Convert a specified image into a PDF image
PdfImage pdfImg = PdfImage.FromImage(images[i]);
//Get image width and height
float width = pdfImg.Width;
float height = pdfImg.Height;
//Add a page with the same size as the image
SizeF size = new SizeF(width, height);
PdfPageBase page = pdf.Pages.Add(size);
//Draw the image at a specified location on the page
page.Canvas.DrawImage(pdfImg, 0, 0, width, height);
}
//Save the result file
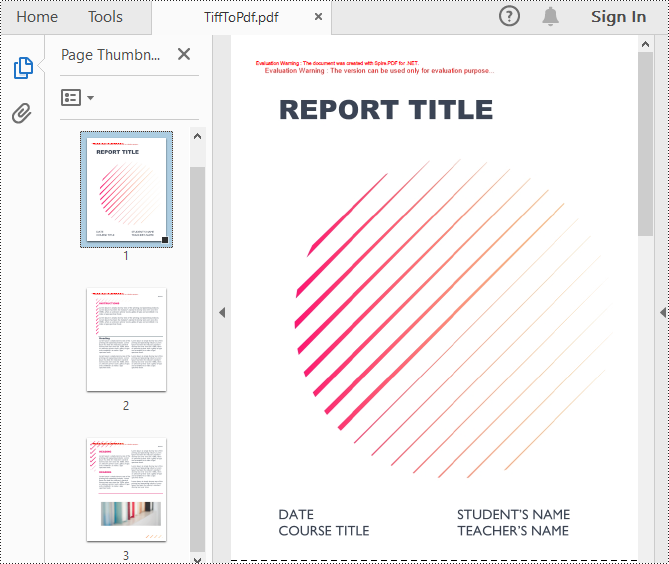
pdf.SaveToFile("TiffToPdf.pdf");
}
public static Image[] SplitTiffImage(Image tiffImage)
{
//Get the number of frames in the Tiff image
int frameCount = tiffImage.GetFrameCount(FrameDimension.Page);
//Create an image array to store the split tiff images
Image[] images = new Image[frameCount];
//Gets the GUID of the first frame dimension
Guid objGuid = tiffImage.FrameDimensionsList[0];
//Create a FrameDimension object
FrameDimension objDimension = new FrameDimension(objGuid);
//Iterate through each frame
for (int i = 0; i < frameCount; i++)
{
//Select a specified frame
tiffImage.SelectActiveFrame(objDimension, i);
//Save the frame in TIFF format to a memory stream
MemoryStream ms = new MemoryStream();
tiffImage.Save(ms, ImageFormat.Tiff);
//Load an image from memory stream
images[i] = Image.FromStream(ms);
}
return images;
}
}
}
Apply for a Temporary License
If you'd like to remove the evaluation message from the generated documents, or to get rid of the function limitations, please request a 30-day trial license for yourself.
Excel documents are easy to print, but it would be a bit tricky if you have some special printing requirements. For example, printing only selected range of a sheet, repeating the header row on each page, or fitting a worksheet on one page. This article covers how to set Excel print options via page setup and how to send an Excel document to printer in C# and VB.NET by using Spire.XLS for .NET.
- Set Excel Print Options via Page Setup in C# and VB.NET
- Print Excel Documents Using Print Dialog in C# and VB.NET
- Silently Print Excel Documents in C# and VB.NET
Install Spire.XLS for .NET
To begin with, you need to add the DLL files included in the Spire.XLS for .NET package as references in your .NET project. The DLL files can be either downloaded from this link or installed via NuGet.
PM> Install-Package Spire.XLS
Set Excel Print Options via Page Setup in C# and VB.NET
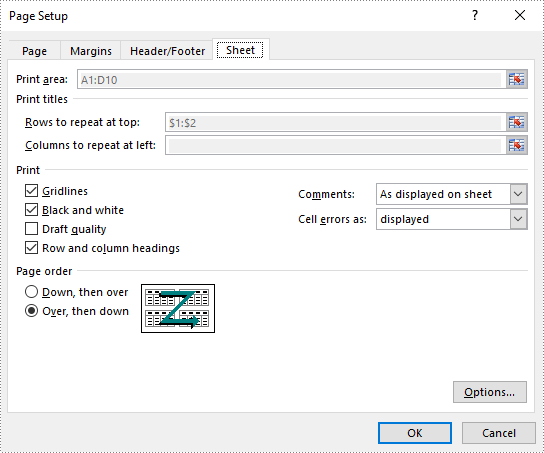
Excel Page Setup provides options to control how a worksheet will be printed, such as whether to print comments, whether to print gridlines and specify the cell range to print. Spire.XLS offers the PageSetup object to deal with these things. The following are the steps to set Excel print options through PageSetup using Spire.XLS for .NET.
- Create a Workbook object.
- Load an Excel file using Workbook.LoadFromFile() method.
- Get a specific worksheet through Workbook.Worksheets[index] property.
- Get PageSetup object through Worksheet.PageSetup property.
- Set page margins, print area, pint title row, print quality, etc. through the properties under PageSetup object.
- Save the workbook to another Excel file using Workbook.SaveToFile() method.
- C#
- VB.NET
using Spire.Xls;

namespace PrintOptions
{
    class Program
    {
        static void Main(string[] args)
        {
            //Create a workbook
            Workbook workbook = new Workbook();

            //Load an Excel document
            workbook.LoadFromFile(@"C:\Users\Administrator\Desktop\sample.xlsx");

            //Get the first worksheet
            Worksheet worksheet = workbook.Worksheets[0];

            //Get the PageSetup object of the first worksheet
            PageSetup pageSetup = worksheet.PageSetup;

            //Set page margins
            pageSetup.TopMargin = 0.3;
            pageSetup.BottomMargin = 0.3;
            pageSetup.LeftMargin = 0.3;
            pageSetup.RightMargin = 0.3;

            //Specify print area
            pageSetup.PrintArea = "A1:D10";

            //Specify title row
            pageSetup.PrintTitleRows = "$1:$2";

            //Allow to print with row/column headings
            pageSetup.IsPrintHeadings = true;

            //Allow to print with gridlines
            pageSetup.IsPrintGridlines = true;

            //Allow to print comments as displayed on worksheet
            pageSetup.PrintComments = PrintCommentType.InPlace;

            //Set printing quality (dpi)
            pageSetup.PrintQuality = 300;

            //Allow to print worksheet in black & white mode
            pageSetup.BlackAndWhite = true;

            //Set the printing order
            pageSetup.Order = OrderType.OverThenDown;

            //Fit worksheet on one page
            pageSetup.IsFitToPage = true;

            //Save the workbook
            workbook.SaveToFile("PagePrintOptions.xlsx", ExcelVersion.Version2016);
        }
    }
}
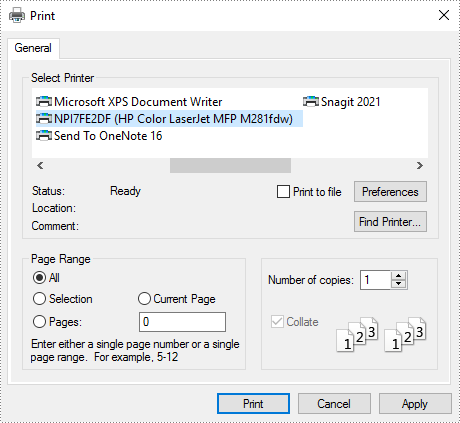
Print Excel Documents Using Print Dialog in C# and VB.NET
A Print Dialog box lets users to select options for a particular print job. For example, the user can specify the printer to use. The following are the steps to send an Excel document to a print dialog using Spire.XLS for .NET.
- Create a Workbook object.
- Load an Excel file using Workbook.LoadFromFile() method.
- Create a PrintDialog object.
- Specify printer settings through the properties under PrintDialog object.
- Apply the print dialog to workbook.
- Get PrintDocument object from the workbook through Workbook.PrintDocument property.
- Invoke the print dialog and start printing using PrintDocument.Print() method.
- C#
- VB.NET
using System;
using Spire.Xls;
using System.Drawing.Printing;
using System.Windows.Forms;

namespace PrintExcelUsingPrintDialog
{
    public partial class Form1 : Form
    {
        public Form1()
        {
            InitializeComponent();
        }

        private void button1_Click(object sender, EventArgs e)
        {
            //Create a Workbook object
            Workbook workbook = new Workbook();

            //Load an Excel file
            workbook.LoadFromFile(@"C:\Users\Administrator\Desktop\sample.xlsx");

            //Fit worksheet on one page
            PageSetup pageSetup = workbook.Worksheets[0].PageSetup;
            pageSetup.IsFitToPage = true;

            //Create a PrintDialog object
            PrintDialog dialog = new PrintDialog();

            //Specify printer settings
            dialog.AllowCurrentPage = true;
            dialog.AllowSomePages = true;
            dialog.AllowSelection = true;
            dialog.UseEXDialog = true;
            dialog.PrinterSettings.Duplex = Duplex.Simplex;

            //Apply the dialog to workbook
            workbook.PrintDialog = dialog;

            //Create a PrintDocument object based on the workbook
            PrintDocument printDocument = workbook.PrintDocument;

            //Invoke the print dialog
            if (dialog.ShowDialog() == DialogResult.OK)
            {
                printDocument.Print();
            }
        }
    }
}
Silently Print Excel Documents in C# and VB.NET
If you do not want to see the print dialog or the print process, you can silently print Excel documents to a specified printer. The following are the steps.
- Create a Workbook object.
- Load an Excel file using Workbook.LoadFromFile() method.
- Set the print controller to StandardPrintController, which will prevent print process from showing.
- Get PrinterSettings object from the workbook through Workbook.PrintDocument.PrinterSettings property.
- Specify printer name, duplex mode and print pages through the properties under PrinerSettings object.
- Print the workbook using Workbook.PrintDocument.Print() method.
- C#
- VB.NET
using Spire.Xls;
using System.Drawing.Printing;

namespace SilentlyPrint
{
    class Program
    {
        static void Main(string[] args)
        {
            //Create a Workbook object
            Workbook workbook = new Workbook();

            //Load an Excel file
            workbook.LoadFromFile(@"C:\Users\Administrator\Desktop\sample.xlsx");

            //Fit worksheet on one page
            PageSetup pageSetup = workbook.Worksheets[0].PageSetup;
            pageSetup.IsFitToPage = true;

            //Set the print controller to StandardPrintController, which will prevent print process from showing
            workbook.PrintDocument.PrintController = new StandardPrintController();

            //Get PrinterSettings from the workbook
            PrinterSettings settings = workbook.PrintDocument.PrinterSettings;

            //Specify printer name, duplex mode and print pages
            settings.PrinterName = "HP LaserJet P1007";
            settings.Duplex = Duplex.Simplex;
            settings.FromPage = 1;
            settings.ToPage = 3;

            //Print the workbook
            workbook.PrintDocument.Print();
        }
    }
}
Apply for a Temporary License
If you'd like to remove the evaluation message from the generated documents, or to get rid of the function limitations, please request a 30-day trial license for yourself.
