
Knowledgebase (2417)
Children categories
C#/VB.NET: Set Background Color or Picture for PowerPoint Slides
2023-08-07 09:03:00 Written by KoohjiSetting a background for slides is a crucial step in creating a visually appealing and impactful presentation. A well-designed background can provide a consistent visual theme, drawing your audience's attention and keeping them engaged throughout your presentation. In this article, we will demonstrate how to set background color or picture for PowerPoint slides in C# and VB.NET using Spire.Presentation for .NET library.
- Set a Background Color for a PowerPoint Slide in C# and VB.NET
- Set a Gradient Background for a PowerPoint Slide in C# and VB.NET
- Set a Background Picture for a PowerPoint Slide in C# and VB.NET
- Set a Background for a Slide Master in PowerPoint in C# and VB.NET
Install Spire.Presentation for .NET
To begin with, you need to add the DLL files included in the Spire.Presentation for.NET package as references in your .NET project. The DLL files can be either downloaded from this link or installed via NuGet.
PM> Install-Package Spire.Presentation
Set a Background Color for a PowerPoint Slide in C# and VB.NET
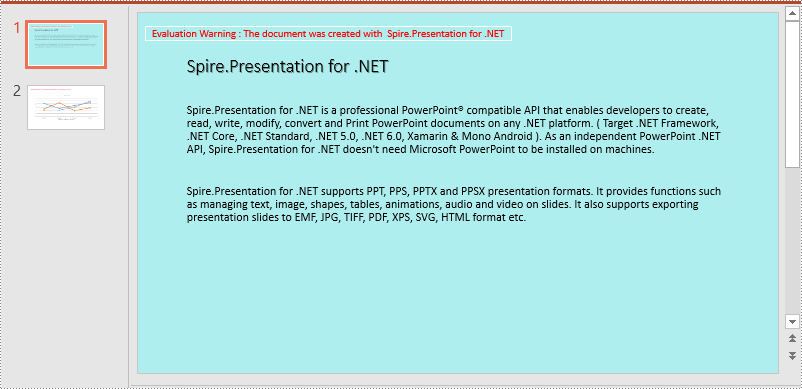
Adding a background color for a PowerPoint slide is very simple. You just need to set the fill mode of the slide’s background as a solid fill and then set a color for the slide’s background. The detailed steps are as follows:
- Initialize an instance of the Presentation class.
- Load a PowerPoint presentation using Presentation.LoadFromFile() method.
- Get a specific slide using Presentation.Slides[int index] property.
- Access the background of the slide using ISlide.SlideBackground property.
- Set the type of the slide's background as a custom type using SlideBackground.Type property.
- Set the fill mode of the slide’s background as a solid fill using SlideBackground.Fill.FillType property.
- Set a color for the slide’s background using SlideBackground.Fill.SolidColor.Color property.
- Save the result presentation using Presentation.SaveToFile() method.
- C#
- VB.NET
using Spire.Presentation;
using Spire.Presentation.Drawing;
using System.Drawing;

namespace SolidBackground
{
    internal class Program
    {
        static void Main(string[] args)
        {
            //Initialize an instance of the Presentation class
            Presentation ppt = new Presentation();
            //Load a PowerPoint presentation
            ppt.LoadFromFile("Sample.pptx");

            //Get the first slide
            ISlide slide = ppt.Slides[0];

            //Access the background of the slide
            SlideBackground background = slide.SlideBackground;

            //Set the type of the slide's background as a custom type
            background.Type = BackgroundType.Custom;
            //Set the fill mode of the slide's background as a solid fill
            background.Fill.FillType = FillFormatType.Solid;
            //Set a color for the slide's background
            background.Fill.SolidColor.Color = Color.PaleTurquoise;

            //Save the result presentation
            ppt.SaveToFile("Solidbackground.pptx", FileFormat.Pptx2013);
            ppt.Dispose();
        }
    }
}
Set a Gradient Background for a PowerPoint Slide in C# and VB.NET
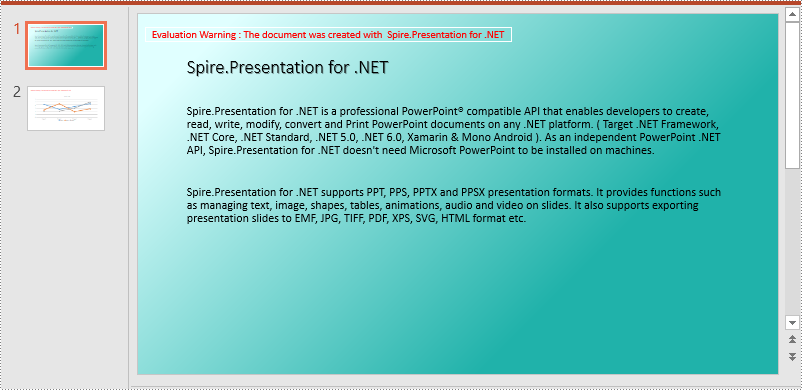
Adding a gradient background is a little complex. You need to set the fill mode of the slide’s background as a gradient fill and then set the gradient stops and colors. The detailed steps are as follows:
- Initialize an instance of the Presentation class.
- Load a PowerPoint presentation using Presentation.LoadFromFile() method.
- Get a specific slide using Presentation.Slides[int index] property.
- Access the background of the slide using ISlide.SlideBackground property.
- Set the type of the slide's background as a custom type using SlideBackground.Type property.
- Set the fill mode of the slide’s background as a gradient fill using SlideBackground.Fill.FillType property.
- Set gradient stops and colors for the slide’s background using SlideBackground.Fill.Gradient.GradientStops.Append() method.
- Set the shape type and angle for the gradient fill.
- Save the result presentation using Presentation.SaveToFile() method.
- C#
- VB.NET
using Spire.Presentation;
using Spire.Presentation.Drawing;
using System.Drawing;

namespace GradientBackground
{
    internal class Program
    {
        static void Main(string[] args)
        {
            //Initialize an instance of the Presentation class
            Presentation ppt = new Presentation();
            //Load a PowerPoint presentation
            ppt.LoadFromFile("Sample.pptx");

            //Get the first slide
            ISlide slide = ppt.Slides[0];

            //Access the background of the slide
            SlideBackground background = slide.SlideBackground;

            //Set the type of the slide's background as a custom type
            background.Type = BackgroundType.Custom;
            //Set the fill mode of the slide's background as a gradient fill
            background.Fill.FillType = FillFormatType.Gradient;

            //Set gradient stops and colors
            background.Fill.Gradient.GradientStops.Append(0.1f, Color.LightCyan);
            background.Fill.Gradient.GradientStops.Append(0.7f, Color.LightSeaGreen);

            //Set the shape type of the gradient fill
            background.Fill.Gradient.GradientShape = GradientShapeType.Linear;
            //Set the angle of the gradient fill
            background.Fill.Gradient.LinearGradientFill.Angle = 45;

            //Save the result presentation
            ppt.SaveToFile("Gradientbackground.pptx", FileFormat.Pptx2013);
            ppt.Dispose();
        }
    }
}
Set a Background Picture for a PowerPoint Slide in C# and VB.NET
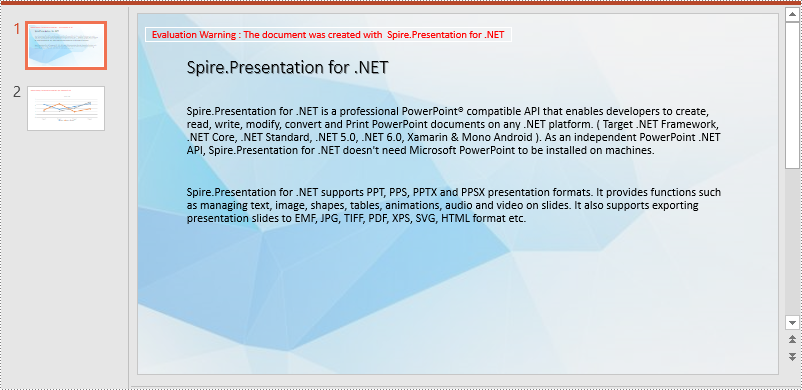
To add a background picture for a PowerPoint slide, you need to set the fill mode of the slide’s background as a picture fill, then add a picture to the image collection of the presentation and set it as the slide’s background. The detailed steps are as follows:
- Initialize an instance of the Presentation class.
- Load a PowerPoint presentation using Presentation.LoadFromFile() method.
- Get a specific slide using Presentation.Slides[int index] property.
- Access the background of the slide using ISlide.SlideBackground property.
- Set the type of the slide's background as a custom type using SlideBackground.Type property.
- Set the fill mode of the slide’s background as a picture fill using SlideBackground.Fill.FillType property.
- Add an image to the image collection of the presentation using Presentation.Images.Append() method.
- Set the image as the slide’s background using background.Fill.PictureFill.Picture.EmbedImage property.
- Save the result presentation using Presentation.SaveToFile() method.
- C#
- VB.NET
using Spire.Presentation;
using Spire.Presentation.Drawing;
using System.Drawing;

namespace PictureBackground
{
    internal class Program
    {
        static void Main(string[] args)
        {
            //Initialize an instance of the Presentation class
            Presentation ppt = new Presentation();
            //Load a PowerPoint presentation
            ppt.LoadFromFile("Sample.pptx");

            //Get the first slide
            ISlide slide = ppt.Slides[0];

            //Access the background of the slide
            SlideBackground background = slide.SlideBackground;

            //Set the type of the slide's background as a custom type
            background.Type = BackgroundType.Custom;
            //Set the fill mode of the slide's background as a picture fill
            background.Fill.FillType = FillFormatType.Picture;

            Image img = Image.FromFile("bg.jpg");
            //Add an image to the image collection of the presentation
            IImageData image = ppt.Images.Append(img);
            //Set the image as the slide's background
            background.Fill.PictureFill.FillType = PictureFillType.Stretch;
            background.Fill.PictureFill.Picture.EmbedImage = image;

            //Save the result presentation
            ppt.SaveToFile("Picturebackground.pptx", FileFormat.Pptx2013);
            ppt.Dispose();
        }
    }
}
Set a Background for a Slide Master in PowerPoint in C# and VB.NET
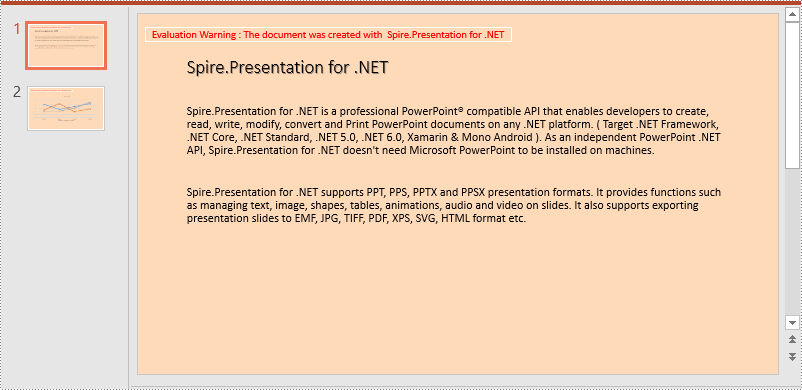
If you don’t wish to set backgrounds for slides one by one, you can set a background for the slide master, then all slides using the same slide master will be applied with the background automatically. The following steps show how to set a solid background color for a slide master:
- Initialize an instance of the Presentation class.
- Load a PowerPoint presentation using Presentation.LoadFromFile() method.
- Get a specific slide master using Presentation.Masters[int index] property.
- Access the background of the slide using ISlide.SlideBackground property.
- Set the type of the slide's background as a custom type using SlideBackground.Type property.
- Set the fill mode of the slide’s background as a solid fill using SlideBackground.Fill.FillType property.
- Set a color for the slide’s background using SlideBackground.Fill.SolidColor.Color property.
- Save the result presentation using Presentation.SaveToFile() method.
- C#
- VB.NET
using Spire.Presentation;
using Spire.Presentation.Drawing;
using System.Drawing;

namespace AddBackgroundToSlideMaster
{
    internal class Program
    {
        static void Main(string[] args)
        {
            //Initialize an instance of the Presentation class
            Presentation ppt = new Presentation();
            //Load a PowerPoint presentation
            ppt.LoadFromFile("Sample.pptx");

            //Get the first slide master
            IMasterSlide slide = ppt.Masters[0];

            //Access the background of the slide
            SlideBackground background = slide.SlideBackground;

            //Set the type of the slide's background as a custom type
            background.Type = BackgroundType.Custom;
            //Set the fill mode of the slide's background as a solid fill
            background.Fill.FillType = FillFormatType.Solid;
            //Set a color for the slide's background
            background.Fill.SolidColor.Color = Color.PeachPuff;

            //Save the result presentation
            ppt.SaveToFile("AddBackgroundToSlideMaster.pptx", FileFormat.Pptx2013);
            ppt.Dispose();

        }
    }
}
Apply for a Temporary License
If you'd like to remove the evaluation message from the generated documents, or to get rid of the function limitations, please request a 30-day trial license for yourself.
Incorporating images into a PowerPoint presentation is crucial for captivating your audience and reinforcing your message. Visual elements not only break up text but also make complex information more digestible. From personal photos to professional graphics, the right images can elevate your slides and enhance understanding.
In this article, you will learn how to insert images from your local disk or a URL into a PowerPoint slide using C# and Spire.Presentation for .NET.
Install Spire.Presentation for .NET
To begin with, you need to add the DLL files included in the Spire.Presentation for.NET package as references in your .NET project. The DLL files can be either downloaded from this link or installed via NuGet.
PM> Install-Package Spire.Presentation
Insert an Image from Disk to PowerPoint in C#
To insert an image from your disk to a PowerPoint document, you can use the ISlide.Shapes.AppendEmbedImage() method. The method requires the following three parameters:
- ShapeType: The type of shape for the image, typically a rectangle.
- IImageData: The data corresponding to the image you want to insert.
- RectangleF: Defines the position and size of the image.
The steps to insert an image from disk to a PowerPoint slide are as follows:
- Create a Presentation object.
- Load a PowerPoint document.
- Load an image from disk using Image.FromFile() method.
- Add the image to the image collection of the document using Presentation.Images.Append() method.
- Create a RectangleF object to specify where the image will be placed and its dimensions.
- Add the image to a specific slide at the specified position using ISlide.Shapes.AppendEmbedImage() method.
- Save the document to a different PowerPoint file.
- C#
using Spire.Presentation;
using Spire.Presentation.Drawing;
using System.Drawing;

namespace InsertImageFromDisk
{
    class Program
    {
        static void Main(string[] args)
        {
            // Create a Presentation object
            Presentation presentation = new Presentation();

            // Load a PowerPoint file
            presentation.LoadFromFile("C:\\Users\\Administrator\\Desktop\\input.pptx");

            // Load an image from the given file path
            Image img = Image.FromFile("C:\\Users\\Administrator\\Desktop\\logo.png");

            // Add the image to the image collection of the document
            IImageData image = presentation.Images.Append(img);

            // Get the image width and height
            int width =  image.Width;
            int height = image.Height;

            // Specify the image position in the slide
            int x = 100;
            int y = 100;

            // Get a specific slide
            ISlide slide = presentation.Slides[0];

            // Insert the image to the slide at the specified position
            RectangleF rect = new RectangleF(x, y, width, height);
            IEmbedImage imageShape = slide.Shapes.AppendEmbedImage(ShapeType.Rectangle, image, rect);

            // Set the line fill type of the image shape to none
            imageShape.Line.FillType = FillFormatType.None;

            // Save the presentation to a different file
            presentation.SaveToFile("InsertImage.pptx", FileFormat.Pptx2010);

            // Dispose resources
            presentation.Dispose();
        }
    }
}

Insert an Image from a URL to PowerPoint
An image from a URL can be downloaded and saved as a stream using the WebClient class. Once downloaded, it can be loaded as a System.Drawing.Image object using the Image.FromStream() method. Then, you can use the ISlide.Shapes.AppendEmbedImage() method to insert the image into the slide as an image shape.
The steps to insert an image from a URL to a PowerPoint slide are as follows:
- Create a Presentation object.
- Load a PowerPoint document.
- Read and convert an image from a URL into stream using WebClient class.
- Load the image from stream using Image.FromStream() method.
- Add the image to the image collection of the document using Presentation.Images.Append() method.
- Create a RectangleF object to specify where the image will be placed and its dimensions.
- Add the image to a specific slide at the specified position using ISlide.Shapes.AppendEmbedImage() method.
- Save the document to a different PowerPoint file.
- C#
using Spire.Presentation;
using Spire.Presentation.Drawing;
using System.Drawing;
using System.Net;

namespace InsertImageFromUrl
{
    class Program
    {
        static void Main(string[] args)
        {
            // Create a Presentation object
            Presentation presentation = new Presentation();

            // Load a PowerPoint file
            presentation.LoadFromFile("C:\\Users\\Administrator\\Desktop\\input.pptx");

            // Declare a variable
            Image img;

            // Read an image from a URL
            string imageUrl = "https://i.imgur.com/OygmMoN.png";
            using (WebClient webClient = new WebClient())
            {
                using (Stream stream = webClient.OpenRead(imageUrl))
                {
                    // Load the image from stream
                    img =  Image.FromStream(stream);
                }
            }

            // Add the image to the image collection of the document
            IImageData image = presentation.Images.Append(img);

            // Get the image width and height
            int width = image.Width;
            int height = image.Height;

            // Specify the image position in the slide
            int x = 100;
            int y = 100;

            // Get a specific slide
            ISlide slide = presentation.Slides[0];

            // Insert the image to the slide at the specified position
            RectangleF rect = new RectangleF(x, y, width, height);
            IEmbedImage imageShape = slide.Shapes.AppendEmbedImage(ShapeType.Rectangle, image, rect);

            // Set the line fill type of the image shape to none
            imageShape.Line.FillType = FillFormatType.None;

            // Save the presentation to a different file
            presentation.SaveToFile("InsertImage.pptx", FileFormat.Pptx2010);

            // Dispose resources
            presentation.Dispose();
        }
    }
}

Apply for a Temporary License
If you'd like to remove the evaluation message from the generated documents, or to get rid of the function limitations, please request a 30-day trial license for yourself.
By default, anyone who can access a PowerPoint document can open and edit it. If you want to prevent your PowerPoint document from unauthorized viewing or modification, you can protect it with a password. In addition to adding password protection, you can also choose other ways to protect the document, such as marking it as final to discourage editing. When you want to make the document public, you can unprotect it at any time. In this article, we will demonstrate how to protect or unprotect PowerPoint documents in C# and VB.NET using Spire.Presentation for .NET.
- Protect a PowerPoint Document with a Password
- Mark a PowerPoint Document as Final
- Remove Password Protection from a PowerPoint Document
- Remove Mark as Final Option from a PowerPoint Document
Install Spire.Presentation for .NET
To begin with, you need to add the DLL files included in the Spire.Presentation for.NET package as references in your .NET project. The DLL files can be either downloaded from this link or installed via NuGet.
PM> Install-Package Spire.Presentation
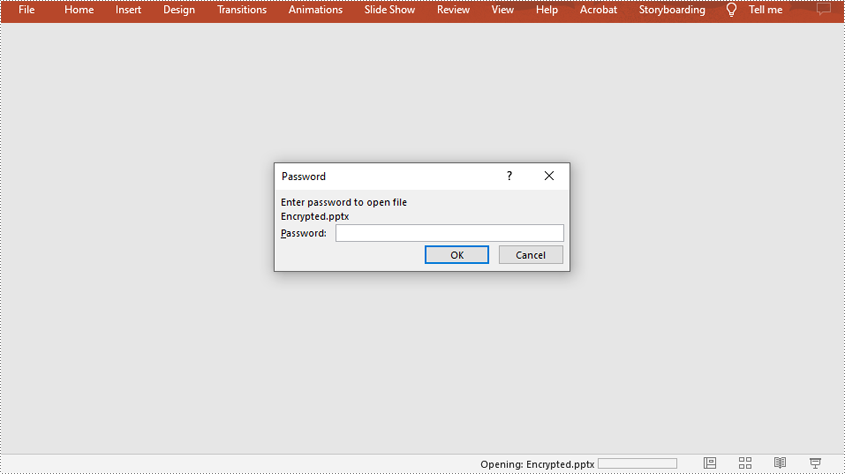
Protect a PowerPoint Document with a Password in C# and VB.NET
You can protect a PowerPoint document with a password to ensure that only the people who have the right password can view and edit it.
The following steps demonstrate how to protect a PowerPoint document with a password:
- Initialize an instance of Presentation class.
- Load a PowerPoint document using Presentation.LoadFromFile() method.
- Encrypt the document with a password using Presentation.Encrypt() method.
- Save the result document using Presentation.SaveToFile() method.
- C#
- VB.NET
using Spire.Presentation;

namespace ProtectPPTWithPassword
{
    class Program
    {
        static void Main(string[] args)
        {
            //Create a Presentation instance
            Presentation presentation = new Presentation();

            //Load a PowerPoint document
            presentation.LoadFromFile(@"Sample.pptx");

            //Encrypt the document with a password
            presentation.Encrypt("your password");

            //Save the result document
            presentation.SaveToFile("Encrypted.pptx", FileFormat.Pptx2013);
        }
    }
}
Mark a PowerPoint Document as Final in C# and VB.NET
You can mark a PowerPoint document as final to inform readers that the document is final and no further editing is expected.
The following steps demonstrate how to mark a PowerPoint document as final:
- Initialize an instance of Presentation class.
- Load a PowerPoint document using Presentation.LoadFromFile() method.
- Mark the document as final through Presentation.DocumentProperty[] property.
- Save the result document using Presentation.SaveToFile() method.
- C#
- VB.NET
using Spire.Presentation;

namespace MarkPPTAsFinal
{
    class Program
    {
        static void Main(string[] args)
        {
            //Create a Presentation instance
            Presentation ppt = new Presentation();
            //Load a PowerPoint document
            ppt.LoadFromFile(@"Sample.pptx");

            //Mark the document as final
            ppt.DocumentProperty["_MarkAsFinal"] = true;

            //Save the result document
            ppt.SaveToFile("MarkAsFinal.pptx", FileFormat.Pptx2013);
        }
    }
}

Remove Password Protection from a PowerPoint Document in C# and VB.NET
You can remove password protection from a PowerPoint document by loading the document with the correct password, then removing the password protection from it.
The following steps demonstrate how to remove password protection from a PowerPoint document:
- Initialize an instance of Presentation class.
- Load a PowerPoint document using Presentation.LoadFromFile() method.
- Mark the document as final through Presentation.RemoveEncryption() method.
- Save the result document using Presentation.SaveToFile() method.
- C#
- VB.NET
using Spire.Presentation;

namespace RemovePasswordProtectionFromPPT
{
    class Program
    {
        static void Main(string[] args)
        {
            //Create a Presentation instance
            Presentation presentation = new Presentation();

            //Load a password-protected PowerPoint document with the right password
            presentation.LoadFromFile(@"Encrypted.pptx", "your password");

            //Remove password protection from the document
            presentation.RemoveEncryption();

            //Save the result document
            presentation.SaveToFile("RemoveProtection.pptx", FileFormat.Pptx2013);
        }
    }
}

Remove Mark as Final Option from a PowerPoint Document in C# and VB.NET
The mark as final feature makes a PowerPoint document read-only to prevent further changes, if you decide to make changes to the document later, you can remove the mark as final option from it.
The following steps demonstrate how to remove mark as final option from a PowerPoint document:
- Initialize an instance of Presentation class.
- Load a PowerPoint document using Presentation.LoadFromFile() method.
- Mark the document as final through Presentation.DocumentProperty[] property.
- Save the result document using Presentation.SaveToFile() method.
- C#
- VB.NET
using Spire.Presentation;

namespace RemoveMarkAsFinalFromPPT
{
    class Program
    {
        static void Main(string[] args)
        {
            //Create a Presentation instance
            Presentation ppt = new Presentation();
            //Load a PowerPoint document
            ppt.LoadFromFile(@"MarkAsFinal.pptx");

            //Remove mark as final option from the document
            ppt.DocumentProperty["_MarkAsFinal"] = false;

            //Save the result document
            ppt.SaveToFile("RemoveMarkAsFinal.pptx", FileFormat.Pptx2013);
        }
    }
}

Apply for a Temporary License
If you'd like to remove the evaluation message from the generated documents, or to get rid of the function limitations, please request a 30-day trial license for yourself.
