
Knowledgebase (2417)
Children categories
How to reset page number for each section start at 1 in a word document in C#
2014-07-17 09:27:54 Written by KoohjiSections are widely used by developers to set different formatting or layout options to each different section, such as use the different header and footer information for different sections and reset page number for each section dynamically. With the help of Spire.Doc for .NET, we can easily insert word section and remove word section in C# and VB.NET. We will show you how to reset page numbering that starts at 1 for each section easily by using Spire.Doc.
Firstly make sure Spire.Doc for .NET has been installed correctly and then add Spire.Doc.dll as reference in the downloaded Bin folder though the below path: "..\Spire.Doc\Bin\NET4.0\ Spire.Doc.dll". Here comes to the codes of how to reset page numbering for each section.
Step 1: Load three different word documents
Document document1 = new Document();
document1.LoadFromFile("..\\..\\1.docx");

Document document2 = new Document();
document2.LoadFromFile("..\\..\\2.docx");

Document document3 = new Document();
document3.LoadFromFile("..\\..\\3.docx");
Step 2: Use section method to combine all documents into one word document
foreach (Section sec in document2.Sections)
{
document1.Sections.Add(sec.Clone());
}
foreach (Section sec in document3.Sections)
{
document1.Sections.Add(sec.Clone());
}
Step 3: Traverse the document
//Traverse every section of document1
foreach (Section sec in document1.Sections)
{
//Traverse every object of the footer
foreach (DocumentObject obj in sec.HeadersFooters.Footer.ChildObjects)
{
if (obj.DocumentObjectType == DocumentObjectType.StructureDocumentTag)
{
DocumentObject para = obj.ChildObjects[0];
foreach (DocumentObject item in para.ChildObjects)
                        {
if (item.DocumentObjectType == DocumentObjectType.Field)
Step 4: Find the field type FieldNumPages and change it to FieldSectionPages
//Find the item and its field type is FieldNumPages
if ((item as Field).Type == FieldType.FieldNumPages)
{
//Change field type to FieldSectionPages
(item as Field).Type = FieldType.FieldSectionPages;
Step 5: Restart page number of section and set the starting page number to 1
document1.Sections[1].PageSetup.RestartPageNumbering = true;
document1.Sections[1].PageSetup.PageStartingNumber = 1;

document1.Sections[2].PageSetup.RestartPageNumbering = true;
document1.Sections[2].PageSetup.PageStartingNumber = 1;
Step 6: Save the document to file and launch it.
document1.SaveToFile("sample.docx",FileFormat.Docx);
System.Diagnostics.Process.Start("sample.docx");
Full codes:
namespace ResetPageNumber
{
    class Program
    {
        static void Main(string[] args)
        {
            Document document1 = new Document();
            document1.LoadFromFile("..\\..\\1.docx");

            Document document2 = new Document();
            document2.LoadFromFile("..\\..\\2.docx");

            Document document3 = new Document();
            document3.LoadFromFile("..\\..\\3.docx");

            foreach (Section sec in document2.Sections)
            {
                document1.Sections.Add(sec.Clone());
            }

            foreach (Section sec in document3.Sections)
            {
                document1.Sections.Add(sec.Clone());

            }
            foreach (Section sec in document1.Sections)
            {
                foreach (DocumentObject obj in sec.HeadersFooters.Footer.ChildObjects)
                {
                    if (obj.DocumentObjectType == DocumentObjectType.StructureDocumentTag)
                    {
                        DocumentObject para = obj.ChildObjects[0];
                        foreach (DocumentObject item in para.ChildObjects)
                        {
                            if (item.DocumentObjectType == DocumentObjectType.Field)
                            {
                                if ((item as Field).Type == FieldType.FieldNumPages)
                                {
                                    (item as Field).Type = FieldType.FieldSectionPages;
                                }
                            }
                        }
                    }
                }
            }

            document1.Sections[1].PageSetup.RestartPageNumbering = true;
            document1.Sections[1].PageSetup.PageStartingNumber = 1;

            document1.Sections[2].PageSetup.RestartPageNumbering = true;
            document1.Sections[2].PageSetup.PageStartingNumber = 1;

            document1.SaveToFile("sample.docx",FileFormat.Docx);
            System.Diagnostics.Process.Start("sample.docx");
        }
    }
}
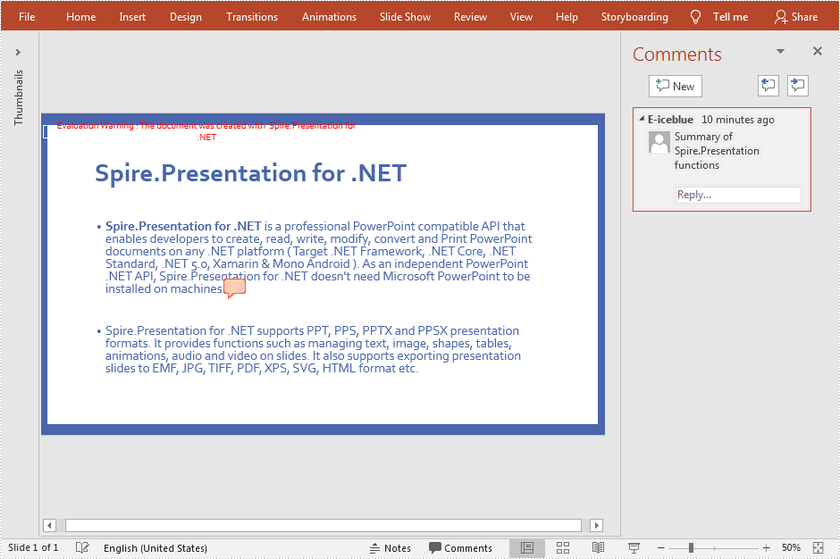
In Microsoft PowerPoint, a comment is a note that you can attach to a phrase or paragraph on a slide. Viewing comments added by the author, readers can learn more information about the content. Likewise, readers can also add comments to provide reviews or feedbacks to the author. In this article, you will learn how to programmatically add or remove comments in a PowerPoint slide using Spire.Presentation for .NET.
Install Spire.Presentation for .NET
To begin with, you need to add the DLL files included in the Spire.Presentation for.NET package as references in your .NET project. The DLL files can be either downloaded from this link or installed via NuGet.
PM> Install-Package Spire.Presentation
Add Comments to a Presentation Slide
The detailed steps are as follows:
- Create a Presentation instance.
- Load a PowerPoint document using Presentation.LoadFromFile() method.
- Get CommentAuthor List using Presentation.CommentAuthors property.
- Add the author of the comment using CommentAuthorList.AddAuthor() method.
- Get a specified slide using Presentation.Slides[] property, and then add a comment to the slide using ISlide.AddComment(ICommentAuthor, String, PointF, DateTime) method.
- Save the result document using Presentation.SaveToFile() method.
- C#
- VB.NET
using Spire.Presentation;
using System;

namespace AddComment
{

    class Program
    {

        static void Main(string[] args)
        {
            //Create a Presentation instance
            Presentation presentation = new Presentation();

            //Load a PowerPoint document
            presentation.LoadFromFile(@"D:\Files\Test.pptx");

            //Add the author of the comment
            ICommentAuthor author = presentation.CommentAuthors.AddAuthor("E-iceblue", "comment:");

            //Add a comment to the specified slide
            presentation.Slides[0].AddComment(author, "Summary of Spire.Presentation functions", new System.Drawing.PointF(25, 22), DateTime.Now);

            //Save the document
            presentation.SaveToFile("comment.pptx", FileFormat.Pptx2010);
        }

    }
}
Remove Comments from a Presentation Slide
The detailed steps are as follows:
- Create a Presentation instance.
- Load a PowerPoint document using Presentation.LoadFromFile() method.
- Get a specified slide using Presentation.Slides[] property.
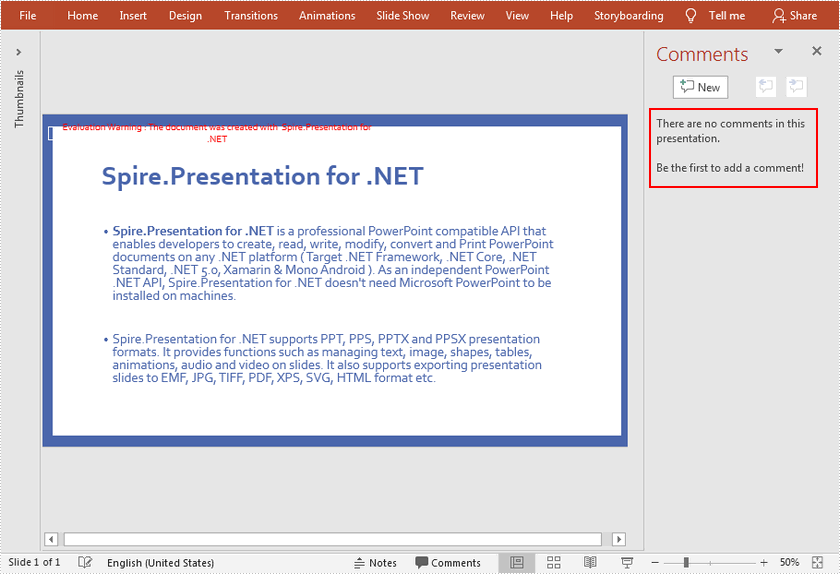
- Remove comment from the specified slide using ISlide.DeleteComment(Comment) method.
- Save the result document using Presentation.SaveToFile() method.
- C#
- VB.NET
using Spire.Presentation;

namespace RemoveComment
{
    class Program
    {
        static void Main(string[] args)
        {
            //Create a Presentation instance
            Presentation presentation = new Presentation();

            //Load a PowerPoint document
            presentation.LoadFromFile("comment.pptx");

            //Get the first slide
            ISlide slide = presentation.Slides[0];

            //Remove comment from the specified slide
            slide.DeleteComment(slide.Comments[0]);

            //Save the document
            presentation.SaveToFile("RemoveComment.pptx", FileFormat.Pptx2010);


        }
    }
}
Apply for a Temporary License
If you'd like to remove the evaluation message from the generated documents, or to get rid of the function limitations, please request a 30-day trial license for yourself.
Spire.PDF has a function of adding, removing the blank pages in C#. We have already shown you how to remove the blank page in a PDF file. This article will show you how to insert an empty page in a PDF file in C#. By using the Spire.PDF, we can add the blank page to any place in the PDF file you want, such as at the first, the middle of the PDF file or at the end of the PDF file. It is very easy and you only need three lines of code to accomplish this task.
Make sure Spire.PDF for .NET has been installed correctly and then add Spire.Pdf.dll as reference in the downloaded Bin folder though the below path: "..\Spire.Pdf\Bin\NET4.0\Spire.Pdf.dll".
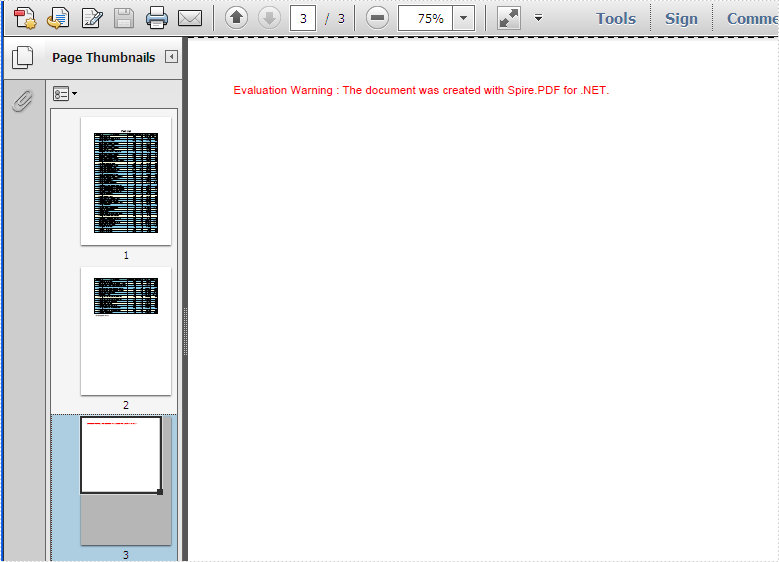
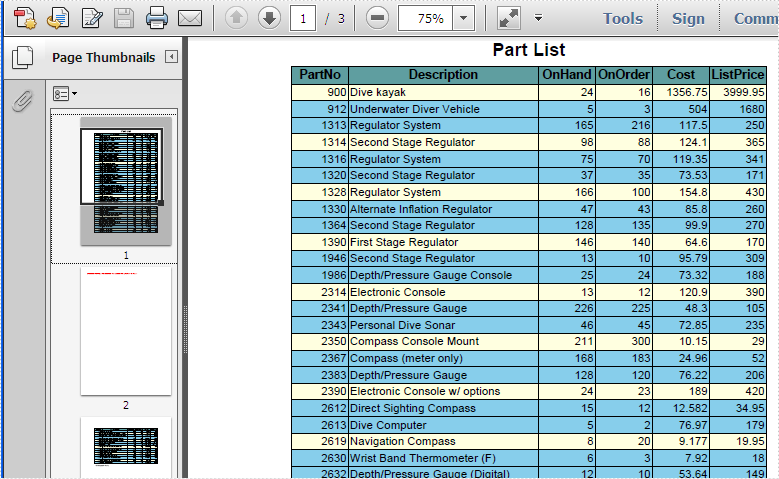
The following code snippet shows you how to insert an empty page in a PDF file. We will show you how to add the empty page at the end of the file and as the second page of the file.
//create a PDF document and load file
PdfDocument doc = new PdfDocument();
doc.LoadFromFile("sample.pdf");

//insert blank page at the end of the PDF file
doc.Pages.Add();

//insert blank page as the second page
doc.Pages.Insert(1);

//Save the document to file
doc.SaveToFile("result.pdf");
Check the effective screenshots as below:
Add the blank page at the end of the PDF file:
Add the blank page as the second page of the PDF file:
Full codes:
using Spire.Pdf;
using System;

namespace InsertPage
{
    class Program
    {
        static void Main(string[] args)
        {
            //create PdfDocument instance and load file
            PdfDocument doc = new PdfDocument();
            doc.LoadFromFile("sample.pdf");

            //insert blank page as last page
            doc.Pages.Add();

            doc.SaveToFile("result.pdf");
            doc.Close();
            System.Diagnostics.Process.Start("result.pdf");

            //create PdfDocument instance and load file
            PdfDocument doc2 = new PdfDocument();
            doc2.LoadFromFile("sample.pdf");

            //insert blank page as second page
            doc2.Pages.Insert(1);

            doc2.SaveToFile("result2.pdf");
            doc2.Close();
            System.Diagnostics.Process.Start("result2.pdf");
        }
    }
}
