
Knowledgebase (2417)
Children categories
Adding, modifying, and removing footers in a PowerPoint document is crucial for enhancing the professionalism and readability of a presentation. By adding footers, you can include key information such as presentation titles, authors, dates, or page numbers, which helps the audience better understand the content. Modifying footers allows you to update information, making it more attractive and practical. Additionally, removing footers is also necessary, especially in certain situations such as when specific information is not required to be displayed at the bottom of each page for a particular occasion. In this article, you will learn how to add, modify, or remove footers in PowerPoint documents in C# using Spire.Presentation for .NET.
- C# Add Footers in PowerPoint Documents
- C# Modify Footers in PowerPoint Documents
- C# Remove Footers in PowerPoint Documents
Install Spire.Presentation for .NET
To begin with, you need to add the DLL files included in the Spire.Presentation for.NET package as references in your .NET project. The DLL files can be either downloaded from this link or installed via NuGet.
PM> Install-Package Spire.Presentation
C# Add Footers in PowerPoint Documents
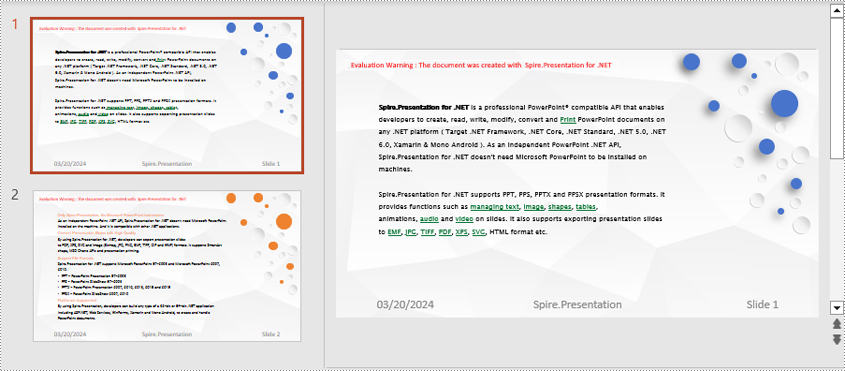
Spire.Presentation enables the addition of footer, slide number, and date placeholders at the bottom of PowerPoint document pages to uniformly add the same footer content across all pages. Here are the detailed steps:
- Create a Presentation object.
- Load a PowerPoint document using the lisentation.LoadFromFile() method.
- Set Presentation.FooterVisible = true to make the footer visible and set the footer text.
- Set Presentation.SlideNumberVisible = true to make slide numbers visible, then iterate through each slide, check for the existence of a slide number placeholder, and modify the text to "Slide X" format if found.
- Set Presentation.DateTimeVisible = true to make date and time visible.
- Use the Presentation.SetDateTime() method to set the date format.
- Save the document using the Presentation.SaveToFile() method.
- C#
using Spire.Presentation;

namespace SpirePresentationDemo
{
    internal class Program
    {
        static void Main(string[] args)
        {
            // Create a Presentation object
            Presentation presentation = new Presentation();

            // Load the presentation from a file
            presentation.LoadFromFile("Sample1.pptx");

            // Set the footer visible
            presentation.FooterVisible = true;

            // Set the footer text to "Spire.Presentation"
            presentation.SetFooterText("Spire.Presentation");

            // Set slide number visible
            presentation.SlideNumberVisible = true;

            // Iterate through each slide in the presentation
            foreach (ISlide slide in presentation.Slides)
            {
                foreach (IShape shape in slide.Shapes)
                {
                    if (shape.Placeholder != null)
                    {
                        // If it is a slide number placeholder
                        if (shape.Placeholder.Type.Equals(PlaceholderType.SlideNumber))
                        {
                            TextParagraph textParagraph = (shape as IAutoShape).TextFrame.TextRange.Paragraph;
                            String text = textParagraph.Text;

                            // Modify the slide number text to "Slide X"
                            textParagraph.Text = "Slide " + text;
                        }
                    }
                }
            }

            // Set date time visible
            presentation.DateTimeVisible = true;

            // Set date time format
            presentation.SetDateTime(DateTime.Now, "MM/dd/yyyy");

            // Save the modified presentation to a file
            presentation.SaveToFile("AddFooter.pptx", FileFormat.Pptx2016);

            // Dispose of the Presentation object resources
            presentation.Dispose();
        }
    }
}
C# Modify Footers in PowerPoint Documents
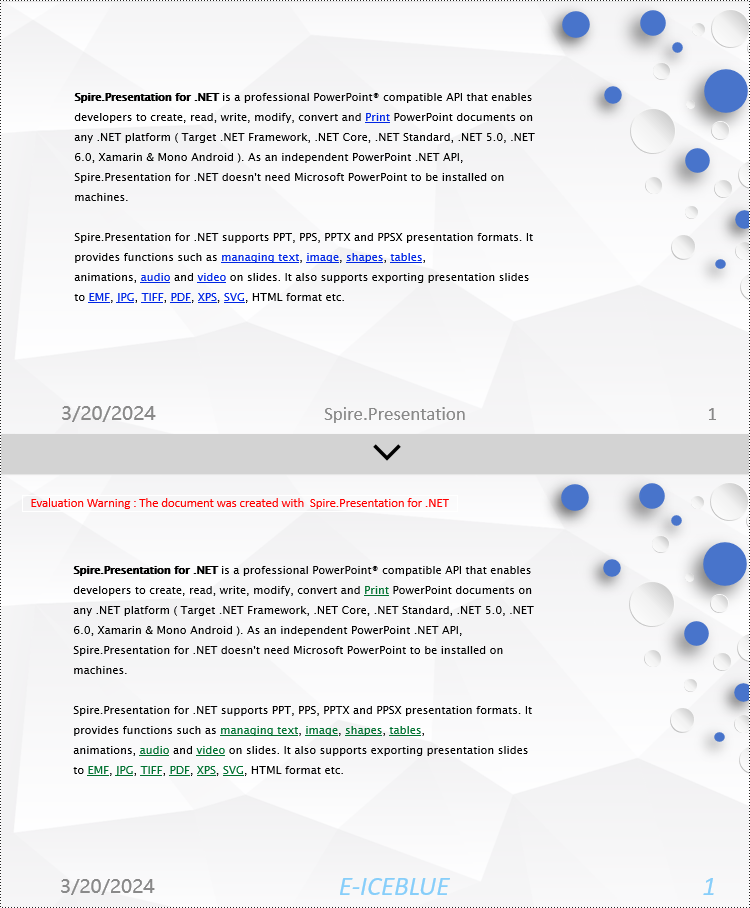
To modify footers in a PowerPoint document, you first need to individually inspect the shapes on each slide, identify footer placeholders, page number placeholders, etc., and then set specific content and formats for each type of placeholder. Here are the detailed steps:
- Create a Presentation object.
- Load a PowerPoint document using the Presentation.LoadFromFile() method.
- Use the Presentation.Slides[index] property to retrieve a slide.
- Use a for loop to iterate through the shapes on the slide, individually checking each shape to determine if it is a placeholder for a footer, page number, etc., and then modify its content or format accordingly.
- Save the document using the Presentation.SaveToFile() method.
- C#
using Spire.Presentation;

namespace SpirePresentationDemo
{
    internal class Program
    {
        static void Main(string[] args)
        {
            // Create a Presentation object
            Presentation presentation = new Presentation();

            // Load the presentation from a file
            presentation.LoadFromFile("Sample2.pptx");

            // Get the first slide
            ISlide slide = presentation.Slides[0];

            // Iterate through shapes in the slide
            for (int i = 0; i < slide.Shapes.Count; i++)
            {
                // Check if the shape is a placeholder
                if (slide.Shapes[i].Placeholder != null)
                {
                    // Get the placeholder type
                    PlaceholderType type = slide.Shapes[i].Placeholder.Type;

                    // If it is a footer placeholder
                    if (type == PlaceholderType.Footer)
                    {
                        // Convert the shape to IAutoShape type
                        IAutoShape autoShape = (IAutoShape)slide.Shapes[i];

                        // Set the text content to "E-ICEBLUE"
                        autoShape.TextFrame.Text = "E-ICEBLUE";

                        // Modify the text font
                        ChangeFont1(autoShape.TextFrame.Paragraphs[0]);
                    }
                    // If it is a slide number placeholder
                    if (type == PlaceholderType.SlideNumber)
                    {
                        // Convert the shape to IAutoShape type
                        IAutoShape autoShape = (IAutoShape)slide.Shapes[i];

                        // Modify the text font
                        ChangeFont1(autoShape.TextFrame.Paragraphs[0]);
                    }
                }
            }

            // Save the modified presentation to a file
            presentation.SaveToFile("ModifyFooter.pptx", FileFormat.Pptx2016);

            // Dispose of the Presentation object resources
            presentation.Dispose();
        }
       static void ChangeFont1(TextParagraph paragraph)
        {
            // Iterate through each text range in the paragraph
            foreach (TextRange textRange in paragraph.TextRanges)
            {
                // Set the text style to italic
                textRange.IsItalic = TriState.True;

                // Set the text font
                textRange.EastAsianFont = new TextFont("Times New Roman");

                // Set the text font size to 34
                textRange.FontHeight = 34;

                // Set the text color
                textRange.Fill.FillType = Spire.Presentation.Drawing.FillFormatType.Solid;
                textRange.Fill.SolidColor.Color = System.Drawing.Color.LightSkyBlue;
            }
        }
   }
}
C# Remove Footers in PowerPoint Documents
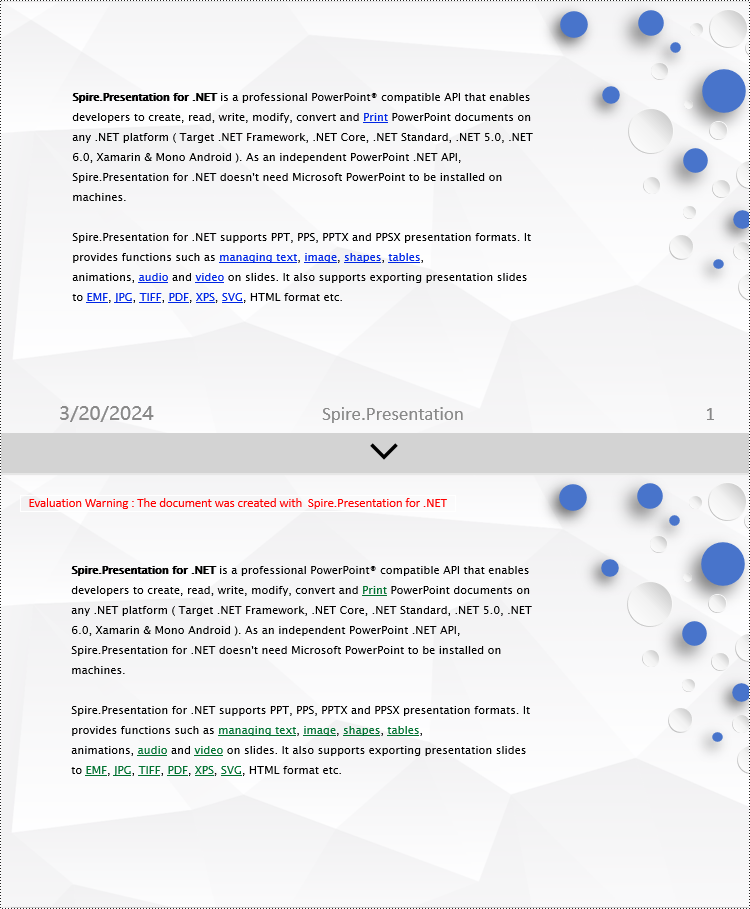
To remove footers from a PowerPoint document, you first need to locate footer placeholders, page number placeholders, date placeholders, etc., within the slides, and then remove them from the collection of shapes on the slide. Here are the detailed steps:
- Create a Presentation object.
- Load a PowerPoint document using the Presentation.LoadFromFile() method.
- Use the Presentation.Slides[index] property to retrieve a slide.
- Use a for loop to iterate through the shapes on the slide, check if it is a placeholder, and if it is a footer placeholder, page number placeholder, date placeholder, remove it from the slide.
- Save the document using the Presentation.SaveToFile() method.
- C#
using Spire.Presentation;

namespace SpirePresentationDemo
{
    internal class Program
    {
        static void Main(string[] args)
        {
            // Create a Presentation object
            Presentation presentation = new Presentation();

            // Load the presentation from a file
            presentation.LoadFromFile("Sample2.pptx");

            // Get the first slide
            ISlide slide = presentation.Slides[0];

            // Iterate through shapes in the slide in reverse order
            for (int i = slide.Shapes.Count - 1; i >= 0; i--)
            {
                // Check if the shape is a placeholder
                if (slide.Shapes[i].Placeholder != null)
                {
                    // Get the placeholder type
                    PlaceholderType type = slide.Shapes[i].Placeholder.Type;

                    // If it is a footer placeholder, slide number placeholder, or date placeholder
                    if (type == PlaceholderType.Footer || type == PlaceholderType.SlideNumber || type == PlaceholderType.DateAndTime)
                    {
                        // Remove it from the slide
                        slide.Shapes.RemoveAt(i);
                    }
                }
            }

            // Save the modified presentation to a file
            presentation.SaveToFile("RemoveFooter.pptx", FileFormat.Pptx2016);

            // Dispose of the Presentation object resources
            presentation.Dispose();
        }
    }
}
Apply for a Temporary License
If you'd like to remove the evaluation message from the generated documents, or to get rid of the function limitations, please request a 30-day trial license for yourself.
PPT file format is a vivid and explicit way to present your stuff. PPT file can be very beautiful and powerful. And text is a basic element that PPT supports. Spire.Presentation is a powerful .NET component specially designed for developers. It enables developers to manipulate PPT files easily and flexibly. In this document, I will introduce you how to add a paragraph to PPT file using Spire.Presentation.
Step 1. Create a PPT document.
Presentation presentation = new Presentation();
Step 2. Add a new shape to the document.
IAutoShape shape = presentation.Slides[0].Shapes.AppendShape(ShapeType.Rectangle, new RectangleF(50, 70, 450, 150));
shape.Fill.FillType = FillFormatType.None;
shape.ShapeStyle.LineColor.Color = Color.White;
Shape represents a TextBox in PPT document.
Step 3. Add some text to the shape.
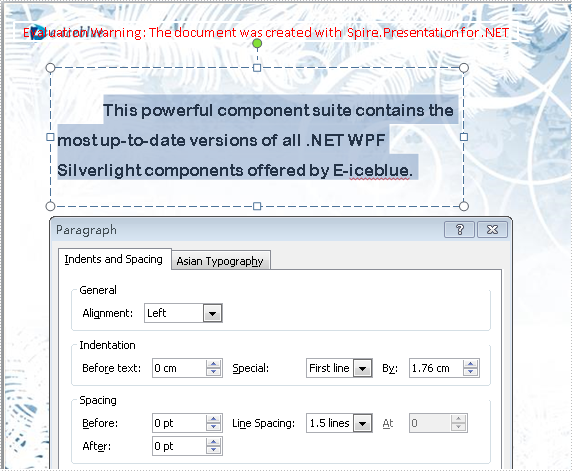
shape.TextFrame.Text = "This powerful component suite contains the most up-to-date versions of all .NET WPF Silverlight components offered by E-iceblue.";
These will form a new paragraph.
Step 4. Set the alignment of the paragraph.
shape.TextFrame.Paragraphs[0].Alignment = TextAlignmentType.Left;
Step 5. Set the indent of the paragraph.
shape.TextFrame.Paragraphs[0].Indent = 25*2;
Step 6. Set the line spacing of the paragraph.
shape.TextFrame.Paragraphs[0].LineSpacing = 250;
Step 7. Save the document.
presentation.SaveToFile("para.pptx", FileFormat.Pptx2010);
Full code:
using Spire.Presentation;
using Spire.Presentation.Drawing;
using System.Drawing;
namespace AddParagh
{
    class Program
    {
        static void Main(string[] args)
        {
            //create PPT document
            Presentation presentation = new Presentation();

            //set background Image
            string ImageFile = "bg.png";
            RectangleF rect = new RectangleF(0, 0, presentation.SlideSize.Size.Width, presentation.SlideSize.Size.Height);
            presentation.Slides[0].Shapes.AppendEmbedImage(ShapeType.Rectangle, ImageFile, rect);
            presentation.Slides[0].Shapes[0].Line.FillFormat.SolidFillColor.Color = Color.FloralWhite;

            //append new shape
            IAutoShape shape = presentation.Slides[0].Shapes.AppendShape(ShapeType.Rectangle, new RectangleF(50, 70, 450, 150));
            shape.Fill.FillType = FillFormatType.None;
            shape.ShapeStyle.LineColor.Color = Color.White;

            //set the alignment
            shape.TextFrame.Paragraphs[0].Alignment = TextAlignmentType.Left;
            //set the indent
            shape.TextFrame.Paragraphs[0].Indent = 50;
            //set the linespacing
            shape.TextFrame.Paragraphs[0].LineSpacing = 150;
            shape.TextFrame.Text = "This powerful component suite contains the most up-to-date versions of all .NET WPF Silverlight components offered by E-iceblue.";

            //set the Font
            shape.TextFrame.Paragraphs[0].TextRanges[0].LatinFont = new TextFont("Arial Rounded MT Bold");
            shape.TextFrame.Paragraphs[0].TextRanges[0].Fill.FillType = FillFormatType.Solid;
            shape.TextFrame.Paragraphs[0].TextRanges[0].Fill.SolidColor.Color = Color.Black;

            //save the document
            presentation.SaveToFile("para.pptx", FileFormat.Pptx2010);
            System.Diagnostics.Process.Start("para.pptx");
        }
    }
}
'create PPT document
Dim presentation As New Presentation()

'set background Image
Dim ImageFile As String = "bg.png"
Dim rect As New RectangleF(0, 0, presentation.SlideSize.Size.Width, presentation.SlideSize.Size.Height)
presentation.Slides(0).Shapes.AppendEmbedImage(ShapeType.Rectangle, ImageFile, rect)
presentation.Slides(0).Shapes(0).Line.FillFormat.SolidFillColor.Color = Color.FloralWhite

'append new shape
Dim shape As IAutoShape = presentation.Slides(0).Shapes.AppendShape(ShapeType.Rectangle, New RectangleF(50, 70, 450, 150))
shape.Fill.FillType = FillFormatType.None
shape.ShapeStyle.LineColor.Color = Color.White

'set the alignment
shape.TextFrame.Paragraphs(0).Alignment = TextAlignmentType.Left
'set the indent
shape.TextFrame.Paragraphs(0).Indent = 50
'set the linespacing
shape.TextFrame.Paragraphs(0).LineSpacing = 150
shape.TextFrame.Text = "This powerful component suite contains the most up-to-date versions of all .NET WPF Silverlight components offered by E-iceblue."

'set the Font
shape.TextFrame.Paragraphs(0).TextRanges(0).LatinFont = New TextFont("Arial Rounded MT Bold")
shape.TextFrame.Paragraphs(0).TextRanges(0).Fill.FillType = FillFormatType.Solid
shape.TextFrame.Paragraphs(0).TextRanges(0).Fill.SolidColor.Color = Color.Black

'save the document
presentation.SaveToFile("para.pptx", FileFormat.Pptx2010)
System.Diagnostics.Process.Start("para.pptx")
Screenshot:
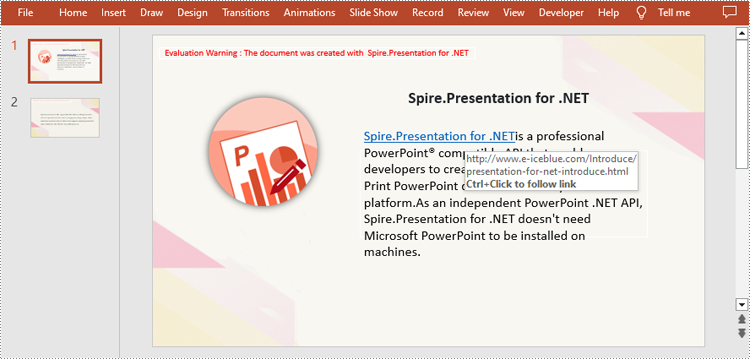
A hyperlink is a clickable element, typically embedded within text or images, which allows users to navigate and access different webpages, documents, or resources. By adding hyperlinks in a PowerPoint presentation, users are able to easily visit related content while viewing or showing the slides, enhancing convenience during the presentation. In this article, we will show you how to add hyperlink to PowerPoint Presentation programmatically by using Spire.Presentation for .NET.
Install Spire.Presentation for .NET
To begin with, you need to add the DLL files included in the Spire.Presentation for.NET package as references in your .NET project. The DLLs files can be either downloaded from this link or installed via NuGet.
PM> Install-Package Spire.Presentation
Add Hyperlink to Text on Slide
Spire.Presentation for .NET allows users to insert hyperlink to text on slides easily by using TextRange.ClickAction.Address property. The following are detailed steps.
- Create a new PowerPoint presentation.
- Load a PowerPoint file using Presentation.LoadFromFile() method.
- Get the first slide using Presentation.Slides[] property.
- Add a rectangle shape to the slide by using ISlide.Shapes.AppendShape() method.
- Remove the default paragraphs in the shape.
- Create a TextParagraph instance to represent a text paragraph.
- Create a TextRange instance to represent a text range and set link address for it by TextRange.ClickAction.Address property.
- Create an another TextRange instance to represent the rest of the text.
- Append text ranges to paragraph using TextParagraph.TextRanges.Append() method.
- Append the paragraph to the shape using IAutoShape.TextFrame.Paragraphs.Append() method.
- Loop through all text ranges in each paragraph and set font for them.
- Save the result file using Presentation.SaveToFile() method.
- C#
- VB.NET
using Spire.Presentation;
using Spire.Presentation.Drawing;
using System.Drawing;

namespace Hyperlink
{
    internal class Program
    {
        static void Main(string[] args)
        {
            //Create a Presentation instance
            Presentation presentation = new Presentation();

            //Load the PowerPoint file
            presentation.LoadFromFile("sample.pptx", FileFormat.Pptx2010);

            //Get the first slide of the presentation
            ISlide slide = presentation.Slides[0];

            //Add a shape to the slide
            RectangleF rec = new RectangleF(presentation.SlideSize.Size.Width / 2 - 120, 200, 500, 150);
            IAutoShape shape = slide.Shapes.AppendShape(ShapeType.Rectangle, rec);
            shape.Fill.FillType = FillFormatType.None;
            shape.ShapeStyle.LineColor.Color = Color.White;

            //Remove the default paragraphs in the shape
            shape.TextFrame.Paragraphs.Clear();

            //Create a TextParagraph instance
            TextParagraph para = new TextParagraph();

            //Create a TextRange instance
            TextRange tr = new TextRange("Spire.Presentation for .NET");

            //Set a hyperlink address for the text range
            tr.ClickAction.Address = "http://www.e-iceblue.com/Introduce/presentation-for-net-introduce.html";

            //Append the text range to the paragraph
            para.TextRanges.Append(tr);

            //Create a TextRange instance
            tr = new TextRange("is a professional PowerPoint® compatible API that enables developers to create, read,  modify, convert and Print PowerPoint documents on any .NET platform."
                +"As an independent PowerPoint .NET API, Spire.Presentation for .NET doesn't need Microsoft PowerPoint to be installed on machines.");

            //Append the text range to the paragraph
            para.TextRanges.Append(tr);

            //Append the paragraph to the shape
            shape.TextFrame.Paragraphs.Append(para);

            //Loop through the paragraphs in the shape
            foreach (TextParagraph textPara in shape.TextFrame.Paragraphs)
            {
                if (!string.IsNullOrEmpty(textPara.Text))
                {

                    //Loop through the text ranges in each paragraph
                    foreach (TextRange textRange in textPara.TextRanges)
                    {

                        //Set font
                        textRange.LatinFont = new TextFont("Calibri");
                        textRange.FontHeight = 24;
                        textRange.Fill.FillType = FillFormatType.Solid;
                        textRange.Fill.SolidColor.Color = Color.Black;
                    }
                }
            }

            //Save the presentation
            presentation.SaveToFile("TextHyperlink.pptx", FileFormat.Pptx2013);
            presentation.Dispose();
        }
    }
}
Add Hyperlink to Image on Slide
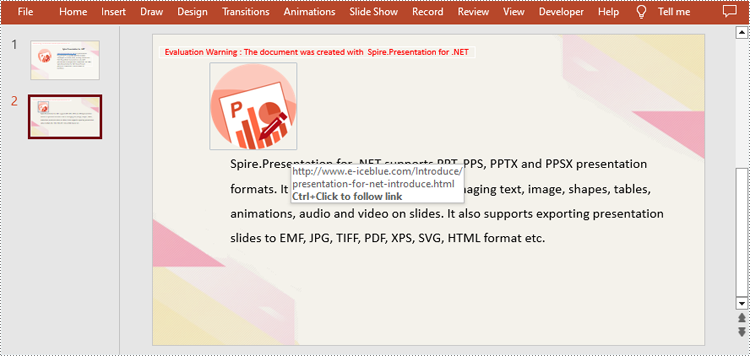
Spire.Presentation for .NET also supports adding a hyperlink to an image. You can create a hyperlink by using ClickHyperlink class and then add the hyperlink to the image using the IEmbedImage.Click property. The related steps are as follows.
- Create a new PowerPoint presentation.
- Load a PowerPoint file using Presentation.LoadFromFile() method.
- Get the second slide by using Presentation.Slides[] property.
- Add a image to the slide using ISlide.Shapes.AppendEmbedImage() method.
- Create a ClickHyperlink object and append the hyperlink to added image using IEmbedImage.Click property.
- Save the result file using Presentation.SaveToFile() method.
- C#
- VB.NET
using Spire.Presentation;
using System.Drawing;
namespace ImageHyperlink
{
    class Program
    {
        static void Main(string[] args)
        {
            //Initialize an object of Presentation class
            Presentation presentation = new Presentation();

            //Load the PowerPoint file
            presentation.LoadFromFile("TextHyperlink.pptx", FileFormat.Pptx2010);

            //Get the second slide of the presentation
            ISlide slide = presentation.Slides[1];

            //Add a image to slide
            RectangleF rect = new RectangleF(100, 50, 150, 150);
            IEmbedImage image = slide.Shapes.AppendEmbedImage(ShapeType.Rectangle, @"logo.png", rect);

            //Add hyperlink to image
            ClickHyperlink hyperlink = new ClickHyperlink("http://www.e-iceblue.com/Introduce/presentation-for-net-introduce.html");
            image.Click = hyperlink;

            //Save the result file
            presentation.SaveToFile("ImageHyperlink.pptx", FileFormat.Pptx2010);
            presentation.Dispose();
        }
    }
}
Apply for a Temporary License
If you'd like to remove the evaluation message from the generated documents, or to get rid of the function limitations, please request a 30-day trial license for yourself.
