
Knowledgebase (2417)
Children categories
Python: Set the Background Color and Image for Excel Worksheets
2024-03-15 08:01:56 Written by KoohjiFor data analysis and reporting, visual aesthetics play a significant role in presenting information effectively. When working with Excel worksheets, the ability to set background colors and images enhances the overall readability and impact of the data. By leveraging the power of Python, developers can effortlessly manipulate Excel files and customize the appearance of their worksheets. This article demonstrates how to use Spire.XLS for Python to set the background color and image for Excel worksheets with Python programs.
Install Spire.XLS for Python
This scenario requires Spire.XLS for Python and plum-dispatch v1.7.4. They can be easily installed in your Windows through the following pip command.
pip install Spire.XLS
If you are unsure how to install, please refer to: How to Install Spire.XLS for Python on Windows
Set the Background Color for an Excel Worksheet
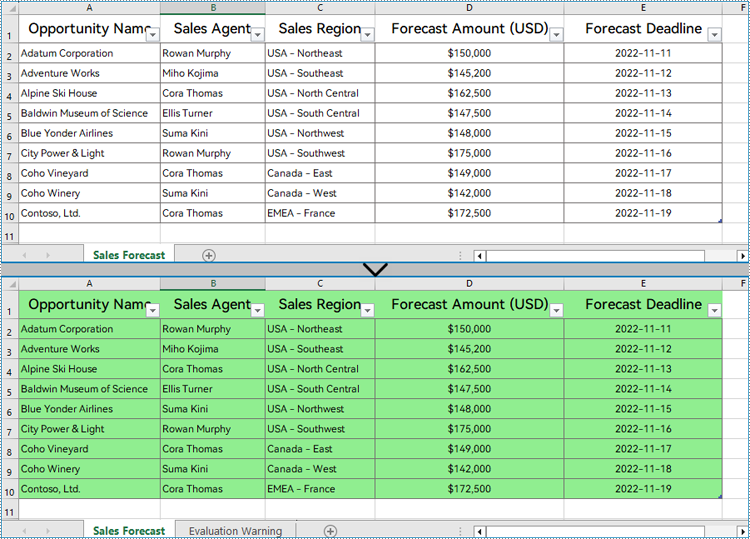
With Spire.XLS for Python, developers can set the background color for a specified cell range through CellRange.Style.Color property. The detailed steps for setting the background color for the used cell range in a worksheet are as follows:
- Create an instance of Workbook class.
- Load an Excel workbook using Workbook.LoadFromFile() method.
- Get a worksheet using Workbook.Worksheets.get_Item() method.
- Get the used range in the worksheet through Worksheet.AllocatedRange property.
- Set the background color of the used range through CellRange.Style.Color property.
- Save the workbook using Workbook.SaveToFile() method.
- Python
from spire.xls import *
from spire.xls.common import *

# Create an instance of Workbook class
wb = Workbook()

# Load an Excel file
wb.LoadFromFile("Sample.xlsx")

# Get a worksheet
sheet = wb.Worksheets.get_Item(0)

# Get the used range of the worksheet
usedRange = sheet.AllocatedRange

# Set the background color of the used range to a light and soft color
usedRange.Style.Color = Color.FromRgb(144, 238, 144)

# Save the workbook
wb.SaveToFile("output/ExcelBackgroundColor.xlsx", FileFormat.Version2016)
wb.Dispose()
Set the Background Image for an Excel Worksheet
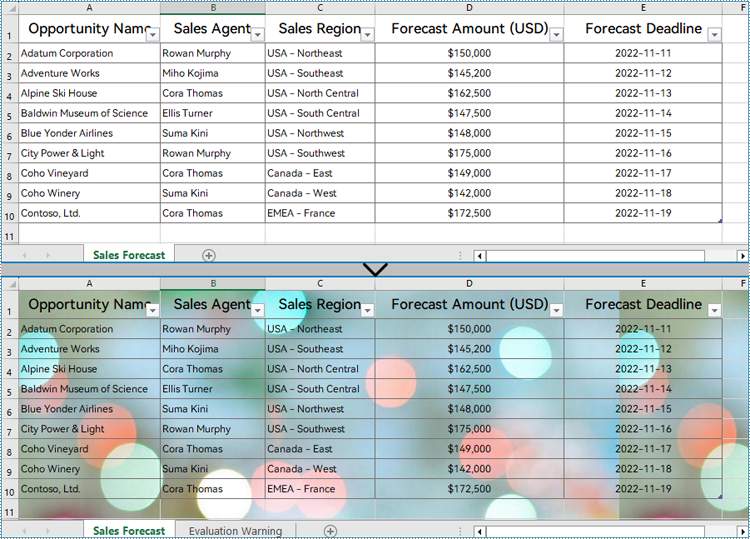
Setting a background image for an Excel worksheet can be accomplished through PageSetup class. Using the Worksheet.PageSetup.BackgroundImage property, developers can set the image background for the entire worksheet. Detailed steps are as follows:
- Create an instance of Workbook class.
- Load an Excel workbook using Workbook.LoadFromFile() method.
- Get a worksheet using Workbook.Worksheets.get_Item() method.
- Load an image using Stream() method.
- Set the background image of the worksheet through Worksheet.PageSetup.BackgroundImage property.
- Save the workbook using Workbook.SaveToFile() method.
- Python
from spire.xls import *
from spire.xls.common import *

# Create an instance of Workbook class
wb = Workbook()

# Load an Excel file
wb.LoadFromFile("Sample.xlsx")

# Get a worksheet
sheet = wb.Worksheets.get_Item(0)

# Load an image
image = Stream("BackgroundImage.jpg")

# Set the background of the worksheet
sheet.PageSetup.BackgoundImage = image

# Save the workbook
wb.SaveToFile("output/ExcelBackgroundImage.xlsx", FileFormat.Version2016)
wb.Dispose()
Apply for a Temporary License
If you'd like to remove the evaluation message from the generated documents, or to get rid of the function limitations, please request a 30-day trial license for yourself.
Shapes are a powerful tool in Excel that enables you to transform raw data into visually appealing and informative representations. By inserting and customizing shapes, you can create clear, engaging, and visually impactful spreadsheets that effectively communicate your data and captivate your audience. In this article, we will demonstrate how to insert and remove shapes in Excel in Python using Spire.XLS for Python.
Install Spire.XLS for Python
This scenario requires Spire.XLS for Python and plum-dispatch v1.7.4. They can be easily installed in your Windows through the following pip command.
pip install Spire.XLS
If you are unsure how to install, please refer to this tutorial: How to Install Spire.XLS for Python on Windows
Insert Shapes in Excel in Python
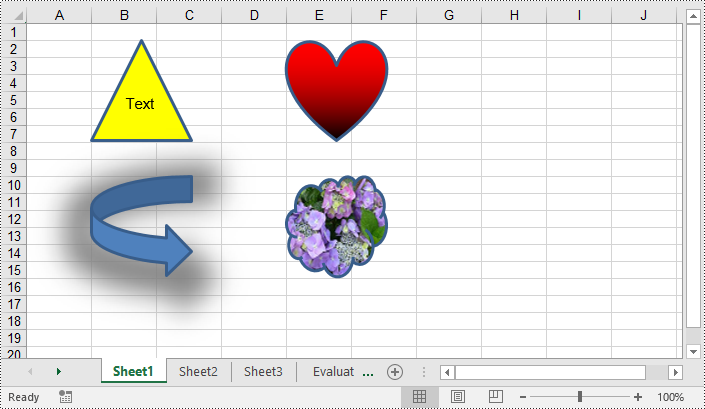
You can add numerous types of shapes, such as lines, rectangles, triangles, and stars, to an Excel worksheet by using the Worksheet.PrstGeomShapes.AddPrstGeomShape() method provided by Spire.XLS for Python. Once added, you can customize the shapes, such as adding text to the shapes, filling the shapes with solid or gradient colors or images, and setting shadow styles for the shapes. The detailed steps are as follows.
- Create an object of the Workbook class.
- Get the first worksheet using Workbook.Worksheets[] property.
- Add a shape to the worksheet using Worksheet.PrstGeomShapes.AddPrstGeomShape() method.
- Add text to the shape using IPrstGeomShape.Text property.
- Fill the shape with a color using IPrstGeomShape.Fill.ForeColor property.
- Set the fill type of the shape as solid using IPrstGeomShape.Fill.FillType property.
- Repeat the above steps to add more shapes to the worksheet.
- Save the result file using Workbook.SaveToFile() method.
- Python
from spire.xls import *
from spire.xls.common import *

# Create a Workbook object
workbook = Workbook()
# Get the first worksheet
sheet = workbook.Worksheets[0]

# Add a triangle shape to the worksheet
triangle = sheet.PrstGeomShapes.AddPrstGeomShape(2, 2, 100, 100, PrstGeomShapeType.Triangle)
# Add text to the shape
triangle.Text = "Text"
# Fill the triangle with a solid color
triangle.Fill.ForeColor = Color.get_Yellow()
triangle.Fill.FillType = ShapeFillType.SolidColor

# Add a heart shape to the worksheet
heart = sheet.PrstGeomShapes.AddPrstGeomShape(2, 5, 100, 100, PrstGeomShapeType.Heart)
# Fill the heart with a gradient color
heart.Fill.ForeColor = Color.get_Red()
heart.Fill.FillType = ShapeFillType.Gradient

# Add an arrow shape with the default color to the worksheet
arrow = sheet.PrstGeomShapes.AddPrstGeomShape(10, 2, 100, 100, PrstGeomShapeType.CurvedRightArrow)
# Set shadow style for the arrow
arrow.Shadow.Angle = 90
arrow.Shadow.Distance = 10
arrow.Shadow.Size = 150
arrow.Shadow.Color = Color.get_Gray()
arrow.Shadow.Blur = 30
arrow.Shadow.Transparency = 1
arrow.Shadow.HasCustomStyle = True

# Add a cloud shape to the worksheet
cloud = sheet.PrstGeomShapes.AddPrstGeomShape(10, 5, 100, 100, PrstGeomShapeType.Cloud)
# Fill the cloud with a custom picture
cloud.Fill.CustomPicture(Image.FromFile("Hydrangea.jpg"), "Hydrangea.jpg")
cloud.Fill.FillType = ShapeFillType.Picture

# Save the result file
workbook.SaveToFile("InsertShapes.xlsx", ExcelVersion.Version2013)
workbook.Dispose()
Remove Shapes from Excel in Python
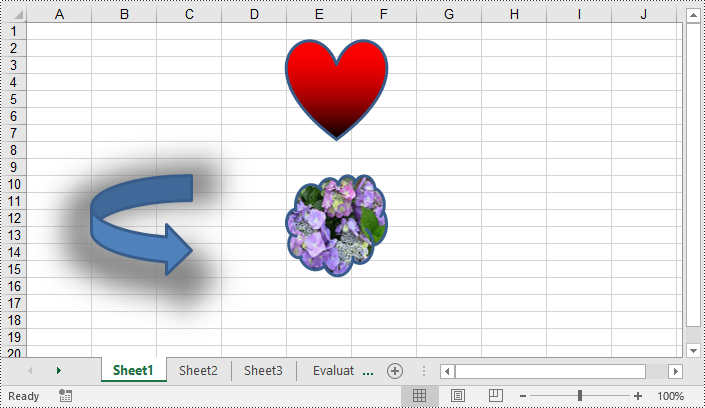
Shapes can improve the visual appearance of your workbook, but they can also increase the file size of it. Removing unnecessary shapes helps reduce the file size, making it more manageable and easier to share or store. Spire.XLS for Python enables you to remove specific shapes from a worksheet effortlessly by using the Worksheet.PrstGeomShapes[index].Remove() method. The detailed steps are as follows.
- Create an object of the Workbook class.
- Load an Excel file using Workbook.LoadFromFile() method.
- Remove a specific shape from the Worksheet using Worksheet.PrstGeomShapes[index].Remove() method.
- Save the result file using Workbook.SaveToFile() method.
- Python
from spire.xls import *
from spire.xls.common import *

# Create a Workbook object
workbook = Workbook()
# Load an Excel file
workbook.LoadFromFile("InsertShapes.xlsx")

# Get the first worksheet
sheet = workbook.Worksheets[0]

# Remove the first shape from the worksheet
sheet.PrstGeomShapes[0].Remove()

#Save to file.
workbook.SaveToFile("RemoveShapes.xlsx", ExcelVersion.Version2013)
workbook.Dispose()
Apply for a Temporary License
If you'd like to remove the evaluation message from the generated documents, or to get rid of the function limitations, please request a 30-day trial license for yourself.
Table borders in PowerPoint refer to the visible lines or outlines that surround the cells within a table. These borders provide a visual separation between cells and help define the boundaries of the table. By setting or modifying table borders, you can customize the appearance of tables in your PowerPoint presentations. In this article, we will guide you on how to set and remove table borders in PowerPoint in Python using Spire.Presentation for Python.
Install Spire.Presentation for Python
This scenario requires Spire.Presentation for Python and plum-dispatch v1.7.4. They can be easily installed in your Windows through the following pip command.
pip install Spire.Presentation
If you are unsure how to install, please refer to this tutorial: How to Install Spire.Presentation for Python on Windows
Set Table Borders in PowerPoint in Python
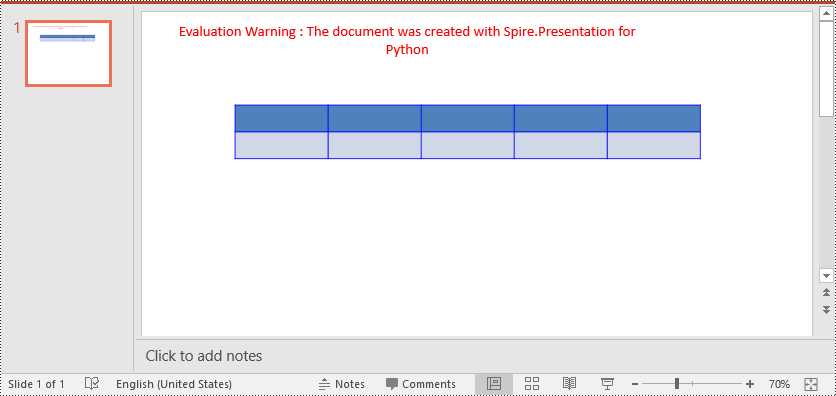
Spire.Presentation for Python provides the ITable.SetTableBorder() method, which allows you to set borders for a table in PowerPoint. The detailed steps are as follows.
- Create an object of the Presentation class.
- Get the first slide of the presentation using Presentation.Slides[] property.
- Add a table to the slide using ISlide.Shapes.AppendTable() method.
- Add borders to the table and set the border type, width, and color using ITable.SetTableBorder() method.
- Save the result presentation using Presentation.SaveToFile() method.
- Python
from spire.presentation.common import *
from spire.presentation import *

# Create a Presentation object
presentation = Presentation()
# Get  the first slide of the presentation
slide = presentation.Slides[0]

# Specify the number and size of rows and columns in table
widths = [100, 100, 100, 100, 100]
heights = [20, 20]

# Add a table to the first slide
table = slide.Shapes.AppendTable(100, 100, widths, heights)

# Add borders to the table and set the border type, width, and color
table.SetTableBorder(TableBorderType.All, 1, Color.get_Blue())

# Save the result presentation
presentation.SaveToFile("SetBorders.pptx", FileFormat.Pptx2013)
presentation.Dispose()
Remove Table Borders in PowerPoint in Python
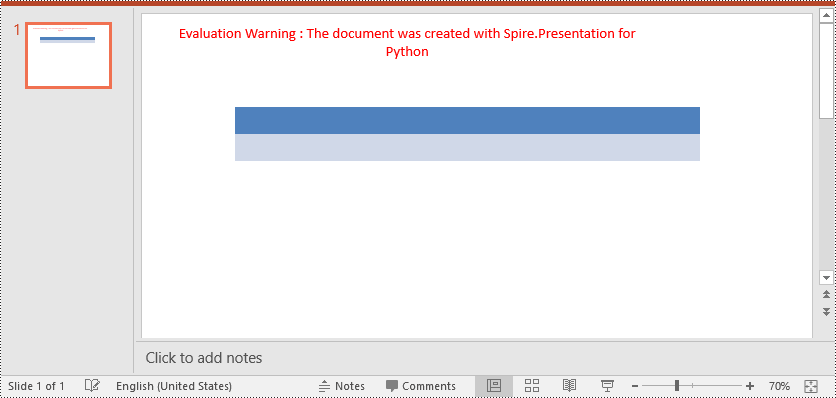
To remove borders from a table, you need to iterate through the cells in the table and then remove the borders from each cell. The detailed steps are as follows.
- Create an object of the Presentation class.
- Load a PowerPoint presentation using Presentation.LoadFromFile() method.
- Get a specific slide of the presentation using Presentation.Slides[] property.
- Get the table on the slide.
- Iterate through the rows in the table and the cells in each row.
- Remove the borders from each cell by setting the fill type of the top, bottom, left and right borders of the cell as none.
- Save the result presentation using Presentation.SaveToFile() method.
- Python
from spire.presentation.common import *
from spire.presentation import *

# Create a PowerPoint presentation
presentation = Presentation()
# Load a PowerPoint presentation
presentation.LoadFromFile("SetBorders.pptx")

# Get the first slide
slide = presentation.Slides[0]
# Get the table on the slide
table = slide.Shapes[0] if isinstance(slide.Shapes[0], ITable) else None
table = (ITable)(table)

# Iterate through the rows and cells in the table
for row in table.TableRows:
    for cell in row:
        # Remove borders from each cell by setting the fill type of the top, bottom, left and right borders of the cell as none
        cell.BorderTop.FillType = FillFormatType.none
        cell.BorderBottom.FillType = FillFormatType.none
        cell.BorderLeft.FillType = FillFormatType.none
        cell.BorderRight.FillType = FillFormatType.none

# Save the result presentation
presentation.SaveToFile("RemoveBorders.pptx", FileFormat.Pptx2013)
presentation.Dispose()
Apply for a Temporary License
If you'd like to remove the evaluation message from the generated documents, or to get rid of the function limitations, please request a 30-day trial license for yourself.
