
Knowledgebase (2344)
Children categories
Converting HTML to PDF in Python is a common need when you want to generate printable reports, preserve web content, or create offline documentation with consistent formatting. In this tutorial, you’ll learn how to convert HTML to PDF in Python— whether you're working with a local HTML file or a HTML string. If you're looking for a simple and reliable way to generate PDF files from HTML in Python, this guide is for you.
Install Spire.Doc to Convert HTML to PDF Easily
To convert HTML to PDF in Python, you’ll need a reliable library that supports HTML parsing and PDF rendering. Spire.Doc for Python is a powerful and easy-to-use HTML to PDF converter library that lets you generate PDF documents from HTML content — without relying on a browser, headless engine, or third-party tools.
Install via pip
You can install the library quickly with pip:
pip install spire.doc
Alternative: Manual Installation
You can also download the Spire.Doc package and perform a custom installation if you need more control over the environment.
Tip: Spire.Doc offers a free version suitable for small projects or evaluation purposes.
Once installed, you're ready to convert HTML to PDF in Python in just a few lines of code.
Convert HTML Files to PDF in Python
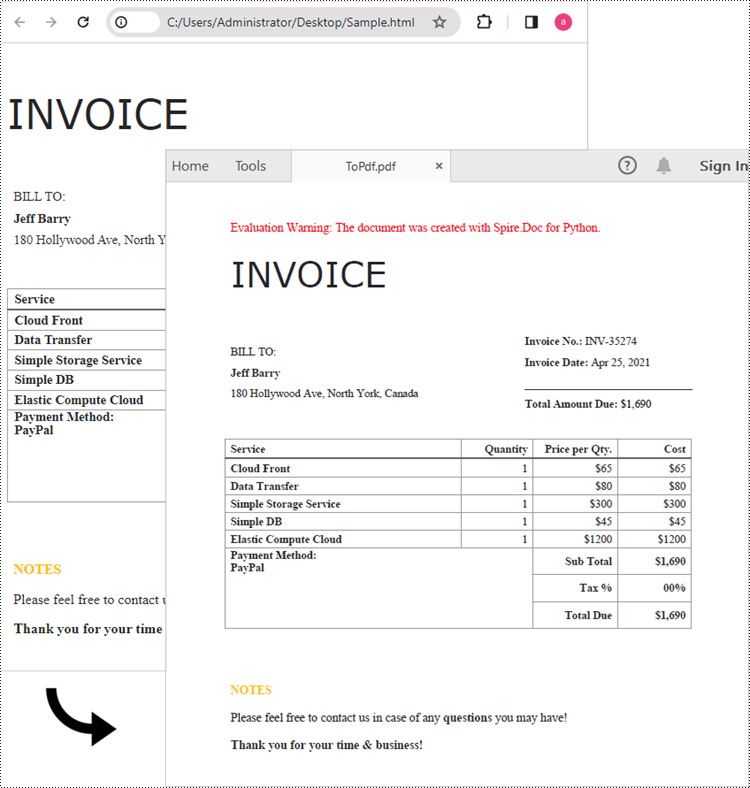
Spire.Doc for Python makes it easy to convert HTML files to PDF. The Document.LoadFromFile() method supports loading various file formats, including .html, .doc, and .docx. After loading an HTML file, you can convert it to PDF by calling Document.SaveToFile() method. Follow the steps below to convert an HTML file to PDF in Python using Spire.Doc.
Steps to convert an HTML file to PDF in Python:
- Create a Document object.
- Load an HTML file using Document.LoadFromFile() method.
- Convert it to PDF using Document.SaveToFile() method.
The following code shows how to convert an HTML file directly to PDF in Python:
from spire.doc import *
from spire.doc.common import *

# Create a Document object
document = Document()

# Load an HTML file
document.LoadFromFile("Sample.html", FileFormat.Html, XHTMLValidationType.none)

# Save the HTML file to a pdf file
document.SaveToFile("output/ToPdf.pdf", FileFormat.PDF)
document.Close()
Convert an HTML String to PDF in Python
If you want to convert an HTML string to PDF in Python, Spire.Doc for Python provides a straightforward solution. For simple HTML content like paragraphs, text styles, and basic formatting, you can use the Paragraph.AppendHTML() method to insert the HTML into a Word document. Once added, you can save the document as a PDF using the Document.SaveToFile() method.
Here are the steps to convert an HTML string to a PDF file in Python.
- Create a Document object.
- Add a section using Document.AddSection() method and insert a paragraph using Section.AddParagraph() method.
- Specify the HTML string and add it to the paragraph using Paragraph.AppendHTML() method.
- Save the document as a PDF file using Document.SaveToFile() method.
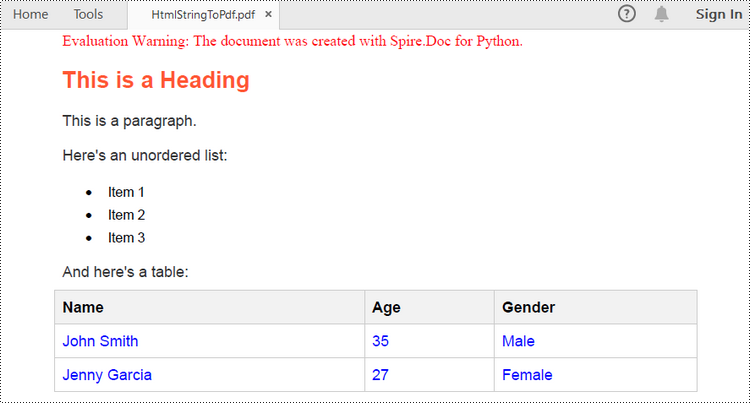
Here's the complete Python code that shows how to convert an HTML string to a PDF:
from spire.doc import *
from spire.doc.common import *

# Create a Document object
document = Document()

# Add a section to the document
sec = document.AddSection()

# Add a paragraph to the section
paragraph = sec.AddParagraph()

# Specify the HTML string
htmlString = """
<html>
<head>
    <title>HTML to Word Example</title>
    <style>
        body {
            font-family: Arial, sans-serif;
        }
        h1 {
            color: #FF5733;
            font-size: 24px;
            margin-bottom: 20px;
        }
        p {
            color: #333333;
            font-size: 16px;
            margin-bottom: 10px;
        }
        ul {
            list-style-type: disc;
            margin-left: 20px;
            margin-bottom: 15px;
        }
        li {
            font-size: 14px;
            margin-bottom: 5px;
        }
        table {
            border-collapse: collapse;
            width: 100%;
            margin-bottom: 20px;
        }
        th, td {
            border: 1px solid #CCCCCC;
            padding: 8px;
            text-align: left;
        }
        th {
            background-color: #F2F2F2;
            font-weight: bold;
        }
        td {
            color: #0000FF;
        }
    </style>
</head>
<body>
    <h1>This is a Heading</h1>
    <p>This is a paragraph.</p>
    <p>Here's an unordered list:</p>
    <ul>
        <li>Item 1</li>
        <li>Item 2</li>
        <li>Item 3</li>
    </ul>
    <p>And here's a table:</p>
    <table>
        <tr>
            <th>Name</th>
            <th>Age</th>
            <th>Gender</th>
        </tr>
        <tr>
            <td>John Smith</td>
            <td>35</td>
            <td>Male</td>
        </tr>
        <tr>
            <td>Jenny Garcia</td>
            <td>27</td>
            <td>Female</td>
        </tr>
    </table>
</body>
</html>
"""

# Append the HTML string to the paragraph
paragraph.AppendHTML(htmlString)

# Save the document as a pdf file
document.SaveToFile("output/HtmlStringToPdf.pdf", FileFormat.PDF)
document.Close()
Customize the Conversion from HTML to PDF in Python
While converting HTML to PDF in Python is often straightforward, there are times when you need more control over the output. For example, you may want to set a password to protect the PDF document, or embed fonts to ensure consistent formatting across different devices. In this section, you’ll learn how to customize the HTML to PDF conversion using Spire.Doc for Python.
1. Set a Password to Protect the PDF
To prevent unauthorized viewing or editing, you can encrypt the PDF by specifying a user password and an owner password.
# Create a ToPdfParameterList object
toPdf = ToPdfParameterList()

# Set PDF encryption passwords
userPassword = "viewer"
ownerPassword = "E-iceblue"
toPdf.PdfSecurity.Encrypt(userPassword, ownerPassword, PdfPermissionsFlags.Default, PdfEncryptionKeySize.Key128Bit)

# Save as PDF with password protection
document.SaveToFile("/HtmlToPdfWithPassword.pdf", toPdf)
2. Embed Fonts to Preserve Formatting
To ensure the PDF displays correctly across all devices, you can embed all fonts used in the document.
# Create a ToPdfParameterList object
ppl = ToPdfParameterList()
ppl.IsEmbeddedAllFonts = True

# Save as PDF with embedded fonts
document.SaveToFile("/HtmlToPdfWithEmbeddedFonts.pdf", ppl)
These options give you finer control when you convert HTML to PDF in Python, especially for professional document sharing or long-term storage scenarios.
The Conclusion
Converting HTML to PDF in Python becomes simple and flexible with Spire.Doc for Python. Whether you're handling static HTML files or dynamic HTML strings, or need to secure and customize your PDFs, this library provides everything you need — all in just a few lines of code. Get a free 30-day license and start converting HTML to high-quality PDF documents in Python today!
FAQs
Q1: Can I convert an HTML file to PDF in Python? Yes. Using Spire.Doc for Python, you can convert a local HTML file to PDF with just a few lines of code.
Q2: How do I convert HTML to PDF in Chrome? While Chrome allows manual "Save as PDF", it’s not suitable for batch or automated workflows. If you're working in Python, Spire.Doc provides a better solution for programmatically converting HTML to PDF.
Q3: How do I convert HTML to PDF without losing formatting? To preserve formatting:
- Use embedded or inline CSS (not external files).
- Use absolute URLs for images and resources.
- Embed fonts using Spire.Doc options like IsEmbeddedAllFonts(True).
A page break is a markup that divides the content of a document or spreadsheet into multiple pages for printing or display. This feature can be used to adjust the page layout of a document to ensure that each page contains the appropriate information. By placing page breaks appropriately, you can also ensure that your document is presented in a better format and layout when printed. This article will explain how to insert or remove horizontal/vertical page breaks in Excel on the Python platform by using Spire.XLS for Python.
- Insert Horizontal Page Breaks in Excel Using Python
- Insert Vertical Page Breaks in Excel Using Python
- Remove Horizontal Page Breaks from Excel Using Python
- Remove Vertical Page Breaks from Excel Using Python
Install Spire.XLS for Python
This scenario requires Spire.XLS for Python and plum-dispatch v1.7.4. They can be easily installed in your Windows through the following pip commands.
pip install Spire.XLS
If you are unsure how to install, please refer to this tutorial: How to Install Spire.XLS for Python on Windows
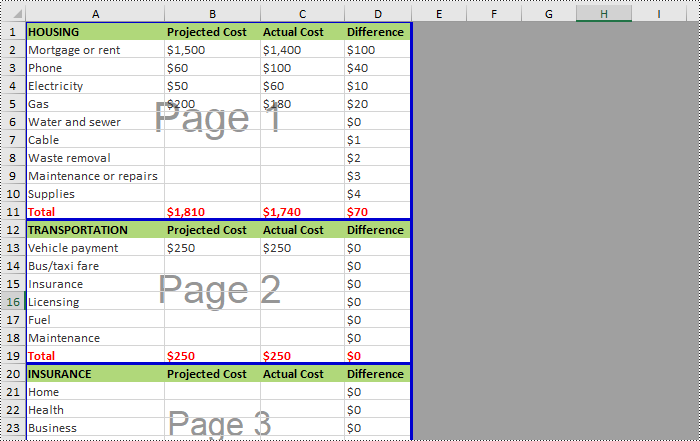
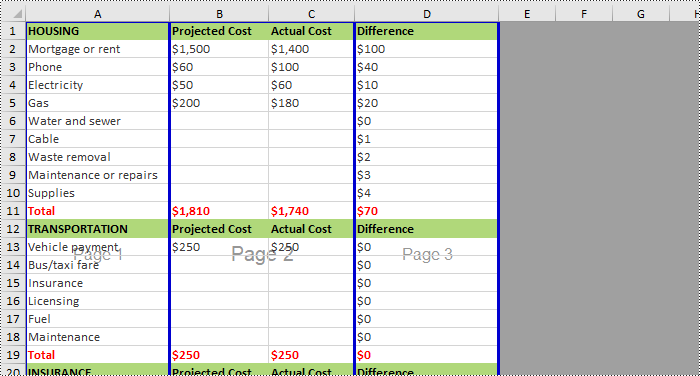
Insert Horizontal Page Breaks in Excel Using Python
Spire.XLS for Python supports inserting horizontal page breaks to specified cell ranges by calling Worksheet.HPageBreaks.Add(CellRange) method. The following are detailed steps.
- Create a Workbook instance.
- Load an Excel file from disk using Workbook.LoadFromFile() method.
- Get a specified worksheet using Workbook.Worksheets[] property.
- Insert horizontal page breaks to specified cell ranges using Worksheet.HPageBreaks.Add(CellRange) method.
- Set view mode to Preview mode by Worksheet.ViewMode property.
- Save the result file using Workbook.SaveToFile() method.
- Python
from spire.xls import *
from spire.xls.common import *

inputFile = "C:/Users/Administrator/Desktop/Sample.xlsx"
outputFile = "C:/Users/Administrator/Desktop/InsertHPageBreak.xlsx"

#Create a Workbook instance
workbook = Workbook()

#Load an Excel file from disk
workbook.LoadFromFile(inputFile)

#Get the first worksheet of this file
sheet = workbook.Worksheets[0]

#Insert horizontal page breaks to specified cell ranges
sheet.HPageBreaks.Add(sheet.Range["A12"])
sheet.HPageBreaks.Add(sheet.Range["A20"])

#Set view mode to Preview mode
sheet.ViewMode = ViewMode.Preview

#Save the result file
workbook.SaveToFile(outputFile, ExcelVersion.Version2013)
workbook.Dispose()
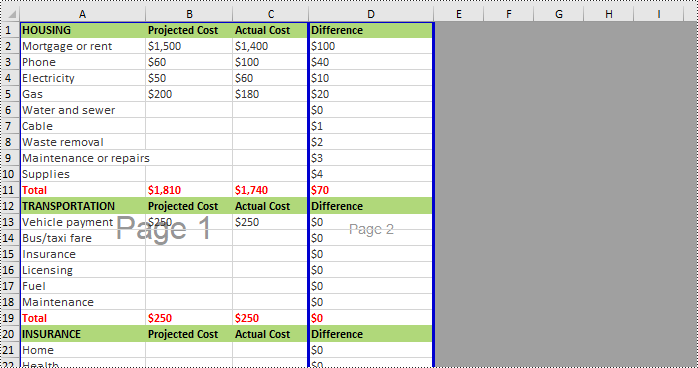
Insert Vertical Page Breaks in Excel Using Python
Spire.XLS for Python also supports inserting vertical page breaks to specified cell ranges by calling Worksheet.VPageBreaks.Add(CellRange) method. The following are detailed steps.
- Create a Workbook instance.
- Load an Excel file from disk using Workbook.LoadFromFile() method.
- Get a specified worksheet using Workbook.Worksheets[] property.
- Insert vertical page breaks to specified cell ranges using Worksheet.VPageBreaks.Add(CellRange) method.
- Set view mode to Preview mode using Worksheet.ViewMode property.
- Save the result file using Workbook.SaveToFile() method.
- Python
from spire.xls import *
from spire.xls.common import *

inputFile = "C:/Users/Administrator/Desktop/Sample.xlsx"
outputFile = "C:/Users/Administrator/Desktop/InsertVPageBreak.xlsx"

#Create a Workbook instance
workbook = Workbook()

#Load an Excel file from disk
workbook.LoadFromFile(inputFile)

#Get the first worksheet of this file
sheet = workbook.Worksheets[0]

#Insert vertical page breaks to specified cell ranges
sheet.VPageBreaks.Add(sheet.Range["B1"])
sheet.VPageBreaks.Add(sheet.Range["D3"])

#Set view mode to Preview mode
sheet.ViewMode = ViewMode.Preview

#Save the result file
workbook.SaveToFile(outputFile, ExcelVersion.Version2013)
workbook.Dispose()
Remove Horizontal Page Breaks from Excel Using Python
If you want to remove horizontal page breaks from Excel, call the Worksheet.HPageBreaks.RemoveAt() or Worksheet.HPageBreaks.Clear() methods. The following are detailed steps.
- Create a Workbook instance.
- Load an Excel file from disk using Workbook.LoadFromFile() method.
- Get a specified worksheet using Workbook.Worksheets[] property.
- Remove all the horizontal page breaks by calling Worksheet.HPageBreaks.Clear() method or remove a specific horizontal page break by calling Worksheet.HPageBreaks.RemoveAt() method.
- Set view mode to Preview mode using Worksheet.ViewMode property.
- Save the result file using Workbook.SaveToFile() method.
- Python
from spire.xls import *
from spire.xls.common import *

inputFile = "C:/Users/Administrator/Desktop/InsertHPageBreak.xlsx"
outputFile = "C:/Users/Administrator/Desktop/RemoveHPageBreak.xlsx"

#Create a Workbook instance
workbook = Workbook()

#Load an Excel file from disk
workbook.LoadFromFile(inputFile)

#Get the first worksheet from this file
sheet = workbook.Worksheets[0]

#Clear all the horizontal page breaks
#sheet.HPageBreaks.Clear()

#Remove the first horizontal page break
sheet.HPageBreaks.RemoveAt(0)

#Set view mode to Preview mode
sheet.ViewMode = ViewMode.Preview

#Save the result file
workbook.SaveToFile(outputFile, ExcelVersion.Version2013)
workbook.Dispose()

Remove Vertical Page Breaks from Excel Using Python
If you want to remove vertical page breaks from Excel, call the Worksheet.VPageBreaks.RemoveAt() or Worksheet.VPageBreaks.Clear() methods. The following are detailed steps.
- Create a Workbook instance.
- Load an Excel file from disk using Workbook.LoadFromFile() method.
- Get a specified worksheet using Workbook.Worksheets[] property.
- Remove all the vertical page breaks by calling Worksheet.VPageBreaks.Clear() method or remove a specific vertical page break by calling Worksheet.VPageBreaks.RemoveAt() method.
- Set view mode to Preview mode using Worksheet.ViewMode property.
- Save the result file using Workbook.SaveToFile() method.
- Python
from spire.xls import *
from spire.xls.common import *

inputFile = "C:/Users/Administrator/Desktop/InsertVPageBreak.xlsx"
outputFile = "C:/Users/Administrator/Desktop/RemoveVPageBreak.xlsx"

#Create a Workbook instance
workbook = Workbook()

#Load an Excel file from disk
workbook.LoadFromFile(inputFile)

#Get the first worksheet from this file
sheet = workbook.Worksheets[0]

#Clear all the vertical page breaks
#sheet.VPageBreaks.Clear()

#Remove the first vertical page break
sheet.VPageBreaks.RemoveAt(0)

#Set view mode to Preview mode
sheet.ViewMode = ViewMode.Preview

#Save the result file
workbook.SaveToFile(outputFile, ExcelVersion.Version2013)
workbook.Dispose()
Apply for a Temporary License
If you'd like to remove the evaluation message from the generated documents, or to get rid of the function limitations, please request a 30-day trial license for yourself.
EPUB, short for Electronic Publication, is a widely used standard format for eBooks. It is an open and free format based on web standards, enabling compatibility with various devices and software applications. EPUB files are designed to provide a consistent reading experience across different platforms, including e-readers, tablets, smartphones, and computers. By converting your Word document to EPUB, you can ensure that your content is accessible and enjoyable to a broader audience, regardless of the devices and software they use. In this article, we will demonstrate how to convert Word documents to EPUB format in Python using Spire.Doc for Python.
Install Spire.Doc for Python
This scenario requires Spire.Doc for Python and plum-dispatch v1.7.4. They can be easily installed in your Windows through the following pip commands.
pip install Spire.Doc
If you are unsure how to install, please refer to this tutorial: How to Install Spire.Doc for Python on Windows
Convert Word to EPUB in Python
The Document.SaveToFile(fileName:str, fileFormat:FileFormat) method provided by Spire.Doc for Python supports converting a Word document to EPUB format. The detailed steps are as follows.
- Create an object of the Document class.
- Load a Word document using Document.LoadFromFile() method.
- Save the Word document to EPUB format using Document.SaveToFile(fileName:str, fileFormat:FileFormat) method.
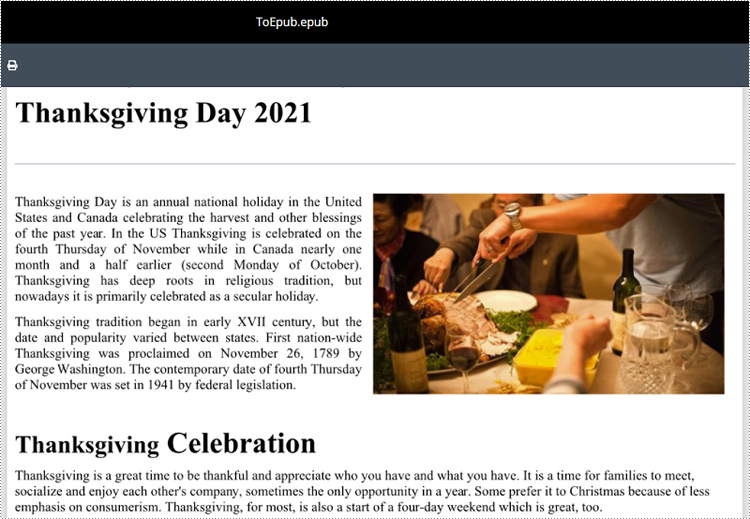
- Python
from spire.doc import *
from spire.doc.common import *

# Specify the input Word document and output EPUB file paths
inputFile = "Sample.docx"
outputFile = "ToEpub.epub"

# Create an object of the Document class
doc = Document()
# Load a Word document
doc.LoadFromFile(inputFile)

# Save the Word document to EPUB format
doc.SaveToFile(outputFile, FileFormat.EPub)
# Close the Document object
doc.Close()
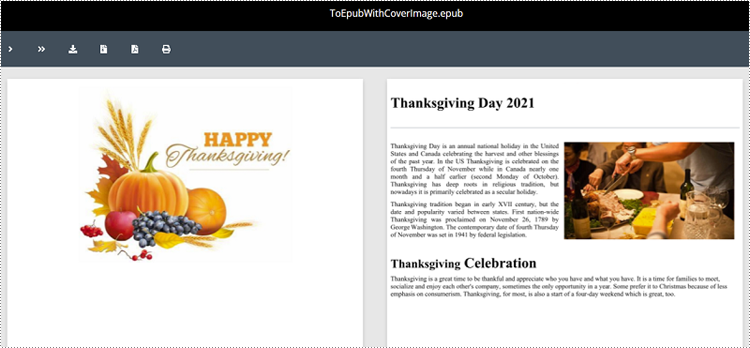
Convert Word to EPUB with a Cover Image in Python
Spire.Doc for Python enables you to convert a Word document to EPUB format and set a cover image for the resulting EPUB file by using the Document.SaveToEpub(fileName:str, coverImage:DocPicture) method. The detailed steps are as follows.
- Create an object of the Document class.
- Load a Word document using Document.LoadFromFile() method.
- Create an object of the DocPicture class, and then load an image using DocPicture.LoadImage() method.
- Save the Word document as an EPUB file and set the loaded image as the cover image of the EPUB file using Document.SaveToEpub(fileName:str, coverImage:DocPicture) method.
- Python
from spire.doc import *
from spire.doc.common import *

# Specify the input Word document and output EPUB file paths
inputFile = "Sample.docx"
outputFile = "ToEpubWithCoverImage.epub"
# Specify the file path for the cover image
imgFile = "Cover.png"

# Create a Document object
doc = Document()
# Load the Word document
doc.LoadFromFile(inputFile)

# Create a DocPicture object
picture = DocPicture(doc)
# Load the cover image file
picture.LoadImage(imgFile)

# Save the Word document as an EPUB file and set the cover image
doc.SaveToEpub(outputFile, picture)
# Close the Document object
doc.Close()
Get a Free License
To fully experience the capabilities of Spire.Doc for Python without any evaluation limitations, you can request a free 30-day trial license.
