
Knowledgebase (2344)
Children categories
Comments in Microsoft PowerPoint allow users to add additional information to specific slides or elements of a slide to improve collaboration and communication when sharing presentations. These comments can be related content, suggestions for changes, and so on. This feature is very useful when several people are working on a presentation together. In this article, you will learn how to use Spire.Presentation for Python to add, remove or replace comments on slides in Python programs.
- Add Comments to a Presentation Slide in Python
- Remove Comments from a Presentation Slide in Python
- Replace Comments on a Presentation Slide in Python
Install Spire.Presentation for Python
This scenario requires Spire.Presentation for Python and plum-dispatch v1.7.4. They can be easily installed in your Windows through the following pip commands.
pip install Spire.Presentation
If you are unsure how to install, please refer to this tutorial: How to Install Spire.Presentation for Python on Windows
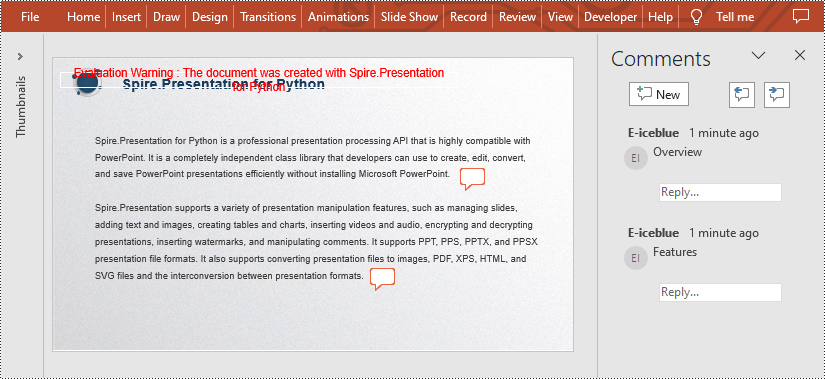
Add Comments to a Presentation Slide in Python
Spire.Presentation for Python provides the Presentation.CommentAuthors.AddAuthor() and Presentation.Slides[].AddComment(author:ICommentAuthor,text:str,position:PointF,dateTime:DateTime) methods to support adding comments to a slide. The detailed steps are as follows.
- Create a new PowerPoint presentation.
- Load a PowerPoint presentation using Presentation.LoadFromFile() method.
- Add the author of the comment by using Presentation.CommentAuthors.AddAuthor() method.
- Then add a comment to the first slide using Presentation.Slides[].AddComment(author:ICommentAuthor,text:str,position:PointF,dateTime:DateTime) method.
- Add another comment using the same method.
- Save the result file using Presentation.SaveToFile() method.
- Python
from spire.presentation.common import *
from spire.presentation import *

inputFile = "C:/Users/Administrator/Desktop/Sample.pptx"
outputFile = "C:/Users/Administrator/Desktop/AddComment.pptx"

# Create a Presentation instance
presentation = Presentation()

# Load a presentation from disk
presentation.LoadFromFile(inputFile)

# Add the author of the comment
author = presentation.CommentAuthors.AddAuthor("E-iceblue", "comment:")

# Add a comment to the first slide
point = PointF(45.0,12.0)
presentation.Slides[0].AddComment(author, "Overview", point, DateTime.get_Now())

# Add another comment to this slide
author = presentation.CommentAuthors.AddAuthor("E-iceblue", "comment:")
point = PointF(35.0,23.0)
presentation.Slides[0].AddComment(author, "Features", point, DateTime.get_Now())

# Save the result file
presentation.SaveToFile(outputFile, FileFormat.Pptx2010)
presentation.Dispose()
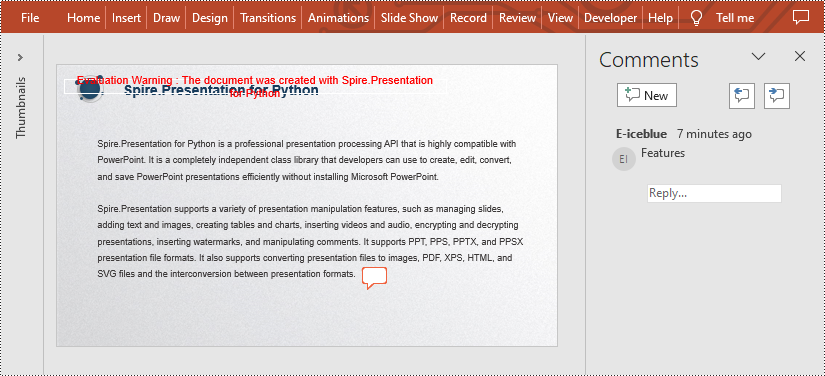
Remove Comments from a Presentation Slide in Python
You can also remove the specific comment from the slides by using Presentation.Slides[].DeleteComment(Comment) method. The detailed steps are as follows.
- Create a Presentation instance.
- Load a PowerPoint presentation using Presentation.LoadFromFile() method.
- Remove the first comment from the specified slide using Presentation.Slides[].DeleteComment(Comment) method.
- Save the result file using Presentation.SaveToFile() method.
- Python
from spire.presentation.common import *
from spire.presentation import *

inputFile = "C:/Users/Administrator/Desktop/AddComment.pptx"
outputFile = "C:/Users/Administrator/Desktop/DeleteComment.pptx"

# Create a Presentation instance
presentation = Presentation()

# Load a presentation from disk
presentation.LoadFromFile(inputFile)

# Delete the first comment from the first slide
presentation.Slides[0].DeleteComment(presentation.Slides[0].Comments[0])

# Save the result file
presentation.SaveToFile(outputFile, FileFormat.Pptx2010)
presentation.Dispose()
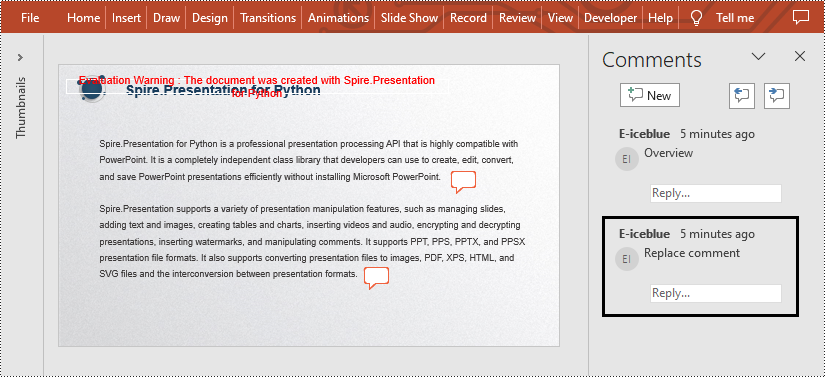
Replace Comments on a Presentation Slide in Python
If you want to replace the comment content with new text, please use the Presentation.Slides[].Comments[].Text property. The detailed steps are as follows.
- Create a Presentation instance.
- Load a PowerPoint presentation using Presentation.LoadFromFile() method.
- Replace the content of the second comment with new text by Presentation.Slides[].Comments[].Text property.
- Save the result file using Presentation.SaveToFile() method.
- Python
from spire.presentation.common import *
from spire.presentation import *

inputFile = "C:/Users/Administrator/Desktop/AddComment.pptx"
outputFile = "C:/Users/Administrator/Desktop/ReplaceComment.pptx"

# Create a Presentation instance
presentation = Presentation()

# Load a presentation from disk
presentation.LoadFromFile(inputFile)

# Replace the content of the second comment with new text
presentation.Slides[0].Comments[1].Text = "Replace comment"

# Save the result file
presentation.SaveToFile(outputFile, FileFormat.Pptx2010)
presentation.Dispose()
Apply for a Temporary License
If you'd like to remove the evaluation message from the generated documents, or to get rid of the function limitations, please request a 30-day trial license for yourself.
Hyperlinks in PDF documents are commonly used tools for navigating to internal or external related information. However, these links need to be accurate and up-to-date in order to be effective. Document editors are supposed to have the power to change or delete hyperlinks to update outdated references, rectify errors, comply with evolving web standards, or enhance accessibility. This article will demonstrate how to use Spire.PDF for Python to modify or remove hyperlinks in PDF documents to ensure accurate information dissemination, seamless navigation, and inclusive user experience.
- Update the Target Address of Hyperlinks in PDF Using Python
- Remove Hyperlinks in PDF Documents Using Python
Install Spire.PDF for Python
This scenario requires Spire.PDF for Python and plum-dispatch v1.7.4. They can be easily installed in your Windows through the following pip command.
pip install Spire.PDF
If you are unsure how to install, please refer to this tutorial: How to Install Spire.PDF for Python on Windows
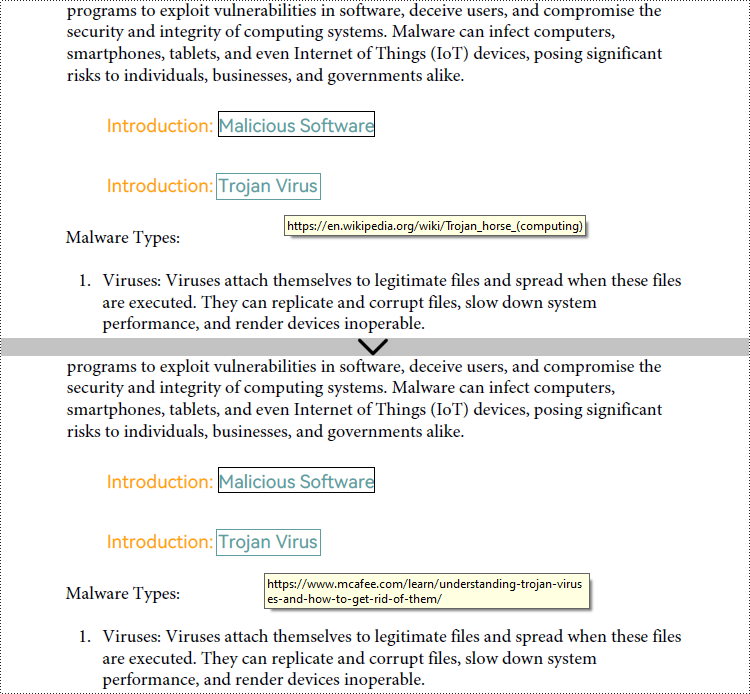
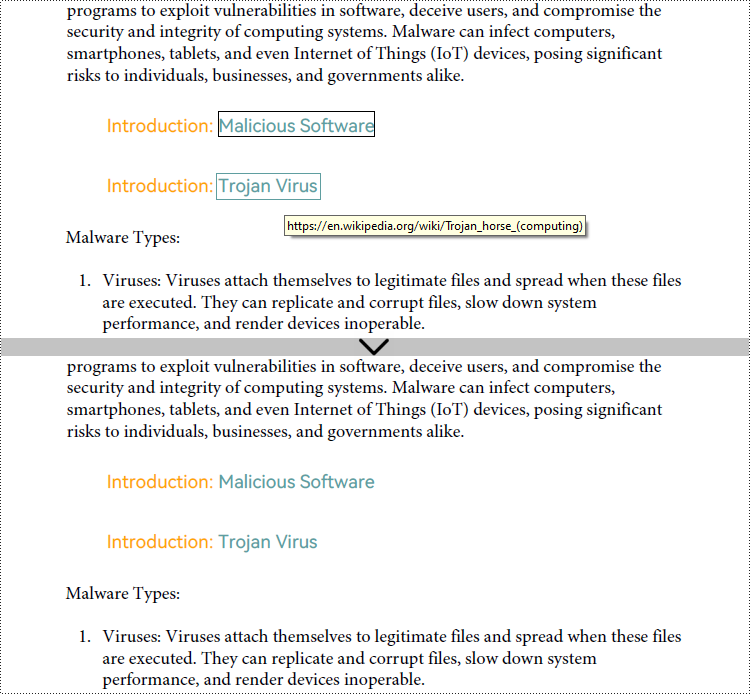
Update the Target Address of Hyperlinks in PDF Using Python
In PDF documents, hyperlinks are annotations displayed on the linked content on a page. Therefore, to modify hyperlinks in PDF documents, it is needed to retrieve all annotations on a page through PdfPageBase.AnnotationsWidget property. Then, a specific hyperlink annotation can be obtained from the annotation list and the target address can be updated through PdfTextWebLinkAnnotationWidget.Url property. The detailed steps are as follows:
- Create an object of PdfDocument class and load a PDF document using PdfDocument.LoadFromFile() method.
- Get a page of the document using PdfDocument.Pages.get_Item() method.
- Get all annotations on the page through PdfPageBase.AnnotationsWidget property.
- Get a hyperlink annotation and cast it to a PdfTextWebLinkAnnotationWidget object.
- Set a new target address for the hyperlink annotation through PdfTextWebLinkAnnotationWidget.Url property.
- Save the document using PdfDocument.SaveToFile() method.
- Python
from spire.pdf.common import *
from spire.pdf import *

# Create an object of PdfDocument class and load a PDF document
pdf = PdfDocument()
pdf.LoadFromFile("Sample.pdf")

# Get the first page of the document
page = pdf.Pages.get_Item(0)

# Get all annotations on the page
widgetCollection = page.AnnotationsWidget

# Get the second hyperlink annotation
annotation = widgetCollection.get_Item(1)

# Cast the hyperlink annotation to a PdfTextWebLinkAnnotationWidget object
link = PdfTextWebLinkAnnotationWidget(annotation)

# Set a new target address for the second hyperlink
link.Url = "https://www.mcafee.com/learn/understanding-trojan-viruses-and-how-to-get-rid-of-them/"

#Save the document
pdf.SaveToFile("output/ModifyPDFHyperlink.pdf")
pdf.Close()
Remove Hyperlinks in PDF Documents Using Python
Spire.PDF for Python enables developers to effortlessly remove specific hyperlinks on a page using the PdfPageBase.AnnotationsWidget.RemoveAt() method. Additionally, developers can also iterate through each page and its annotations to identify and eliminate all hyperlink annotations in the entire PDF document with the help of Spire.PDF for Python. The detailed steps are as follows:
- Create an object of PdfDocument class and load a PDF document using PdfDocument.LoadFromFile() method.
- To remove a specific hyperlink, get a page in the document using PdfDocument.Pages.get_Item() method and remove the hyperlink annotation using PdfPageBase.AnnotationsWidget.RemoveAt() method.
- To remove all hyperlinks in the document, loop through the pages in the document to get the annotations on each page through PdfPageBase.AnnotationsWidget property.
- Loop through the annotations to check if each annotation is an instance of PdfTextWebLinkAnnotationWidget class. If it is, remove it using PdfAnnotationCollection.Remove() method.
- Save the document using PdfDocument.SaveToFile() method.
- Python
from spire.pdf import *
from spire.pdf.common import *

# # Create an object of PdfDocument class and load a PDF document
pdf = PdfDocument()
pdf.LoadFromFile("Sample.pdf")

# Remove the first hyperlink on the first page
#page = pdf.Pages.get_Item(0)
#page.AnnotationsWidget.RemoveAt(0)

# Remove all hyperlinks
# Loop through the pages in the document
for j in range(pdf.Pages.Count):
    # Get each page
    page = pdf.Pages.get_Item(j)
    # Get the annotations on each page
    annotations = page.AnnotationsWidget
    # Check if there is any annotations on a page
    if annotations.Count > 0:
        # Loop through the annotations
        i = annotations.Count - 1
        while i >=0:
            # Get an annotation
            annotation = annotations.get_Item(i)
            # Check if each annotation is a hyperlink
            if isinstance(annotation, PdfTextWebLinkAnnotationWidget):
                # Remove hyperlink annotations
                annotations.Remove(annotation)
            i -= 1

# Save the document
pdf.SaveToFile("output/RemovePDFHyperlink.pdf")
pdf.Close()
Apply for a Temporary License
If you'd like to remove the evaluation message from the generated documents, or to get rid of the function limitations, please request a 30-day trial license for yourself.
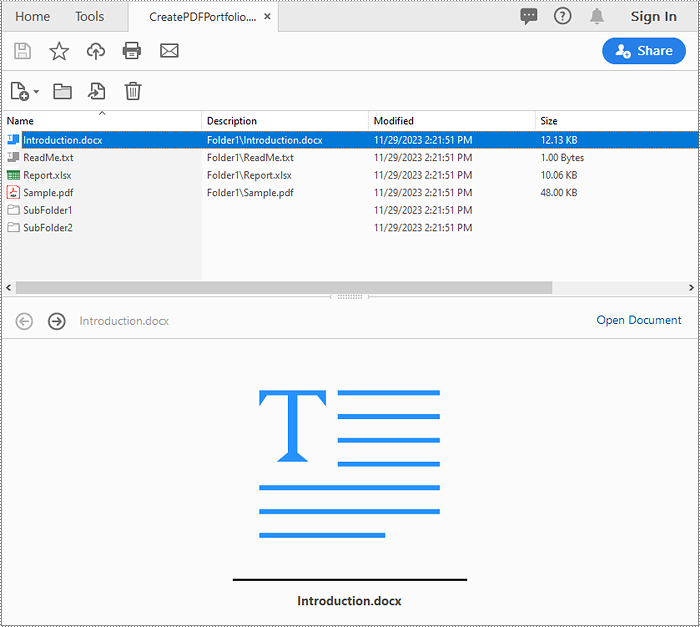
A PDF portfolio is a collection of files assembled into a single PDF document. It serves as a comprehensive and interactive showcase of various types of content, such as documents, images, presentations, videos, and more. Unlike a traditional PDF document, a PDF portfolio allows you to present multiple files in a cohesive and organized manner, providing a seamless browsing experience for the viewer. In this article, we will demonstrate how to create a PDF portfolio and how to identify if a PDF is a portfolio in Python using Spire.PDF for Python.
Install Spire.PDF for Python
This scenario requires Spire.PDF for Python and plum-dispatch v1.7.4. They can be easily installed in your Windows through the following pip command.
pip install Spire.PDF
If you are unsure how to install, please refer to this tutorial: How to Install Spire.PDF for Python on Windows
Create a PDF Portfolio with Python
Spire.PDF for Python allows you to generate a PDF portfolio by adding files to a PDF using the PdfDocument.Collection.AddFile() method. Furthermore, you can organize the files within the PDF portfolio by adding folders using the PdfDocument.Collection.Folders.CreateSubfolder() method. The detailed steps are as follows.
- Specify the output file path and the folders where the files to be included in the PDF portfolio are located.
- Create a PdfDocument object.
- Iterate through the files in the first folder and add them to the PDF portfolio using the PdfDocument.Collection.AddFile() method.
- Iterate through the files in the second folder. For each file, create a separate folder within the PDF portfolio using the PdfDocument.Collection.Folders.CreateSubfolder() method, and then add the file to the corresponding folder using the PdfFolder.AddFile() method.
- Save the resulting PDF portfolio using the PdfDocument.SaveToFile() method.
- Python
from spire.pdf.common import *
from spire.pdf import *
import glob

# Specify the folders where the files to be included in the PDF portfolio are located
input_folder1 = "Folder1/*"
input_folder2 = "Folder2/*"
# Specify the output file path
output_file = "CreatePDFPortfolio.pdf"

# Create a PdfDocument object
doc = PdfDocument()

# Get the list of file paths in the first folder
files1 = glob.glob(input_folder1)
# Loop through the files in the list
for i, file in enumerate(files1):
    # Add each file to the PDF portfolio
    doc.Collection.AddFile(file)

# Get the list of file paths in the second folder
files2 = glob.glob(input_folder2)
# Loop through the files in the list
for j, file in enumerate(files2):
    # Create a separate folder for each file
    folder = doc.Collection.Folders.CreateSubfolder(f"SubFolder{j + 1}")
    # Add the file to the folder
    folder.AddFile(file)

# Save the resulting PDF portfolio to the specified file path
doc.SaveToFile(output_file)

# Close the PdfDocument object
doc.Close()
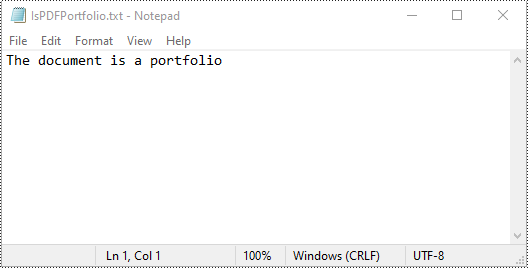
Identify if a PDF is a Portfolio with Python
You can use the PdfDocument.IsPortfolio property to easily identify whether a PDF document is a portfolio or not. The detailed steps are as follows.
- Specify the input and output file paths.
- Create a PdfDocument object.
- Load a PDF document using the PdfDocument.LoadFromFile() method.
- Identify whether the document is a portfolio or not using the PdfDocument.IsPortfolio property.
- Save the result to a text file.
- Python
from spire.pdf.common import *
from spire.pdf import *

# Specify the input and output file paths
input_file = "CreatePDFPortfolio.pdf"
output_file = "IsPDFPortfolio.txt"

# Create a PdfDocument object
doc = PdfDocument()
# Load a PDF document
doc.LoadFromFile(input_file)

# Identify whether the document is a portfolio or not
if doc.IsPortfolio:
    st = "The document is a portfolio"
else:
    st = "The document is not a portfolio"

# Save the result to a text file
with open(output_file, "w") as text_file:
    text_file.write(st)

# Close the PdfDocument object
doc.Close()
Apply for a Temporary License
If you'd like to remove the evaluation message from the generated documents, or to get rid of the function limitations, please request a 30-day trial license for yourself.
