Come salvare una tabella Excel come immagine: Guida completa per ogni utente
Microsoft Excel è uno degli strumenti più potenti per gestire dati, creare report e presentare approfondimenti visivamente. Tuttavia, quando si tratta di condividere le tabelle di Excel, come grafici, riepiloghi finanziari o dati formattati, potresti volerle salvare come immagini. Ciò consente di inserirle in presentazioni, siti web o e-mail senza perdere la formattazione o esporre le formule.
In questo articolo, esploreremo come salvare una tabella di Excel come immagine utilizzando direttamente Microsoft, strumenti online e metodi di programmazione in C#. Che tu sia un utente occasionale alla ricerca di una rapida conversione online o uno sviluppatore che ha bisogno di automatizzare il processo, qui troverai una soluzione affidabile.
Ecco un breve elenco per aiutarti a scegliere i metodi migliori. Puoi fare clic per passare ai tutorial corrispondenti:
- Metodo 1. Copia e Incolla per Inviare Tabelle di Excel in Formato Immagine con Microsoft: Ideale per una condivisione rapida e una tantum o quando è necessario catturare solo una piccola sezione del foglio di calcolo.
- Metodo 2. Salvare una Tabella di Excel in Formato Immagine con un Convertitore Online: Ideale per utenti occasionali o non sviluppatori che desiderano un modo rapido e senza installazione per convertire file Excel in immagini direttamente nel browser.
- Metodo 3. (Avanzato) Convertire File Excel in Formato Immagine con C#: Ideale per sviluppatori e aziende per conversioni di massa e personalizzazioni.
Metodo 1. Semplicemente Copia e Incolla per Inviare Tabelle di Excel in Formato Immagine
Iniziamo con il modo più semplice e diretto per inviare la tua tabella di Excel come immagine. Non sono necessari strumenti aggiuntivi o passaggi complessi: basta la funzione di copia e incolla integrata di Excel.
Basta seguire i passaggi seguenti:
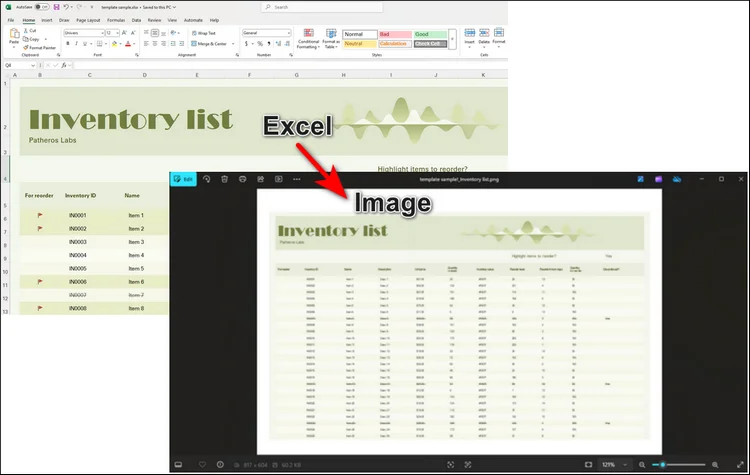
Passaggio 1. Apri il tuo file Excel con Microsoft e seleziona le tabelle specifiche che desideri condividere.
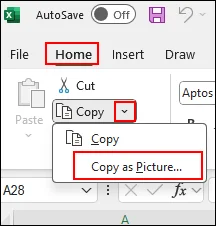
Passaggio 2. Trova la sezione "Home" dalla barra multifunzione. Vedrai un menu a discesa per "Copia". Fai clic sulla freccia verso il basso e fai clic su "Copia come immagine..." per continuare.
Passaggio 3. Quindi, puoi condividere la tabella in formato immagine. Apri la finestra di chat con cui desideri condividere e incolla direttamente con Ctrl + V.
Metodo 2. Salvare una Tabella di Excel come Immagine Online con CloudxDocs
Se stai cercando un modo rapido e semplice per trasformare i tuoi fogli di calcolo Excel in formato immagine, la conversione online è la scelta migliore. Con un convertitore online, devi solo caricare il file Excel e scaricare il file immagine convertito. Non sono necessari passaggi aggiuntivi.
Per ottenere una conversione più fluida, un buon convertitore online è il punto chiave. CloudxDocs Online Excel to Image Converter è la soluzione perfetta. Questo potente strumento basato sul web è progettato sia per utenti professionali che occasionali. Assicura una conversione istantanea da file Excel (XLS, XLSX) in immagini di alta qualità come PNG o JPG. Che tu voglia condividere tabelle in una presentazione, incorporare dati in un report o semplicemente preservare il layout del tuo foglio di calcolo esattamente come appare, CloudxDocs rende il processo fluido, accurato e sicuro.
Ora, segui i passaggi seguenti per convertire i tuoi file Excel in JPG/PNG con CloudxDocs:
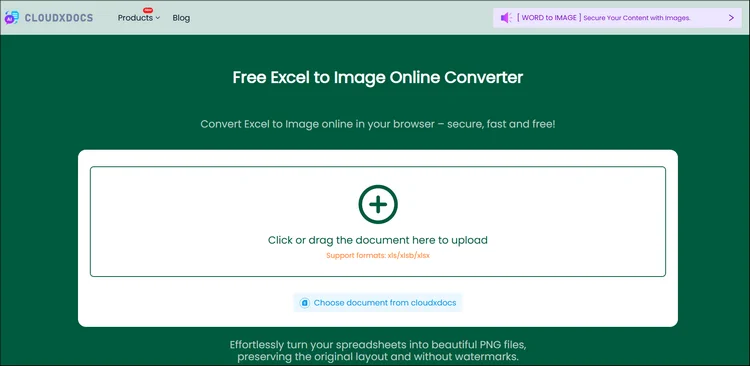
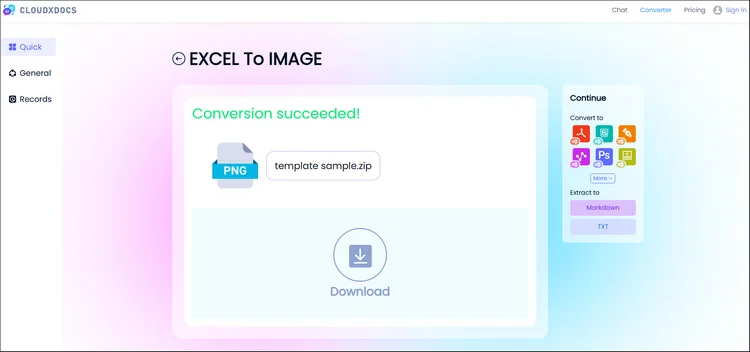
Passaggio 1. Vai alla pagina ufficiale di CloudxDocs Excel to Image Converter. Puoi caricare i tuoi file Excel facendo clic o trascinando il file nell'interfaccia principale.
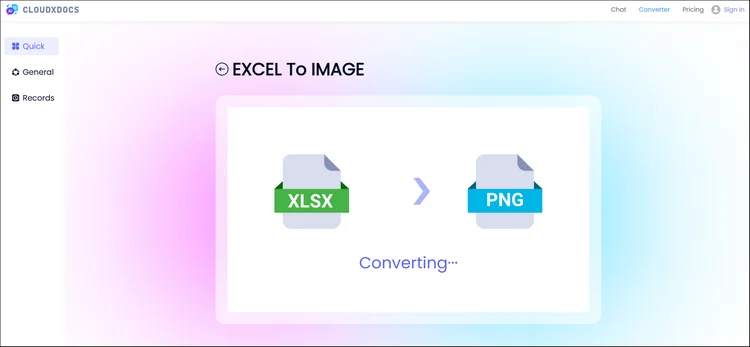
Passaggio 2. Dopo il caricamento, CloudxDocs inizierà ad analizzare il tuo file Excel e a convertirlo immediatamente in formato immagine. L'intero processo non richiederà molto tempo, quindi attendi solo pochi secondi.
Passaggio 3. CloudxDocs fornirà un file compresso con tutte le immagini convertite. Fai clic sul pulsante "Download" e decomprimi il file. Quindi, otterrai tutte le immagini convertite dal file Excel originale.
Metodo 3. (Avanzato) Salvare una Tabella di Excel come Immagine Programmaticamente in C#
Per gli sviluppatori o le organizzazioni che necessitano di automatizzare il processo di conversione in blocco o di integrarlo in un'applicazione, sono disponibili anche metodi programmatici. Questi approcci consentono di ottimizzare le conversioni su larga scala da Excel a immagine, ridurre il lavoro manuale e garantire una qualità di output costante su più file.
Incorporando la logica di conversione direttamente nel tuo flusso di lavoro o sistema, puoi generare facilmente tabelle basate su immagini per report, visualizzazione dei dati o documentazione. Una libreria di codice come Spire.XLS for .NET offre una soluzione professionale.
Breve Introduzione a Spire.XLS for .NET
Spire.XLS for .NET è una potente libreria di manipolazione di Excel sviluppata da E-ICEBLUE, che consente agli sviluppatori di creare, modificare, convertire e renderizzare file Excel senza che Microsoft Excel sia installato. Una delle sue funzionalità avanzate è quella di esportare fogli di lavoro o intervalli di Excel direttamente come immagini, mantenendo una precisa fedeltà visiva.

Funzionalità uniche per aiutarti a scegliere Spire.XLS for .NET:
- Conversione veloce e sicura da Excel a immagine: Converti rapidamente intervalli specifici di Excel o interi fogli di lavoro in immagini di alta qualità mantenendo i tuoi dati al sicuro in un ambiente locale.
- Conversione di alta qualità per diversi formati: Mantieni layout, colori e formattazione precisi durante l'esportazione in formati popolari tra cui PDF, TXT, HTML, ecc.
- Funzionalità più personalizzabili: Consenti agli sviluppatori di utilizzare funzionalità più personalizzate come rimuovere collegamenti ipertestuali, inserire e valutare formule, aggiungere grafici, ecc.
- Totalmente indipendente da Microsoft Office: Funziona senza problemi senza Microsoft Office, rendendolo ideale per l'implementazione su qualsiasi sistema o server.
Tutorial C# per Salvare File Excel in Formato Immagine con Spire.XLS for .NET
Passaggio 1. Installa prima la libreria di codice.
Puoi aggiungere la libreria di codice al tuo computer tramite due opzioni:
- Scarica dalla pagina di download ufficiale e aggiungi le dipendenze da solo.
- Scarica tramite NuGet con il codice seguente:
PM> Install-Package Spire.XLS
Passaggio 2. Copia e personalizza il codice in base alle tue esigenze.
Qui forniremo il codice di esempio per aiutarti a convertire senza problemi le tabelle di Excel in formato JPG/PNG. Non dimenticare di regolare elementi personalizzati come la posizione del file:
using Spire.Xls;
namespace Xls2Image

{
    class Program
    {
        static void Main(string[] args)
        {
            //Create a Workbook instance
            Workbook workbook = new Workbook();

            //Load an Excel sample document
            workbook.LoadFromFile( @"sample.xlsx");

            //Get the first worksheet
            Worksheet sheet = workbook.Worksheets[0];

            //Save the worksheet as an image
            sheet.SaveToImage("XlsToImage.jpg");
        }
    }
}
Ottieni maggiori dettagli in questo tutorial: Converti Excel in Immagini con C#
RISULTATO:
Suggerimenti per Ottenere i Migliori Risultati
Prima di iniziare a convertire i tuoi file Excel in immagini, alcune semplici regolazioni possono fare una grande differenza nell'output finale. Prestare attenzione a layout, formattazione e impostazioni dell'immagine aiuta a garantire che i file convertiti appaiano puliti e professionali.
Ecco alcuni suggerimenti pratici per aiutarti a ottenere i migliori risultati ogni volta.
- Prima della conversione, regola la larghezza delle colonne e l'altezza delle righe per un layout pulito.
- Usa dimensioni e colori dei caratteri coerenti per rendere la tua tabella visivamente accattivante.
- Quando si utilizza il codice, specificare intervalli di celle esatti per un controllo preciso.
- Per fogli di lavoro più grandi, considera l'esportazione in parti per mantenere la chiarezza.
Queste piccole ottimizzazioni possono fare una grande differenza quando si presentano visivamente i dati di Excel.
Conclusione
Salvare una tabella di Excel come immagine è uno dei modi più semplici ma più efficaci per condividere i tuoi dati in un formato pulito e visivamente coerente. Che tu stia inviando un'istantanea rapida di un report, incorporando grafici in una presentazione o preparando dati per la pubblicazione, la conversione delle tabelle di Excel in immagini garantisce che layout, colori e formattazione rimangano perfettamente conservati.
Per una condivisione una tantum, la funzione integrata di Microsoft Copia come immagine è la scelta più rapida e semplice. Se desideri un'opzione online rapida e intuitiva, CloudxDocs Online Excel to Image Converter gestisce i caricamenti nel browser e produce file PNG/JPG di alta qualità senza installazioni. Quando hai bisogno di automazione, elaborazione in blocco o controllo di livello aziendale, Spire.XLS for .NET consente agli sviluppatori di incorporare una conversione affidabile e offline da Excel a immagine direttamente nelle applicazioni.
Inizia a sperimentare oggi e scopri con quanta facilità puoi trasformare le tue tabelle di Excel in immagini condivisibili e di qualità professionale.
Leggi di più:
Como salvar uma tabela do Excel como imagem: Guia completo para todos os usuários
O Microsoft Excel é uma das ferramentas mais poderosas para gerenciar dados, criar relatórios e apresentar insights visualmente. No entanto, quando se trata de compartilhar suas tabelas do Excel — como gráficos, resumos financeiros ou dados formatados — você pode querer salvá-las como imagens. Isso permite que você as insira em apresentações, sites ou e-mails sem perder a formatação ou expor fórmulas.
Neste artigo, exploraremos como salvar uma tabela do Excel como imagem usando diretamente o Microsoft, ferramentas online e métodos de programação em C#. Seja você um usuário casual procurando uma conversão online rápida ou um desenvolvedor que precisa automatizar o processo, encontrará uma solução confiável aqui.
Aqui está uma breve lista para ajudá-lo a escolher os melhores métodos. Você pode clicar para ir para os tutoriais correspondentes:
- Método 1. Copiar e Colar para Enviar Tabelas do Excel em Formato de Imagem com o Microsoft: Ideal para compartilhamento rápido e único ou quando você só precisa capturar uma pequena seção da sua planilha do Excel.
- Método 2. Salvar Tabela do Excel em Formato de Imagem com Conversor Online: Ideal para usuários casuais ou não desenvolvedores que desejam uma maneira rápida e sem instalação de converter arquivos do Excel em imagens diretamente no navegador.
- Método 3. (Avançado) Converter Arquivos do Excel para Formato de Imagem com C#: Ideal para desenvolvedores e empresas para conversão em massa e personalização.
Método 1. Simplesmente Copie e Cole para Enviar Tabelas do Excel em Formato de Imagem
Vamos começar com a maneira mais fácil e direta de enviar sua tabela do Excel como imagem. Nenhuma ferramenta adicional ou etapas complexas são necessárias — apenas a função de copiar e colar integrada do Excel.
Basta seguir os passos abaixo:
Passo 1. Abra seu arquivo do Excel com o Microsoft e selecione as tabelas específicas que você gostaria de compartilhar.
Passo 2. Encontre a seção "Página Inicial" na Faixa de Opções. Você verá um menu suspenso para "Copiar". Clique na seta para baixo e clique em "Copiar como Imagem…" para continuar.
Passo 3. Então, você pode compartilhar a tabela em formato de imagem. Abra a caixa de bate-papo com a qual você gostaria de compartilhar e cole com Ctrl + V diretamente.
Método 2. Salvar Tabela do Excel como Imagem Online com CloudxDocs
Se você está procurando uma maneira rápida e fácil de transformar suas planilhas do Excel em formato de imagem, a conversão online é a melhor escolha. Com um conversor online, você só precisa carregar o arquivo Excel e baixar o arquivo de imagem convertido. Nenhuma etapa extra é necessária.
Para obter uma conversão mais suave, um bom conversor online é o ponto-chave. O Conversor Online de Excel para Imagem da CloudxDocs é a solução perfeita. Esta poderosa ferramenta baseada na web foi projetada para usuários profissionais e casuais. Garante a conversão instantânea de arquivos do Excel (XLS, XLSX) em imagens de alta qualidade, como PNG ou JPG. Se você deseja compartilhar tabelas em uma apresentação, incorporar dados em um relatório ou simplesmente preservar o layout da sua planilha exatamente como ele aparece, o CloudxDocs torna o processo contínuo, preciso e seguro.
Agora, siga os passos abaixo para converter seus arquivos do Excel para JPG/PNG com o CloudxDocs:
Passo 1. Acesse a página oficial do Conversor de Excel para Imagem da CloudxDocs. Você pode fazer o upload de seus arquivos do Excel clicando ou arrastando o arquivo para a interface principal.
Passo 2. Após o upload, o CloudxDocs começará a analisar seu arquivo do Excel e a convertê-lo para o formato de imagem imediatamente. O processo todo não levará muito tempo, então espere apenas alguns segundos.
Passo 3. O CloudxDocs fornecerá um arquivo compactado com todas as imagens convertidas. Clique no botão "Baixar" e descompacte o arquivo. Então, você obterá todas as imagens convertidas do arquivo original do Excel.
Método 3. (Avançado) Salvar Tabela do Excel como Imagem Programaticamente em C#
Para desenvolvedores ou organizações que precisam automatizar o processo de conversão em massa ou integrá-lo a um aplicativo, também existem métodos programáticos disponíveis. Essas abordagens permitem otimizar conversões de Excel para imagem em grande escala, reduzir o trabalho manual e garantir uma qualidade de saída consistente em vários arquivos.
Ao incorporar a lógica de conversão diretamente em seu fluxo de trabalho ou sistema, você pode gerar facilmente tabelas baseadas em imagens para relatórios, visualização de dados ou documentação. Bibliotecas de código como Spire.XLS for .NET oferecem uma solução profissional.
Breve Introdução sobre o Spire.XLS for .NET
O Spire.XLS for .NET é uma poderosa biblioteca de manipulação de Excel desenvolvida pela E-ICEBLUE, que permite aos desenvolvedores criar, editar, converter e renderizar arquivos do Excel sem o Microsoft Excel instalado. Uma de suas capacidades avançadas é exportar planilhas ou intervalos do Excel diretamente como imagens, mantendo uma fidelidade visual precisa.
Recursos exclusivos para ajudá-lo a escolher o Spire.XLS for .NET:
- Conversão rápida e segura de Excel para Imagem: Converta rapidamente intervalos específicos do Excel ou planilhas inteiras em imagens de alta qualidade, mantendo seus dados seguros em um ambiente local.
- Conversão de alta qualidade para diversos formatos: Mantenha o layout, a cor e a formatação precisos ao exportar para formatos populares, incluindo PDF, TXT, HTML, etc.
- Mais recursos personalizáveis: Permite que os desenvolvedores usem recursos mais personalizados, como remover hiperlinks, inserir e avaliar fórmulas, adicionar gráficos, etc.
- Totalmente independente do Microsoft Office: Funciona perfeitamente sem o Microsoft Office, tornando-o ideal para implantação em qualquer sistema ou servidor.
Tutorial em C# para Salvar Arquivos do Excel em Formato de Imagem com o Spire.XLS for .NET
Passo 1. Instale primeiro a biblioteca de código.
Você pode adicionar a biblioteca de código ao seu computador por meio de duas opções:
- Baixe da página de download oficial e adicione as dependências por conta própria.
- Baixe através do NuGet com o código abaixo:
PM> Install-Package Spire.XLS
Passo 2. Copie e personalize o código de acordo com suas necessidades.
Aqui, forneceremos o código de exemplo para ajudá-lo a converter tabelas do Excel para o formato JPG/PNG sem problemas. Não se esqueça de ajustar itens personalizados, como a localização do arquivo:
using Spire.Xls;
namespace Xls2Image

{
    class Program
    {
        static void Main(string[] args)
        {
            //Create a Workbook instance
            Workbook workbook = new Workbook();

            //Load an Excel sample document
            workbook.LoadFromFile( @"sample.xlsx");

            //Get the first worksheet
            Worksheet sheet = workbook.Worksheets[0];

            //Save the worksheet as an image
            sheet.SaveToImage("XlsToImage.jpg");
        }
    }
}
Obtenha mais detalhes neste tutorial: Converter Excel para Imagens com C#
RESULTADO:
Dicas para Obter os Melhores Resultados
Antes de começar a converter seus arquivos do Excel em imagens, alguns ajustes simples podem fazer uma grande diferença no resultado final. Prestar atenção ao layout, formatação e configurações de imagem ajuda a garantir que seus arquivos convertidos pareçam limpos e profissionais.
Aqui estão algumas dicas práticas para ajudá-lo a obter os melhores resultados sempre.
- Antes da conversão, ajuste a largura da coluna e a altura da linha para um layout limpo.
- Use tamanhos de fonte e cores consistentes para tornar sua tabela visualmente atraente.
- Ao usar código, especifique intervalos de células exatos para um controle preciso.
- Para planilhas maiores, considere exportar em partes para manter a clareza.
Essas pequenas otimizações podem fazer uma grande diferença ao apresentar seus dados do Excel visualmente.
Conclusão
Salvar uma tabela do Excel como imagem é uma das maneiras mais simples e eficazes de compartilhar seus dados em um formato limpo e visualmente consistente. Esteja você enviando um instantâneo rápido de um relatório, incorporando gráficos em uma apresentação ou preparando dados para publicação, converter suas tabelas do Excel em imagens garante que seu layout, cores e formatação permaneçam perfeitamente preservados.
Para um compartilhamento único, a função integrada do Microsoft Copiar como Imagem é a escolha mais rápida e simples. Se você deseja uma opção online rápida e fácil de usar, o Conversor Online de Excel para Imagem da CloudxDocs lida com uploads no navegador e produz arquivos PNG/JPG de alta qualidade sem instalações. Quando você precisa de automação, processamento em massa ou controle de nível empresarial, o Spire.XLS for .NET permite que os desenvolvedores incorporem uma conversão confiável e offline de Excel para imagem diretamente nos aplicativos.
Comece a experimentar hoje e descubra como é fácil transformar suas tabelas do Excel em imagens compartilháveis e de qualidade profissional.
Leia Mais:
Excel 표를 이미지로 저장하는 방법: 모든 사용자를 위한 완벽 가이드
Microsoft Excel은 데이터를 관리하고, 보고서를 작성하며, 통찰력을 시각적으로 제시하는 가장 강력한 도구 중 하나입니다. 그러나 차트, 재무 요약 또는 서식이 지정된 데이터와 같은 Excel 표를 공유할 때는 이미지로 저장하는 것이 좋습니다. 이렇게 하면 서식을 잃거나 수식을 노출하지 않고 프레젠테이션, 웹사이트 또는 이메일에 삽입할 수 있습니다.
이 기사에서는 Microsoft를 직접 사용하거나, 온라인 도구 및 C# 프로그래밍 방법을 사용하여 Excel 표를 이미지로 저장하는 방법을 살펴보겠습니다. 빠른 온라인 변환을 찾는 일반 사용자이든, 프로세스를 자동화해야 하는 개발자이든, 여기에서 신뢰할 수 있는 솔루션을 찾을 수 있습니다.
다음은 최상의 방법을 선택하는 데 도움이 되는 간단한 목록입니다. 클릭하여 해당 튜토리얼로 이동할 수 있습니다:
- 방법 1. Microsoft로 복사하여 붙여넣기로 Excel 표를 이미지 형식으로 보내기: 빠르고 일회성으로 공유하거나 Excel 시트의 작은 부분만 캡처해야 할 때 가장 좋습니다.
- 방법 2. 온라인 변환기로 Excel 표를 이미지 형식으로 저장하기: 브라우저에서 직접 Excel 파일을 이미지로 변환하는 빠르고 설치가 필요 없는 방법을 원하는 일반 사용자나 비개발자에게 가장 좋습니다.
- 방법 3. (고급) C#으로 Excel 파일을 이미지 형식으로 변환하기: 대량 변환 및 사용자 정의가 필요한 개발자 및 기업에 가장 좋습니다.
방법 1. 간단히 복사하여 붙여넣기로 Excel 표를 이미지 형식으로 보내기
Excel 표를 이미지로 보내는 가장 쉽고 간단한 방법부터 시작하겠습니다. 추가 도구나 복잡한 단계가 필요 없으며, Excel의 내장된 복사 및 붙여넣기 기능만 사용하면 됩니다.
아래 단계를 따르기만 하면 됩니다:
1단계. Microsoft로 Excel 파일을 열고 공유하려는 특정 표를 선택합니다.
2단계. 리본에서 "홈" 섹션을 찾습니다. "복사"에 대한 드롭다운 메뉴가 표시됩니다. 아래쪽 화살표를 클릭하고 "그림으로 복사…"를 클릭하여 계속합니다.
3단계. 그런 다음 표를 이미지 형식으로 공유할 수 있습니다. 공유하려는 채팅 상자를 열고 Ctrl + V를 사용하여 직접 붙여넣습니다.
방법 2. CloudxDocs를 사용하여 온라인에서 Excel 표를 이미지로 저장하기
Excel 스프레드시트를 이미지 형식으로 빠르고 간편하게 변환하는 방법을 찾고 있다면 온라인 변환이 최선의 선택입니다. 온라인 변환기를 사용하면 Excel 파일을 업로드하고 변환된 이미지 파일을 다운로드하기만 하면 됩니다. 추가 단계가 필요하지 않습니다.
보다 원활한 변환을 위해서는 좋은 온라인 변환기가 핵심입니다. CloudxDocs 온라인 Excel-이미지 변환기는 완벽한 솔루션입니다. 이 강력한 웹 기반 도구는 전문가와 일반 사용자 모두를 위해 설계되었습니다. Excel 파일(XLS, XLSX)을 PNG 또는 JPG와 같은 고품질 이미지로 즉시 변환합니다. 프레젠테이션에서 표를 공유하거나, 보고서에 데이터를 포함하거나, 단순히 스프레드시트 레이아웃을 그대로 보존하려는 경우, CloudxDocs는 프로세스를 원활하고 정확하며 안전하게 만듭니다.
이제 아래 단계에 따라 CloudxDocs로 Excel 파일을 JPG/PNG로 변환하십시오:
1단계. CloudxDocs Excel-이미지 변환기의 공식 페이지로 이동합니다. 파일을 클릭하거나 주 인터페이스로 드래그하여 Excel 파일을 업로드할 수 있습니다.
2단계. 업로드 후 CloudxDocs는 Excel 파일을 분석하고 즉시 이미지 형식으로 변환하기 시작합니다. 전체 프로세스는 시간이 많이 걸리지 않으므로 몇 초만 기다리면 됩니다.
3단계. CloudxDocs는 변환된 모든 이미지가 포함된 압축 파일을 제공합니다. "다운로드" 버튼을 클릭하고 파일의 압축을 풉니다. 그러면 원본 Excel 파일에서 변환된 모든 이미지를 얻을 수 있습니다.
방법 3. (고급) C#에서 프로그래밍 방식으로 Excel 표를 이미지로 저장하기
대량으로 변환 프로세스를 자동화하거나 응용 프로그램에 통합해야 하는 개발자나 조직을 위해 프로그래밍 방식의 방법도 사용할 수 있습니다. 이러한 접근 방식을 사용하면 대규모 Excel-이미지 변환을 간소화하고, 수동 작업을 줄이며, 여러 파일에서 일관된 출력 품질을 보장할 수 있습니다.
변환 로직을 워크플로우나 시스템에 직접 내장함으로써 보고, 데이터 시각화 또는 문서화를 위한 이미지 기반 표를 쉽게 생성할 수 있습니다. Spire.XLS for .NET과 같은 코드 라이브러리는 전문적인 솔루션을 제공합니다.
Spire.XLS for .NET에 대한 간략한 소개
Spire.XLS for .NET은 E-ICEBLUE에서 개발한 강력한 Excel 조작 라이브러리로, 개발자가 Microsoft Excel을 설치하지 않고도 Excel 파일을 생성, 편집, 변환 및 렌더링할 수 있도록 합니다. 고급 기능 중 하나는 Excel 워크시트나 범위를 이미지로 직접 내보내면서 정밀한 시각적 충실도를 유지하는 것입니다.
Spire.XLS for .NET을 선택하는 데 도움이 되는 고유한 기능:
- 빠르고 안전한 Excel-이미지 변환: 로컬 환경 내에서 데이터를 안전하게 유지하면서 특정 Excel 범위나 전체 워크시트를 고품질 이미지로 빠르게 변환합니다.
- 다양한 형식에 대한 고품질 변환: PDF, TXT, HTML 등과 같은 인기 있는 형식으로 내보낼 때 정확한 레이아웃, 색상 및 서식을 유지합니다.
- 더 많은 사용자 정의 기능: 개발자가 하이퍼링크 제거, 수식 삽입 및 평가, 차트 추가 등과 같은 더 많은 사용자 정의 기능을 수행할 수 있도록 합니다.
- Microsoft Office로부터 완전히 독립적: Microsoft Office 없이도 원활하게 작동하므로 모든 시스템이나 서버에 배포하기에 이상적입니다.
Spire.XLS for .NET을 사용하여 C#에서 Excel 파일을 이미지 형식으로 저장하는 튜토리얼
1단계. 먼저 코드 라이브러리를 설치합니다.
두 가지 옵션을 통해 컴퓨터에 코드 라이브러리를 추가할 수 있습니다:
- 공식 다운로드 웹페이지에서 다운로드하고 직접 종속성을 추가합니다.
- 아래 코드를 사용하여 NuGet을 통해 다운로드합니다:
PM> Install-Package Spire.XLS
2단계. 필요에 따라 코드를 복사하고 사용자 정의합니다.
여기서는 Excel 표를 JPG/PNG 형식으로 원활하게 변환하는 데 도움이 되는 예제 코드를 제공합니다. 파일 위치와 같은 사용자 정의 사항을 조정하는 것을 잊지 마십시오:
using Spire.Xls;
namespace Xls2Image

{
    class Program
    {
        static void Main(string[] args)
        {
            //Create a Workbook instance
            Workbook workbook = new Workbook();

            //Load an Excel sample document
            workbook.LoadFromFile( @"sample.xlsx");

            //Get the first worksheet
            Worksheet sheet = workbook.Worksheets[0];

            //Save the worksheet as an image
            sheet.SaveToImage("XlsToImage.jpg");
        }
    }
}
이 튜토리얼에서 자세한 내용을 확인하세요: C#으로 Excel을 이미지로 변환하기
결과:
최상의 결과를 얻기 위한 팁
Excel 파일을 이미지로 변환하기 전에 몇 가지 간단한 조정만으로도 최종 출력물에 큰 차이를 만들 수 있습니다. 레이아웃, 서식 및 이미지 설정에 주의를 기울이면 변환된 파일이 깨끗하고 전문적으로 보이도록 할 수 있습니다.
다음은 매번 최상의 결과를 얻는 데 도움이 되는 몇 가지 실용적인 팁입니다.
- 변환하기 전에 열 너비와 행 높이를 조정하여 깔끔한 레이아웃을 만듭니다.
- 일관된 글꼴 크기와 색상을 사용하여 표를 시각적으로 매력적으로 만듭니다.
- 코드를 사용할 때 정확한 제어를 위해 정확한 셀 범위를 지정합니다.
- 더 큰 워크시트의 경우 명확성을 유지하기 위해 부분적으로 내보내는 것을 고려합니다.
이러한 작은 최적화는 Excel 데이터를 시각적으로 제시할 때 큰 차이를 만들 수 있습니다.
결론
Excel 표를 이미지로 저장하는 것은 데이터를 깨끗하고 시각적으로 일관된 형식으로 공유하는 가장 간단하면서도 효과적인 방법 중 하나입니다. 보고서의 빠른 스냅샷을 보내거나, 프레젠테이션에 차트를 포함하거나, 출판을 위해 데이터를 준비할 때 Excel 표를 이미지로 변환하면 레이아웃, 색상 및 서식이 완벽하게 보존됩니다.
일회성 공유의 경우 Microsoft의 내장된 그림으로 복사가 가장 빠르고 간단한 선택입니다. 빠르고 사용자 친화적인 온라인 옵션을 원한다면 CloudxDocs 온라인 Excel-이미지 변환기가 브라우저에서 업로드를 처리하고 설치 없이 고품질 PNG/JPG 파일을 생성합니다. 자동화, 대량 처리 또는 엔터프라이즈급 제어가 필요한 경우 Spire.XLS for .NET을 사용하면 개발자가 신뢰할 수 있는 오프라인 Excel-이미지 변환을 응용 프로그램에 직접 내장할 수 있습니다.
오늘 바로 실험을 시작하여 Excel 표를 공유 가능하고 전문가 수준의 이미지로 얼마나 쉽게 변환할 수 있는지 알아보십시오.
더 읽어보기:
Comment enregistrer un tableau Excel en tant qu'image : Guide complet pour tous les utilisateurs
Table des matières
Microsoft Excel est l'un des outils les plus puissants pour gérer les données, créer des rapports et présenter des informations visuellement. Cependant, lorsqu'il s'agit de partager vos tableaux Excel — tels que des graphiques, des résumés financiers ou des données formatées — vous pourriez vouloir les enregistrer en tant qu'images. Cela vous permet de les insérer dans des présentations, des sites web ou des e-mails sans perdre la mise en forme ni exposer les formules.
Dans cet article, nous explorerons comment enregistrer un tableau Excel en tant qu'image en utilisant directement Microsoft, des outils en ligne et des méthodes de programmation en C#. Que vous soyez un utilisateur occasionnel à la recherche d'une conversion en ligne rapide ou un développeur ayant besoin d'automatiser le processus, vous trouverez ici une solution fiable.
Voici une courte liste pour vous aider à choisir les meilleures méthodes. Vous pouvez cliquer pour accéder aux tutoriels correspondants :
- Méthode 1. Copier-coller pour envoyer des tableaux Excel au format image avec Microsoft : Idéal pour un partage rapide et unique ou lorsque vous n'avez besoin de capturer qu'une petite section de votre feuille Excel.
- Méthode 2. Enregistrer un tableau Excel au format image avec un convertisseur en ligne : Idéal pour les utilisateurs occasionnels ou les non-développeurs qui souhaitent un moyen rapide et sans installation de convertir des fichiers Excel en images directement dans le navigateur.
- Méthode 3. (Avancé) Convertir des fichiers Excel au format image avec C# : Idéal pour les développeurs et les entreprises pour la conversion en masse et la personnalisation.
Méthode 1. Simplement copier-coller pour envoyer des tableaux Excel au format image
Commençons par le moyen le plus simple et le plus direct d'envoyer votre tableau Excel en tant qu'image. Aucun outil supplémentaire ni étape complexe n'est nécessaire — juste la fonction copier-coller intégrée d'Excel.
Suivez simplement les étapes ci-dessous :
Étape 1. Ouvrez votre fichier Excel avec Microsoft et sélectionnez les tableaux spécifiques que vous souhaitez partager.
Étape 2. Trouvez la section "Accueil" dans le ruban. Vous verrez un menu déroulant pour "Copier". Cliquez sur la flèche vers le bas et cliquez sur "Copier en tant qu'image…" pour continuer.
Étape 3. Ensuite, vous pouvez partager le tableau au format image. Ouvrez la boîte de discussion avec laquelle vous souhaitez partager et collez directement avec Ctrl + V.
Méthode 2. Enregistrer un tableau Excel en tant qu'image en ligne avec CloudxDocs
Si vous cherchez un moyen rapide et simple de transformer vos feuilles de calcul Excel en format image, la conversion en ligne est le meilleur choix. Avec un convertisseur en ligne, il vous suffit de télécharger le fichier Excel et de télécharger le fichier image converti. Aucune étape supplémentaire n'est requise.
Pour une conversion plus fluide, un bon convertisseur en ligne est essentiel. Le Convertisseur Excel en Image en ligne de CloudxDocs est la solution parfaite. Cet outil puissant basé sur le web est conçu pour les utilisateurs professionnels et occasionnels. Il assure une conversion instantanée des fichiers Excel (XLS, XLSX) en images de haute qualité telles que PNG ou JPG. Que vous souhaitiez partager des tableaux dans une présentation, intégrer des données dans un rapport ou simplement préserver la mise en page de votre feuille de calcul exactement telle qu'elle apparaît, CloudxDocs rend le processus transparent, précis et sécurisé.
Maintenant, suivez les étapes ci-dessous pour convertir vos fichiers Excel en JPG/PNG avec CloudxDocs :
Étape 1. Allez sur la page officielle du Convertisseur Excel en Image de CloudxDocs. Vous pouvez télécharger vos fichiers Excel en cliquant ou en faisant glisser le fichier vers l'interface principale.
Étape 2. Après le téléchargement, CloudxDocs commencera à analyser votre fichier Excel et à le convertir immédiatement au format image. L'ensemble du processus ne prendra pas beaucoup de temps, alors attendez quelques secondes.
Étape 3. CloudxDocs fournira un fichier compressé avec toutes les images converties. Cliquez sur le bouton "Télécharger" et décompressez le fichier. Ensuite, vous obtiendrez toutes les images converties à partir du fichier Excel d'origine.
Méthode 3. (Avancé) Enregistrer un tableau Excel en tant qu'image par programmation en C#
Pour les développeurs ou les organisations qui ont besoin d'automatiser le processus de conversion en masse ou de l'intégrer dans une application, des méthodes programmatiques sont également disponibles. Ces approches vous permettent de rationaliser les conversions Excel-image à grande échelle, de réduire le travail manuel et d'assurer une qualité de sortie constante sur plusieurs fichiers.
En intégrant la logique de conversion directement dans votre flux de travail ou votre système, vous pouvez facilement générer des tableaux basés sur des images pour les rapports, la visualisation de données ou la documentation. Une bibliothèque de code comme Spire.XLS for .NET offre une solution professionnelle.
Brève introduction à Spire.XLS for .NET
Spire.XLS for .NET est une puissante bibliothèque de manipulation Excel développée par E-ICEBLUE, permettant aux développeurs de créer, modifier, convertir et rendre des fichiers Excel sans que Microsoft Excel soit installé. L'une de ses capacités avancées est d'exporter des feuilles de calcul ou des plages Excel directement en tant qu'images, en maintenant une fidélité visuelle précise.
Fonctionnalités uniques pour vous aider à choisir Spire.XLS for .NET :
- Conversion rapide et sécurisée d'Excel en image : Convertissez rapidement des plages Excel spécifiques ou des feuilles de calcul entières en images de haute qualité tout en gardant vos données en sécurité dans un environnement local.
- Conversion de haute qualité pour divers formats : Maintenez une mise en page, des couleurs et une mise en forme précises lors de l'exportation vers des formats populaires, y compris PDF, TXT, HTML, etc.
- Fonctionnalités plus personnalisables : Permet aux développeurs d'utiliser des fonctionnalités plus personnalisées comme la suppression des hyperliens, l'insertion et l'évaluation de formules, l'ajout de graphiques, etc.
- Totalement indépendant de Microsoft Office : Fonctionne de manière transparente sans Microsoft Office, ce qui le rend idéal pour un déploiement sur n'importe quel système ou serveur.
Tutoriel C# pour enregistrer des fichiers Excel au format image avec Spire.XLS for .NET
Étape 1. Installez d'abord la bibliothèque de code.
Vous pouvez ajouter la bibliothèque de code à votre ordinateur via deux options :
- Téléchargez depuis la page de téléchargement officielle et ajoutez les dépendances vous-même.
- Téléchargez via NuGet avec le code ci-dessous :
PM> Install-Package Spire.XLS
Étape 2. Copiez et personnalisez le code selon vos besoins.
Nous fournirons ici l'exemple de code pour vous aider à convertir en douceur les tableaux Excel au format JPG/PNG. N'oubliez pas d'ajuster les éléments personnalisés comme l'emplacement du fichier :
using Spire.Xls;
namespace Xls2Image

{
    class Program
    {
        static void Main(string[] args)
        {
            //Create a Workbook instance
            Workbook workbook = new Workbook();

            //Load an Excel sample document
            workbook.LoadFromFile( @"sample.xlsx");

            //Get the first worksheet
            Worksheet sheet = workbook.Worksheets[0];

            //Save the worksheet as an image
            sheet.SaveToImage("XlsToImage.jpg");
        }
    }
}
Obtenez plus de détails dans ce tutoriel : Convertir Excel en images avec C#
RÉSULTAT :
Conseils pour obtenir les meilleurs résultats
Avant de commencer à convertir vos fichiers Excel en images, quelques ajustements simples peuvent faire une grande différence dans le résultat final. Prêter attention à la mise en page, à la mise en forme et aux paramètres de l'image permet de garantir que vos fichiers convertis aient un aspect propre et professionnel.
Voici quelques conseils pratiques pour vous aider à obtenir les meilleurs résultats à chaque fois.
- Avant la conversion, ajustez la largeur des colonnes et la hauteur des lignes pour une mise en page propre.
- Utilisez des tailles de police et des couleurs cohérentes pour rendre votre tableau visuellement attrayant.
- Lorsque vous utilisez du code, spécifiez des plages de cellules exactes pour un contrôle précis.
- Pour les feuilles de calcul plus grandes, envisagez d'exporter par parties pour maintenir la clarté.
Ces petites optimisations peuvent faire une grande différence lors de la présentation visuelle de vos données Excel.
Conclusion
Enregistrer un tableau Excel en tant qu'image est l'un des moyens les plus simples mais les plus efficaces de partager vos données dans un format propre et visuellement cohérent. Que vous envoyiez un aperçu rapide d'un rapport, intégriez des graphiques dans une présentation ou prépariez des données pour publication, la conversion de vos tableaux Excel en images garantit que votre mise en page, vos couleurs et votre mise en forme restent parfaitement préservées.
Pour un partage unique, la fonction intégrée de Microsoft Copier en tant qu'image est le choix le plus rapide et le plus simple. Si vous voulez une option en ligne rapide et conviviale, le Convertisseur Excel en Image en ligne de CloudxDocs gère les téléchargements dans le navigateur et produit des fichiers PNG/JPG de haute qualité sans installation. Lorsque vous avez besoin d'automatisation, de traitement en masse ou d'un contrôle de niveau entreprise, Spire.XLS for .NET permet aux développeurs d'intégrer une conversion Excel-image fiable et hors ligne directement dans les applications.
Commencez à expérimenter dès aujourd'hui et découvrez avec quelle facilité vous pouvez transformer vos tableaux Excel en images partageables de qualité professionnelle.
Lire la suite :
Cómo guardar una tabla de Excel como imagen: Guía completa para todos los usuarios
Tabla de Contenidos
Microsoft Excel es una de las herramientas más potentes para gestionar datos, crear informes y presentar información visualmente. Sin embargo, a la hora de compartir tus tablas de Excel —como gráficos, resúmenes financieros o datos con formato— puede que quieras guardarlas como imágenes. Esto te permite insertarlas en presentaciones, sitios web o correos electrónicos sin perder el formato ni exponer las fórmulas.
En este artículo, exploraremos cómo guardar una tabla de Excel como imagen utilizando directamente Microsoft, herramientas en línea y métodos de programación en C#. Tanto si eres un usuario ocasional que busca una conversión rápida en línea como si eres un desarrollador que necesita automatizar el proceso, aquí encontrarás una solución fiable.
Aquí tienes una breve lista para ayudarte a elegir los mejores métodos. Puedes hacer clic para saltar a los tutoriales correspondientes:
- Método 1. Copiar y Pegar para Enviar Tablas de Excel en Formato de Imagen con Microsoft: Ideal para compartir rápidamente una sola vez o cuando solo necesitas capturar una pequeña sección de tu hoja de Excel.
- Método 2. Guardar Tabla de Excel en Formato de Imagen con un Convertidor en Línea: Ideal para usuarios ocasionales o no desarrolladores que desean una forma rápida y sin instalación de convertir archivos de Excel a imágenes directamente en el navegador.
- Método 3. (Avanzado) Convertir Archivos de Excel a Formato de Imagen con C#: Ideal para desarrolladores y empresas para la conversión masiva y personalización.
Método 1. Simplemente Copiar y Pegar para Enviar Tablas de Excel en Formato de Imagen
Empecemos con la forma más fácil y directa de enviar tu tabla de Excel como imagen. No se necesitan herramientas adicionales ni pasos complejos, solo la función de copiar y pegar integrada de Excel.
Solo sigue los pasos a continuación:
Paso 1. Abre tu archivo de Excel con Microsoft y selecciona las tablas específicas que te gustaría compartir.
Paso 2. Encuentra la sección "Inicio" en la Cinta de opciones. Verás un menú desplegable para "Copiar". Haz clic en la flecha hacia abajo y haz clic en "Copiar como imagen…" para continuar.
Paso 3. Luego, puedes compartir la tabla en formato de imagen. Abre el cuadro de chat con el que te gustaría compartir y pega con Ctrl + V directamente.
Método 2. Guardar Tabla de Excel como Imagen en Línea con CloudxDocs
Si busca una forma rápida y sencilla de convertir sus hojas de cálculo de Excel a formato de imagen, la conversión en línea es la mejor opción. Con un convertidor en línea, solo necesita cargar el archivo de Excel y descargar el archivo de imagen convertido. No se requieren pasos adicionales.
Para obtener una conversión más fluida, un buen convertidor en línea es el punto clave. El Convertidor de Excel a Imagen en Línea de CloudxDocs es la solución perfecta. Esta potente herramienta basada en la web está diseñada tanto para usuarios profesionales como ocasionales. Asegura una conversión instantánea de archivos de Excel (XLS, XLSX) a imágenes de alta calidad como PNG o JPG. Ya sea que desees compartir tablas en una presentación, incrustar datos en un informe o simplemente preservar el diseño de tu hoja de cálculo exactamente como aparece, CloudxDocs hace que el proceso sea fluido, preciso y seguro.
Ahora, sigue los pasos a continuación para convertir tus archivos de Excel a JPG/PNG con CloudxDocs:
Paso 1. Ve a la página oficial del Convertidor de Excel a Imagen de CloudxDocs. Puedes subir tus archivos de Excel haciendo clic o arrastrando el archivo a la interfaz principal.
Paso 2. Después de subirlo, CloudxDocs comenzará a analizar tu archivo de Excel y a convertirlo a formato de imagen inmediatamente. Todo el proceso no tomará mucho tiempo, así que solo espera unos segundos.
Paso 3. CloudxDocs proporcionará un archivo comprimido con todas las imágenes convertidas. Haz clic en el botón "Descargar" y descomprime el archivo. Luego, obtendrás todas las imágenes convertidas del archivo de Excel original.
Método 3. (Avanzado) Guardar Tabla de Excel como Imagen Programáticamente en C#
Para desarrolladores u organizaciones que necesitan automatizar el proceso de conversión en masa o integrarlo en una aplicación, también existen métodos programáticos disponibles. Estos enfoques te permiten optimizar las conversiones de Excel a imagen a gran escala, reducir el trabajo manual y garantizar una calidad de salida constante en múltiples archivos.
Al incrustar la lógica de conversión directamente en tu flujo de trabajo o sistema, puedes generar fácilmente tablas basadas en imágenes para informes, visualización de datos o documentación. Una biblioteca de código como Spire.XLS for .NET ofrece una solución profesional.
Breve Introducción sobre Spire.XLS for .NET
Spire.XLS for .NET es una potente biblioteca de manipulación de Excel desarrollada por E-ICEBLUE, que permite a los desarrolladores crear, editar, convertir y renderizar archivos de Excel sin tener Microsoft Excel instalado. Una de sus capacidades avanzadas es exportar hojas de cálculo o rangos de Excel directamente como imágenes, manteniendo una fidelidad visual precisa.
Características únicas para ayudarte a elegir Spire.XLS for .NET:
- Conversión rápida y segura de Excel a imagen: Convierte rápidamente rangos específicos de Excel o hojas de cálculo enteras a imágenes de alta calidad mientras mantienes tus datos seguros en un entorno local.
- Conversión de alta calidad para diversos formatos: Mantiene el diseño, el color y el formato precisos al exportar a formatos populares, incluidos PDF, TXT, HTML, etc.
- Más funciones personalizables: Permite a los desarrolladores realizar más funciones personalizadas como eliminar hipervínculos, insertar y evaluar fórmulas, agregar gráficos, etc.
- Totalmente independiente de Microsoft Office: Funciona sin problemas sin Microsoft Office, lo que lo hace ideal para su implementación en cualquier sistema o servidor.
Tutorial de C# para Guardar Archivos de Excel en Formato de Imagen con Spire.XLS for .NET
Paso 1. Instala primero la biblioteca de código.
Puedes agregar la biblioteca de código a tu computadora a través de dos opciones:
- Descargar desde la página de descarga oficial y agregar las dependencias por tu cuenta.
- Descargar a través de NuGet con el siguiente código:
PM> Install-Package Spire.XLS
Paso 2. Copia y personaliza el código según tus necesidades.
Aquí proporcionaremos el código de ejemplo para ayudarte a convertir tablas de Excel a formato JPG/PNG sin problemas. No olvides ajustar cosas personalizadas como la ubicación del archivo:
using Spire.Xls;
namespace Xls2Image

{
    class Program
    {
        static void Main(string[] args)
        {
            //Create a Workbook instance
            Workbook workbook = new Workbook();

            //Load an Excel sample document
            workbook.LoadFromFile( @"sample.xlsx");

            //Get the first worksheet
            Worksheet sheet = workbook.Worksheets[0];

            //Save the worksheet as an image
            sheet.SaveToImage("XlsToImage.jpg");
        }
    }
}
Obtén más detalles en este tutorial: Convertir Excel a Imágenes con C#
RESULTADO:
Consejos para Obtener los Mejores Resultados
Antes de comenzar a convertir tus archivos de Excel a imágenes, algunos ajustes simples pueden marcar una gran diferencia en el resultado final. Prestar atención al diseño, el formato y la configuración de la imagen ayuda a garantizar que tus archivos convertidos se vean limpios y profesionales.
Aquí tienes algunos consejos prácticos para ayudarte a obtener los mejores resultados cada vez.
- Antes de la conversión, ajusta el ancho de las columnas y el alto de las filas para un diseño limpio.
- Usa tamaños de fuente y colores consistentes para que tu tabla sea visualmente atractiva.
- Cuando uses código, especifica los rangos de celdas exactos para un control preciso.
- Para hojas de cálculo más grandes, considera exportar por partes para mantener la claridad.
Estas pequeñas optimizaciones pueden marcar una gran diferencia al presentar tus datos de Excel visualmente.
Conclusión
Guardar una tabla de Excel como imagen es una de las formas más simples pero efectivas de compartir tus datos en un formato limpio y visualmente consistente. Ya sea que estés enviando una instantánea rápida de un informe, incrustando gráficos en una presentación o preparando datos para su publicación, convertir tus tablas de Excel a imágenes garantiza que tu diseño, colores y formato se conserven perfectamente.
Para compartir una sola vez, la función integrada de Microsoft Copiar como imagen es la opción más rápida y sencilla. Si deseas una opción en línea rápida y fácil de usar, el Convertidor de Excel a Imagen en Línea de CloudxDocs maneja las subidas en el navegador y produce archivos PNG/JPG de alta calidad sin instalaciones. Cuando necesitas automatización, procesamiento por lotes o control a nivel empresarial, Spire.XLS for .NET permite a los desarrolladores incrustar una conversión fiable y sin conexión de Excel a imagen directamente en las aplicaciones.
Comienza a experimentar hoy y descubre con qué facilidad puedes convertir tus tablas de Excel en imágenes compartibles y de calidad profesional.
Leer Más:
Wie man eine Excel-Tabelle als Bild speichert: Vollständige Anleitung für jeden Benutzer
Microsoft Excel ist eines der leistungsstärksten Werkzeuge zur Verwaltung von Daten, zur Erstellung von Berichten und zur visuellen Präsentation von Einblicken. Wenn es jedoch darum geht, Ihre Excel-Tabellen – wie Diagramme, Finanzzusammenfassungen oder formatierte Daten – zu teilen, möchten Sie sie möglicherweise als Bilder speichern. Dies ermöglicht es Ihnen, sie in Präsentationen, Websites oder E-Mails einzufügen, ohne die Formatierung zu verlieren oder Formeln preiszugeben.
In diesem Artikel werden wir untersuchen, wie man eine Excel-Tabelle als Bild speichert, indem man Microsoft direkt, Online-Tools und C#-Programmiermethoden verwendet. Ob Sie ein gelegentlicher Benutzer sind, der eine schnelle Online-Konvertierung sucht, oder ein Entwickler, der den Prozess automatisieren muss, hier finden Sie eine zuverlässige Lösung.
Hier ist eine kurze Liste, die Ihnen bei der Auswahl der besten Methoden hilft. Sie können klicken, um zu den entsprechenden Tutorials zu springen:
- Methode 1. Kopieren und Einfügen, um Excel-Tabellen im Bildformat mit Microsoft zu senden: Am besten für schnelles, einmaliges Teilen oder wenn Sie nur einen kleinen Teil Ihres Excel-Blatts erfassen müssen.
- Methode 2. Excel-Tabelle im Bildformat mit Online-Konverter speichern: Am besten für gelegentliche Benutzer oder Nicht-Entwickler, die eine schnelle, installationsfreie Möglichkeit suchen, Excel-Dateien direkt im Browser in Bilder umzuwandeln.
- Methode 3. (Fortgeschritten) Excel-Dateien mit C# ins Bildformat konvertieren: Am besten für Entwickler und Unternehmen zur Massenkonvertierung und Anpassung.
Methode 1. Einfach kopieren und einfügen, um Excel-Tabellen im Bildformat zu senden
Beginnen wir mit der einfachsten und direktesten Methode, Ihre Excel-Tabelle als Bild zu senden. Es sind keine zusätzlichen Werkzeuge oder komplexen Schritte erforderlich – nur die integrierte Kopier- und Einfügefunktion von Excel.
Folgen Sie einfach den nachstehenden Schritten:
Schritt 1. Öffnen Sie Ihre Excel-Datei mit Microsoft und wählen Sie die spezifischen Tabellen aus, die Sie teilen möchten.
Schritt 2. Finden Sie den Abschnitt „Start“ im Menüband. Sie sehen ein Dropdown-Menü für „Kopieren“. Klicken Sie auf den nach unten zeigenden Pfeil und dann auf „Als Bild kopieren…“, um fortzufahren.
Schritt 3. Dann können Sie die Tabelle im Bildformat teilen. Öffnen Sie das Chatfenster, mit dem Sie teilen möchten, und fügen Sie es direkt mit Strg + V ein.
Methode 2. Excel-Tabelle online als Bild mit CloudxDocs speichern
Wenn Sie nach einer schnellen und problemlosen Möglichkeit suchen, Ihre Excel-Tabellen in ein Bildformat umzuwandeln, ist die Online-Konvertierung die beste Wahl. Mit einem Online-Konverter müssen Sie nur die Excel-Datei hochladen und die konvertierte Bilddatei herunterladen. Es sind keine zusätzlichen Schritte erforderlich.
Für eine reibungslosere Konvertierung ist ein guter Online-Konverter der entscheidende Punkt. Der CloudxDocs Online Excel to Image Converter ist die perfekte Lösung. Dieses leistungsstarke webbasierte Tool ist sowohl für professionelle als auch für gelegentliche Benutzer konzipiert. Es gewährleistet eine sofortige Konvertierung von Excel-Dateien (XLS, XLSX) in hochwertige Bilder wie PNG oder JPG. Ob Sie Tabellen in einer Präsentation teilen, Daten in einen Bericht einbetten oder einfach nur Ihr Tabellenlayout genau so beibehalten möchten, wie es erscheint, CloudxDocs macht den Prozess nahtlos, genau und sicher.
Folgen Sie nun den nachstehenden Schritten, um Ihre Excel-Dateien mit CloudxDocs in JPG/PNG zu konvertieren:
Schritt 1. Gehen Sie zur offiziellen Seite des CloudxDocs Excel to Image Converter. Sie können Ihre Excel-Dateien hochladen, indem Sie auf die Hauptoberfläche klicken oder die Datei dorthin ziehen.
Schritt 2. Nach dem Hochladen beginnt CloudxDocs sofort mit der Analyse Ihrer Excel-Datei und der Konvertierung in das Bildformat. Der gesamte Vorgang dauert nicht lange, also warten Sie einfach ein paar Sekunden.
Schritt 3. CloudxDocs stellt eine komprimierte Datei mit allen konvertierten Bildern zur Verfügung. Klicken Sie auf die Schaltfläche „Herunterladen“ und entpacken Sie die Datei. Dann erhalten Sie alle konvertierten Bilder aus der ursprünglichen Excel-Datei.
Methode 3. (Fortgeschritten) Excel-Tabelle programmgesteuert in C# als Bild speichern
Für Entwickler oder Organisationen, die den Konvertierungsprozess in großen Mengen automatisieren oder in eine Anwendung integrieren müssen, stehen auch programmgesteuerte Methoden zur Verfügung. Diese Ansätze ermöglichen es Ihnen, groß angelegte Excel-zu-Bild-Konvertierungen zu rationalisieren, manuelle Arbeit zu reduzieren und eine konsistente Ausgabequalität über mehrere Dateien hinweg sicherzustellen.
Indem Sie die Konvertierungslogik direkt in Ihren Arbeitsablauf oder Ihr System einbetten, können Sie problemlos bildbasierte Tabellen für Berichte, Datenvisualisierung oder Dokumentation erstellen. Eine Codebibliothek wie Spire.XLS for .NET bietet eine professionelle Lösung.
Kurze Einführung zu Spire.XLS for .NET
Spire.XLS for .NET ist eine leistungsstarke Excel-Manipulationsbibliothek, die von E-ICEBLUE entwickelt wurde und es Entwicklern ermöglicht, Excel-Dateien zu erstellen, zu bearbeiten, zu konvertieren und zu rendern, ohne dass Microsoft Excel installiert ist. Eine seiner erweiterten Funktionen ist der direkte Export von Excel-Arbeitsblättern oder -Bereichen als Bilder unter Beibehaltung präziser visueller Wiedergabetreue.
Einzigartige Funktionen, die Ihnen bei der Auswahl von Spire.XLS for .NET helfen:
- Schnelle und sichere Konvertierung von Excel in Bilder: Konvertieren Sie schnell bestimmte Excel-Bereiche oder ganze Arbeitsblätter in hochwertige Bilder, während Ihre Daten in einer lokalen Umgebung sicher bleiben.
- Hochwertige Konvertierung für verschiedene Formate: Behalten Sie präzises Layout, Farbe und Formatierung beim Export in gängige Formate wie PDF, TXT, HTML usw. bei.
- Weitere anpassbare Funktionen: Ermöglichen Sie Entwicklern, weitere benutzerdefinierte Funktionen wie das Entfernen von Hyperlinks, das Einfügen und Auswerten von Formeln, das Hinzufügen von Diagrammen usw. zu nutzen.
- Völlig unabhängig von Microsoft Office: Funktioniert nahtlos ohne Microsoft Office und ist somit ideal für die Bereitstellung auf jedem System oder Server.
C#-Tutorial zum Speichern von Excel-Dateien im Bildformat mit Spire.XLS for .NET
Schritt 1. Installieren Sie zuerst die Codebibliothek.
Sie können die Codebibliothek über zwei Optionen zu Ihrem Computer hinzufügen:
- Laden Sie von der offiziellen Download-Webseite herunter und fügen Sie Abhängigkeiten selbst hinzu.
- Laden Sie über NuGet mit dem folgenden Code herunter:
PM> Install-Package Spire.XLS
Schritt 2. Kopieren Sie den Code und passen Sie ihn an Ihre Bedürfnisse an.
Hier stellen wir den Beispielcode zur Verfügung, der Ihnen hilft, Excel-Tabellen reibungslos in das JPG/PNG-Format zu konvertieren. Vergessen Sie nicht, benutzerdefinierte Dinge wie den Dateispeicherort anzupassen:
using Spire.Xls;
namespace Xls2Image

{
    class Program
    {
        static void Main(string[] args)
        {
            //Create a Workbook instance
            Workbook workbook = new Workbook();

            //Load an Excel sample document
            workbook.LoadFromFile( @"sample.xlsx");

            //Get the first worksheet
            Worksheet sheet = workbook.Worksheets[0];

            //Save the worksheet as an image
            sheet.SaveToImage("XlsToImage.jpg");
        }
    }
}
Weitere Details finden Sie in diesem Tutorial: Excel mit C# in Bilder konvertieren
ERGEBNIS:
Tipps für die besten Ergebnisse
Bevor Sie mit der Konvertierung Ihrer Excel-Dateien in Bilder beginnen, können einige einfache Anpassungen einen großen Unterschied im Endergebnis bewirken. Die Beachtung von Layout, Formatierung und Bildeinstellungen trägt dazu bei, dass Ihre konvertierten Dateien sauber und professionell aussehen.
Hier sind einige praktische Tipps, die Ihnen helfen, jedes Mal die besten Ergebnisse zu erzielen.
- Passen Sie vor der Konvertierung die Spaltenbreite und Zeilenhöhe für ein sauberes Layout an.
- Verwenden Sie einheitliche Schriftgrößen und -farben, um Ihre Tabelle optisch ansprechend zu gestalten.
- Geben Sie bei der Verwendung von Code genaue Zellbereiche für eine präzise Steuerung an.
- Bei größeren Arbeitsblättern sollten Sie den Export in Teilen in Betracht ziehen, um die Übersichtlichkeit zu wahren.
Diese kleinen Optimierungen können einen großen Unterschied machen, wenn Sie Ihre Excel-Daten visuell präsentieren.
Fazit
Das Speichern einer Excel-Tabelle als Bild ist eine der einfachsten und zugleich effektivsten Möglichkeiten, Ihre Daten in einem sauberen, visuell konsistenten Format zu teilen. Ob Sie einen schnellen Schnappschuss eines Berichts senden, Diagramme in eine Präsentation einbetten oder Daten für die Veröffentlichung vorbereiten, die Konvertierung Ihrer Excel-Tabellen in Bilder stellt sicher, dass Ihr Layout, Ihre Farben und Ihre Formatierung perfekt erhalten bleiben.
Für eine einmalige Freigabe ist die integrierte Funktion Als Bild kopieren von Microsoft die schnellste und einfachste Wahl. Wenn Sie eine schnelle, benutzerfreundliche Online-Option wünschen, verarbeitet der CloudxDocs Online Excel to Image Converter Uploads im Browser und erzeugt hochwertige PNG/JPG-Dateien ohne Installation. Wenn Sie Automatisierung, Massenverarbeitung oder unternehmensweite Kontrolle benötigen, können Entwickler mit Spire.XLS for .NET eine zuverlässige Offline-Konvertierung von Excel in Bilder direkt in Anwendungen einbetten.
Beginnen Sie noch heute mit dem Experimentieren und entdecken Sie, wie einfach Sie Ihre Excel-Tabellen in gemeinsam nutzbare, professionelle Bilder umwandeln können.
Lesen Sie mehr:
Как сохранить таблицу Excel как изображение: Полное руководство для каждого пользователя
Microsoft Excel — один из самых мощных инструментов для управления данными, создания отчетов и визуального представления информации. Однако, когда дело доходит до обмена вашими таблицами Excel — такими как диаграммы, финансовые сводки или отформатированные данные — вы можете захотеть сохранить их в виде изображений. Это позволяет вставлять их в презентации, на веб-сайты или в электронные письма, не теряя форматирования и не раскрывая формул.
В этой статье мы рассмотрим, как сохранить таблицу Excel в виде изображения, используя непосредственно Microsoft, онлайн-инструменты и методы программирования на C#. Независимо от того, являетесь ли вы обычным пользователем, ищущим быстрое онлайн-преобразование, или разработчиком, которому необходимо автоматизировать этот процесс, вы найдете здесь надежное решение.
Вот краткий список, который поможет вам выбрать лучшие методы. Вы можете нажать, чтобы перейти к соответствующим руководствам:
- Метод 1. Копирование и вставка для отправки таблиц Excel в формате изображения с помощью Microsoft: Лучше всего подходит для быстрого одноразового обмена или когда вам нужно захватить только небольшую часть вашего листа Excel.
- Метод 2. Сохранение таблицы Excel в формате изображения с помощью онлайн-конвертера: Лучше всего подходит для обычных пользователей или не-разработчиков, которые хотят быстро и без установки конвертировать файлы Excel в изображения прямо в браузере.
- Метод 3. (Продвинутый) Преобразование файлов Excel в формат изображения с помощью C#: Лучше всего подходит для разработчиков и предприятий для массового преобразования и настройки.
Метод 1. Просто скопируйте и вставьте, чтобы отправить таблицы Excel в формате изображения
Начнем с самого простого и прямолинейного способа отправить вашу таблицу Excel в виде изображения. Никаких дополнительных инструментов или сложных шагов не требуется — только встроенная функция копирования и вставки в Excel.
Просто следуйте приведенным ниже шагам:
Шаг 1. Откройте ваш файл Excel в Microsoft и выберите конкретные таблицы, которыми вы хотите поделиться.
Шаг 2. Найдите раздел "Главная" на ленте. Вы увидите выпадающее меню для "Копировать". Нажмите на стрелку вниз и выберите "Копировать как рисунок…", чтобы продолжить.
Шаг 3. Затем вы можете поделиться таблицей в формате изображения. Откройте чат, в котором вы хотите поделиться, и вставьте с помощью Ctrl + V напрямую.
Метод 2. Сохраните таблицу Excel как изображение онлайн с помощью CloudxDocs
Если вы ищете быстрый и простой способ превратить ваши таблицы Excel в формат изображения, лучший выбор — это конвертация онлайн. С помощью онлайн-конвертера вам просто нужно загрузить файл Excel и скачать преобразованный файл изображения. Никаких дополнительных шагов не требуется.
Для более гладкого преобразования ключевым моментом является хороший онлайн-конвертер. CloudxDocs Online Excel to Image Converter — идеальное решение. Этот мощный веб-инструмент предназначен как для профессиональных, так и для обычных пользователей. Он обеспечивает мгновенное преобразование файлов Excel (XLS, XLSX) в высококачественные изображения, такие как PNG или JPG. Независимо от того, хотите ли вы поделиться таблицами в презентации, встроить данные в отчет или просто сохранить макет вашей электронной таблицы в точности таким, каким он выглядит, CloudxDocs делает процесс бесшовным, точным и безопасным.
Теперь следуйте приведенным ниже шагам, чтобы преобразовать ваши файлы Excel в JPG/PNG с помощью CloudxDocs:
Шаг 1. Перейдите на официальную страницу CloudxDocs Excel to Image Converter. Вы можете загрузить свои файлы Excel, нажав или перетащив файл в основной интерфейс.
Шаг 2. После загрузки CloudxDocs начнет анализировать ваш файл Excel и немедленно начнет преобразовывать его в формат изображения. Весь процесс не займет много времени, так что просто подождите несколько секунд.
Шаг 3. CloudxDocs предоставит сжатый файл со всеми преобразованными изображениями. Нажмите кнопку "Скачать" и распакуйте файл. Затем вы получите все преобразованные изображения из исходного файла Excel.
Метод 3. (Продвинутый) Программное сохранение таблицы Excel в виде изображения на C#
Для разработчиков или организаций, которым необходимо автоматизировать процесс преобразования в массовом порядке или интегрировать его в приложение, также доступны программные методы. Эти подходы позволяют оптимизировать крупномасштабные преобразования Excel в изображения, сократить ручную работу и обеспечить постоянное качество вывода для нескольких файлов.
Встраивая логику преобразования непосредственно в ваш рабочий процесс или систему, вы можете легко генерировать таблицы на основе изображений для отчетности, визуализации данных или документации. Библиотека кода, такая как Spire.XLS for .NET, предлагает профессиональное решение.
Краткое введение в Spire.XLS for .NET
Spire.XLS for .NET — это мощная библиотека для работы с Excel, разработанная E-ICEBLUE, которая позволяет разработчикам создавать, редактировать, конвертировать и отображать файлы Excel без установленного Microsoft Excel. Одной из ее расширенных возможностей является экспорт листов или диапазонов Excel непосредственно в виде изображений с сохранением точной визуальной точности.
Уникальные функции, которые помогут вам выбрать Spire.XLS for .NET:
- Быстрое и безопасное преобразование Excel в изображение: Быстро преобразуйте определенные диапазоны Excel или целые листы в высококачественные изображения, сохраняя ваши данные в безопасности в локальной среде.
- Высококачественное преобразование для различных форматов: Сохраняйте точный макет, цвет и форматирование при экспорте в популярные форматы, включая PDF, TXT, HTML и т. д.
- Больше настраиваемых функций: Позволяет разработчикам использовать больше настраиваемых функций, таких как удаление гиперссылок, вставка и вычисление формул, добавление диаграмм и т. д.
- Полностью независим от Microsoft Office: Работает без проблем без Microsoft Office, что делает его идеальным для развертывания на любой системе или сервере.
Руководство по C# для сохранения файлов Excel в формате изображения с помощью Spire.XLS for .NET
Шаг 1. Сначала установите библиотеку кода.
Вы можете добавить библиотеку кода на свой компьютер двумя способами:
- Скачать с официальной страницы загрузки и добавить зависимости самостоятельно.
- Скачать через NuGet с помощью приведенного ниже кода:
PM> Install-Package Spire.XLS
Шаг 2. Скопируйте и настройте код в соответствии с вашими потребностями.
Здесь мы предоставим пример кода, который поможет вам плавно преобразовать таблицы Excel в формат JPG/PNG. Не забудьте настроить такие вещи, как местоположение файла:
using Spire.Xls;
namespace Xls2Image

{
    class Program
    {
        static void Main(string[] args)
        {
            //Create a Workbook instance
            Workbook workbook = new Workbook();

            //Load an Excel sample document
            workbook.LoadFromFile( @"sample.xlsx");

            //Get the first worksheet
            Worksheet sheet = workbook.Worksheets[0];

            //Save the worksheet as an image
            sheet.SaveToImage("XlsToImage.jpg");
        }
    }
}
Больше подробностей в этом руководстве: Преобразование Excel в изображения с помощью C#
РЕЗУЛЬТАТ:
Советы для получения наилучших результатов
Прежде чем вы начнете преобразовывать свои файлы Excel в изображения, несколько простых настроек могут существенно повлиять на конечный результат. Внимание к макету, форматированию и настройкам изображения помогает обеспечить, чтобы ваши преобразованные файлы выглядели чисто и профессионально.
Вот несколько практических советов, которые помогут вам каждый раз получать наилучшие результаты.
- Перед преобразованием настройте ширину столбцов и высоту строк для чистого макета.
- Используйте одинаковые размеры шрифтов и цвета, чтобы сделать вашу таблицу визуально привлекательной.
- При использовании кода указывайте точные диапазоны ячеек для точного контроля.
- Для больших листов рассмотрите возможность экспорта по частям для сохранения четкости.
Эти небольшие оптимизации могут иметь большое значение при визуальном представлении ваших данных Excel.
Заключение
Сохранение таблицы Excel в виде изображения — один из самых простых, но наиболее эффективных способов поделиться своими данными в чистом, визуально согласованном формате. Независимо от того, отправляете ли вы быстрый снимок отчета, вставляете диаграммы в презентацию или готовите данные для публикации, преобразование ваших таблиц Excel в изображения гарантирует, что ваш макет, цвета и форматирование останутся идеально сохраненными.
Для одноразового обмена встроенная функция Microsoft Копировать как рисунок является самым быстрым и простым выбором. Если вам нужен быстрый, удобный онлайн-вариант, CloudxDocs Online Excel to Image Converter обрабатывает загрузки в браузере и создает высококачественные файлы PNG/JPG без установки. Когда вам нужна автоматизация, массовая обработка или контроль на уровне предприятия, Spire.XLS for .NET позволяет разработчикам встраивать надежное офлайн-преобразование Excel в изображение непосредственно в приложения.
Начните экспериментировать сегодня и узнайте, как легко вы можете превратить свои таблицы Excel в профессиональные изображения, готовые к обмену.
Читать далее:
```
How to Save an Excel Table as an Image: Complete Guide for Every User
Table of Contents
Microsoft Excel is one of the most powerful tools for managing data, creating reports, and presenting insights visually. However, when it comes to sharing your Excel tables — such as charts, financial summaries, or formatted data — you might want to save them as images. This allows you to insert them into presentations, websites, or emails without losing formatting or exposing formulas.
In this article, we'll explore how to save an Excel table as an image using Microsoft directly, online tools, and C# programming methods. Whether you're a casual user looking for a quick online conversion or a developer who needs to automate the process, you’ll find a reliable solution here.
Here is a brief list to help you choose the best methods. You can click to jump to the corresponding tutorials:
- Method 1. Copy and Paste to Send Excel Tables in Image Format with Microsoft: Best for quick, one-time sharing or when you only need to capture a small section of your Excel sheet.
- Method 2. Save Excel Table in Image Format with Online Converter: Best for casual users or non-developers who want a fast, installation-free way to convert Excel files to images directly in the browser.
- Method 3. (Advanced) Convert Excel Files to Image Format with C#: Best for developers and enterprises for bulk conversion and customization.
Method 1. Simply Copy and Paste to Send Excel Tables in Image Format
Let's start with the easiest and most straightforward way to send your Excel table as an image. No additional tools or complex steps are needed — just Excel's built-in copy and paste function.
Just follow the steps below:
Step 1. Open your Excel file with Microsoft and select the specific tables that you'd like to share with.
Step 2. Find the "Home" section from the Ribbon. You will see a drop-down menu for "Copy". Click the downward arrow and click "Copy as Picture…" to continue.
Step 3. Then, you can share the table in image format. Open the chat box that you'd like to share with and paste with Ctrl + V directly.
Method 2. Save Excel Table as Image Online with CloudxDocs
If you're looking for a quick and hassle-free way to turn your Excel spreadsheets into image format, trying to convert online is the best choice. With an online converter, you just need to upload the Excel file and download the converted image file. No extra steps are required.
To get a smoother conversion, a good online converter is the key point. CloudxDocs Online Excel to Image Converter is the perfect solution. This powerful web-based tool is designed for both professional and casual users. It ensures instant conversion from Excel files (XLS, XLSX) into high-quality images such as PNG or JPG. Whether you want to share tables in a presentation, embed data in a report, or simply preserve your spreadsheet layout exactly as it appears, CloudxDocs makes the process seamless, accurate, and secure.
Now, follow the steps below to convert your Excel files to JPG/PNG with CloudxDocs:
Step 1. Go to the official page of CloudxDocs Excel to Image Converter. You can upload your Excel files by clicking or dragging the file to the main interface.
Step 2. After uploading, CloudxDocs will begin to analyze your Excel file and begin to convert it to image format immediately. The whole process won't take much time so just wait for seconds.
Step 3. CloudxDocs will provide a compressed file with all converted images. Click the "Download" button and unzip the file. Then, you will get all converted images from the original Excel file.
Method 3. (Advanced) Save Excel Table as an Image Programmatically in C#
For developers or organizations that need to automate the conversion process in bulk or integrate it into an application, there are also programmatic methods available. These approaches allow you to streamline large-scale Excel-to-image conversions, reduce manual work, and ensure consistent output quality across multiple files.
By embedding the conversion logic directly into your workflow or system, you can easily generate image-based tables for reporting, data visualization, or documentation.Code library like Spire.XLS for .NET offers a professional solution.
Brief Introduction About Spire.XLS for .NET
Spire.XLS for .NET is a powerful Excel manipulation library developed by E-ICEBLUE, allowing developers to create, edit, convert, and render Excel files without Microsoft Excel installed. One of its advanced capabilities is to export Excel worksheets or ranges directly as images, maintaining precise visual fidelity.
Unique features to help you choose Spire.XLS for .NET:
- Fast and secure Excel to Image conversion: Quickly convert specific Excel ranges or entire worksheets to high-quality images while keeping your data safe within a local environment.
- High-quality conversion for diverse formats: Maintain precise layout, color, and formatting when exporting to popular formats including PDF, TXT, HTML, etc.
- More customizable features: Allow developers to do more customized features like remove hyperlinks, insert and evaluate formulas, add charts, etc.
- Totally independent from Microsoft Office: Work seamlessly without Microsoft Office, making it ideal for deployment on any system or server.
C# Tutorial to Save Excel Files in Image Format with Spire.XLS for .NET
Step 1. Install the code library first.
You can add the code library to your computer through two options:
- Download from the official download webpage and add dependencies on your own.
- Download through NuGet with the code below:
PM> Install-Package Spire.XLS
Step 2. Copy and customize the code according to your needs.
Here we will provide the example code to help you convert Excel tables to JPG/PNG format smoothly. Don't forget to adjust customized things like file location:
using Spire.Xls;
namespace Xls2Image

{
    class Program
    {
        static void Main(string[] args)
        {
            //Create a Workbook instance
            Workbook workbook = new Workbook();

            //Load an Excel sample document
            workbook.LoadFromFile(@"sample.xlsx");

            //Get the first worksheet
            Worksheet sheet = workbook.Worksheets[0];

            //Save the worksheet as an image
            sheet.SaveToImage("XlsToImage.jpg");
        }
    }
}
Get more details in this tutorial: Convert Excel to Images with C#
RESULT:
Tips for Getting the Best Results
Before you start converting your Excel files to images, a few simple adjustments can make a big difference in the final output. Paying attention to layout, formatting, and image settings helps ensure your converted files look clean and professional.
Here are some practical tips to help you get the best results every time.
- Before conversion, adjust column width and row height for a clean layout.
- Use consistent font sizes and colors to make your table visually appealing.
- When using code, specify exact cell ranges for precise control.
- For larger worksheets, consider exporting in parts to maintain clarity.
These small optimizations can make a big difference when presenting your Excel data visually.
Conclusion
Saving an Excel table as an image is one of the simplest yet most effective ways to share your data in a clean, visually consistent format. Whether you're sending a quick snapshot of a report, embedding charts into a presentation, or preparing data for publication, converting your Excel tables to images ensures that your layout, colors, and formatting remain perfectly preserved.
For a one-off share, Microsoft's built-in Copy as Picture is the fastest and simplest choice. If you want a quick, user-friendly online option, CloudxDocs Online Excel to Image Converter handles uploads in the browser and produces high-quality PNG/JPG files without installs. When you need automation, bulk processing, or enterprise-grade control, Spire.XLS for .NET lets developers embed reliable, offline Excel-to-image conversion directly into applications.
Start experimenting today and discover how easily you can turn your Excel tables into shareable, professional-quality images.
Read More:
Convertire facilmente PowerPoint in Word – Office, strumenti online e Python
Le presentazioni PowerPoint sono perfette per la narrazione visiva, ma a volte è necessaria una versione Word delle diapositive, per la documentazione, la modifica o la stampa di dispense. La conversione di PowerPoint (PPT/PPTX) in Word consente di riutilizzare le diapositive come testo modificabile, aggiungere annotazioni e integrarle in materiali scritti più ampi come report o manuali.
Questo tutorial ti guida attraverso tre modi pratici per convertire PowerPoint in Word, a seconda dei tuoi strumenti e del tuo flusso di lavoro:
- Utilizzando la funzionalità di esportazione integrata di PowerPoint — veloce e semplice, non è necessario alcun software aggiuntivo
- Utilizzando convertitori online gratuiti da PowerPoint a Word — accessibili da qualsiasi browser
- Utilizzando l'automazione Python — ideale per l'elaborazione batch e ambienti professionali
Diamo un'occhiata a come funziona ogni metodo e quale si adatta meglio alle tue esigenze.
Metodo 1: Convertire PowerPoint in Word utilizzando Microsoft Office
Se hai già installato Microsoft PowerPoint e Word, puoi convertire le presentazioni in Word direttamente senza strumenti aggiuntivi. Ci sono due approcci:
- "Crea Dispense" (utile per note delle diapositive stampabili ma non per diapositive modificabili)
- "Salva come PDF e apri in Word" (consigliato per documenti completamente modificabili)
Diamo un'occhiata a entrambi.
1.1 Convertire PowerPoint in Word utilizzando "Crea Dispense"
Questa funzionalità integrata di PowerPoint esporta le diapositive in Word per creare appunti o dispense.
Passaggi:
- Apri il tuo file PowerPoint.
- Vai a File → Esporta → Crea Dispense.
- Scegli un'opzione di layout (ad es. Note sotto le diapositive, Righe vuote, Solo struttura).
- Fai clic su OK per generare un file Word.
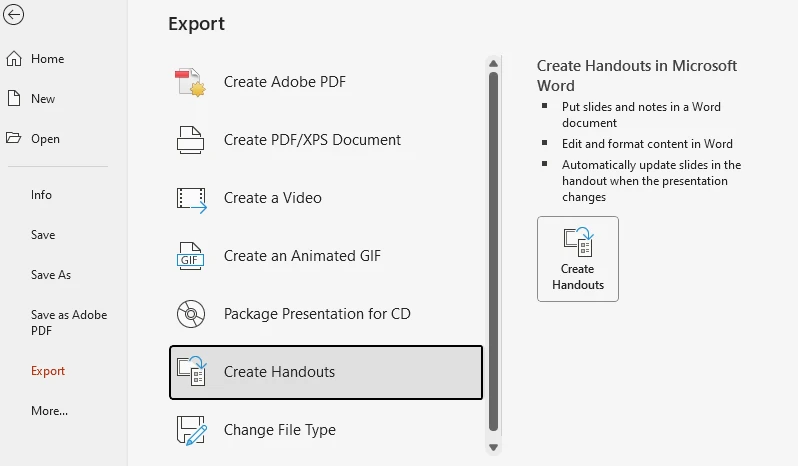
Tuttavia, le diapositive esportate appaiono in Word come immagini statiche, non come oggetti modificabili. Puoi modificare il testo intorno a loro — ad esempio, aggiungendo note, commenti o descrizioni — ma non il contenuto all'interno delle diapositive.
Quindi questo metodo è ottimo per stampare o distribuire riassunti, ma non è ideale per modificare il contenuto delle diapositive.
Se desideri esportare direttamente le diapositive come immagini statiche, puoi consultare come esportare le diapositive di PowerPoint come immagini per un approccio dedicato.
1.2 Convertire PowerPoint in Word modificabile tramite PDF
Per una conversione completamente modificabile, l'approccio più efficace è salvare prima la presentazione come PDF, quindi aprirla in Microsoft Word.
Passaggi:
-
In PowerPoint:
- Vai a File → Salva con nome → PDF.
- Scegli la posizione di output e fai clic su Salva.
-
In Word:
- Apri Microsoft Word.
- Fai clic su File → Apri e seleziona il PDF che hai appena creato.
- Fai clic su Sì nella finestra pop-up e Word convertirà automaticamente il PDF in un documento Word modificabile.
Ora puoi modificare il documento come desideri o salvarlo come file .docx.
Perché questo funziona meglio:
- PowerPoint esporta le diapositive in PDF con layout accurato e grafica vettoriale.
- Il motore di conversione PDF integrato di Word può ricostruire caselle di testo, immagini e formattazione in oggetti Word modificabili.
- Il documento risultante mantiene sia la fedeltà visiva che l'accessibilità del testo, consentendoti di modificare tutto direttamente.
Suggerimenti per risultati migliori:
- Utilizza un'esportazione PDF ad alta risoluzione per immagini pulite.
- Evita transizioni o effetti 3D eccessivamente complessi: appariranno come elementi visivi piatti.
- Dopo la conversione, ricontrolla gli stili dei caratteri e la spaziatura dei paragrafi.
Questo flusso di lavoro PowerPoint → PDF → Word offre il miglior equilibrio tra aspetto e modificabilità, ideale per la documentazione, la pubblicazione e l'archiviazione.
Metodo 2: Convertire PowerPoint in Word utilizzando strumenti online
Se non hai Office installato, i convertitori online da PowerPoint a Word possono aiutarti. Sono veloci, accessibili e indipendenti dalla piattaforma.
Perché scegliere un convertitore online
- Funziona direttamente nel tuo browser — non è necessaria alcuna installazione.
- Compatibile con tutti i sistemi (Windows, macOS, Linux, ChromeOS).
- Comodo per utenti occasionali o attività leggere.
Tuttavia, tieni presente:
- Molti strumenti hanno limiti di dimensione del file o di numero di pagine.
- Il caricamento di file riservati su server di terze parti comporta rischi per la privacy.
Strumenti gratuiti consigliati
| Strumento | Limite dimensione file | Formato di output | Registrazione | Supporto batch |
|---|---|---|---|---|
| FreeConvert | 1024MB | DOCX/DOC | Opzionale | Sì |
| Zamzar | 7MB | DOCX/DOC | Opzionale | Sì |
| Convertio | 100MB | DOCX/DOC | Opzionale | Sì |
Nota: leggi sempre l'informativa sulla privacy di ogni sito prima di caricare materiale sensibile.
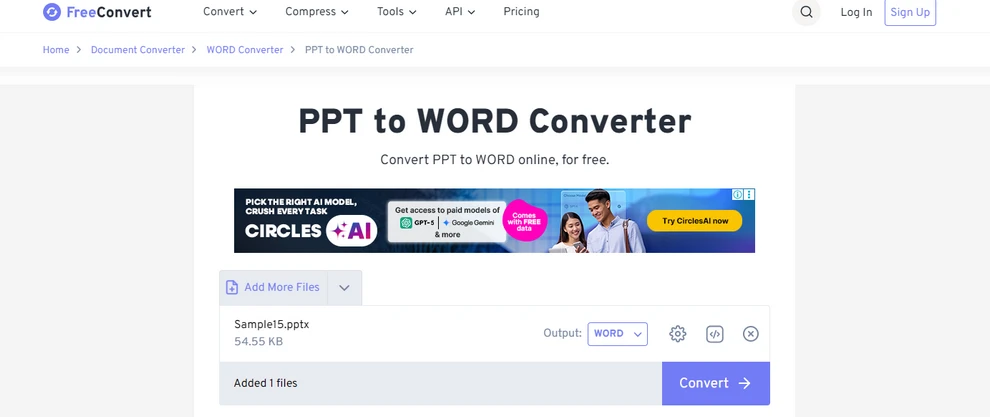
Esempio: utilizzo di FreeConvert
- Visita Convertitore da PPT a Word di FreeConvert.
- Carica il tuo file PowerPoint e fai clic su Converti.
- Attendi il completamento della conversione.
- Scarica il documento Word convertito.
Vantaggi:
- Nessuna installazione di software
- Semplice interfaccia drag-and-drop
- Buona precisione di formattazione
Svantaggi:
- Conversioni gratuite limitate al giorno
- Potrebbe comprimere o riformattare leggermente le immagini
I convertitori online sono convenienti per attività una tantum veloci, ma per conversioni regolari o su larga scala, una soluzione desktop o automatizzata è più efficiente.
Per una gamma più ampia di conversioni di documenti online, puoi esplorare CLOUDXDOCS Free Online Document Converter, che supporta gratuitamente più tipi di file e formati.
Metodo 3: Automatizzare la conversione da PowerPoint a Word con Python
Per sviluppatori o team che devono gestire presentazioni in blocco, l'automazione offre la soluzione più veloce e affidabile. Con poche righe di codice Python, puoi convertire più presentazioni PowerPoint in documenti Word, il tutto elaborato localmente sulla tua macchina, senza limiti di dimensione del file o problemi di privacy.
Questo esempio utilizza **Free Spire.Office for Python**, una libreria all-in-one che consente di completare l'intera conversione con un unico toolkit.
Installa la libreria con pip:
pip install spire.office.free
Esempio: convertire PowerPoint in Word in Python
import os
from spire.presentation import Presentation, FileFormat
from spire.pdf import PdfDocument, FileFormat as PdfFileFormat

input_ppt = "G:/Documents/Sample14.pptx"
temp_pdf = "output/temp.pdf"
output_docx = "output/output.docx"

# Step 1: Convert PowerPoint to PDF
presentation = Presentation()
presentation.LoadFromFile(input_ppt)
presentation.SaveToFile(temp_pdf, FileFormat.PDF)

# Step 2: Convert PDF to Word
pdf = PdfDocument()
pdf.LoadFromFile(temp_pdf)
pdf.SaveToFile(output_docx, PdfFileFormat.DOCX)

# Step 3: Delete the temporary PDF file
if os.path.exists(temp_pdf):
    os.remove(temp_pdf)

print("PPTX è stato convertito con successo in Word!")
L'immagine seguente mostra il risultato della conversione di una presentazione PowerPoint in un documento Word utilizzando Python.
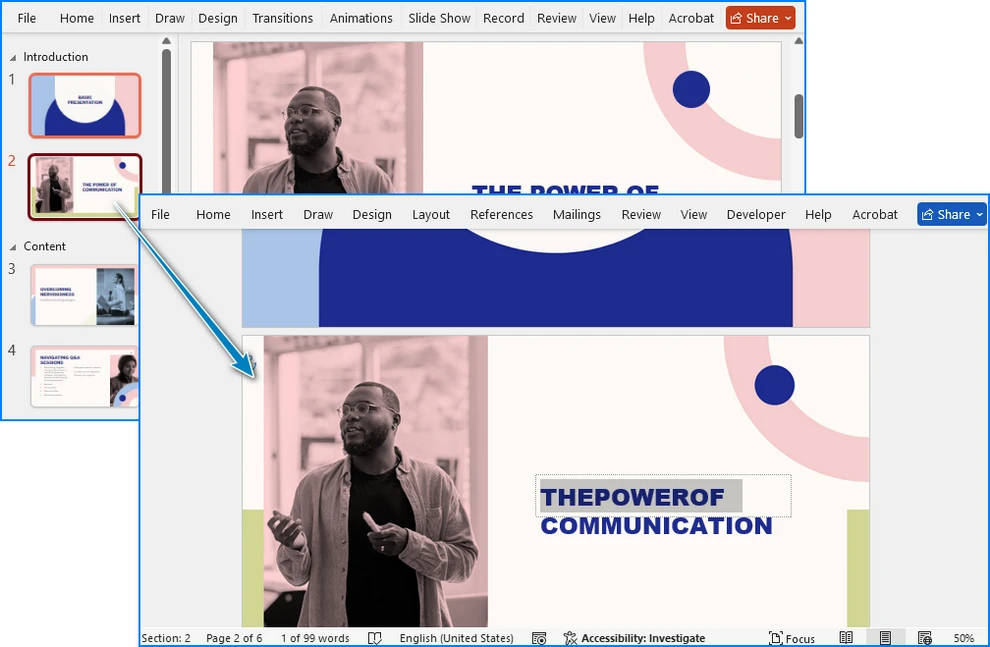
Spiegazione del codice
Questo script utilizza **Free Spire.Office for Python** per gestire entrambi i passaggi della conversione:
- Spire.Presentation carica il file PowerPoint e lo esporta come PDF di alta qualità.
- Spire.PDF converte il PDF in un documento Word completamente modificabile (.docx).
- Dopo la conversione, il file PDF temporaneo viene eliminato automaticamente per mantenere pulito il tuo spazio di lavoro.
Questo flusso di lavoro è veloce, affidabile e mantiene tutti i file in locale, garantendo una formattazione coerente, un layout accurato e un testo modificabile senza utilizzare alcun servizio online.
Esempio di conversione batch
Puoi estendere la stessa logica per convertire tutti i file PowerPoint in una cartella:
import os
from spire.presentation import Presentation, FileFormat
from spire.pdf import PdfDocument, FileFormat as PdfFileFormat

folder = "presentations"

for file in os.listdir(folder):
    if file.endswith(".pptx"):
        ppt_path = os.path.join(folder, file)
        temp_pdf = os.path.join(folder, file.replace(".pptx", ".pdf"))
        docx_path = os.path.join(folder, file.replace(".pptx", ".docx"))

        # Step 1: Convert PPTX to PDF
        presentation = Presentation()
        presentation.LoadFromFile(ppt_path)
        presentation.SaveToFile(temp_pdf, FileFormat.PDF)

        # Step 2: Convert PDF to Word
        pdf = PdfDocument()
        pdf.LoadFromFile(temp_pdf)
        pdf.SaveToFile(docx_path, PdfFileFormat.DOCX)

        # Step 3: Delete the temporary PDF file
        if os.path.exists(temp_pdf):
            os.remove(temp_pdf)

print("Tutti i file PowerPoint sono stati convertiti con successo in Word!")
Questo approccio è perfetto per **archivi aziendali, librerie di contenuti didattici o sistemi di reporting automatizzati**, consentendo di convertire decine o centinaia di presentazioni in modo rapido e sicuro, senza file temporanei residui.
Potrebbe piacerti anche: Come convertire PowerPoint in HTML
Confronto di tutti i metodi
Per aiutarti a scegliere il metodo più adatto per convertire PowerPoint in Word, ecco un confronto di tutti gli approcci disponibili.
| Metodo | Strumenti necessari | Ideale per | Pro | Contro |
|---|---|---|---|---|
| PowerPoint + Word (metodo PDF) | Microsoft Office | Documenti modificabili | Layout accurato, completamente modificabile | Passaggi manuali per file |
| Dispense di PowerPoint | PowerPoint | Dispense, appunti | Integrato, veloce | Diapositive non modificabili |
| Strumenti online | Browser | Uso occasionale | Facile, multipiattaforma | Rischio per la privacy, dimensioni limitate |
| Automazione Python | Python, SDK Spire | Conversioni batch | Completamente automatizzato, flessibile | Richiede configurazione |
Domande comuni sulla conversione di PowerPoint in Word
D1: Posso convertire PowerPoint in Word senza perdere la formattazione?
Sì. L'approccio PDF → Word preserva caselle di testo, layout e immagini con alta precisione.
D2: Perché non posso modificare le diapositive quando uso "Crea Dispense"?
Perché PowerPoint esporta le diapositive come immagini statiche. Puoi modificare le note o il testo circostante, ma non il contenuto della diapositiva stessa.
D3: C'è un modo per mantenere le animazioni in Word?
No, Word non supporta gli effetti di animazione: viene trasferito solo il contenuto statico.
D4: Come posso convertire più file PowerPoint automaticamente?
Utilizza il metodo di automazione Python mostrato sopra. Può elaborare tutti i file .pptx in una cartella a livello di codice.
D5: Quale metodo offre il risultato più professionale?
Gli **Strumenti online** e il **metodo di automazione Python** offrono generalmente il miglior equilibrio tra fedeltà del layout e modificabilità.
Conclusione
La conversione di PowerPoint in Word ti offre la flessibilità di modificare, annotare, stampare e riutilizzare facilmente il contenuto della tua presentazione.
- Utilizza la funzione dispense di PowerPoint per semplici note o schemi stampabili.
- Scegli il percorso da PDF a Word quando hai bisogno di contenuti completamente modificabili.
- Automatizza il processo con Python per conversioni su larga scala o ricorrenti.
Ogni metodo ha uno scopo diverso, che si tratti di preparare un report, stampare materiali di formazione o integrare la conversione in un flusso di lavoro automatizzato.
Con l'approccio giusto, puoi trasformare qualsiasi presentazione in un documento Word strutturato, modificabile e professionale in pochi minuti.
Vedi anche
Converta PowerPoint para Word facilmente – Office, ferramentas online e Python
As apresentações do PowerPoint são perfeitas para contar histórias visuais, mas às vezes você precisa de uma versão do Word de seus slides — para documentação, edição ou impressão de folhetos. Converter PowerPoint (PPT/PPTX) para Word permite que você reutilize seus slides como texto editável, adicione anotações e os integre em materiais escritos maiores, como relatórios ou manuais.
Este tutorial apresenta três maneiras práticas de converter PowerPoint para Word, dependendo de suas ferramentas e fluxo de trabalho:
- Usando o recurso de exportação integrado do PowerPoint — rápido e simples, sem necessidade de software extra
- Usando conversores online gratuitos de PowerPoint para Word — acessíveis de qualquer navegador
- Usando automação com Python — ideal para processamento em lote e ambientes profissionais
Vamos ver como cada método funciona e qual deles se adapta melhor às suas necessidades.
Método 1: Converter PowerPoint para Word Usando o Microsoft Office
Se você já tem o Microsoft PowerPoint e o Word instalados, pode converter apresentações para o Word diretamente, sem ferramentas extras. Existem duas abordagens:
- "Criar Folhetos" (útil para notas de slides imprimíveis, mas não para slides editáveis)
- "Salvar como PDF e abrir no Word" (recomendado para documentos totalmente editáveis)
Vamos analisar ambos.
1.1 Converter PowerPoint para Word Usando "Criar Folhetos"
Este recurso integrado do PowerPoint exporta slides para o Word para criar notas de aula ou folhetos.
Passos:
- Abra seu arquivo do PowerPoint.
- Vá para Arquivo → Exportar → Criar Folhetos.
- Escolha uma opção de layout (por exemplo, Notas abaixo dos slides, Linhas em branco, Somente tópicos).
- Clique em OK para gerar um arquivo do Word.
No entanto, os slides exportados aparecem no Word como imagens estáticas, não como objetos editáveis. Você pode editar o texto ao redor deles — por exemplo, adicionando notas, comentários ou descrições — mas não o conteúdo dentro dos slides.
Portanto, este método é ótimo para imprimir ou distribuir resumos, mas não é ideal para editar o conteúdo dos slides.
Se você deseja exportar diretamente os slides como imagens estáticas, pode conferir como exportar slides do PowerPoint como imagens para uma abordagem dedicada.
1.2 Converter PowerPoint para Word Editável via PDF
Para uma conversão totalmente editável, a abordagem mais eficaz é primeiro salvar sua apresentação como PDF e, em seguida, abri-la no Microsoft Word.
Passos:
-
No PowerPoint:
- Vá para Arquivo → Salvar como → PDF.
- Escolha o local de saída e clique em Salvar.
-
No Word:
- Abra o Microsoft Word.
- Clique em Arquivo → Abrir e selecione o PDF que você acabou de criar.
- Clique em Sim na janela pop-up, e o Word converterá automaticamente o PDF em um documento do Word editável.
Agora você pode editar o documento como desejar ou salvá-lo como um arquivo .docx.
Por que isso funciona melhor:
- O PowerPoint exporta os slides para PDF com layout preciso e gráficos vetoriais.
- O mecanismo de conversão de PDF integrado do Word pode reconstruir caixas de texto, imagens e formatação em objetos editáveis do Word.
- O documento resultante mantém tanto a fidelidade visual quanto a acessibilidade do texto, permitindo que você edite tudo diretamente.
Dicas para melhores resultados:
- Use uma exportação de PDF de alta resolução para imagens nítidas.
- Evite transições ou efeitos 3D excessivamente complexos — eles aparecerão como visuais planos.
- Após a conversão, verifique novamente os estilos de fonte e o espaçamento dos parágrafos.
Este fluxo de trabalho PowerPoint → PDF → Word oferece o melhor equilíbrio entre aparência e editabilidade — ideal para documentação, publicação e arquivamento.
Método 2: Converter PowerPoint para Word Usando Ferramentas Online
Se você não tem o Office instalado, os conversores online de PowerPoint para Word podem ajudar. Eles são rápidos, acessíveis e independentes de plataforma.
Por que escolher um conversor online
- Funciona diretamente no seu navegador — sem necessidade de instalação.
- Compatível com todos os sistemas (Windows, macOS, Linux, ChromeOS).
- Conveniente para usuários ocasionais ou tarefas leves.
No entanto, tenha em mente:
- Muitas ferramentas têm limites de tamanho de arquivo ou contagem de páginas.
- O upload de arquivos confidenciais para servidores de terceiros apresenta riscos de privacidade.
Ferramentas Gratuitas Recomendadas
| Ferramenta | Limite de Tamanho do Arquivo | Formato de Saída | Registro | Suporte a Lote |
|---|---|---|---|---|
| FreeConvert | 1024MB | DOCX/DOC | Opcional | Sim |
| Zamzar | 7MB | DOCX/DOC | Opcional | Sim |
| Convertio | 100MB | DOCX/DOC | Opcional | Sim |
Nota: Sempre leia a política de privacidade de cada site antes de enviar material sensível.
Exemplo: Usando o FreeConvert
- Visite o Conversor de PPT para Word do FreeConvert.
- Carregue seu arquivo do PowerPoint e clique em Converter.
- Aguarde a conclusão da conversão.
- Baixe o documento do Word convertido.
Vantagens:
- Nenhuma instalação de software
- Interface simples de arrastar e soltar
- Boa precisão de formatação
Desvantagens:
- Conversões gratuitas limitadas por dia
- Pode comprimir ou reformatar imagens ligeiramente
Os conversores online são convenientes para tarefas rápidas e únicas, mas para conversões regulares ou em grande escala, uma solução de desktop ou automatizada é mais eficiente.
Para uma gama mais ampla de conversões de documentos online, você pode explorar o Conversor de Documentos Online Gratuito CLOUDXDOCS, que suporta vários tipos e formatos de arquivo gratuitamente.
Método 3: Automatizar a Conversão de PowerPoint para Word com Python
Para desenvolvedores ou equipes que precisam lidar com apresentações em massa, a automação oferece a solução mais rápida e confiável. Com apenas algumas linhas de código Python, você pode converter várias apresentações do PowerPoint em documentos do Word — tudo processado localmente em sua máquina, sem limites de tamanho de arquivo ou preocupações com a privacidade.
Este exemplo usa o Free Spire.Office for Python, uma biblioteca tudo-em-um que torna possível concluir toda a conversão com um único kit de ferramentas.
Instale a biblioteca com o pip:
pip install spire.office.free
Exemplo: Converter PowerPoint para Word em Python
import os
from spire.presentation import Presentation, FileFormat
from spire.pdf import PdfDocument, FileFormat as PdfFileFormat

input_ppt = "G:/Documents/Sample14.pptx"
temp_pdf = "output/temp.pdf"
output_docx = "output/output.docx"

# Step 1: Convert PowerPoint to PDF
presentation = Presentation()
presentation.LoadFromFile(input_ppt)
presentation.SaveToFile(temp_pdf, FileFormat.PDF)

# Step 2: Convert PDF to Word
pdf = PdfDocument()
pdf.LoadFromFile(temp_pdf)
pdf.SaveToFile(output_docx, PdfFileFormat.DOCX)

# Step 3: Delete the temporary PDF file
if os.path.exists(temp_pdf):
    os.remove(temp_pdf)

print("O PPTX foi convertido com sucesso para o Word!")
A imagem abaixo mostra o resultado da conversão de uma apresentação do PowerPoint para um documento do Word usando Python.
Explicação do Código
Este script usa o Free Spire.Office for Python para lidar com ambas as etapas da conversão:
- O Spire.Presentation carrega o arquivo do PowerPoint e o exporta como um PDF de alta qualidade.
- O Spire.PDF converte o PDF em um documento do Word (.docx) totalmente editável.
- Após a conversão, o arquivo PDF temporário é excluído automaticamente para manter seu espaço de trabalho limpo.
Este fluxo de trabalho é rápido, confiável e mantém todos os arquivos locais — garantindo formatação consistente, layout preciso e texto editável sem usar nenhum serviço online.
Exemplo de Conversão em Lote
Você pode estender a mesma lógica para converter todos os arquivos do PowerPoint em uma pasta:
import os
from spire.presentation import Presentation, FileFormat
from spire.pdf import PdfDocument, FileFormat as PdfFileFormat

folder = "presentations"

for file in os.listdir(folder):
    if file.endswith(".pptx"):
        ppt_path = os.path.join(folder, file)
        temp_pdf = os.path.join(folder, file.replace(".pptx", ".pdf"))
        docx_path = os.path.join(folder, file.replace(".pptx", ".docx"))

        # Step 1: Convert PPTX to PDF
        presentation = Presentation()
        presentation.LoadFromFile(ppt_path)
        presentation.SaveToFile(temp_pdf, FileFormat.PDF)

        # Step 2: Convert PDF to Word
        pdf = PdfDocument()
        pdf.LoadFromFile(temp_pdf)
        pdf.SaveToFile(docx_path, PdfFileFormat.DOCX)

        # Step 3: Delete the temporary PDF file
        if os.path.exists(temp_pdf):
            os.remove(temp_pdf)

print("Todos os arquivos do PowerPoint foram convertidos com sucesso para o Word!")
Esta abordagem é perfeita para arquivos corporativos, bibliotecas de conteúdo educacional ou sistemas de relatórios automatizados, permitindo que dezenas ou centenas de apresentações sejam convertidas de forma rápida e segura, sem arquivos temporários restantes.
Você também pode gostar: Como Converter PowerPoint para HTML
Comparação de Todos os Métodos
Para ajudá-lo a escolher o método mais adequado para converter PowerPoint para Word, aqui está uma comparação de todas as abordagens disponíveis.
| Método | Ferramentas Necessárias | Melhor Para | Prós | Contras |
|---|---|---|---|---|
| PowerPoint + Word (método PDF) | Microsoft Office | Documentos editáveis | Layout preciso, totalmente editável | Passos manuais por arquivo |
| Folhetos do PowerPoint | PowerPoint | Folhetos, notas | Integrado, rápido | Slides não editáveis |
| Ferramentas Online | Navegador | Uso ocasional | Fácil, multiplataforma | Risco de privacidade, tamanho limitado |
| Automação com Python | Python, SDKs Spire | Conversões em lote | Totalmente automatizado, flexível | Requer configuração |
Perguntas Comuns sobre a Conversão de PowerPoint para Word
Q1: Posso converter PowerPoint para Word sem perder a formatação?
Sim. A abordagem PDF → Word preserva caixas de texto, layouts e imagens com alta precisão.
Q2: Por que não consigo editar slides ao usar "Criar Folhetos"?
Porque o PowerPoint exporta os slides como imagens estáticas. Você pode editar notas ou o texto ao redor, mas não o conteúdo do slide em si.
Q3: Existe uma maneira de manter as animações no Word?
Não, o Word não suporta efeitos de animação — apenas o conteúdo estático é transferido.
Q4: Como converto vários arquivos do PowerPoint automaticamente?
Use o método de automação com Python mostrado acima. Ele pode processar todos os arquivos .pptx em uma pasta programaticamente.
Q5: Qual método oferece o resultado com aparência mais profissional?
As Ferramentas Online e o método de automação com Python geralmente fornecem o melhor equilíbrio entre fidelidade de layout e editabilidade.
Conclusão
Converter PowerPoint para Word oferece a flexibilidade de editar, anotar, imprimir e reutilizar o conteúdo da sua apresentação facilmente.
- Use o recurso de folhetos do PowerPoint para anotações simples ou esboços para impressão.
- Escolha a rota PDF-para-Word quando precisar de conteúdo totalmente editável.
- Automatize o processo com Python para conversões em grande escala ou recorrentes.
Cada método serve a um propósito diferente — seja para preparar um relatório, imprimir materiais de treinamento ou integrar a conversão em um fluxo de trabalho automatizado.
Com a abordagem certa, você pode transformar qualquer apresentação em um documento do Word estruturado, editável e profissional em questão de minutos.