Tabelle in Excel entfernen (In Bereich umwandeln, Formatierung löschen, VBA & Python)
Inhaltsverzeichnis
- Verstehen, was passiert, wenn Sie eine Tabelle in Excel entfernen
- So entfernen Sie eine Tabelle in Excel, indem Sie sie in einen Bereich umwandeln
- So entfernen Sie die Tabellenformatierung in Excel
- So entfernen Sie eine Tabelle in Excel vollständig
- So entfernen Sie Tabellen in Excel auf einmal mit VBA
- So entfernen Sie Tabellen in Excel mit Python-Automatisierung
- Profi-Tipps zum Entfernen einer Tabelle in Excel
- Fazit
- FAQs: Tabelle in Excel entfernen

Das Entfernen einer Tabelle in Excel ist eine einfache, aber wesentliche Aufgabe zur Vereinfachung Ihrer Daten. Obwohl Tabellen nützlich sind, um Informationen zu organisieren und zu verwalten, gibt es Zeiten, in denen Sie sie möglicherweise entfernen möchten – sei es, um die Formatierung zu optimieren, Rohdaten zu exportieren oder die Verwendung strukturierter Funktionen einzustellen.
In diesem Leitfaden werden wir verschiedene Methoden zum Entfernen einer Tabelle in Excel untersuchen, einschließlich der Umwandlung in einen Bereich, dem Löschen der Formatierung und dem vollständigen Löschen. Zusätzlich zeigen wir, wie Sie den Prozess mit VBA und Python automatisieren können, um Zeit bei der Arbeit mit mehreren Tabellen zu sparen.
Inhaltsübersicht
- Verstehen, was passiert, wenn Sie eine Tabelle in Excel entfernen
- So entfernen Sie eine Tabelle in Excel, indem Sie sie in einen Bereich umwandeln
- So entfernen Sie die Tabellenformatierung in Excel
- So entfernen Sie eine Tabelle in Excel vollständig
- So entfernen Sie Tabellen in Excel auf einmal mit VBA
- So entfernen Sie Tabellen in Excel mit Python-Automatisierung
- Profi-Tipps zum Entfernen einer Tabelle in Excel
- Fazit
- FAQs: Tabelle in Excel entfernen
Verstehen, was passiert, wenn Sie eine Tabelle in Excel entfernen
Das Entfernen einer Tabelle in Excel kann je nach gewählter Methode unterschiedliche Ergebnisse haben:
- In Bereich umwandeln: Behält alle Ihre Daten und jede auf die Tabelle angewendete Formatierung als statische Zellformatierung bei, entfernt jedoch Tabellenfunktionen wie Filter und strukturierte Verweise.
- Tabellenformatierung löschen: Behält die Daten bei, entfernt jedoch alle Tabellenfarben, Rahmen und Stile.
- Ganze Tabelle löschen: Entfernt dauerhaft sowohl die Tabelle als auch ihre Daten.
Lassen Sie uns diese Optionen im Detail untersuchen und sehen, wie sie sich auf Ihre Excel-Daten auswirken.
So entfernen Sie eine Tabelle in Excel, indem Sie sie in einen Bereich umwandeln?
Die einfachste und zuverlässigste Methode zum Entfernen einer Tabelle in Excel besteht darin, sie in einen regulären Bereich umzuwandeln, wodurch Ihre Daten und Formatierungen erhalten bleiben. Sie können für diese Konvertierung aus zwei Hauptoptionen wählen: die Verwendung des Excel-Menübands oder des Kontextmenüs.
Option 1. Verwendung des Excel-Menübands
Befolgen Sie die nachstehenden Schritte, um eine Tabelle über das Excel-Menüband in einen Bereich umzuwandeln:
-
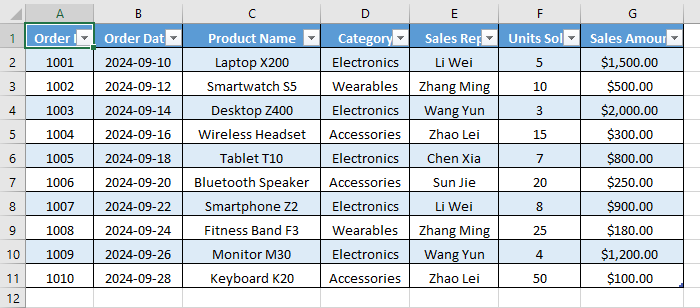
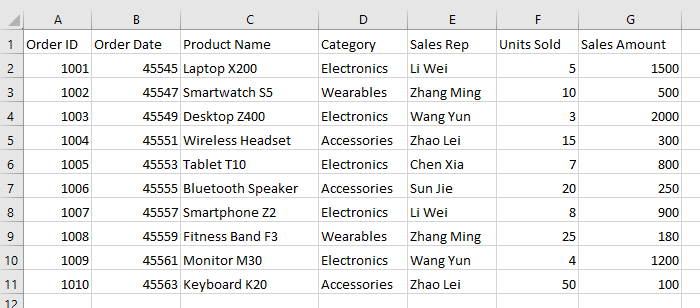
Wählen Sie eine beliebige Zelle in Ihrer Tabelle aus: Klicken Sie auf eine beliebige Zelle (z. B. "A1") innerhalb der Tabelle, die Sie entfernen möchten. Sie müssen nicht die gesamte Tabelle auswählen.
-
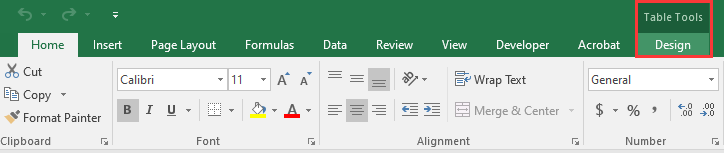
Navigieren Sie zum Tab „Entwurf“: Sobald Sie eine Tabellenzelle auswählen, wird der kontextbezogene Tab Entwurf im Excel-Menüband unter Tabellentools angezeigt. Klicken Sie darauf.
-
Klicken Sie auf „In Bereich konvertieren“: In der Gruppe Tools ganz links finden Sie die Schaltfläche „In Bereich konvertieren“. Klicken Sie darauf.

-
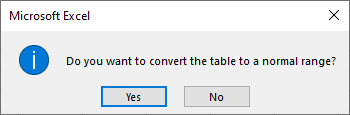
Bestätigen Sie die Aktion: Excel zeigt ein Dialogfeld mit der Frage an: „Möchten Sie die Tabelle in einen normalen Bereich konvertieren?“ Klicken Sie auf Ja.
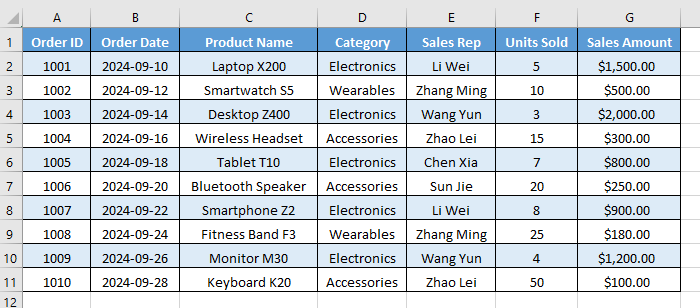
Nach der Konvertierung wird die Tabellenstruktur entfernt und Filter sind nicht mehr verfügbar. Jede Tabellenformatierung (wie gebänderte Zeilen und Kopfzeilenstile) bleibt jedoch erhalten, aber der Bereich wird statisch anstatt dynamisch.
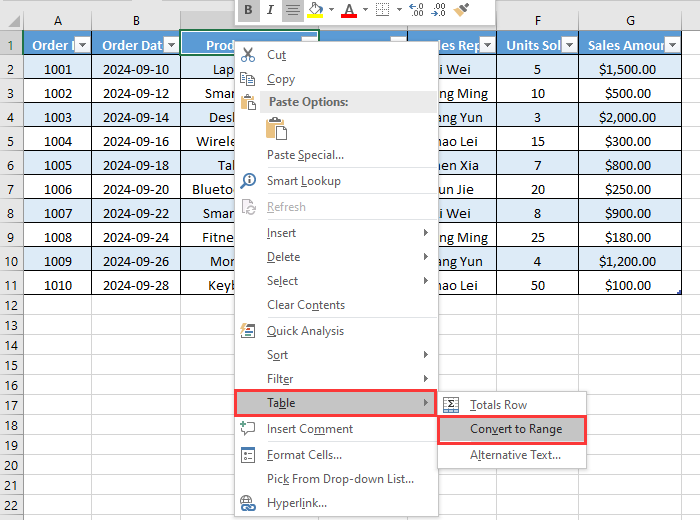
Option 2. Verwendung des Kontextmenüs
Für diejenigen, die Kontextmenüs bevorzugen, ist die Verwendung des Kontextmenüs genauso effektiv und etwas schneller:
-
Wählen Sie eine beliebige Zelle in der Tabelle aus: Klicken Sie wie bei der ersten Methode einfach irgendwo in die Daten Ihrer Tabelle.
-
Klicken Sie mit der rechten Maustaste, um das Kontextmenü zu öffnen: Klicken Sie mit der rechten Maustaste auf die ausgewählte Zelle.
-
Navigieren Sie im Menü: Bewegen Sie den Mauszeiger im Kontextmenü über Tabelle (oder klicken Sie darauf).
-
Wählen Sie „In Bereich konvertieren“: Wählen Sie im angezeigten Untermenü In Bereich konvertieren aus.
-
Bestätigen Sie die Aktion: Klicken Sie im Bestätigungsdialogfeld auf Ja.
Diese Methode führt zum gleichen Ergebnis wie die Verwendung des Menübands, bietet jedoch einen schnelleren, mausgesteuerten Ansatz.
So entfernen Sie die Tabellenformatierung in Excel?
In einigen Fällen möchten Sie möglicherweise die Tabellenformatierung in Excel entfernen, einschließlich Elementen wie Filtern, Farben und Rahmen. Befolgen Sie die nachstehenden Schritte, um die Formatierung zu löschen und Ihre Daten in ein einfacheres Layout zurückzuversetzen:
-
Wandeln Sie die Tabelle in einen Bereich um: Wandeln Sie die Tabelle zunächst mit dem oben beschriebenen Excel-Menüband oder dem Kontextmenü in einen normalen Bereich um.
-
Löschen Sie die Tabellenformatierung
Da die Daten nun ein einfacher Bereich sind, können Sie die verbleibende Formatierung entfernen.-
Wählen Sie den gesamten Datenbereich aus: Klicken und ziehen Sie, um alle Zellen auszuwählen, die Teil der ursprünglichen Tabelle waren, einschließlich der Kopfzeile.
-
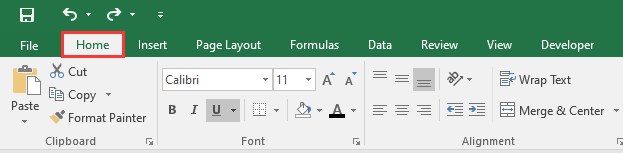
Gehen Sie zum Start-Tab: Navigieren Sie im Excel-Menüband zum Start-Tab.
-
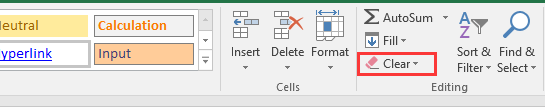
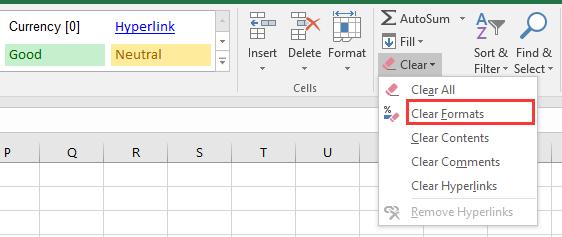
Löschen Sie die Formate:
-
Klicken Sie in der Gruppe Bearbeiten auf die Schaltfläche Löschen (sie sieht aus wie ein rosa Radiergummi).
-
Wählen Sie im Dropdown-Menü Formate löschen aus.
-
-
Jetzt wird die gesamte tabellenspezifische Formatierung entfernt, aber Ihre Daten bleiben erhalten. Die Zellen kehren zur Standardschriftart, -farbe und -umrandung von Excel zurück und geben Ihnen einen sauberen, unformatierten Datenblock, der für neue Formatierungen oder Analysen bereit ist.
So entfernen Sie eine Tabelle in Excel vollständig
Wenn Sie sowohl die Tabelle als auch alle darin enthaltenen Daten entfernen müssen, hilft Ihnen diese Methode. Stellen Sie sicher, dass Sie die Informationen nicht mehr benötigen, bevor Sie fortfahren. Um eine Tabelle vollständig zu löschen, führen Sie die folgenden Schritte aus:
-
Wählen Sie die gesamte Tabelle aus: Klicken Sie irgendwo in die Tabelle und drücken Sie Strg + A (Windows) oder Cmd + A (Mac), um die gesamte Tabelle auszuwählen, einschließlich der Kopf- und Summenzeilen.
-
Alle Daten und Formatierungen löschen: Gehen Sie zum Start-Tab und suchen Sie die Gruppe Bearbeiten. Klicken Sie auf Löschen und wählen Sie dann im Dropdown-Menü Alles löschen aus.
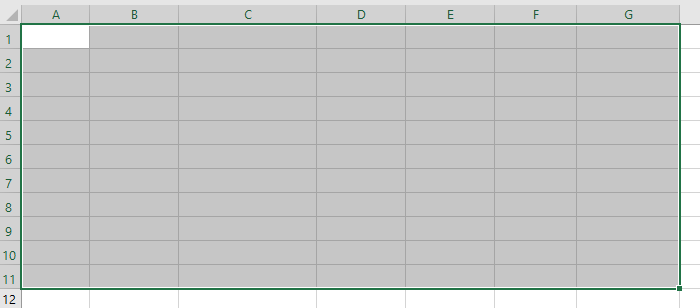
Diese Aktion entfernt dauerhaft alle Daten, Formatierungen und die Tabellenstruktur. Die Zellen werden geleert und hinterlassen keine Spuren der ursprünglichen Tabelle.
So entfernen Sie Tabellen in Excel auf einmal mit VBA
Wenn Ihre Excel-Datei mehrere Tabellen enthält, kann das manuelle Entfernen jeder einzelnen zeitaufwändig sein. Sie können VBA (Visual Basic for Applications) verwenden, um den Prozess zu automatisieren.

So entfernen Sie alle Tabellen in einer Excel-Datei und behalten die Daten mit einem VBA-Skript bei:
-
Drücken Sie Alt + F11, um den VBA-Editor zu öffnen.
-
Klicken Sie auf Einfügen → Modul.
-
Kopieren Sie den folgenden VBA-Code und fügen Sie ihn ein:
Sub ConvertAllTablesToRanges() Dim ws As Worksheet Dim tbl As ListObject For Each ws In ActiveWorkbook.Worksheets For Each tbl In ws.ListObjects tbl.Unlist ' Tabelle in Bereich umwandeln Next tbl Next ws End Sub -
Drücken Sie F5, um das Makro auszuführen.
Dieses Makro durchläuft jedes Arbeitsblatt in der Excel-Datei, findet alle ListObjects (Tabellen) und wandelt sie in normale Bereiche um – wobei die Daten erhalten bleiben, aber die Tabellenfunktionalität entfernt wird.
Weitere Einzelheiten zur in diesem VBA-Skript verwendeten Unlist-Methode finden Sie in der offiziellen Microsoft-Dokumentation: Excel ListObject.Unlist-Methode.
So entfernen Sie Tabellen in Excel mit Python-Automatisierung?
Wenn Sie mit Python für die Datenverarbeitung, automatisierte Berichterstellung oder Backend-Anwendungen arbeiten, können Sie Tabellen in Excel mit einer Bibliothek wie Spire.XLS for Python entfernen.
Spire.XLS for Python ist eine beliebte Excel-Bibliothek, mit der Entwickler Excel-Dateien direkt per Code erstellen, lesen und bearbeiten können, ohne dass Microsoft Excel erforderlich ist. Neben dem Entfernen von Tabellen können Sie damit Zellwerte und Formeln lesen und schreiben, Formatierungen anwenden oder löschen, Arbeitsblätter verwalten, Diagramme oder Bilder einfügen und sogar Excel-Dateien in PDF oder andere Formate konvertieren.
So entfernen Sie Tabellen in Excel mit Python und Spire.XLS for Python:
-
Installieren Sie Spire.XLS for Python: Führen Sie den folgenden Befehl in Ihrem Terminal aus, um es direkt über PyPI zu installieren:
pip install Spire.XLS -
Tabellen mit Python-Code entfernen: Sobald die Bibliothek installiert ist, fügen Sie den folgenden Code hinzu, um Tabellen in Ihrer Excel-Datei mit Python zu entfernen:
from spire.xls import *

# Laden Sie die Arbeitsmappe
workbook = Workbook()
workbook.LoadFromFile("CreateTable.xlsx")

# Durchlaufen Sie alle Arbeitsblätter nach Index
for ws_index in range(len(workbook.Worksheets)):
  sheet = workbook.Worksheets[ws_index]
  # Schleife von der letzten zur ersten Tabelle, um sicher nach Index zu entfernen
  for tbl_index in range(len(sheet.ListObjects) - 1, -1, -1):
      sheet.ListObjects.RemoveAt(tbl_index)

# Speichern Sie die Arbeitsmappe
workbook.SaveToFile("DeleteAllTables.xlsx", ExcelVersion.Version2016)
workbook.Dispose()
Dieser Code entfernt alle Tabellen in der Excel-Datei, wobei Ihre Daten intakt und für die weitere Verarbeitung bereit bleiben.
Lesen Sie die vollständige offizielle Anleitung: Tabellen in Excel in Python hinzufügen oder entfernen.
Profi-Tipps zum Entfernen einer Tabelle in Excel
Beim Entfernen einer Tabelle in Excel können Ihnen die folgenden Tipps helfen, häufige Probleme zu vermeiden und die Datenintegrität zu wahren:
- Sichern Sie immer Ihre Arbeitsmappe, bevor Sie VBA- oder Automatisierungsskripte ausführen.
- Überprüfen Sie Formeln nach der Konvertierung auf fehlerhafte Verweise.
- Wenden Sie Filter bei Bedarf nach der Konvertierung in einen Bereich manuell erneut an.
- Behalten Sie ein einheitliches Format bei, indem Sie nach dem Entfernen der Tabellenformatierung benutzerdefinierte Zellstile anwenden.
- Verwenden Sie benannte Bereiche anstelle von Tabellen, wenn Sie nur feste Verweise ohne strukturiertes Verhalten benötigen.
Fazit
Das Entfernen einer Tabelle in Excel muss nicht kompliziert sein. Indem Sie dieser Anleitung zum Entfernen einer Tabelle in Excel folgen, können Sie Ihre Daten und Formatierungen sicher beibehalten. Ob Sie manuelle Schritte, VBA-Automatisierung oder Python-Skripting mit Spire.XLS bevorzugen, diese Methoden machen das Entfernen von Tabellen schnell, zuverlässig und stressfrei. Probieren Sie sie noch heute aus, um Ihre Tabellenkalkulationen zu bereinigen und Ihren Arbeitsablauf zu optimieren!
FAQs: Tabelle in Excel entfernen
F1: Wie konvertiert man eine Tabelle in einen normalen Bereich in Excel, behält aber die Daten?
A1: Wählen Sie eine beliebige Zelle in der Tabelle aus → Klicken Sie mit der rechten Maustaste auf Tabelle → In Bereich konvertieren oder gehen Sie zu Entwurf → In Bereich konvertieren → Klicken Sie auf Ja. Ihre Daten bleiben erhalten, aber die Tabellenfunktionen werden entfernt.
F2: Wie entferne ich nur die Tabellenformatierung in Excel?
A2: Wandeln Sie zuerst die Tabelle in einen normalen Bereich um. Wählen Sie dann alle Zellen aus → gehen Sie zu Start → klicken Sie auf Löschen → Formate löschen.
F3: Kann ich mehrere Tabellen in Excel auf einmal entfernen?
A3: Ja. Verwenden Sie ein VBA-Makro, um alle Tabellen in Bereiche umzuwandeln.
F4: Kann ich eine Tabelle in Excel mit Python entfernen?
A4: Ja. Sie können Bibliotheken wie Spire.XLS for Python verwenden, um Tabellen in Excel mit Python zu entfernen.
Lesen Sie auch
Удаление таблицы в Excel (преобразование в диапазон, очистка форматирования, VBA и Python)
Содержание
- Что происходит при удалении таблицы в Excel
- Как удалить таблицу в Excel, преобразовав ее в диапазон
- Как удалить форматирование таблицы в Excel
- Как полностью удалить таблицу в Excel
- Как удалить все таблицы в Excel сразу с помощью VBA
- Как удалить таблицы в Excel с помощью автоматизации на Python
- Профессиональные советы по удалению таблиц в Excel
- Заключение
- Часто задаваемые вопросы: удаление таблиц в Excel
Удаление таблицы в Excel — простая, но важная задача для упрощения ваших данных. Хотя таблицы полезны для организации и управления информацией, бывают случаи, когда вы можете захотеть их удалить — будь то для оптимизации форматирования, экспорта необработанных данных или прекращения использования структурированных функций.
В этом руководстве мы рассмотрим различные методы удаления таблицы в Excel, включая преобразование ее в диапазон, очистку ее форматирования и полное удаление. Кроме того, мы продемонстрируем, как автоматизировать этот процесс с помощью VBA и Python, что поможет вам сэкономить время при работе с несколькими таблицами.
Обзор содержимого
- Что происходит при удалении таблицы в Excel
- Как удалить таблицу в Excel, преобразовав ее в диапазон
- Как удалить форматирование таблицы в Excel
- Как полностью удалить таблицу в Excel
- Как удалить все таблицы в Excel сразу с помощью VBA
- Как удалить таблицы в Excel с помощью автоматизации на Python
- Профессиональные советы по удалению таблиц в Excel
- Заключение
- Часто задаваемые вопросы: удаление таблиц в Excel
Что происходит при удалении таблицы в Excel
Удаление таблицы в Excel может иметь разные результаты в зависимости от выбранного вами метода:
- Преобразовать в диапазон: сохраняет все ваши данные и любое форматирование, примененное к таблице, как статическое форматирование ячеек, но удаляет функции таблицы, такие как фильтры и структурированные ссылки.
- Очистить форматирование таблицы: сохраняет данные, но удаляет все цвета, границы и стили таблицы.
- Удалить всю таблицу: навсегда удаляет как таблицу, так и ее данные.
Давайте подробно рассмотрим эти варианты и посмотрим, как они влияют на ваши данные в Excel.
Как удалить таблицу в Excel, преобразовав ее в диапазон?
Самый простой и надежный способ удалить таблицу в Excel — это преобразовать ее в обычный диапазон, что сохранит ваши данные и форматирование. Вы можете выбрать один из двух основных вариантов этого преобразования: с помощью ленты Excel или контекстного меню.
Вариант 1. Использование ленты Excel
Выполните следующие шаги, чтобы преобразовать таблицу в диапазон с помощью ленты Excel:
-
Выберите любую ячейку внутри вашей таблицы: щелкните любую ячейку (например, «A1») в таблице, которую вы хотите удалить. Вам не нужно выделять всю таблицу.
-
Перейдите на вкладку «Конструктор»: как только вы выберете ячейку таблицы, на ленте Excel в разделе Работа с таблицами появится контекстная вкладка Конструктор. Нажмите на нее.
-
Нажмите «Преобразовать в диапазон»: в группе Сервис слева вы найдете кнопку «Преобразовать в диапазон». Нажмите ее.
-
Подтвердите действие: Excel отобразит диалоговое окно с вопросом: «Вы хотите преобразовать таблицу в обычный диапазон?» Нажмите Да.
После преобразования структура таблицы удаляется, и фильтры больше не доступны. Однако любое форматирование таблицы (например, чередующиеся строки и стили заголовков) остается, но диапазон становится статическим, а не динамическим.
Вариант 2. Использование контекстного меню
Для тех, кто предпочитает контекстные меню, использование контекстного меню так же эффективно и немного быстрее:
-
Выберите любую ячейку внутри таблицы: как и в первом методе, щелкните в любом месте данных вашей таблицы.
-
Щелкните правой кнопкой мыши, чтобы открыть контекстное меню: щелкните правой кнопкой мыши по выделенной ячейке.
-
Перемещайтесь по меню: в контекстном меню наведите указатель мыши на (или щелкните) Таблица.
-
Выберите «Преобразовать в диапазон»: в появившемся подменю выберите Преобразовать в диапазон.
-
Подтвердите действие: нажмите Да в диалоговом окне подтверждения.
Этот метод дает тот же результат, что и использование ленты, но предлагает более быстрый подход с помощью мыши.
Как удалить форматирование таблицы в Excel?
В некоторых случаях вам может потребоваться удалить форматирование таблицы в Excel, включая такие элементы, как фильтры, цвета и границы. Выполните следующие шаги, чтобы очистить форматирование и вернуть данные к более простому макету:
-
Преобразуйте таблицу в диапазон: сначала преобразуйте таблицу в обычный диапазон, используя либо ленту Excel, либо контекстное меню, описанное выше.
-
Очистить форматирование таблицы
Теперь, когда данные представляют собой простой диапазон, вы можете удалить оставшееся форматирование.-
Выделите весь диапазон данных: щелкните и перетащите, чтобы выделить все ячейки, которые были частью исходной таблицы, включая заголовок.
-
Перейдите на вкладку «Главная»: на ленте Excel перейдите на вкладку Главная.
-
Очистить форматы:
-
В группе Редактирование нажмите кнопку Очистить (она выглядит как розовый ластик).
-
В раскрывающемся меню выберите Очистить форматы.
-
-
Теперь все форматирование, специфичное для таблицы, удалено, но ваши данные остаются нетронутыми. Ячейки возвращаются к шрифту, цвету и границам Excel по умолчанию, предоставляя вам чистый, неформатированный блок данных, готовый к новому форматированию или анализу.
Как полностью удалить таблицу в Excel
Если вам нужно удалить как таблицу, так и все содержащиеся в ней данные, этот метод поможет. Прежде чем продолжить, убедитесь, что вам больше не нужна эта информация. Чтобы полностью удалить таблицу, выполните следующие действия:
-
Выделите всю таблицу: щелкните в любом месте таблицы и нажмите Ctrl + A (Windows) или Cmd + A (Mac), чтобы выделить всю таблицу, включая заголовок и строки итогов.
-
Очистить все данные и форматирование: перейдите на вкладку Главная и найдите группу Редактирование. Нажмите Очистить, затем выберите Очистить все в раскрывающемся меню.
Это действие навсегда удаляет все данные, форматирование и структуру таблицы. Ячейки будут очищены, не оставив и следа от исходной таблицы.
Как удалить все таблицы в Excel сразу с помощью VBA
Если ваш файл Excel содержит несколько таблиц, удаление каждой из них вручную может занять много времени. Вы можете использовать VBA (Visual Basic для приложений) для автоматизации этого процесса.
Вот как удалить все таблицы в файле Excel, сохранив данные, с помощью скрипта VBA:
-
Нажмите Alt + F11, чтобы открыть редактор VBA.
-
Нажмите Вставка → Модуль.
-
Скопируйте и вставьте следующий код VBA:
Sub ConvertAllTablesToRanges() Dim ws As Worksheet Dim tbl As ListObject For Each ws In ActiveWorkbook.Worksheets For Each tbl In ws.ListObjects tbl.Unlist ' Convert table to range Next tbl Next ws End Sub -
Нажмите F5, чтобы запустить макрос.
Этот макрос просматривает каждый лист в файле Excel, находит все ListObjects (таблицы) и преобразует их в обычные диапазоны, сохраняя данные, но удаляя функциональность таблицы.
Для получения более подробной информации о методе Unlist, используемом в этом скрипте VBA, см. официальную документацию Microsoft: Метод Excel ListObject.Unlist.
Как удалить таблицы в Excel с помощью автоматизации на Python?
Если вы работаете с Python для обработки данных, автоматизированной отчетности или серверных приложений, вы можете удалять таблицы в Excel с помощью такой библиотеки, как Spire.XLS для Python.
Spire.XLS для Python — это популярная библиотека Excel, которая позволяет разработчикам создавать, читать и управлять файлами Excel непосредственно через код, не требуя Microsoft Excel. Помимо удаления таблиц, она позволяет читать и записывать значения и формулы ячеек, применять или очищать форматирование, управлять листами, вставлять диаграммы или изображения и даже преобразовывать файлы Excel в PDF или другие форматы.
Вот как вы можете удалить таблицы в Excel с помощью Python с Spire.XLS для Python:
-
Установите Spire.XLS для Python: выполните следующую команду в своем терминале, чтобы установить его непосредственно через PyPI:
pip install Spire.XLS -
Удалите таблицы с помощью кода Python: после установки библиотеки добавьте следующий код для удаления таблиц в вашем файле Excel с помощью Python:
from spire.xls import *

# Load the workbook
workbook = Workbook()
workbook.LoadFromFile("CreateTable.xlsx")

# Loop through all worksheets by index
for ws_index in range(len(workbook.Worksheets)):
  sheet = workbook.Worksheets[ws_index]
  # Loop from last table to first to safely remove by index
  for tbl_index in range(len(sheet.ListObjects) - 1, -1, -1):
      sheet.ListObjects.RemoveAt(tbl_index)

# Save the workbook
workbook.SaveToFile("DeleteAllTables.xlsx", ExcelVersion.Version2016)
workbook.Dispose()
Этот код удаляет все таблицы в файле Excel, сохраняя ваши данные нетронутыми и готовыми к дальнейшей обработке.
Прочтите полное официальное руководство: Добавление или удаление таблиц в Excel на Python.
Профессиональные советы по удалению таблиц в Excel
При удалении таблицы в Excel следующие советы помогут вам избежать распространенных проблем и сохранить целостность данных:
- Всегда создавайте резервную копию своей книги перед запуском сценариев VBA или автоматизации.
- Дважды проверьте формулы на наличие неработающих ссылок после преобразования.
- При необходимости повторно примените фильтры вручную после преобразования в диапазон.
- Сохраняйте единообразный формат, применяя настраиваемые стили ячеек после удаления форматирования таблицы.
- Используйте именованные диапазоны вместо таблиц, если вам нужны только фиксированные ссылки без структурированного поведения.
Заключение
Удаление таблицы в Excel не должно быть сложным. Следуя этому руководству о том, как удалить таблицу в Excel, вы можете безопасно сохранить свои данные и форматирование. Независимо от того, предпочитаете ли вы ручные шаги, автоматизацию VBA или написание сценариев на Python с помощью Spire.XLS, эти методы делают удаление таблиц быстрым, надежным и без лишних хлопот. Попробуйте их сегодня, чтобы навести порядок в своих электронных таблицах и оптимизировать свой рабочий процесс!
Часто задаваемые вопросы: удаление таблиц в Excel
В1: Как преобразовать таблицу в обычный диапазон в Excel, но сохранить данные?
О1: Выберите любую ячейку в таблице → Щелкните правой кнопкой мыши Таблица → Преобразовать в диапазон или перейдите в Конструктор → Преобразовать в диапазон → Нажмите Да. Ваши данные остаются, но функции таблицы удаляются.
В2: Как удалить только форматирование таблицы в Excel?
О2: Сначала преобразуйте таблицу в обычный диапазон. Затем выделите все ячейки → перейдите на вкладку Главная → нажмите Очистить → Очистить форматы.
В3: Могу ли я удалить несколько таблиц в Excel одновременно?
О3: Да. Используйте макрос VBA для преобразования всех таблиц в диапазоны.
В4: Могу ли я удалить таблицу в Excel с помощью Python?
О4: Да. Вы можете использовать библиотеки, такие как Spire.XLS для Python, для удаления таблиц в Excel с помощью Python.
Также читайте
Como baixar uma página da web como PDF: Guia para iniciantes
Às vezes, você encontra uma página da web que deseja guardar, mas não é permitido copiá-la ou salvá-la diretamente. Nesses casos, salvar a página como PDF é uma ótima solução. Isso permite que você acesse a página offline a qualquer momento e até mesmo edite ou destaque o conteúdo posteriormente. Neste guia, você explorará três maneiras fáceis de baixar uma página da web como PDF — usando os recursos integrados do navegador, ferramentas online e métodos baseados em código.
- Baixar Página da Web como PDF com o Recurso Integrado
- Como Baixar uma Página da Web como PDF com Ferramentas Online
- Como Baixar uma Página da Web como PDF com Código
- A Conclusão
Baixar Página da Web como PDF com o Recurso Integrado
Quando você precisa salvar uma página da web como PDF, o primeiro instinto da maioria das pessoas é usar o recurso de download integrado do navegador. É a maneira mais rápida e conveniente de fazer o trabalho. No entanto, os passos podem variar um pouco dependendo do seu sistema operacional. Vamos ver como baixar uma página da web como PDF nas duas plataformas mais comuns — Windows e macOS.
Baixar uma Página da Web como PDF no Windows
- Pressione Ctrl + P para abrir a caixa de diálogo de impressão.

- Na lista suspensa Impressora, selecione Microsoft Print to PDF ou Salvar como PDF (o nome pode variar dependendo do seu navegador).
- Clique em Imprimir para continuar.
- Quando a caixa de diálogo de arquivo aparecer, escolha uma pasta de destino e clique em Salvar.
- Se a sua versão do Windows não incluir o Microsoft Print to PDF, você ainda pode usar a opção integrada do Chrome Salvar como PDF para baixar a página da web como PDF.
Baixar uma Página da Web como PDF no macOS
- Pressione Command + P para abrir a janela de impressão.

- No canto inferior esquerdo, clique no menu suspenso PDF e selecione Salvar como PDF.
- No Chrome, você também pode escolher Abrir PDF no Preview para visualizá-lo antes de salvar.
- Quando solicitado, selecione um local para salvar o arquivo e confirme.
Como Baixar uma Página da Web como PDF com Ferramentas Online
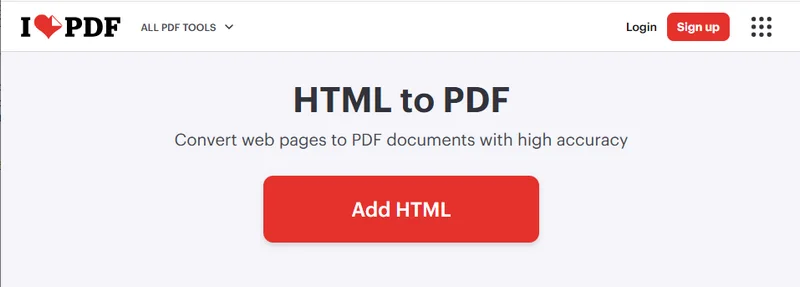
Além das teclas de atalho integradas no seu computador, você também pode usar ferramentas online para salvar uma página da web como PDF. Essas ferramentas são convenientes porque não exigem instalação, funcionam em qualquer dispositivo (computadores, laptops e celulares) e podem processar rapidamente diferentes tipos de conteúdo da web. Os passos são simples — basta pesquisar por “HTML para PDF” ou “Baixar página da web como PDF” no seu navegador. No exemplo abaixo, usaremos o iLovePDF, uma das ferramentas mais populares para esse fim.
- Acesse o site oficial do iLovePDF e encontre a ferramenta HTML para PDF.
- Clique no botão Adicionar HTML e, em seguida, insira a URL da página da web que você deseja salvar na janela pop-up. Depois de confirmar que tudo está correto, clique no botão vermelho Adicionar no canto inferior direito.
- Em seguida, ajuste as configurações no painel direito conforme necessário e clique em Converter para PDF. Assim que a conversão for concluída, você poderá baixar o arquivo PDF para o seu computador.
Como Baixar uma Página da Web como PDF com Código
Além dos dois métodos comuns mencionados acima, você também pode realizar esta tarefa usando código — uma opção mais flexível projetada para desenvolvedores. Essa abordagem oferece várias vantagens que os métodos anteriores não oferecem, como download em lote, operação totalmente offline e melhor automação para tarefas em grande escala.
Neste tutorial, usaremos o Spire.Doc for Python para demonstrar como baixar uma página da web como PDF. Como uma biblioteca Python profissional, ela permite que os desenvolvedores lidem com tudo, desde conversões simples de formato de documento até tarefas avançadas, como edição de conteúdo e criptografia.
Passos para baixar uma página da web inteira como PDF em Python:
-
Instale o Spire.Doc usando o comando
pip install spire.doc. Você também precisará instalar o requests, uma biblioteca usada para buscar o conteúdo da página da web. -
Importe os módulos necessários:
from spire.doc import *
from spire.doc.common import *
import requests
- Especifique a URL da página da web e busque o conteúdo do HTML:
# Obtenha o conteúdo HTML da página da web
url = "/Tutorials/Python/Spire.Doc-for-Python/Program-Guide/Conversion/Python-Convert-HTML-to-PDF.html"
html = requests.get(url).text
- Escreva o conteúdo HTML em um documento do Word:
# Escreva o HTML em um documento do Word
doc = Document()
section = doc.AddSection()
paragraph = section.AddParagraph()
paragraph.AppendHTML(html)
- Finalmente, salve o documento como um arquivo PDF:
# Salve o documento como PDF
doc.SaveToFile("E:/Administrator/Python1/webpage_to_pdf11.pdf", FileFormat.PDF)
Aqui está o exemplo de código completo:
from spire.doc import *
from spire.doc.common import *
import requests

#  HTML Obtenha HTML da web
url = "/Tutorials/Python/Spire.Doc-for-Python/Program-Guide/Conversion/Python-Convert-HTML-to-PDF.html"
html = requests.get(url).text

# Escreva HTML no documento
doc = Document()
section = doc.AddSection()
paragraph = section.AddParagraph()
paragraph.AppendHTML(html)

# Salve o documento em um arquivo PDF
doc.SaveToFile("E:/Administrator/Python1/webpage_to_pdf11.pdf", FileFormat.PDF)
doc.Close()
Abaixo está uma pré-visualização do arquivo PDF resultante: 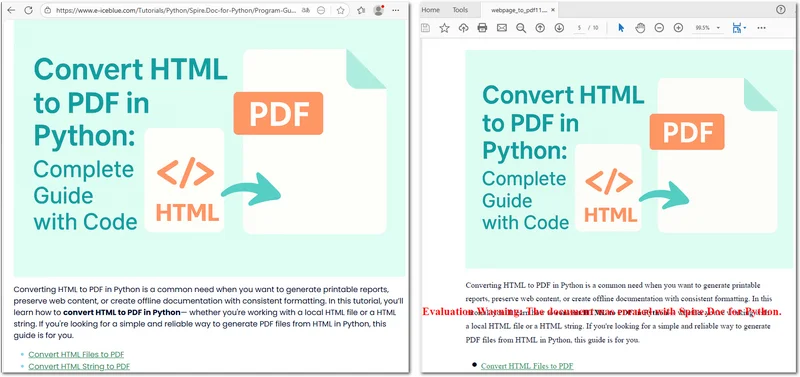
Se você salvar uma página da web no formato HTML, o Spire.Doc também pode convertê-la facilmente para PDF usando o método Document.SaveToFile().
A Conclusão
Este artigo apresentou três maneiras diferentes de baixar uma página da web como PDF. Dependendo de suas necessidades, você pode escolher o método que funciona melhor para você — seja usando recursos integrados, ferramentas online ou a biblioteca Spire.Doc Python. Se você deseja explorar recursos de PDF mais avançados, considere experimentar a licença gratuita de 30 dias do Spire.Doc para experimentar todo o seu potencial.
LEIA TAMBÉM
Come scaricare una pagina web in formato PDF: Guida per principianti
A volte ti imbatti in una pagina web che vuoi conservare, ma copiarla o salvarla direttamente non è consentito. In questi casi, salvare la pagina web come PDF è un'ottima soluzione. Ti consente di accedere alla pagina offline in qualsiasi momento e persino di modificare o evidenziare il contenuto in un secondo momento. In questa guida, esplorerai tre modi semplici per scaricare una pagina web come PDF: utilizzando le funzionalità integrate del browser, strumenti online e metodi basati sul codice.
- Scaricare una Pagina Web come PDF con la Funzionalità Integrata
- Come Scaricare una Pagina Web come PDF con Strumenti Online
- Come Scaricare una Pagina Web come PDF con il Codice
- La Conclusione
Scaricare una Pagina Web come PDF con la Funzionalità Integrata
Quando è necessario salvare una pagina web come PDF, il primo istinto della maggior parte delle persone è utilizzare la funzione di download integrata del browser. È il modo più rapido e conveniente per portare a termine il lavoro. Tuttavia, i passaggi possono variare leggermente a seconda del sistema operativo. Diamo un'occhiata a come scaricare una pagina web come PDF sulle due piattaforme più comuni: Windows e macOS.
Scaricare una Pagina Web come PDF su Windows
- Premi Ctrl + P per aprire la finestra di dialogo di stampa.
- Nell'elenco a discesa Stampante, seleziona Microsoft Print to PDF o Salva come PDF (il nome potrebbe variare a seconda del browser).
- Fai clic su Stampa per continuare.
- Quando viene visualizzata la finestra di dialogo del file, scegli una cartella di destinazione e fai clic su Salva.
- Se la tua versione di Windows non include Microsoft Print to PDF, puoi comunque utilizzare l'opzione integrata di Chrome Salva come PDF per scaricare la pagina web come PDF.
Scaricare una Pagina Web come PDF su macOS
- Premi Comando + P per aprire la finestra di stampa.
- Nell'angolo in basso a sinistra, fai clic sul menu a discesa PDF e seleziona Salva come PDF.
- In Chrome, puoi anche scegliere Apri PDF in Anteprima per visualizzarlo prima di salvarlo.
- Quando richiesto, seleziona una posizione per salvare il file e conferma.
Come Scaricare una Pagina Web come PDF con Strumenti Online
Oltre ai tasti di scelta rapida integrati nel tuo computer, puoi anche utilizzare strumenti online per salvare una pagina web come PDF. Questi strumenti sono convenienti perché non richiedono installazione, funzionano su qualsiasi dispositivo (computer, laptop e telefoni cellulari) e possono elaborare rapidamente diversi tipi di contenuti web. I passaggi sono semplici: basta cercare "HTML in PDF" o "Scarica pagina web come PDF" nel tuo browser. Nell'esempio seguente, utilizzeremo iLovePDF, uno degli strumenti più popolari per questo scopo.
- Vai al sito ufficiale di iLovePDF e trova lo strumento HTML in PDF.
- Fai clic sul pulsante Aggiungi HTML, quindi inserisci l'URL della pagina web che desideri salvare nella finestra pop-up. Dopo aver confermato che tutto è corretto, fai clic sul pulsante rosso Aggiungi in basso a destra.
- Successivamente, regola le impostazioni nel pannello di destra secondo necessità, quindi fai clic su Converti in PDF. Una volta completata la conversione, puoi scaricare il file PDF sul tuo computer.
Come Scaricare una Pagina Web come PDF con il Codice
Oltre ai due metodi comuni menzionati sopra, puoi anche eseguire questa attività utilizzando il codice, un'opzione più flessibile progettata per gli sviluppatori. Questo approccio offre diversi vantaggi che i metodi precedenti non hanno, come il download in batch, il funzionamento completamente offline e una migliore automazione per attività su larga scala.
In questo tutorial, utilizzeremo Spire.Doc for Python per dimostrare come scaricare una pagina web come PDF. In quanto libreria Python professionale, consente agli sviluppatori di gestire tutto, dalle semplici conversioni di formato di documenti ad attività avanzate come la modifica e la crittografia dei contenuti.
Passaggi per scaricare un'intera pagina web come PDF in Python:
-
Installa Spire.Doc usando il comando
pip install spire.doc. Dovrai anche installare requests, una libreria utilizzata per recuperare il contenuto della pagina web. -
Importa i moduli richiesti:
from spire.doc import *
from spire.doc.common import *
import requests
- Specifica l'URL della pagina web e recupera il contenuto dall'HTML:
# Ottieni il contenuto HTML dalla pagina web
url = "/Tutorials/Python/Spire.Doc-for-Python/Program-Guide/Conversion/Python-Convert-HTML-to-PDF.html"
html = requests.get(url).text
- Scrivi il contenuto HTML in un documento Word:
# Scrivi HTML in un documento Word
doc = Document()
section = doc.AddSection()
paragraph = section.AddParagraph()
paragraph.AppendHTML(html)
- Infine, salva il documento come file PDF:
# Salva il documento come PDF
doc.SaveToFile("E:/Administrator/Python1/webpage_to_pdf11.pdf", FileFormat.PDF)
Ecco l'esempio di codice completo:
from spire.doc import *
from spire.doc.common import *
import requests

# HTML Ottieni HTML dal web
url = "/Tutorials/Python/Spire.Doc-for-Python/Program-Guide/Conversion/Python-Convert-HTML-to-PDF.html"
html = requests.get(url).text

# Scrivi HTML nel documento
doc = Document()
section = doc.AddSection()
paragraph = section.AddParagraph()
paragraph.AppendHTML(html)

# Salva il documento in un file PDF
doc.SaveToFile("E:/Administrator/Python1/webpage_to_pdf11.pdf", FileFormat.PDF)
doc.Close()
Di seguito è riportata un'anteprima del file PDF risultante:
Se salvi una pagina web in formato HTML, Spire.Doc può anche convertirla facilmente in PDF utilizzando il metodo Document.SaveToFile().
La Conclusione
Questo articolo ha introdotto tre modi diversi per scaricare una pagina web come PDF. A seconda delle tue esigenze, puoi scegliere il metodo che funziona meglio per te, sia che si tratti di utilizzare funzionalità integrate, strumenti online o la libreria Python Spire.Doc. Se desideri esplorare funzionalità PDF più avanzate, considera di provare la licenza gratuita di 30 giorni di Spire.Doc per sperimentarne tutto il potenziale.
LEGGI ANCHE
웹페이지를 PDF로 다운로드하는 방법: 초보자 가이드
보관하고 싶은 웹페이지를 발견했지만 직접 복사하거나 저장하는 것이 허용되지 않는 경우가 있습니다. 이러한 경우 웹페이지를 PDF로 저장하는 것이 좋은 해결책입니다. 언제든지 오프라인으로 페이지에 액세스하고 나중에 콘텐츠를 편집하거나 강조 표시할 수도 있습니다. 이 가이드에서는 내장된 브라우저 기능, 온라인 도구 및 코드 기반 방법을 사용하여 웹페이지를 PDF로 다운로드하는 세 가지 쉬운 방법을 살펴봅니다.
기본 제공 기능으로 웹페이지를 PDF로 다운로드
웹페이지를 PDF로 저장해야 할 때 대부분의 사람들은 가장 먼저 브라우저의 내장 다운로드 기능을 사용합니다. 이것이 작업을 완료하는 가장 빠르고 편리한 방법입니다. 그러나 운영 체제에 따라 단계가 약간 다를 수 있습니다. 가장 일반적인 두 플랫폼인 Windows와 macOS에서 웹페이지를 PDF로 다운로드하는 방법을 살펴보겠습니다.
Windows에서 웹페이지를 PDF로 다운로드
- Ctrl + P를 눌러 인쇄 대화상자를 엽니다.
- 프린터 드롭다운 목록에서 Microsoft Print to PDF 또는 PDF로 저장을 선택합니다(이름은 브라우저에 따라 다를 수 있음).
- 인쇄를 클릭하여 계속합니다.
- 파일 대화상자가 나타나면 대상 폴더를 선택하고 저장을 클릭합니다.
- Windows 버전에 Microsoft Print to PDF가 포함되어 있지 않은 경우에도 Chrome의 내장 PDF로 저장 옵션을 사용하여 웹페이지를 PDF로 다운로드할 수 있습니다.
macOS에서 웹페이지를 PDF로 다운로드
- Command + P를 눌러 인쇄 창을 엽니다.
- 왼쪽 하단에서 PDF 드롭다운 메뉴를 클릭하고 PDF로 저장을 선택합니다.
- Chrome에서는 저장하기 전에 미리보기에서 PDF 열기를 선택하여 볼 수도 있습니다.
- 메시지가 표시되면 파일을 저장할 위치를 선택하고 확인합니다.
온라인 도구를 사용하여 웹페이지를 PDF로 다운로드하는 방법
컴퓨터의 내장 단축키 외에도 온라인 도구를 사용하여 웹페이지를 PDF로 저장할 수도 있습니다. 이러한 도구는 설치가 필요 없고 모든 장치(컴퓨터, 노트북, 휴대폰)에서 작동하며 다양한 유형의 웹 콘텐츠를 빠르게 처리할 수 있어 편리합니다. 단계는 간단합니다. 브라우저에서 "HTML to PDF" 또는 "웹페이지를 PDF로 다운로드"를 검색하기만 하면 됩니다. 아래 예에서는 이 목적을 위해 가장 널리 사용되는 도구 중 하나인 iLovePDF를 사용하겠습니다.
- iLovePDF 공식 웹사이트로 이동하여 HTML to PDF 도구를 찾으십시오.
- HTML 추가 버튼을 클릭한 다음 팝업 창에 저장하려는 웹페이지의 URL을 입력합니다. 모든 것이 올바른지 확인한 후 오른쪽 하단의 빨간색 추가 버튼을 클릭합니다.
- 다음으로, 필요에 따라 오른쪽 패널에서 설정을 조정한 다음 PDF로 변환을 클릭합니다. 변환이 완료되면 PDF 파일을 컴퓨터에 다운로드할 수 있습니다.
코드를 사용하여 웹페이지를 PDF로 다운로드하는 방법
위에서 언급한 두 가지 일반적인 방법 외에도 코드를 사용하여 이 작업을 수행할 수도 있습니다. 이는 개발자를 위해 설계된 보다 유연한 옵션입니다. 이 접근 방식은 일괄 다운로드, 전체 오프라인 작업, 대규모 작업을 위한 더 나은 자동화와 같이 이전 방법에서는 제공하지 않았던 몇 가지 이점을 제공합니다.
이 튜토리얼에서는 Spire.Doc for Python을 사용하여 웹페이지를 PDF로 다운로드하는 방법을 보여줍니다. 전문적인 Python 라이브러리로서 개발자는 간단한 문서 형식 변환부터 내용 편집 및 암호화와 같은 고급 작업까지 모든 것을 처리할 수 있습니다.
Python에서 전체 웹페이지를 PDF로 다운로드하는 단계:
-
pip install spire.doc명령을 사용하여 Spire.Doc을 설치합니다. 웹페이지 콘텐츠를 가져오는 데 사용되는 라이브러리인 requests도 설치해야 합니다. -
필요한 모듈 가져오기:
from spire.doc import *
from spire.doc.common import *
import requests
- 웹페이지 URL을 지정하고 HTML에서 콘텐츠 가져오기:
# 웹페이지에서 HTML 콘텐츠 가져오기
url = "/Tutorials/Python/Spire.Doc-for-Python/Program-Guide/Conversion/Python-Convert-HTML-to-PDF.html"
html = requests.get(url).text
- HTML 콘텐츠를 Word 문서에 쓰기:
# HTML을 Word 문서에 쓰기
doc = Document()
section = doc.AddSection()
paragraph = section.AddParagraph()
paragraph.AppendHTML(html)
- 마지막으로 문서를 PDF 파일로 저장합니다:
# 문서를 PDF로 저장
doc.SaveToFile("E:/Administrator/Python1/webpage_to_pdf11.pdf", FileFormat.PDF)
다음은 전체 코드 예제입니다:
from spire.doc import *
from spire.doc.common import *
import requests

#  웹에서 HTML 가져오기
url = "/Tutorials/Python/Spire.Doc-for-Python/Program-Guide/Conversion/Python-Convert-HTML-to-PDF.html"
html = requests.get(url).text

# 문서를 HTML로 쓰기
doc = Document()
section = doc.AddSection()
paragraph = section.AddParagraph()
paragraph.AppendHTML(html)

# 문서를 PDF 파일로 저장
doc.SaveToFile("E:/Administrator/Python1/webpage_to_pdf11.pdf", FileFormat.PDF)
doc.Close()
다음은 결과 PDF 파일의 미리보기입니다:
웹페이지를 HTML 형식으로 저장하는 경우 Spire.Doc은 Document.SaveToFile() 메서드를 사용하여 쉽게 PDF로 변환할 수도 있습니다.
결론
이 기사에서는 웹페이지를 PDF로 다운로드하는 세 가지 다른 방법을 소개했습니다. 필요에 따라 내장 기능, 온라인 도구 또는 Spire.Doc Python 라이브러리 사용 등 자신에게 가장 적합한 방법을 선택할 수 있습니다. 더 많은 고급 PDF 기능을 탐색하고 싶다면 Spire.Doc의 30일 무료 라이선스를 사용하여 잠재력을 최대한 경험해 보십시오.
함께 읽기
Comment télécharger une page web en PDF : Guide du débutant
Parfois, vous tombez sur une page Web que vous souhaitez conserver, mais la copie ou l'enregistrement direct n'est pas autorisé. Dans de tels cas, enregistrer la page Web en PDF est une excellente solution. Cela vous permet d'accéder à la page hors ligne à tout moment et même de modifier ou de surligner le contenu plus tard. Dans ce guide, vous explorerez trois façons simples de télécharger une page Web en PDF — en utilisant les fonctionnalités intégrées du navigateur, des outils en ligne et des méthodes basées sur le code.
- Télécharger une page Web en PDF avec la fonctionnalité intégrée
- Comment télécharger une page Web en PDF avec des outils en ligne
- Comment télécharger une page Web en PDF avec du code
- La conclusion
Télécharger une page Web en PDF avec la fonctionnalité intégrée
Lorsque vous devez enregistrer une page Web en PDF, le premier réflexe de la plupart des gens est d'utiliser la fonction de téléchargement intégrée du navigateur. C'est le moyen le plus rapide et le plus pratique de le faire. Cependant, les étapes peuvent varier légèrement en fonction de votre système d'exploitation. Voyons comment télécharger une page Web en PDF sur les deux plateformes les plus courantes — Windows et macOS.
Télécharger une page Web en PDF sous Windows
- Appuyez sur Ctrl + P pour ouvrir la boîte de dialogue d'impression.
- Dans la liste déroulante Imprimante, sélectionnez Microsoft Print to PDF ou Enregistrer en PDF (le nom peut différer selon votre navigateur).
- Cliquez sur Imprimer pour continuer.
- Lorsque la boîte de dialogue de fichier apparaît, choisissez un dossier de destination et cliquez sur Enregistrer.
- Si votre version de Windows n'inclut pas Microsoft Print to PDF, vous pouvez toujours utiliser l'option intégrée de Chrome Enregistrer en PDF pour télécharger la page Web en PDF.
Télécharger une page Web en PDF sous macOS
- Appuyez sur Commande + P pour ouvrir la fenêtre d'impression.
- Dans le coin inférieur gauche, cliquez sur le menu déroulant PDF et sélectionnez Enregistrer en PDF.
- Dans Chrome, vous pouvez également choisir Ouvrir le PDF dans Aperçu pour le visualiser avant de l'enregistrer.
- Lorsque vous y êtes invité, sélectionnez un emplacement pour enregistrer le fichier et confirmez.
Comment télécharger une page Web en PDF avec des outils en ligne
Outre les touches de raccourci intégrées sur votre ordinateur, vous pouvez également utiliser des outils en ligne pour enregistrer une page Web en PDF. Ces outils sont pratiques car ils ne nécessitent aucune installation, fonctionnent sur n'importe quel appareil (ordinateurs, ordinateurs portables et téléphones mobiles) et peuvent traiter rapidement différents types de contenu Web. Les étapes sont simples — il suffit de rechercher « HTML en PDF » ou « Télécharger une page Web en PDF » dans votre navigateur. Dans l'exemple ci-dessous, nous utiliserons iLovePDF, l'un des outils les plus populaires à cet effet.
- Allez sur le site officiel d'iLovePDF et trouvez l'outil HTML en PDF.
- Cliquez sur le bouton Ajouter HTML, puis entrez l'URL de la page Web que vous souhaitez enregistrer dans la fenêtre contextuelle. Après avoir confirmé que tout est correct, cliquez sur le bouton rouge Ajouter en bas à droite.
- Ensuite, ajustez les paramètres dans le panneau de droite selon vos besoins, puis cliquez sur Convertir en PDF. Une fois la conversion terminée, vous pouvez télécharger le fichier PDF sur votre ordinateur.
Comment télécharger une page Web en PDF avec du code
En plus des deux méthodes courantes mentionnées ci-dessus, vous pouvez également effectuer cette tâche en utilisant du code — une option plus flexible conçue pour les développeurs. Cette approche offre plusieurs avantages que les méthodes précédentes n'ont pas, tels que le téléchargement par lots, le fonctionnement entièrement hors ligne et une meilleure automatisation pour les tâches à grande échelle.
Dans ce tutoriel, nous utiliserons Spire.Doc for Python pour démontrer comment télécharger une page Web en PDF. En tant que bibliothèque Python professionnelle, elle permet aux développeurs de tout gérer, des conversions de format de document simples aux tâches avancées comme l'édition de contenu et le chiffrement.
Étapes pour télécharger une page Web entière en PDF en Python :
-
Installez Spire.Doc en utilisant la commande
pip install spire.doc. Vous devrez également installer requests, une bibliothèque utilisée pour récupérer le contenu des pages Web. -
Importez les modules requis :
from spire.doc import *
from spire.doc.common import *
import requests
- Spécifiez l'URL de la page Web et récupérez le contenu du HTML:
# Obtenir le contenu HTML de la page Web
url = "/Tutorials/Python/Spire.Doc-for-Python/Program-Guide/Conversion/Python-Convert-HTML-to-PDF.html"
html = requests.get(url).text
- Écrivez le contenu HTML dans un document Word :
# Écrire le HTML dans un document Word
doc = Document()
section = doc.AddSection()
paragraph = section.AddParagraph()
paragraph.AppendHTML(html)
- Enfin, enregistrez le document en tant que fichier PDF :
# Enregistrer le document en PDF
doc.SaveToFile("E:/Administrator/Python1/webpage_to_pdf11.pdf", FileFormat.PDF)
Voici l'exemple de code complet :
from spire.doc import *
from spire.doc.common import *
import requests

# HTML Obtenir le HTML du web
url = "/Tutorials/Python/Spire.Doc-for-Python/Program-Guide/Conversion/Python-Convert-HTML-to-PDF.html"
html = requests.get(url).text

# Écrire le HTML dans le document
doc = Document()
section = doc.AddSection()
paragraph = section.AddParagraph()
paragraph.AppendHTML(html)

# Enregistrer le document en fichier PDF
doc.SaveToFile("E:/Administrator/Python1/webpage_to_pdf11.pdf", FileFormat.PDF)
doc.Close()
Ci-dessous un aperçu du fichier PDF résultant :
Si vous enregistrez une page Web au format HTML, Spire.Doc peut également facilement la convertir en PDF en utilisant la méthode Document.SaveToFile().
La conclusion
Cet article a présenté trois manières différentes de télécharger une page Web en PDF. En fonction de vos besoins, vous pouvez choisir la méthode qui vous convient le mieux — que ce soit en utilisant les fonctionnalités intégrées, des outils en ligne ou la bibliothèque Python Spire.Doc. Si vous souhaitez explorer des fonctionnalités PDF plus avancées, envisagez d'essayer la licence gratuite de 30 jours de Spire.Doc pour découvrir tout son potentiel.
LIRE AUSSI
Cómo descargar una página web como PDF: Guía para principiantes
A veces te encuentras con una página web que quieres conservar, pero no está permitido copiarla o guardarla directamente. En tales casos, guardar la página web como PDF es una gran solución. Te permite acceder a la página sin conexión en cualquier momento e incluso editar o resaltar el contenido más tarde. En esta guía, explorarás tres formas sencillas de descargar una página web como PDF: utilizando las funciones integradas del navegador, herramientas en línea y métodos basados en código.
- Descargar Página Web como PDF con la Función Incorporada
- Cómo Descargar una Página Web como PDF con Herramientas en Línea
- Cómo Descargar una Página Web como PDF con Código
- La Conclusión
Descargar Página Web como PDF con la Función Incorporada
Cuando necesitas guardar una página web como PDF, el primer instinto de la mayoría de las personas es usar la función de descarga incorporada del navegador. Es la forma más rápida y conveniente de hacerlo. Sin embargo, los pasos pueden variar ligeramente según tu sistema operativo. Veamos cómo descargar una página web como PDF en las dos plataformas más comunes: Windows y macOS.
Descargar una Página Web como PDF en Windows
- Presiona Ctrl + P para abrir el diálogo de impresión.
- En la lista desplegable Impresora, selecciona Microsoft Print to PDF o Guardar como PDF (el nombre puede variar según tu navegador).
- Haz clic en Imprimir para continuar.
- Cuando aparezca el diálogo de archivo, elige una carpeta de destino y haz clic en Guardar.
- Si tu versión de Windows no incluye Microsoft Print to PDF, aún puedes usar la opción incorporada de Chrome Guardar como PDF para descargar la página web como PDF.
Descargar una Página Web como PDF en macOS
- Presiona Command + P para abrir la ventana de impresión.
- En la esquina inferior izquierda, haz clic en el menú desplegable PDF y selecciona Guardar como PDF.
- En Chrome, también puedes elegir Abrir PDF en Vista Previa para verlo antes de guardarlo.
- Cuando se te solicite, selecciona una ubicación para guardar el archivo y confirma.
Cómo Descargar una Página Web como PDF con Herramientas en Línea
Además de las teclas de acceso directo incorporadas en tu computadora, también puedes usar herramientas en línea para guardar una página web como PDF. Estas herramientas son convenientes porque no requieren instalación, funcionan en cualquier dispositivo (computadoras, portátiles y teléfonos móviles) y pueden procesar rápidamente diferentes tipos de contenido web. Los pasos son simples: solo busca "HTML a PDF" o "Descargar página web como PDF" en tu navegador. En el ejemplo a continuación, usaremos iLovePDF, una de las herramientas más populares para este propósito.
- Ve al sitio web oficial de iLovePDF y busca la herramienta HTML a PDF.
- Haz clic en el botón Añadir HTML, luego ingresa la URL de la página web que deseas guardar en la ventana emergente. Después de confirmar que todo es correcto, haz clic en el botón rojo Añadir en la parte inferior derecha.
- A continuación, ajusta la configuración en el panel derecho según sea necesario, luego haz clic en Convertir a PDF. Una vez que se completa la conversión, puedes descargar el archivo PDF a tu computadora.
Cómo Descargar una Página Web como PDF con Código
Además de los dos métodos comunes mencionados anteriormente, también puedes realizar esta tarea usando código, una opción más flexible diseñada para desarrolladores. Este enfoque ofrece varias ventajas que los métodos anteriores no tienen, como la descarga por lotes, la operación completa sin conexión y una mejor automatización para tareas a gran escala.
En este tutorial, usaremos Spire.Doc for Python para demostrar cómo descargar una página web como PDF. Como una biblioteca profesional de Python, permite a los desarrolladores manejar todo, desde conversiones simples de formato de documentos hasta tareas avanzadas como la edición de contenido y el cifrado.
Pasos para descargar una página web completa como PDF en Python:
-
Instala Spire.Doc usando el comando
pip install spire.doc. También necesitarás instalar requests, una biblioteca utilizada para obtener el contenido de la página web. -
Importa los módulos requeridos:
from spire.doc import *
from spire.doc.common import *
import requests
- Especifica la URL de la página web y obtén el contenido de HTML:
# Obtener contenido HTML de la página web
url = "/Tutorials/Python/Spire.Doc-for-Python/Program-Guide/Conversion/Python-Convert-HTML-to-PDF.html"
html = requests.get(url).text
- Escribe el contenido HTML en un documento de Word:
# Escribir HTML en un documento de Word
doc = Document()
section = doc.AddSection()
paragraph = section.AddParagraph()
paragraph.AppendHTML(html)
- Finalmente, guarda el documento como un archivo PDF:
# Guardar el documento como PDF
doc.SaveToFile("E:/Administrator/Python1/webpage_to_pdf11.pdf", FileFormat.PDF)
Aquí está el ejemplo de código completo:
from spire.doc import *
from spire.doc.common import *
import requests

#  HTML Obtener HTML de la web
url = "/Tutorials/Python/Spire.Doc-for-Python/Program-Guide/Conversion/Python-Convert-HTML-to-PDF.html"
html = requests.get(url).text

# Escribir HTML en el documento
doc = Document()
section = doc.AddSection()
paragraph = section.AddParagraph()
paragraph.AppendHTML(html)

# Guardar el documento en un archivo PDF
doc.SaveToFile("E:/Administrator/Python1/webpage_to_pdf11.pdf", FileFormat.PDF)
doc.Close()
A continuación se muestra una vista previa del archivo PDF resultante:
Si guardas una página web en formato HTML, Spire.Doc también puede convertirla fácilmente a PDF usando el método Document.SaveToFile().
La Conclusión
Este artículo presentó tres formas diferentes de descargar una página web como PDF. Dependiendo de tus necesidades, puedes elegir el método que mejor se adapte a ti, ya sea utilizando funciones integradas, herramientas en línea o la biblioteca Spire.Doc para Python. Si deseas explorar funciones de PDF más avanzadas, considera probar la licencia gratuita de 30 días de Spire.Doc para experimentar todo su potencial.
TAMBIÉN LEA
Wie man eine Webseite als PDF herunterlädt: Anleitung für Anfänger
Manchmal stoßen Sie auf eine Webseite, die Sie behalten möchten, aber das direkte Kopieren oder Speichern ist nicht erlaubt. In solchen Fällen ist das Speichern der Webseite als PDF eine großartige Lösung. So können Sie jederzeit offline auf die Seite zugreifen und den Inhalt später sogar bearbeiten oder hervorheben. In dieser Anleitung erfahren Sie drei einfache Möglichkeiten, eine Webseite als PDF herunterzuladen – mit integrierten Browserfunktionen, Online-Tools und codebasierten Methoden.
- Webseite als PDF mit der integrierten Funktion herunterladen
- So laden Sie eine Webseite als PDF mit Online-Tools herunter
- So laden Sie eine Webseite als PDF mit Code herunter
- Fazit
Webseite als PDF mit der integrierten Funktion herunterladen
Wenn Sie eine Webseite als PDF speichern müssen, ist der erste Instinkt der meisten Menschen, die integrierte Download-Funktion des Browsers zu verwenden. Das ist der schnellste und bequemste Weg, um die Aufgabe zu erledigen. Die Schritte können jedoch je nach Betriebssystem leicht variieren. Sehen wir uns an, wie man eine Webseite auf den beiden gängigsten Plattformen – Windows und macOS – als PDF herunterlädt.
Eine Webseite als PDF unter Windows herunterladen
- Drücken Sie Strg + P, um den Druckdialog zu öffnen.
- Wählen Sie in der Dropdown-Liste Drucker die Option Microsoft Print to PDF oder Als PDF speichern aus (der Name kann je nach Browser unterschiedlich sein).
- Klicken Sie auf Drucken, um fortzufahren.
- Wenn das Dateidialogfeld angezeigt wird, wählen Sie einen Zielordner aus und klicken Sie auf Speichern.
- Wenn Ihre Windows-Version Microsoft Print to PDF nicht enthält, können Sie dennoch die integrierte Option Als PDF speichern von Chrome verwenden, um die Webseite als PDF herunterzuladen.
Eine Webseite als PDF unter macOS herunterladen
- Drücken Sie Befehl + P, um das Druckfenster zu öffnen.
- Klicken Sie in der unteren linken Ecke auf das Dropdown-Menü PDF und wählen Sie Als PDF speichern.
- In Chrome können Sie auch PDF in der Vorschau öffnen wählen, um es vor dem Speichern anzuzeigen.
- Wenn Sie dazu aufgefordert werden, wählen Sie einen Speicherort für die Datei aus und bestätigen Sie.
So laden Sie eine Webseite als PDF mit Online-Tools herunter
Neben den integrierten Tastenkombinationen auf Ihrem Computer können Sie auch Online-Tools verwenden, um eine Webseite als PDF zu speichern. Diese Tools sind praktisch, da sie keine Installation erfordern, auf jedem Gerät (Computer, Laptops und Mobiltelefone) funktionieren und verschiedene Arten von Webinhalten schnell verarbeiten können. Die Schritte sind einfach – suchen Sie einfach in Ihrem Browser nach „HTML in PDF“ oder „Webseite als PDF herunterladen“. Im folgenden Beispiel verwenden wir iLovePDF, eines der beliebtesten Tools für diesen Zweck.
- Gehen Sie zur offiziellen iLovePDF-Website und suchen Sie das HTML in PDF-Tool.
- Klicken Sie auf die Schaltfläche HTML hinzufügen und geben Sie dann die URL der Webseite, die Sie speichern möchten, in das Popup-Fenster ein. Nachdem Sie bestätigt haben, dass alles korrekt ist, klicken Sie unten rechts auf die rote Schaltfläche Hinzufügen.
- Passen Sie als Nächstes die Einstellungen im rechten Bereich nach Bedarf an und klicken Sie dann auf In PDF konvertieren. Sobald die Konvertierung abgeschlossen ist, können Sie die PDF-Datei auf Ihren Computer herunterladen.
So laden Sie eine Webseite als PDF mit Code herunter
Zusätzlich zu den beiden oben genannten gängigen Methoden können Sie diese Aufgabe auch mit Code ausführen – eine flexiblere Option, die für Entwickler entwickelt wurde. Dieser Ansatz bietet mehrere Vorteile, die die vorherigen Methoden nicht bieten, wie z. B. Stapel-Downloads, vollständiger Offline-Betrieb und eine bessere Automatisierung für umfangreiche Aufgaben.
In diesem Tutorial verwenden wir Spire.Doc for Python, um zu demonstrieren, wie man eine Webseite als PDF herunterlädt. Als professionelle Python-Bibliothek ermöglicht sie Entwicklern, alles von einfachen Dokumentformatkonvertierungen bis hin zu fortgeschrittenen Aufgaben wie Inhaltsbearbeitung und Verschlüsselung zu bewältigen.
Schritte zum Herunterladen einer gesamten Webseite als PDF in Python:
-
Installieren Sie Spire.Doc mit dem Befehl
pip install spire.doc. Sie müssen auch requests installieren, eine Bibliothek, die zum Abrufen von Webinhalten verwendet wird. -
Importieren Sie die erforderlichen Module:
from spire.doc import *
from spire.doc.common import *
import requests
- Geben Sie die URL der Webseite an und rufen Sie den Inhalt aus HTML ab:
# Get HTML content from the webpage
url = "/Tutorials/Python/Spire.Doc-for-Python/Program-Guide/Conversion/Python-Convert-HTML-to-PDF.html"
html = requests.get(url).text
- Schreiben Sie den HTML-Inhalt in ein Word-Dokument:
# Write HTML to a Word document
doc = Document()
section = doc.AddSection()
paragraph = section.AddParagraph()
paragraph.AppendHTML(html)
- Speichern Sie das Dokument abschließend als PDF-Datei:
# Save the document as a PDF
doc.SaveToFile("E:/Administrator/Python1/webpage_to_pdf11.pdf", FileFormat.PDF)
Hier ist das vollständige Codebeispiel:
from spire.doc import *
from spire.doc.common import *
import requests

#  HTML Get HTML from web
url = "/Tutorials/Python/Spire.Doc-for-Python/Program-Guide/Conversion/Python-Convert-HTML-to-PDF.html"
html = requests.get(url).text

# Write HTML to document
doc = Document()
section = doc.AddSection()
paragraph = section.AddParagraph()
paragraph.AppendHTML(html)

# Save the document to PDF file
doc.SaveToFile("E:/Administrator/Python1/webpage_to_pdf11.pdf", FileFormat.PDF)
doc.Close()
Unten sehen Sie eine Vorschau der resultierenden PDF-Datei:
Wenn Sie eine Webseite im HTML-Format speichern, kann Spire.Doc sie auch einfach mit der Methode Document.SaveToFile() in ein PDF konvertieren.
Fazit
Dieser Artikel hat drei verschiedene Möglichkeiten vorgestellt, eine Webseite als PDF herunterzuladen. Je nach Ihren Bedürfnissen können Sie die Methode wählen, die für Sie am besten geeignet ist – sei es die Verwendung integrierter Funktionen, Online-Tools oder der Spire.Doc Python-Bibliothek. Wenn Sie erweiterte PDF-Funktionen erkunden möchten, sollten Sie die 30-tägige kostenlose Lizenz von Spire.Doc ausprobieren, um das volle Potenzial zu erleben.
LESEN SIE AUCH
Как скачать веб-страницу в формате PDF: Руководство для начинающих
Иногда вы натыкаетесь на веб-страницу, которую хотите сохранить, но прямое копирование или сохранение не разрешено. В таких случаях сохранение веб-страницы в формате PDF — отличное решение. Это позволяет вам получать доступ к странице в автономном режиме в любое время и даже редактировать или выделять содержимое позже. В этом руководстве вы изучите три простых способа скачать веб-страницу в формате PDF — с помощью встроенных функций браузера, онлайн-инструментов и методов на основе кода.
- Скачать веб-страницу в формате PDF с помощью встроенной функции
- Как скачать веб-страницу в формате PDF с помощью онлайн-инструментов
- Как скачать веб-страницу в формате PDF с помощью кода
- Заключение
Скачать веб-страницу в формате PDF с помощью встроенной функции
Когда вам нужно сохранить веб-страницу в формате PDF, большинство людей инстинктивно используют встроенную функцию загрузки браузера. Это самый быстрый и удобный способ выполнить работу. Однако шаги могут незначительно отличаться в зависимости от вашей операционной системы. Давайте посмотрим, как скачать веб-страницу в формате PDF на двух самых распространенных платформах — Windows и macOS.
Скачать веб-страницу в формате PDF в Windows
- Нажмите Ctrl + P, чтобы открыть диалоговое окно печати.
- В раскрывающемся списке Принтер выберите Microsoft Print to PDF или Сохранить как PDF (название может отличаться в зависимости от вашего браузера).
- Нажмите Печать, чтобы продолжить.
- Когда появится диалоговое окно файла, выберите папку назначения и нажмите Сохранить.
- Если ваша версия Windows не включает Microsoft Print to PDF, вы все равно можете использовать встроенную опцию Chrome Сохранить как PDF, чтобы скачать веб-страницу в формате PDF.
Скачать веб-страницу в формате PDF в macOS
- Нажмите Command + P, чтобы открыть окно печати.
- В левом нижнем углу щелкните раскрывающееся меню PDF и выберите Сохранить как PDF.
- В Chrome вы также можете выбрать Открыть PDF в Preview, чтобы просмотреть его перед сохранением.
- Когда будет предложено, выберите место для сохранения файла и подтвердите.
Как скачать веб-страницу в формате PDF с помощью онлайн-инструментов
Помимо встроенных сочетаний клавиш на вашем компьютере, вы также можете использовать онлайн-инструменты для сохранения веб-страницы в формате PDF. Эти инструменты удобны, потому что они не требуют установки, работают на любом устройстве (компьютеры, ноутбуки и мобильные телефоны) и могут быстро обрабатывать различные типы веб-контента. Шаги просты — просто найдите «HTML в PDF» или «Скачать веб-страницу в PDF» в вашем браузере. В приведенном ниже примере мы будем использовать iLovePDF, один из самых популярных инструментов для этой цели.
- Перейдите на официальный сайт iLovePDF и найдите инструмент HTML в PDF.
- Нажмите кнопку Добавить HTML, затем введите URL-адрес веб-страницы, которую вы хотите сохранить, во всплывающем окне. После подтверждения того, что все правильно, нажмите красную кнопку Добавить в правом нижнем углу.
- Затем при необходимости настройте параметры на правой панели и нажмите Конвертировать в PDF. После завершения преобразования вы можете скачать PDF-файл на свой компьютер.
Как скачать веб-страницу в формате PDF с помощью кода
В дополнение к двум распространенным методам, упомянутым выше, вы также можете выполнить эту задачу с помощью кода — более гибкий вариант, предназначенный для разработчиков. Этот подход предлагает несколько преимуществ, которых нет у предыдущих методов, таких как пакетная загрузка, полная автономная работа и лучшая автоматизация для крупномасштабных задач.
В этом руководстве мы будем использовать Spire.Doc for Python, чтобы продемонстрировать, как скачать веб-страницу в формате PDF. Как профессиональная библиотека Python, она позволяет разработчикам выполнять все: от простого преобразования форматов документов до сложных задач, таких как редактирование контента и шифрование.
Шаги по скачиванию всей веб-страницы в формате PDF на Python:
-
Установите Spire.Doc с помощью команды
pip install spire.doc. Вам также потребуется установить requests, библиотеку, используемую для получения содержимого веб-страницы. -
Импортируйте необходимые модули:
from spire.doc import *
from spire.doc.common import *
import requests
- Укажите URL-адрес веб-страницы и получите содержимое из HTML:
# Получить HTML-содержимое с веб-страницы
url = "/Tutorials/Python/Spire.Doc-for-Python/Program-Guide/Conversion/Python-Convert-HTML-to-PDF.html"
html = requests.get(url).text
- Запишите HTML-содержимое в документ Word:
# Записать HTML в документ Word
doc = Document()
section = doc.AddSection()
paragraph = section.AddParagraph()
paragraph.AppendHTML(html)
- Наконец, сохраните документ в виде файла PDF:
# Сохранить документ в формате PDF
doc.SaveToFile("E:/Administrator/Python1/webpage_to_pdf11.pdf", FileFormat.PDF)
Вот полный пример кода:
from spire.doc import *
from spire.doc.common import *
import requests

#  HTML Get HTML from web
url = "/Tutorials/Python/Spire.Doc-for-Python/Program-Guide/Conversion/Python-Convert-HTML-to-PDF.html"
html = requests.get(url).text

# Write HTML to document
doc = Document()
section = doc.AddSection()
paragraph = section.AddParagraph()
paragraph.AppendHTML(html)

# Save the document to PDF file
doc.SaveToFile("E:/Administrator/Python1/webpage_to_pdf11.pdf", FileFormat.PDF)
doc.Close()
Ниже приведен предварительный просмотр полученного файла PDF:
Если вы сохраните веб-страницу в формате HTML, Spire.Doc также может легко преобразовать ее в PDF с помощью метода Document.SaveToFile().
Заключение
В этой статье были представлены три различных способа скачивания веб-страницы в формате PDF. В зависимости от ваших потребностей вы можете выбрать метод, который подходит вам лучше всего — будь то использование встроенных функций, онлайн-инструментов или библиотеки Spire.Doc для Python. Если вы хотите изучить более продвинутые функции PDF, рассмотрите возможность попробовать 30-дневную бесплатную лицензию Spire.Doc, чтобы ощутить весь ее потенциал.
ТАКЖЕ ЧИТАЙТЕ
I 4 modi migliori per ruotare un PDF gratuitamente: Online, Offline e con Python
Indice dei Contenuti
- Metodo 1: Strumenti Online Gratuiti per Ruotare i PDF
- Metodo 2: Ruotare i PDF Utilizzando il Browser Web Predefinito
- Metodo 3: App Desktop Gratuite per la Rotazione Offline dei PDF
- Metodo 4: Automatizzare la Rotazione Massiva di PDF con Python
- FAQ: Domande Frequenti sulla Rotazione dei PDF
- Considerazioni Finali
Hai bisogno di ruotare un PDF ma non vuoi pagare per un software costoso? Che tu stia sistemando un documento scannerizzato con pagine capovolte o riorganizzando un file per una migliore leggibilità, ruotare i PDF gratuitamente è più facile di quanto pensi. In questa guida, esploreremo i migliori strumenti gratuiti per ruotare i PDF online e offline, oltre a un tutorial passo-passo di Python per automatizzare le attività massive.
- Metodo 1: Strumenti Online Gratuiti per Ruotare i PDF
- Metodo 2: Ruotare i PDF Utilizzando il Browser Web Predefinito
- Metodo 3: App Desktop Gratuite per la Rotazione Offline dei PDF
- Metodo 4: Automatizzare la Rotazione Massiva di PDF con Python
- FAQ: Domande Frequenti sulla Rotazione dei PDF
- Considerazioni Finali
Metodo 1: Strumenti Online Gratuiti per Ruotare i PDF
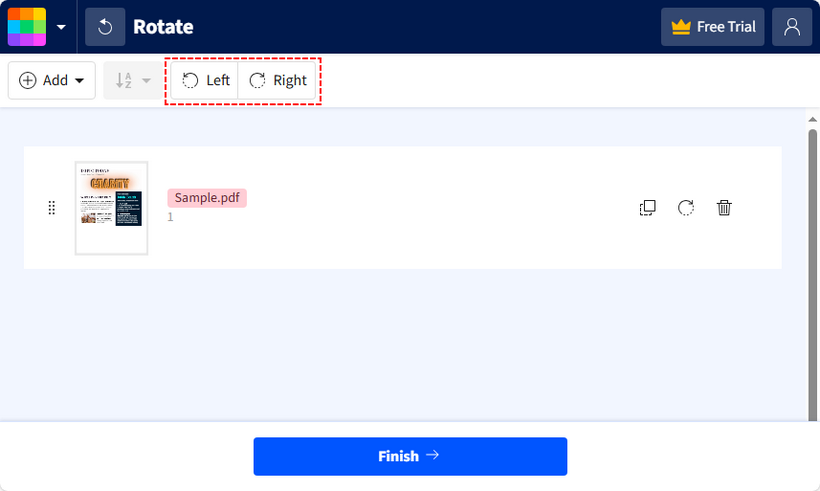
Gli strumenti online sono la scelta migliore per gli utenti che devono ruotare 1-2 PDF e non vogliono installare nulla. Funzionano in qualsiasi browser e la maggior parte è 100% gratuita senza costi nascosti. Due delle piattaforme più popolari per ruotare i PDF online sono Smallpdf Free PDF Rotator e ILovePDF Rotate PDF. Prendiamo Smallpdf come esempio.
Come Usare Smallpdf (Passo-passo):
- Vai allo strumento Ruota PDF di Smallpdf.
- Clicca su “SCEGLI FILE” per caricare il tuo PDF (o trascinalo).
- Usa i pulsanti “Ruota a Sinistra” (90° in senso antiorario) o “Ruota a Destra” (90° in senso orario) per regolare le pagine.
- Una volta ruotato, clicca su “Fine” → “Download” per salvare il PDF ruotato sul tuo dispositivo.
Pro:
- Nessuna installazione richiesta; funziona su Windows, Mac o mobile.
- Interfaccia semplice e intuitiva (ottima per i principianti).
Contro:
- La maggior parte delle versioni gratuite ha limiti sulla dimensione dei file.
- Richiede una connessione internet (non ideale per l'uso offline).
Potrebbe interessarti anche: Come Eliminare Pagine da un PDF senza Acrobat (Metodi Gratuiti)
Metodo 2: Ruotare i PDF Utilizzando il Browser Web Predefinito
Sapevi che il tuo browser predefinito (Chrome, Edge o Firefox) può ruotare i PDF gratuitamente? Questo metodo è ottimo se vuoi evitare del tutto gli strumenti di terze parti. Non sono necessarie app o siti web aggiuntivi.
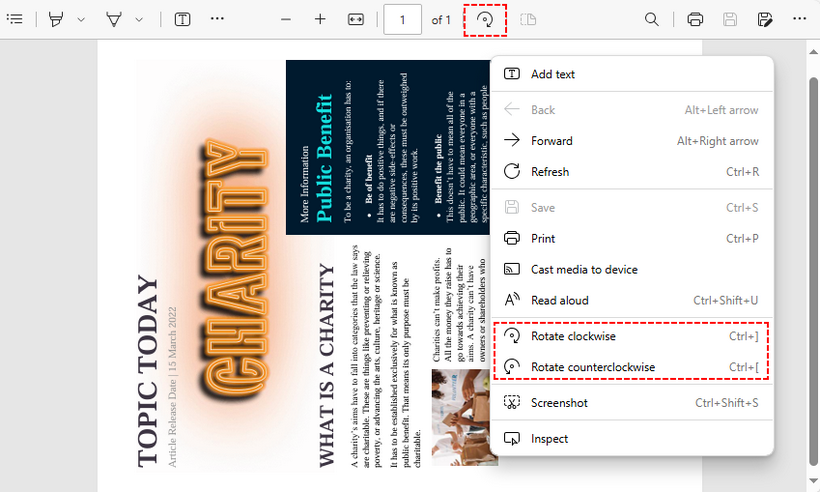
Passo-passo con Microsoft Edge:
- Individua il tuo file PDF sul computer, fai clic con il pulsante destro del mouse e seleziona "Apri con > Microsoft Edge".
- Nella barra degli strumenti in alto, fai clic sul pulsante “Ruota” (freccia circolare) per ruotare in senso orario. Per la rotazione in senso antiorario, fai clic con il pulsante destro del mouse sul PDF → “Ruota in senso antiorario”.
- Fai clic su "Salva con nome" e scegli una cartella per archiviare il PDF ruotato.
Pro:
- Nessun download, nessuna connessione internet necessaria (dopo aver aperto il PDF); 100% gratuito.
- Funziona su Windows, Mac, Linux e anche sui browser mobili.
Contro:
- Funziona solo per un PDF alla volta; nessuna rotazione in batch.
- I visualizzatori predefiniti ruotano tutte le pagine contemporaneamente.
Metodo 3: App Desktop Gratuite per la Rotazione Offline dei PDF
Per l'uso offline (o per file sensibili che non vuoi caricare online), il software desktop è la soluzione migliore. Due ottimi strumenti gratuiti sono Adobe Acrobat Reader DC (per uso generale) e PDF-XChange Editor (per la rotazione di pagine specifiche).
Scelta Migliore: Adobe Acrobat Reader DC
Per gli utenti che hanno familiarità con l'ecosistema di Adobe, Adobe Acrobat Reader DC (versione gratuita) rimane una scelta affidabile per ruotare i PDF offline. È ampiamente compatibile e affidabile, anche se meno flessibile nelle regolazioni di pagine specifiche.
Come Ruotare e Salvare un PDF:
- Scarica e installa Adobe Acrobat Reader DC (gratuito per tutti gli utenti).
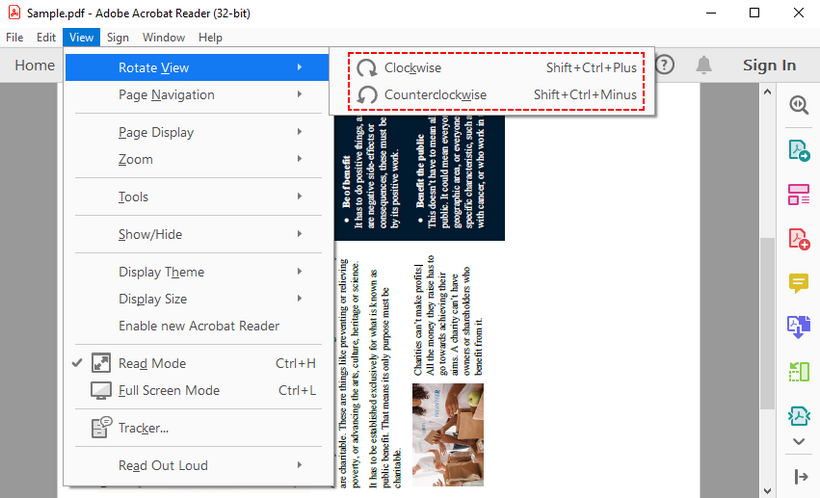
- Apri il tuo PDF in Acrobat Reader.
- Per ruotare temporaneamente (solo per la visualizzazione): Vai alla scheda “Visualizza” → “Ruota vista” → seleziona “In senso orario” o “In senso antiorario”.
- Salva le modifiche permanenti: Vai su “File” → “Salva” (o “Salva con nome” per creare una nuova copia).
Pro:
- Funziona offline; nessuna connessione internet richiesta.
- Compatibile con tutti i tipi di PDF e sistemi operativi (Windows, Mac, mobile).
Contro:
- La versione gratuita ruota tutte le pagine contemporaneamente (nessuna rotazione di pagine specifiche).
- Occupa spazio di archiviazione (richiede installazione).
Alternativa: PDF-XChange Editor (Versione Gratuita)
Se hai bisogno di ruotare pagine PDF specifiche (non solo interi documenti), PDF-XChange Editor (Versione Gratuita) è una scelta consigliata. Questo strumento leggero e offline è perfetto per i PDF con orientamenti misti.
Ruotare Pagine PDF con PDF-XChange Editor:
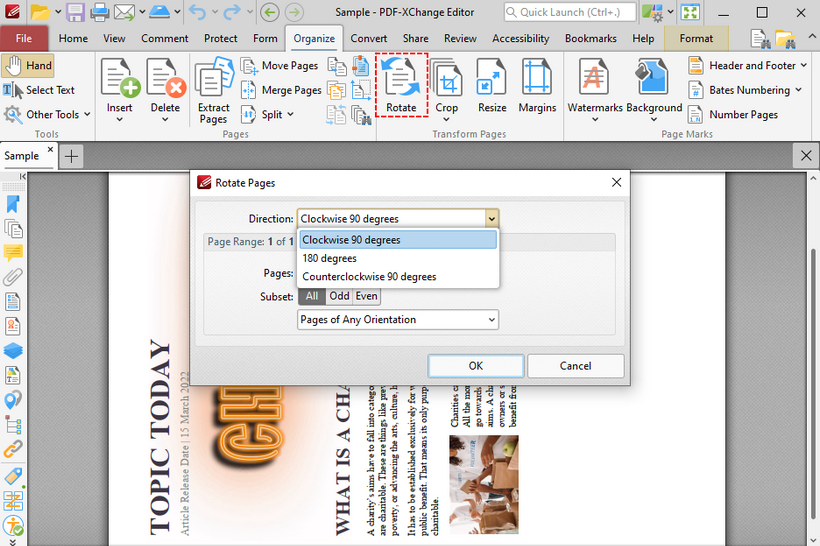
- Scarica e installa PDF-XChange Editor (seleziona la “Versione Gratuita” durante l'installazione).
- Apri il tuo PDF e vai alla scheda "Organizza" > "Ruota".
- Nella finestra di dialogo "Ruota Pagine":
- Fai clic sul menu a discesa “Direzione” e seleziona l'angolo di rotazione desiderato.
- Scegli "Tutte le pagine", "Pagina corrente" o un intervallo personalizzato (es. 1,3,5-8).
- Fai clic su "OK" e salva il PDF ruotato tramite "File" > "Salva con nome".
Pro:
- Funziona completamente offline senza limiti di dimensione del file.
- La versione gratuita supporta la rotazione di pagine specifiche (una caratteristica rara negli strumenti gratuiti).
Contro:
- Solo per Windows (nessun supporto per Mac/Linux).
- Richiede installazione (anche se minima).
Metodo 4: Automatizzare la Rotazione Massiva di PDF con Python
Se hai bisogno di ruotare più PDF contemporaneamente (ad es. 10+ file) o automatizzare la rotazione (ad es. integrare la rotazione in un flusso di lavoro), una libreria Python come Free Spire.PDF for Python è una svolta. È gratuita sia per uso commerciale che non commerciale e ti consente di scrivere un semplice script per ruotare i PDF in blocco.
Passo 1: Installa Free Spire.PDF
Apri il tuo prompt dei comandi (Windows) o terminale (macOS/Linux) ed esegui questo comando per installare la libreria tramite pip:
pip install Spire.Pdf.Free
Passo 2: Scrivi il Codice Python per Ruotare le Pagine del PDF
Crea un nuovo file Python e incolla il codice qui sotto. Il codice caricherà un PDF, ruoterà una pagina specificata di 90° in senso orario e salverà il risultato:
from spire.pdf import *
from spire.pdf.common import *

# Crea un oggetto PdfDocument
pdf = PdfDocument()

# Carica un documento PDF
pdf.LoadFromFile("Sample.pdf")

# Ottieni la prima pagina
page = pdf.Pages[0]

# Ottieni l'angolo di rotazione originale della pagina
rotation = int(page.Rotation.value)

# Ruota la pagina di 90 gradi in senso orario
rotation += int(PdfPageRotateAngle.RotateAngle90.value)
page.Rotation = PdfPageRotateAngle(rotation)

# Salva il PDF risultante
pdf.SaveToFile("RotatePDFPage.pdf")
pdf.Close()
Per ruotare tutte le pagine del PDF, itera su ogni pagina del PDF per ruotarle.
# Itera attraverso ogni pagina del documento
for i in range(pdf.Pages.Count):
    page = pdf.Pages.get_Item(i)

    # Ottieni l'angolo di rotazione originale della pagina
    rotation = int(page.Rotation.value)

    # Ruota la pagina di 90 gradi in senso orario
    rotation += int(PdfPageRotateAngle.RotateAngle90.value)
    page.Rotation = PdfPageRotateAngle(rotation)
Spiegazione del Codice:
La rotazione della pagina PDF si basa sull'angolo di rotazione originale della pagina corrente. Di seguito una spiegazione dettagliata del codice principale:
-
Ottieni l'angolo di rotazione originale:
rotation = int(page.Rotation.value): estrae l'angolo di rotazione corrente della prima pagina (es. 0°, 90°, 180° o 270°) e lo converte in un intero.
-
Ruota la pagina di 90° in senso orario:
PdfPageRotateAngle.RotateAngle90.value: rappresenta una rotazione di 90° in senso orario.rotation += int(...): aggiunge 90° all'angolo di rotazione originale, calcolando la nuova rotazione totale (es. se la pagina era originariamente ruotata di 90°, diventa 180° dopo questo passaggio).page.Rotation = PdfPageRotateAngle(rotation): applica il nuovo angolo di rotazione alla pagina, aggiornandone l'orientamento.
Pro:
- Ruota pagine PDF specifiche o tutte; ruota in batch decine di PDF (aggiungi un ciclo per elaborare una cartella).
- Automatizza la rotazione (integra con altre attività Python, come l'ordinamento dei file).
Contro:
- Richiede una conoscenza di base di Python (non per principianti assoluti).
- La versione gratuita ha un limite di pagine (fino a 10 pagine per PDF; sufficiente per la maggior parte dell'uso personale).
Dopo la rotazione, puoi eseguire altre operazioni relative ai PDF (ad es. convertire il PDF in HTML, estrarre testo da esso) con la libreria Python gratuita.
FAQ: Domande Frequenti sulla Rotazione dei PDF
D1: Posso ruotare un PDF gratuitamente?
Sì, tutti i metodi in questa guida sono completamente gratuiti. Strumenti online, le funzionalità di rotazione di Adobe Acrobat, gli strumenti del browser e le librerie Python offrono tutti funzionalità di rotazione gratuite.
D2: Posso ruotare un PDF senza Adobe?
Sì. Gli strumenti online gratuiti, le funzionalità del browser, PDF-XChange Editor e gli script Python forniscono tutti la funzionalità di rotazione dei PDF senza il software Adobe.
D3: Come posso ruotare un PDF in modo permanente?
Usa "Salva con nome" in Adobe Acrobat, PDF-XChange Editor o scarica dagli strumenti online. Le rotazioni del browser potrebbero richiedere la stampa su PDF per modifiche permanenti.
D4: Qual è il modo migliore per ruotare più pagine di un PDF?
Per il controllo di singole pagine, usa PDF-XChange Editor. Per più file, l'automazione con Python funziona meglio.
D5: La rotazione di un PDF ne ridurrà la qualità?
No. La rotazione di un PDF è un'azione non distruttiva. Cambia solo l'orientamento di visualizzazione, non la qualità del testo o delle immagini all'interno.
Considerazioni Finali
Ruotare le pagine di un PDF è un'operazione semplice e gratuita che non richiede software costosi. Per una soluzione rapida e una tantum, gli strumenti online sono ideali. Se stai gestendo documenti sensibili, un software offline dedicato è la scelta più sicura. E per grandi lotti o flussi di lavoro automatizzati, uno script Python offre il massimo controllo ed efficienza.
Che tu sia un principiante o uno sviluppatore esperto, scegliere la giusta soluzione gratuita può rendere i tuoi documenti PDF leggibili in pochi minuti.
Vedi Anche
```