
Knowledgebase (2417)
Children categories
Comparison of PDF documents is essential for effective document management. By comparing PDF documents, users can easily identify differences in document content to have a more comprehensive understanding of them, which will greatly facilitate the user to modify and integrate the document content. This article will introduce how to use Spire.PDF for Java to compare PDF documents and find the differences.
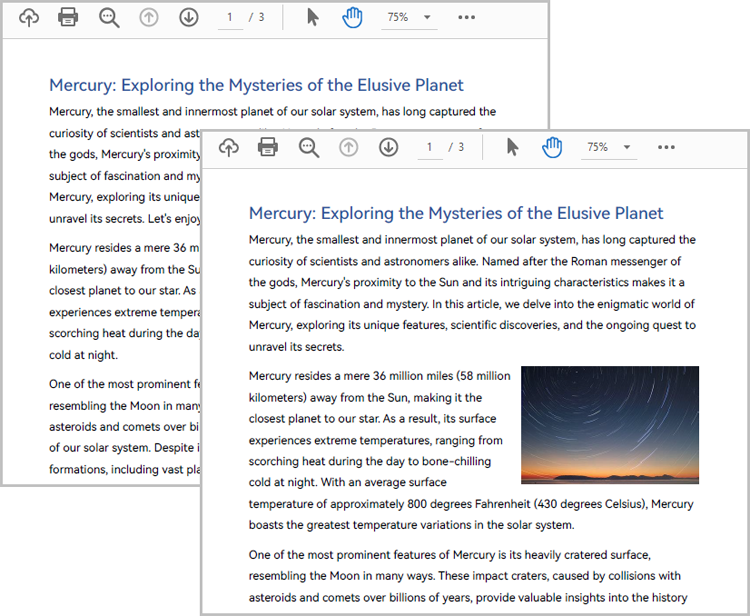
Examples of the two PDF documents that will be used for comparison:
Install Spire.PDF for Java
First of all, you need to add the Spire.Pdf.jar file as a dependency in your Java program. The JAR file can be downloaded from this link. If you use Maven, you can easily import the JAR file by adding the following code to your project's pom.xml file.
<repositories>
    <repository>
        <id>com.e-iceblue</id>
        <name>e-iceblue</name>
        <url>https://repo.e-iceblue.com/nexus/content/groups/public/</url>
    </repository>
</repositories>
<dependencies>
    <dependency>
        <groupId>e-iceblue</groupId>
        <artifactId>spire.pdf</artifactId>
        <version>12.9.0</version>
    </dependency>
</dependencies>
Compare Two PDF Documents
Spire.PDF for Java provides the PdfComparer class for users to create an object with two PDF documents for comparing. After creating the PdfComparer object, users can use PdfComparer.compare(String fileName) method to compare the two documents and save the result as a new PDF file.
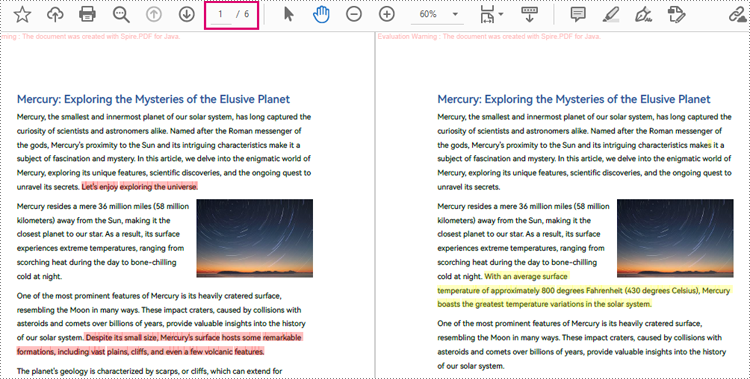
The resulting PDF document displays the two original documents on the left and the right, with the deleted items in red and the added items in yellow.
The detailed steps for comparing two PDF documents are as follows:
- Create two objects of PdfDocument class and load two PDF documents using PdfDocument.loadFromFile() method.
- Create an object of PdfComparer class with the two documents.
- Compare the two documents and save the result as a new PDF document using PdfComparer.compare() method.
- Java
import com.spire.pdf.PdfDocument;
import com.spire.pdf.comparison.PdfComparer;

public class ComparePDFPageRange {
    public static void main(String[] args) {
        //Create an object of PdfDocument class and load a PDF document
        PdfDocument pdf1 = new PdfDocument();
        pdf1.loadFromFile("Sample1.pdf");

        //Create another object of PdfDocument class and load another PDF document
        PdfDocument pdf2 = new PdfDocument();
        pdf2.loadFromFile("Sample2.pdf");

        //Create an object of PdfComparer class
        PdfComparer comparer = new PdfComparer(pdf1,pdf2);

        //Compare the two PDF documents and save the compare results to a new document
        comparer.compare("ComparisonResult.pdf");
    }
}
Compare a Specified Page Range of Two PDF Documents
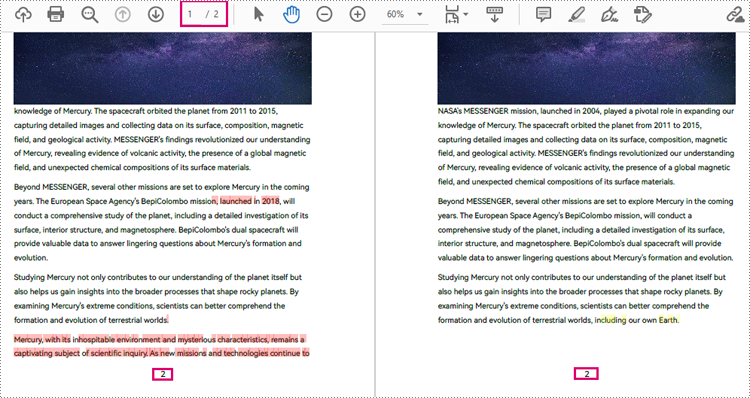
Before comparing, users can use the PdfComparer.getOptions().setPageRanges() method to limit the page range to be compared. The detailed steps are as follows:
- Create two objects of PdfDocument class and load two PDF documents using PdfDocument.loadFromFile() method.
- Create an object of PdfComparer class with the two documents.
- Set the page range to be compared using PdfComparer.getOptions().setPageRanges() method.
- Compare the two documents and save the result as a new PDF document using PdfComparer.compare() method.
- Java
import com.spire.pdf.PdfDocument;
import com.spire.pdf.comparison.PdfComparer;

public class ComparePDFPageRange {
    public static void main(String[] args) {
        //Create an object of PdfDocument class and load a PDF document
        PdfDocument pdf1 = new PdfDocument();
        pdf1.loadFromFile("G:/Documents/Sample6.pdf");

        //Create another object of PdfDocument class and load another PDF document
        PdfDocument pdf2 = new PdfDocument();
        pdf2.loadFromFile("G:/Documents/Sample7.pdf");

        //Create an object of PdfComparer class
        PdfComparer comparer = new PdfComparer(pdf1,pdf2);

        //Set the page range to be compared
        comparer.getOptions().setPageRanges(1, 1, 1, 1);

        //Compare the two PDF documents and save the compare results to a new document
        comparer.compare("ComparisonResult.pdf");
    }
}
Apply for a Temporary License
If you'd like to remove the evaluation message from the generated documents, or to get rid of the function limitations, please request a 30-day trial license for yourself.
A workbook can consist of one or more worksheets, and each worksheet is independent. When dealing with an existing Excel file or creating a new Excel file from scratch, we can add worksheets as needed to better manage and analyze data. In this article, we will show you how to add worksheets to Excel programmatically by using Spire.XLS for Python.
- Add a Worksheet to an Existing Excel file
- Add a Worksheet to a New Excel file
- Add Multiple Worksheets to a New Excel file
Install Spire.XLS for Python
This scenario requires Spire.XLS for Python and plum-dispatch v1.7.4. They can be easily installed in your Windows through the following pip command.
pip install Spire.XLS
If you are unsure how to install, please refer to this tutorial: How to Install Spire.XLS for Python on Windows
Add a Worksheet to an Existing Excel file
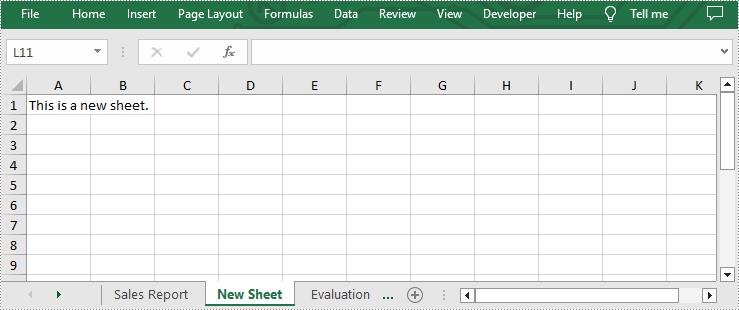
Spire.XLS for Python allows users to add a new worksheet to an existing Excel file by using Workbook.Worksheets.Add(sheetName) method. The following are detailed steps.
- Create an object of Workbook class.
- Load an Excel file using Workbook.LoadFromFile() method.
- Add a new sheet to this file using Workbook.Worksheets.Add(sheetName) method.
- Add desired text to cell A1 by Worksheet.Range[cellName].Text property.
- Save the result file using Workbook.SaveToFile() method.
- Python
from spire.xls import *
from spire.xls.common import *

inputFile = "sample.xlsx"
outputFile = "AddWorksheet.xlsx"

#Create an object of Workbook class
workbook = Workbook()

#Load an Excel file from disk
workbook.LoadFromFile(inputFile)

#Add a new worksheet to this file
sheet = workbook.Worksheets.Add("New Sheet")

#Add desired text to cell A1
sheet.Range["A1"].Text = "This is a new sheet."

#Save the result file
workbook.SaveToFile(outputFile, ExcelVersion.Version2013)
workbook.Dispose()
Add a Worksheet to a New Excel file
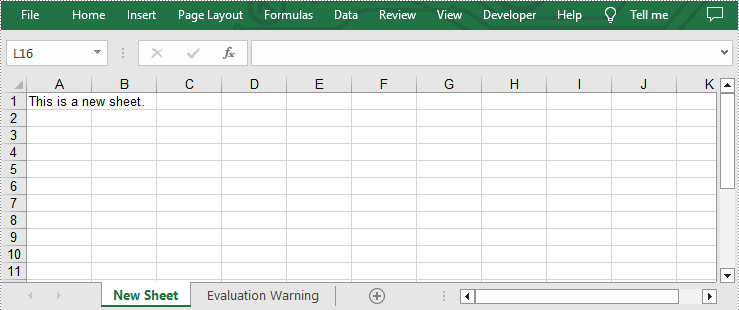
In addition to adding worksheets to existing Excel files, you can also add worksheets to a newly created Excel files with the same method. You just need to clear the default worksheet before adding by calling Workbook.Worksheets.Clear() method. The following are detailed steps.
- Create an object of Workbook class.
- Clear the default worksheets using Workbook.Worksheets.Clear() method.
- Add a new sheet to the new workbook by using Workbook.Worksheets.Add(sheetName) method.
- Add desired text to cell A1 by Worksheet.Range[cellName].Text property.
- Save the result file using Workbook.SaveToFile() method.
- Python
from spire.xls import *
from spire.xls.common import *

outputFile = "AddWorksheet.xlsx"

#Create an object of Workbook class
workbook = Workbook()

#Clear the default sheets
workbook.Worksheets.Clear()

#Add a new worksheet to the new file
sheet = workbook.Worksheets.Add("New Sheet")

#Add desired text to cell A1
sheet.Range["A1"].Text = "This is a new sheet."

#Save the result file
workbook.SaveToFile(outputFile, ExcelVersion.Version2013)
workbook.Dispose()
Add Multiple Worksheets to a New Excel file
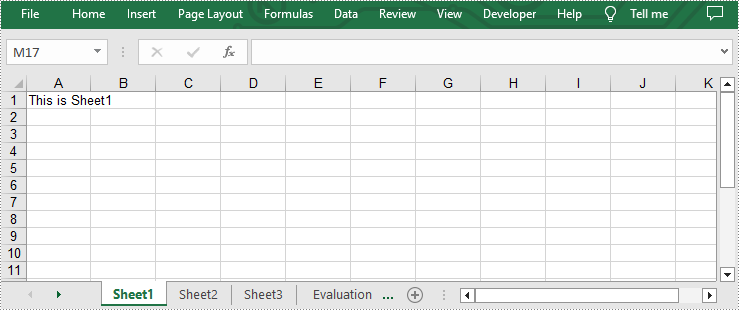
If you want to add multiple worksheets to a newly created Excel file, you can use Workbook.CreateEmptySheets(sheetCount) method to add a specified number of worksheets. The following are detailed steps.
- Create an object of Workbook class.
- Add three sheets to this file by using Workbook.CreateEmptySheets(sheetCount) method.
- Loop through the added worksheets and add text to cell A1 in each worksheet by Worksheet.Range[cellName].Text property.
- Save the result file using Workbook.SaveToFile() method.
- Python
from spire.xls import *
from spire.xls.common import *

outputFile = "AddWorksheet.xlsx"

#Create an object of Workbook class
workbook = Workbook()

#Add three sheets to this file
sheetCount = 3
workbook.CreateEmptySheets(sheetCount)

#Loop through the added worksheets
for i in range(sheetCount):

    #Add text to cell A1 in each worksheet
    sheet = workbook.Worksheets[i]
    sheet.Range["A1"].Text = "This is Sheet{}".format(i+1)

#Save the result file
workbook.SaveToFile(outputFile, ExcelVersion.Version2013)
workbook.Dispose()
Apply for a Temporary License
If you'd like to remove the evaluation message from the generated documents, or to get rid of the function limitations, please request a 30-day trial license for yourself.
Hiding and showing slides are two practical features in PowerPoint that allow you to control the visibility of slides during a slideshow. Hiding slides is useful when you want to skip certain slides or temporarily remove them from the presentation without deleting them. Whereas showing slides is helpful when you want to re-display the hidden slides. In this article, we will demonstrate how to hide and show slides in a PowerPoint presentation in Python using Spire.Presentation for Python.
- Hide a Specific Slide in PowerPoint in Python
- Show a Hidden Slide in PowerPoint in Python
- Show All Hidden Slides in PowerPoint in Python
Install Spire.Presentation for Python
This scenario requires Spire.Presentation for Python and plum-dispatch v1.7.4. They can be easily installed in your Windows through the following pip command.
pip install Spire.Presentation
If you are unsure how to install, please refer to this tutorial: How to Install Spire.Presentation for Python on Windows
Hide a Specific Slide in PowerPoint in Python
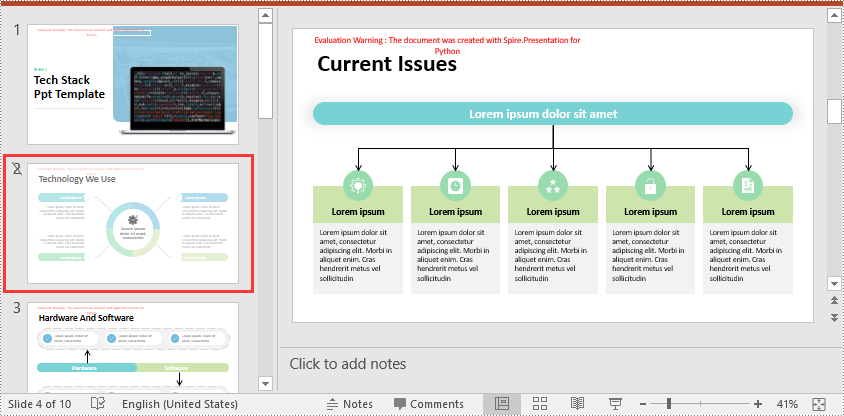
Spire.Presentation for Python provides the ISlide.Hidden property to control the visibility of a slide during a slideshow. If you don’t want a certain slide to be shown, you can hide this slide by setting the ISlide.Hidden property as True. The detailed steps are as follows.
- Create an object of the Presentation class.
- Load a PowerPoint presentation using Presentation.LoadFromFile() method.
- Get a specific slide using Presentation.Slides[index] property.
- Hide the slide by setting the ISlide.Hidden property as True.
- Save the resulting presentation using Presentation.SaveToFile() method.
- Python
from spire.presentation.common import *
from spire.presentation import *

# Create an object of the Presentation class
ppt = Presentation()
# Load a PowerPoint presentation
ppt.LoadFromFile("Sample.pptx")

# Get the second slide and hide it
slide = ppt.Slides[1]
slide.Hidden = True

# Save the resulting presentation to a new .pptx file
ppt.SaveToFile("HideSlide.pptx", FileFormat.Pptx2016)
ppt.Dispose()
Show a Hidden Slide in PowerPoint in Python
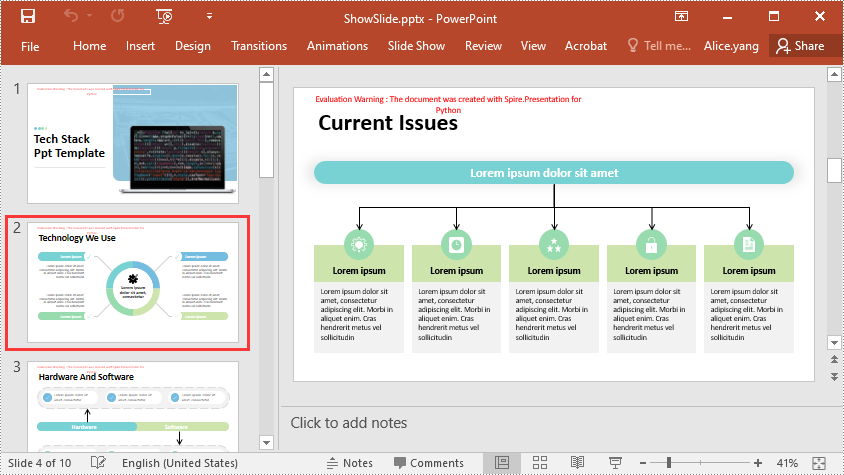
To show a hidden slide, you can set the ISlide.Hidden property as False. The detailed steps are as follows.
- Create an object of the Presentation class.
- Load a PowerPoint presentation using Presentation.LoadFromFile() method.
- Get a specific slide using Presentation.Slides[index] property.
- Unhide the slide by setting the ISlide.Hidden property as False.
- Save the resulting presentation using Presentation.SaveToFile() method.
- Python
from spire.presentation.common import *
from spire.presentation import *

# Create an object of the Presentation class
ppt = Presentation()
# Load a PowerPoint presentation
ppt.LoadFromFile("HideSlide.pptx")

# Get the second slide and unhide it
slide = ppt.Slides[1]
slide.Hidden = False

# Save the resulting presentation to a new .pptx file
ppt.SaveToFile("ShowSlide.pptx", FileFormat.Pptx2016)
ppt.Dispose()
Show All Hidden Slides in PowerPoint in Python
To show all hidden slides in a PowerPoint presentation, you need to loop through all the slides in the presentation, then find the hidden slides and unhide them by setting the ISlide.Hidden property as False. The detailed steps are as follows.
- Create an object of the Presentation class.
- Load a PowerPoint presentation using Presentation.LoadFromFile() method.
- Loop through the slides in the presentation.
- Check whether the current slide is hidden or not using ISlide.Hidden property. If the result is true, unhide the slide by setting the ISlide.Hidden property as False.
- Save the resulting presentation using Presentation.SaveToFile() method.
- Python
from spire.presentation.common import *
from spire.presentation import *

# Create an object of the Presentation class
ppt = Presentation()
# Load a PowerPoint presentation
ppt.LoadFromFile("Sample2.pptx")

# Loop through each slide in the presentation
for i in range(ppt.Slides.Count):
    slide = ppt.Slides[i]
    # Check if the slide is hidden
    if(slide.Hidden):
        # Unhide the slide
        slide.Hidden = False

# Save the resulting presentation to a new .pptx file
ppt.SaveToFile("ShowAllHidenSlides.pptx", FileFormat.Pptx2016)
ppt.Dispose()
Apply for a Temporary License
If you'd like to remove the evaluation message from the generated documents, or to get rid of the function limitations, please request a 30-day trial license for yourself.
