
Knowledgebase (2417)
Children categories
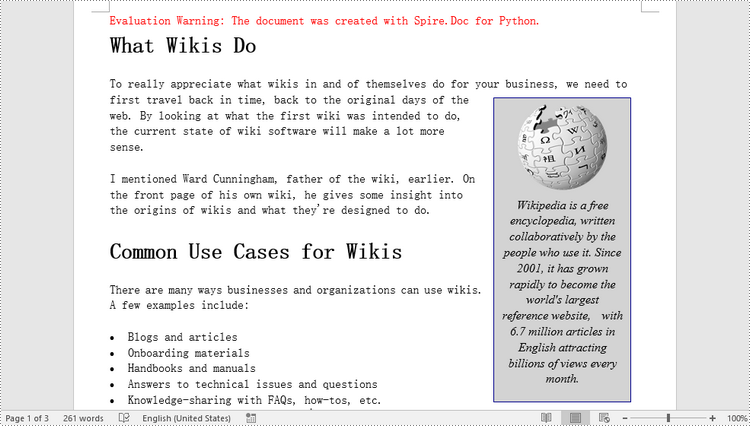
Textboxes are versatile tools in Microsoft Word, allowing you to insert and position text or other elements anywhere on a page, giving you the power to create eye-catching flyers, brochures, or reports. Whether you're looking to emphasize a particular section of text, place captions near images, or simply add a decorative touch, the capacity to manipulate textboxes offers a practical and aesthetic advantage in document design. In this article, you will learn how to add or remove textboxes in a Word document in Python using Spire.Doc for Python.
Install Spire.Doc for Python
This scenario requires Spire.Doc for Python and plum-dispatch v1.7.4. They can be easily installed in your Windows through the following pip command.
pip install Spire.Doc
If you are unsure how to install, please refer to this tutorial: How to Install Spire.Doc for Python on Windows
Add a Textbox to a Word Document in Python
Spire.Doc for Python provides the Paragraph.AppendTextBox() method to insert a textbox in a specified paragraph. The content and formatting of the textbox can be set through the properties under the TextBox object. The following are the detailed steps.
- Create a Document object.
- Load a Word document using Document.LoadFromFile() method.
- Get the first section and add a paragraph to the section using Section.AddParagraph() method.
- Add a text box to the paragraph using Paragraph.AppendTextBox() method.
- Get the format of the textbox using TextBox.Format property, and then set the textbox's wrapping type, position, border color and fill color using the properties of TextBoxFormat Class.
- Add a paragraph to the textbox using TextBox.Body.AddParagraph() method.
- Add an image to the paragraph using Paragraph.AppendPicture() method.
- Add text to the textbox using Paragraph.AppendText() method
- Save the document to a different file using Document.SaveToFile() method.
- Python
from spire.doc import *
from spire.doc.common import *

# Create a Document object
document = Document()

# Load a Word document
document.LoadFromFile("C:/Users/Administrator/Desktop/input3.docx")

# Insert a textbox and set its wrapping style
textBox = document.Sections[0].Paragraphs[0].AppendTextBox(135, 300)
textBox.Format.TextWrappingStyle = TextWrappingStyle.Square

# Set the position of the textbox
textBox.Format.HorizontalOrigin = HorizontalOrigin.RightMarginArea
textBox.Format.HorizontalPosition = -145.0
textBox.Format.VerticalOrigin = VerticalOrigin.Page
textBox.Format.VerticalPosition = 120.0

# Set the border style and fill color of the textbox
textBox.Format.LineColor = Color.get_DarkBlue()
textBox.Format.FillColor = Color.get_LightGray()

# Insert an image to textbox as a paragraph
para = textBox.Body.AddParagraph();
picture = para.AppendPicture("C:/Users/Administrator/Desktop/Wikipedia_Logo.png")

# Set alignment for the paragraph
para.Format.HorizontalAlignment = HorizontalAlignment.Center

# Set the size of the inserted image
picture.Height = 90.0
picture.Width = 90.0

# Insert text to textbox as the second paragraph
textRange = para.AppendText("Wikipedia is a free encyclopedia, written collaboratively by the people who use it. "
    + "Since 2001, it has grown rapidly to become the world's largest reference website,  "
    + "with 6.7 million articles in English attracting billions of views every month.")

# Set alignment for the paragraph
para.Format.HorizontalAlignment = HorizontalAlignment.Center

# Set the font of the text
textRange.CharacterFormat.FontName = "Times New Roman"
textRange.CharacterFormat.FontSize = 12.0
textRange.CharacterFormat.Italic = True

# Save the result file
document.SaveToFile("output/AddTextBox.docx", FileFormat.Docx)
Remove a Textbox from a Word Document in Python
Spire.Doc for Python provides the Document.TextBoxes.RemoveAt(int index) method to delete a specified textbox. To delete all textboxes from a Word document, you can use the Document.TextBoxes.Clear() method. The following example shows how to remove the first textbox from a Word document.
- Create a Document object.
- Load a Word document using Document.LoadFromFile() method.
- Remove the first text box using Document.TextBoxes.RemoveAt(int index) method.
- Save the document to another file using Document.SaveToFile() method.
- Python
from spire.doc import *
from spire.doc.common import *

# Create a Document object
document = Document()

# Load a Word document
document .LoadFromFile("C:/Users/Administrator/Desktop/TextBox.docx")

# Remove the first textbox
document .TextBoxes.RemoveAt(0)

# Remove all textboxes
# document.TextBoxes.Clear()

# Save the result document
document.SaveToFile("output/RemoveTextbox.docx", FileFormat.Docx)
Apply for a Temporary License
If you'd like to remove the evaluation message from the generated documents, or to get rid of the function limitations, please request a 30-day trial license for yourself.
Pages are the most fundamental components of a PDF document. If you want to add new information or supplemental material to an existing PDF, it is necessary to add new pages. Conversely, if there are some pages that contain incorrect or irrelevant content, you can remove them to create a more professional document. In this article, you will learn how to programmatically add or delete pages in PDF using Spire.PDF for Python.
Install Spire.PDF for Python
This scenario requires Spire.PDF for Python and plum-dispatch v1.7.4. They can be easily installed in your Windows through the following pip command.
pip install Spire.PDF
If you are unsure how to install, please refer to this tutorial: How to Install Spire.PDF for Python on Windows
Add Empty Pages to a PDF Document in Python
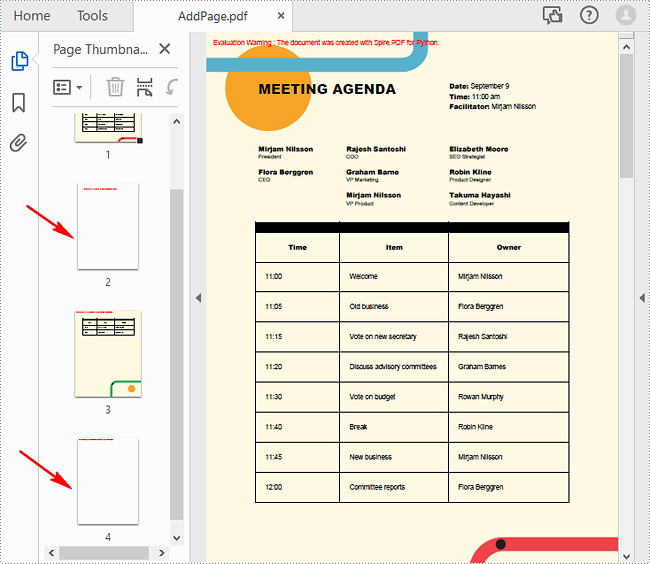
With Spire.PDF for Python, you can easily add a blank page to a specific position or to the end of the document using PdfDocument.Pages.Insert() or PdfDocument.Pages.Add(SizeF, PdfMargins) methods. The following are the detailed steps.
- Create a PdfDocument object.
- Load a sample PDF document using PdfDocument.LoadFromFile() method.
- Create a new blank page and insert it into a specific position of the document using PdfDocument.Pages.Insert() method.
- Create another new blank page with the specified size and margins, and then append it to the end of the document using PdfDocument.Pages.Add(SizeF, PdfMargins) method.
- Save the result document using PdfDocument.SaveToFile() method.
- Python
from spire.pdf.common import *
from spire.pdf import *

# Create a PdfDocument object
pdf = PdfDocument()

# Load a PDF document
pdf.LoadFromFile("Test.pdf")

# Insert a blank page to the document as the second page
pdf.Pages.Insert(1)

# Add an empty page to the end of the document
pdf.Pages.Add(PdfPageSize.A4(), PdfMargins(0.0, 0.0))

# Save the result document
pdf.SaveToFile("AddPage.pdf")
pdf.Close()
Delete an Existing Page in a PDF Document in Python
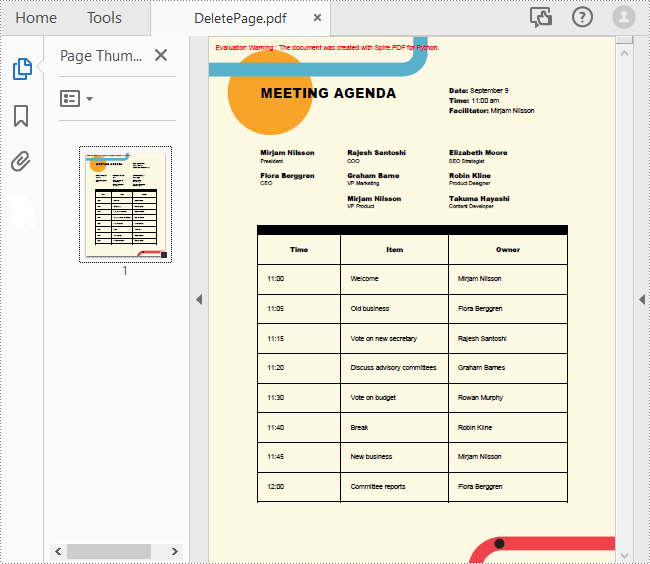
To remove a specified page from a PDF, you can use the PdfDocument.Pages.RemoveAt() method. The following are the detailed steps.
- Create a PdfDocument object.
- Load a sample PDF document using PdfDocument.LoadFromFile() method.
- Remove a specified page from the document using PdfDocument.Pages.RemoveAt() method.
- Save the result document using PdfDocument.SaveToFile() method.
- Python
from spire.pdf.common import *
from spire.pdf import *

# Create a PdfDocument object
pdf = PdfDocument()

# Load a PDF document
pdf.LoadFromFile("Test.pdf")

# Delete the second page of the document
pdf.Pages.RemoveAt(1)

# Save the result document
pdf.SaveToFile("DeletePage.pdf")
pdf.Close()
Apply for a Temporary License
If you'd like to remove the evaluation message from the generated documents, or to get rid of the function limitations, please request a 30-day trial license for yourself.
Stamps are a powerful tool in PDF documents that allow users to mark and annotate specific areas or sections of a PDF file. Often used for approval, review, or to indicate a specific status, stamps can greatly enhance collaboration and document management. In PDF, stamps can take various forms, such as a simple checkmark, a customized graphic, a date and time stamp, or even a signature. In this article, you will learn how to add image stamps and dynamic stamps to a PDF document in Python using Spire.PDF for Python.
Install Spire.PDF for Python
This scenario requires Spire.PDF for Python and plum-dispatch v1.7.4. They can be easily installed in your Windows through the following pip command.
pip install Spire.PDF
If you are unsure how to install, please refer to this tutorial: How to Install Spire.PDF for Python on Windows
Add an Image Stamp to PDF Documents in Python
Spire.PDF for Python offers the PdfRubberStampAnnotation class to represent a rubber stamp in a PDF document. In order to create the appearance of a rubber stamp, the PdfTemplate class is used. The PdfTemplate is a piece of canvas on which you can draw whatever information you want, such as text, images, date, and time.
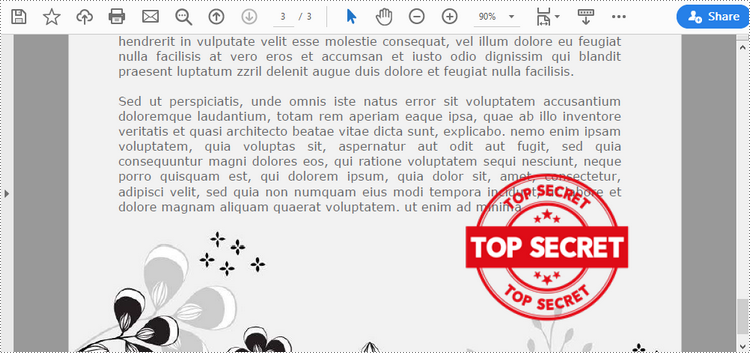
Image stamps can include logos, signatures, watermarks, or any other custom graphics that you want to overlay onto your PDFs. The main steps to add an image stamp to PDF using Spire.PDF for Python are as follows.
- Create a PdfDocument object.
- Load a PDF file using PdfDocument.LoadFromFile() method.
- Load an image that you want to stamp on PDF using PdfImage.FromFile() method.
- Create a PdfTemplate object with the dimensions of the image.
- Draw the image on the template using PdfTemplate.Graphics.DrawImage() method.
- Create a PdfRubberStampAnnotation object, and set the template as its appearance.
- Add the stamp to a specific PDF page using PdfPageBase.AnnotationsWidget.Add() method.
- Save the document to a different file using PdfDocument.SaveToFile() method.
- Python
from spire.pdf.common import *
from spire.pdf import *

# Create a PdfDocument object
doc = PdfDocument()

# Load a PDF document
doc.LoadFromFile("C:\\Users\\Administrator\\Desktop\\input.pdf")

# Get a specific page
page = doc.Pages.get_Item(2)

# Load an image file
image = PdfImage.FromFile("C:\\Users\\Administrator\\Desktop\\secret.png")

# Get the width and height of the image
width = (float)(image.Width)
height = (float)(image.Height)

# Create a PdfTemplate object based on the size of the image
template = PdfTemplate(width, height, True)

# Draw image on the template
template.Graphics.DrawImage(image, 0.0, 0.0, width, height)

# Create a rubber stamp annotation, specifying its location and position
rect = RectangleF((float) (page.ActualSize.Width - width - 50), (float) (page.ActualSize.Height - height - 40), width, height)
stamp = PdfRubberStampAnnotation(rect)

# Create a PdfAppearance object
pdfAppearance = PdfAppearance(stamp)

# Set the template as the normal state of the appearance
pdfAppearance.Normal = template

# Apply the appearance to the stamp
stamp.Appearance = pdfAppearance

# Add the stamp annotation to PDF
page.AnnotationsWidget.Add(stamp)

# Save the file
doc.SaveToFile("output/ImageStamp.pdf")
doc.Close()
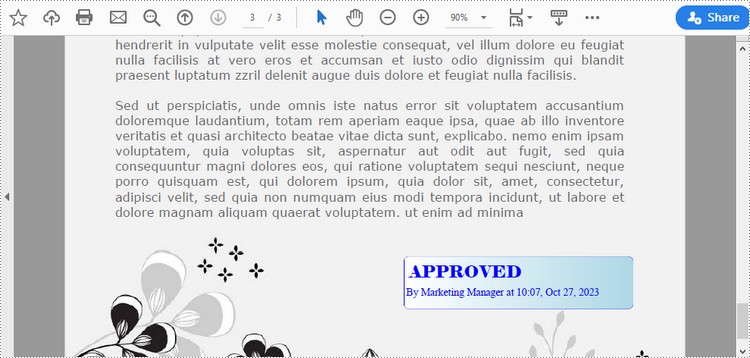
Add a Dynamic Stamp to PDF in Python
Unlike static stamps, dynamic stamps can contain variable information such as the date, time, or user input. The following are the steps to create a dynamic stamp in PDF using Spire.PDF for Python.
- Create a PdfDocument object.
- Load a PDF file using PdfDocument.LoadFromFile() method.
- Create a PdfTemplate object with desired size.
- Draw strings on the template using PdfTemplate.Graphics.DrawString() method.
- Create a PdfRubberStampAnnotation object, and set the template as its appearance.
- Add the stamp to a specific PDF page using PdfPageBase.AnnotationsWidget.Add() method.
- Save the document to a different file using PdfDocument.SaveToFile() method.
- Python
from spire.pdf.common import *
from spire.pdf import *

# Create a PdfDocument object
doc = PdfDocument()

# Load a PDF document
doc.LoadFromFile("C:\\Users\\Administrator\\Desktop\\input.pdf")

# Get a specific page
page = doc.Pages.get_Item(2)

# Create a PdfTemplate object
template = PdfTemplate(220.0, 50.0, True)

# Create two fonts
font1 = PdfTrueTypeFont("Elephant", 16.0, 0, True)
font2 = PdfTrueTypeFont("Times New Roman", 10.0, 0, True)

# Create a solid brush and a gradient brush
solidBrush = PdfSolidBrush(PdfRGBColor(Color.get_Blue()))
rectangle1 = RectangleF(PointF(0.0, 0.0), template.Size)
linearGradientBrush = PdfLinearGradientBrush(rectangle1, PdfRGBColor(Color.get_White()), PdfRGBColor(Color.get_LightBlue()), PdfLinearGradientMode.Horizontal)

# Create a pen
pen = PdfPen(solidBrush)

# Create a rounded rectangle path
CornerRadius = 10.0
path = PdfPath()
path.AddArc(template.GetBounds().X, template.GetBounds().Y, CornerRadius, CornerRadius, 180.0, 90.0)
path.AddArc(template.GetBounds().X + template.Width - CornerRadius, template.GetBounds().Y, CornerRadius, CornerRadius, 270.0, 90.0)
path.AddArc(template.GetBounds().X + template.Width - CornerRadius, template.GetBounds().Y + template.Height - CornerRadius, CornerRadius, CornerRadius, 0.0, 90.0)
path.AddArc(template.GetBounds().X, template.GetBounds().Y + template.Height - CornerRadius, CornerRadius, CornerRadius, 90.0, 90.0)
path.AddLine(template.GetBounds().X, template.GetBounds().Y + template.Height - CornerRadius, template.GetBounds().X, template.GetBounds().Y + CornerRadius / 2)

# Draw path on the template
template.Graphics.DrawPath(pen, path)
template.Graphics.DrawPath(linearGradientBrush, path)

# Draw text on the template
string1 = "APPROVED\n"
string2 = "By Marketing Manager at " + DateTime.get_Now().ToString("HH:mm, MMM dd, yyyy")
template.Graphics.DrawString(string1, font1, solidBrush, PointF(5.0, 5.0))
template.Graphics.DrawString(string2, font2, solidBrush, PointF(2.0, 28.0))

# Create a rubber stamp, specifying its size and location
rectangle2 = RectangleF((float) (page.ActualSize.Width - 220.0 - 50.0), (float) (page.ActualSize.Height - 50.0 - 100.0), 220.0, 50.0)
stamp = PdfRubberStampAnnotation(rectangle2)

# Create a PdfAppearance object and apply the template as its normal state
apprearance = PdfAppearance(stamp)
apprearance.Normal = template

# Apply the appearance to stamp
stamp.Appearance = apprearance

# Add the stamp annotation to annotation collection
page.AnnotationsWidget.Add(stamp)

# Save the file
doc.SaveToFile("output/DynamicStamp.pdf", FileFormat.PDF)
doc.Dispose()
Apply for a Temporary License
If you'd like to remove the evaluation message from the generated documents, or to get rid of the function limitations, please request a 30-day trial license for yourself.
